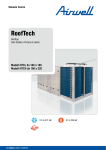
1
Electrolux
EFS - Dishwashing Systems Platform
Electrolux Professional
SERVICE MANUAL
MODULAR AND COMPACT
RACK-TYPE DISHWASHERS
U
U
CONTENTS: This document contains all the parameters and information for programming the electronic boards.
EDITION: 05.2007
Valid for firmware from 1.56 to 1.62
CAUTION:
All the safety regulations and procedures to be followed by the Specialised Technician/Technical Assistance performing electrical, mechanical or electronic maintenance operations are contained in the instruction manual supplied with the machine: refer to this document before operating. This applies for anyone
carrying out operations using these documents. The specialised technician must wear personal protection equipment suitable for the work being performed (e.g. gloves, safety glasses and shoes, suitable
clothing, etc.) and use appropriate tools, equipment and auxiliary means.
DOC. N.
5956.573.02
Page 1 / 80
Electrolux
EFS - Dishwashing Systems Platform
Electrolux Professional
INDEX
A
FUNCTION KEYS............................................................................................. Page4
A1
A2
A3
A4
B
PROGRAMMING SHEETS............................................................................... Page30
B1
B2
C
DOC. N.
CONFIGURATION PARAMETERS ................................................................................. Page 30
B1.1 MODULAR RACK TYPE ..................................................................................... Page 30
B1.2 COMPACT RACK TYPE...................................................................................... Page 41
B1.3 COMPACT RACK TYPE USA ............................................................................. Page 53
SPECIFIC FUNCTIONS .................................................................................................. Page 54
B2.1 SETTING UNIT OF MEASURE IN FAHRENHEIT .............................................. Page54
B2.2 LANGUAGE SETTING ........................................................................................ Page54
B2.3 “MAX. MOTOR CURR.” PARAMETER ( GCU ) SETTING .................................. Page54
INVERTER PARAMETERS .............................................................................. Page55
C1
D
E
DISPLAY OF AUXILIARY VALUES ................................................................................. Page4
A1.1 MODULAR MACHINES....................................................................................... Page4
A1.2 COMPACT MACHINES ....................................................................................... Page5
ACCESSING THE USER MENU AND SERVICE MENU ................................................ Page6
USER MENU (ONLY FOR MODULAR RACK TYPE) ..................................................... Page7
A3.1 EXIT .................................................................................................................... Page7
A3.2 DATA SETTING ................................................................................................... Page7
SERVICE MENU ............................................................................................................. Page8
A4.1 PARAMETERS .................................................................................................... Page8
A4.1.1 USER SETTINGS (ONLY FOR MODULAR RACK TYPE)................ Page8
A4.1.2 GENERIC FUNC............................................................................... Page9
A4.1.3 RINSE MODULE............................................................................... Page15
A4.1.4 WASH MODULE ............................................................................... Page16
A4.1.5 PREWASH MODULE........................................................................ Page18
A4.1.6 DT MODULE ..................................................................................... Page19
A4.1.7 HACCP.............................................................................................. Page20
A4.1.8 RATING PLATE (ONLY FOR MODULAR RACK TYPE) ................... Page20
A4.2 DATALOG (ONLY FOR MODULAR RACK TYPE)............................................... Page22
A4.3 INFO .................................................................................................................... Page25
A4.4 STATISTICS (ONLY FOR MODULAR RACK TYPE) ........................................... Page26
A4.5 RINSE CONTROL ( JUST FOR ATMOSPHERIC RACK TYPE )........................ Page27
A4.6 KEY MANAGEMENT ( JUST FOR MODULAR RACK TYPE ) ........................... Page28
A4.7 SENSOR ADJUSTMENT .................................................................................... Page28
INVERTER PROGRAMMING.......................................................................................... Page 55
C1.1 DISPLAY FUNCTIONS........................................................................................ Page 55
C1.2 INVERTER PARAMETER LISTS ........................................................................ Page 55
WARNING MESSAGES AND TROUBLESHOOTINGPage............................. 59
POWER BOARDS CONNECTORS LAYOUTPage .......................................... 63
5956.573.02
Page 2 / 80
Electrolux
EFS - Dishwashing Systems Platform
Electrolux Professional
INDEX OF FIGURES AND TABLES
Figure 1 Menu access keysPage ........................................................................................................ 4
Figure 2 Accessing current, temperatures and levels display modePage........................................... 4
Figure 3 Accessing the USER MENUPage......................................................................................... 6
Figure 4 Accessing the SERVICE MENUPage ................................................................................... 6
Figure 5 Parameter and function access menu chart for Modular Rack TypePage ............................ 6
Figure 6 Parameter and function access menu chart for Compact Rack TypePage ........................... 6
Figure 7 Scheme for “Heat two comm.” parameter and “Heating manage” parameter (only for
Modular Rack Type)Page
13
Figura 8 Scheme for “H2C” parameter and “b_t” parameter (only for Compact Rack Type)Page ...... 13
Table 1
Machine codes list and relative programming sheetsPage................................................... 30
N.B. The vertical lines on the left of the text indicate additions with respect to the previous edition.
DOC. N.
5956.573.02
Page 3 / 80
Electrolux
EFS - Dishwashing Systems Platform
Electrolux Professional
A
FUNCTION KEYS
BUTTONS USED
B
A
C
D
E
U
Figure 1 Menu access keys
A1
DISPLAY OF AUXILIARY VALUES
From the normal machine operation mode it is possible to see several screens not accessible to the user.
These screens give various machine values, and are accessed by pressing at the same time the combinations
of buttons displayed. (Figure 4).
U
U
Figure 2 Accessing current, temperatures and levels display mode
A1.1
MODULAR MACHINES
Press the Speed1 - “E” (Figure 1) - and Increase buttons - “A” (Figure 1) - at the same time for a few seconds
to access the screen displaying the levels of the various tanks and airgap.
Prewash
200 mmH2O
Wash
195 mmH2O
Airgap
60 mmH2O
DUO
55 mmH2O
Press the Increase button - “A” (Figure 1) - to access the screen giving the current absorbed by the gear
motor.
DOC. N.
5956.573.02
Page 4 / 80
Electrolux
EFS - Dishwashing Systems Platform
Electrolux Professional
Mot. Curr.
35 decA
To return to the standard display, wait 30 seconds or press the Confirm button - “C” (Figure 1) -.
A1.2
COMPACT MACHINES
Press the Speed1 button - “E” (Figure 1) - and Accessory Functions button - ”D” (Figure 1) - at the same time
for a few seconds to access the first screen; press the Increase button - “A” (Figure 1) - to access the subsequent screens. The following screens are displayed ( in order) :
Adt
tmp
68
1 DT temperature
(significant only
for machines with DT)
tAn
LE
198
4 Wash tank level
b_U
tmp
138
2 Temperature of first boiler
(significant only for USA
machines with 2 boilers)
sCp
LE
204
5 Prewash tank level
(significant only for
machines with prewash)
AIG
LE
60
3 Air Gap level
(significant only for
atmospheric machines)
Mot
Cur
34
6 Gear motor current
To return to the standard display, wait 30 seconds or press the Confirm button - “C” (Figure 1) -.
DOC. N.
5956.573.02
Page 5 / 80
Electrolux
EFS - Dishwashing Systems Platform
Electrolux Professional
A2
ACCESSING THE USER MENU AND SERVICE MENU
From normal machine operation mode all the parameters and information can be accessed for programming
the electronic boards by pressing the combinations of keys displayed in (Figure 3) and in (Figure 4).
U
U
U
Figure 3 Accessing the USER MENU
Figure 4 Accessing the SERVICE MENU
From the USER MENU and SERVICE MENU it is possible to access the following parameter families and information see (Figure 5) and (Figure 6) using the increase (“A” - (Figure 1)) and decrease (“B” - (Figure 1)) keys
to select the object, the confirm key (“C” - (Figure 1)) to access the selected object and the accessory functions
key (“D” - (Figure 1)) to exit the object.
USER MENU
EXIT
USER
SETTINGS
SERVICE MENU
DATA SETTING
GENERIC FUNC.
PARAMETERS
RINSE
MODULE
WASH
MODULE
DATALOG
INFO
STATISTICS
PREWASH
MODULE
DT
MODULE
HACCP
RINSE CONTROL
KEY MANAGEM.
SENS. ADJUST.
RATING
PLATE
Figure 5 Parameter and function access menu chart for Modular Rack Type
FAC (SERVICE MENU)
PAr(PARAMETERS)
GFu
(GENERIC
FUNC.)
RiN
(RINSE
MODULE)
tub
(WASH
MODULE)
Inf(INFO)
pRE
(PREWASH
MODULE)
Dt
rfC(RINSE CONTROL)
(DT MODULE)
SAd(SENSOR ADJUST.)
HAC
(HACCP)
Figure 6 Parameter and function access menu chart for Compact Rack Type
DOC. N.
5956.573.02
Page 6 / 80
Electrolux
EFS - Dishwashing Systems Platform
Electrolux Professional
A3
USER MENU (ONLY FOR MODULAR RACK TYPE)
Press the accessory functions keys (“D” - (Figure 1)) and the increase key (“A” - (Figure 1)) at the same time
for several seconds to access the USER MENU.
1
2
3
USER MENU
1 - EXIT
2 - DATA SETTING
The current date and time used in recording events (see par. A4.2 DATALOG (ONLY FOR MODULAR RACK
TYPE)) and statistics (see A4.4 STATISTICS (ONLY FOR MODULAR RACK TYPE)) can be set inside the
USER MENU.
CAUTION:
At first machine start-up make sure the date and time are correctly set.
The various USER MENU items can be selected by using the increase (“A” - (Figure 1)) and decrease
(“B” - (Figure 1)) keys.
A3.1
EXIT
Press the confirm key (“C” - (Figure 1)) when the selection arrow indicates the item EXIT to return to normal
machine operation.
A3.2
DATA SETTING
Press the confirm key (“C” - (Figure 1)) when the selection arrow indicates the item DATA SETTING and the
display will show the set date and time:
DATE & TIME
09 NOV 05
14 : 25
Press the accessory functions key (“D” - (Figure 1)) to display the USER MENU again. To modify the set date,
select the date with the increase (“A” - (Figure 1)) and decrease (“B” - (Figure 1)) keys and press the confirm
key (“C” - (Figure 1)). The display shows the current date at the bottom and the date being set at the top.
12
MAY
SET DATE
09 NOV 05
09 NOV 05
Use the increase, decrease and confirm keys to modify the date.
To modify the set time, select the time with the increase and decrease keys and press the confirm key.
The display shows the current time at the bottom and the time being set at the top.
SET TIME
15 : 25 : 32
14 : 25 : 32
Use the increase, decrease and confirm keys to modify the time.
DOC. N.
5956.573.02
Page 7 / 80
Electrolux
EFS - Dishwashing Systems Platform
Electrolux Professional
A4
SERVICE MENU
Press the accessory functions key (“D” - (Figure 1)) and the decrease key (“B” - (Figure 1)) at the same time
for several seconds to access the SERVICE MENU.
MODULAR RACK TYPE
1
2
3
COMPACT RACK TYPE
SERVICE MENU
1 - PARAMETERS
2 - DATALOG
Inside the SERVICE MENU it is possible to:
• display and edit all the machine parameters;
• access the DATALOG, i.e. a file of events that occurred during machine operation (only for modular rack
type);
• display information of a general nature, such as the machine software versions;
• consult a file of statistics relevant to the various machine load activation times and starts (only for modular
rack type).
• adjust the rinse flowrate cock ( just for atmospheric rack type).
• Save the parameters, datalog content and content of the statistics in a removable
backup memory (for modular RT's only).
• Set the pressure sensors that detect the levels of the airgap, Duo rinse tank, wash tank and prewash tank.
CAUTION:
After entering the SERVICE MENU switch the machine off and then on again to return to normal operation.
The various SERVICE MENU items can be selected by using the increase (“A” - (Figure 1)) and decrease
(“B” - (Figure 1)) keys.
A4.1
PARAMETERS
Press the confirm key (“C” - (Figure 1)) when the arrow indicates the PARAMETERS item and the display will
show the first family of parameters.
A4.1.1
USER SETTINGS (ONLY FOR MODULAR RACK TYPE)
The USER SETTINGS family contains parameters for setting the user interface.
USER SETTINGS
Use the increase and decrease keys to select the other parameter families.
Press the accessory functions key (“D” - (Figure 1)) to display the SERVICE MENU again.
Press the confirm key (“C” - (Figure 1)) to access the first parameter of the USER SETTINGS family.
USER SETTINGS
Language
ENGLISH
Press the accessory functions key (“D” - (Figure 1)) to display the USER SETTINGS family again.
DOC. N.
5956.573.02
Page 8 / 80
Electrolux
EFS - Dishwashing Systems Platform
Electrolux Professional
Use the increase and decrease keys to select the other parameters of the USER SETTINGS family.
Press the confirm key to edit the selected parameter; the selection arrow moves from the parameter name to
the parameter value.
USER SETTINGS
Language
ENGLISH
Use the increase and decrease keys to modify the parameter value. Press the confirm key to save the new set
value. Press the accessory functions key to exit without saving the new setting.
The USER SETTINGS family parameters are described below:
Parameter
name
Family
Nr.
Parameter
Nr.
Parameter description
Unit of
measure
Min
Max
Factory
setting
Language
0
0
Allows setting of required language
-
-
-
English
Contrast
0
1
Allows setting of screen contrast
-
0
5
3
A4.1.2
GENERIC FUNC.
The GENERIC FUNC. family parameters are selected and edited by using the keys in the same way as that
described for the USER SETTINGS family.
The GENERIC FUNC. family contains parameters that identify several general machine characteristics.
MODULAR RACK TYPE
COMPACT RACK TYPE
GENERIC FUNC.
The GENERIC FUNC. family parameters are described below:
DOC. N.
5956.573.02
Page 9 / 80
Electrolux
EFS - Dishwashing Systems Platform
Electrolux Professional
Modular
parameter
Compact
paramet
er
Family
Nr.
Parame
ter Nr.
Appl. type
APt
1
0
Parameter description
Unit
of
meas
ure
Min
Max
Factory
setting [for
WTM165 (*)]
Machine type for modular rack type:
Ws Ri : 2 modules rinse and wash.
Pw Ws Ri : 3 modules rinse, wash and prewash.
Pw Ws Ri Dt: 4 modules rinse, wash, prewash and
DT.
Ws Ri Dt: 3 modules rinse, wash and DT.
-
-
-
Ri Ws
Machine type for compact rack type:
4: Compact pressurized plumbing circuit
5: Compact atmospheric plumbing circuit
6: Compact pressurized plumbing circuit with dt
7: Compact atmospheric plumbing circuit with dt
8: Compact pressurized plumbing circuit with
prewash
9: Compact atmospheric plumbing circuit with
prewash
10: Compact pressurized plumbing circuit with
prewash and dt
11: Compact atmospheric plumbing circuit with
prewash and dt
12: Compact Usa
13: Compact Usa with DT
14: Compact Usa with prewash
15: Compact Usa with prewash and DT
-
-
-
Appl.
direct.
Ad
1
1
Rack pulling direction (meaningful parameter only
for Modular Rack Type):
LEFT: left rack insertion.
RIGHT: right rack insertion.
-
LEFT
RIGHT
RIGHT
Speed nr.
1
SP1
1
2
Indicates gear motor operation frequency at speed
1.
Hz
15
100
27 (**)
Wash time
sp 1
rd1
1
3
Time between insertion of rack and start of rinse
phase when speed 1 is set.
sec
0
250
110
Speed nr.
2
SP2
1
4
Indicates gear motor operation frequency at speed
2.
Hz
15
100
51 (**)
Wash time
sp 2
rd2
1
5
Time between insertion of rack and start of rinse
phase when speed 2 is set.
sec
0
250
58
(*) For the other equipment families, see par. B1.1 MODULAR RACK TYPE
(**)
(***)
Modular machine type
WTM140
WTM180
WTM165
WTM200
WTM250
WTM300
Racks/h Speed nr. 1
80
110
90
130
160
180
Speed nr. 1
25
35
27
40
53
60
Racks/h Speed nr. 2
140
180
165
200
250
300
Speed nr. 2
45
59
51
63
83
100
(**)
Compact machine type
RTC90 /
CTC90 /
WTC90
RTC140 /
CTC140 /
WTC140
RTC180 /
CTC180 /
WTC180
RTC220 /
CTC220 /
WTC220
WT44
WT66
(***)
Racks/h Speed nr. 1
90
80
120
180
100
100
Speed nr. 1
27
25
35
57
31
31
Racks/h Speed nr. 2
90
140
180
220
200
200
Speed nr. 2
27
44
57
69
63
63
(***) To comply with Standard DIN 10510 it is advisable to use speed nr. 1
DOC. N.
5956.573.02
Page 10 / 80
Electrolux
EFS - Dishwashing Systems Platform
Electrolux Professional
DOC. N.
Modular
parameter
Compact
parameter
Family
Nr.
Parame
ter
Nr.
Clean
duration
dCd
1
11
Duration of wash phase during self-clean cycle.
Drain
enable
drE
1
16
Enabling of drain and self-clean cycles:
0: All the drain and self-clean cycles are disabled.
1: Enables the drain cycle of all tanks in the
equipment.
5: Enables the drain cycle of all tanks in the equipment
and only the drain cycle for the wash tank.
7: Enables the drain cycle of all tanks in the
equipment, only the drain cycle for the wash tank and
only the drain cycle for the prewash tank.
13: Enables the drain cycle of all tanks in the
equipment, only the drain cycle for the wash tank and
only the drain cycle for the DUO rinse tank.
15: Enables the drain cycle of all tanks in the
equipment, only the drain cycle for the wash tank, only
the drain cycle for the prewash tank and only the drain
cycle for the DUO rinse tank.
21: Enables the drain cycle of all tanks in the
equipment, only the drain cycle for the wash tank and
the drain cycle for the air gap.
23: Enables the drain cycle of all tanks in the
equipment, only the drain cycle for the wash tank, only
the drain cycle for the prewash tank and the drain cycle
for the air gap.
29: Enables the drain cycle of all tanks in the
equipment, only the drain cycle for the wash tank, only
the drain cycle for the DUO rinse tank and the drain
cycle for the air gap.
31: Enables the drain cycle of all tanks in the
equipment, only the drain cycle for the wash tank, only
the drain cycle for the prewash tank, only the drain
cycle for the DUO rinse tank and the drain cycle for the
air gap.
33: Enables the drain cycle of all tanks in the
equipment and the self-clean cycle.
37: Enables the drain cycle of all tanks in the
equipment, only the drain cycle for the wash tank
and the self-clean cycle.
39: Enables the drain cycle of all tanks in the
equipment, only the drain cycle for the wash tank,
only the drain cycle for the prewash tank and the
self-clean cycle.
45: Enables the drain cycle of all tanks in the
equipment, only the drain cycle for the wash tank, only
the drain cycle for the DUO rinse tank and the selfclean cycle.
47: Enables the drain cycle of all tanks in the
equipment, only the drain cycle for the wash tank, only
the drain cycle for the prewash tank, only the drain
cycle for the DUO rinse tank and the self-clean cycle.
49: Enables the drain cycle of all tanks in the
equipment and the self-clean cycle and the drain cycle
for the air gap.
53: Enables the drain cycle of all tanks in the
equipment, only the drain cycle for the wash tank
and the self-clean cycle and the drain cycle for the
air gap.
55: Enables the drain cycle of all tanks in the
equipment, only the drain cycle for the wash tank,
only the drain cycle for the prewash tank, the selfclean cycle and the drain cycle for the air gap.
61: Enables the drain cycle of all tanks in the
equipment, only the drain cycle for the wash tank,
only the drain cycle for the DUO rinse tank, the
self-clean cycle and the drain cycle for the air gap.
63: Enables the drain cycle of all tanks in the
equipment, only the drain cycle for the wash tank,
only the drain cycle for the prewash tank, only the
drain cycle for the DUO rinse tank, the self-clean
cycle and the drain cycle for the air gap.
5956.573.02
Parameter description
Unit
of
meas
ure
Min
Max
Factory
setting [for
WTM165 (*)]
sec
0
100
15
-
0
63
61
Page 11 / 80
Electrolux
EFS - Dishwashing Systems Platform
Electrolux Professional
.
Modular
parameter
Compact
parameter
Family
Nr.
Parame
ter
Nr.
Heat two
comm.
H2C
1
18
Heating
manage
B_t
1
19
Parameter description
Unit
of
meas
ure
Min
Max
Factory
setting [for
WTM165 (*)]
Modular Rack Type:
Wash tank heating element management mode; if set
on “Yes” the two heating elements are managed by two
separate controls, otherwise they are managed by a
single control (See Figure 7 Scheme for “Heat two
comm.” parameter and “Heating manage”
parameter (only for Modular Rack Type)).
-
No
Yes
Yes
Compact Rack Type:
Wash tank heating element management mode; if set
on “1” the two heating elements are managed by two
separate controls, otherwise they are managed by a
single control (See Figura 8 Scheme for “H2C”
parameter and “b_t” parameter (only for Compact
Rack Type)).
-
0
1
0
-
LO
W
HIG
H
MEDIUM
-
0
1
0
Machine heating power management.
Maximum power: the wash tank heating elements
and the boiler heating elements can operate at the
same time.
CAUTION:
Check the electrical system and safety
devices ahead of the equipment before
setting “Max. power” mode
Medium power: when the boiler heating elements are
on, only one of the two wash tank heating elements
can operate; during the warmup, the tank is heated
first and then the boiler, whereas the boiler has priority
during normal operation.
Minimum power: the wash tank heating elements
cannot operate when the boiler heating elements are
on; during the warmup, the tank is heated first and
then the boiler, whereas the boiler has priority during
normal operation (See Figure 7 Scheme for “Heat
two comm.” parameter and “Heating manage”
parameter (only for Modular Rack Type) and
Figura 8 Scheme for “H2C” parameter and “b_t”
parameter (only for Compact Rack Type)).
Modular Rack Type:
“HIGH” = Maximum power
“MEDIUM” = Medium power
“LOW” = Minimum power
CAUTION:
THIS CONFIGURATION CAN ONLY
WORK ON ELECTRICALLY ARRANGED
MACHINES AND THE “Heat two comm.”
PARAMETER MUST BE SET ON “Yes”.
The machines electrically arranged to operate in
“MEDIUM” mode are the WTM165 and the WTM200
models.
Compact Rack Type:
“0” = Maximum power
“2” = Medium power
“1” = Minimum power
CAUTION:
THIS CONFIGURATION “2” CAN NOT
BE IMPLEMENTED IN THE ACTUAL
VERSIONS OF COMPACT RACK TYPE.
DOC. N.
5956.573.02
Page 12 / 80
Electrolux
EFS - Dishwashing Systems Platform
Electrolux Professional
HIGH
SINGLE
CONTACTOR
LOW
HARDWARE MACHINE
CONFIGURATION
HIGH
DOUBLE
CONTACTOR
MEDIUM
LOW
Heat two comm.
Heating manage
Figure 7 Scheme for “Heat two comm.” parameter and “Heating manage” parameter (only for Modular
Rack Type)
HARDWARE MACHINE
CONFIGURATION
0
(Maximum Power)
1
(Minimum Power)
SINGLE
CONTACTOR
H2C
b_t
Figura 8 Scheme for “H2C” parameter and “b_t” parameter (only for Compact Rack Type)
Modular
parameter
Compact
parameter
Family
Nr.
Para
meter
Nr.
Boiler
load tank
btF
1
20
Sanit.
enable
Heat
pump
Fahrenhei
t vis.
DOC. N.
SnE
HP
CF
5956.573.02
1
1
1
22
23
25
Parameter description
Unit of
measure
Min
Max
Factory
setting
[for
WTM165
(*)]
Modular Rack Type:
Wash tank filling mode: the tank is filled by means of
a dedicated solenoid valve.
-
No
Yes
No
Standard Compact Rack Type:
Wash tank filling mode: the tank is filled by means of
the rinse arms.
-
0
1
1
Usa Compact Rack Type:
Wash tank filling mode: the tank is filled by means of
a dedicated solenoid valve.
-
0
1
0
Modular Rack Type:
“No” sanitization cycle disable
“Yes” sanitization cycle enable.
-
No
Yes
No
Compact Rack Type:
“0” sanitization cycle disable
“1” sanitization cycle enable.
-
0
1
0
Modular Rack Type:
“No” heat pump management disable
“Yes” heat pump management enable.
-
No
Yes
No
Compact Rack Type:
“0” heat pump management disable
“1” heat pump management enable.
-
0
1
0
Modular Rack Type:
“No” the temperature is displayed in degrees Celsius
“Yes” the temperature is displayed in degrees
Fahrenheit.
-
No
Yes
No
Compact Rack Type:
“0” the temperature is displayed in degrees Celsius
“1” the temperature is displayed in degrees
Fahrenheit.
-
0
1
0
Enables sanitization cycle (N.B.: heating element
must be installed in prewash module).
Enables heat pump management.
The heat pump contains 1050 g of R134a refrigerant
liquid in its hydraulic circuit.
Unit of measure used in displaying temperatures; if
set on “Yes” the temperature is displayed in degrees
Fahrenheit, otherwise in degrees Celsius.
Page 13 / 80
Electrolux
EFS - Dishwashing Systems Platform
Electrolux Professional
Buzzer
enabled.
Demo
mode
b_E
dMo
1
1
26
27
Enables machine buzzer.
Modular Rack Type:
“No” machine buzzer disable
“Yes” machine buzzer enable.
-
No
Yes
Yes
Compact Rack Type:
- The buzzer is always enabled.
-
0
1
0
Modular Rack Type:
- “No demo” normal operation.
- “Demo mec” the users are not activated and the
inputs are not read, but communication between the
USER card and POWER cards is maintained .
- “Demo user” the users are not activated, the inputs
are not read, the USER card doesn’t communicate
with the POWER cards.
-
-
-
No demo
Compact Rack Type:
- “0” normal dishwasher operation.
- “1” the users are not activated and the inputs are not
read, but communication between the USER card
and POWER cards is maintained .
- “2” not available on these models.
-
-
-
0
Sof
twa
re/0
Mec
hani
cal/
1
Software/
0
0
-
40
-
35
(110Vac
gearmotor
)
Demo mode.
Rinse
autostart.
r_A
1
28
Indicates the type of command for the start of the
rinse phase. It can be set to “Mechanical” (1) only if
the special mechanical lever is present in the rinse
zone. **
Max.
motor
curr.***
GCU ***
1
29
Indicates the maximum current supplied from the
inverter to the gear motor.
If the supplied current is higher than this value,the
message “CROCKERY STUCK” appears on modular
Rack Type and the message “ SEE
ITEM
INSIDE” on compact Rack Type.
dec Amp.
-
It allows all the parameters to be set to their default
value. The set parameters are those of a WTM165
without DT.
The parameter set to “Yes” (1) automatically returns
to “No” (0).
-
Set
default
par.
spd
1
30
0
(230Vac
gearmotor
)
No/
0
Yes/
1
No/
0
(*) For the other equipment families, see par. Table 1 Machine codes list and relative programming
sheets.
** The table given below indicates the delay between transit of the rack on the autorinse lever and stopping of
the rinse phase.
E.g. in a WTM165 working at high speed (165 racks/h) the rinse pump keeps operating for 11 seconds after
the last rack has released the autorinse lever.
WTM140
WTM165
WTM180
WTM200
WTM250
WTM300
Speed n°1 (Hz)
25
27
35
40
53
60
Capacity speed n°1 (racks/hour)
80
90
110
130
160
180
Delay speed n° 1 (sec)
22
20
15
13
10
9
Speed n°2 (Hz)
45
51
58
63
83
100
Capacity speed n°2 (racks/hour)
140
165
180
200
250
300
Delay speed n° 2(sec)
12
11
9
9
6
5
*** Procedure for correctly setting the “Max. motor curr.” parameter:
1. Wait until the machine, complete with tables, is ready for a wash cycle.
2. Start a wash cycle and read the current absorbed by the gear motor
( refer to par. A1 “DISPLAY OF AUXILIARY VALUES”).
3. Add 2 to the read value (e.g. if “Motor current” = 34 ---> 34+2=36 decA).
4. Set the “Max. motor curr.” parameter with the value thus obtained.
CAUTION:
The Rack Type leaves the factory with the “Max motor curr.” parameter already set to the optimum
value. Reset it only when replacing a PCB or the gear motor.
DOC. N.
5956.573.02
Page 14 / 80
Electrolux
EFS - Dishwashing Systems Platform
Electrolux Professional
A4.1.3
RINSE MODULE
The RINSE MODULE family parameters are selected and edited by using the keys in the same way as that
described for the USER SETTINGS family.
The RINSE MODULE family contains the parameters that identify the rinse module characteristics.
COMPACT RACK TYPE
MODULAR RACK TYPE
RINSE MODULE
The RINSE MODULE / rin family parameters are described below:
DOC. N.
Modular
parameter
Compact
parameter
Family
Nr.
Paramet
er
Nr.
Parameter description
Unit of
measure
Min
Max
Factory
setting
Max. lev.
airgap(*)
ASL(*)
2
0
Max water level in air gap.
mmH2O
30
100
90
Max hist.
airgap(*)
ASH(*)
2
1
Hysteresis level relative to max level in the air gap.
mmH2O
0
80
30
Work hist.
airgap(*)
AnL(*)
2
2
Water level in the air gap enabling rinse pump
operation.
mmH2O
0
100
50
Max. lev.
duo (**)
dSL(**)
(meaningless
for compact
family)
2
4
Indicates the maximum level in the Duo rinse tank.
The filling stops when the water level reaches this
value.
mmH2O
30
100
55
Dm max
duo lev.
(**)
dSd(**)
(meaningless
for compact
family)
2
5
Meaningful only during ““Drain and clean” cycle.
Indicates the maximum level during “Drain and
clean” cycle.
mmH2O
10
100
40
Max hist.
duo (**)
dSH(**)
(meaningless
for compact
family)
2
6
Indicates the hysteresis level relative to the
maximum level in the Duo tank.
It is related to the “Max. lev. duo” and to the “Dm
max duo lev.”.
mmH2O
0
80
15
Work lev.
duo (**)
dnL(**)
(meaningless
for compact
family)
2
7
Indicates the water level in the the Duo tank
enabling the Duo heating element and the Duo
pump operations.
mmH2O
0
50
20
Boil. temp.
start
btS
2
9
Boiler temperature set point at start of rinse
phase; the initial overtemperature determined by
this parameter ensures that the introduction of
cold water in the boiler does not lower the rinse
water temperature at the start of rinsing.
°C / °F
10/
50
99/
210
92/198
Boiler
temper.
bot
2
10
Boiler temperature set point.
°C / °F
10/
50
99/
210
86/187
Hist. boil
temp.
btH
2
11
Hysteresis temperature
temperature set point.
boiler
°C / °F
0/0
15/
27
0/0
First boil.
temp.
Fbt
2
12
First boiler temperature set point.
( Significant only for USA machines with 2 boilers).
°C / °F
0/32
99/
210
59/138
First boil.
hist.
FbH
2
13
Hysteresis temperature relative to first boiler
temperature set point.
( Significant only for USA machines with 2 boilers).
°C / °F
0/0
15/
27
0/0
Duo
temper.
dut
2
14
DUO rinse tank temperature set point.
°C / °F
5/41
95/
203
70/158
Hist. duo
temp.
dtH
2
15
Hysteresis temperature relative to DUO rinse tank
temperature set point.
°C / °F
0/0
50/
90
5/9
Drain del.
airgap
Add
2
17
Time between reaching level “0” (air trap level)
the air gap and stop of rinse pump.
in
sec
0
200
32
Drain delay
duo
ddd
2
19
Time between reaching level “0” (air trap level) in
the DUO rinse tank and closing of the drain
solenoid valve; allows complete emptying of tank.
sec
0
200
30
5956.573.02
relative
to
Page 15 / 80
Electrolux
EFS - Dishwashing Systems Platform
Electrolux Professional
Heat. tim.
enable
HtE
2
20
Allows enabling/disabling of the boiler heating
Time out alarm ( alarm 15).
If the parameter is set to “No” (0), the alarm 15
does not appear even if the boiler never reaches
the setpoint temperature.
-
No/
0
Yes/
1
Yes/
1
Duo heat.
unrel.
dHU
2
21
Allows the Duo heating element operation to be
freed from that of the other heating elements. If set
to “Yes” (1) the Duo heating element can switch on
even if the tank and boiler heating elements are
on.
-
No/
0
Yes/
1
No/
0
Airgap
area
AAG
2
22
Defines the base area of the airgap. This value is
used in the “Rinse control” procedure.
mmq
500
999
700
(*) The difference between the max. water level and the hysteresis level must be higher than the work hysteresis airgap.
Max. lev. airgap - Max. hist. airgap Work hist. airgap
ASL - ASH > AnL
(**) The difference between the max. water level and the hysteresis level must be higher than the working level:
Max. lev. duo - Max. hist. duo > Work lev. duo
(**) The difference between the max. water level during drain cycle and the hysteresis level must be higher than the working level:
Dm max duo lev. - Max. hist. duo > Work lev. duo
A4.1.4
WASH MODULE
The WASH MODULE family parameters are selected and edited by using the keys in the same way as that
described for the USER SETTINGS family.
The WASH MODULE family contains the parameters that identify the wash module characteristics.
COMPACT RACK TYPE
MODULAR RACK TYPE
WASH MODULE
The WASH MODULE / tub family parameters are described below:
DOC. N.
Modular
paramet
er
Compact
parameter
Family
Nr.
Param
eter
Nr.
Wash
module
tty
3
0
Parameter description
Unit of
measure
Min
Max
Factory
setting
[for
WTM165
(*)]
Modular Rack Type:
- “1165” module from 1165 mm
- “1490” module from 1490 mm.
-
-
-
1490
Compact Rack Type:
- “2” Wash+Rinse module
-
-
-
2
Type of wash module
Stanby
level (**)
tSS(**)
3
1
Indicates the maximum level in the wash tank.
The filling stops when the water level reaches
this level.
mmH2O
60
400
205
Run max
level (**)
tSr(**)
3
2
The value for the maximum level is modified from
“Standby level” to “Run max level” during
washing phase in order to avoid water loss when
the pumps stop.
mmH2O
60
400
170
Drain
max lev.
(**)
tSd(**)
3
3
Meaninful only during “Drain and clean” cycle.
Indicates the maximum level during “Drain and
clean” cycle.
mmH2O
60
400
190
Max lev.
hister.
(**)
tSH(**)
3
4
Indicates the hysteresis level relative to the
maximum level in the wash tank. It is related to
the “Standby level” to the “Run max level” and to
the “Drain max lev.”.
mmH2O
0
80
30
Working
level (**)
tnL(**)
3
5
Indicates the water level in the wash tank
enabling the wash tank heating elements and the
wash pumps operations.
mmH2O
60
400
90
Tank
temper.
tut
3
7
Tank temperature set point.
°C / °F
5/41
90/194
66/151
Sanit.
temper.
tSt
3
8
Tank temperature set point during the
sanitization phase (only on machines with
sanitization).
°C / °F
10/50
90/194
75/167
5956.573.02
Page 16 / 80
Electrolux
EFS - Dishwashing Systems Platform
Electrolux Professional
Histesys
temp.
ttH
3
9
Hysteresis temperature
temperature set point.
tank
°C / °F
0/0
50/90
2/4
Max
Temp.
CU
StC
3
10
Max permissible temperature for the water
leaving the CU to enable heat pump operation. If
the water leaving the CU exceeds this
temperature, the machine continues to work
normally but the heat pump (if present) stops.
°C / °F
1/34
90/194
50/122
°C / °F
1/2
20/46
50/90
relative
to
CAUTION:
Do not modify this parameter unless
expressly required by the factory.
Hist.
Temp.
CU
HtC
3
11
Max permissible temperature for the water
leaving the CU to enable heat pump operation: if
the temperature of the water leaving the CU falls
below “Max temp. CU - Hist. temp. CU”, the
machine continues to work normally but the heat
pump (if present) stops.
CAUTION:
Do not modify this parameter unless
expressly required by the factory.
Temp.
Thresh.
CU
ttC
3
12
Meaninful only for machines with heat pump.
Indicates the CU temperature when the washing
tank heating elements stop.
This function is enabled only if the heat pump is
installed and allows maintaining the CU
temperature compatible with the heat pump
features.
°C / °F
20 / 68
70 /
158
48 / 118
Wash
san.
duration
Std
3
13
Duration of wash tank cleaning phase during a
sanitization cycle.
sec
0
250
60
Fan
delay
start
CGd
3
14
The time between start of wash and start of CU
fan ( Parameter not significant for Compact Rack
Type ).
sec
0
200
0
Fan
delay
stop
CSd
3
15
The time between stop of wash phase and stop
of CU fan ( Parameter not significant for Compact
Rack Type ).
sec
0
200
20
Drain
delay
dtd
3
17
Time between reaching level “0” (air trap level) in
the tank and closing of the drain solenoid valve;
allows complete emptying of wash tank
sec
0
200
30
Autom.
drain
del.
Atd
3
18
Time between two automatic water changes. If
this parameter is set at zero the function is
disabled.
min
0
250
120
Water to
drain
qtd
3
19
Quantity of water to be drained with each
automatic emptying.
mmH2O
0
100
25 (***)
Condensi
ng unit
CUn
3
20
CU presence.
-
No/0
Yes/1
Yes/1
(*) For the other equipment families, see par. Table 1 Machine codes list and relative programming
sheets.
(***)
WASH TANKS
1165
1490
Tank capacity
100 l
150 l
Water to drain (in litres/mm)
0,32 l/mm
0,485 l/mm
(**) The difference between the max water level and the hysteresis level must be higher than the working level:
Stanby level - Max lev. hister > Working level
tSS - tSH
>
tnl
(**) The difference between the max water level during washing phase and the hysteresis level must be higher than the working level:
Run max level - Max lev. hyster. > Working level
tSr - tSH > tnl
(**) The difference between the max water level during drain cycle and the hysteresis level must be higher than the working level:
Drain max lev. - Max lev. hyster. > Working level
tSd - tSH
DOC. N.
5956.573.02
>
tnl
Page 17 / 80
Electrolux
EFS - Dishwashing Systems Platform
Electrolux Professional
A4.1.5
PREWASH MODULE
The PREWASH MODULE family parameters are selected and edited by using the keys in the same way as
that described for the USER SETTINGS family.
The PREWASH MODULE family contains the parameters that identify the prewash module characteristics.
COMPACT RACK TYPE
MODULAR RACK TYPE
PREWASH MODULE
The PREWASH MODULE / PrE family parameters are described below:
:
(**) The difference between the max water level and the hysteresis level must be higher than the working level:
Modular
paramet
er
Compact
parameter
Family
Nr.
Param
eter
Nr.
Parameter description
Prewash
module
Pty
4
0
Type of prewash module
Unit of
measur
e
Min
Max
Factory
setting
[for
WTM200
(*)]
- “1165-600” module from 1165 mm or from 600 mm
- “1490” module from 1490 mm.
-
-
-
1165-600
- “0” module from 1165 mm or from 600 mm
- “1” module from 1490 mm.
-
-
-
0
Stanby
level
SbL(**)
4
1
Indicates the maximum level in the prewash tank. The
filling stops when the water level reaches this value.
mmH2O
60
400
220
Run
level
PSS(**)
4
2
The value for the maximum level is modified from
“Stanby level” to “Run level” during prewashing phase
in order to avoid water loss when the pumps stop.
mmH2O
60
400
180
Drain
max lev.
PSd(**)
4
3
Meaninful only during “Drain and clean” cycle.
Indicates the maximum level during “Drain and clean”
cycle.
mmH2O
60
400
190
Max lev.
hister.
PSH(**)
4
4
Indicates the hysteresis level relative to the maximum
level in the prewash tank. It is related to the “Stanby
level” , to the “Run level” and to the “Drain max lev.”.
mmH2O
0
80
30
Working
level
PnL(**)
4
5
Indicates the water level in the prewash tank enabling
the prewash tank heating elements and the prewash
pumps operations.
mmH2O
60
400
90
Tank
temper.
Prt
4
7
Tank temperature set point.
°C / °F
5/
41
90/
194
10/50
Sanit.
temper.
PSt
4
8
Tank temperature set point during sanitization phase
(only on machines with sanitization - N.B.: heating
element must be installed in prewash module).
°C / °F
10/
50
90/
194
75/167
Histesys
temp.
PtH
4
9
Hysteresis temperature relative to tank temperature
set point.
°C / °F
1/2
50/90
5/9
Prew.
san.
durat.
SPd
4
10
Duration of wash tank cleaning phase during a
sanitization cycle.
sec
0
250
60
Drain
delay
dPd
4
12
Time between reaching level “0” (air trap level) in the
tank and closing of the drain solenoid valve; allows
complete emptying of tank.
sec
0
200
30
Autom.
drain
del.
APd
4
13
Time between two automatic water changes. If this
parameter is set at zero the function is disabled.
min
0
250
50
Water to
drain
qPd
4
14
Quantity of water to be drained with each automatic
emptying.
mmH2O
0
50
10 (****)
Max
temper.
prew.
dPt
4
15
Max permissible temperature in prewash tank. If the
tank temperature exceeds the set temperature, a
quantity of water equal to the quantity set by means
of the "Water to drain" parameter is drained.
If this parameter is set at zero the function is
disabled.
°C / °F
0/
32
99/
210
40/104
Stanby level - Max lev. hister > Working level
DOC. N.
5956.573.02
Page 18 / 80
Electrolux
EFS - Dishwashing Systems Platform
Electrolux Professional
SbL - PSH > Pnl
(**) The difference between the max water level during washing phase and the hysteresis level must be higher than the working level:
Run level - Max lev. hister > Working level
PSS - PSH
>
Pnl
(**) The difference between the max water level during drain cycle and the hysteresis level must be higher than the working level:
Drain max level - Max lev. hister > Working level
PSd - PSH
>
Pnl
(*) For the other equipment families, see par. Table 1 Machine codes list and relative programming
sheets.
(****)
A4.1.6
PREWASH TANKS
600
1165
Tank capacity
45 l
100 l
1490
150 l
Water to drain (in litres/mm)
0,136 l/mm
0,32 l/mm
0,485 l/mm
DT MODULE
The DT MODULE family parameters are selected and edited by using the keys in the same way as that
described for the USER SETTINGS family.
The DT MODULE family contains the parameters that identify the drying zone (DT) characteristics.
COMPACT RACK TYPE
MODULAR RACK TYPE
DT MODULE
The DT MODULE / dt family parameters are described below:
DOC. N.
Modular
paramet
er
Compact
parameter
Family
Nr.
Paramet
er
Nr.
Dt
temper.
dtt
5
0
Dt hist.
temp.
dtH
5
Dt fan
delay
Afd
Dt type.
d_t
5956.573.02
Parameter description
Unit of
measure
Min
Max
Factory
setting
Drying tunnel temperature set point.
°C / °F
10/
50
90/
194
70/158
1
Hysteresis temperature relative to the drying tunnel
temperature set point.
°C / °F
0/0
50/
90
3/5
5
3
Time between stop of DT heating element and stop
of DT fan. This parameter ensures a correct cooling
for the DT heating element.
sec
0
250
120
5
4
Indicates the type of DT installed.
-
Stan
dard
/0
New
type/
1
Standard/
0
Page 19 / 80
Electrolux
EFS - Dishwashing Systems Platform
Electrolux Professional
A4.1.7
HACCP
The HACCP family parameters are selected and edited by using the keys in the same way as that described
for the USER SETTINGS family.
The HACCP family contains the parameters that identify the HACCP connection characteristics.
COMPACT RACK TYPE
MODULAR RACK TYPE
HACCP
The HACCP / HAC family parameters are described below:
Unit
of
meas
ure
Min
Max
Facto
ry
settin
g
Specific address of equipment in an HACCP network.
-
0
254
1
1
Specific address of equipment in an IrDa communication
network.
-
0
254
1
6
2
Indicates the communication speed of the equipment in
an HACCP network.
-
1200/
0
192
00/4
9600/
3
6
3
Indicates the communication speed of the equipment in
an IrDa communication network.
-
1200/
0
192
00/4
9600/
3
Modular
paramet
er
Compact
parameter
Family
Nr.
Paramet
er
Nr.
HACCP
address
Adr
6
0
IR
Address
IrA
6
HACCP
baud
rate
Hbr
IR baud
rate
Ibr
A4.1.8
Parameter description
RATING PLATE (ONLY FOR MODULAR RACK TYPE)
The RATING PLATE family contains the parameters that identify the machine rating data.
RATING PLATE
The RATING PLATE family parameters are selected and edited by using the keys in the same way as that
described for the USER SETTINGS family except for the "STRING" parameters given in the following table.
After a “STRING” is displayed
RATING PLATE
P.N.C.
0000000000000
the parameter can be edited by pressing the confirm key; the selection arrow moves from the parameter name
to the parameter value.
DOC. N.
5956.573.02
Page 20 / 80
Electrolux
EFS - Dishwashing Systems Platform
Electrolux Professional
RATING PLATE
P.N.C.
0000000000000
Use the increase and decrease keys to move the cursor until it is under the digit to be modified. Press the confirm key to modify the selected digit.
RATING PLATE
P.N.C.
0000000000000
The digit flashes and the value of the digit selected can be modified by using the increase and decrease keys.
Press the confirm key to save the new value. Press the accessory functions key to exit without saving.
When all the digits have been modified as required, press the accessory functions key to return to parameter
selection mode.
The RATING PLATE family parameters are described below:
Parameter
name
Family
Nr.
Para
meter
Nr.
Parameter description
Unit of
measu
re
Min
Max
Factory
setting
Example
“STRING”
parameter
P.N.C.
7
0
Product Number Code
-
-
-
-
534104 00
Yes
Serial number
7
1
Serial number
-
-
-
-
54600001
Yes
Model
7
2
Factory Model
-
-
-
-
WTM165ERA
+DT
Yes
Constr. year
7
3
Year of construction
-
-
-
-
2007
Yes
Prod. site
7
4
Production site (6 = Washing)
-
0
10
6
6
Yes
Inst. power
7
5
Installed power
kW
-
-
-
42.3 KW
Yes
Voltage supply
7
6
Power supply voltage
F
-
-
-
AC 400 V 3P N
Yes
Frequency
7
7
Frequency
Hz
50
60
50
50 Hz
No
Max. current
7
8
Absorbed current
A
6
32
6
65A
No
A
-
-
-
-----
Yes
A
-
-
-
-----
Yes
MCA
7
9
MCA (Minimum supply Circuit Ampacity)
[for USA versions only]
MOP
7
10
MOP (Maximum Overcurrent Protection)
[for USA versions only]
Prot. degree
7
11
Protection rating
-
IPX5
IPX5
Yes
Inst. day
7
12
Installation day (*****)
-
-
-
-
20
Yes
Inst. month
7
13
Installation month (*****)
-
-
-
-
06
Yes
Inst. year
7
14
Installation year (*****)
-
-
-
-
07
Yes
(*****) The installer must set the day, month and year of installation.
DOC. N.
5956.573.02
Page 21 / 80
Electrolux
EFS - Dishwashing Systems Platform
Electrolux Professional
A4.2
DATALOG (ONLY FOR MODULAR RACK TYPE)
Accessing the "DATALOG" mode allows a number of events that occurred in the machine to be displayed.
In addition to the event, the screen also shows the time the event began and ended, as well as other information whose significance depends on the type of event recorded.
Every event is characterised by a START date and time and a STOP date and time.
The event STOP can be recorded when its cause is no longer present (e.g. a temperature exceeding the permissible upper limit and then coming within the correct range),
34
TYPE
START
WASH
STOP
EVENT DATALOG
WASH OVERTEMP.
DD-MM-YY HH:HH VALUE
10-10-05
14:10 80 °C
OVERTEMP.
10-10-05
14:15
or when the machine is switched off following shutdown by the user (POWER OFF) or no power (POWER FAIL).
In the latter case, event STOP is described with the indication POWER OFF or POWER FAIL.
EVENT DATALOG
34
WASH OVERTEMP.
TYPE DD-MM-YY HH:HH VALUE
START 10-10-05
14:10 80 °C
POWER OFF
STOP 10-10-05
14:15
If accessing the display of an event that began after the last machine start and which has not ended because
its cause is still present, closing of the event is not displayed.
34
TYPE
START
STOP
DOC. N.
EVENT DATALOG
WASH OVERTEMP.
DD-MM-YY HH:HH VALUE
10-10-05
14:10 80 °C
-------------:--------
5956.573.02
Page 22 / 80
Electrolux
EFS - Dishwashing Systems Platform
Electrolux Professional
List of events documented by the DATALOG:
Event
number
DOC. N.
Event name
Event description
Event value (VALUE)
1
BOIL. TEMP. HIGH
The boiler temperature has exceeded the temperature set point
by 7 °C/13 °F.
Indicates the boiler temperature at the time
of event recording.
2
DUO TEMP. HIGH
The duo rinse temperature has exceeded the temperature set
point by 8 °C/14 °F.
Indicates the duo rinse temperature at the
time of event recording.
3
WASH. TEMP. HIGH
The wash tank temperature has exceeded the temperature set
point by 8 °C/14 °F.
Indicates the wash tank temperature at the
time of event recording.
4
PREW. TEMP. HIGH
The prewash tank temperature has exceeded the temperature
set point by 35 °C/63 °F.
Indicates the prewash temperature at the
time of event recording.
5
DT TEMP. HIGH
The dry tunnel temperature has exceeded the temperature set
point by 15 °C/27 °F.
Indicates the dry tunnel temperature at the
time of event recording.
6
BOIL. TEMP. LOW
During the wash phase the boiler temperature has decreased
by more than 12 °C/25 °F with respect to the permissible min.
value (– hysteresis temperature set point).
Indicates the boiler temperature at the time
of event recording.
7
DUO TEMP. LOW
During the wash phase the duo rinse temperature has decreased
by more than 15 °C/27 °F with respect to the permissible min.
value (–hysteresis temperature set point).
Indicates the duo rinse temperature at the
time of event recording.
8
WASH TEMP. LOW
During the wash phase the wash tank temperature has
decreased by more than 15 °C/27 °F with respect to the
permissible min. value (–hysteresis temperature set point).
Indicates the wash tank temperature at the
time of event recording.
9
DT TEMP. LOW
During the wash phase the dry tunnel temperature has
decreased by more than 15 °C/27 °F with respect to the
permissible min. value (–hysteresis temperature set point).
Indicates the dry tunnel temperature at the
time of event recording.
11
AIRG. FILL. TOUT
Alarm number 11 has occurred:
The Air Gap was not completely filled within the max. filling time.
Indicates the air gap level at the time of
event recording.
12
AIRG. LEV. FAULT
Alarm number 12 has occurred:
The pressure sensor on the rinse module electronic board does
not work correctly.
Indicates the air gap level at the time of
event recording.
13
DUO FILL. TOUT
Alarm number 13 has occurred:
The Duo-rinse tank was not completely filled within the max.
filling time.
Indicates the duo rinse level at the time of
event recording.
14
DUO LEV. FAULT
Alarm number 14 has occurred:
The pressure sensor on the Duo-rinse tank does not work
correctly.
Indicates the duo rinse level at the time of
event recording.
15
BOIL. HEAT. TOUT
Alarm number 15 has occurred:
The required temperature was not reached in the boiler within the
max. heating time.
Indicates the boiler temperature at the time
of event recording.
16
BOILER OVERTEMP.
Alarm number 16 has occurred:
The water temperature in the boiler is too high
Indicates the boiler temperature at the time
of event recording.
17
BOILER NTC SHORT
Alarm number 17 has occurred:
The boiler temperature sensor is short circuited.
Not significant
18
BOILER NTC OPEN
Alarm number 18 has occurred:
The boiler temperature sensor is open.
Not significant
19
DUO HEAT. TOUT
Alarm number 19 has occurred:
The required temperature was not reached in the Duo-rinse tank
within the max. heating time.
Indicates the duo rinse temperature at the
time of event recording.
20
DUO OVERTEMP.
Alarm number 20 has occurred:
The water temperature in the Duo-rinse tank is too high.
Indicates the duo rinse temperature at the
time of event recording.
21
DUO NTC SHORT
Alarm number 21 has occurred:
The Duo-rinse tank temperature sensor is short circuited.
Not significant
22
DUO NTC OPEN
Alarm number 22 has occurred:
The Duo-rinse tank temperature sensor is open.
Not significant
23
RIN. PUMP THERM.
Alarm number 23 has occurred:
MODULAR: The rinse pump thermal protector has tripped.
COMPACT: The rinse pump thermal protector, the wash pump
thermal protector or the CU thermal protector has tripped.
Not significant
24
DUO PUMP THERM.
Alarm number 24 has occurred:
The Duo-rinse pump thermal protector has tripped.
Not significant
25
DRAIN DUO TOUT
Alarm number 25 has occurred:
The Duo-rinse tank was not completely emptied within the max.
emptying time.
Indicates the duo rinse level at the time of
event recording.
27
INVERTER ERROR
Alarm number 27 has occurred:
The motor control inverter has generated an error.
Indicates the selected speed at the time of
event recording.
30
DRAIN AIRG TOUT
Alarm number 30 has occurred:
The Air gap was not completely emptied within the max.
emptying time.
Indicates the airgap level at the time of event
recording.
31
WASH FILL. TOUT
Alarm number 31 has occurred:
The wash tank was not completely filled within the max. filling
time.
Indicates the wash tank level at the time of
event recording.
32
WASH LEV. FAULT
Alarm number 32 has occurred:
The pressure sensor on the wash tank does not work correctly.
Indicates the wash tank level at the time of
event recording.
33
WASH HEAT. TOUT
Alarm number 33 has occurred:
The required temperature in the wash tank was not reached
within the max. heating time.
Indicates the wash tank temperature at the
time of event recording.
5956.573.02
Page 23 / 80
Electrolux
EFS - Dishwashing Systems Platform
Electrolux Professional
Event
number
DOC. N.
Event name
Event description
Event value (VALUE)
34
WASH OVERTEMP.
Alarm number 34 has occurred:
The water temperature in the wash tank is too high.
Indicates the wash tank temperature at the
time of event recording.
35
WASH NTC SHORT
Alarm number 35 has occurred:
The wash tank temperature sensor is short circuited.
Not significant
36
WASH NTC OPEN
Alarm number 36 has occurred:
The wash tank temperature sensor is open.
Not significant
37
WASH PUMP1 THER.
Alarm number 37 has occurred:
The upper wash pump thermal protector has tripped.
Not significant
38
WASH PUMP2 THER.
Alarm number 38 has occurred:
The lower wash pump thermal protector has tripped.
Not significant
39
CU FAN THER.
Alarm number 39 has occurred:
The CU (condensing unit) fan thermal protector has tripped.
Not significant
40
DRAIN WASH TOUT
Alarm number 40 has occurred:
The wash tank was not completely emptied within the max.
emptying time.
Indicates the wash tank level at the time of
event recording.
42
AIRGAP LEV. LOW
The air gap tank water level has fallen by more than 10 mm with
respect to the permissible min. level (–hysteresis set point level).
Indicates the air gap level at the time of
event recording.
43
DUO LEV. LOW
The duo rinse tank water level has fallen by more than 10 mm
with respect to the permissible min. level (–hysteresis set point
level).
Indicates the duo rinse level at the time of
event recording.
44
WASH LEV. LOW
The wash tank water level has fallen by more than 20 mm with
respect to the permissible min. level (–hysteresis set point level).
Indicates the wash tank level at the time of
event recording.
45
PREWASH LEV. LOW
The prewash tank water level has fallen by more than 20 mm with
respect to the permissible min. level (–hysteresis set point level).
Indicates the prewash tank level at the time
of event recording.
46
POWER ON
Records appliance activation.
Not significant
47
FORCED WASH
A wash start has been forced.
Indicates the boiler temperature at the time
of event recording.
48
EMERGENCY
SWITCH
The emergency mushroom has been pressed.
Not significant
49
PARAMETER MODE
Parameter mode has been accessed.
Not significant
50
PARAMETER MODIF.
A parameter has been modified.
Indicates the modified family and parameter
number.
51
PREW. FILL. TOUT
Alarm number 51 has occurred:
The prewash tank was not completely filled within the max. filling
time.
Indicates the prewash tank level at the time
of event recording.
52
PREW. LEV. FAULT
Alarm number 52 has occurred:
The pressure sensor on the prewash tank does not work
correctly.
Indicates the prewash tank level at the time
of event recording.
53
PREW. HEAT. TOUT
Alarm number 53 has occurred:
The required temperature in the prewash tank was not reached
within the max. heating time.
Indicates the prewash tank temperature at
the time of event recording.
54
PREW. OVERTEMP.
Alarm number 54 has occurred:
The water temperature in the prewash tank is too high.
Indicates the prewash tank temperature at
the time of event recording.
55
PREW. NTC SHORT
Alarm number 55 has occurred:
The prewash tank temperature sensor is short circuited.
Not significant
56
PREW. NTC OPEN
Alarm number 56 has occurred:
The prewash tank temperature sensor is open.
Not significant
57
PREW. PUMP THER.
Alarm number 57 has occurred:
The prewash pump thermal protector has tripped.
Not significant
58
DRAIN PREW. TOUT
Alarm number 58 has occurred:
The prewash tank was not completely emptied within the max.
emptying time.
Indicates the prewash tank level at the time
of event recording.
60
CU NTC SHORT
The warning number 60 has occurred:
The CU temperature sensor is short circuited.
Not significant
61
CU NTC OPEN
The warning number 61 has occurred:
The CU temperature sensor is open.
Not significant
62
HEAT PUMP FAULT
The warning number 62 has occurred:
Indicates that the heat pump has generated an error.
Not significant
63
CU TEMP. HIGH
The CU temperature has exceeded by 8°C/14°F degrees the
permissible max. value to ensure the correct operation of the
heat pump.
Indicates the CU temperature at the time of
event recording.
64
CU TEMP. LOW
During the wash phase the CU temperature has decreased by
more than 10 °C/18 °F with respect to the permissible min. value
(–hysteresis temperature set point) to ensure the correct
operation of the heat pump.
Indicates the CU temperature at the time of
event recording.
65
LEV. LOW WASH
Washing has stopped due to a lowering of the levels
Indicates the air gap level at the time of
event recording.
66
RINSE FLOW CTRL
A calibration cycle for the rinse flow shutter has been started.
Whole part and fractional part of the flow
measured.
71
DT HEAT. TOUT
Alarm number 71 has occurred:
The required temperature in the drying tunnel was not reached
within the max. heating time.
Indicates the drying tunnel temperature at
the time of event recording.
72
DT OVERTEMP.
Alarm number 72 has occurred:
The temperature in the drying tunnel is too high.
Indicates the drying tunnel temperature at
the time of event recording.
5956.573.02
Page 24 / 80
Electrolux
EFS - Dishwashing Systems Platform
Electrolux Professional
Event
number
Event name
Event description
Event value (VALUE)
73
DT NTC SHORT
Alarm number 73 has occurred: ( Up to version FW 1.52)
The drying tunnel temperature sensor is short circuited.
Not significant
74
DT NTC OPEN
Alarm number 74 has occurred:
The drying tunnel temperature sensor is open.
Not significant
75
DT FAN THER.
Alarm number 75 has occurred:
The drying tunnel fan thermal protector has tripped.
Not significant
76
MOT CURR OOR H.
Alarm number 76 has occurred:
The gear motor supplied current is higher than the maximum
value allowed for the gear motor current.
Not significant
77
MOT CURR OOR L.
Alarm number 77 has occurred:
The gear motor supplied current is lower than the minimum value
allowed for the gear motor current.
Not significant
78
HIGH MOT. CURR.
Dishes are jammed.:
The gear motor supplied current is higher than the value set in
the “Max motor curr.” parameter.
Indicates the supplied current to gear motor
at the time of event recording.
79
BOIL. USA T. HI..
The first boiler temperature has exceeded the temperature set
point by 7 °C/13 °F.
Indicates the first boiler temperature at the
time of event recording.
80
BOIL. USA T. LO.
During the wash phase the first boiler temperature has
decreased by more than 12 °C/25 °F with respect to the
permissible min. value (– hysteresis temperature set point).
Indicates the first boiler temperature at the
time of event recording.
81
EN. PEAK CTRL.
The “Energy peak control” input has been activated. All the
heating elements of the machine remain off during activation of
this input.
Indicates the boiler temperature at the time
of event recording.
82
BOIL. USA TOUT
Alarm number 82 has occurred:
The required temperature was not reached in the first boiler
within the max. heating time.
Indicates the first boiler temperature at the
time of event recording.
83
BOIL. USA OVERT.
Alarm number 83 has occurred:
The water temperature in the first boiler is too high
Indicates the first boiler temperature at the
time of event recording.
84
BOIL. USA NTC S.
Alarm number 84 has occurred:
The first boiler temperature sensor is short circuited.
Not significant
85
BOIL. USA NTC O.
Alarm number 85 has occurred:
The first boiler temperature sensor is open.
Not significant
86
SEN. PRESS. ADJ
The pressure sensor setting procedure has been performed.
Not significant
89
U.I. TEMP. HIGH
Alarm number 89 has occurred:
Temperature too high on User interface.
Indicates the User interface temperature at
the time of event recording.
90
ECAP ERROR
Alarm number 90 has occurred:
Communication problems between machine electronic boards.
Indicates the module that generated a
communication error between User interface
and Mec:
1: rinse
2: wash
4: prewash
8: DT.
A4.3
INFO
Press the confirm key (“C” - (Figure 1)) when the selection arrow indicates the INFO item and the machine
firmware (FW) versions will be displayed.
MODULAR RACK TYPE
i
COMPACT RACK TYPE
INFO
FW USER
FW LCD
FW RINSE
FW WASH
FW PREWASH
FW DT
15660200
15660300
15660100
15660100
15660100
15660100
POWER
USER
Modular Rack Type will show the USER INTERFACE board software version (FW USER e FW LCD) and the
POWER boards software versions (FW RINSE, FW WASH, FW PREWASH, FW DT), Compact Rack Type will
show the USER INTERFACE board software version and the POWER board connected to the USER INTERFACE software version.
Press the confirm key to return to the SERVICE MENU.
DOC. N.
5956.573.02
Page 25 / 80
Electrolux
EFS - Dishwashing Systems Platform
Electrolux Professional
A4.4
STATISTICS (ONLY FOR MODULAR RACK TYPE)
Press the confirm key (“C” - (Figure 1)) when the selection arrow indicates the STATISTICS item and the
display will show the statistics relevant to starts and activation times of the first electric user of the machine.
The table below describes all the codes (LOAD CODE) of the electric users in the machine. The display
shows the minutes of activation and number of starts of the selected electric user starting from the machine
installation date.
It also shows the number of starts (RESET ACT) of the selected electric user, counted from the date indicated
opposite, which corresponds to the last reset.
STATISTICS
LOAD CODE 25
12000
MIN
100
ACT
RESET ACT DD-MM-YY HH:MM
2
10-10-05
14:25
In fact the number of starts counter for the selected electric user can be reset, by pressing the confirm key; in
this way STATISTICS RESET mode is accessed.
.
STATISTICS RESET
LOAD CODE 25
12000
MIN
100
ACT
RESET ACT DD-MM-YY HH:MM
2
10-10-05
14:25
Press the confirm key again to reset the number of starts counter (RESET ACT).
The number of starts counter (RESET ACT) is reset and the date and time are saved.
If the last reset of the resettable counter (RESET ACT) occurred in the factory, the indication FAC appears
next to the reset time.
Press the accessory functions key to exit STATISTICS RESET mode.
List of codes (LOAD CODE) of electric users in the machine:
LOAD CODE
DOC. N.
Electric user description
1
Air gap filling solenoid valve
2
Wash tank filling solenoid valve
3
Prewash tank filling solenoid valve
4
Boiler heating element
5
DUO heating element
6
Wash tank heating element
7
Wash tank second heating element (for machines with separately controlled tank heating elements only)
8
Prewash tank heating element
9
DT heating element
10
Upper wash pump
11
Lower wash pump
12
Upper prewash pump
13
Lower prewash pump
14
Rinse pump
15
DUO pump
16
CU fan
17
DT fan
18
DUO tank drain solenoid valve
19
Wash tank drain solenoid valve
20
Prewash tank drain solenoid valve
21
Wash pump impeller drain solenoid valve
22
Prewash pump impeller drain solenoid valve
23
Gear motor
5956.573.02
Page 26 / 80
Electrolux
EFS - Dishwashing Systems Platform
Electrolux Professional
A4.5
24
Machine infeed motor-driven handling system start command
25
Machine outfeed motor-driven handling system start command
26
Machine infeed motor-driven handling system speed 2 start command
27
Machine infeed motor-driven handling system speed 2 start command
28
Heat Pump
29
Prewash module door opening
30
Wash module door opening
31
Rinse module door opening
32
DT module door opening
33
First boiler heating element
RINSE CONTROL ( JUST FOR ATMOSPHERIC RACK TYPE )
Press the confirm key (“C” - (Figure 1)) when the selection arrow indicates the item RINSE CONTROL, and
the machine is going to start a rinse flow control cycle.
If there is a communication error between the rack type boards, the rinse flow control cycle cannot be carried
out.
In this case the display will show:
RINSE FLOW CONTROL
RINSE FLOW CONTROL
NOT AVAILABLE
PRESS
TO EXIT
If the communication is working correctly the dispaly informs the user that the machine is ready to start a rinse
flow control cycle:
RINSE FLOW CONTROL
PRESS
TO START
OR
TO EXIT
Press the confirm key (“C” - (Figure 1)) and a control cycle is started:
RINSE FLOW CONTROL
RINSE FLOW CONTROL
IN PROGRESS
rfC
pRG
Wait about 2 minutes, until the display will show the actual rinse flow:
RINSE FLOW CONTROL
5,0 Lit Min
PRESS
TO REPEAT OR
DOC. N.
5956.573.02
TO EXIT
Page 27 / 80
Electrolux
EFS - Dishwashing Systems Platform
Electrolux Professional
Compare the result obtained with the data given in the table below and if the flow is higher or lower than that
indicated in the table, close or open the rinse flow regulating cock and repeat the control cycle until the optimum value is reached.
MACHINE TYPE
CORRECT FLOW (Lit/Min)
WTM140
4.00
WTM165
5.00
WTM180
5.00
WTM200
5.00
WTM250
5.00
WTM300
5.00
RTC 90
4.00
RTC140
4.00
RTC180
4.00
RTC220
5.00
WT44
5.00
WT66
5.00
(5.00 with heat pump)
CAUTION:
The Rack Type leaves the factory with the cock already adjusted in the optimum position.
CAUTION:
The indication of rinse flowrate can be subject to an error of ± 0,3 litres/min.
A4.6
KEY MANAGEMENT ( JUST FOR MODULAR RACK TYPE )
Not available yet.
A4.7
SENSOR ADJUSTMENT
Press the “Confirm” button - “C” (Figure 1) - when the selection arrow indicates the item SENS. ADJUST.
(Modular RT's) or when the item SAd (Compact RT's) is displayed, to access the procedure for setting the
machine pressure sensors.
The pressure sensors are fitted inside the electronic boards and read the levels of the Duo Rinse tank, wash
tank, prewash tank and Airgap. It is advisable to carry out this procedure when replacing one of the following
boards:
1 - Air gap level sensor card (Atmospheric RT's)
2 - Prewash module power board (Modular RT's)
2 - Wash module power board (Modular RT's)
4 - Rinse module power board (Modular RT's)
5 - Wash+Rinse module power board (Compact RT's)
CAUTION:
All the tanks and the airgap must be completely emptied before carrying out the pressure sensor setting procedure.
CAUTION:
The Rack Type leaves the factory with the pressure sensors already set to the optimum value.
DOC. N.
5956.573.02
Page 28 / 80
Electrolux
EFS - Dishwashing Systems Platform
Electrolux Professional
Pressure sensor setting cannot be carried out if an error in communication between the Rack Type boards is
in progress.
In this case the display will show:
PRES. SENS. SET-UP
PRES. SENS. SET-UP
NOT AVAILABLE
PRESS
TO EXIT
snS
AdJ
n A
If the communication is working correctly the dispaly informs the user that the machine is ready for carrying
out pressure sensor setting.
PRES. SENS. SET-UP
PRESS
TO START
OR
TO EXIT
snS
AdJ
rdY
Press the confirm key - “C” (Figure 1) - and the setting cycle is started:
PRES. SENS. SET-UP
PRES.
SENS.
SET-UP
IN PROGRESS
snS
AdJ
PrG
Wait about 5 seconds, until the display will show:
PRES. SENS. SET-UP
DONE.
PRESS
TO EXIT
snS
AdJ
End
If the pressure sensor setting procedure is sterted without having previously emptied the tanks and air gap,
the following message appears:
PRES. SENS. SET-UP
NOT EXECUTED
EMPTY BOTH TANKS AND AIRGAP
BEFORE MAKING SENSORS SET-UP
PRESS
DOC. N.
5956.573.02
TO EXIT
snS
AdJ
n_d
Page 29 / 80
Electrolux
EFS - Dishwashing Systems Platform
Electrolux Professional
B
PROGRAMMING SHEETS
When installing a new user interface card in the equipment it must be configured according to the machine in
which it is being installed.
CAUTION:
The parameters that must be configured are installation day, month and year (see par. A4.1.8 RATING
PLATE (ONLY FOR MODULAR RACK TYPE)), all the specific configuration parameters of each equipment family (see par. B1.1 MODULAR RACK TYPE) and the configuration parameters of the “specific
functions” (refer to par. B2 “SPECIFIC FUNCTIONS”).
FactoryCode
534020
534021
534022
534023
534024
534025
534026
534027
534028
534029
534030
534031
534032
534033
534070
Factory Model
WTC90ERBG
WTC90ELBG
WTC140ERAG
WTC140ELAG
WTC140ERBG
WTC140ELBG
WTC180ERAG
WTC180ELAG
WTC180ERBG
WTC180ELBG
WTC220ERAG
WTC220ELAG
WTC220ERBG
WTC220ELBG
WT44BL208
Prog
013
013
017
017
017
017
021
021
021
021
025
025
025
025
029
FactoryCode
534071
534072
534073
534074
534075
534076
534077
534090
534091
534092
534093
534094
534095
534096
534097
Factory Model
WT44BR208
WT44BL240
WT44BR240
WT44CL208
WT44CR208
WT44CL240
WT44CR240
WT66BL208
WT66BR208
WT66BL240
WT66BR240
WT66CL208
WT66CR208
WT66CL240
WT66CR240
Prog
029
029
029
029
029
029
029
030
030
030
030
030
030
030
030
Table 1Machine codes list and relative programming sheets
B1
CONFIGURATION PARAMETERS
B1.1
MODULAR RACK TYPE
Prog 1
WTM140
GENERIC FUNC.
Set default par.
GENERIC FUNC.
Appl. type
Appl. direct.
Speed nr. 1
Wash time sp 1
Speed nr. 2
Wash time sp 2
Drain enable
Heat two comm.
DOC. N.
5956.573.02
Rinse 600 & Was 1165 (without DT)
Enter GENERIC FUNC. and set the following parameters.
Yes
It allows all the parameters to be set to their default value.
Switch the machine off and then on again.
Enter GENERIC FUNC. and set the following parameters.
Ri Ws
Machine type.
Left/Right Rack pulling direction.
Left: left rack insertion.
Right: right rack insertion.
25
Indicates gear motor operation frequency at speed 1 [Hz].
85
Time between insertion of rack and start of rinse phase when
speed 1 [s] is set.
45
Indicates gear motor operation frequency at speed 2 [Hz].
50
Time between insertion of rack and start of rinse phase when
speed 2 [s] is set.
61
Enabling of drain and cleaning cycles.
No
Wash tank heating element management mode.
Page 30 / 80
Electrolux
EFS - Dishwashing Systems Platform
Electrolux Professional
Heating manage
Boiler load tank
Rinse autostart
HIGH
No
Machine heating power management.
Up to serial number 71800000
From serial number 71800001
See Par.
Indicates the maximum current supplied from the inverter to the
B2.3
gear motor.
Enter RINSE MODULE and set the following parameters.
40
Time between reaching level “0” (air trap level) in the air gap and
stop of rinse pump.
Enter WASH MODULE and set the following parameters.
1165
Type of wash module.
Switch the machine off and then on again.
Software
Mechanical
Max motor curr.
RINSE MODULE
Drain delay airgap
WASH MODULE
Wash module
Prog 2
WTM165
GENERIC FUNC.
Set default par.
GENERIC FUNC.
Appl. type
Appl. direct.
Speed nr. 1
Wash time sp 1
Speed nr. 2
Wash time sp 2
Drain enable
Heat two comm.
Heating manage
Boiler load tank
Rinse autostart
Max motor curr.
RINSE MODULE
Drain delay airgap
WASH MODULE
Wash module
DOC. N.
5956.573.02
Rinse 600 & Wash 1490 (without DT)
Enter GENERIC FUNC. and set the following parameters.
Yes
It allows all the parameters to be set to their default value.
Switch the machine off and then on again.
Enter GENERIC FUNC. and set the following parameters.
Ri Ws
Machine type.
Left/Right Rack pulling direction.
Left: left rack insertion.
Right: right rack insertion.
27
Indicates gear motor operation frequency at speed 1 [Hz].
110
Time between insertion of rack and start of rinse phase when
speed 1 [s] is set.
51
Indicates gear motor operation frequency at speed 2 [Hz].
58
Time between insertion of rack and start of rinse phase when
speed 2 [s] is set.
61
Enabling of drain and cleaning cycles.
Yes
Wash tank heating element management mode.
MEDIUM Machine heating power management.
No
Software
Up to serial number 71800000
Mechanical From serial number 71800001
See Par.
Indicates the maximum current supplied from the inverter to the
B2.3
gear motor.
Enter RINSE MODULE and set the following parameters.
32
Time between reaching level “0” (air trap level) in the air gap and
stop of rinse pump.
Enter WASH MODULE and set the following parameters.
1490
Type of wash module.
Switch the machine off and then on again.
Page 31 / 80
Electrolux
EFS - Dishwashing Systems Platform
Electrolux Professional
Prog 3
WTM180
GENERIC FUNC.
Set default par.
GENERIC FUNC.
Appl. type
Appl. direct.
Speed nr. 1
Wash time sp 1
Speed nr. 2
Wash time sp 2
Drain enable
Heat two comm.
Heating manage
Boiler load tank
Rinse autostart
Max motor curr.
RINSE MODULE
Drain delay airgap
WASH MODULE
Wash module
PREWASH MODULE
Prewash module
Standby level
Run level
Rinse 600 & Wash 1165 & Prewash 600 (without DT)
Enter GENERIC FUNC. and set the following parameters.
Yes
It allows all the parameters to be set to their default value.
Switch the machine off and then on again.
Enter GENERIC FUNC. and set the following parameters.
Ri Ws Pw Machine type.
Left/Right Rack pulling direction.
Left: left rack insertion.
Right: right rack insertion.
35
Indicates gear motor operation frequency at speed 1 [Hz].
108
Time between insertion of rack and start of rinse phase when
speed 1 [s] is set.
58
Indicates gear motor operation frequency at speed 2 [Hz].
59
Time between insertion of rack and start of rinse phase when
speed 2 [s] is set.
63
Enabling of drain and cleaning cycles.
No
Wash tank heating element management mode.
HIGH
Machine heating power management.
No
Software
Up to serial number 71800000
Mechanical From serial number 71800001
See Par.
Indicates the maximum current supplied from the inverter to the
B2.3
gear motor.
Enter RINSE MODULE and set the following parameters.
32
Time between reaching level “0” (air trap level) in the air gap and
stop of rinse pump.
Enter WASH MODULE and set the following parameters.
1165
Type of wash module.
Enter WASH MODULE and set the following parameters.
1165-600 Type of wash module.
220
Indicates the maximum level in the prewash tank. The filling stops
when the water level reaches this value.
180
The value for the maximum level is modified from “Standby level” to
“Run level” during prewashing phase in order to avoid water loss
whan the pumps stop.
Switch the machine off and then on again.
DOC. N.
5956.573.02
Page 32 / 80
Electrolux
EFS - Dishwashing Systems Platform
Electrolux Professional
Prog 4
WTM200
GENERIC FUNC.
Set default par.
GENERIC FUNC.
Appl. type
Appl. direct.
Speed nr. 1
Wash time sp 1
Speed nr. 2
Wash time sp 2
Drain enable
Heat two comm.
Heating manage
Boiler load tank
Rinse autostart
Max motor curr.
RINSE MODULE
Drain delay airgap
WASH MODULE
Wash module
PREWASH MODULE
Prewash module
Standby level
Run level
Rinse 600 & Wash 1490 & Prewash 600 (without DT)
Enter GENERIC FUNC. and set the following parameters.
Yes
It allows all the parameters to be set to their default value.
Switch the machine off and then on again.
Enter GENERIC FUNC. and set the following parameters.
Ri Ws Pw Machine type.
Left/Right Rack pulling direction.
Left: left rack insertion.
Right: right rack insertion.
40
Indicates gear motor operation frequency at speed 1 [Hz].
105
Time between insertion of rack and start of rinse phase when
speed 1 [s] is set.
63
Indicates gear motor operation frequency at speed 2 [Hz].
65
Time between insertion of rack and start of rinse phase when
speed 2 [s] is set.
63
Enabling of drain and cleaning cycles.
Yes
Wash tank heating element management mode.
MEDIUM Machine heating power management.
No
Software
Up to serial number 71800000
Mechanical From serial number 71800001
See Par.
Indicates the maximum current supplied from the inverter to the
B2.3
gear motor.
Enter RINSE MODULE and set the following parameters.
32
Time between reaching level “0” (air trap level) in the air gap and
stop of rinse pump.
Enter WASH MODULE and set the following parameters.
1490
Type of wash module.
Enter WASH MODULE and set the following parameters.
1165-600
220
180
Type of wash module.
Indicates the maximum level in the prewash tank. The filling stops
when the water level reaches this value.
The value for the maximum level is modified from “Standby level” to
“Run level” during prewashing phase in order to avoid water loss
whan the pumps stop.
Switch the machine off and then on again.
DOC. N.
5956.573.02
Page 33 / 80
Electrolux
EFS - Dishwashing Systems Platform
Electrolux Professional
Prog 5
WTM250
Rinse 600 & Wash 1490 & Prewash 1165 (without DT)
GENERIC FUNC.
Set default par.
Enter GENERIC FUNC. and set the following parameters.
Yes
It allows all the parameters to be set to their default value.
Switch the machine off and then on again.
Enter GENERIC FUNC. and set the following parameters.
Ri Ws Pw Machine type.
Left/Right Rack pulling direction.
Left: left rack insertion.
Right: right rack insertion.
53
Indicates gear motor operation frequency at speed 1 [Hz].
99
Time between insertion of rack and start of rinse phase when
speed 1 [s] is set.
83
Indicates gear motor operation frequency at speed 2 [Hz].
65
Time between insertion of rack and start of rinse phase when
speed 2 [s] is set.
63
Enabling of drain and cleaning cycles.
No
Wash tank heating element management mode.
HIGH
Machine heating power management.
No
Software
Up to serial number 71800000
Mechanical From serial number 71800001
See Par.
Indicates the maximum current supplied from the inverter to the
B2.3
gear motor.
Enter RINSE MODULE and set the following parameters.
32
Time between reaching level “0” (air trap level) in the air gap and
stop of rinse pump.
Enter WASH MODULE and set the following parameters.
1490
Type of wash module.
Enter WASH MODULE and set the following parameters.
1165-600 Type of wash module.
205
Indicates the maximum level in the prewash tank. The filling stops
when the water level reaches this value.
170
The value for the maximum level is modified from “Standby level” to
“Run level” during prewashing phase in order to avoid water loss
whan the pumps stop.
GENERIC FUNC.
Appl. type
Appl. direct.
Speed nr. 1
Wash time sp 1
Speed nr. 2
Wash time sp 2
Drain enable
Heat two comm.
Heating manage
Boiler load tank
Rinse autostart
Max motor curr.
RINSE MODULE
Drain delay airgap
WASH MODULE
Wash module
PREWASH MODULE
Prewash module
Standby level
Run level
Switch the machine off and then on again.
Prog 6
WTM300
GENERIC FUNC.
Set default par.
GENERIC FUNC.
Appl. type
Appl. direct.
Speed nr. 1
DOC. N.
5956.573.02
Rinse 600 & Wash 1490 & Prewash 1490 (without DT)
Enter GENERIC FUNC. and set the following parameters.
Yes
It allows all the parameters to be set to their default value.
Switch the machine off and then on again.
Enter GENERIC FUNC. and set the following parameters.
Ri Ws Pw Machine type.
Left/Right Rack pulling direction.
Left: left rack insertion.
Right: right rack insertion.
60
Indicates gear motor operation frequency at speed 1 [Hz].
Page 34 / 80
Electrolux
EFS - Dishwashing Systems Platform
Electrolux Professional
Wash time sp 1
100
Speed nr. 2
Wash time sp 2
100
60
Drain enable
Heat two comm.
Heating manage
Boiler load tank
Rinse autostart
63
No
HIGH
No
Time between insertion of rack and start of rinse phase when
speed 1 [s] is set.
Indicates gear motor operation frequency at speed 2 [Hz].
Time between insertion of rack and start of rinse phase when
speed 2 [s] is set.
Enabling of drain and cleaning cycles.
Wash tank heating element management mode.
Machine heating power management.
Up to serial number 71800000
From serial number 71800001
See Par.
Indicates the maximum current supplied from the inverter to the
B2.3
gear motor.
Enter RINSE MODULE and set the following parameters.
32
Time between reaching level “0” (air trap level) in the air gap and
stop of rinse pump.
Enter WASH MODULE and set the following parameters.
1490
Type of wash module.
Enter WASH MODULE and set the following parameters.
1490
Type of wash module.
205
Indicates the maximum level in the prewash tank. The filling stops
when the water level reaches this value.
170
The value for the maximum level is modified from “Standby level” to
“Run level” during prewashing phase in order to avoid water loss
whan the pumps stop.
Software
Mechanical
Max motor curr.
RINSE MODULE
Drain delay airgap
WASH MODULE
Wash module
PREWASH MODULE
Prewash module
Standby level
Run level
Switch the machine off and then on again.
Prog 7
WTM140
GENERIC FUNC.
Set default par.
GENERIC FUNC.
Appl. type
Appl. direct.
Speed nr. 1
Wash time sp 1
Speed nr. 2
Wash time sp 2
Drain enable
Heat two comm.
DOC. N.
5956.573.02
Rinse 600 & Wash 1165 (DT)
Enter GENERIC FUNC. and set the following parameters.
Yes
It allows all the parameters to be set to their default value.
Switch the machine off and then on again.
Enter GENERIC FUNC. and set the following parameters.
Ri Ws Dt
Machine type.
Left/Right
Rack pulling direction.
Left: left rack insertion.
Right: right rack insertion.
25
Indicates gear motor operation frequency at speed 1 [Hz].
85
Time between insertion of rack and start of rinse phase when
speed 1 [s] is set.
45
Indicates gear motor operation frequency at speed 2 [Hz].
50
Time between insertion of rack and start of rinse phase when
speed 2 [s] is set.
61
Enabling of drain and cleaning cycles.
No
Wash tank heating element management mode.
Page 35 / 80
Electrolux
EFS - Dishwashing Systems Platform
Electrolux Professional
Heating manage
Boiler load tank
Rinse autostart
HIGH
No
Machine heating power management.
Up to serial number 71800000
From serial number 71800001
See Par.
Indicates the maximum current supplied from the inverter to the
B2.3
gear motor.
Enter RINSE MODULE and set the following parameters.
40
Time between reaching level “0” (air trap level) in the air gap and
stop of rinse pump.
Enter WASH MODULE and set the following parameters.
1165
Type of wash module.
Switch the machine off and then on again.
Software
Mechanical
Max motor curr.
RINSE MODULE
Drain delay airgap
WASH MODULE
Wash module
Prog 8
WTM165
GENERIC FUNC.
Set default par.
GENERIC FUNC.
Appl. type
Appl. direct.
Speed nr. 1
Wash time sp 1
Speed nr. 2
Wash time sp 2
Drain enable
Heat two comm.
Heating manage
Boiler load tank
Rinse autostart
Rinse 600 & Wash 1490 (DT)
Enter GENERIC FUNC. and set the following parameters.
Yes
It allows all the parameters to be set to their default value.
Switch the machine off and then on again.
Enter GENERIC FUNC. and set the following parameters.
Ri Ws Dt Machine type.
Left/
Rack pulling direction.
Right
Left: left rack insertion.
Right: right rack insertion.
27
Indicates gear motor operation frequency at speed 1 [Hz].
110
Time between insertion of rack and start of rinse phase when speed
1 [s] is set.
51
Indicates gear motor operation frequency at speed 2 [Hz].
58
Time between insertion of rack and start of rinse phase when speed
2 [s] is set.
61
Enabling of drain and cleaning cycles.
YES
Wash tank heating element management mode.
MEDIUM Machine heating power management.
No
Software
Up to serial number 71800000
MechaniFrom serial number 71800001
cal
Max motor curr.
RINSE MODULE
Drain delay airgap
WASH MODULE
Wash module
DOC. N.
5956.573.02
See Par. Indicates the maximum current supplied from the inverter to the
B2.3
gear motor.
Enter RINSE MODULE and set the following parameters.
32
Time between reaching level “0” (air trap level) in the air gap and
stop of rinse pump.
Enter WASH MODULE and set the following parameters.
1490
Type of wash module.
Switch the machine off and then on again.
Page 36 / 80
Electrolux
EFS - Dishwashing Systems Platform
Electrolux Professional
Prog 9
WTM180
GENERIC FUNC.
Set default par.
GENERIC FUNC.
Appl. type
Appl. direct.
Speed nr. 1
Wash time sp 1
Speed nr. 2
Wash time sp 2
Drain enable
Heat two comm.
Heating manage
Boiler load tank
Rinse autostart
Max motor curr.
RINSE MODULE
Drain delay airgap
WASH MODULE
Wash module
PREWASH MODULE
Prewash module
Standby level
Run level
Rinse 600 & Wash 1165 & Prewash 600 (DT)
Enter GENERIC FUNC. and set the following parameters.
Yes
It allows all the parameters to be set to their default value.
Switch the machine off and then on again.
Enter GENERIC FUNC. and set the following parameters.
Ri Ws Pw Dt Machine type.
Left/Right
Rack pulling direction.
Left: left rack insertion.
Right: right rack insertion.
35
Indicates gear motor operation frequency at speed 1 [Hz].
108
Time between insertion of rack and start of rinse phase when
speed 1 [s] is set.
58
Indicates gear motor operation frequency at speed 2 [Hz].
59
Time between insertion of rack and start of rinse phase when
speed 2 [s] is set.
63
Enabling of drain and cleaning cycles.
No
Wash tank heating element management mode.
HIGH
Machine heating power management.
No
Software
Up to serial number 71800000
Mechanical
From serial number 71800001
See Par.
Indicates the maximum current supplied from the inverter to the
B2.3
gear motor.
Enter RINSE MODULE and set the following parameters.
32
Time between reaching level “0” (air trap level) in the air gap
and stop of rinse pump.
Enter WASH MODULE and set the following parameters.
1165
Type of wash module.
Enter WASH MODULE and set the following parameters.
1165-600
Type of wash module.
205
Indicates the maximum level in the prewash tank. The filling
stops when the water level reaches this value.
170
The value for the maximum level is modified from “Standby
level” to “Run level” during prewashing phase in order to avoid
water loss whan the pumps stop.
Switch the machine off and then on again.
DOC. N.
5956.573.02
Page 37 / 80
Electrolux
EFS - Dishwashing Systems Platform
Electrolux Professional
Prog 10
WTM200
GENERIC FUNC.
Set default par.
GENERIC FUNC.
Appl. type
Appl. direct.
Speed nr. 1
Wash time sp 1
Speed nr. 2
Wash time sp 2
Drain enable
Heat two comm.
Heating manage
Boiler load tank
Rinse autostart
Max motor curr.
RINSE MODULE
Drain delay airgap
WASH MODULE
Wash module
PREWASH MODULE
Prewash module
Standby level
Run level
Rinse 600 & Wash 1490 & Prewash 600 (DT)
Enter GENERIC FUNC. and set the following parameters.
Yes
It allows all the parameters to be set to their default value.
Switch the machine off and then on again.
Enter GENERIC FUNC. and set the following parameters.
Ri Ws Pw Dt Machine type.
Left/Right
Rack pulling direction.
Left: left rack insertion.
Right: right rack insertion.
40
Indicates gear motor operation frequency at speed 1 [Hz].
105
Time between insertion of rack and start of rinse phase when
speed 1 [s] is set.
63
Indicates gear motor operation frequency at speed 2 [Hz].
65
Time between insertion of rack and start of rinse phase when
speed 2 [s] is set.
63
Enabling of drain and cleaning cycles.
Yes
Wash tank heating element management mode.
MEDIUM
Machine heating power management.
No
Software
Up to serial number 71800000
Mechanical
From serial number 71800001
See Par.
Indicates the maximum current supplied from the inverter to the
B2.3
gear motor.
Enter RINSE MODULE and set the following parameters.
32
Time between reaching level “0” (air trap level) in the air gap
and stop of rinse pump.
Enter WASH MODULE and set the following parameters.
1490
Type of wash module.
Enter WASH MODULE and set the following parameters.
1165-600
Type of wash module.
220
Indicates the maximum level in the prewash tank. The filling
stops when the water level reaches this value.
180
The value for the maximum level is modified from “Standby
level” to “Run level” during prewashing phase in order to avoid
water loss whan the pumps stop.
Switch the machine off and then on again.
DOC. N.
5956.573.02
Page 38 / 80
Electrolux
EFS - Dishwashing Systems Platform
Electrolux Professional
Prog 11
WTM250
GENERIC FUNC.
Set default par.
GENERIC FUNC
Appl. type
Appl. direct.
Speed nr. 1
Wash time sp 1
Speed nr. 2
Wash time sp 2
Drain enable
Heat two comm.
Heating manage
Boiler load tank
Rinse autostart
Max motor curr.
RINSE MODULE
Drain delay airgap
WASH MODULE
Wash module
PREWASH MODULE
Prewash module
Standby level
Run level
Rinse 600 & Wash 1490 & Prewash 1165 (DT)
Enter GENERIC FUNC. and set the following parameters.
Yes
It allows all the parameters to be set to their default value.
Switch the machine off and then on again.
Enter GENERIC FUNC. and set the following parameters.
Ri Ws Pw Dt
Machine type.
Left/Right
Rack pulling direction.
Left: left rack insertion.
Right: right rack insertion.
53
Indicates gear motor operation frequency at speed 1 [Hz].
99
Time between insertion of rack and start of rinse phase when
speed 1 [s] is set.
83
Indicates gear motor operation frequency at speed 2 [Hz].
65
Time between insertion of rack and start of rinse phase when
speed 2 [s] is set.
63
Enabling of drain and cleaning cycles.
No
Wash tank heating element management mode.
HIGH
Machine heating power management.
No
Software
Up to serial number 71800000
Mechanical
From serial number 71800001
See Par.
Indicates the maximum current supplied from the inverter to the
B2.3
gear motor.
Enter RINSE MODULE and set the following parameters.
32
Time between reaching level “0” (air trap level) in the air gap
and stop of rinse pump.
Enter WASH MODULE and set the following parameters.
1490
Type of wash module.
Enter WASH MODULE and set the following parameters.
1165-600
Type of wash module.
205
Indicates the maximum level in the prewash tank. The filling
stops when the water level reaches this value.
170
The value for the maximum level is modified from “Standby
level” to “Run level” during prewashing phase in order to avoid
water loss whan the pumps stop.
Switch the machine off and then on again.
DOC. N.
5956.573.02
Page 39 / 80
Electrolux
EFS - Dishwashing Systems Platform
Electrolux Professional
Prog 12
WTM300
GENERIC FUNC.
Set default par.
GENERIC FUNC
Appl. type
Appl. direct.
Speed nr. 1
Wash time sp 1
Speed nr. 2
Wash time sp 2
Drain enable
Heat two comm.
Heating manage
Boiler load tank
Rinse autostart
Max motor curr.
RINSE MODULE
Drain delay airgap
WASH MODULE
Wash module
PREWASH MODULE
Prewash module
Standby level
Run level
Rinse 600 & Wash 1490 & Prewash 1490 (DT)
Enter GENERIC FUNC. and set the following parameters.
Yes
It allows all the parameters to be set to their default value.
Switch the machine off and then on again.
Enter GENERIC FUNC. and set the following parameters.
Ri Ws Pw Dt
Machine type.
Left/Right
Rack pulling direction.
Left: left rack insertion.
Right: right rack insertion.
60
Indicates gear motor operation frequency at speed 1 [Hz].
100
Time between insertion of rack and start of rinse phase when
speed 1 [s] is set.
100
Indicates gear motor operation frequency at speed 2 [Hz].
60
Time between insertion of rack and start of rinse phase when
speed 2 [s] is set.
63
Enabling of drain and cleaning cycles.
No
Wash tank heating element management mode.
HIGH
Machine heating power management.
No
Software
Up to serial number 71800000
Mechanical
From serial number 71800001
See Par. B2.3 Indicates the maximum current supplied from the inverter to the
gear motor.
Enter RINSE MODULE and set the following parameters.
32
Time between reaching level “0” (air trap level) in the air gap
and stop of rinse pump.
Enter WASH MODULE and set the following parameters.
1490
Type of wash module.
Enter WASH MODULE and set the following parameters.
1490
Type of wash module.
205
Indicates the maximum level in the prewash tank. The filling
stops when the water level reaches this value.
170
The value for the maximum level is modified from “Standby
level” to “Run level” during prewashing phase in order to avoid
water loss whan the pumps stop.
Switch the machine off and then on again.
DOC. N.
5956.573.02
Page 40 / 80
Electrolux
EFS - Dishwashing Systems Platform
Electrolux Professional
B1.2
COMPACT RACK TYPE
Prog 13 RTC90 / CTC90 / WTC90
Wash + Rinse from 1165 (atmospheric circuit without DT)
GFu
SdP
Enter GFu and set the following parameters.
It allows all the parameters to be set to their default value.
1
Switch the machine off and then on again.
GFu
Apt
SP1
rd1
SP2
rd2
drE
H2C
b_t
btF
r_A
CCu
Rin
Add
tub
tty
Enter GFu and set the following parameters.
Machine type.
5
27
55
27
55
53
0
0
1
0
Indicates gear motor operation frequency at speed 1 [Hz].
Time between insertion of rack and start of rinse phase when speed 1 [s] is set.
Indicates gear motor operation frequency at speed 2 [Hz].
Time between insertion of rack and start of rinse phase when speed 2 [s] is set.
Enabling of drain and cleaning cycles.
Wash tank heating element management mode.
Machine heating power management.
Wash tank filling mode.
Indicates the type of command for the start of the rinse phase.
See Par. Indicates the maximum current supplied from the inverter to the gear motor.
B2.3
Enter RINSE MODULE and set the following parameters.
40
Time between reaching level “0” (air trap level) in the air gap and stop of rinse
pump.
Enter tub and set the following parameters.
Type of wash module.
2
Switch the machine off and then on again.
Prog 14 RTC90 / CTC90 / WTC90
Wash + Rinse from 1165 (atmospheric circuit with DT)
GFu
SdP
Enter GFu and set the following parameters.
It allows all the parameters to be set to their default value.
1
Switch the machine off and then on again.
GFu
Apt
SP1
rd1
SP2
rd2
drE
H2C
b_t
DOC. N.
5956.573.02
Enter GFu and set the following parameters.
Machine type.
7
27
55
27
55
53
0
0
Indicates gear motor operation frequency at speed 1 [Hz].
Time between insertion of rack and start of rinse phase when speed 1 [s] is set.
Indicates gear motor operation frequency at speed 2 [Hz].
Time between insertion of rack and start of rinse phase when speed 2 [s] is set.
Enabling of drain and cleaning cycles.
Wash tank heating element management mode.
Machine heating power management.
Page 41 / 80
Electrolux
EFS - Dishwashing Systems Platform
Electrolux Professional
btF
r_A
CCu
Rin
Add
tub
tty
1
0
Wash tank filling mode.
Indicates the type of command for the start of the rinse phase.
See Par. Indicates the maximum current supplied from the inverter to the gear motor.
B2.3
Enter RINSE MODULE and set the following parameters.
40
Time between reaching level “0” (air trap level) in the air gap and stop of rinse
pump.
Enter tub and set the following parameters.
Type of wash module.
2
Switch the machine off and then on again.
Prog 15 RTC90 / CTC90 / WTC90
Wash + Rinse from 1165 (pressure circuit without DT)
GFu
SdP
Enter GFu and set the following parameters.
It allows all the parameters to be set to their default value.
1
Switch the machine off and then on again.
GFu
Apt
SP1
rd1
SP2
rd2
drE
H2C
b_t
btF
r_A
CCu
Rin
Add
tub
tty
Enter GFu and set the following parameters.
Machine type.
4
27
55
27
55
37
0
0
1
0
Indicates gear motor operation frequency at speed 1 [Hz].
Time between insertion of rack and start of rinse phase when speed 1 [s] is set.
Indicates gear motor operation frequency at speed 2 [Hz].
Time between insertion of rack and start of rinse phase when speed 2 [s] is set.
Enabling of drain and cleaning cycles.
Wash tank heating element management mode.
Machine heating power management.
Wash tank filling mode.
Indicates the type of command for the start of the rinse phase.
See Par. Indicates the maximum current supplied from the inverter to the gear motor.
B2.3
Enter RINSE MODULE and set the following parameters.
40
Time between reaching level “0” (air trap level) in the air gap and stop of rinse
pump.
Enter tub and set the following parameters.
Type of wash module.
2
Switch the machine off and then on again.
DOC. N.
5956.573.02
Page 42 / 80
Electrolux
EFS - Dishwashing Systems Platform
Electrolux Professional
Prog 16 RTC90 / CTC90 / WTC90
Wash + Rinse from 1165 (pressure circuit with DT)
GFu
SdP
Enter GFu and set the following parameters.
It allows all the parameters to be set to their default value.
1
Switch the machine off and then on again.
GFu
Apt
SP1
rd1
SP2
rd2
drE
H2C
b_t
btF
r_A
CCu
Rin
Add
tub
tty
Enter GFu and set the following parameters.
Machine type.
6
27
55
27
55
37
0
0
1
0
Indicates gear motor operation frequency at speed 1 [Hz].
Time between insertion of rack and start of rinse phase when speed 1 [s] is set.
Indicates gear motor operation frequency at speed 2 [Hz].
Time between insertion of rack and start of rinse phase when speed 2 [s] is set.
Enabling of drain and cleaning cycles.
Wash tank heating element management mode.
Machine heating power management.
Wash tank filling mode.
Indicates the type of command for the start of the rinse phase.
See Par. Indicates the maximum current supplied from the inverter to the gear motor.
B2.3
Enter RINSE MODULE and set the following parameters.
40
Time between reaching level “0” (air trap level) in the air gap and stop of rinse
pump.
Enter tub and set the following parameters.
Type of wash module.
2
Switch the machine off and then on again.
Prog 17 RTC140 / CTC140 / WTC140
Wash + Rinse from 1490 (atmospheric circuit without DT)
GFu
SdP
Enter GFu and set the following parameters.
It allows all the parameters to be set to their default value.
1
Switch the machine off and then on again.
GFu
Apt
SP1
rd1
SP2
rd2
drE
H2C
b_t
btF
r_A
CCu
DOC. N.
5956.573.02
Enter GFu and set the following parameters.
Machine type.
5
25
80
45
40
53
0
0
1
0
See Par.
B2.3
Indicates gear motor operation frequency at speed 1 [Hz].
Time between insertion of rack and start of rinse phase when speed 1 [s] is set.
Indicates gear motor operation frequency at speed 2 [Hz].
Time between insertion of rack and start of rinse phase when speed 2 [s] is set.
Enabling of drain and cleaning cycles.
Wash tank heating element management mode.
Machine heating power management.
Wash tank filling mode.
Indicates the type of command for the start of the rinse phase.
Indicates the maximum current supplied from the inverter to the gear motor.
Page 43 / 80
Electrolux
EFS - Dishwashing Systems Platform
Electrolux Professional
Rin
Add
Enter RINSE MODULE and set the following parameters.
tub
tty
Enter tub and set the following parameters.
Type of wash module.
2
40
Time between reaching level “0” (air trap level) in the air gap and stop of rinse
pump.
Switch the machine off and then on again.
Prog 18 RTC140 / CTC140 / WTC140
Wash + Rinse from 1490 (atmospheric circuit with DT)
GFu
SdP
Enter GFu and set the following parameters.
It allows all the parameters to be set to their default value.
1
Switch the machine off and then on again.
GFu
Apt
SP1
rd1
SP2
rd2
drE
H2C
b_t
btF
r_A
CCu
Rin
Add
tub
tty
Enter GFu and set the following parameters.
Machine type.
7
25
80
45
40
53
0
0
1
0
Indicates gear motor operation frequency at speed 1 [Hz].
Time between insertion of rack and start of rinse phase when speed 1 [s] is set.
Indicates gear motor operation frequency at speed 2 [Hz].
Time between insertion of rack and start of rinse phase when speed 2 [s] is set.
Enabling of drain and cleaning cycles.
Wash tank heating element management mode.
Machine heating power management.
Wash tank filling mode.
Indicates the type of command for the start of the rinse phase.
See Par. Indicates the maximum current supplied from the inverter to the gear motor.
B2.3
Enter RINSE MODULE and set the following parameters.
40
Time between reaching level “0” (air trap level) in the air gap and stop of rinse
pump.
Enter tub and set the following parameters.
Type of wash module.
2
Switch the machine off and then on again.
DOC. N.
5956.573.02
Page 44 / 80
Electrolux
EFS - Dishwashing Systems Platform
Electrolux Professional
Prog 19 RTC140 / CTC140 / WTC140
Wash + Rinse from 1490 (pressure circuit without DT)
GFu
SdP
Enter GFu and set the following parameters.
It allows all the parameters to be set to their default value.
1
Switch the machine off and then on again.
GFu
Apt
SP1
rd1
SP2
rd2
drE
H2C
b_t
btF
r_A
CCu
Rin
Add
tub
tty
Enter GFu and set the following parameters.
Machine type.
4
25
80
45
40
37
0
0
1
0
Indicates gear motor operation frequency at speed 1 [Hz].
Time between insertion of rack and start of rinse phase when speed 1 [s] is set.
Indicates gear motor operation frequency at speed 2 [Hz].
Time between insertion of rack and start of rinse phase when speed 2 [s] is set.
Enabling of drain and cleaning cycles.
Wash tank heating element management mode.
Machine heating power management.
Wash tank filling mode.
Indicates the type of command for the start of the rinse phase.
See Par. Indicates the maximum current supplied from the inverter to the gear motor.
B2.3
Enter RINSE MODULE and set the following parameters.
40
Time between reaching level “0” (air trap level) in the air gap and stop of rinse
pump.
Enter tub and set the following parameters.
Type of wash module.
2
Switch the machine off and then on again.
Prog 20 RTC140 / CTC140 / WTC140
Wash + Rinse from 1490 (pressure circuit with DT)
GFu
SdP
Enter GFu and set the following parameters.
It allows all the parameters to be set to their default value.
1
Switch the machine off and then on again.
GFu
Apt
SP1
rd1
SP2
rd2
drE
H2C
b_t
btF
r_A
CCu
DOC. N.
5956.573.02
Enter GFu and set the following parameters.
Machine type.
6
25
80
45
40
37
0
0
1
0
See Par.
B2.3
Indicates gear motor operation frequency at speed 1 [Hz].
Time between insertion of rack and start of rinse phase when speed 1 [s] is set.
Indicates gear motor operation frequency at speed 2 [Hz].
Time between insertion of rack and start of rinse phase when speed 2 [s] is set.
Enabling of drain and cleaning cycles.
Wash tank heating element management mode.
Machine heating power management.
Wash tank filling mode.
Indicates the type of command for the start of the rinse phase.
Indicates the maximum current supplied from the inverter to the gear motor.
Page 45 / 80
Electrolux
EFS - Dishwashing Systems Platform
Electrolux Professional
Rin
Add
Enter RINSE MODULE and set the following parameters.
tub
tty
Enter tub and set the following parameters.
Type of wash module.
2
40
Time between reaching level “0” (air trap level) in the air gap and stop of rinse
pump.
Switch the machine off and then on again.
Prog 21 RTC180 / CTC180 / WTC180 Wash + Rinse from 1165 &
Prewash from 600 (atmospheric circuit without DT)
GFu
SdP
Enter GFu and set the following parameters.
It allows all the parameters to be set to their default value.
1
Switch the machine off and then on again.
GFu
Apt
SP1
rd1
SP2
rd2
drE
H2C
b_t
btF
r_A
CCu
Rin
Add
tub
tty
PrE
Pty
SbI
PSS
Enter GFu and set the following parameters.
Machine type.
9
35
88
58
48
55
0
0
1
0
Indicates gear motor operation frequency at speed 1 [Hz].
Time between insertion of rack and start of rinse phase when speed 1 [s] is set.
Indicates gear motor operation frequency at speed 2 [Hz].
Time between insertion of rack and start of rinse phase when speed 2 [s] is set.
Enabling of drain and cleaning cycles.
Wash tank heating element management mode.
Machine heating power management.
Wash tank filling mode.
Indicates the type of command for the start of the rinse phase.
See Par. Indicates the maximum current supplied from the inverter to the gear motor.
B2.3
Enter RINSE MODULE and set the following parameters.
40
Time between reaching level “0” (air trap level) in the air gap and stop of rinse
pump.
Enter tub and set the following parameters.
Type of wash module.
2
Enter PrE and set the following parameters.
Type of prewash module.
0
220
180
Indicates the maximum level in the prewash tank. The filling stops when the
water level reaches this value.
The value for the maximum level is modified from “Standby level” to “Run level”
during prewashing phase in order to avoid water loss whan the pumps stop.
Switch the machine off and then on again.
DOC. N.
5956.573.02
Page 46 / 80
Electrolux
EFS - Dishwashing Systems Platform
Electrolux Professional
Prog 22 RTC180 / CTC180 / WTC180 Wash + Rinse from 1165 &
Prewash from 600 (atmospheric circuit with DT)
GFu
SdP
Enter GFu and set the following parameters.
It allows all the parameters to be set to their default value.
1
Switch the machine off and then on again.
GFu
Apt
SP1
rd1
SP2
rd2
drE
H2C
b_t
btF
r_A
CCu
Rin
Add
tub
tty
PrE
Pty
SbI
PSS
Enter GFu and set the following parameters.
Machine type.
11
35
88
58
48
55
0
0
1
0
Indicates gear motor operation frequency at speed 1 [Hz].
Time between insertion of rack and start of rinse phase when speed 1 [s] is set.
Indicates gear motor operation frequency at speed 2 [Hz].
Time between insertion of rack and start of rinse phase when speed 2 [s] is set.
Enabling of drain and cleaning cycles.
Wash tank heating element management mode.
Machine heating power management.
Wash tank filling mode.
Indicates the type of command for the start of the rinse phase.
See Par. Indicates the maximum current supplied from the inverter to the gear motor.
B2.3
Enter RINSE MODULE and set the following parameters.
40
Time between reaching level “0” (air trap level) in the air gap and stop of rinse
pump.
Enter tub and set the following parameters.
Type of wash module.
2
Enter PrE and set the following parameters.
Type of prewash module.
0
220
180
Indicates the maximum level in the prewash tank. The filling stops when the
water level reaches this value.
The value for the maximum level is modified from “Standby level” to “Run level”
during prewashing phase in order to avoid water loss whan the pumps stop.
Switch the machine off and then on again.
Prog 23 RTC180 / CTC180 / WTC180 Wash + Rinse from 1165 &
Prewash from 600 (pressure circuit without DT)
GFu
SdP
Enter GFu and set the following parameters.
It allows all the parameters to be set to their default value.
1
Switch the machine off and then on again.
GFu
Apt
SP1
rd1
DOC. N.
5956.573.02
Enter GFu and set the following parameters.
Machine type.
8
35
88
Indicates gear motor operation frequency at speed 1 [Hz].
Time between insertion of rack and start of rinse phase when speed 1 [s] is set.
Page 47 / 80
Electrolux
EFS - Dishwashing Systems Platform
Electrolux Professional
SP2
rd2
drE
H2C
b_t
btF
r_A
CCu
Rin
Add
tub
tty
PrE
Pty
SbI
PSS
58
48
39
0
0
1
0
Indicates gear motor operation frequency at speed 2 [Hz].
Time between insertion of rack and start of rinse phase when speed 2 [s] is set.
Enabling of drain and cleaning cycles.
Wash tank heating element management mode.
Machine heating power management.
Wash tank filling mode.
Indicates the type of command for the start of the rinse phase.
See Par. Indicates the maximum current supplied from the inverter to the gear motor.
B2.3
Enter RINSE MODULE and set the following parameters.
40
Time between reaching level “0” (air trap level) in the air gap and stop of rinse
pump.
Enter tub and set the following parameters.
Type of wash module.
2
Enter PrE and set the following parameters.
Type of prewash module.
0
220
180
Indicates the maximum level in the prewash tank. The filling stops when the
water level reaches this value.
The value for the maximum level is modified from “Standby level” to “Run level”
during prewashing phase in order to avoid water loss whan the pumps stop.
Switch the machine off and then on again.
Prog 24 RTC180 / CTC180 / WTC180 Wash + Rinse from 1165 &
Prewash from 600 (pressure circuit with DT)
GFu
SdP
Enter GFu and set the following parameters.
It allows all the parameters to be set to their default value.
1
Switch the machine off and then on again.
GFu
Apt
SP1
rd1
SP2
rd2
drE
H2C
b_t
btF
r_A
CCu
Rin
Add
tub
tty
DOC. N.
5956.573.02
Enter GFu and set the following parameters.
Machine type.
10
35
88
58
48
39
0
0
1
0
Indicates gear motor operation frequency at speed 1 [Hz].
Time between insertion of rack and start of rinse phase when speed 1 [s] is set.
Indicates gear motor operation frequency at speed 2 [Hz].
Time between insertion of rack and start of rinse phase when speed 2 [s] is set.
Enabling of drain and cleaning cycles.
Wash tank heating element management mode.
Machine heating power management.
Wash tank filling mode.
Indicates the type of command for the start of the rinse phase.
See Par. Indicates the maximum current supplied from the inverter to the gear motor.
B2.3
Enter RINSE MODULE and set the following parameters.
40
Time between reaching level “0” (air trap level) in the air gap and stop of rinse
pump.
Enter tub and set the following parameters.
Type of wash module.
2
Page 48 / 80
Electrolux
EFS - Dishwashing Systems Platform
Electrolux Professional
PrE
Pty
SbI
PSS
Enter PrE and set the following parameters.
Type of prewash module.
0
220
180
Indicates the maximum level in the prewash tank. The filling stops when the
water level reaches this value.
The value for the maximum level is modified from “Standby level” to “Run level”
during prewashing phase in order to avoid water loss whan the pumps stop.
Switch the machine off and then on again.
Prog 25 RTC220 / CTC220 / WTC220 Wash + Rinse from 1165 &
Prewash from 1165 (atmospheric circuit without DT)
GFu
SdP
Enter GFu and set the following parameters.
It allows all the parameters to be set to their default value.
1
Switch the machine off and then on again.
GFu
Apt
SP1
rd1
SP2
rd2
drE
H2C
b_t
btF
r_A
CCu
Rin
Add
tub
tty
PrE
Pty
SbI
PSS
Enter GFu and set the following parameters.
Machine type.
9
57
73
69
57
55
0
0
1
0
Indicates gear motor operation frequency at speed 1 [Hz].
Time between insertion of rack and start of rinse phase when speed 1 [s] is set.
Indicates gear motor operation frequency at speed 2 [Hz].
Time between insertion of rack and start of rinse phase when speed 2 [s] is set.
Enabling of drain and cleaning cycles.
Wash tank heating element management mode.
Machine heating power management.
Wash tank filling mode.
Indicates the type of command for the start of the rinse phase.
See Par. Indicates the maximum current supplied from the inverter to the gear motor.
B2.3
Enter RINSE MODULE and set the following parameters.
32
Time between reaching level “0” (air trap level) in the air gap and stop of rinse
pump.
Enter tub and set the following parameters.
Type of wash module.
2
Enter PrE and set the following parameters.
Type of prewash module.
0
205
170
Indicates the maximum level in the prewash tank. The filling stops when the
water level reaches this value.
The value for the maximum level is modified from “Standby level” to “Run level”
during prewashing phase in order to avoid water loss whan the pumps stop.
Switch the machine off and then on again.
DOC. N.
5956.573.02
Page 49 / 80
Electrolux
EFS - Dishwashing Systems Platform
Electrolux Professional
Prog 26 RTC220 / CTC220 / WTC220 Wash + Rinse from 1165 &
Prewash from 1165 (atmospheric circuit with DT)
GFu
SdP
Enter GFu and set the following parameters.
It allows all the parameters to be set to their default value.
1
Switch the machine off and then on again.
GFu
Apt
SP1
rd1
SP2
rd2
drE
H2C
b_t
btF
r_A
CCu
Rin
Add
tub
tty
PrE
Pty
SbI
PSS
Enter GFu and set the following parameters.
Machine type.
11
57
73
69
57
55
0
0
1
0
Indicates gear motor operation frequency at speed 1 [Hz].
Time between insertion of rack and start of rinse phase when speed 1 [s] is set.
Indicates gear motor operation frequency at speed 2 [Hz].
Time between insertion of rack and start of rinse phase when speed 2 [s] is set.
Enabling of drain and cleaning cycles.
Wash tank heating element management mode.
Machine heating power management.
Wash tank filling mode.
Indicates the type of command for the start of the rinse phase.
See Par. Indicates the maximum current supplied from the inverter to the gear motor.
B2.3
Enter RINSE MODULE and set the following parameters.
32
Time between reaching level “0” (air trap level) in the air gap and stop of rinse
pump.
Enter tub and set the following parameters.
Type of wash module.
2
Enter PrE and set the following parameters.
Type of prewash module.
0
205
170
Indicates the maximum level in the prewash tank. The filling stops when the
water level reaches this value.
The value for the maximum level is modified from “Standby level” to “Run level”
during prewashing phase in order to avoid water loss whan the pumps stop.
Switch the machine off and then on again.
Prog 27 RTC220 / CTC220 / WTC220 Wash + Rinse from 1165 &
Prewash from 1165 (pressure circuit without DT)
GFu
SdP
Enter GFu and set the following parameters.
It allows all the parameters to be set to their default value.
1
Switch the machine off and then on again.
GFu
DOC. N.
5956.573.02
Enter GFu and set the following parameters.
Page 50 / 80
Electrolux
EFS - Dishwashing Systems Platform
Electrolux Professional
Apt
SP1
rd1
SP2
rd2
drE
H2C
b_t
btF
r_A
CCu
Rin
Add
tub
tty
PrE
Pty
SbI
PSS
8
57
73
69
57
39
0
0
1
0
Machine type.
Indicates gear motor operation frequency at speed 1 [Hz].
Time between insertion of rack and start of rinse phase when speed 1 [s] is set.
Indicates gear motor operation frequency at speed 2 [Hz].
Time between insertion of rack and start of rinse phase when speed 2 [s] is set.
Enabling of drain and cleaning cycles.
Wash tank heating element management mode.
Machine heating power management.
Wash tank filling mode.
Indicates the type of command for the start of the rinse phase.
See Par. Indicates the maximum current supplied from the inverter to the gear motor.
B2.3
Enter RINSE MODULE and set the following parameters.
32
Time between reaching level “0” (air trap level) in the air gap and stop of rinse
pump.
Enter tub and set the following parameters.
Type of wash module.
2
Enter PrE and set the following parameters.
Type of prewash module.
0
205
170
Indicates the maximum level in the prewash tank. The filling stops when the
water level reaches this value.
The value for the maximum level is modified from “Standby level” to “Run level”
during prewashing phase in order to avoid water loss whan the pumps stop.
Switch the machine off and then on again.
Prog 28 RTC220 / CTC220 / WTC220 Wash + Rinse from 1165 &
Prewash from 1165 (pressure circuit with DT)
GFu
SdP
Enter GFu and set the following parameters.
It allows all the parameters to be set to their default value.
1
Switch the machine off and then on again.
GFu
Apt
SP1
rd1
SP2
rd2
drE
H2C
b_t
btF
r_A
DOC. N.
5956.573.02
Enter GFu and set the following parameters.
Machine type.
10
57
73
69
57
39
0
0
1
0
Indicates gear motor operation frequency at speed 1 [Hz].
Time between insertion of rack and start of rinse phase when speed 1 [s] is set.
Indicates gear motor operation frequency at speed 2 [Hz].
Time between insertion of rack and start of rinse phase when speed 2 [s] is set.
Enabling of drain and cleaning cycles.
Wash tank heating element management mode.
Machine heating power management.
Wash tank filling mode.
Indicates the type of command for the start of the rinse phase.
Page 51 / 80
Electrolux
EFS - Dishwashing Systems Platform
Electrolux Professional
CCu
Rin
Add
tub
tty
PrE
Pty
SbI
PSS
See Par. Indicates the maximum current supplied from the inverter to the gear motor.
B2.3
Enter RINSE MODULE and set the following parameters.
Time between reaching level “0” (air trap level) in the air gap and stop of rinse pump.
32
Enter tub and set the following parameters.
Type of wash module.
2
Enter PrE and set the following parameters.
Type of prewash module.
0
Indicates the maximum level in the prewash tank. The filling stops when the
205
170
water level reaches this value.
The value for the maximum level is modified from “Standby level” to “Run level”
during prewashing phase in order to avoid water loss whan the pumps stop.
Switch the machine off and then on again.
DOC. N.
5956.573.02
Page 52 / 80
Electrolux
EFS - Dishwashing Systems Platform
Electrolux Professional
B1.3
COMPACT RACK TYPE USA
Prog 29 WT44
Wash + Rinse from 44’’ (atmospheric circuit without DT)
GFu
SdP
Enter GFu and set the following parameters.
It allows all the parameters to be set to their default value.
1
Switch the machine off and then on again.
GFu
Apt
SP1
rd1
SP2
rd2
drE
H2C
b_t
btF
CF
r_A
CCu
Rin
Add
tub
tty
tut
ttH
Enter GFu and set the following parameters.
Machine type.
12
31
44
63
22
53
0
0
0
1
0
Indicates gear motor operation frequency at speed 1 [Hz].
Time between insertion of rack and start of rinse phase when speed 1 [s] is set.
Indicates gear motor operation frequency at speed 2 [Hz].
Time between insertion of rack and start of rinse phase when speed 2 [s] is set.
Enabling of drain and cleaning cycles.
Wash tank heating element management mode.
Machine heating power management.
Wash tank filling mode.
The temperature is displayed in degrees Fahrenheit.
Indicates the type of command for the start of the rinse phase.
See Par. Indicates the maximum current supplied from the inverter to the gear motor.
B2.3
Enter RINSE MODULE and set the following parameters.
32
Time between reaching level “0” (air trap level) in the air gap and stop of rinse
pump.
Enter tub and set the following parameters.
Type of wash module.
2
78
0
Tank temperature set point.
Hysteresis temperature relative to tank temperature set point.
Switch the machine off and then on again.
Prog 30 WT66 Wash + Rinse from 44’’ & Prewash from 22’’
(atmospheric circuit without DT)
GFu
SdP
Enter GFu and set the following parameters.
It allows all the parameters to be set to their default value.
1
Switch the machine off and then on again.
GFu
Apt
SP1
rd1
SP2
rd2
drE
H2C
b_t
DOC. N.
5956.573.02
Enter GFu and set the following parameters.
Machine type.
14
31
85
63
42
55
0
0
Indicates gear motor operation frequency at speed 1 [Hz].
Time between insertion of rack and start of rinse phase when speed 1 [s] is set.
Indicates gear motor operation frequency at speed 2 [Hz].
Time between insertion of rack and start of rinse phase when speed 2 [s] is set.
Enabling of drain and cleaning cycles.
Wash tank heating element management mode.
Machine heating power management.
Page 53 / 80
Electrolux
EFS - Dishwashing Systems Platform
Electrolux Professional
btF
CF
r_A
CCu
Rin
Add
tub
tty
tut
ttH
PrE
Pty
SbI
PSS
0
1
0
Wash tank filling mode.
The temperature is displayed in degrees Fahrenheit.
Indicates the type of command for the start of the rinse phase.
See Par. Indicates the maximum current supplied from the inverter to the gear motor.
B2.3
Enter RINSE MODULE and set the following parameters.
32
Time between reaching level “0” (air trap level) in the air gap and stop of rinse
pump.
Enter tub and set the following parameters.
Type of wash module.
2
Tank temperature set point.
78
Hysteresis temperature relative to tank temperature set point.
0
Enter PrE and set the following parameters.
Type of prewash module.
0
Indicates the maximum level in the prewash tank. The filling stops when the
220
180
water level reaches this value.
The value for the maximum level is modified from “Standby level” to “Run level”
during prewashing phase in order to avoid water loss whan the pumps stop.
Switch the machine off and then on again.
B2
SPECIFIC FUNCTIONS
B2.1
SETTING UNIT OF MEASURE IN FAHRENHEIT
The machines ( apart from Usa Compact machines) leave the factory with the unit of measure used for displaying temperatures in degrees Celsius (Fahrenheit vis. = No only for Modular Rack Type and CF= 0 only
for Compact Rack Type).
To set the unit of measure used for displaying temperatures in degrees Fahrenheit, enter in GENERIC FUNC.
and set the Fahrenheit vis. parameter = Yes (only for Modular Rack Type) or enter in GFu and set the CF
parameter to 1 (only for Compact Rack Type).
B2.2
LANGUAGE SETTING
The factory-set language on modular machines is English. Set the required language using the “LANGUAGE”
parameter in the “USER SETTINGS” family.
B2.3
“MAX. MOTOR CURR.” PARAMETER ( GCU ) SETTING
1. Wait until the machine, complete with tables, is ready for a wash cycle.
2. Start a wash cycle and read the current absorbed by the gear motor
( refer to par. A1 “DISPLAY OF AUXILIARY VALUES”).
3. Add 2 to the read value (e.g. if “Motor current” = 34 ---> 34+2=36 decA).
4. Set the “Max. motor curr.” parameter with the value thus obtained.
CAUTION:
The Rack Type leaves the factory with the “Max motor curr.” parameter already set to the optimum
value. Reset it only when replacing a PCB or the gear motor.
DOC. N.
5956.573.02
Page 54 / 80
Electrolux
EFS - Dishwashing Systems Platform
Electrolux Professional
C INVERTER PARAMETERS
C1
C1.1
INVERTER PROGRAMMING
DISPLAY FUNCTIONS
Telemecanique
Altivar 11
3 “7 segment”
displays
Exits a menu or parameter or
aborts the displayed value
to return to the previous value
in the memory
ESC
ENT
Returns to the previous menu or
parameter, or increases the
displayed value
Pressing
Save the selection:
or
Enters a menu or a parameter,
or saves the displayed
parameter or value
Goes to the next menu or
parameter, or decreases the
displayed value
does not store the selection.
ENT
The display flashes when a value is stored.
C1.2
INVERTER PARAMETER LISTS
Telemecanique speed drive Altivar 11 type ATV11PU12M2E380
Parameters for 110Vac gearmotor ( Delta connection)
Parameter
Description
Standard
machine
ACC
dEC
LSP
Acceleration ramp time
Deceleration ramp time
Low speed
3.0
0.5
0.0
HSP
High speed
100
Motor thermal current
3.6
SP2
2nd preset speed
10
SP3
3rd preset speed
25
SP4
4th preset speed
50
Scale of analog input
10U
ItH
Alt
DOC. N.
5956.573.02
Act
Page 55 / 80
Electrolux
EFS - Dishwashing Systems Platform
Electrolux Professional
drC
FUn
UnS
FrS
StA
Nominal motor voltage
Nominal motor frequency
Frequency loop stability
110
50
20
FLG
Frequency loop gain
50
UFr
Ir compensation
50
nCr
Nominal motor current
3.6
CLI
Current limit
3.9
nSL
Nominal motor slip
5
SLP
Slip compensation
100
COS
Nominal motor cosine
0.65
ACt
tCt
Type of control
Type of two wire control
2C
Lel
LIA
LIB
LIA
LIB
Reverse
Preset speed lia
Preset speed lib
Config. input Lia
Config. input Lib
nO
nO
nO
nO
nO
0.0
nO
90
0
0.3
60
10
nO
nO
nO
nO
tCC
rrS
Ps2
HSP
tLS
PI
LOC
tOL
API
LUL
tUL
rSF
rP2
LC2
nST
PIF
LI
LI
StP
Controlled stop on loss of line
supply
Deceleration ramp adaptation
FST
ACt
Automatic dc injection
YES
tdC
Injection time on stopping
0.5
SdC
Injection current
2.9
ACt
Frequency range
LF
Sfr
Switching frequency
4
Catch on the fly
nO
Analogic output do
OCr
Atr
Automatic restart
nO
bFr
Motor frequency
50
SCS
Configuration backup
nO
FCS
Reminder of the configuration
nO
brA
AdC
SfT
FLr
dO
DOC. N.
5956.573.02
Overload threshold
Time delay for overl. func.
Histeresis freq. reached
Underload threshold
Time delay for underl. func.
Fault reset
Second ramp
2nd limit current
Freewheel stop
ACt
YES
Page 56 / 80
Electrolux
EFS - Dishwashing Systems Platform
Electrolux Professional
Telemecanique speed drive Altivar 11 type ATV11PU12M2E380
Parameters for 230Vac gearmotor ( Delta connection)
Parameter
Description
Standard
machine
ACC
dEC
LSP
Acceleration ramp time
Deceleration ramp time
Low speed
3.0
0.5
0.0
HSP
High speed
100
Motor thermal current
1.7
SP2
2nd preset speed
10
SP3
3rd preset speed
25
SP4
4th preset speed
50
ItH
Alt
Act
Scale of analog input
10U
drC
UnS
FrS
StA
Nominal motor voltage
Nominal motor frequency
Frequency loop stability
230
50
20
FLG
Frequency loop gain
50
UFr
Ir compensation
50
nCr
Nominal motor current
1.7
CLI
Current limit
3.1
nSL
Nominal motor slip
2
SLP
Slip compensation
100
COS
Nominal motor cosine
0.65
ACt
tCt
Type of control
Type of two wire control
2C
LEL
LIA
LIB
LIA
LIB
Reverse
Preset speed lia
Preset speed lib
Config. input Lia
Config. input Lib
nO
nO
nO
nO
nO
0.0
nO
90
0
0.3
60
0
nO
nO
nO
nO
FUn
tCC
rrS
Ps2
HSP
tLS
PI
LOC
tOL
API
LUL
tUL
rSF
rP2
LC2
nST
StP
brA
DOC. N.
5956.573.02
PIF
LI
LI
Overload threshold
Time delay for overl. func.
Histeresis freq. reached
Underload threshold
Time delay for underl. func.
Fault reset
Second ramp
2nd limit current
Freewheel stop
Controlled stop on loss of line
supply
Deceleration ramp adaptation
FST
YES
Page 57 / 80
Electrolux
EFS - Dishwashing Systems Platform
Electrolux Professional
AdC
ACt
Automatic dc injection
YES
tdC
Injection time on stopping
0.5
SdC
Injection current
1.4
ACt
Frequency range
Lf
Sfr
Switching frequency
4
Catch on the fly
nO
Analogic output do
FtA
Atr
Automatic restart
nO
bFr
Motor frequency
50
SCS
Configuration backup
nO
FCS
Reminder of the configuration
nO
SfT
FLr
dO
DOC. N.
5956.573.02
ACt
Page 58 / 80
Electrolux
EFS - Dishwashing Systems Platform
Electrolux Professional
D
WARNING MESSAGES AND TROUBLESHOOTING
List of possible documented machine alarms:
CODE
DESCRIPTION
POSSIBLE CAUSE
11
The Air Gap was not completely
filled within the max. filling time.
- The air gap water supply cock is not open.
- The water filling solenoid valve doesn’t work properly.
- The water feed flow is too low.
- The water inlet filter is not clean.
- The boiler pressure sensor doesn’t work properly.
12
The pressure sensor on the air gap
does not work correctly.
- The pressure sensor on the air gap doesn’t work properly.
- The pressure sensor connector on the air gap is not correctly inserted.
- The X7 connector on the rinse board is not correctly inserted.
13
The Duo-Rinse tank was not
completely filled within the max.
filling time.
- The impeller rotation is wrong.
- There is a leak in the plumbing circuit that connects the air gap to the rinse jets.
- There is a leak in the CU.
- The non return valve on the air gap doesn’t work properly.
- The DUO tank overflow is not inserted.
- The Duo drain solenoid valve doesn’t work properly and remains open.
- The pressure sensor on the rinse board doesn’t work properly.
- The rinse board doesn’t work properly.
14
The pressure sensor on the DuoRinse tank does not work correctly.
- The pressure sensor on the rinse board doesn’t work properly.
- The rinse board doesn’t work properly.
15 *
The required temperature was not
reached in the boiler within the max.
heating time.
- The rinse water flow is too high.
- A heating element or a heating element branch doesn’t work properly.
- The CU is not clean.
- The boiler temperature sensor doesn’t work properly.
- The boiler heating element starter controller doesn’t work properly or its coil is not correctly
connected to the rinse board.
16
The water temperature in the boiler
is too high.
- The “Boil. temp. start” parameter (bt5) or the “Boiler temper.” parameter (bot) has been
changed.
- The relay that activates the boiler heating elements starter controller is stuck.
17
The boiler temperature sensor is
short-circuited.
- The boiler temperature sensor is short-circuited.
18
The boiler temperature sensor is
open.
- The boiler temperature sensor is open or disconnected.
- The boiler temperature sensor connector is not correctly inserted.
- The connector on the rinse board is not correctly inserted.
19 **
The required temperature was not
reached in the Duo-Rinse tank within
the max. heating time.
- The Duo rinse heating element doesn’t work properly.
- The Duo rinse temperature sensor doesn’t work properly.
- The Duo rinse heating element starter controller doesn’t work properly or its coil is not correctly
connected to the rinse board.
20
The water temperature in the DuoRinse tank is too high.
- The “Duo temper.” parameter (dut) has been changed.
- The relay that activates the Duo rinse heating element starter controller is stuck.
21
The Duo-Rinse tank temperature
sensor is short-circuited.
- The Duo rinse temperature sensor is short-circuited.
22 **
The Duo-Rinse tank temperature
sensor is open.
- The Duo rinse temperature sensor is open or disconnected.
- The Duo rinse temperature sensor connector is not correctly inserted.
- The connector on the rinse board is not correctly inserted.
23
The upper wash pump thermal
protector has tripped.
( just modular machines)
- The upper wash pump thermal protector is not correctly set.
- The upper wash pump doesn’t work properly.
- The upper wash pump impeller is blocked.
One of the following user’s thermal
protector has tripped:
- wash pump
- rinse pump
- CU fan
( just compact machines)
- The wash pump thermal protector is not correctly set.
- The wash pump doesn’t work properly.
- The wash pump impeller is blocked.
- The “Wash module” parameter (ttY) is not correctly set.
- The CU (Condensing Unit) fan thermal protector is not correctly set.
- The CU fan doesn’t work properly.
- The rinse pump thermal protector is not correctly set.
- The rinse pump doesn’t work properly.
- The rinse pump impeller is blocked.
24 **
The Duo-Rinse pump
protector has tripped.
- The Duo rinse pump thermal protector is not correctly set.
- The Duo rinse pump doesn’t work properly.
- The Duo pump impeller is blocked.
25 **
The Duo-Rinse tank was not
completely emptied within the max.
emptying time.
- The drain is blocked.
- The drain solenoid valve doesn’t work properly.
- The Duo rinse tank air trap is not clean.
The gear motor inverter
generated an allarm.
- The inverter or the gear motor
doesn’t work properly. Possible
machine alarms documented on
27
thermal
has
1) OCF overcurrent
DOC. N.
5956.573.02
Possible cause
Remedy
- ramp too short
- inertia or load too high
- mechanical locking
- check the state of the
mechanism.
Page 59 / 80
Electrolux
EFS - Dishwashing Systems Platform
Electrolux Professional
DOC. N.
2) SCF motor short circuit
- insulation fault or shortcircuit at the drive output
- check the cables
connecting the drive to
the motor , and the motor
insulation.
3) InF internal fault
- internal fault
- check the environment
(electromagnetic
compatibility).
- send the drive to be
checked/repaired.
4) CFF configuration fault
- The current configuration is
inconsistent
- some parameters in the
inverter have been modified
- return to factory settings.
5) SOF overspeed
- instability or
- driving load too high
- some parameters in the
inverter have been modified
- return to factory settings.
6) CrF internal fault
- load relay control fault or
damaged load resistor
- replace the drive.
7) OHF drive overload
- drive temperature too high
- check the motor load
and the enviroment.Wait
for the drive to cool down
before restarting.
8) OLF motor overload
- triggered by motor current
too high
- check the motor load.
Wait for the drive to cool
down before restarting.
9) OSF overvoltage
- line voltage too high
- disturbed line supply
- check the line voltage.
The overvoltage thresold
is 415 V on the DC bus.
10) ObF
overvoltage during
deceleration
- braking too sudden or
driving load.
- increase the
deceleration time.
11) PHF line phase failure
- drive incorrectly supplied or
a fuse blown
- failure of one phase
- unbalanced load
- check the power
connection and the fuses.
- reset.
12) USF undervoltage
- line supply too low
- transient voltage dip
- damaged load resistor
- check the voltage and
the voltage parameter.
The undervoltage
threshold is 230 V on the
DC bus.
- replace the drive.
30 **
The Air gap was not completely
emptied within the max. emptying
time.
- The impeller rotation is wrong.
- The non return valve on the air gap doesn’t work properly.
- The pressure sensor on the air gap doesn’t work properly.
- The air gap air trap is not clean.
31
The wash tank was not completely
filled within the max. filling time.
32
The pressure sensor on the wash
tank does not work correctly.
- The wash tank water supply cock is not open.
- The water load solenoid valve doesn’t work properly.
- The water feed flow is too low.
- The water inlet filter is not clean.
- The pressure sensor on the wash tank doesn’t work properly.
- The wash tank overflow has not been inserted.
- The wash tank drain solenoid valve doesn’t work properly and remains open.
- The pressure sensor on the wash board doesn’t work properly.
- The wash board doesn’t work properly.
- The pressure sensor on the wash board doesn’t work properly.
- The wash board doesn’t work properly.
33 **
The required temperature in the
wash tank was not reached within
the max. heating time.
- A heating element or a heating element branch of the wash board doesn’t work properly.
- The wash tank temperature sensor doesn’t work properly.
- The wash tank heating element starter controller doesn’t work properly or its coil is not correctly
connected to the rinse board.
34
The water temperature in the wash
tank is too high.
- The “Tank temper.” parameter (tut) or the “Sanit. temper.” parameter (tSt) has been
changed.
- The relay that activates the wash tank heating elements starter controller is stuck.
35
The wash tank temperature sensor
is short-circuited.
- The wash tank temperature sensor is short-circuited.
36 **
The wash tank temperature sensor
is open.
- The wash tank temperature sensor is open or disconnected.
- The wash tank temperature sensor connector is not correctly inserted.
- The connector on the wash board is not correctly inserted.
37 ***
The upper wash pump thermal
protector has tripped.
( only modular rack type)
- The upper wash pump thermal protector is not correctly set.
- The upper wash pump doesn’t work properly.
- The upper wash pump impeller is blocked.
5956.573.02
Page 60 / 80
Electrolux
EFS - Dishwashing Systems Platform
Electrolux Professional
38 **
The lower wash pump
protector has tripped.
( just modular machines)
39 **
The CU (Condensing unit)
thermal protector has tripped.
( just modular machines)
40 **
The wash tank was not completely
emptied within the max. emptying
time.
- The drain is blocked.
- The drain solenoid valve doesn’t work properly.
- The wash tank air trap is not clean.
51
The prewash tank was not
completely filled within the max.
filling time.
- The prewash tank water supply cock is not open.
- The water load solenoid valve doesn’t work properly.
- The water feed flow is too low.
- The water inlet filter is not clean.
- The load solenoid valve filter is not clean.
- The prewash tank pressure sensor doesn’t work properly.
- The prewash tank overflow has not been inserted.
- The prewash tank drain solenoid valve doesn’t work properly and remains open.
- The pressure sensor on the prewash board doesn’t work properly.
- The prewash board doesn’t work properly.
52
The pressure sensor on the prewash
tank does not work correctly.
- The pressure sensor on the prewash board doesn’t work properly.
- The prewash board doesn’t work properly.
53 **
The required temperature in the
prewash tank was not reached within
the max. heating time.
- A heating element or a heating element branch of the prewash board doesn’t work properly.
- The prewash tank temperature sensor doesn’t work properly.
- The prewash tank heating element starter controller doesn’t work properly or its coil is not
correctly connected to the rinse board.
54
The water temperature
prewash tank is too high.
- The “Tank temper.” parameter (Prt) or the “Sanit. temper.” parameter (PSt) has been
changed.
- The relay that activates the wash tank heating elements remote control switch is stuck.
55
The prewash tank temperature
sensor is short-circuited.
- The prewash tank temperature sensor is short-circuited.
56 **
The prewash
sensor is open.
- The prewash tank temperature sensor is open or disconnected.
- The prewash tank temperature sensor connector is not correctly inserted.
- The connector on the prewash board is not correctly inserted.
57 **
The
prewash
pump
protector has tripped.
58 **
The prewash tank was not
completely emptied within the max.
emptying time.
- The drain is blocked.
- The drain solenoid valve doesn’t work properly.
- The prewash tank air trap is not clean.
71 **
The required temperature in the
drying tunnel was not reached within
the max. heating time.
- The DT heating element or the DT heating element branch doesn’t work properly.
- The DT temperature sensor doesn’t work properly.
- The DT heating element starter controller doesn’t work properly or its coil is not
correctly connected to the rinse board.
72
The drying tunnel temperature is too
high.
- The “Dt temper.” parameter (dtt) has been changed.
- The relay that activates the DT heating element starter controller is stuck.
- The DT fan doesn’t work properly.
- The DT temperature sensor doesn’t work properly.
73
The drying tunnel temperature
sensor is short-circuited.
- The DT temperature sensor is short-circuited.
The drying tunnel
sensor is open.
- The DT temperature sensor is open or disconnected.
- The DT temperature sensor connector is not correctly inserted.
- The connector on the DT board is not correctly inserted.
74 ****
75 **
DOC. N.
tank
thermal
in
fan
the
temperature
thermal
temperature
The drying tunnel fan
protector has tripped.
thermal
- The lower wash pump thermal protector is not correctly set.
- The lower wash pump doesn’t work properly.
- The lower wash pump impeller is blocked.
- The “Wash module” parameter (ttY) is not correctly set.
- The CU (Condensing Unit) fan thermal protector is not correctly set.
- The CU fan doesn’t work properly.
- The prewash pump thermal protector is not correctly set.
- The prewash pump doesn’t work properly.
- The prewash pump impeller is blocked.
- The DT fan thermal protector is not correctly set.
- The DT fan doesn’t work properly.
76
The gear motor supplied current is
higher than the maximum value
allowed for the “Max motor curr.”.
- The wire connected from the inverter ( Do terminal block) to the elctronic board (X7-5) is shortcircuited with the ground.
- The inverter parameters are not correctly set.
77
The gear motor supplied current is
lower than the minimum value
allowed for the gear motor current.
- The wire connected from the inverter ( Do terminal block) to the electronic board (X7-5) is open.
- The inverter parameters are not correctly set.
- The gear motor is configured with star connection and it must be configured with delta
connections.
82 **
The required temperature was not
reached in the first boiler within the
max. heating time.
- The rinse water flow is too high.
- A heating element or a heating element branch doesn’t work properly.
- The CU is not clean.
- The first boiler temperature sensor doesn’t work properly.
- The first boiler heating element starter controller doesn’t work properly or its coil is not correctly
connected to the rinse board.
83
The water temperature in the first
boiler is too high.
- The “Boil. temp. start” parameter (bt5) or the “Boiler temper.” parameter (bot) has been
changed.
- The relay that activates the first boiler heating elements starter controller is stuck.
5956.573.02
Page 61 / 80
Electrolux
EFS - Dishwashing Systems Platform
Electrolux Professional
84
The first boiler temperature sensor is
short-circuited.
- The first boiler temperature sensor is short-circuited.
85
The first boiler temperature sensor is
open.
- The first boiler temperature sensor is open or disconnected.
- The first boiler temperature sensor connector is not correctly inserted.
- The connector on the rinse board is not correctly inserted.
89
The temperature on
interface is too high.
- Presence of steam too hot on the user interface board.
- The user interface doesn’t work properly.
90
( modular
machines)
the
user
Communication problems between
machine electronic boards.
CoM
Err
- The bus connection cables are not correctly connected to all the boards.
- One or more boards don’t work properly.
- The “Appl. type” parameter (APt) is not correctly set.
- The connector X6 is not correctly connected.
When alarm 90 appears, the display will show the name (modular rack type) or the number
(compact rack type), of the electronic board that generated the communication error.
2: wash and rinse
3: prewash
4: dt
If, after a communication error, the machine is able to re-enable the communication between the
boards, the following message appears on the display:
( compact
machines)
Modular
PRESS
91
User interface board (modular rack
type) or power board connectedto
the user interface board (compact
rack type) out of order.
Compact
I
No
CoM
Err
- The user interface board doesn’t work properly (modular rack type).
- The Power board connected to the user interface board doesn’t work properly (compact rack
type)
- The user interface board doesn’t work properly (compact rack type).
- The connection between the user card and power card is damaged (compact rack type).
*
If the value of the parameter "Heat tim. enable" (HtE) is "Yes" (1), the machine stops when this alarm
appears. If the parameter value is "No" (0), the machine does not shut down when this alarm appears.
**
The machine does not shut down if these alarms appear. A message indicating the alarm number is
shown on the display every 3 minutes. The "alarm" LED flashes, but the machine continues to carry out the
normal operations.
*** In WTM140 versions the machine stops when this alarm appears. In all the other models the machine
continues to work.
**** With Dt/ Hab standard models the machine shuts down when this alarm appears, but does not in the
new Dt/ Hab versions.
DOC. N.
5956.573.02
Page 62 / 80
F40
F39
F38
F37
F36
F35
F34
F33
F32
F31
RL4_B
RL3_B
VDR1
RL2_B
VDR2
VDR3
C65
C67
VDR4
F28
1
X1
3
C63
C64
F27
X2
X3
U15
X4
F21
U5
VDR7
F26
VDR6
F25
VDR5
F24
RL5
F23
RL6
F22
RL7
F20
X5
VDR8
1
F19
C69
X6
X16
X15
F18
JP7
F17
6
X7
JP1
U1
C3
VDR10
F16
VDR9
F15
RL9
F30
RL1_B
RL8
C4
OPTY1
F13
X8
F11
VDR11
1
C77
X9
F10
R122
F14
RL10
F12
OPTY2
F8
F9
TY1
8
T1
F7
1
F3
F4
F5
F6
X10
U12
9
R129
VDR12
PTC3
F1
F2
U14
VDR13
U13
U2
C9
X13
L2
C5
PTC2
X11
TY2
5956.573.02
L3
DOC. N.
L1
E
C10
F29
Electrolux
EFS - Dishwashing Systems Platform
Electrolux Professional
POWER BOARDS CONNECTORS LAYOUT
PREWASH
( MODULAR RACK TYPE )
Page 63 / 80
F40
F39
F38
F37
F36
F35
F34
F33
F32
F31
RL4_B
RL3_B
VDR1
RL2_B
VDR2
VDR3
C65
C67
1
F27
X1
3
1
X2
3
X3
U15
X4
F21
U5
VDR7
F28
C63
C64
F26
VDR6
F25
VDR5
F24
RL5
F23
RL6
F22
RL7
F20
X5
VDR8
1
F19
C69
X6
X16
X15
F18
JP7
F17
6
X7
JP1
U1
C3
VDR10
F16
VDR9
F15
RL9
VDR4
RL8
C4
OPTY1
F13
X8
F11
VDR11
1
C77
X9
F10
R122
F14
RL10
F12
OPTY2
F30
RL1_B
F8
F9
TY1
8
T1
F7
1
F3
F4
F5
F6
X10
U12
9
R129
VDR12
PTC3
F1
U13
U2
C9
X13
L2
C5
PTC2
X11
TY2
F2
U14
VDR13
L3
5956.573.02
L1
DOC. N.
C10
F29
Electrolux
EFS - Dishwashing Systems Platform
Electrolux Professional
( MODULAR RACK TYPE )
WASH
Page 64 / 80
F40
F39
F38
F37
F36
F35
F34
F33
F32
F31
RL4_B
RL3_B
VDR1
RL2_B
VDR2
VDR3
C65
C67
1
F27
X1
3
1
X2
3
X3
U15
X4
F21
U5
VDR7
F28
C63
C64
F26
VDR6
F25
VDR5
F24
RL5
F23
RL6
F22
RL7
VDR4
F20
X5
VDR8
F19
C69
X6
F18
JP7
F17
1
X7
JP1
7
U1
C3
VDR10
F16
VDR9
X16
X15
RL8
F15
RL9
1
F14
RL10
C4
OPTY1
F13
X8
F11
6
VDR11
F12
1
C77
OPTY2
X9
F10
R122
F30
RL1_B
F8
F9
TY1
8
T1
F7
1
F3
F4
F5
F6
X10
U12
9
R129
VDR12
PTC3
F1
U13
U2
C9
X13
L2
C5
PTC2
X11
TY2
F2
U14
VDR13
L3
5956.573.02
L1
DOC. N.
C10
F29
Electrolux
EFS - Dishwashing Systems Platform
Electrolux Professional
( MODULAR RACK TYPE )
RINSE
Page 65 / 80
F40
F39
F38
F37
F36
F35
F34
F33
F32
F31
RL4_B
RL3_B
VDR1
RL2_B
VDR2
VDR3
C65
C67
F28
1
X1
3
C63
C64
F27
X2
X3
U15
X4
F21
U5
VDR7
F26
VDR6
F25
VDR5
F24
RL5
F23
RL6
F22
RL7
F20
X5
VDR8
1
F19
C69
X6
X16
X15
F18
JP7
F17
6
X7
JP1
U1
C3
VDR10
F16
VDR9
F15
RL9
VDR4
RL8
C4
OPTY1
F13
X8
F11
VDR11
1
C77
X9
F10
R122
F14
RL10
F12
OPTY2
F30
RL1_B
F8
F9
TY1
8
T1
F7
1
F3
F4
F5
F6
X10
U12
9
R129
VDR12
PTC3
F1
U13
U2
C9
X13
L2
C5
PTC2
X11
TY2
F2
U14
VDR13
L3
5956.573.02
L1
DOC. N.
C10
F29
Electrolux
EFS - Dishwashing Systems Platform
Electrolux Professional
( MODULAR RACK TYPE )
DT
Page 66 / 80
F32/F37
F40
F39
F38
F37
F36
F35
F34
F33
F32
F31
F30
VDR1
VDR2
VDR3
C65
C67
VDR4
F28
3
X1
C63
C64
1
F20
F21
F23
F25
F26
1
3
X2
X3
U15
X4
1
U5
VDR5 VDR6 VDR7 VDR8
F27
RL5
RL4_B
RL3_B
RL2_B
F24
RL6
X5
6
1
F19
X6
X16
6
C69
X15
F17
F18
X7
JP1
JP7
U1
C3
VDR10
F16
VDR9
C4
OPTY1
X8
F12
1
C77
F9
X9
F10
VDR11
F8
F7
8
1
T1
TY1
F29
RL1_B
F22
RL7
F4
F5
F6
X10
U12
PTC3
9
F3
R129
VDR12
F13
F13/F16
VDR13
L2
C5
U13
U2
C9
X13
PTC2
X11
U14
F2
F20/F24
RL8
F15
RL9
F14
RL10
F11
R122
F29/F31
OPTY2
F1
TY2
5956.573.02
L3
DOC. N.
L1
CNJ1
C10
F24/F28
Electrolux
EFS - Dishwashing Systems Platform
Electrolux Professional
( COMPACT RACK TYPE )
PREWASH
F38/F40
Page 67 / 80
F32/F37
F40
F39
F38
F37
F36
F35
F34
F33
F32
F31
F30
VDR1
VDR2
VDR3
C65
C67
VDR4
F28
3
X1
C63
C64
1
F20
F21
F23
F25
F26
1
3
X2
X3
U15
X4
1
U5
VDR5 VDR6 VDR7 VDR8
F27
RL5
RL4_B
RL3_B
RL2_B
F24
RL6
X5
6
1
F19
X6
X16
6
C69
X15
F17
F18
1
X7
JP1
JP7
7
1
U1
C3
VDR10
F16
VDR9
F12
6
C4
OPTY1
X8
1
C77
F9
X9
F10
VDR11
F7
8
1
T1
F4
F13
CNJ7
F8
TY1
F29
RL1_B
F22
RL7
F5
F6
X10
U12
PTC3
9
F3
R129
VDR12
CNJ3 F13/F16
VDR13
L2
C5
U13
U2
C9
X13
PTC2
X11
U14
F2
F20/F24
RL8
F15
RL9
F14
RL10
F11
R122
F29/F31
OPTY2
F1
5956.573.02
TY2
DOC. N.
L3
CNJ4
L1
CNJ1
C10
F24/F28
Electrolux
EFS - Dishwashing Systems Platform
Electrolux Professional
WASH + RINSE 1165 - 1490
( COMPACT RACK TYPE )
F38/F40
Page 68 / 80
F32/F37
F40
F39
F38
F37
F36
F35
F34
F33
F32
F31
F30
VDR1
VDR2
VDR3
C65
C67
VDR4
F28
3
X1
C63
C64
1
F20
F21
F23
F25
F26
1
3
X2
X3
U15
1
3
X4
1
U5
VDR5 VDR6 VDR7 VDR8
F27
RL5
RL4_B
RL3_B
RL2_B
F24
RL6
X5
6
1
F19
X6
X16
6
C69
X15
F17
F18
1
X7
JP1
JP7
7
1
U1
C3
VDR10
F16
VDR9
F12
6
C4
OPTY1
X8
1
C77
F9
X9
F10
VDR11
F7
8
1
T1
F5
PTC3
X10
U12
F6
F13
J5/J6
F4
CNJ7
F8
TY1
F29
RL1_B
F22
RL7
9
F3
R129
VDR12
CNJ3 F13/F16
VDR13
L2
C5
U13
U2
C9
X13
PTC2
X11
U14
F2
F20/F24
RL8
F15
RL9
F14
RL10
F11
R122
F29/F31
OPTY2
F1
5956.573.02
TY2
DOC. N.
L3
CNJ4
L1
CNJ1
C10
F24/F28
Electrolux
EFS - Dishwashing Systems Platform
Electrolux Professional
( COMPACT RACK TYPE )
WASH + RINSE 44’’
F38/F40
Page 69 / 80
F32/F37
F40
F39
F38
F37
F36
F35
F34
F33
F32
F31
VDR1
VDR2
VDR3
C65
C67
VDR4
F28
3
X1
C63
C64
1
F20
F21
F23
F25
F26
X2
X3
U15
X4
1
U5
VDR5 VDR6 VDR7 VDR8
F27
RL5
RL4_B
RL3_B
RL2_B
F24
RL6
X5
6
1
F19
X6
X16
6
C69
X15
F17
F18
X7
JP1
JP7
U1
C3
VDR10
F16
VDR9
C4
OPTY1
X8
F12
1
C77
F9
X9
F10
VDR11
F7
8
1
T1
F4
F5
F6
X10
U12
PTC3
9
VDR13
L2
C5
U13
U2
C9
X13
PTC2
X11
U14
F2
CNJ7
F8
TY1
F30
RL1_B
F22
RL7
F3
R129
VDR12
F29
RL8
F15
RL9
F14
RL10
F11
R122
F29/F31
OPTY2
F1
5956.573.02
TY2
DOC. N.
L3
CNJ4
L1
CNJ1
C10
F20/F24
Electrolux
EFS - Dishwashing Systems Platform
Electrolux Professional
( COMPACT RACK TYPE )
DT
F38/F40
Page 70 / 80
F13
Electrolux
EFS - Dishwashing Systems Platform
Electrolux Professional
LEGEND
DOC. N.
5956.573.02
F 3- F12
Main supply connector
F13-F16
Loads connector
F20-F28
Loads connector
F21-F31
Loads connector
F32-F37
Loads connector
F38-F40
Loads connector
x1
Temperature sensor connector
x2
Temperature sensor connector
x4
Temperature sensor connector
x5
Thermal protection, autostart, emergency switch
x6
Board identification connector
x7
Air gap pressure sensor connector
x8
Gearmotor speed signal connector
x9
Thermal protection, autostart, emergency switch
x10
Door switch connector - user interface
Page 71 / 80
Electrolux
EFS - Dishwashing Systems Platform
Electrolux Professional
MULTICONNECTOR BOARDS CONNECTORS LAYOUT
PREWASH 600 - 1160 - 1490
( COMPACT RACK TYPE )
5
2
1
J23
1
6
1
J26
1
6
1
4
1
1
1
5
1
J25
3
J27
1
1
4
4
1
1
5
1
1
9
9
9
2
2
J20
6
1
1
6
1
J43
1
4
1
1
4
J29
4
J30
1
1
1
8
8
4
1
J42
1
1
8
6
6
J32
1
J40
1
4
4
1
1
9
9
1
4
1
3
J34
1
9
1
8
1
1
DOC. N.
5956.573.02
1
8
J35
8
Page 72 / 80
Electrolux
EFS - Dishwashing Systems Platform
Electrolux Professional
PREWASH 22’’
( COMPACT RACK TYPE )
5
2
1
J23
1
6
1
J26
1
6
1
4
1
1
1
5
1
J25
3
J27
1
1
4
4
1
1
5
1
1
9
9
9
2
2
J20
6
1
1
6
1
J43
1
4
1
1
4
J29
4
J30
1
1
1
8
8
4
1
J42
1
1
8
6
6
J32
1
J40
1
4
4
1
1
9
9
1
4
1
3
J34
1
9
1
8
1
1
DOC. N.
5956.573.02
1
8
J35
8
Page 73 / 80
Electrolux
EFS - Dishwashing Systems Platform
Electrolux Professional
WASH + RINSE 1165 - 1490
( COMPACT RACK TYPE )
MACHINES WITH DT
2
1
MACHINES WITH PREWASH
J25
1
3
4
5
2
1
J23
1
2
1
6
1
J25
HACCP
J24
J27
J26
1
6
1
4
1
1
1
1
1
1
1
5
3
J22
J27
1
1
1
1
4
4
4
1
J21
9
9
2
1
1
5
9
5
J20
J29
6
1
1
6
1
J43
1
4
1
1
4
4
4
1
8
J31
1
1
6
1
4
1
8
1
4
J30
J42
6
8
8
1
1
J41
J32
1
J40
9
1
4
4
1
1
9
1
4
1
3
J34
1
1
DOC. N.
5956.573.02
J37
9
1
9
1
J36
8
1
8
1
1
8
J35
8
Page 74 / 80
Electrolux
EFS - Dishwashing Systems Platform
Electrolux Professional
WASH + RINSE 44’’
( COMPACT RACK TYPE )
MACHINES WITH DT
2
1
MACHINES WITH PREWASH
J25
1
3
4
5
2
1
J23
1
J24
2
1
J25
HACCP
6
1
J27
J26
1
6
1
4
1
1
1
1
1
1
1
5
3
J22
1
4
4
1
1
1
J27
4
4
J28
1
5
9
2
1
9
5
1
9
J21
1
J29
J20
6
1
1
6
1
J43
1
4
1
1
4
2
4
1
J31
1
1
6
1
1
8
1
4
8
J42
4
J30
6
8
8
1
1
J41
J32
1
J40
9
1
1
4
4
1
1
9
4
1
3
J34
1
1
DOC. N.
5956.573.02
J37
9
1
9
1
J36
8
1
8
1
1
8
J35
8
Page 75 / 80
Electrolux
EFS - Dishwashing Systems Platform
Electrolux Professional
DT 90°
( COMPACT RACK TYPE )
5
2
1
J23
1
1
1
6
1
1
1
2
1
J25
HACCP
3
4
5
1
1
J24
J27
J22
1
1
4
4
1
4
4
J30
1
1
5
9
9
1
1
J20
1
1
4
2
2
4
6
1
1
6
1
J43
8
4
4
J31
1
1
6
1
1
6
8
8
1
1
J41
J32
1
J40
1
9
1
4
4
1
J39
4
1
1
9
4
1
3
J34
1
1
DOC. N.
5956.573.02
J37
9
1
9
1
8
J36
1
1
8
8
Page 76 / 80
Electrolux
EFS - Dishwashing Systems Platform
Electrolux Professional
DT 600 / DT 900
( COMPACT RACK TYPE )
5
2
1
J23
1
1
1
6
1
1
1
2
1
J25
HACCP
3
4
5
1
1
J24
J27
J22
1
1
4
4
1
4
4
J30
1
1
5
9
9
1
1
J20
1
1
4
2
2
4
6
1
1
6
1
J43
8
4
4
J31
1
1
6
1
1
6
8
8
1
1
J41
J32
1
J40
9
1
4
4
1
1
9
1
4
1
3
J34
1
1
DOC. N.
5956.573.02
J37
9
1
9
1
8
J36
1
1
8
8
Page 77 / 80
Electrolux
EFS - Dishwashing Systems Platform
Electrolux Professional
JUMPER JP1 BRIDGE POSITION
Old PCB terminal board
DOC. N.
New PCB terminal board
MODULE
OLD PCB TERMINAL BOARD
NEW PCB TERMINAL BOARD
DT - HAB 600/ 900/ 90°
Pos. 2-3
Pos. 1-2
COMPACT - WASH+ RINSE
WITHOUT HAB - DT
Pos. 2-3
Pos. 1-2
COMPACT - WASH+ RINSE
WITH HAB - DT
Pos. 1-2
Pos. 2-3
PREWASH
Pos. 1-2
Pos. 2-3
5956.573.02
Page 78 / 80
Electrolux
EFS - Dishwashing Systems Platform
Electrolux Professional
MODULE COMPOSITION FOR MODULAR AND COMPACT RACK TYPE
MODULAR RACK TYPE
WASH
PREWASH
600
1165
1490
600
1165
1490
WTM140
X
X
-
-
-
-
WTM165
X
-
X
-
-
-
WTM180
X
X
-
X
-
-
WTM200
X
-
X
X
-
-
WTM250
X
-
X
-
X
-
WTM300
X
-
X
-
-
X
COMPACT RACK TYPE
DOC. N.
RINSE
WASH + RINSE
PREWASH
1165 - 44’’
1490
600 - 22’’
1165
RTC90/CTC90/WTC90
X
-
-
-
RTC140/CTC140/WTC140
-
X
-
-
RTC180/CTC180/WTC180
X
-
X
-
RTC220/CTC220/WTC220
X
-
-
X
WT44
X
-
-
-
WT66
X
-
X
-
5956.573.02
Page 79 / 80