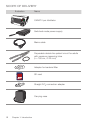
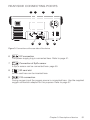
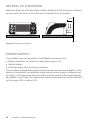
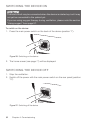
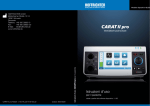
1
Quality makes the Difference HOFFRICHTER GmbH Mettenheimer Straße 12 / 14 19061 Schwerin Germany Telephone: +49 385 39925 - 0 Fax: +49 385 39925 - 25 Email: [email protected] www.hoffrichter.de CARAT II pro Ventilator Article no.: 5000 0626 User’s manual CARAT II pro for patients CARAT II pro Patient 1.000 ENG_2014-07-16_01 Device type 9LV203 User’s manual for patients as of device software 1.000 CARAT II pro User's manual for patients ©2014 HOFFRICHTER GmbH All rights reserved. The content published in this user's manual is the sole property of the HOFFRICHTER GmbH. All forms of reproduction, editing, distribution and any kind of exploitation, even in part, require the prior written consent of the HOFFRICHTER GmbH. The HOFFRICHTER GmbH reserves the right to amend or replace this user's manual without prior notice. Please ensure that you are always working with the most current version of this user's manual. Should you have any questions, please contact the ventilation device provider, or check our information at www.hoffrichter.de. The respiratory device may only be operated and maintained by trained personnel. The following documents are available for CARAT II pro in addition to this user's manual: • User's manual for CARAT II pro for physicians and medical professionals • Brief instructions for CARAT II pro • Service manual • Hygiene concept • Maintenance plan 3 Please read first this user's manual carefully and in its entirety before first using the ventilator. In particular, follow all safety and cleaning instructions. Keep the instructions in close proximity to the device for immediate reference if necessary. Every HOFFRICHTER GmbH device is supplied with a serial number for traceability purposes. Please enter your device’s serial number here. You will find the serial number on the rating plate on the bottom of the device. ............................................. Please always quote the serial number for all queries and complaints. The device complies with the requirements of Directive 93/42/EEC. 4 TABLE OF CONTENTS CHAPTER 1 ............................................................................ 11 INTRODUCTION ...........................................................................................11 Scope of delivery ...........................................................................................12 Symbols ........................................................................................................14 Intended use ..................................................................................................19 Contraindications ...........................................................................................19 Side effects ....................................................................................................20 CHAPTER 2 ............................................................................ 21 SAFETY INFORMATION ...............................................................................21 General safety instructions .............................................................................22 Electrical safety ..............................................................................................24 Installation requirements and transport ...........................................................25 Instructions before commissioning .................................................................26 Using of oxygen .............................................................................................26 Safety-related test ..........................................................................................27 CHAPTER 3 ............................................................................ 29 DESCRIPTION OF DEVICE ..........................................................................29 Front side connecting points ..........................................................................30 Rear side connecting points ...........................................................................31 Control elements ............................................................................................33 LED displays ..................................................................................................35 Movable and removable housing parts ...........................................................37 CHAPTER 4 ............................................................................ 39 COMMISSIONING ........................................................................................39 Setting up the device .....................................................................................40 Power supply .................................................................................................40 Connecting the tube circuit ............................................................................47 Calibrating the tube circuit..............................................................................52 Connecting the alarm box or the nurse call .....................................................54 SpO2 sensor connection ................................................................................55 Inserting the SD card .....................................................................................56 RemovING the SD card ..................................................................................56 Using oxygen .................................................................................................57 Table of contents 5 Using the functional bag.................................................................................61 Switching the device on .................................................................................62 Switching the device off .................................................................................62 CHAPTER 5 ............................................................................ 63 VENTILATION MODES .................................................................................63 CHAPTER 6 ............................................................................ 65 DEVICE OPERATION ....................................................................................65 Key lock.........................................................................................................65 User profiles...................................................................................................65 Menu structure ..............................................................................................66 Basic operation ..............................................................................................66 Basic screen layout ........................................................................................68 Explanation of toolbar icons ...........................................................................69 Enabling a screen ..........................................................................................71 Monitoring .....................................................................................................73 Activating a ventilation set ..............................................................................79 Display of stored alarms .................................................................................81 System settings .............................................................................................82 Statistics ........................................................................................................88 Starting ventilation .........................................................................................90 Stopping ventilation .......................................................................................90 CHAPTER 7 ............................................................................ 91 ALARMS AND MESSAGES ..........................................................................91 General information ........................................................................................92 Alarm sound test............................................................................................92 Audible alarm output (audio alarms)................................................................93 Visible alarm output .......................................................................................94 Alarm log .......................................................................................................96 Forwarding alarms .........................................................................................96 Alarm overview ..............................................................................................97 Messages ....................................................................................................101 CHAPTER 8 .......................................................................... 103 CLEANING AND DISINFECTION ................................................................103 Overview......................................................................................................104 Cleaning the device ......................................................................................106 6 Table of contents Cleaning the tube circuit...............................................................................106 Cleaning the mask .......................................................................................106 Cleaning the headgear .................................................................................107 Cleaning / Replacing the filter ........................................................................107 CHAPTER 9 .......................................................................... 109 ROUTINE CHECKS AND MAINTENANCE WORK......................................109 Overview......................................................................................................110 Battery maintenance ....................................................................................111 CHAPTER 10 ........................................................................ 113 APPENDIX ..................................................................................................113 Data management .......................................................................................114 Error messages ............................................................................................115 Technical data ..............................................................................................117 Replacement parts and accessories .............................................................121 Manufacturer's declaration on electromagnetic compatibility.........................128 Disposal.......................................................................................................129 Disclaimer ....................................................................................................130 Table of contents 7 LIST OF FIGURES Figure 1: Rating plate....................................................................................15 Figure 2: Connections at the front side of the device .....................................30 Figure 3: Connections at the rear side of the device ......................................31 Figure 4: Control elements ............................................................................33 Figure 5: LED displays ..................................................................................35 Figure 6: Left device side ..............................................................................37 Figure 7: Right device side ............................................................................37 Figure 8: Setting up the device .....................................................................40 Figure 9: Mains connection via power supply unit ..........................................41 Figure 10: Start screen ...................................................................................42 Figure 11: Standby screen ..............................................................................42 Figure 12: AKKUPACK uni BASE (right) / AKKUPACK uni PLUS (left) ...............45 Figure 13: Connecting AKKUPACK uni BASE ..................................................46 Figure 14: Connecting a single line patient circuit ............................................48 Figure 15: Connecting a double line patient circuit ..........................................49 Figure 16: Connecting the humidifier - single line patient circuit .......................50 Figure 17: Connecting the humidifier - double line patient circuit......................51 Figure 18: "Measurement without pressure tube" message box .......................52 Figure 19: Connecting alarm box ....................................................................54 Figure 20: Connecting the SpO2 sensor ..........................................................55 Figure 21: Inserting SD card ...........................................................................56 Figure 22: Removing SD card .........................................................................56 Figure 23: Connecting the oxygen source (rear of unit) ....................................57 Figure 24: Connecting the FiO2 sensor (single line patient circuit example) .......59 Figure 25: Functional Bag ...............................................................................61 Figure 26: Switching on the device .................................................................62 Figure 27: Switching off the device..................................................................62 Figure 28: Ventilation modes overview ...........................................................63 Figure 29: User profile in the toolbar................................................................65 Figure 30: Basic screen layout ........................................................................68 Figure 31: Home screen .................................................................................71 Figure 32: Monitoring screen (data) .................................................................74 Figure 33: Monitoring screen (graphs) .............................................................75 Figure 34: Monitoring screen (freeze graphs) ...................................................76 Figure 35: Flow-Volume-Loop .........................................................................77 Figure 36: Volume-Pressure-Loop ...................................................................77 Figure 37: Flow-Volume-Loop .........................................................................78 Figure 38: Parameter screen ..........................................................................79 Figure 39: Alarm log screen ............................................................................81 Figure 40: System screen ...............................................................................84 8 List of figures Figure 41: Statistics screen (1 ventilation parameter) .......................................89 Figure 42: Stop ventilation ..............................................................................90 Figure 43: Alarm displays in the toolbar ...........................................................93 Figure 44: Alarm output in the toolbar .............................................................94 Figure 45: Alarm output in the textbox ............................................................95 Figure 46: Alarm box ......................................................................................96 Figure 47: Messages in the toolbar ...............................................................101 Figure 48: Filter cassette structure ................................................................107 List of figures 9 LIST OF TABLES Table 1: Operating time with battery power and factory default settings ........43 Table 2: Overview ventilation modes .............................................................64 Table 3: Adjustable alarms ............................................................................97 Table 4: Adjustable alarms ............................................................................98 Table 5: Fixed Alarms ...................................................................................99 Table 6: Fixed Alarms .................................................................................100 Table 7: Messages .....................................................................................101 Table 8: Cleaning intervals - overview .........................................................104 Table 9: Service intervals - overview ...........................................................110 Table 10: Data management.........................................................................114 Table 11: Error messages during operation and at device start-up ................115 Table 12: Error messages during operation and at device start-up ................116 10 List of tables CHAPTER 1 INTRODUCTION This chapter contains general information on the use and operation of the ventilator. Chapter 1: Introduction 11 SCOPE OF DELIVERY Illustration Name CARAT II pro Ventilator Switched-mode power supply Mains cable Disposable double line patient circuit for adults with pressure measuring tube (L = 180 cm, 22 mm) Adapter for bacterial filter SD card Straight FiO2 connection adapter Carrying case 12 Chapter 1: Introduction Illustration Name Spare filter cassette, complete (open) with filters Spare coarse filter, 1 pack (2 ea) Spare fine filter, 1 pack (5 ea) User's manual for the patient Brief instructions Final inspection certificate Chapter 1: Introduction 13 SYMBOLS PACKAGING SYMBOLS Symbol Meaning European Article Number Article number Serial number CE - Declaration of Conformity Transport and store package with arrows pointing up at all times Fragile contents Protect from moisture! 95 Humidity range during storage and transport 5 1100 hPa Air pressure range during storage and transport 250 hPa +55°C Temperature range for storage and transport up to 1 month -20°C +45°C Temperature range for storage and transport up to 6 months -20°C +35°C Temperature range for storage and transport longer than 6 months -20°C C A U T I O N HANDLE WITH CARE LITHIUM ION RECHARGEABLE BATTERIES INSIDE (No lithium metal) Do not damage or mishandle this package. If package is damaged, batteries must be quarantined, inspected and repacked. For additional emergency information call: +49 ENTHÄLT WIEDERAUFLADBARE LITHIUM-IONEN BATTERIEN (Kein Lithium-Metall) Vorsichtig behandeln! Bei Beschädigungen der Verpackung müssen die Batterien ausgesondert, überprüft und neu verpackt werden! Informationen für den Notfall: KEEP UPRIGHT CAUTION! 385 39925 - 0 V O R S I C H T IF DAMAGED +49 385 39925 - 0 IF DAMAGED Lithium-ion Batteries DO NOT LOAD OR TRANSPORT PACKAGE IF DAMAGED For more information, call +49 385 39925-0 14 Chapter 1: Introduction CAUTION! Device contains lithium-ion batteries SYMBOLS ON THE RATING PLATE The rating plate is on the back of the device Ventilator Type: 9LV203 CARAT II pro Quality makes the Difference Li-Ion ICR 18650 14.8V; 4400mAh; 65.12Wh SN DC-INPUT O2-INPUT max. 5A max. 15l/min 24V 12V max. 10A 1000 hPa EAG1300001 IP22 Figure 1: Rating plate Symbol Meaning Observe the warning and safety instructions in the user’s manual. Protection class II (protective insulation) BF application part IP22 Protect against: • solid foreign objects with diameters from 12.5 mm • access to hazardous parts with a finger • falling / dripping water, as long as the housing is tilted up to15° Serial number CE - Declaration of Conformity Manufacturer Do not dispose of the device with the household waste. Please contact the relevant customer services department to find out how to properly dispose of the device. Chapter 1: Introduction 15 SYMBOLS ON THE DEVICE Symbol Meaning Connecting points Inspiration tube connection Expiration tube connection Control tube connection Pressure measuring tube connection FiO2 sensor connection DC SpO2 Com DC connection SpO2 sensor connection Com-interface Remote alarm/nurse call connection USB interface O2 FiO2 connection O2 FiO2 output SD card slot 16 Chapter 1: Introduction Symbol Meaning Operation Alarm key ON/OFF key Safe key Home key Escape key LEDs Alarm LED Mains LED Battery LED Chapter 1: Introduction 17 SYMBOLS USED IN THIS USER’S MANUAL Important information is denoted by symbols in this user’s manual. Please ensure that you follow these instructions in order to avoid accidents, personal injury and material damage. In addition, the local accident prevention regulations and general safety regulations in force in the area of use must be observed. This symbol denotes general safety instructions. Follow these instructions to avoid accidents, personal injury or material damage. This symbol denotes hazardous situations that lead to serious injuries or death. This symbol denotes hazardous situations that may lead to serious injuries or death. This symbol denotes hazardous situations that may lead to light or severe injuries. This symbol denotes situations that may lead to material damage or damage to the device. This symbol denotes information, tips and instructions for the efficient, correct use of the device. 18 Chapter 1: Introduction INTENDED USE The use of the device contrary to its intended use can endanger the health of the patient. CARAT II pro is used for continuous or intermittent respiratory support and for the ventilation of patients. The device is suitable for adults and children from a tidal volume of 50 ml and higher and is designed for home or clinical applications. CARAT II pro has both pressure- and volume-controlled ventilation modes. The ventilation can be invasive (e.g using a tracheostoma) or non-invasive (using a mask). CARAT II pro has the technical prerequisites to allow it to run with a single line patient circuit with exhalation valve or with a double line patient circuit as required. The device can be connected to a low-pressure source of oxygen for ventilation with increased oxygen concentration. There is also the option to combine CARAT II pro with an external humidifier. CONTRAINDICATIONS Ventilation may be contraindicated for certain pre-existing conditions. The following conditions may be a contraindication for non-invasive ventilation: • • • • • • • • Severe cardiac arrhythmia Severe hypotension Severe epistaxis Pneumothorax or pneumomediastinum Pneumoencephalus Cranial trauma Status after cranial or brain surgery Acute inflammation of the paranasal sinuses, middle ear infection or a perforated ear drum • Aspiration hazard In individual cases, the attending physician must decide on the therapy. Chapter 1: Introduction 19 SIDE EFFECTS The following undesired side effects may occur in connection with artificial respiration: Invasive ventilation: • Complications due to tube / tracheal cannula Mask ventilation: • Pressure points and skin defects in the face • Eye irritation due to leaks • Gastric inflation • Aspiration • Sinusitis • Nose bleeds General complications of mechanical ventilation: • Pulmonary barotrauma / volutrauma caused by ventilation • Ventilator-associated pneumonia • Effects on the cardio-vascular system 20 Chapter 1: Introduction CHAPTER 2 SAFETY INFORMATION This chapter contains safety instructions on the following topics: • General safety instructions • Electrical safety • Installation and transport • Commissioning • Use of oxygen • Safety-related test Chapter 2: Safety warnings 21 GENERAL SAFETY INSTRUCTIONS • Only qualified, trained, specialist medical staff under the supervision of a physician may make adjustments to the ventilator. The device must only be used by persons who have fully read and understood this user’s manual before undertaking and have familiarized themselves with the device. Disregarding these instructions can lead to life-threatening situations for the patient. • In cases of emergency, an alternative ventilation option, such as a second ventilator or an emergency ventilation bag, must be available at all times and for use by the attending person. • For patients who are unable to breathe independently or are completely dependent on the ventilation system, additional monitoring depending on and adapted to the disability is recommended. • The device must only be used on the responsibility and prescription of the physician. • The device must only be used on patients whose clinical record requires its application. • Please take the utmost care to ensure that the patient remains connected to the tubing circuit during ventilation. • The device must not be used with flammable anesthetics or ambient air that contains explosive gases. This may cause fires or explosions. • Before being used again on another patient, all parts that come into contact with respiratory gas must be hygienically prepared. • The directions given in this user’s manual and the applicable regulations of the hospital or nursing home must be adhered to when hygienically preparing and cleaning the device. • We recommend the use of the tube systems tested and approved for use by the manufacturer. Using other tube systems may lead to aberrant results. • Manufacturer tested and approved accessories are recommended for the device. If other accessories are used, this may lead to insufficient ventilation or the use of hazardous materials may lead to further, secondary complications. 22 Chapter 2: Safety warnings • When a nasal or full face mask is used for noninvasive ventilation, this mask must not contain any expiration opening. • If used with a single line patient circuit, the controlled expiration valve must not meet any resistance during exhalation and must allow quick ventilation of the ventilation tube system. • In order to ensure patient safety, the device must be operated in such a way that all adjustable alarms are activated and adjusted to the patient. • Alarms must not be ignored. They indicate conditions that require an immediate action. • An annual safety-related test and maintenance is required for the ventilator. • In case of exessive agitation on the part of the patient, there is a risk of hyperventilation in all ventilation modes with inspiration triggering. • The device must not be steam-sterilized in an autoclave. • Filters and other parts that are connected to the device must be regularly replaced. Please dispose of the used parts according to the regulations for used medical material and/or the local environmental protection rules. • The connection of accessories or other components to the respiratory system of the ventilator can lead to increased expiratory pressure at the patient connection opening. • Please ensure that the total resistance of the ventilation system does not exceed 6 hPa with a flow of 60 l/min for adults and 30 l/min for children. • Any modification to the device poses a threat to its reliability and is accordingly not permitted. • Masks may only be used on the prescription of a physician and after training by qualified medical staff. • Masks may only be used after training by qualified medical staff. The intake of medicines and possible contraindications and side effects associated with the use of the prescribed mask should be clarified. • Please note the operating, transport and storage conditions. Chapter 2: Safety warnings 23 • Temperatures lower than + 5 °C and higher than + 40 °C can impair the function of the device. • Please be sure to check the ventilation and alarm parameter settings after all servicing work. • Please ensure that no water has accumulated in the pressure measuring tube during ventilation. ELECTRICAL SAFETY • Only the supplied power supply unit may be used for operating the ventilator. • Respiratory therapy may be contraindicated for certain pre-existing conditions. • The device must never be located near other devices or equipment such as defibrillators, diathermy units, mobile phones, microwaves, remote controlled toys, etc. Electromagnetic fields that exceed 10 V/m may adversely affect the operation of the ventilator. • In order to disconnect the device from the mains supply, the plug must be pulled. • Before cleaning the device, the plug must be disconnected from the electrical outlet. • The use of accessories or power supplies, not approved by us for the ventilator, can increase the emission of electromagnetic radiation, reduce interference immunity or can lead to an increased patient leakage current. • During certain examinations or treatments, mutual interference between the ventilator and other medical devices may occur. Please observe the information regarding electromagnetic compatibility and monitor the devices with regard to error-free and proper operation. • Do not reach for the device under any circumstances if it falls into water. • Do not try to open the device. Maintenance and repairs may only be performed by personnel authorized by HOFFRICHTER GmbH. 24 Chapter 2: Safety warnings INSTALLATION REQUIREMENTS AND TRANSPORT • For operation, the device must be placed on a safe and level base. • The air inlet at the rear of the device, as well as all ventilation slots, must not be blocked. • Please ensure the device is operated in an area where there is sufficient and clean ambient air. • The display and the alarm LED's must not be covered and must be visible at all times. • No objects must be placed on the device. • The system must never be stored or transported at ambient temperatures under - 20 °C and over + 60 °C. • The device must not be exposed to direct sunlight. • Due to possible electromagnetic interference the ventilator may not be placed directly next to other devices in which the electromagnetic radiation is not CE compliant and/or the limits values exceed 10 V/m. If this is unavoidable, then the ventilator operation must be monitored for trouble-free and correct operation. • Do not locate the device near water containers (baths). Chapter 2: Safety warnings 25 INSTRUCTIONS BEFORE COMMISSIONING • An malfunctioning device can endanger the patient or operator. Should the appliance not start properly, or if the device's automatically carried out self-tests should fail, you must stop operating the device. In such cases, the service provider must be informed. • Locate the device in such a way that the mains plug is easily accessible and can be unplugged quickly in the event of a potential hazard. • Do not use the device if the housing or the cable of the device or the power supply are damaged. USING OF OXYGEN • Please be sure to observe the user’s manual of the manufacturer or distributor from whom you obtain the oxygen. • If the patient is supplied with oxygen via the device, the FiO2 should be measured. • CARAT II pro offers a FiO2 measurement via the optional FiO2 sensor. We recommend using this particular sensor exclusively. • The FiO2 sensor contains a caustic liquid. Avoid skin or eye contact if there is a sensor leak! Replace the sensor. • The oxygen supplied must not exceed a pressure of 1000 hPa and a flow of 15 l/min. The oxygen must be dosed using an external flow meter. • When supplying oxygen, please ensure that only dry gas (FiO2) is used. Increased residual moisture may lead to device defects. If necessary, a humidifier can be connected between the air outlet of the device and the patient. • The connection between the FiO2 connection and external FiO2 source must be absolutely airtight. Otherwise, leakage losses may occur during ventilation. • The oxygen supply should be stopped before the ventilation is interrupted. We further recommend that, after stopping the ventilation, the device is allowed to run for several respiratory cycles without an oxygen supply. 26 Chapter 2: Safety warnings • In the event of an oxygen leak, the oxygen supply should be closed off immediately. The room must be ventilated immediately. At the same time, any sparks, fire or potential flammable sources in the vicinity of the device must be avoided. • Oxygen supports combustion. Therefore, observe the fire protection regulations applicable for using oxygen. Please ensure that the oxygen fittings, as well as all ports and surfaces near the oxygen lines are free of grease. Do not smoke and do not handle naked flames. When using oxygen, an increased oxygen concentration in the ambient air can occur. SAFETY-RELATED TEST • In order to ensure the operating safety of the device, a safety-related test or maintenance must be carried out at the prescribed intervals. Chapter 2: Safety warnings 27 28 Chapter 2: Safety warnings CHAPTER 3 DESCRIPTION OF DEVICE This chapter describes the connections, operation and display elements of the device. Chapter 3: Description of device 29 FRONT SIDE CONNECTING POINTS 1 2 5 3 4 Figure 2: Connections at the front side of the device 1 Connection of tube circuit - inspiration The single line patient circuit or the inspiration section of a double line patient circuit is connected here. Refer to page 48 and page 49. 2 Connection of FiO2 sensor cable Connect the FiO2 sensor cable here for measuring the oxygen concentration. Refer to page 59. 3 Connection of pressure measuring tube Refer to page 48 and page 49. 4 Connection of tube circuit - expiration The expiration section of a double line patient circuit will be connected here. Refer to page 49. 5 Connection of control tube Refer to page 48. 30 Chapter 3: Description of device REAR SIDE CONNECTING POINTS 6 9 8 7 I 0 O2 SpO2 DC Com 13 12 10 11 Figure 3: Connections at the rear side of the device 6 DC connection The power supply plug is connected here. Refer to page 41. 7 Connection of SpO2 sensor A SpO2 sensor can be connected here. page 55. 8 SD card slot An SD card here can be inserted here. 9 FiO2 connection During oxygen input the oxygen source is connected here. Use the supplied oxygen connection adaptor for this purpose. Refer to page 57. SpO2 Chapter 3: Description of device 31 10 FiO2 output Oxygen monitoring: This is the exit for excess oxygen from the oxygen valve of the unit when ventilation has been turned off. Pressure monitoring: Excess oxygen pressure is exhausted to the outside from this exit during oxygen therapy. This is the case, when the pressure is higher than 1 hPa above the set ventilation pressure setting. In volume controlled modes, the value also opens when the measured breathing volume is more than 10 % higher than the set value. 11 USB interface (Connection of PC) A PC may be connected here with a USB cable (optional accessory). In order to be able to communicate with the device, the PC software "EASYset" must be installed on the PC. 12 Connection of remote alarm/nurse call An alarm box (optional accessory) or a nurse call system may be connected here. Refer to page 54. 13 RS232 interface (service interface) Accessories connection 32 Chapter 3: Description of device CONTROL ELEMENTS 14 15 20 I 0 16 17 18 19 Figure 4: Control elements 14 Alarm key The alarm key has several functions: Function Condition Action Confirm all current alarms Active alarms Press briefly Confirm no longer active alarms Stored alarms press briefly Mute the audible alarm for 2 min (audio alarm pause) Active alarms Press briefly Cancel the audible alarm suppression Audio alarm paused Press briefly When multiple events occur at the same time, only one event is confirmed each time the key is pressed, and in the order they are listed above. 15 ON/OFF key Function Action Start ventilation Press briefly Stop ventilation Refer to page 90 Chapter 3: Description of device 33 16 Multifunctional key MFK Function Action Select another parameter Turn Set parameters Turn Confirm parameter selection Press briefly Confirm modified parameter value Press briefly Open adjustment window for graphs and loops in the monitoring screen Press briefly The MFK is backlit (only when "MFK brightness" > 0 %). The color of the light depends on the operating status or the alarm priority of the currently displayed alarm. The backlight intensity of the MFK can be adjusted in the system screen. 17 18 19 Home key Function Action Return to the home screen Press briefly Escape key Function Action Exit the current screen Press briefly Leave selected parameter Press briefly Cancel Press briefly Safe key Function Action Activate key lock Press briefly and confirm with MFK Deactivate key lock Press briefly and confirm with MFK 20 Main switch Switch the device on and off with the main switch. For more information, refer to page 62. 34 Chapter 3: Description of device LED DISPLAYS 21 22 23 Figure 5: LED displays 21 22 Alarm LED The alarm LED lights/flashes in the event of an alarm. It also provides information on the alarm priority. Color Status (light) Priority Red Flashes HIGH Yellow Flashes MEDIUM Turquoise Glows steadily LOW Power LED The power LED gives information on the status of the power supply. Color Status (light) Status Green Glows steadily Mains operation Yellow Glows steadily Unacknowledged power failure White Flashes Device shuts down None Off Confirmed AC power failure or no mains voltage / battery power Chapter 3: Description of device 35 23 36 Battery LED The battery LED provides information on the state of the internal battery charge. Color Status (light) Battery charge state Green Glows steadily 60 % Yellow Glows steadily 20 % ... < 60 % Red Glows steadily 0 % ... 20 % White Flashes Device shuts down Chapter 3: Description of device MOVABLE AND REMOVABLE HOUSING PARTS 24 26 25 Figure 6: Left device side Figure 7: Right device side 24 Handle (pull-out) The handle may be pulled out for device transport. 25 Bottom flap Valve membrane (expiration) is located under the bottom flap. 26 Filter cassette The filter cassette contains the two air filters (coarse and fine filter). For information on how to replace and clean the filter, refer to page 107. Chapter 3: Description of device 37 38 Chapter 3: Description of device CHAPTER 4 COMMISSIONING • Before commissioning the device, read the safety information as from page 21 onwards. • Before commissioning the ventilation system (ventilator, tube, humidifier, etc.), check all connections for leaks, as well as the stability of the connected accessories. • Never operate the device without the air filter. • Only use Original HOFFRICHTER Filters. If the device was previously in an environment where the air temperature was not the same as in the new operating location, allow approximately 1 hour until the temperatures have evened out before commissioning. Chapter 4: Commissioning 39 SETTING UP THE DEVICE Place the device on a flat and stable surface. Make sure that the device is placed securely and that the air inlet at the rear of the device is not blocked. > 10 cm Figure 8: Setting up the device POWER SUPPLY The ventilator may be supplied by three different power sources. • Mains connection via switched-mode power supply unit • Internal battery • External battery pack (optional accessory) The ventilator automatically detects which power sources are available. If the device is connected to an external power source (power supply or external battery pack), it will always use this source first and then switch to the internal battery as needed. In each case, the used power source being drawn on will be indicated by the power LED or battery LED. 40 Chapter 4: Commissioning MAINS OPERATION 1. Insert the power supply plug into the DC connector socket. 2. Connect the mains cable to the power supply. 3. Insert the mains cable plug into the power socket (100 - 240 V, 50/60 Hz). A I 0 B D E C A Power socket B Mains cable C Power supply D Power supply plug E DC connector socket Figure 9: Mains connection via power supply unit 4. The device boots and performs the following hardware tests: • Testing the primary and secondary alarm sounds: Both alarm sounds give a short beep one-by-one. • Checking of other hardware components. If errors are detected during the hardware test, they will be displayed at the bottom left of the screen. Each error must be confirmed by pressing the MFK. Then the system switches to the home screen (see page 71). If the error message "System locked" appears, a serious error has occurred. The device should not be put into operation. In this case, contact your service provider. All error messages listed in the Table 11 on page 115. All three LEDs will glow white during the booting process. This allows the user to determine if the LEDs are working correctly. Chapter 4: Commissioning 41 A SW-Version 1.000 Quality makes the Difference 0x12 Primary Alarm Not Working B A Software version B Error message Figure 10: Start screen If no errors were detected during the hardware test or the errors have been confirmed, the display will switch to the standby screen. The current level of battery charge will be displayed on the standby screen. 90 % charging... Figure 11: Standby screen 5. Switch on the ventilator by the main switch (see page 62). 42 Chapter 4: Commissioning OPERATION WITH INTERNAL BATTERY To prevent the internal battery from discharging, the device should stay connected to the mains power during standby times. In order to ensure the full function of the battery, the battery must be maintained in accordance with the section "Battery maintenance" on page111 . With a fully charged battery the device can be operated up to 4 hours on the factory default settings. Table 1: Operating time with battery power and factory default settings Battery power level Time Alarm 100 – 10 % 199 min - 10 – 0 % 39 min Low Internal Battery 0 % – complete power loss 1 min Internal Battery Empty The internal battery enables operation of at least 1 hour at maximum power consumption. Information about the battery charge level is indicated by the battery LED and by touching the battery icon. If the alarm "Low Internal Battery" appears, the ventilator must immediately be connected to an alternative power source. The alarm will continue until the battery charge has exceeded 10%. Recharging a fully discharged battery takes approximately 3.5 hours. The device is fully functional during recharging. If the device switched on without having a connection to the mains supply, an audible alarm will sound, the alarm message "Battery Operation" will appear, and the alarm LED will flash yellow. The battery LED glows depending on state of charge. Chapter 4: Commissioning 43 POWER FAILURE During a power failure, the battery capacity display must be monitored and an alternative power source kept ready. For further details on the battery state display, please refer to page 36. If the power supply is interrupted by a power failure, the device is supplied with power via the internal battery. Power failure and thus the switch to the internal battery is indicated by an alarm sound, as well as by the message "Power Failure". In addition, the alarm LED flashes yellow and the power LED glows yellow. The battery LED glows according to the state of charge. When the power supply returns, the device is supplied with power from the mains supply and the internal battery is charged and the power LED glows green again. 44 Chapter 4: Commissioning OPERATION WITH EXTERNAL BATTERY Only the HOFFRICHTER AKKUPACK uni BASE may be used for the external power supply. Before initial commissioning, please read the user’s manual for AKKUPACK uni BASE. The AKKUPACK uni BASE enables the device to be operated independently of the mains power supply. The battery pack is optionally available as an accessory (see page 126). To supply the battery pack with power, use the power cable and the power supply unit of the ventilator. If the battery pack is connected to the ventilator, the power LED glows green. At full capacity and factory settings, the AKKUPACK uni BASE enables TRENDvent to operate for up to 8 hours. Using AKKUPACK uni BASE together with AKKUPACK uni PLUS doubles operation time to up to 16 hours. For further information on connecting and handling the device, please refer to the AKKUPACK uni BASE user’s manual. Figure 12: AKKUPACK uni BASE (right) / AKKUPACK uni PLUS (left) Chapter 4: Commissioning 45 CONNECTING EXTERNAL BATTERY "AKKUPACK uni BASE" Connect the AKKUPACK uni BASE to the device according to Figure 13. I 0 A D E BAS UPA CK un i AKK B C A DC port B DC cable for ventilation C DC out (device connection ) D AKKUPACK uni BASE Figure 13: Connecting AKKUPACK uni BASE 46 Chapter 4: Commissioning CONNECTING THE TUBE CIRCUIT The following decsribes it is described how to connect the tube circuit to the device. We recommend the use of bacterial filters, in particular for clinic operations, when using the device for more than one patient. Tubes and cables must always be positioned so that they cannot wrap around the neck or limbs of the patient, thus avoiding the risk of strangulation. Make sure that the bacterial filter is installed as shown in the illustrations. When using bacterial filters and a tube circuit without pressure measuring tube, a tube calibration must be performed. Otherwise the pressure measurement values may be incorrect. Please be sure to replace the bacterial filter daily and follow the manufacturer's user's manual. When a nasal or full face mask is used for noninvasive ventilation, the mask must not contain any expiration opening. Chapter 4: Commissioning 47 CONNECTING A SINGLE LINE PATIENT CIRCUIT If the CARAT II pro ventilator is operated with a single line patient circuit, it must not be used as a life-supporting device. Connect the tube circuit to the device according to Figure 14. Note: When using a bacterial filter, please read the instructions of use of this filter. If water collects in the tubes, we recommend the use of water traps. Single line patient circuits with water traps are available as an accessory (see page 124). Should you be using a tube circuit without pressure measuring tube, the circuit in use must be calibrated (see page 52). E D C TIE PA NT B A H G F A Patient side connection B Expiration valve C Ventilation tube D Bacterial filter E Adapter for bacterial filter F Pressure measuring tube G Control tube H Air outlet Figure 14: Connecting a single line patient circuit 48 Chapter 4: Commissioning CONNECTING A DOUBLE LINE PATIENT CIRCUIT Connect the tube circuit to the device according to Figure 15. Note: When using a bacterial filter, please read the instructions of use of this filter. If water should collect in the tubes, we recommend the use of water traps. Double line patient circuits with water traps are available as an accessory (see page 124). Should you be using a tube circuit without pressure measuring tube, the used circuit must be calibrated (see page 52). F E D TIE PA NT C B G H A A Patient side connection B Pressure measuring tube C Expiration tube D Inspiration tube E+H Bacterial filters F+G Adapters for bacterial filters Figure 15: Connecting a double line patient circuit Chapter 4: Commissioning 49 CONNECTING A HUMIDIFIER A humidifier is used to humidify the breathing air. If you use a humidifier, be sure to follow the manufacturer's user's manual. The humidifier is integrated into the inspiration section. It should be positioned below the patient and the device, so that no water can accumulate in the patient's lungs or in the device. If water accumulates in the tube circuit, we recommend using water traps. The respective tube circuits with water traps are available at HOFFRICHTER (see page 124). Note: When using a bacterial filter, please read the instructions of use of this filter. Single line patient circuit Connect the tube circuit to the humidifier and the device as shown in Figure 16. When using a tube circuit without pressure measuring tube, the used tube circuit must be calibrated page 52). C B D A F E J TIE PA NT G H I A Patient side connection B Expiration valve C Ventilation tube D Connecting tube for inspiration E Bacterial filter F Adapter for bacterial filter G Control tube H Pressure measuring tube I Humidifier J Air outlet Figure 16: Connecting the humidifier - single line patient circuit 50 Chapter 4: Commissioning Double line patient circuit Connect the tube circuit to the humidifier and the device according to Figure 17. When using a tube circuit without pressure measuring tube, the used tube circuit must be calibrated (see page 52). C D B F E TIE PA NT A J G H I A Patient side connection B Pressure measuring tube C Expiration tube D Connecting tube for inspiration E+H Bacterial filters F+G Adapters for bacterial filters I Humidifier J Inspiration tube Figure 17: Connecting the humidifier - double line patient circuit Chapter 4: Commissioning 51 CALIBRATING THE TUBE CIRCUIT The tube calibration must be performed only by using a tube system without measuring tube. A tube calibration should be performed after an interruption in the power supply (on/off switching when running on battery power) and if changes have been made to the circuit system. These may include connecting and disconnecting of the following components, for example: • Bacterial filter, humidifier, tube circuit, mask, FiO2 sensor, water trap, etc. If you do not perform a tube calibration, the stored standard calibration data is used for the tube calibration. After starting the ventilation a message box (see Figure 18) is displayed. Although the ventilation is continued, however, the pressure measurement may be incorrect. A tube calibration is therefore recommended. Attention! Tubeless Pressure Measurement! Stored Calibration Data are used. Press the MFK to Continue Figure 18: "Measurement without pressure tube" message box To calibrate the tube circuit: 1. Disconnect the tube circuit from the patient. The patient side connection of the tube circuit must be unobstructed and left open to the air during tube calibration (a mask may be connected). 2. Navigate to "System" in the home screen by turning the MFK. 3. Press the MFK. 52 Chapter 4: Commissioning 4. Navigate to "Calibrate Tube" by turning the MFK. Calibrate Tube FiO2-Monitoring Internal Calibrate FiO2 Sensor Alarm Volume 3 Brightness Display 50 % Brightness LEDs 10 % Brightness MFK 10 % 5. Press the MFK. Tube calibration begins. Run... Calibrate Tube FiO2-Monitoring Internal Calibrate FiO2 Sensor Alarm Volume 3 Brightness Display 50 % Brightness LEDs 10 % Brightness MFK 10 % 6. If the calibration was successful, "OK" will appear after a few seconds. If the calibration was not successful, "Error" will display. In the event of an error, check the entire system. Resistance in the overall system may be too high. You may, for example, have to exchange the bacterial filter(s) or use another humidifier. Then rerun the calibration. Calibrate Tube FiO2-Monitoring Ok Internal Finish calibration Calibrate FiO2 Sensor Alarm Volume 3 Brightness Display 50 % Brightness LEDs 10 % Brightness MFK 10 % 7. Press the MFK to exit the tube calibration process. Chapter 4: Commissioning 53 CONNECTING THE ALARM BOX OR THE NURSE CALL Connect the alarm box to the device as shown in Figure 19. A I 0 B C A Alarm box B Remote alarm/nurse call connection C Alarm box cable Figure 19: Connecting alarm box Alarm boxes are available as an accessory (see page 127). An on-site nurse call can also be connected to the remote alarm/nurse call connection point as well. You will need a cable with a RJ10 plug to do this. The cables are available as an accessory (see page 127). Additional information on alarm boxes and forwarding alarms is available in the section "Forwarding alarms" on page96. 54 Chapter 4: Commissioning SpO2 SENSOR CONNECTION Connect the SpO2 sensor to the device as shown in Figure 20. The toolbar will then show the Sp O2 icon. If the sensor is connected to the patient, the oxygen saturation and heart rate are displayed in the monitoring screen; if ventilation is in progress, it will also show in the parameter screen. B A A SpO2 finger clip sensor B SpO2 sensor connection Figure 20: Connecting the SpO2 sensor Chapter 4: Commissioning 55 INSERTING THE SD CARD Insert the SD card into the SD card slot until it clicks into place as shown in Figure 21. The toolbar will then show the icon. Qual ity mak es the Diffe renc e Figure 21: Inserting SD card SD and SDHC cards up to 32 GB may be used. More information on SD cards is available on page 114. REMOVING THE SD CARD Remove the SD card only when the device is turned off and is disconnected from the main power supply to ensure that the data storage of the SD-card is not damaged. The device is completely shut down when the power and battery LEDs no longer flash after the device has been turned off. Gently press the card into the SD card slot and remove the card. Figure 22: Removing SD card 56 Chapter 4: Commissioning USING OXYGEN Before using oxygen, the safety instructions must be read as of page 26. Oxygen may only be supplied during active ventilation. The supply of oxygen is possible in all ventilation modes. Please note that any changes to the ventilation parameters, as e.g. pressure, I:E, frequency, will lead to a change of the FiO2 concentration. CONNECTING THE OXYGEN SOURCE Only the oxygen connection adapter supplied may be used to connect oxygen. Otherwise, there is a risk that the back-stop in the connection is damaged. Connect the oxygen source to the device as shown in Figure 23. A B C A Oxygen connection B Oxygen connection adapter, straight C Tube from the oxygen source Figure 23: Connecting the oxygen source (rear of unit) Chapter 4: Commissioning 57 MEASURING OXYGEN CONCENTRATION The oxygen concentration may be inconsistent when feeding in a fixed value oxygen flow (FlowO2). The inspirational oxygen concentration (FiO2) can vary depending on pressure, ventilation pattern of the patient, mask or leakage. The oxygen concentration should therefore always be measured with a FiO2 sensor when oxygen is being supplied (see accessories on page 125). The FiO2 sensor must be calibrated for exact results (see page 59). In addition, the device will allow you to measure the inspiratory oxygen concentration FiO2 with an external monitoring device during oxygen therapy, under the supervision of a physician. The FiO2 monitoring device should be connected according to the manufacturer's instructions before commissioning the ventilator. It must also be equipped with an alarm system which is able to detect an alarm event for unacceptably high oxygen content. The measuring of the oxygen concentration with an external FiO2 monitoring device must be set up in the system screen by a physician. The factory default is set to a measuring with a FiO2 sensor (FiO2 monitoring "Internal") STARTING THE SUPPLY OF OXYGEN Use only certified and clean oxygen sources. 1. Switch the device on. 2. Start ventilation and wait for several respiratory cycles. 3. Start supplying the oxygen. STOPPING THE SUPPLY OF OXYGEN 1 Stop the supply of oxygen at the oxygen source. 2 Continue ventilation for a number of respiratory cycles. 3. Stop ventilation. 58 Chapter 4: Commissioning CALIBRATING THE FiO2 SENSOR Calibration is done in relation to the ambient air with an assumption of an oxygen content of 21 %. Automatic calibration when the device is switched on (recommended) When the device is switched on and you connect the FiO2 sensor to the device, the FiO2 sensor will be calibrated automatically. The FiO2 value readout will be displayed in the monitoring screen. Automatic calibration during running ventilation If the FiO2 sensor is disconnected and reconnected during ventilation, then the oxygen supply is interrupted for at least 30 seconds, so that the oxygen content in the FiO2 therapy air is reduced. After successful calibration, the oxygen supply is restored and the FiO2 values will be displayed in the monitoring screen again. Manual calibration A manual calibration may be performed in the system screen at any time. During continuous oxygen therapy we recommend manual calibration of the FiO2 sensor once a week. To calibrate the FiO2 sensor: 1. Make sure that the ventilator has been switched off. 2. Install the FiO2 sensor according to Figure 24. Tip: Plug and screw the straight plug of the connecting line (A) to the device and then connect the right-angled to with the FiO2 sensor. A B C E D A Connecting line B FiO2 sensor C Housing gas duct D T adapter E Tube circuit Figure 24: Connecting the FiO2 sensor (single line patient circuit example) Chapter 4: Commissioning 59 3. Navigate to the system screen using the MFK . Press the MFK. 4. Navigate to "Calibrate FiO2 Sensor" by turning the MFK. Calibrate Tube FiO2-Monitoring Internal Calibrate FiO2 Sensor Alarm Volume 3 Brightness Display 50 % Brightness LEDs 10 % Brightness MFK 10 % 5. Press the MFK. Calibration begins. 6. If the calibration was successful, "OK" will appear after a few seconds. If the calibration was not successful, "Error" will display. In the event of an error, repeat the calibration. If the calbration is still unsuccessful, replace the FiO2 sensor. Calibrate Tube FiO2-Monitoring 21% Internal Ok Finish calibration Calibrate FiO2 Sensor Alarm Volume 3 Brightness Display 50 % Brightness LEDs 10 % Brightness MFK 10 % 7. Press the MFK to end the FiO2 sensor calibration. Depending on environmental conditions and the storage time, the sensor may take up to 15 minutes after connecting to reach signal stability again. FiO2 sensors have a limited service life. The service life of the sensors is approx. 1 year at a oxygen concentration for about 40 %. After that, the FiO2 sensor must be replaced by a new one. The sensor should not be storaged more than 6 month. For the longest possible sensor service life, we recommend storage at +5 °C to + 30 °C. 60 Chapter 4: Commissioning USING THE FUNCTIONAL BAG Use only the original HOFFRICHTER functional bag. We recommend using our functional bag for transporting the CARAT II pro on wheelchairs, walkers or in transport vehicles. The functional bag is available as an accessory (see page 127). Figure 25: Functional Bag When using the device in the functional bag the following instructions must be observed to ensure safe and trouble-free operation: • Set the alarm sound to level 3. • Make sure that all alarm messages are visible through the viewing window and that the air vents of the bag are not blocked. The air supply for the device must be guaranteed at all times. • Use the bag in such a way that the device is protected from overheating, dust and water. • All accessories connected, such as tube, filter, supply lines, etc, must be arranged so that they cannot cause any malfunctions of the device. Chapter 4: Commissioning 61 SWITCHING THE DEVICE ON The tube circuit may be connected when the device is started up, but it may not yet be connected to the patient yet. If you are using oxygen therapy during ventilation, please note the section "Using oxygen" from page 57. To switch on the device: 1. Press the main power switch on the back of the device (position "I"). I I 00 Figure 26: Switching on the device 2. The home screen (see page 71) will be displayed. SWITCHING THE DEVICE OFF 1. Stop the ventilation. 2. Switch off the power with the main power switch on the rear panel (position "0"). I 0 Figure 27: Switching off the device 62 Chapter 4: Commissioning CHAPTER 5 VENTILATION MODES The device has three types of ventilation modes: • Mandatory ventilation modes, where the device performs the respiratory work for the patient completely. • Augmented ventilation modes, where the device performs part of the respiratory work, alternating or overlapping with the patient's breathing rate. • Spontaneous ventilation modes, where the patient does the respiratory work with the support of the device. The patient determines the frequency. Respiratory work Device (%) Respiratory work Patient (%) M a n d a t o r y S p o n t a n e o u s Augmented Figure 28: Ventilation modes overview Chapter 5: Ventilation modes 63 Table 2: Overview ventilation modes Mode Description Mandatory ventilation modes PCV Pressure Controlled Ventilation APCV Assisted Pressure Controlled Ventilation VCV Volume Controlled Ventilation AVCV Assisted Volume Controlled Ventilation Augmented ventilation modes P-SIMV Pressure Controlled Synchronized Intermittent Mandatory Ventilation V-SIMV Volume Controlled Synchronized Intermittent Mandatory Ventilation Spontaneous ventilation modes CPAP Continious Positive Airway Pressure PSV Pressure Supported Ventilation PSV-S Pressure Supported Ventilation-Spontaneous 64 Chapter 5: Ventilation modes CHAPTER 6 DEVICE OPERATION This chapter decribes the device operation in more detail. KEY LOCK The key lock function is designed to protect against the accidental changing of device settings. It deactivates all control functions, except: • ON/OFF key to start ventilation • ON/OFF key + MFK to stop the ventilation • Alarm key LOCK/UNLOCK KEYS 1. Press the Safe key. Flashes on the toolbar for about 5 s. 2. Press the MFK during that time. USER PROFILES The device can operated in 2 different profiles - Clinic and Home. The user has access to all device settings in the clinic mode. In contrast, the ventilation and alarm parameters cannot be set up in the home mode. The currently active user profile displays in the toolbar. PCV 22:33 A A "Clinic", "Home" Figure 29: User profile in the toolbar Chapter 6: Device operation 65 MENU STRUCTURE • Home screen Monitoring screen Measurements (p, VI, VE, MV, f, I:E, FiO2, SpO2, HF) Graphs (p, V, V, FiO2) Loops (V-Flow-Loop, p-V-Loop) Parameter screen Set 1 Set 2 Set 3 Alarm log screen System screen Statistics screen Service screen BASIC OPERATION Use the control elemtents on the right or the touch screen to operate the device. OPERATING WITH CONTROL ELEMENTS The control elements functions are described starting with page 33. 66 Chapter 6: Device operation TOUCH SCREEN OPERATION The following operations can be initiated with the touch screen: 60 60 Calibrate Tube FiO2-Monitoring Alarm Volume Monitoring Alarm Log Parameter System Statistics Service Brightness LEDs 10 % Brightness MFK 10 % Language 22:33 PCV 22:33 Graphs Loops Measurements 60 24 12 p [hPa] 6 0 3 6 9 12 15 18 21 24 27 -600 V [l] 3 6 9 12 15 18 21 24 27 -600 30 300 0 3 6 9 12 15 18 21 24 27 30 t [s] 22:33 Freeze real-time curve on the monitoring screen Select tab Measurements V [l] Graphs 0 3 600 Flow [l/min] 300 0 Loops -600 V [l] 15 18 24 Graph 3 21 Time 12 0 3 6 9 12 Measurements 3 6 p [hPa] 15 18 21 24 27 30 15 18 21 24 27 30 t [s] Graphs Loops 18 Battery State 12 0 30 Pressure Auto Scale 0 27 9 On 12 15 18 21 0 3 6 9 12 15 600 Flow [l/min] 300 0 27 -600 30 300 0 V [l] 18 21 24 27 30 24 27 30 24 27 30 90 % charging... -300 24 600 -600 0 6 6 12 Graph 1 9 Graph 2 -300 9 Press the MFK to Continue 22:33 60 Type -300 6 300 Continue real-time curve Show errors on the monitoring screen (if present) Settings 6 30 24 12 0 27 PCV 18 3 24 600 -600 24 p [hPa] 0 Error Error FiO Sensor15 6 9 2 12 18 21 Primary Alarm Not Working -300 0 PCV 60 3 -300 0 600 -600 0 600 Flow [l/min] 300 0 -300 12 0 30 -300 Loops 18 6 0 600 Flow [l/min] 300 0 Graphs 24 18 hPa Seconds Parameter selection Measurements English Display Time Insp. Screen selection p [hPa] 50 % Pressure Unit PCV 60 3 Brightness Display Internal Calibrate FiO2 Sensor 0 3 6 9 12 15 18 21 600 Press the MFK to Continue 300 0 -300 0 3 6 PCV Open settings window 9 12 15 18 21 24 27 30 t [s] 22:33 -600 0 3 6 9 12 15 18 21 PCV t [s] 22:33 Show battery state Chapter 6: Device operation 67 BASIC SCREEN LAYOUT A B 60 Monitoring Parameter Alarm Log System Statistics Service PCV 1:45 Low Frequency D 22:33 C A Pressure bar (during running ventilation) B Screen content C Toolbar D Active ventilation mode Figure 30: Basic screen layout 68 Chapter 6: Device operation EXPLANATION OF TOOLBAR ICONS Icon Meaning Clinic mode active Home mode active Alarm active Red icon High priority alarm Yellow icon Medium priority alarm Turquoise icon Low priority alarm Audio alarm paused The audible alarm has been paused for 2 min. The audible alarm of even a new alarm event will also be paused for 2 min. The audible alarm may be deactivated by pressing the alarm key before an alarm event occurs. Pressing the key again reactivates the audible alarm in case an alarm event has occurred. 1:45 Counter "Audio alarm paused counter" Indicates how much longer the audible alarm will be paused. Key lock activated The functions of all controls are disabled, except for the ON/OFF and alarm key. FiO2 sensor connected "FiO2-Monitoring" setting has been set to "External" in the system screen. Measurement of oxygen concentration is performed with an external FiO2Monitoring unit. Oxygen is supplied Spontaneous breathing detected The device has detected spontaneous breathing by the patient. This triggered the inspiration trigger. The icon will remain visible during inspiration and will shut off with the beginning of the expiration. Chapter 6: Device operation 69 Icon Meaning Trigger lock "On" Trigger lock momentarily active SD card is inserted into the device No SD card inserted into the device Sp O2 SpO2 sensor connected PC is connected via the USB port Error detected Selecting this icon results in a list of all current errors (see "Error messages" on page115). Internal battery fully charged Internal battery being charged (1 bar ≙ 20 % of charge) 70 Chapter 6: Device operation ENABLING A SCREEN The following screens are accessible from the home screen: • Monitoring screen Monitoring measurements (numerical and graphs) • Parameter screen Ventilation and alarm parameters of the active ventilation mode • Alarm log screen Display of alarms with time stamp and measurements • System screen System settings, calibrations, counters and device information • Statistics screen Statistical evaluation reports • Service screen System calibration and tests for service work (PIN code protected) A 60 Monitoring Parameter Alarm Log System Statistics Service PSV 22:33 A Selected screen icon Figure 31: Home screen Chapter 6: Device operation 71 To enable a screen: 1. Navigate to the desired screen by turning the MFK. The selected screen icon Black Icon not selected Blue 2. Press the MFK to activate the selected screen. During active ventilation the device will switch to the monitoring screen 2 minutes after the last completed operation. If ventilation is not active the device will switch over to the home screen after 2 minutes. 72 Chapter 6: Device operation MONITORING In the monitoring screen the ventilation parameters are shown in real-time. The monitoring screen is divided into three sections: • Measurements • Graphs • Loops MEASUREMENTS DISPLAY The "Measurements" section displays the following ventilation parameters when ventilation is running: • Pressure (p), • Inspiration volume (VI), • Expiration volume (VE), • Minute ventilation (MV), • Frequency (f) • Inspiration to expiration ratio (I:E) • FiO2 concentration (FiO2) (only using a FiO2 sensor) • Oxygen saturation (SpO2) (only using an SpO2 sensor) • Heart rate (HR) (only using an SpO2 sensor) The measured values are displayed on the parameter screen during active ventilation. Chapter 6: Device operation 73 How to call up to the data: 1. Navigate to "Monitoring" in the home screen by turning the MFK: 2. Press the MFK. A 60 Measurements Graphs Loops 19,8 12 1:1,5 0,570 VI FiO2 [bpm] I:E 6,840 [l] MV [%] SpO2 60 f [hPa] p C B 0,570 [l] VE [%] HR 98 [l] 76 [bpm] PCV 22:33 I H G F E D A Pressure B Frequency C I:E ratio D Heart rate E Expiration volume F SpO2 saturation G Minute ventilation H FiO2 concentration I Inspiration volume Figure 32: Monitoring screen (data) 74 Chapter 6: Device operation GRAPHS DISPLAY Depending on your settings, "Curves" will graphically display the following ventilation parameters during running ventilation: • Pressure (p), • Flow (V), • Volume (V) • Oxygen FiO2 How to call up to the graphs: 1. Navigate to "Monitoring" in the home screen by turning the MFK: 2. Press the MFK. 3. Navigate to "Graphs" by turning the MFK. Measurements 60 Graphs Loops 24 p [hPa] 18 A 12 6 0 0 3 6 9 12 15 18 21 24 27 30 0 3 6 9 12 15 18 21 24 27 30 0 3 6 9 12 15 18 21 24 27 30 600 Flow [l/min] 300 0 -300 -600 V [l] 600 300 0 -300 -600 PCV t [s] 22:33 A Automatic scaling is on Figure 33: Monitoring screen (graphs) Chapter 6: Device operation 75 Freezing the real-time curve: 1. Press the pause symbol . Measurements 60 Graphs Loops 24 p [hPa] 18 12 6 0 0 3 6 9 12 15 18 21 24 27 30 0 3 6 9 12 15 18 21 24 27 30 0 3 6 9 12 15 18 21 24 27 30 600 Flow [l/min] 300 0 -300 -600 V [l] 600 300 0 -300 -600 PCV 22:33 Figure 34: Monitoring screen (freeze graphs) 2. Press the start symbol to restart the real-time curve 76 Chapter 6: Device operation t [s] . DISPLAY LOOPS Depending on your settings, you may display the following loops graphically in "Loops", while ventilation is running: • Flow-Volume-Loop • Volume-Pressure-Loop Flow-Volume-Loop Flow 100 [l/min] 50 0 50 -100 V 0 0,200 Current breath 0,400 0,600 [l ] Last breath Figure 35: Flow-Volume-Loop Volume-Pressure-Loop V 0,800 [ l] 0,600 0,400 0,200 0 p 0 5 Current breath 10 15 20 25 [h Pa ] Last breath Figure 36: Volume-Pressure-Loop Chapter 6: Device operation 77 How to call up to "Loops": 1. Navigate to "Monitoring" in the home screen by turning the MFK. 2. Press the MFK. 3. Navigate to "Loops" by turning the MFK. Measurement 60 Flow Graphs Loops 100 [l/min] 50 0 50 -100 V 0 PCV Figure 37: Flow-Volume-Loop 78 Chapter 6: Device operation 0,200 0,400 0,600 [l ] 22:33 ACTIVATING A VENTILATION SET How to call up to the set settings: 1. Navigate to "Parameter" in the home screen by turning the MFK 2. Press the MFK. 60 Set 1 Set 2 Set 3 Mode PCV IPAP 20,0 hPa PEEP 5,0 hPa Frequency 12 bpm Time Inspiration 2,0 s Ramp 3 Minimum Volume Off Sigh Function Off High Inspiration Volume PCV 1,00 l 19,8 p [ hPa] 12 f [ bpm ] 1:1,5 0,570 I:E VI [l] 6,840 0,570 MV [l] 60 FiO2 [%] 76 HR [ bpm ] VE [l] 98 SpO2 [%] 15 Leck. [ l/min] 22:33 Figure 38: Parameter screen The active setting is highlighted in green and has a check mark . Chapter 6: Device operation 79 To activate a ventilation set: 1. Navigate to the ventilation set you wish to activate by turning the MFK. Set 1 Set 2 Activate Set Set 3 No Mode PSV IPAP 20,0 hPa PEEP 5,0 hPa Frequency 12 bpm Time Inspiration 2,0 s 2. Press the MFK twice. Set 1 Set 2 Activate Set Set 3 No Mode PSV IPAP 20,0 hPa PEEP 5,0 hPa Frequency 12 bpm Time Inspiration 2,0 s 3. Change the setting to "Yes" by turning the MFK. Set 1 Activate Set Set 2 Set 3 Yes Mode PSV IPAP 20,0 hPa PEEP 5,0 hPa Frequency 12 bpm Time Inspiration 2,0 s 4. Press the MFK to confirm the new setting. 80 Chapter 6: Device operation DISPLAY OF STORED ALARMS How to call up the alarm log screen: 1. Navigate to "Alarm log" in the home screen by turning the MFK. 2. Press the MFK. 3. You can move between the alarm entries by turning the MFK. A 60 B 04.07.13 22:35 Low Internal Battery 04.07.13 23:16 Low Inspiration Volume 05.07.13 02:24 Low Pressure 05.07.13 05:04 Power Failure 05.07.13 21:55 High Minute Ventilation 06.07.13 02:46 Stenosis 08.07.13 03:24 Low Inspiration Volume 12.07.13 00:10 Disconnection 12.07.13 04:12 Check Expiration Outlet 18.07.13 22:18 Low Pressure PCV 22:33 A Alarm priority B Selected alarm Figure 39: Alarm log screen For more information on the alarms, refer to chapter "Alarms and messages" starting on page 91 Chapter 6: Device operation 81 SYSTEM SETTINGS In the system screen basic device settings, calibrations and tightness check can be made. Selecting the system screen device information can be obtained. Adjustable (Home profile) Menu item Explanation Calibrate Tube Calibrating the connected tube circuit (see page 52) FiO2-Monitoring Setting, if oxygen concentration measurements are to be taken with internal FiO2 monitoring or with external FiO2 monitoring - Calibrate O2 Sensor Calibrating the FiO2 sensor (see page 59) Alarm Volume Volume of the primary alarm sound Brightness Display Brightness of the display Brightness LEDs Brightness of the alarm LED, power LED and battery LED Brightness MFK Background lighting brightness of the multifunctional key Language Setting the device language - Pressure Unit Setting the device pressure unit - Display Time Insp. Setting to etablish whether the inspiration time can be set in seconds or as I:E ratio in the parameter screen - Date and Time Date and time settings Number of Ventilation Sets Setting to etablish how many ventilation sets is displayed in the parameter screen User Profile Setting the user profile Clinic: full access to all settings Home: restricted access to the settings - - Tightness Check Here you can perform a tightness check. The tightness check serves to detect leaks in the tube circuit. - Recent Ventilation Hours Ventilation hours since the last reset - Ventilation Hours Total Total ventilation hours (can be reset with PC software) - 82 Chapter 6: Device operation Adjustable (Home profile) Menu item Explanation Standby Hours Hours, during which the device was turned on (without ventilation hours) - Blower Service in Number of hours after which the blower must be replaced - SW-Version Software version of the device - Serial Number Serial number of the device - Chapter 6: Device operation 83 SYSTEM SETTING CHANGES How to call up to the system settings: 1. Navigate to the home screen by turning the MFK to "System": 2. Press the MFK. Calibrate Tube FiO2-Monitoring Internal Calibrate FiO2 Sensor Alarm Volume Brightness Display 50 % Brightness LEDs 10 % Brightness MFK 10 % Language Pressure Unit Display Time Insp. PCV Figure 40: System screen 84 3 Chapter 6: Device operation English hPa Seconds 22:33 To change the system settings (e.g. alarm volume): 1. Navigate to the desired parameter by turning the MFK. Calibrate O2 Sensor Alarm Volume 3 Brightness Display 50 % Brightness LEDs 10 % 2. Press the MFK. Calibrate O2 Sensor Alarm Volume 3 Brightness Display 50 % Brightness LEDs 10 % 3. Change the setting by turning the MFK. Calibrate O2 Sensor Alarm Volume 3 Brightness Display 70 % Brightness LEDs 10 % 4. Press the MFK to confirm the new setting. Chapter 6: Device operation 85 DATE AND TIME CHANGES To change the date and time: 1. Navigate to "System" in the home screen by turning the MFK: 2. Press the MFK. 3. Navigate to "Date and Time" by turning the MFK. Date and Time Number Ventilation Sets User Profile 13.02.14 10:36 3 Home Tightness Check Recent Ventilation Hours 65 h Ventilation Hours Total 342 h Standby Hours 622 h 4. Press the MFK. Date and Time Number Ventilation Sets User Profile 13.02.14 10:36 3 Home Tightness Check Recent Ventilation Hours 65 h Ventilation Hours Total 342 h Standby Hours 622 h Year Month 2014 2 Day 13 Hour 10 Minute 36 5. Navigate to the desired parameter by turning the MFK. Date and Time Number Ventilation Sets User Profile 13.02.14 10:36 3 Home Tightness Check Recent Ventilation Hours 86 65 h Ventilation Hours Total 342 h Standby Hours 622 h Chapter 6: Device operation Year Month 2014 2 Day 13 Hour 10 Minute 36 6. Press the MFK. Date and Time Number Ventilation Sets User Profile 13.02.14 10:36 3 Home Tightness Check Recent Ventilation Hours 65 h Ventilation Hours Total 342 h Standby Hours 622 h Year Month 2014 2 Day 13 Hour 10 Minute 36 7. Change the setting by turning the MFK. Date and Time Number Ventilation Sets User Profile 13.02.14 10:36 3 Home Tightness Check Recent Ventilation Hours 65 h Ventilation Hours Total 342 h Standby Hours 622 h Year Month 2014 2 Day 28 Hour 10 Minute 36 8. Press the MFK to confirm the new setting. Chapter 6: Device operation 87 STATISTICS The statistics screen contains statistical evaluations of the following ventilation parameters. • Minute volume • Frequency • SpO2 • Leak Rate • Tidal Volume • I:E Ratio The evaluation of the ventilation parameters is based on percentiles. Percentiles are the dispersion measurement of the statistical data distribution during ventilation sessions. An example based on frequency 25 during 95 % of the day's therapy duration the frequency was 24 bpm during 75 % of the day's therapy duration the frequency was 22 bpm f [ bpm ] 20 during 50 % of the day's therapy duration the frequency was 15 bpm 15 during 25 % of the day's therapy duration the frequency was 12 bpm during 5 % of the day's therapy duration the frequency was 10 bpm 10 0 88 08 Chapter 6: Device operation How to call up to the statistical values: 1. Navigate to the home screen by turning the MFK to "System": 2. Press the MFK. 5% 25% Median 75% 95% 60 25 f [ bpm ] 20 15 10 0 08 09 10 11 12 13 14 15 16 17 18 19 20 21 22 23 24 25 26 27 28 29 30 31 01 02 03 04 05 06 PCV Jan/14 Feb/14 22:33 Figure 41: Statistics screen (1 ventilation parameter) Chapter 6: Device operation 89 STARTING VENTILATION The expiration valve air outlet has to be open during running ventilation. Make sure that the opening is not blocked as the expired air will be unable to escape and will affect the ventilation process. 1. Switch on the device using the main power switch on the rear of the device 2. Press the ON/OFF key . Ventilation begins. STOPPING VENTILATION 1. Press the ON/OFF key . Measurements 60 Graphs Loops 24 p [hPa] 18 12 Stop Ventilation 6 0 0 3 6 9 12 15 18 21 24 27 30 21 24 27 30 24 27 30 600 Flow [l/min] 300 0 Stop Ventilation? -300 -600 V [l] 0 3 6 9 12 15 18 Yes 600 No 300 0 -300 -600 0 3 6 9 12 15 PCV Figure 42: Stop ventilation 2. Navigate to "Yes" by turning the MFK. 3. Press the MFK. 90 Chapter 6: Device operation 18 21 t [s] 22:33 CHAPTER 7 ALARMS AND MESSAGES This chapter describes alarms and messages, their cause, and what measures need to be taken in case of an alarm event. Chapter 7: Alarms and messages 91 GENERAL INFORMATION The device must be operated so that the alarm is audible and visible by the user. Audible alarms can be forwarded using the nurse call or the alarm box. The CARAT II pro ventilator is equipped with fixed and adjustable alarms, relating to the respective ventilation modes. There are 3 alarm priorities: Alarm priority What action is required? HIGH Immediate action is required. Monitor the patient and the cause of the alarm closely. MEDIUM Fast action is required for medium priority alarms. Correct the cause of the alarm. LOW User attention is requested for low-priority alarms. Low-priority alarms indicate a change at "normal" device operation. Check the cause of the alarm. ALARM SOUND TEST A hardware test is performed with each device start-up. The primary and secondary alarm sound transmitters are tested (see page 41). Both alarm sound transmitters must emit a short beep in sequence. Otherwise, an error message is issued and the device must be returned for servicing. 92 Chapter 7: Alarms and messages AUDIBLE ALARM OUTPUT (AUDIO ALARMS) Audio alarms are issued in a sequence of beeps. Alarm tones differ depending on alarm cause and priority. For more information, please see page 97. If the alarm sound equipment is defective and emits no sound, the audible alarms will be triggered by a second alarm sound transmitter which emits only a simple audible alarm. An audio alarm will switch off when the alarm event is no longer fulfilled and the priority has been lowered but the alarm will stay in active until it has been confirmed with the alarm key. TO TEMPORARILY MUTE AUDIO ALARMS (AUDIO ALARM PAUSED) Audio alarms can be muted for 2 minutes by pressing the alarm key (audio alarm paused). If this function is enabled, the audible alarm created by new alarm events will also be suppressed as well. The alarm LED will visibly indicate an alarm event, even when the audible alarm has been temporarily suppressed. If the cause of the alarm is not corrected, the audible alarm will sound again after two minutes. The audio alarm may also be suppressed by pressing the alarm key even before an alarm event occurs, e.g. before the tube circuit is temporarily disconnected for suctioning the patient. The audio alarm can be reactivated after correcting the alarm cause, even within the two minute period, by pushing the alarm key again. icon will indicate when the audio alarm is temporarThe "Audio alarm paused" ily switched to mute. The counter tracks the time until the audio alarm will sounds again. 1:45 Low Frequency PCV A 22:33 B A "Audio alarm paused" icon B "Audio alarm paused" counter Figure 43: Alarm displays in the toolbar The "Internal Battery Empty" audible alarm cannot be set to pause while the device is in battery operation. Chapter 7: Alarms and messages 93 VISIBLE ALARM OUTPUT Visible alarms are displayed as follows: • via the alarm LED • in the toolbar • as a textbox • lighting up the multifunctional key ALARM OUTPUT VIA THE ALARM LED The alarm LED may take on 3 different statuses, to signify the current alarm priority. • Red, flashes rapidly (2 Hz) high-priority alarm • Yellow, flashes (0.5 Hz) medium-priority alarm • Turquoise, glows steadily low-priority alarm If multiple alarms are triggered simultaneously or in quick succession, the alarm with the highest priority will be displayed first. More information on alarm LEDs is available on page 35. ALARM OUTPUT IN THE TOOLBAR Alarms are shown in the toolbar by the "Alarm active" icon and displayed with an alarm message. The icon's color indicates the alarm priority: • Red icon high-priority alarm • Yellow icon medium-priority alarm • Turquoise icon low-priority alarm If multiple alarms are triggered simultaneously or in quick succession, the alarm with the highest priority will be displayed first. 1:45 Low Frequency PCV A B A "Alarm active" icon B Alarm Figure 44: Alarm output in the toolbar 94 Chapter 7: Alarms and messages 22:33 ALARM OUTPUT AS A TEXTBOX 120 seconds after the last performed operation the alarms will also display in a textbox as well. The textbox will disappear as soon as you press the alarm key. The textbox color corresponds to the highest priority alarm: • Red textbox high-priority alarm • Yellow textbox medium priority alarm • Turquoise textbox low-priority alarm If multiple alarms occur at the same time the alarms are sorted and displayed in order of priority. Measurements 60 Graphs Loops 24 p [hPa] 18 12 6 0 0 3 0 3 600 Flow [l/min] 300 0 Alarm Stenosis 6 9 12 15 18 Leakage Low Pressure High Inspiration Volume 21 24 27 30 21 24 27 30 24 27 30 -300 -600 V [l] 6 9 12 15 18 600 Press 300 0 to Continue -300 PCV -600 0 3 6 9 12 15 Stenosis 18 21 t [s] 22:33 A A Textbox Figure 45: Alarm output in the textbox Chapter 7: Alarms and messages 95 ALARM OUTPUT VIA THE MULTIFUNCTIONAL KEY The backlighting of the MFK either glows steadily or flashes in the event of an alarm, depending on the alarm priority (only when " MFK brightness" > 0 %). ALARM LOG The device stores the last 50 alarm events. When additional alarms occur, the oldest entry will be overwritten. You can view the alarms in the alarm log screen. For more information, please refer to page 54. Alarms are permanently stored even during a complete power failure. FORWARDING ALARMS Alarms can be forwarded by using a nurse call or the optionally available alarm box. This allows even better monitoring of the device at the home or clinic. The use of the remote alarm box or a nurse call is especially recommended when several ventilators are used in one room, as this allows the device generating the alarm to be easily identified. The alarms will be forwarded without delay to the nurse call or the alarm box. Instructions on how to connect the HOFFRICHTER alarm box or nurse call can be found on page 54. Figure 46: Alarm box The alarm box is an optional accessory to facilitate remote output of the alarm. It does not replace monitoring of the ventilator's primary alarm sound! 96 Chapter 7: Alarms and messages ALARM OVERVIEW ADJUSTABLE ALARMS The adjustable alarms are physiologically conditional alarms. The alarm limits can only be set by the physician in the parameter screen. Table 3: Alarm Adjustable alarms Audible alarm LED alarm Status Cause Time delay caf–af Red flashes Set time ("Apnoea Alarm") has been exceeded None High FiO2 MEDIUM Cba Yellow flashes The FiO2 measured is higher than the set "High FiO2" None Low FiO2 MEDIUM Cba Yellow flashes The FiO2 measured is lower than the set "Low FiO2" None High MEDIUM Leak Rate caf Yellow flashes Double line circuit: Difference between expiration and inspiration volume is higher then the set "Leak Rate" value for 3 breaths in a row Apnoea Priority HIGH Single and double line for 3 breaths in circuit: when VI > 2,54 l a row High Pressure Low Pressure MEDIUM caf Yellow flashes Pressure is higher than the set "High Pressure Tolerance" for 3 breaths in a row HIGH caf–af Red flashes Pressure is higher than the set "High Pressure Tolerance" for 10 breaths in a row MEDIUM caf Yellow flashes Pressure is lower than the set "Low Pressure Tolerance" for 3 breaths in a row HIGH caf–af Red flashes Pressure is higher than the set "High Pressure Tolerance" for 10 breaths in a row Chapter 7: Alarms and messages 97 Table 4: Alarm Adjustable alarms Audible alarm LED alarm Status Cause Time delay High MEDIUM Frequency caf Yellow flashes Measured frequency is higher than the "High Frequency" for 3 breaths in a row MEDIUM Low Frequency caf Yellow flashes Measured frequency is lower than the "High Frequency" for 3 breaths in a row MEDIUM High Inspiration Volume caf Yellow flashes Tidal volume is higher than the "High Inspiration Volume" for 3 breaths in a row MEDIUM Low Inspiration Volume caf Yellow flashes Tidal volume is lower than the "Low Inspiration Volume" for 3 breaths in a row High MEDIUM Minute Ventilation caf Yellow flashes Ventilation minute volume is higher than the "High Minute Ventilation" for 3 breaths in a row Low MEDIUM Minute Ventilation caf Yellow flashes Ventilation minute volume is lower than the "Low Minute Ventilation" for 3 breaths in a row High MEDIUM Expiration Volume caf Yellow flashes Expiration volume is higher than the "High Inspiration Volume" for 3 breaths in a row Low MEDIUM Expiration Volume caf Yellow flashes Expiration volume is lower than the "Low Inspiration Volume" for 3 breaths in a row Low SpO2 MEDIUM Cba Yellow flashes Measured SpO2 is lower than the set "Low SpO2" None 98 Priority Chapter 7: Alarms and messages FIXED ALARMS The fixed alarms are technically conditional alarms. Alarm conditions are built into the device and are non-adjustable by the user. Table 5: Fixed Alarms Alarm Priority Audible alarm State of the alarm LED Cause Correction Error Internal Battery HIGH ccc–cc Red flashes Defective battery Device must be serviced Overcurrent fuse HIGH C c c – Cc Red flashes Motor current too high Restart the device, in the event of a recurrence the device must be serviced Stenosis HIGH caf–af Red flashes No flow for more than 3 breaths Check tube circuit and tubing for obstructions Error Internal Communication HIGH ccc–cc Red flashes Communication with the control unit has been interrupted for more than 10s Restart the device, in the event of a recurrence the device must be serviced. Disconnect HIGH caf–af Red flashes Inspiration- and/ or expiration lines of the tube circuit are not connected to the device Connect the inspiratory and/ or expiration line to the device Internal Battery Empty HIGH C c c – Cc Red flashes Battery empty (Current state of charge of the battery = 0 %) Battery must be recharged; maximum 1 minute left until complete mains failure; ventilation process will only be possible with external power supply Chapter 7: Alarms and messages 99 Table 6: Fixed Alarms Alarm Priority Audible alarm State of the alarm LED Cause Correction caf Yellow flashes Over pressure detected throughout 3 breaths or 15s Device must be serviced, or check if the alarm may have been triggered by the patient coughing Battery MEDIUM Operation Ccc Yellow flashes Mains power supply has failed, the device is running on battery power Restore mains power supply Low Internal Battery MEDIUM Ccc Yellow flashes Device operating on battery power supply, battery charge 10 % Battery must be recharged; Alarm remains, until the battery charge is > 10 % Mains Failure MEDIUM Ccc Yellow flashes Power supply from the mains (AC) connection has failed Restore mains power supply caf Yellow flashes Expiratory flow during inspiration detected or expiration flow too low during expiration Check control tube connection on the device and the tube circuit Over Pressure MEDIUM Check MEDIUM Expiration Outlet Check expiration outlet Check Measuring Tube 100 LOW ec Turquoise glows steadily Chapter 7: Alarms and messages Measurement tube kinked or not connected to the device Check for kinks in the measuring tube Check measuring tube at the device MESSAGES MESSAGE DISPLAY IN THE TOOLBAR Messages are displayed in the toolbar. When an alarm occurs, the alarm is displayed instead of the message, since the alarm has a higher priority. Minimum Volume Not Reached PCV 22:33 A A Message Figure 47: Messages in the toolbar MESSAGES OVERVIEW Table 7: Messages Messages Cause Time delay Back-up Frequency Active Device operates in PSV mode, patient has no spontaneous breath and is ventilated at the set frequency None Minimum Volume Not Reached Measured minimum volume lower than set "Minimum Volume" 3 breaths in a row Chapter 7: Alarms and messages 101 102 Chapter 7: Alarms and messages CHAPTER 8 CLEANING AND DISINFECTION • Before cleaning the device, remove the power plug from the power supply. • If ventilation is running, insert a spare coarse filter for the duration of the cleaning or insert a complete replacement filter cassette into the device. • Hygienically preparing and cleaning the device must be performed according to the user’s manual and the applicable regulations of the hospital or nursing home. • The device cannot be sterilized by using standard sterilization methods. • Do not use any aggressive or abrasive cleaning agents (e. g., acetone). • Do not immerse the device in water or solvents. • Follow the accessory manufacturer’s instructions for cleaning and disinfection. Chapter 8: Cleaning and disinfection 103 OVERVIEW The following overview table describes the cleaning intervals of articles delivered by HOFFRICHTER. For articles by other manufacturers, please follow their cleaning instructions. Table 8: Cleaning intervals - overview Component Name Clean Disinfect Replace CARAT II pro Ventilator As needed With every new patient - Power supply unit As needed With every new patient - Mains cable As needed With every new patient - Disposable double line circuit No No Every change of patient Mask Daily In accordance with manufacturer instructions No Every change of patient In accordance with manufacturer instructions 104 Adapter for bacterial filters As needed With every new patient Every change of patient Oxygen connection adapter As needed No Every change of patient Carrying case As needed No Every change of patient Chapter 8: Cleaning and disinfection Cleaning intervals - overview Table 8: Component TIE PA NT Name Clean Disinfect Replace Filter cassette (without filter) As needed With every new patient - Course filter Weekly No Instead of cleaning, when patient changes Fine filter No No Monthly, if severely contaminated, or for a patient change FiO2 sensor As needed No In accordance with manufacturer instructions Bacterial filters No No Daily, and whenever patient changes Chapter 8: Cleaning and disinfection 105 CLEANING THE DEVICE Domestic use For cleaning the surface of the device, use a cloth moistened with soapy water. Then wipe with a cloth moistened with clear water in order to remove any remaining of the soapy water. The device must be completely dry before commissioning. Clinical use Disinfect the device surface on a regular basis, or when there is any possibility of contamination. We recommend schülke® wipes. Similar disinfectant wipes are also acceptable as well. The device must be completely dry before commissioning. CLEANING THE TUBE CIRCUIT A heavily worn or damaged tube system should be disposed of correctly and replaced by a new one. The tube circuit supplied is intended for use on one patient only. It must not be cleaned and used for other patients. When using other tube circuits, the manufacturer’s instructions must be observed. Tube circuits not designed for reuse must be disposed of properly. CLEANING THE MASK A heavily worn or damaged mask must not be reused and should be disposed of correctly. 1. 2. 3. 4. 106 Disconnect the mask from the tube circuit. Clean the mask with mild soapy water. Do not use any other agents! Rinse the mask thoroughly with clear water. Let the mask dry completely in the air. Chapter 8: Cleaning and disinfection CLEANING THE HEADGEAR 1. Disconnect the headgear from the mask. 2. Clean the headgear as described in the headgear manufacturer's users'manual. CLEANING / REPLACING THE FILTER A B I 0 C D A Filter frame cover B Filter cassette C Fine filter (white) D Coarse filter (black) Figure 48: Filter cassette structure CLEANING THE COARSE FILTER 1. 2. 3. 4. 5. 6. 7. Pull the filter cassette from the device. Remove the coarse filter (black) from the filter cassette. Clean the filter with mild soapy water. Do not use any other agents! Rinse the filter thoroughly with clear water. Let the filter dry completely in the air. Insert the cleaned filter back into the filter cassette. Slide the filter cassette into the device. Instead of cleaning the filter, you can insert a new one or replace the entire filter cassette with a new one. Chapter 8: Cleaning and disinfection 107 REPLACING THE FINE FILTER The white fine filter cannot be cleaned. It must be replaced with a new one. 1. 2. 3. 4. 5. Pull the filter cassette from the device. Remove the coarse filter (black). Remove the fine filter (white) and replace it with a new one. Insert the coarse filter back into the cassette. Slide the filter cassette into the device. CHANGING THE FILTER CASSETTE 1. 2. 3. 4. 108 Pull the filter cassette from the device. Pull apart the filter cassette and the filter frame cover. Reassemble the replacement cassette and the filter frame cover. Slide the filter cassette into the device. Chapter 8: Cleaning and disinfection CHAPTER 9 ROUTINE CHECKS AND MAINTENANCE WORK Routine checks and scheduled maintenance are necessary in order to maintain safe functioning of the device. This chapter describes which and when tests and maintenance works must be performed. You must not perform any testing or maintenance work while the patient is still connected to the device. Provide an alternative ventilation system for the patient during that time. Chapter 9: Routine checks and maintenance work 109 OVERVIEW Table 9: Service intervals - overview When? What? By whom? Before commissioning Safety-related test Provider/Service Weekly Clean/replace the coarse filter (see page 107) User/Patient Visually check of the fine filter User/Patient Monthly, or before, if heavily contaminated Replace fine filter (see page 108) User/Patient Monthly Battery quick test (see page 112) User/Provider Every 6 months during in storage Charge battery to 100 % (see page 111) User/Provider Every 6 months without bacterial filter Replace the valve membrane (expiration) Provider/Service Every 12 months Maintenance 1 (refer to the service manual) Provider/Service Safety-related test Provider/Service Every 2 years Maintenance 2 (refer to the service manual) Provider/Service After 15,000 h blower run time or every 5 years Maintenance 5 (refer to the service manual) Provider/Service 110 Chapter 9: Routine checks and maintenance work BATTERY MAINTENANCE The batteries in CARAT II pro are powerful lithium-ion batteries. To obtain the full capacity of the batteries it is important to charge and maintain them on a regular basis. The number of charging cycles of lithium-ion batteries is limited. Therefore after a certain time the batteries must be replaced and disposed. Tips for disposal can be found on page 129. MAINTENANCE/REPLACEMENT INTERVALS U S A G E Battery quick test 1 month S T O R A G E 6 months Charge Replacement incl. battery test 2 years Replacement incl. battery test CHARGING THE BATTERIES During storage, charge the batteries every 6 months up to 100 % capacity, by operating the devices via mains supply. Chapter 9: Routine checks and maintenance work 111 PERFORM THE BATTERY QUICK TEST The battery quick test must be carried out monthly as follows. 1. Make sure that the battery is fully charged (100%). 2. Disconnect the device from the mains and operate the device for 1 hour on battery power. 3. The test is positive if after 1 hour the battery capacity is > 10 % and the alarm "Low Internal Battery" has not sounded. If the battery capacity has fallen below 10 % and the alarm "Low Internal Battery" has sounded, the batteries must be replaced by an authorized service technician. REPLACE THE BATTERIES The batteries must be replaced every 2 years by an authorized service technician. The procedure is described in the CARAT pro service manual. 112 Chapter 9: Routine checks and maintenance work CHAPTER 10 APPENDIX Chapter 15: Appendix 113 DATA MANAGEMENT The device has an internal memory to recording data. We recommend operating the device with an SD card to save larger amounts of data. More information about SD cards are available on page 56. The following data will be saved: Table 10: Data management Data and parameters Inside the device SD card Alarms and events with date and time stamp Yes (approx. 15,000 entries) Yes (approx. 15,000 entries) Statistics Yes No Device settings and counter Yes No Update files No Yes Initialization files No Yes Measurement parameters (Pressure, volume, flow, FiO2) No Yes (approx. 50 days at a recording rate of 20 values per second) 114 Chapter 15: Appendix ERROR MESSAGES Table 11: Error messages during operation and at device start-up Error message Error SpO2 sensor Cause Correction Communication to SpO2 measuring module not possible Device must be serviced SpO2 sensor defective Replace SpO2 sensor SD card is full No storage space available on the SD card Insert blank SD card Flash Not Working No access to the flash Device must be serviced An older parameter set is on the device Current parameter set is incorrect The device uses the old parameter set and can continue to be utilized. Default parameters are on the device No valid parameter set available or they are faulty The device uses the default parameter set and can continue to be utilized. The flow sensor shows an error Flow sensor is defective Device must be serviced The FiO2 sensor shows an error FiO2 sensor is defective Check FiO2 sensor connection Recalibrate FiO2sensor Replace FiO2 sensor Error Pressure Sensor Defective pressure sensor Device must be serviced Calibration File Damaged Calibration data for sensors is damaged Device must be serviced Eventlog File Damaged Event read data failed Device must be serviced Primary Alarm Not Working Primary alarm sound unit is defective Device must be serviced Secondary Alarm Not Working Secondary alarm sound transmitter is defective Device must be serviced No Alarm Available Primary and secondary alarm sound units are defective Device must be serviced Chapter 15: Appendix 115 Table 12: Error messages during operation and at device start-up Error message Cause Correction Booting Error Boot failed Device must be serviced Fatal Error Fatal error occurred Device must be serviced Maintenance 5 necessary Maximum blower run times reached Device must be serviced 116 Chapter 15: Appendix TECHNICAL DATA The manufacturer reserves the right to make technical changes without notice. Power supply Mains operation 100...240 V AC (-20 %, +10 %), 50...60 Hz DC operation 12 V DC / 10 A or 24 V DC / 5 A Internal battery operation Lithium ion battery, 14.8 V (nominal voltage) / 4.4 Ah / 65.12 Wh External battery operation AKKUPACK uni BASE/PLUS 20...26 V (nominal voltage) / 5 A Maximum power consumption 75 W Electrical protection class Class II Specifications and performance Dimensions (W x D x H) 304 x 253 x 160 mm Weight 4.72 kg Max. stable limit pressure 60 hPa Min. stable limit pressure 0 hPa Max. working pressure 50 hPa Min. working pressure 0 hPa Max. flow 175 l/min Operating conditions Temperature range + 5 °C to + 40 °C (+ 41 °F to + 104 °F) Relative humidity 10 % ... 95 %, non-condensing Air pressure range 600 hPa ... 1100 hPa Storage and transport conditions Temperature range < 1 day < 1 month < 6 months > 6 months + 20 °C to + 60 °C (+ 68 °F to + 140 °F) + 20 °C to + 55 °C (+ 68 °F to + 131 °F) + 20 °C to + 45 °C (+ 68 °F to + 113 °F) + 20 °C to + 35 °C (+ 68 °F to + 95 °F) Chapter 15: Appendix 117 Storage and transport conditions Relative humidity 5 % ... 95 %, non-condensing Air pressure range 250 hPa ... 1100 hPa Storage conditions Store in a dry, vibration-free place, in an upright position; store device and accessories in their original packaging. Sound pressure range of audible alarm signal (at 1 m distance) Lowest value 55 dBA, Level 1 Medium value 60 dBA, Level 2 Highest value 65 dBA, Level 3 Pressure at 60 l/min Inspiratory resistance of the device at the patient connection port Single line patient circuit Double line patient circuit 2.8 hPa 2.9 hPa Expiratory resistance of the device at the patient connection port Single line patient circuit Double line patient circuit 3.9 hPa 4.2 hPa Total resistance of the system < 6 hPa Technical requirements for accessories Oxygen inlet Connection type Quick-connect coupling Pressure 1000 hPa Flow 15 l/min Bacterial filter Connections 22 / 15 mm cone (according to EN1281-1) Resistance < 2.3 hPa at 60 l/min Compressible volume < 66 ml Internal volume < 200 ml 118 Chapter 15: Appendix Measured values Parameter Display area Display increments Measurement Accuracy Pressure 0 – 100 hPa 0.1 hPa 0.0 – 100 hPa 1.0 hPa or 5 % of the measured value Pressure bar 0 – 60 hPa 15 Pa 0.0 – 100 hPa 1.0 hPa or 5 % of the measured value 0 – 2.5 l 0.01 l Calculated from flow measurements 0.03 l or 20 % of the measured value 0 – 200 l/min 1l -200 – 200 l/min ± 4 l/min Oxygen 0 – 100 % 1% 0 – 100 % 5% Frequency 0 – 99 bpm 1 bpm Calculated from period duration of inspiration + expiration in 0.002 s 1 bpm I:E 1:0.1 – 1:25 0.1 Calculated from period duration of inspiration + expiration in 0.002 s 0.2 0 – 25 l 0.1 l Calculated from flow measurements 0.03 l or 20 % of the measured value SpO2 35 – 100 % 1% 35 – 100 % ± 2 % at 70 – 100 % ± 3 % at 50 – 70 % Not defined < 50 % Pulse 30 – 240 bpm 1 bpm 30 – 240 bpm ± 2 bpm or ± 2 % Leak Rate 0 – 230 l/min 1 l/min 0 – 230 l/min 10 l/min Volume Flow MV (minute volume) All flow and volume values are measured at 25°C (77°F) and 1030 hPa. Chapter 15: Appendix 119 STANDARDS The device complies with the following standards: • DIN EN 60601-1-2 Medical electrical equipment - Part 1-2: General requirements for basic safety and essential performance - Collateral standard: Electromagnetic compatibility - Requirements and tests (IEC 60601-1-2:2007, modified) • DIN EN 60601-1-4 Medical electrical equipment - Part 1-4: General requirements for safety; Collateral standard: Programmable electrical medical systems (IEC 60601-14:1996 + A1:1999) • Medical electrical equipment - Part 1-8: General requirements for basic safety and essential performance - Collateral Standard: General requirements, tests and guidance for alarm systems in medical electrical equipment and medical electrical systems (IEC 60601-1-8:2006 + A1:2012) • DIN EN ISO 10651-6 (only for use with the single line circuit) Lung ventilators for medical use - Particular requirements for basic safety and essential performance - Part 6: Home-care ventilatory support devices (ISO 10651-6:2004) • DIN EN ISO 10651-2 (only for use with the double line patient circuit) Lung ventilators for medical use - Particular requirements for basic safety and essential performance - Part 2: Home care ventilators for ventilator-dependent patients (ISO 10651-2:2004) 120 Chapter 15: Appendix REPLACEMENT PARTS AND ACCESSORIES Make sure to follow all general safety guidelines when using replacement parts and accessories page 22. For ordering of replacement parts and accessories, please contact a HOFFRICHTER service partner. REPLACEMENT PARTS Name Figure Article number Disposable double line circuit for adults with pressure measuring tube (L = 180 cm, 22 mm) 00007969 Bacterial filter adapter 00004933 Straight FiO2 connection adapter 41000104 SD card, 2 GB 11200010 Mains cable 31100023 Switched-mode power supply 00014206 Filter cassette, complete (open) 00002145 Chapter 15: Appendix 121 Name Article number Filter cassette, complete (closed) 00002146 Filter cassette, complete (open) with filters 00002038 Filter cassette, complete (closed) with filters 00002058 Filter cassette cover 42101301 Coarse filter, 1 pack (2 ea) 00014950 Course filter 00002993 Fine filter, 1 pack (5 ea) 00014951 Fine filter 00002994 User's manual for CARAT II pro for physicians and medical professionals 50000625 User's manual for CARAT II pro for patients 50000626 122 Chapter 15: Appendix Figure Name Article number Figure Brief instructions for CARAT II pro 50000645 Carrying case 00004875 Chapter 15: Appendix 123 ACCESSORIES Name Article number Disposable single line circuit for adults with an expiratory valve and the pressure measuring and control tube (L = 180 cm, 22 mm) 00014967 Disposable single line circuit for adults with an expiratory valve and the pressure measuring and control tube plus water trap (L = 180 cm, 22 mm) 00014995 Disposable double line circuit for adults with pressure measuring tube and water traps (L = 180 cm, 22 mm) 00007996 Disposable single line circuit for children with an expiratory valve, pressure measuring and control tube (L = 180 cm, 15 mm) 00014923 Disposable double line circuit for children with pressure measuring tube (L = 180 cm, 15 mm) 00004928 CPAP Silicon nasal mask, size S 00004960 CPAP Silicon nasal mask, size M 00003440 CPAP Silicon nasal mask, size L 00003434 124 Chapter 15: Appendix Figure Name Article number Figure CPAP Silicon full face mask, size S 00003441 CPAP Silicon full face mask, size M 00003436 CPAP Silicon full face mask, size L 00003437 NIPPV Silicon full face mask, size S 00003461 NIPPV Silicon full face mask, size M 00003442 NIPPV Silicon full face mask, size L 00003438 NIPPV Silicon full face mask, size XL 00003462 NIPPV PSU Silicon full face mask, size L (autoclavable) 00003439 Bacterial filter PA TIE NT 00004932 FiO2 measurement set consisting of: FiO2 sensor, T-adapter, FiO2 sensor adapter, FiO2 sensor connecting cable with screw connector 00004944 FiO2 sensor OOM103-1 23000018 T adapter 23000019 Chapter 15: Appendix 125 Name Article number FiO2 sensor adapter 23000020 FiO2 sensor connecting cable with screw connector 00014116 FiO2 connection adapter, angled 41000087 Cover for expiration tube connection 42100449 USB cable (PC cable) 00005291 AKKUPACK uni BASE "Ventilation" 00011100 AKKUPACK uni PLUS 00011099 SpO2 finger clip sensor, cable length 2 m 00005292 SpO2 adhesive sensor for adults and children (finger and toe), cable length 2 m 00005294 126 Chapter 15: Appendix Figure Name Article number Figure Extension cable for SpO2 sensor, cable length 1 m 00005293 Remote alarm box, complete including accessories 00014122 Remote alarm box without accessories 00004834 Cable for remote alarm box 00014115 Cable for nurse call 00014117 Functional bag 00004879 "EASYset" PC software Chapter 15: Appendix 127 MANUFACTURER'S DECLARATION ON ELECTROMAGNETIC COMPATIBILITY The CARAT II pro must be commissioned in accordance with the provisions in these user's manual. Wireless home network devices, mobile phones, cordless phones and their base stations, walkie-talkies etc. can affect the CARAT II pro. Close proximity to these devices should therefore be avoided. Example: A distance of 3.25 m has to be maintained for a typical mobile phone with a maximum output power of 2 W to preserve an electromagnetic immunity of 10V/m. 128 Chapter 15: Appendix DISPOSAL Proper disposal saves natural resources and prevents harmful substances being released into the environment. DEVICE The device must not be disposed of with the household waste. Please contact the relevant customer services department to find out how to dispose of the device, etc. properly. BATTERIES Replaced batteries must be disposed in accordance with the respective local laws. Please contact the relevant customer services department to find out how to dispose of the device, etc. properly. PACKAGING The packaging is taken back by the distributor but it can alternatively be disposed of separately with the normal household waste. FiO2 SENSOR The FiO2 sensor must not be disposed of with the household waste. Please contact the relevant customer services department to find out how to dispose of the device, etc. properly. Chapter 15: Appendix 129 DISCLAIMER HOFFRICHTER GmbH accepts no liability for consequences in terms of safety, reliability and performance of the product if: • interventions, modifications, extensions, calibration, repairs and maintenance are carried out by persons not authorized by us, • other manufacturers’ accessories and spare parts are used that have not been approved by us for use on the product, • the product is used for pusposes other than stipulated in the user’s manual or • the hygiene and cleaning instructions stipulated in the user’s manual have not been complied with. Statutory guarantee rights remain unaffected by this disclaimer. 130 Chapter 15: Appendix