1
Reassembly (continued)
Reassembly (continued)
6. Dome/Combination Spring and Dome Loaded
Regulators are more easily reassembled by
holding regulator firmly in vise and reinstalling
dome.
7. Self-Venting Regulator - If your regulator has
an adjustable relief valve mechanism, it is set
on final assembly at the factory and usually will
not require further adjustment. If adjustment
becomes necessary, use the following
procedure after regulator has been installed:
Step 1. Remove hole plug in control knob.
Step 2. Using control knob, apply 10 to 15 psi
on downstream side.
Step 3. Turn CW vent adjusting screw (located
under hole plug) until media can be
heard escaping through relief valve.
Step 4. Turn screw CCW until media flow
stops, plus 1/2 turn. Replace hole plug.
8. Reinstalling wire mesh inlet filter: Insert filter
into primary inlet port. It then must be expanded
to fit correctly. This can be accomplished by
inserting a metal tool the same size as the port
and then lightly tapping it with a hammer.
AFTER REGULATOR HAS BEEN
REASSEMBLED, IT SHOULD BE
CONNECTED TO A PRESSURE
SOURCE WITH MEDIA COMPATIBLE
WITH THE USE OF THE REGULATOR AND PRESSURIZED TO CHECK FOR INTERNAL
AND EXTERNAL LEAKAGE AND OPERATING
CHARACTERISTICS.
LIMITED WARRANTY
Tescom Corporation (“Seller”) warrants that the licensed firmware embodied in the goods will execute the programming instructions
provided by Seller, and that the goods manufactured or services provided by Seller will be free from defects in materials or workmanship
under normal use and care until the expiration of the applicable warranty period. Goods are warranted for twelve (12) months from the
date of initial installation or eighteen (18) months from the date of shipment by Seller, whichever period expires first. Consumables and
services are warranted for a period of 90 days from the date of shipment or completion of the services. Products purchased by Seller
from a third party for resale to Buyer ("Resale Products") shall carry only the warranty extended by the original manufacturer. Buyer
agrees that Seller has no liability for Resale Products beyond making a reasonable commercial effort to arrange for procurement and
shipping of the Resale Products. If buyer discovers any warranty defects and notifies Seller thereof in writing during the applicable
warranty period, Seller shall, at its option, correct any errors that are found by Seller in the firmware of services or repair or replace F.O.B.
point of manufacture that portion of the goods or firmware found by Seller to be defective, or refund the purchase price of the defective
portion of the goods/services. All replacements or repairs necessitated by inadequate maintenance, normal wear and usage, unsuitable
power sources or environmental conditions, accident, misuse, improper installation, modification, repair, storage or handling, or any other
cause not the fault of Seller are not covered by this limited warranty, and shall be at buyer's expense. Seller shall not be obligated to
pay any costs or charges incurred by buyer or any other party except as may be agreed upon in writing in advance by Seller. All costs of
dismantling, reinstallation and freight and the time and expenses of Seller's personnel and representatives for site travel and diagnosis
under this warranty clause shall be borne by buyer unless accepted in writing by Seller. Goods repaired and parts replaced by Seller
during the warranty period shall be in warranty for the remainder of the original warranty period or ninety (90) days, whichever is longer.
This limited warranty is the only warranty made by Seller and can be amended only in a writing signed by Seller. THE WARRANTIES
AND REMEDIES SET FORTH ABOVE ARE EXCLUSIVE. THERE ARE NO REPRESENTATIONS OR WARRANTIES OF ANY KIND,
EXPRESSED OR IMPLIED, AS TO MERCHANTABILITY, FITNESS FOR PARTICULAR PURPOSE OR ANY OTHER MATTER WITH
RESPECT TO ANY OF THE GOOD OR SERVICES.
12616 Industrial Boulevard
Elk River, MN 55330 USA
T
+1 800 447 1250
+1 763 241 3238
F
+1 763 241 3224
E
[email protected]
W www.tescom.com
©TESCOM Corporation, 2006; All Rights Reserved.
TESCOM is a business unit of the Regulator Division.
Trademarks are property of divisions of Emerson Process Management.
5
OPERATION AND
SERVICE MANUAL
for
Diaphragm Sensed Pressure
Reducing Regulators
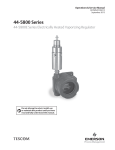
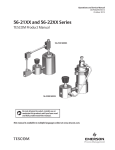
General
TESCOM’s diaphragm sensed pressure
reducing regulators are specifically engineered
for applications requiring dependable pressure
regulation. These regulators are especially
appropriate for installations where high system
pressures (up to 6000 psi) must be reduced to
levels suitable for actuating low pressure (28 vac to
500 psi) instruments and related equipment.
Pressure Activation Methods
TESCOM uses three basic types of activation
methods. The activation method provides the
means by which the operator can set the force that
determines the outlet pressure of a regulator.
Control Knob: Delivery pressure is increased by
turning the control knob. The control knob applies a
load through a spring to the diaphragm.
Dome Load: Delivery pressure is increased by
applying pressurized gas or liquid to the dome of a
regulator at a pressure equal to the outlet pressure
desired. This dome pressure is normally provided
by a second regulator called the pilot regulator.
Combination Spring and Dome: Delivery pressure
is increased by applying a spring force as well as
the introduction of pressurized gas or liquid.
DOPSM1885X012
Form No. 1885 Rev. 8/10 15M Printed in the U.S.A.
6
Operation (Control Knob Adjustment)
Maintenance (continued)
Reassembly
Controlled outlet pressure settings are obtained
using TESCOM pressure reducing regulators
by adjusting the control knob. Rotating the knob
clockwise raises the outlet pressure while a
counterclockwise rotation coupled with venting of
the downstream side of the regulator plumbing
lowers the outlet pressure. Final adjustments should
be made in the direction of increasing pressure to
obtain the most accurate set point.
The regulator is reassembled in the reverse order
of disassembly, observing the following precautions.
Please reference the Bill of Material and assembly
drawing for the correct location of replacement parts
and correct torque specifications.
TESCOM regulators will operate with any liquid
or gaseous media compatible with the wetted
materials. Some series/modifications come
with an internal filter designed to stop random
contamination resulting from the installation
of the regulator. An auxiliary upstream filter is
recommended for use in all but the cleanest media.
Gaseous media should be free of excessive
moisture to prevent icing of the regulator at high
flow rates.
A regulator is not intended to be
used as a shutoff device. When
the regulator is not in use, the
inlet supply should be turned
off. As a safety precaution, a pressure
relief device should be installed
downstream of the regulator.
Maintenance
The following procedures are provided to enable
the customer to perform all normal maintenance
and repair operations. These operations are more
easily performed with the regulator removed from
the line. However, in some cases repair may be
accomplished without removal of the regulator body
as long as the supply has been shut off and the inlet
and outlet pressures have been vented.
The following steps outline the disassembly of
pressure reducing regulators for maintenance and
repair (up-to-date assembly drawings and bills of
material are available from TESCOM):
1. Clamp the regulator in a vise by the flats on the
bottom and/or side of the regulator body.
2. Turn control knob and/or spring adjustment
mechanism counterclockwise to insure removal
of all spring force on the diaphragm.
2
NOTE: (Dome loaded regulators) All
pressurized gas or liquid must be vented from
dome before disassembly.
3. Remove upper portion of regulator (bonnet and/
or dome). Some models require the mounting
bracket to be removed first.
NOTE: Upper portion of regulator may also
include spring button, load spring back-up
plate, and diaphragm, etc. Review correct
drawing to ensure that all parts have been
disassembled.
NOTE: (Two-Stage Regulator) TESCOM
Model Series 44-3400 is a two-stage regulator
that has portions on both ends of the regulator
body that must be removed. It is TESCOM’s
recommendation that two-stage regulators be
returned to the factory for repair.
4. The valve parts can now be removed from the
regulator body by turning the seat retainer and/
or back cap counterclockwise until it is free of
the regulator body.
NOTE: If necessary, valve seat may be
removed from the seat retainer using a sharp
instrument.
CAUTION: When removing valve parts from
a regulator that has a back cap, care must be
taken to insure the main valve stem remains
vertical. If the main valve stem is not removed
correctly, parts may remain in the regulator.
5. To disassemble main valve assembly and/or
valve, clamp valve in smoothed jaw vice or hold
with pliers. Clamping should be done on flats.
CAUTION: Care must be used to not damage
valve.
Several TESCOM REGulators are
supplied with internal filters.
They will be located either in the
inlet port or in the main valve
area of the regulator. In each case,
they should be removed and replaced
before reassembly.
3
1. Inspect all parts and replace those worn or
damaged with TESCOM replacement parts.
2. All parts should be cleaned to the cleanliness
level required for safe operation with the media
and system they will be used in. All parts in
the flow stream must be free of particles which
could prevent proper seating of the main valve.
3. Apply a thin uniform coating of fluorocarbon
grease to any or all of the following parts:
Indentation of spring button, threaded portion
of adjusting screw, entire threaded area of the
bonnet, all O-rings, all threaded parts internal to
regulator.
DO NOT APPLY ANY TYPE OF GREASE
TO THREADED INTERNAL PARTS OF
REGULATORS THAT COME STANDARD
WITH METAL TO METAL DIAPHRAGM
SEALS. THESE MODELS INCLUDE THE
FOLLOWING REGULATOR SERIES: 44-2200,
44-2300, 44-2600, 44-2800, 44-3200, 44-3400,
44-4600 AND 44-4800 SERIES.
NOTE: Do NOT apply any type of grease to
the inlet or outlet connections.
4. Valve seat must be installed with the chamfered
side towards the main valve.
5. Standard Regulator with Control Knob - The
body and bonnet are best joined by holding the
bonnet assembly open end up and dropping
all required items into place one at a time. The
last item to be placed in the bonnet will be the
diaphragm. It can be centered on the seating
surface of the bonnet before the body assembly
is inverted and screwed into the bonnet
firmly – hand tight. Regulator should then be
placed in vise and bonnet retorqued to correct
specifications. See print.
4