1
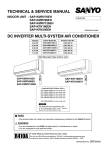
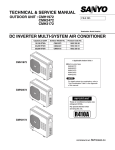
TECHNICAL & SERVICE MANUAL
OUTDOOR UNIT : SAP-CMRV1424EH
SAP-CMRV1924EH
SAP-CMRV1934EH
SAP-CMRV2444EH
SAP-CMRV3144EH
FILE NO.
Destination: Europe
Northern Europe
DC INVERTER MULTI-SYSTEM AIR CONDITIONER
Capacity
Outdoor Model No.
Product Code No.
4.0kW
SAP-CMRV1424EH
1 852 330 12
5.6kW
SAP-CMRV1924EH
1 852 336 59
5.6kW
SAP-CMRV1934EH
1 852 330 13
6.8kW
SAP-CMRV2444EH
1 852 330 14
8.0kW
SAP-CMRV3144EH
1 852 330 15
< Applicable Indoor Units >
SAP-CMRV1424EH
Wall mounted type
SAP-KMRV74EH
SAP-KMRV94EH
SAP-KMRV124EH
SAP-KRV184EH
SAP-KRV244EH
NOTE
For details about the combination, refer to
"Unit Combination Table" in the Appendix of
this manual.
SAP-CMRV1924EH
SAP-CMRV1934EH
SAP-CMRV2444EH
IMPORTANT
SAP-CMRV3144EH
These air conditioners employ new
refrigerant R410A.
Pay special attention when
servicing the unit.
REFERENCE NO. SM700662
When Transporting
Important!
Please Read Before Starting
Be careful when picking up and moving the indoor and
outdoor units. Get a partner to help, and bend your knees
when lifting to reduce strain on your back. Sharp edges or
thin aluminum fins on the air conditioner can cut your
fingers.
This air conditioning system meets strict safety and
operating standards. As the installer or service person, it
is an important part of your job to install or service the
system so it operates safely and efficiently.
When Installing
In a Ceiling or Wall
Make sure the ceiling/wall is strong enough to hold the
unit’s weight. It may be necessary to construct a strong
wood or metal frame to provide added support.
In a Room
Properly insulate any tubing run inside a room to prevent
"sweating" that can cause dripping and water damage to
walls and floors.
In Moist or Uneven Locations
Use a raised concrete pad or concrete blocks to provide a
solid, level foundation for the outdoor unit. This prevents
water damage and abnormal vibration.
In an Area with High Winds
Securely anchor the outdoor unit down with bolts and a
metal frame. Provide a suitable air baffle.
In a Snowy Area (for Heat Pump-type Systems)
Install the outdoor unit on a raised platform that is higher
than drifting snow. Provide snow vents.
For safe installation and trouble-free operation, you
must:
Carefully read this instruction booklet before beginning.
Follow each installation or repair step exactly as shown.
Observe all local, state, and national electrical codes.
Pay close attention to all warning and caution notices
given in this manual.
WARNING
This symbol refers to a hazard
or unsafe practice which can
result in severe personal
injury or death.
CAUTION
This symbol refers to a hazard
or unsafe practice which can
result in personal injury or
product or property damage.
If Necessary, Get Help
When Connecting Refrigerant Tubing
These instructions are all you need for most installation
sites and maintenance conditions. If you require help for
a special problem, contact our sales/service outlet or
your certified dealer for additional instructions.
• Use the flare method for connecting tubing.
• Apply refrigerant lubricant to the matching surfaces of
the flare and union tubes before connecting them, then
tighten the nut with a torque wrench for a leak-free
connection.
• Check carefully for leaks before starting the test run.
In Case of Improper Installation
The manufacturer shall in no way be responsible for
improper installation or maintenance service, including
failure to follow the instructions in this document.
When Servicing
• Turn the power off at the main power box (mains) before
opening the unit to check or repair electrical parts and
wiring.
• Keep your fingers and clothing away from any moving
parts.
• Clean up the site after you finish, remembering to check
that no metal scraps or bits of wiring have been left
inside the unit being serviced.
SPECIAL PRECAUTIONS
WARNING
When Wiring
ELECTRICAL SHOCK CAN CAUSE
SEVERE PERSONAL INJURY OR DEATH.
ONLY A QUALIFIED, EXPERIENCED
ELECTRICIAN SHOULD ATTEMPT TO
WIRE THIS SYSTEM.
Others
• Do not supply power to the unit until all wiring and
tubing are completed or reconnected and checked.
• Highly dangerous electrical voltages are used in this
system. Carefully refer to the wiring diagram and these
instructions when wiring. Improper connections and
inadequate grounding can cause accidental injury or
death.
• Ground the unit following local electrical codes.
• Connect all wiring tightly. Loose wiring may cause
overheating at connection points and a possible fire
hazard.
CAUTION
• Ventilate any enclosed areas when installing or testing
the refrigeration system. Escaped refrigerant gas, on
contact with fire or heat, can produce dangerously toxic
gas.
• Confirm upon completing installation that no refrigerant
gas is leaking. If escaped gas comes in contact with a
stove, gas water heater, electric room heater or other
heat source, it can produce dangerously toxic gas.
2
Table of Contents
Page
APPLICABLE INDOOR UNIT .......................................................................................................
5
1. OPERATING RANGE ...................................................................................................................
6
2. SPECIFICATIONS
2-1. Unit Specifications .............................................................................................................
2-2. Major Component Specifications .......................................................................................
2-3. Other Component Specifications .......................................................................................
7
12
17
3. DIMENSIONAL DATA .....................................................................................................................
18
4. REFRIGERANT FLOW DIAGRAM
4-1. Refrigerant Flow Diagram ...................................................................................................
23
5. PERFORMANCE DATA
5-1. Temperature Charts ............................................................................................................
5-2. Heating Performance ..........................................................................................................
28
28
6. ELECTRICAL DATA
6-1. Electric Wiring Diagrams ....................................................................................................
29
7. FUNCTIONS
7-1. Explanation of Functions ....................................................................................................
7-2. Protective Functions ...........................................................................................................
34
38
8. TROURLE SHOOTING
8-1. Precautions before Performing Inspection or Repair ...........................................................
8-2. Trouble Diagnosis by Error Monitor Lamps .........................................................................
8-3. Checking the Outdoor System ............................................................................................
8-4. Trouble Diagnosis of Each Part ..........................................................................................
8-5. Trouble Diagnosis of Fan Motor ..........................................................................................
41
42
43
44
47
9. REFRIGERANT R410A:
SPECIAL PRECAUTIONS WHEN SERVICING UNIT
9-1. Characteristics of New Refrigerant R410A .........................................................................
9-2. Checklist before Servicing ...................................................................................................
9-3. Tools Specifically for R410A ................................................................................................
9-4. Tubing Installation Procedures ............................................................................................
9-5. In Case of Compressor Malfunction ....................................................................................
9-6. In Case Refrigerant is Leaking ............................................................................................
9-7. Charging Additional Refrigerant ..........................................................................................
9-8. Retro-Fitting Existing Systems ............................................................................................
48
48
50
50
51
53
54
54
3
Page
APPENDIX A INSTALLATION INSTRUCTIONS ............................................................................. A-1
(SAP-CMRV1424EH)
APPENDIX B INSTALLATION INSTRUCTIONS ............................................................................. A-2
SAP-CMRV1924EH, SAP-CMRV1934EH
SAP-CMRV2444EH, SAP-CMRV3144EH
(
)
APPENDIX C UNIT COMBINATION TABLES ................................................................................. A-3
4
APPLICABLE INDOOR UNITS
Indoor Unit
Multi-Outdoor Unit
NOTE
SAPKMRV74EH
SAPKMRV94EH
SAPKMRV124EH
SAPKRV184EH
SAPKRV244EH
2-Room
SAP-CMRV1424EH
YES
YES
YES
NO
NO
2-Room
SAP-CMRV1924EH
YES
YES
YES
YES
NO
3-Room
SAP-CMRV1934EH
YES
YES
YES
YES
NO
4-Room
SAP-CMRV2444EH
YES
YES
YES
YES
YES
4-Room
SAP-CMRV3144EH
YES
YES
YES
YES
YES
1. The table lists the wall-mounted type of indoor units as representative models.
2. For details on the applicable indoor units other than the wall-mounted type, refer to the catalog.
5
1. OPERATING RANGE
Cooling
Heating
Temperature
Indoor Air Intake Temp.
Maximum
32 °C D.B. / 23 °C W.B.
43 °C D.B.
Minimum
19 °C D.B. / 14 °C W.B.
19 °C D.B.
Maximum
27 °C D.B.
Minimum
16 °C D.B.
24 °C D.B. / 18 °C W.B.
_ D.B. / -15 °C W.B.
6
Outdoor Air Intake Temp.
2. SPECIFICATIONS
2-1. Unit Specifications
Outdoor Unit
SAP-CMRV1424EH
Type
2-Room Multi Outdoor Unit
Number of Connectable Indoor Units
2
Number of Operatable Indoor Units
2
Max. Capacity of Operating Indoor Units
kW
6.15
Power Source
220 to 240V Single-Phase 50Hz
Voltage Rating
230V
Performance
Capacity
Cooling
4.0
( 2.0 to 5.0 )
13,600 ( 6,800 to 17,100 )
1,900
kW
BTU/h
m 3/h
Air Circulation (High)
Electrical Rating
Available Voltage Range
Running Amperes
Power Input
Power Factor
E.E.R.
C.O.P.
Compressor Locked Rotor Amperes
Heating
4.5
( 2.2 to 5.5 )
15,400 ( 7,500 to 18,800 )
1,900
Cooling
V
A
W
%
W/W
W/W
A
Features
Controls
Fan Speeds
Compressor
Refrigerant / Amount charged at shipment
Refrigerant Control
Operation Sound
Hi
Refrigerant Tubing Connections
Max. allowable tubing length per unit
Refrigerant
Narrow tube
Tube Diameter
Wide tube
4.1
925
98
4.32
-
4.1
925
98
4.86
14.5
Microprocessor
Auto (Hi, Me, Lo)
DC Twin Rotary (Inverter)
R410A / 1,700
Electric Expansion Valve
g
dB-A
47
48
Flare Type
20
6.35 (1/4") x 2
9.52 (3/8") x 2
m
mm (in.)
mm (in.)
Dimensions & Weight
Unit Dimensions
Height x Width x Depth
Package Dimensions
Height x Width x Depth
Weight
Net
Shipping
Shipping Volume
Heating
198 to 264
mm
569 x 790 x 285
mm
kg
kg
m3
645 x 921 x 386
42.0
45.0
0.22
DATA SUBJECT TO CHANGE WITHOUT NOTICE.
Remarks:
1.The Values shown in perfromance section and electrical rating section above are based on the following unit combination.
For other combination unit, please refer to the "Unit Combination Table" in this manual.
Indoor Unit: SAP-KMRV94EH 2units
Outdoor Unit: SAP-CMRV1424EH 1unit
2. Rating conditions are: Cooling: Indoor air temp.
27°C D.B. / 19°C W.B.
Outdoor air temp. 35°C D.B. / 24°C W.B.
7
Heating: Indoor air temp.
20°C D.B.
Outdoor air temp. 7°C D.B. / 6°C W.B.
Outdoor Unit
SAP-CMRV1924EH
Type
2-Room Multi Outdoor Unit
Number of Connectable Indoor Units
2
Number of Operatable Indoor Units
2
Max. Capacity of Operating Indoor Units
kW
8.65
Power Source
220 to 240V Single-Phase 50Hz
Voltage Rating
230V
Performance
Capacity
Cooling
5.6
( 2.1 to 6.8 )
19,100 ( 7,200 to 23,200 )
*1
kW
BTU/h
m 3/h
Air Circulation (High)
Electrical Rating
Available Voltage Range
Running Amperes
Power Input
Power Factor
E.E.R.
C.O.P.
Compressor Locked Rotor Amperes
Features
Controls
Fan Speeds
Compressor
Refrigerant / Amount charged at shipment
Refrigerant Control
Operation Sound
Hi
Refrigerant Tubing Connections
Max. allowable tubing length per unit
Refrigerant
Narrow tube
Tube Diameter
Wide tube
Dimensions & Weight
Unit Dimensions
Height x Width x Depth
Package Dimensions
Height x Width x Depth
Weight
Net
Shipping
Shipping Volume
Heating
7.3
( 2.4 to 8.4 )
24,900 ( 8,200 to 28,700 )
*1
Cooling
V
A
W
%
W/W
W/W
A
Heating
198 to 264
7.52
1,695
98
3.30
-
7.70
1,735
98
4.21
14.5
Microprocessor
Auto (Hi, Me, Lo)
DC Twin Rotary (Inverter)
R410A / 2,800
Electric Expansion Valve
g
dB-A
50
52
Flare Type
25
6.35 (1/4") x 2
9.52 (3/8") x 2
m
mm (in.)
mm (in.)
mm
740 x 900 x 320
mm
kg
kg
m3
860 x 1,032 x 413
65.0
69.0
0.36
DATA SUBJECT TO CHANGE WITHOUT NOTICE.
Remarks:
1.The Values shown in perfromance section and electrical rating section above are based on the following unit combination.
For other combination unit, please refer to the "Unit Combination Table" in this manual.
Indoor Unit: SAP-KMRV94EH 1unit + SAP-KRV184EH 1unit
2. Rating conditions are: Cooling: Indoor air temp.
Outdoor Unit: SAP-CMRV1924EH 1unit
27°C D.B. / 19°C W.B.
Heating: Indoor air temp.
Outdoor air temp. 35°C D.B. / 24°C W.B.
3. *1 This data will be available in next issue of the Technical & Service Manual.
8
20°C D.B.
Outdoor air temp. 7°C D.B. / 6°C W.B.
Outdoor Unit
SAP-CMRV1934EH
Type
3-Room Multi Outdoor Unit
Number of Connectable Indoor Units
3
Number of Operatable Indoor Units
3
Max. Capacity of Operating Indoor Units
kW
10.5
Power Source
220 to 240V Single-Phase 50Hz
Voltage Rating
230V
Performance
Capacity
kW
BTU/h
m 3/h
Air Circulation (High)
Electrical Rating
Available Voltage Range
Running Amperes
Power Input
Power Factor
E.E.R.
C.O.P.
Compressor Locked Rotor Amperes
Cooling
5.6
( 2.9 to 6.8 )
19,100 ( 9,900 to 23,200 )
*1
Heating
7.3
( 3.4 to 8.4 )
24,900 ( 11,600 to 28,700 )
*1
Cooling
Heating
V
A
W
%
W/W
W/W
A
Features
Controls
Fan Speeds
Compressor
Refrigerant / Amount charged at shipment
Refrigerant Control
Operation Sound
Hi
Refrigerant Tubing Connections
Max. allowable tubing length per unit
Refrigerant
Narrow tube
Tube Diameter
Wide tube
198 to 264
6.88
1,550
98
3.61
14.5
Microprocessor
Auto (Hi, Me, Lo)
DC Twin Rotary (Inverter)
R410A / 2,800
Electric Expansion Valve
g
dB-A
50
52
Flare Type
25
6.35 (1/4") x 3
9.52 (3/8") x 3
m
mm (in.)
mm (in.)
Dimensions & Weight
Unit Dimensions
Height x Width x Depth
Package Dimensions
Height x Width x Depth
Weight
Net
Shipping
Shipping Volume
7.70
1,735
98
4.21
mm
740 x 900 x 320
mm
kg
kg
m3
860 x 1,032 x 413
65.0
69.0
0.36
DATA SUBJECT TO CHANGE WITHOUT NOTICE.
Remarks:
1.The Values shown in perfromance section and electrical rating section above are based on the following unit combination.
For other combination unit, please refer to the "Unit Combination Table" in this manual.
Indoor Unit: SAP-KMRV94EH 3units
Outdoor Unit: SAP-CMRV1934EH 1unit
2. Rating conditions are: Cooling: Indoor air temp.
27°C D.B. / 19°C W.B.
Heating: Indoor air temp.
Outdoor air temp. 35°C D.B. / 24°C W.B.
3. *1 This data will be available in next issue of the Technical & Service Manual.
9
20°C D.B.
Outdoor air temp. 7°C D.B. / 6°C W.B.
Outdoor Unit
SAP-CMRV2444EH
Type
4-Room Multi Outdoor Unit
Number of Connectable Indoor Units
4
Number of Operatable Indoor Units
3
Max. Capacity of Operating Indoor Units
kW
12.2
Power Source
220 to 240V Single-Phase 50Hz
Voltage Rating
230V
Performance
Capacity
kW
BTU/h
m 3/h
Air Circulation (High)
Electrical Rating
Available Voltage Range
Running Amperes
Power Input
Power Factor
E.E.R.
C.O.P.
Compressor Locked Rotor Amperes
Cooling
6.8
( 2.9 to 8.1 )
23,200 ( 9,900 to 27,600 )
*1
Heating
8.6
( 3.4 to 9.0 )
29,300 ( 11,600 to 30,700 )
*1
Cooling
Heating
V
A
W
%
W/W
W/W
A
Features
Controls
Fan Speeds
Compressor
Refrigerant / Amount charged at shipment
Refrigerant Control
Operation Sound
Hi
Refrigerant Tubing Connections
Max. allowable tubing length per unit
Refrigerant
Narrow tube
Tube Diameter
Wide tube
198 to 264
8.87
2,000
98
3.40
14.5
Microprocessor
Auto (Hi, Me, Lo)
DC Twin Rotary (Inverter)
R410A / 2,800
Electric Expansion Valve
g
dB-A
50
52
Flare Type
25
6.35 (1/4") x 4
9.52 (3/8") x 3 + 12.7 (1/2") x 1
m
mm (in.)
mm (in.)
Dimensions & Weight
Unit Dimensions
Height x Width x Depth
Package Dimensions
Height x Width x Depth
Weight
Net
Shipping
Shipping Volume
8.87
2,000
98
4.30
mm
740 x 900 x 320
mm
kg
kg
m3
860 x 1,032 x 413
65.0
69.0
0.36
DATA SUBJECT TO CHANGE WITHOUT NOTICE.
Remarks:
1.The Values shown in perfromance section and electrical rating section above are based on the following unit combination.
For other combination unit, please refer to the "Unit Combination Table" in this manual.
Indoor Unit: SAP-KMRV94EH 3units
Outdoor Unit: SAP-CMRV2444EH 1unit
2. Rating conditions are: Cooling: Indoor air temp.
27°C D.B. / 19°C W.B.
Heating: Indoor air temp.
Outdoor air temp. 35°C D.B. / 24°C W.B.
3. *1 This data will be available in next issue of the Technical & Service Manual.
10
20°C D.B.
Outdoor air temp. 7°C D.B. / 6°C W.B.
Outdoor Unit
SAP-CMRV3144EH
Type
4-Room Multi Outdoor Unit
Number of Connectable Indoor Units
4
Number of Operatable Indoor Units
4
Max. Capacity of Operating Indoor Units
kW
14.7
Power Source
220 to 240V Single-Phase 50Hz
Voltage Rating
230V
Performance
Capacity
kW
BTU/h
m 3/h
Air Circulation (High)
Electrical Rating
Available Voltage Range
Running Amperes
Power Input
Power Factor
E.E.R.
C.O.P.
Compressor Locked Rotor Amperes
Cooling
8.0
( 2.9 to 9.2 )
27,300 ( 9,900 to 31,400 )
*1
Heating
9.4
( 3.4 to 9.8 )
32,100 ( 11,600 to 33,400 )
*1
Cooling
Heating
V
A
W
%
W/W
W/W
A
Features
Controls
Fan Speeds
Compressor
Refrigerant / Amount charged at shipment
Refrigerant Control
Operation Sound
Hi
Refrigerant Tubing Connections
Max. allowable tubing length per unit
Refrigerant
Narrow tube
Tube Diameter
Wide tube
198 to 264
7.58
1,725
99
4.64
17.0
Microprocessor
Auto (Hi, Me, Lo)
DC Twin Rotary (Inverter)
R410A / 3,800
Electric Expansion Valve
g
dB-A
50
52
Flare Type
30
6.35 (1/4") x 4
9.52 (3/8") x 2 + 12.7 (1/2") x 2
m
mm (in.)
mm (in.)
Dimensions & Weight
Unit Dimensions
Height x Width x Depth
Package Dimensions
Height x Width x Depth
Weight
Net
Shipping
Shipping Volume
8.96
2,040
99
4.61
mm
890 x 900 x 320
mm
kg
kg
m3
1,010 x 1,032 x 413
82.0
86.0
0.43
DATA SUBJECT TO CHANGE WITHOUT NOTICE.
Remarks:
1.The Values shown in perfromance section and electrical rating section above are based on the following unit combination.
For other combination unit, please refer to the "Unit Combination Table" in this manual.
Indoor Unit: SAP-KMRV94EH 4units
Outdoor Unit: SAP-CMRV3144EH 1unit
2. Rating conditions are: Cooling: Indoor air temp.
27°C D.B. / 19°C W.B.
Heating: Indoor air temp.
Outdoor air temp. 35°C D.B. / 24°C W.B.
3. *1 This data will be available in next issue of the Technical & Service Manual.
11
20°C D.B.
Outdoor air temp. 7°C D.B. / 6°C W.B.
2-2. Major Component Specifications
2-2-1. Outdoor Unit
Outdoor Unit
SAP-CMRV1424EH
Control PCB
Part No.
Controls
Control Circuit Fuse
CB-CMRV1424EH
Microprocessor
250V 25A
Compressor
Type
Compressor Model / Nominal Output
Compressor Oil ... Amount
Coil Resistance (Ambient Temp. 20 oC)
CC
Ohm
DC Twin Rotary (Hermetic)
C-6RVN93H0M / 1,000W
FV50S ... 350
R - S : 0.482
S - T : 0.482
T - R : 0.482
Safety Device
CT (Peak current cut-off control)
Compressor Discharge Temp. Control
Operation cut-off control in abnormal ambient Temp.
Overload Relay
Run Capacitor
Model
Operation Temp.
Micro F
VAC
Crankcase Heater
Yes
Yes
Yes
CS-7L115
Open : 115 oC, Close : 95 oC
-
Fan
Type
Q'ty ... Dia.
Fan Motor
Type
Model ... Q'ty
No. of Poles
Rough Measure RPM (Cool:Hi / Heat:Hi)
Nominal Output
Coil Resistance
(Ambient Temp. 20 oC)
Safety Device
Type
Over- Current Protection
Run Capacitor
Heat Exchanger Coil
Coil
Rows
Fin Pitch
Face Area
mm
W
Ohm
Micro F
VAC
mm
m2
External Finish
Propeller
1 ... D420
DC Motor
DAJ12-55J71-CR ... 1
8
750 / 750
50
RED - WHT : 77.5
WHT - BLU : 77.5
BLU - RED : 77.5
Internal Controller
Yes
-
Aluminum Plate Fin / Copper Tube
2
1.3
0.452
Acrylic baked-on enamel finish
DATA SUBJECT TO CHANGE WITHOUT NOTICE.
12
Outdoor Unit
SAP-CMRV1924EH
Control PCB
Part No.
Controls
Control Circuit Fuse
CB-CMRV1924EH
Microprocessor
250V 25A
Compressor
Type
Compressor Model / Nominal Output
Compressor Oil ... Amount
Coil Resistance (Ambient Temp. 20 oC)
CC
Ohm
DC Twin Rotary (Hermetic)
5KD240XAB21 / 1,700W
FV50S ... 900
U - V : 0.720
V - W : 0.708
W - U : 0.726
Safety Device
CT (Peak current cut-off control)
Compressor Discharge Temp. Control
Operation cut-off control in abnormal ambient Temp.
Overload Relay
Run Capacitor
Model
Operation Temp.
Micro F
VAC
Crankcase Heater
Yes
Yes
Yes
CS-7LN115
Open : 115 oC, Close : 100 oC
230V 25W
Fan
Type
Q'ty ... Dia.
Fan Motor
Type
Model ... Q'ty
No. of Poles
Rough Measure RPM (Cool:Hi / Heat:Hi)
Nominal Output
Coil Resistance
(Ambient Temp. 20 oC)
Safety Device
Type
Over- Current Protection
Over- Heat Protection
Run Capacitor
Heat Exchanger Coil
Coil
Rows
Fin Pitch
Face Area
mm
Propeller
1 ... D460
W
Ohm
DC Motor
SIC-71FW-D490-1 ... 1
8
750 / 750
90
-
Micro F
VAC
mm
m2
External Finish
Internal Controller
Yes
Yes
-
Aluminum Plate Fin / Copper Tube
2
1.4
0.595
Acrylic baked-on enamel finish
DATA SUBJECT TO CHANGE WITHOUT NOTICE.
13
Outdoor Unit
SAP-CMRV1934EH
Control PCB
Part No.
Controls
Control Circuit Fuse
CB-CMRV1934EH
Microprocessor
250V 25A
Compressor
Type
Compressor Model / Nominal Output
Compressor Oil ... Amount
Coil Resistance (Ambient Temp. 20 oC)
CC
Ohm
DC Twin Rotary (Hermetic)
5KD240XAB21 / 1,700W
FV50S ... 900
U - V : 0.720
V - W : 0.708
W - U : 0.726
Safety Device
CT (Peak current cut-off control)
Compressor Discharge Temp. Control
Operation cut-off control in abnormal ambient Temp.
Overload Relay
Run Capacitor
Model
Operation Temp.
Micro F
VAC
Crankcase Heater
Yes
Yes
Yes
CS-7LN115
Open : 115 oC, Close : 100 oC
230V 25W
Fan
Type
Q'ty ... Dia.
Fan Motor
Type
Model ... Q'ty
No. of Poles
Rough Measure RPM (Cool:Hi / Heat:Hi)
Nominal Output
Coil Resistance
(Ambient Temp. 20 oC)
Safety Device
Type
Over- Current Protection
Over- Heat Protection
Run Capacitor
Heat Exchanger Coil
Coil
Rows
Fin Pitch
Face Area
mm
Propeller
1 ... D460
W
Ohm
DC Motor
SIC-71FW-D490-1 ... 1
8
750 / 750
90
-
Micro F
VAC
mm
m2
External Finish
Internal Controller
Yes
Yes
-
Aluminum Plate Fin / Copper Tube
2
1.4
0.595
Acrylic baked-on enamel finish
DATA SUBJECT TO CHANGE WITHOUT NOTICE.
14
Outdoor Unit
SAP-CMRV2444EH
Control PCB
Part No.
Controls
Control Circuit Fuse
CB-CMRV2444EH
Microprocessor
250V 25A
Compressor
Type
Compressor Model / Nominal Output
Compressor Oil ... Amount
Coil Resistance (Ambient Temp. 20 oC)
CC
Ohm
DC Twin Rotary (Hermetic)
5KD240XAB21 / 1,700W
FV50S ... 900
U - V : 0.720
V - W : 0.708
W - U : 0.726
Safety Device
CT (Peak current cut-off control)
Compressor Discharge Temp. Control
Operation cut-off control in abnormal ambient Temp.
Overload Relay
Run Capacitor
Model
Operation Temp.
Micro F
VAC
Crankcase Heater
Yes
Yes
Yes
CS-7LN115
Open : 115 oC, Close : 100 oC
230V 25W
Fan
Type
Q'ty ... Dia.
Fan Motor
Type
Model ... Q'ty
No. of Poles
Rough Measure RPM (Cool:Hi / Heat:Hi)
Nominal Output
Coil Resistance
(Ambient Temp. 20 oC)
Safety Device
Type
Over- Current Protection
Over- Heat Protection
Run Capacitor
Heat Exchanger Coil
Coil
Rows
Fin Pitch
Face Area
mm
Propeller
1 ... D460
W
Ohm
DC Motor
SIC-71FW-D490-1 ... 1
8
750 / 750
90
-
Micro F
VAC
mm
m2
External Finish
Internal Controller
Yes
Yes
-
Aluminum Plate Fin / Copper Tube
2
1.4
0.595
Acrylic baked-on enamel finish
DATA SUBJECT TO CHANGE WITHOUT NOTICE.
15
Outdoor Unit
SAP-CMRV3144EH
Control PCB
Part No.
Controls
Control Circuit Fuse
CB-CMRV3144EH
Microprocessor
250V 25A
Compressor
Type
Compressor Model / Nominal Output
Compressor Oil ... Amount
Coil Resistance (Ambient Temp. 20 oC)
CC
Ohm
DC Twin Rotary (Hermetic)
5JD420XAB22 / 3,000W
FV50S ... 1,200
U - V : 0.435
V - W : 0.441
W - U : 0.452
Safety Device
CT (Peak current cut-off control)
Compressor Discharge Temp. Control
Operation cut-off control in abnormal ambient Temp.
Overload Relay
Run Capacitor
Model
Operation Temp.
Micro F
VAC
Crankcase Heater
Yes
Yes
Yes
CS-7LN115
Open : 115 oC, Close : 100 oC
230V 25W
Fan
Type
Q'ty ... Dia.
Fan Motor
Type
Model ... Q'ty
No. of Poles
Rough Measure RPM (Cool:Hi / Heat:Hi)
Nominal Output
Coil Resistance
(Ambient Temp. 20 oC)
Safety Device
Type
Over- Current Protection
Over- Heat Protection
Run Capacitor
Heat Exchanger Coil
Coil
Rows
Fin Pitch
Face Area
mm
Propeller
1 ... D460
W
Ohm
DC Motor
SIC-71FW-D490-1 ... 1
8
750 / 750
90
-
Micro F
VAC
mm
m2
External Finish
Internal Controller
Yes
Yes
-
Aluminum Plate Fin / Copper Tube
2
1.4
0.723
Acrylic baked-on enamel finish
DATA SUBJECT TO CHANGE WITHOUT NOTICE.
16
2-3. Other Component Specifications
Model No.
of sensor
Sensor Name
Quantity of Sensor
SAPSAPSAPSAPSAPCMRV1424EH CMRV1924EH CMRV1934EH CMRV2444EH CMRV3144EH
Outdoor air temp sensor
TKS295B
1
1
1
1
1
Outdoor heat exchanger sensor
TKS292B
1
1
1
1
1
AW / AN sensor
TKS292B
1
1
1
1
1
BW / BN sensor
TKS292B
1
1
1
1
1
CW / CN sensor
TKS292B
0
0
1
1
1
DW / DN sensor
TKS292B
0
0
0
1
1
Resistance (k ohm)
40
35
30
25
20
15
10
5
0
-20 -15 -10 -5 0
5 10
Temperature (°C)
Model No.
of sensor
Sensor Name
Compressor temp sensor
TKS293B
15
20
Quantity of Sensor
SAPSAPSAPSAPSAPCMRV1424EH CMRV1924EH CMRV1934EH CMRV2444EH CMRV3144EH
1
1
Resistance (k ohm)
200
180
160
140
120
100
80
60
40
20
0
0
10 20 30 40 50 60 70 80 90
Temperature (°C)
17
1
1
1
3. DIMENSIONAL DATA
Outdoor Unit SAP-CMRV1424EH
608
336
310
285
2
18
D:1
.6
:23
ID:
2-I
4-ID
295
Narrow tube service valve
dia.6.35 (1/4") × 2
Wide tube service valve
dia.9.52 (3/8") × 2
70
122
158
70
70
569
790
15
46
85
46
142
Unit: mm
18
Outdoor Unit SAP-CMRV1924EH
D:2
18
12
369
345
320
5-I
ID:
Narrow tube service valve
dia.6.35 (1/4") × 2
Wide tube service valve
dia.9.52 (3/8") × 2
85
113
150
75
72
740
900
18
35
293
136
3.6
608
51
114
Unit: mm
19
Outdoor Unit SAP-CMRV1934EH
608
136
3.6
12
D:2
18
369
345
320
5-I
ID:
Narrow tube service valve
dia.6.35 (1/4") × 3
Wide tube service valve
dia.9.52 (3/8") × 3
85
113
150
72
75 70
70
740
900
18
35
293
51
114
Unit: mm
20
Outdoor Unit SAP-CMRV2444EH
608
136
3.6
12
D:2
18
369
345
320
5-I
ID:
Wide tube service valve
dia.12.70 (1/2") × 1
Narrow tube service valve
dia.6.35 (1/4") × 4
Wide tube service valve
dia.9.52 (3/8") × 3
113
150
72
75 70
70
70 70
85
740
900
18
35
293
51
114
Unit: mm
21
Outdoor Unit SAP-CMRV3144EH
608
136
3.6
12
D:2
18
369
345
320
5-I
ID:
Wide tube service valve
dia.12.70 (1/2") × 2
Narrow tube service valve
dia.6.35 (1/4") × 4
Wide tube service valve
dia.9.52 (3/8") × 2
85
113
150
73
75 70
70
70 70
890
900
18
35
293
51
114
Unit: mm
22
4. REFRIGERANT FLOW DIAGRAM
4-1. Refrigerant Flow Diagram
Outdoor Unit SAP-CMRV1424EH
Outdoor unit
Wide tube
O.D.9.52mm
Sub
accumulator
Service valve on
wide tube
BW
AW
O.D.9.52mm
Main
accumulator
Compressor
Indoor unit
Muffler
Defrost valve
for hot gas bypass
Narrow tube
O.D.6.35mm
Service valve on
narrow tube
BN
S
Capillary
tube for
split flow
Electric
expansion
valve
M
Cooling cycle
M
AN
O.D.6.35mm
Heat exchanger
4-way
valve
Heating cycle
Strainer
Defrosting cycle
Insulation of Refrigerant Tubing
IMPORTANT
Because capillary tubing is used in the outdoor unit, both the
wide and narrow tubes of this air conditioner become cold. To
prevent heat loss and wet floors due to dripping of
condensation, both tubes must be well insulated with a
proper insulation material. The thickness of the insulation
should be a min. 8 mm.
CAUTION
After a tube has been insulated,
never try to bend it into a narrow
curve because it can cause the tube
to break or crack.
23
Insulation
Thickness:
Min. 8 mm
Thickness:
Min. 8 mm
Narrow tube
Wide tube
Outdoor Unit SAP-CMRV1924EH
Outdoor unit
Wide tube
O.D.9.52mm
Sub
accumulator
Service valve on
wide tube
BW
Main
accumulator
Compressor
Indoor unit
AW
O.D.9.52mm
Header
Defrost valve
for hot gas bypass
Narrow tube
O.D.6.35mm
Service valve on
narrow tube
BN
Electric
expansion
valve
M
Cooling cycle
M
AN
O.D.6.35mm
S
Heat exchanger
4-way
valve
Heating cycle
Strainer
Header
Defrosting cycle
Insulation of Refrigerant Tubing
IMPORTANT
Because capillary tubing is used in the outdoor unit, both the
wide and narrow tubes of this air conditioner become cold. To
prevent heat loss and wet floors due to dripping of
condensation, both tubes must be well insulated with a
proper insulation material. The thickness of the insulation
should be a min. 8 mm.
CAUTION
After a tube has been insulated,
never try to bend it into a narrow
curve because it can cause the tube
to break or crack.
24
Insulation
Thickness:
Min. 8 mm
Thickness:
Min. 8 mm
Narrow tube
Wide tube
Outdoor Unit SAP-CMRV1934EH
Outdoor unit
Wide tube
O.D.9.52mm
Sub
accumulator
Service valve on
wide tube
CW
Main
accumulator
Compressor
Indoor unit
BW
O.D.9.52mm
AW
Header
4-way
valve
Defrost valve
for hot gas bypass
Narrow tube
O.D.6.35mm
Service valve on
narrow tube
CN
M
M
BN
O.D.6.35mm
Cooling cycle
M
AN
O.D.6.35mm
Electric
expansion
valve
S
Heat exchanger
O.D.9.52mm
Heating cycle
Strainer
Header
Defrosting cycle
Insulation of Refrigerant Tubing
IMPORTANT
Because capillary tubing is used in the outdoor unit, both the
wide and narrow tubes of this air conditioner become cold. To
prevent heat loss and wet floors due to dripping of
condensation, both tubes must be well insulated with a
proper insulation material. The thickness of the insulation
should be a min. 8 mm.
CAUTION
After a tube has been insulated,
never try to bend it into a narrow
curve because it can cause the tube
to break or crack.
25
Insulation
Thickness:
Min. 8 mm
Thickness:
Min. 8 mm
Narrow tube
Wide tube
Outdoor Unit SAP-CMRV2444EH
Outdoor unit
Wide tube
O.D.9.52mm
Service valve on
wide tube
DW
Sub
accumulator
Main
accumulator
CW
Compressor
Indoor unit
O.D.9.52mm
BW
O.D.9.52mm
AW
O.D.12.7mm
Header
Defrost valve
for hot gas bypass
Narrow tube
O.D.6.35mm
Service valve on
narrow tube
DN
M
M
CN
O.D.6.35mm
M
BN
O.D.6.35mm
Cooling cycle
M
AN
O.D.6.35mm
Electric
expansion
valve
S
Heat exchanger
4-way
valve
Strainer
Heating cycle
Header
Defrosting cycle
Insulation of Refrigerant Tubing
IMPORTANT
Because capillary tubing is used in the outdoor unit, both the
wide and narrow tubes of this air conditioner become cold. To
prevent heat loss and wet floors due to dripping of
condensation, both tubes must be well insulated with a
proper insulation material. The thickness of the insulation
should be a min. 8 mm.
CAUTION
After a tube has been insulated,
never try to bend it into a narrow
curve because it can cause the tube
to break or crack.
26
Insulation
Thickness:
Min. 8 mm
Thickness:
Min. 8 mm
Narrow tube
Wide tube
Outdoor Unit SAP-CMRV3144EH
Outdoor unit
Wide tube
O.D.9.52mm
Service valve on
wide tube
DW
Sub
accumulator
Main
accumulator
CW
Compressor
Indoor unit
O.D.9.52mm
BW
O.D.12.7mm
AW
O.D.12.7mm
Header
Defrost valve
for hot gas bypass
Narrow tube
O.D.6.35mm
Service valve on
narrow tube
DN
M
M
CN
O.D.6.35mm
M
BN
O.D.6.35mm
Cooling cycle
M
AN
O.D.6.35mm
Electric
expansion
valve
S
Heat exchanger
4-way
valve
Strainer
Heating cycle
Header
Defrosting cycle
Insulation of Refrigerant Tubing
IMPORTANT
Because capillary tubing is used in the outdoor unit, both the
wide and narrow tubes of this air conditioner become cold. To
prevent heat loss and wet floors due to dripping of
condensation, both tubes must be well insulated with a
proper insulation material. The thickness of the insulation
should be a min. 8 mm.
CAUTION
After a tube has been insulated,
never try to bend it into a narrow
curve because it can cause the tube
to break or crack.
27
Insulation
Thickness:
Min. 8 mm
Thickness:
Min. 8 mm
Narrow tube
Wide tube
5. PERFORMANCE DATA
5-1. Temperature Charts
This data will be available in next issue of the Technical & Service Manual.
5-2. Heating Performance
This data will be available in next issue of the Technical & Service Manual.
28
COMPRESSOR
THERMISTOR
BLK
BLK
CM
GRN/YEL
FERRITE
CORE
YEL
YEL
BLK
BLK
1 1 RED (PNK)
2 2 WHT
3 3 BLU
WHT
V
W
U
OLR1
W
W
OLR0
W
1 2 3 4
COIL/OUTDOOR
1
2 COMP
W
W
(4P) CONNECTOR
COIL
WHT
THERMISTOR
YEL
YEL
BLK
BLK
OUTDOOR
THERMISTOR
(3P)CONNECTOR
(2P) CONNECTOR
RED (PNK)
S/U
R/V WHT
BLU
C/W
COMPRESSOR
MOTOR
(OLR)
OVERLOAD RELAY
WHT
1 1
BLK
2 2
BLK
(2P) CONNECTOR
RED
1 1
WHT
WHT
2 2
WHT
WHT
1 2 3 4
A-TH
1 2 3 4
1 2 3 4
1 2 3 4
B-TH
2 1
2 1
W
W
DEF1 DEF0
CONTROLLER
CN04 DCFM
1 2 3 4 5 6 7
(4P) CONNECTOR
BLU
(4P) CONNECTOR
RED
AW THERMISTOR
YEL
YEL
YEL
YEL
AN THERMISTOR
YEL
YEL
YEL
YEL
1 2 3 4
1 2 3 4
BLK
BLK
1 2 3 4 5 6 7
1 2 3 4 5 6 7
FAN MOTOR
FM
2 1
2 1
RV
(2P) CONNECTOR
WHT
BLU
BLU
W
MV1
1 2 3 4 5
RV1 RV0
W
BLK
BLK
BW THERMISTOR
YEL
YEL
YEL
YEL
BN THERMISTOR
BLK
RED
BLU
YEL
1 2 3 4
1 2 3 4
WHT
YEL
YEL
YEL
YEL
(7P) CONNECTOR
WHT
WHT
(2P) CONNECTOR
BLK
BLU
BLU
BLK
RED
BLU
YEL
1 2 3 4 5
1 2 3 4 5
W
MV0
1 2 3 4 5
1 2 3 4 5
1 2 3 4 5
MV0
MAGNETIC COIL
1 2 3 4 5
1 2 3 4 5
MV1
BLU
MAGNETIC COIL
1 2 3 4 5
1 2 3 4 5
W
L2
E-1
W
E-2
W
L1
2 1
2 1
REACTANCE
WHT
WHT
(5P) CONNECTOR
DEF
(5P) CONNECTOR
GRN/YEL
ORG
RED
YEL
BLK
GRY
ORG
RED
YEL
BLK
GRY
ORG
RED
YEL
BLK
GRY
ORG
RED
YEL
BLK
GRY
(2P) CONNECTOR
WHT
WHT
WHT
GRN/YEL
RED
COIL
4WAY VALVE
25A
W
W
SI-A
SI-B
BLK
BLK
BLU
RED
WHT
BLK
REACTANCE
ACIN2
W
W
ACIN1
E
GRN/YEL
W
WHT
WHT
BLK
8
7
6
5
4
3
2
1
TERMINAL
PLATE
L
A INDDOR
UNIT
GND
N
29
B INDDOR
UNIT
WARNING
POWER
SUPPLY
COIL
DEFROST VALVE
6. ELECTRICAL DATA
6-1. Electric Wiring Diagrams
Outdoor Unit SAP-CMRV1424EH
To avoid electrical shock hazard, be sure to
disconnect power before checking, servicing
and/or cleaning any electrical parts.
8FA2-5257-56900-1
TO INDDOR UNIT
(OLR)
OVERLOAD RELAY
(2P) CONNECTOR
W
W
W
W
1 2 3
1 2 3
CM
WHT
(2P) CONNECTOR
W
W
HEATER1 HEATER0
2 2
1 1
HEATER
CRANKCASE
C/W
GRN/YEL
COMPRESSOR
MOTOR
S/U
V
OLR1
W
U
OLR0
W
COMP
COMPRESSOR
THERMISTOR
BLK
BLK
WHT
WHT
(3P) CONNECTOR
RED
1 1
2 2
1 2 3 4
1 2 3 4
B-TH
WHT
WHT
WHT
1 1
2 2
1 2 3 4
1 2 3 4
A-TH
WHT
1 2 3 4
1 2 3 4
COIL/OUTDOOR
WHT
RED (PNK)
WHT
BLU
RED (PNK)
R/V
WHT
BLU
FERRITE
CORE
COIL
THERMISTOR
YEL
YEL
BLK
BLK
OUTDOOR
THERMISTOR
AW THERMISTOR
YEL
YEL
YEL
YEL
AN THERMISTOR
BW THERMISTOR
YEL
YEL
YEL
YEL
BN THERMISTOR
WHT
WHT
DEF
2 1
2 1
W
W
DEF1 DEF0
CN04 DCFM
1 2 3 4 5 6 7
1 2 3 4 5 6 7
1 2 3 4 5 6 7
RED
FAN MOTOR
FM
RV
2 1
2 1
W
W
(2P) CONNECTOR
WHT
2 1
2 1
W
L1
W
L2
W
1 2 3 4 5
1 2 3 4 5
MV0
MAGNETIC COIL
1 2 3 4 5
1 2 3 4 5
MV1
MAGNETIC COIL
E
25A
W
W
GRN/YEL
E-1
MV0
1 2 3 4 5
1 2 3 4 5
E-2
MV1
1 2 3 4 5
1 2 3 4 5
CONTROLLER
RV1 RV0
REACTANCE
GRN/YEL
ORG
RED
YEL
BLK
GRY
(2P) CONNECTOR
BLK
BLU
BLU
RED
GRN/YEL
ORG
RED
YEL
BLK
GRY
BLK
BLK
BLU
BRN
WHT
ORG
BLU
BRN
WHT
ORG
(2P) CONNECTOR
WHT
BLU
BLU
BLK
BLK
WHT
WHT
WHT
WHT
COIL
4WAY VALVE
W
W
SI-B
REACTANCE
W
SI-A
ACIN2
W
ACIN1
BLK
BLK
BLU
RED
WHT
BLK
FERRITE
CORE
WHT
WHT
BLK
8
7
6
5
4
3
2
1
TERMINAL
PLATE
L
A INDDOR
UNIT
GND
N
30
B INDDOR
UNIT
WARNING
POWER
SUPPLY
COIL
DEFROST VALVE
Outdoor Unit SAP-CMRV1924EH
To avoid electrical shock hazard, be sure to
disconnect power before checking, servicing
and/or cleaning any electrical parts.
8FA2-5257-84200-0
TO INDDOR UNIT
COMPRESSOR
THERMISTOR
BLK
BLK
CM
C/W
U
V
W
W
W
W
1 2 3 4 5 6 7
1 2 3 4 5 6 7
FAN MOTOR
FM
OVERLOAD RELAY
(OLR)
RED
2 2
WHT
WHT
1 1
WHT
WHT
(2P) CONNECTOR
COMPRESSOR
MOTOR
S/U
1 2 3
1 2 3
OLR1
W
CN04 DCFM
1 2 3 4 5 6 7
OLR0
W
2 1
2 1
DEF
W
DEF1 DEF0
W
RV
2 1
2 1
W
C-TH
1 2 3 4
1 2 3 4
MV2
1 2 3 4 5
1 2 3 4 5
MAGNETIC COIL
MV2
1 2 3 4 5
1 2 3 4 5
W
SI-C
SICOM2
W
1 2 3 4 5 6
1 2 3 4 5 6
CN02
1 2 3 4 5 6 7 8
1 2 3 4 5 6 7 8
CN03
1 2 3 4
1 2 3 4
CN01
W
KS10
1 2 3 4
KS22
1 2 3 4 5 6
RV1 RV0
W
WHT
W
W
WHT
REACTANCE
2 1
2 1
L1
L2
E-2
W
E
E-1
MAGNETIC COIL
MV1
1 2 3 4 5
1 2 3 4 5
BRN
MAGNETIC COIL
MV0
1 2 3 4 5
1 2 3 4 5
25A
W
W
MV0
1 2 3 4 5
1 2 3 4 5
W
W
GRN/YEL
MV1
1 2 3 4 5
1 2 3 4 5
HEATER1 HEATER0
1 1
2 2
(2P) CONNECTOR
WHT
(2P) CONNECTOR
WHT
CRANKCASE
HEATER
COIL
4WAY VALVE
KS23
1 2 3 4 5 6 7 8
CONTROLLER
1 2 3 4
1 2 3 4
B-TH
1 2 3 4
1 2 3 4
A-TH
1 2 3 4
1 2 3 4
COIL/OUTDOOR
1 1
2 2
WHT
FERRITE
CORE
COMP
RED
RED
(3P) CONNECTOR
COIL
THERMISTOR
YEL
YEL
BLK
BLK
OUTDOOR
THERMISTOR
GRN/YEL
RED (PNK)
WHT
BLU
AW THERMISTOR
YEL
YEL
YEL
YEL
AN THERMISTOR
BLU
BRN
WHT
ORG
(2P) CONNECTOR
WHT
BLK
WHT
RED
BLU
BLK
WHT
RED
BLU
CW THERMISTOR
YEL
YEL
YEL
YEL
CN THERMISTOR
RED (PNK)
R/V
WHT
BLU
BW THERMISTOR
YEL
YEL
YEL
YEL
BN THERMISTOR
BLU
BRN
WHT
ORG
(2P) CONNECTOR
BLK
BLU
BLU
BLK
BLK
WHT
WHT
WHT
WHT
BLU
BLU
BLK
WHT
RED
BLU
BLK
WHT
W
SI-B
REACTANCE
W
SI-A
ACIN2
W
ACIN1
W
BLK
BLK
BLU
RED
WHT
BLK
FERRITE
CORE
WHT
5
9
8
7
6
4
WHT
3
2
1
BLK
BLK
3
2
1
TERMINAL
PLATE
L
GND
N
BLK
BLK
BLK
WHT
RED
BLU
GRN/YEL
ORG
RED
YEL
BLK
GRY
GRN/YEL
ORG
RED
YEL
BLK
GRY
POWER
SUPPLY
A INDDOR
UNIT
WHT
WHT
WHT
ORG
RED
YEL
BLK
GRY
31
B INDDOR
UNIT
GND
WARNING
C INDDOR
UNIT
COIL
DEFROST VALVE
Outdoor Unit SAP-CMRV1934EH
To avoid electrical shock hazard, be sure to
disconnect power before checking, servicing
and/or cleaning any electrical parts.
8FA2-5257-57000-0
TO INDDOR UNIT
COMPRESSOR
THERMISTOR
BLK
BLK
CM
C/W
OLR1
U
V
W
W
W
W
W
CN04 DCFM
1 2 3 4 5 6 7
OLR0
W
1 2 3 4 5 6 7
1 2 3 4 5 6 7
FM
FAN MOTOR
OVERLOAD RELAY
(OLR)
RED
2 2
WHT
WHT
1 1
WHT
WHT
(2P) CONNECTOR
COMPRESSOR
MOTOR
S/U
1 2 3
1 2 3
1 1
2 2
2 1
2 1
DEF
W
DEF1 DEF0
W
RV
2 1
2 1
W
D-TH
1 2 3 4
1 2 3 4
C-TH
1 2 3 4
1 2 3 4
MV3
1 2 3 4 5
1 2 3 4 5
MV2
1 2 3 4 5
1 2 3 4 5
1 2 3 4 5
1 2 3 4 5
MV2
MAGNETIC COIL
1 2 3 4 5
1 2 3 4 5
MV3
MAGNETIC COIL
W
SI-D
W
SI-C
SICOM2
W
1 2 3 4 5 6
1 2 3 4 5 6
CN02
1 2 3 4 5 6 7 8
1 2 3 4 5 6 7 8
CN03
1 2 3 4
1 2 3 4
CN01
W
KS10
1 2 3 4
KS22
1 2 3 4 5 6
RV1 RV0
W
WHT
W
W
WHT
REACTANCE
2 1
2 1
L1
L2
E-2
W
E
E-1
MAGNETIC COIL
MV1
1 2 3 4 5
1 2 3 4 5
GRY
BRN
MAGNETIC COIL
MV0
1 2 3 4 5
1 2 3 4 5
25A
W
W
MV0
1 2 3 4 5
1 2 3 4 5
W
W
GRN/YEL
MV1
1 2 3 4 5
1 2 3 4 5
HEATER1 HEATER0
1 1
2 2
(2P) CONNECTOR
WHT
(2P) CONNECTOR
WHT
CRANKCASE
HEATER
COIL
4WAY VALVE
KS23
1 2 3 4 5 6 7 8
CONTROLLER
1 2 3 4
1 2 3 4
B-TH
1 2 3 4
1 2 3 4
A-TH
1 2 3 4
1 2 3 4
COIL/OUTDOOR
FERRITE
CORE
WHT
COMP
RED
RED
(3P) CONNECTOR
COIL
THERMISTOR
YEL
YEL
BLK
BLK
OUTDOOR
THERMISTOR
GRN/YEL
RED (PNK)
WHT
BLU
RED (PNK)
WHT
BLU
AW THERMISTOR
YEL
YEL
YEL
YEL
AN THERMISTOR
DW THERMISTOR
YEL
YEL
YEL
YEL
DN THERMISTOR
BLU
BRN
WHT
ORG
(2P) CONNECTOR
BLK
BLU
BLU
BLK
BLK
BLK
WHT
RED
BLU
BLK
WHT
RED
BLU
CW THERMISTOR
YEL
YEL
YEL
YEL
CN THERMISTOR
R/V
BW THERMISTOR
YEL
YEL
YEL
YEL
BN THERMISTOR
BLU
BRN
WHT
ORG
(2P) CONNECTOR
WHT
BLK
WHT
RED
BLU
BLK
WHT
ORG
RED
YEL
BLK
GRY
WHT
WHT
WHT
WHT
BLU
BLU
BLK
BLK
BLK
WHT
RED
BLU
ORG
RED
YEL
BLK
GRY
W
SI-B
REACTANCE
W
SI-A
ACIN2
W
ACIN1
W
BLK
BLK
BLU
RED
WHT
BLK
FERRITE
CORE
WHT
WHT
WHT
GND
12
11
9
GND
10
8
7
6
5
BLK
4
WHT
3
2
1
BLK
BLK
3
2
1
TERMINAL
PLATE
L
N
WHT
WHT
WHT
GRN/YEL
ORG
RED
YEL
BLK
GRY
GRN/YEL
ORG
RED
YEL
BLK
GRY
POWER
SUPPLY
A INDDOR
UNIT
B INDDOR
UNIT
32
C INDDOR
UNIT
WARNING
D INDDOR
UNIT
COIL
DEFROST VALVE
Outdoor Unit SAP-CMRV2444EH
To avoid electrical shock hazard, be sure to
disconnect power before checking, servicing
and/or cleaning any electrical parts.
8FA2-5257-57100-0
TO INDDOR UNIT
CM
C/W
OLR1
U
V
W
W
W
W
W
CN04 DCFM
1 2 3 4 5 6 7
OLR0
W
1 2 3 4 5 6 7
1 2 3 4 5 6 7
FAN MOTOR
FM
WHT
OVERLOAD RELAY
(OLR)
RED
2 2
WHT
WHT
1 1
WHT
WHT
(2P) CONNECTOR
COMPRESSOR
MOTOR
S/U
WHT
COMPRESSOR
THERMISTOR
BLK
BLK
1 2 3
1 2 3
1 1
2 2
2 1
2 1
W
W
DEF1 DEF0
2 1
2 1
RV
W
W
D-TH
1 2 3 4
1 2 3 4
C-TH
1 2 3 4
1 2 3 4
MV3
1 2 3 4 5
1 2 3 4 5
MAGNETIC COIL
MV3
1 2 3 4 5
1 2 3 4 5
MV2
1 2 3 4 5
1 2 3 4 5
MAGNETIC COIL
MV2
1 2 3 4 5
1 2 3 4 5
W
SI-D
W
WHT
W
W
WHT
REACTANCE
2 1
2 1
W
E-2
E
MAGNETIC COIL
MV1
1 2 3 4 5
1 2 3 4 5
GRY
BRN
MAGNETIC COIL
MV0
1 2 3 4 5
1 2 3 4 5
W
W
W
SI-A
SI-B
ACIN2
W
ACIN1
REACTANCE
25A
W
W
GRN/YEL
E-1
MV0
1 2 3 4 5
1 2 3 4 5
W
L1
W
L2
MV1
1 2 3 4 5
1 2 3 4 5
HEATER1 HEATER0
SI-C
SICOM2
W
1 2 3 4 5 6
1 2 3 4 5 6
CN02
1 2 3 4 5 6 7 8
1 2 3 4 5 6 7 8
CN03
1 2 3 4
1 2 3 4
CN01
W
KS10
1 2 3 4
KS22
1 2 3 4 5 6
KS23
1 2 3 4 5 6 7 8
RV1 RV0
1 1
2 2
(2P) CONNECTOR
WHT
(2P) CONNECTOR
WHT
CRANKCASE
HEATER
COIL
4WAY VALVE
WHT
WHT
WHT
WHT
DEF
CONTROLLER
1 2 3 4
1 2 3 4
B-TH
1 2 3 4
1 2 3 4
A-TH
(7P) CONNECTOR
FERRITE
CORE
COMP
RED
RED
(3P) CONNECTOR
1 2 3 4
1 2 3 4
COIL/OUTDOOR
DW THERMISTOR
YEL
YEL
YEL
YEL
DN THERMISTOR
RED (PNK)
WHT
BLU
COIL
THERMISTOR
YEL
YEL
BLK
BLK
OUTDOOR
THERMISTOR
BLK
WHT
RED
BLU
BLK
WHT
RED
BLU
CW THERMISTOR
YEL
YEL
YEL
YEL
CN THERMISTOR
R/V
AW THERMISTOR
YEL
YEL
YEL
YEL
AN THERMISTOR
GRN/YEL
(2P) CONNECTOR
BLK
BLU
BLU
BLK
BLK
BLK
WHT
RED
BLU
BLK
WHT
ORG
RED
YEL
BLK
GRY
BLU
BRN
WHT
ORG
(2P) CONNECTOR
WHT
BLU
BLU
BLK
BLK
BLK
WHT
RED
BLU
ORG
RED
YEL
BLK
GRY
RED (PNK)
WHT
BLU
BW THERMISTOR
YEL
YEL
YEL
YEL
BN THERMISTOR
BLU
BRN
WHT
ORG
WHT
WHT
WHT
GRN/YEL
ORG
RED
YEL
BLK
GRY
BLK
BLK
BLU
RED
WHT
BLK
FERRITE
CORE
WHT
WHT
WHT
12
11
10
9
8
7
6
5
BLK
4
WHT
3
2
1
BLK
BLK
3
2
1
TERMINAL
PLATE
L
GND
N
GRN/YEL
ORG
RED
YEL
BLK
GRY
POWER
SUPPLY
A INDDOR
UNIT
B INDDOR
UNIT
33
C INDDOR
UNIT
GND
WARNING
D INDDOR
UNIT
COIL
DEFROST VALVE
Outdoor Unit SAP-CMRV3144EH
To avoid electrical shock hazard, be sure to
disconnect power before checking, servicing
and/or cleaning any electrical parts.
8FA2-5257-89000-0
TO INDDOR UNIT
7. FUNCTIONS
7-1. Explanation of Functions
NOTE
The numerical values such as temperature, frequency, time and current in parentheses are an example
of SAP-CMRV3144EH and the values are different from the other models.
Control/conditions
INITIAL
Unit operation
Breaker is ON.
The ON/OFF operation
button on the remote
controller is pressed.
Explanation
Power is supplied to the indoor and outdoor unit
control circuits, however the unit remains stopped.
Positioning of the outdoor unit electric expansion
valve is performed.
If automatic operation mode has been selected
with the remote controller, operation begins in
HEAT, SENSOR DRY, or COOL mode
depending on the room temperature and
outdoor temperature at the time operation starts.
This applies in the case of automatic
HEAT/COOL operation.
Depending on the operational mode, refer to the HEAT, SENSOR DRY, or COOL item.
HEAT
The ON/OFF operation
button on the remote
controller is pressed.
Operation lamp illuminates.
Indoor fan is stopped to prevent cold air from
being emitted.
Outdoor unit begins operating after
forced-stop is canceled.
The unit is forced to stop for 3 minutes after
the power is turned ON, or 3 minutes after the
compressor stops, in order to protect the
compressor.
The frequency is increased at the rate of 1 Hz
every 0.5 seconds.
When the indoor coil temperature rises,
the compressor starts,
the outdoor fan starts,
and the indoor fan changes from "LL"
to the set fan speed.
Depending on the relationship between the
remote controller temperature setting and the
room temperature, the compressor may stop
temporarily (in other words, the thermostat
may turn OFF).
When the frequency reaches Hz,frequency
increases are stopped for a period of seconds.
(Refor to Table 2 "Freguency control".)
This is in order to stabilize the return of oil to the
compressor.
The frequency then increases.
If the indoor and outdoor temperatures are high,
the current peak cut-off activates, stopping any
increases in frequency.
The room temperature
has reached the desired
temperature.
The indoor temperature and the remote
controller temperature setting are
approximately equal.
The thermostat turns
OFF.
The indoor fan is stopped.
The indoor and outdoor
temperatures are high.
The outdoor unit stops. (It does not stop if the
thermostat for another indoor unit is ON.)
Approximately 30 seconds after the
thermostat turns OFF, the indoor fan is
stopped.
In order to protect the compressor, the outdoor
unit will not operate for 3 minutes after the
thermostat turns OFF, even if the room
temperature drops below the desired
temperature.
The frequency is not increased, even if
there is a difference between the room
temperature and the desired temperature.
In some cases, the frequency may be
decreased.
The thermostat turns ON.
Operating frequency is stabilized in order to
maintain a comfortable environment.
The indoor unit is stopped.
34
The outdoor unit starts automatically after 3
minutes.
During these 3 minutes, a low-pressure
pressure balance is achieved, allowing the
compressor to start more easily.
The amount of heat pump exceeds the amount
of heat radiation from the room.
Therefore, there is no need to further increase
the compressor capacity, and the frequency is
stabilized or lowered.
The unit operated before, and the temperature of
the indoor heat exchanger is relatively warm.
Therefore,the fan speed may start at the set fan
speed at the same time that the thermostat turns
ON.
Control/conditions
HEAT
When defrost operation
begins, frost has formed
on the outdoor unit
(when the ambient air
temperature is low).
Unit operation
Explanation
Defrost operation begins based on outdoor
temperature conditions.
Non-stop defrost
Indoor fan : Stopped
Outdoor fan : Stopped
Compressor : 80 Hz
Solenoid valve (for hot gas bypass): ON
4-way valve : Remains ON
Operation lamp : Red and orange ON
alternately
Non-stop defrost (Refer to Fig. 1)
1. After HEAT operation begins, the temperature
of the outdoor heat exchanger is at or below the
L1 line for 35 minutes.
(If outdoor air temperature is less than –3 °C,
the time is 48 minutes)
2. After HEAT operation begins, the temperature
of the outdoor heat exchanger is at or below the
L2 line for 120 minutes.
The 4-way valve remains ON during defrost.
The outdoor fan stops and the solenoid
valve turns ON, allowing the refrigerant to
bypass the indoor unit.
The operating frequency during defrost is
80 Hz. (Frequency is lowered if the current
peak cut-off function is activated.)
The maximum length of a single defrost
operation is 12 minutes.
For the outdoor heat exchanger temperature
conditions for ending defrost, refer to Table 1.
Defrost release
Indoor fan turns ON.
After 10 seconds, the solenoid valve
(for hot gas bypass) turns OFF.
When the cold air feel has disappeared,
the indoor fan starts and gradually increases
speed until it reaches the set speed.
STOP
[Clean defrost]
Defrost is performed
when the outdoor unit is
stopped, and the
temperature of the
outdoor unit coil is at or
below the L1 line.
(Refer to Fig. 1.)
All indicator lamps turn OFF. The indoor and
outdoor units stop.
Operation is restarted
within 4 hours (only when
AUTO mode is selected
with the remote
controller).
Starts operating in the same operating mode
(HEAT) and with the same temperature
settings as before operation was stopped.
Operation starts after 4
hours or more have
passed.
New operation begins based on the
temperature conditions at the time the
ON/OFF button is pressed.
Within 4 hours after operation was stopped, it is
assumed that there has been no significant
change in the indoor and outdoor temperatures,
and the previous conditions (HEAT) are stored.
Temperature of releasing
Outdoor heat
exchanger temperature
Defrost operation time
(–20)
Outdoor air
temperature
0
(– 6)
(– 7)
L2
L1
(– 24)
(– 28)
Coil temperature for
releasing defrosting
Less than 2 minutes
2 minutes or more
No releasing
14 °C or higher (*1)
*1 The temperature for releasing of defrosting is (20 °C) or higher when the
outdoor air temperature is less than 0 °C.
Table 1
Fig. 1
35
Control/conditions
COOL
The ON/OFF operation
button on the remote
controller is pressed.
Unit operation
Explanation
The operation lamp illuminates.
The indoor fan operates at the set fan speed.
The outdoor unit stops.
The outdoor unit starts.
The outdoor unit does not operate for 3 minutes
even after the breaker is turned ON.
The frequency is increased at the rate of 0.5
Hz every 1 seconds.
(Compressor and the outdoor fan start.)
The room temperature
has reached the
desired temperature.
When the frequency reaches Hz,
frequency increases are stopped for a period
of seconds. (Refer to Table 2.)
This is in order to stabilize the return of oil to the
compressor.
The frequency then increases.
If the indoor and outdoor temperatures are high,
the current peak cut-off activates, stopping
any increases in frequency.
The indoor temperature and the desired
temperature are approximately equal.
Operating frequency is stabilized in order to
maintain a comfortable environment.
The thermostat turns
OFF.
The thermostat turns
ON again.
Freeze prevention
The outdoor unit stops. (It does not stop if the
thermostart for another indoor unit is ON.)
After the thermostat turns ON again, the
outdoor unit will not operate for 3 minutes,
even if the room temperature increases
above the desired temperature.
After 3 minutes, the outdoor unit begins operating
automatically.
During these 3 minutes, a pressure balance is
achieved, allowing the compressor to start
more easily.
When the temperature of the indoor heat
exchanger drops to approximately 2 °C
or below, the compressor turns OFF, the
outdoor fan turns OFF, and the indoor fan
continues operating with no changes.
In order to protect against freezing, the
compressor stops temporarily, until the
temperature of the indoor heat exchanger has
risen.
Approximately 3 minutes later, if the
temperature of the indoor heat exchanger
is adove 8 °C, the system returns to its
original conditions.
Stop
All indicator lamps turn OFF. The indoor and
outdoor units stop.
Operation is restarted
within 4 hours (only when
AUTO mode is selected
with the remote
controller).
Starts operating in the same operating mode
(COOL) and with the same temperature
settings as before operation was stopped.
Operation starts after 4
hours or more have
passed.
New operating mode is determined based on
the temperature conditions at the time the
ON/OFF operation button is pressed.
Within 4 hours after operation was stopped, it is
assumed that there has been no significant
change in the indoor and outdoor temperatures,
and the previous conditions (COOL) are stored.
Frequency control
(senconds)
(Hz)
Outdoor air temperature is below 0 °C.
Outdoor air temperature is 0 °C or higher.
(25) Hz
(120) seconds
(60) seconds
(35) Hz
(60) seconds
(30) seconds
(45) Hz
(60) seconds
(30) seconds
(55) Hz
(180) seconds
(90) seconds
Table 2
36
(1/f fluctuation fan)
Control/conditions
SENSOR The ON/OFF operation
button on the remote
DRY
controller is pressed.
Unit operation
The operation lamp illuminates.
The indoor fan operates at the set fan speed.
The outdoor unit stops.
The outdoor unit starts.
Explanation
The outdoor unit does not operate for 3 minutes
even after the breaker is turned ON.
The frequency is increased at the rate of 0.5
Hz every 1 seconds.
(Compressor and the outdoor fan start.)
The room temperature
reaches the desired
temperature, and there
is no need for further
cooling.
The room temperature is
15 °C or higher, and is
slightly too cold.
When the frequency reaches Hz,
frequency increases are stopped for a period
of seconds. (Refer to Table 2.)
This is in order to stabilize the return of oil to the
compressor.
The frequency then increases.
If the indoor and outdoor temperatures are high,
the current peak cut-off activates, stopping
any increases in frequency.
DRY operation starts
Operating frequency is stabilized in order to
maintain a comfortable environment.
DRY A operation
The indoor fan changes between "Low"
and "LL" (very low) over a 6-minute cycle.
This is 1/f fluctuation fan operation.
(Refer to Fig. 2.)
Operates to effectively dehumidify the air while
not excessively reducing the indoor
temperature.
The indoor unit operates at 1/f fluctuation fan
operation, at a fan speed that does not cause
a chilly feeling.
DRY B operation
(1) The indoor fan changes between "Low"
and "LL" (very low) over a 6-minute cycle.
This is 1/f fluctuation fan operation.
The compressor operates on a 3-minutes ON,
6-minutes OFF cycle, to prevent the room
temperature from dropping too much.
(2) After appoximately 3 minutes, the
compressor turns OFF, the outdoor fan
turns OFF, and the indoor fan turns OFF.
(3) After approximately 6 minutes, the
conditions return to (1).
The room temperature is
below 15 °C.
Monitoring operation begins.
1/f fluctuation fan
250
200
150
(Step)
100
50
0
6-minute cycle
Fig. 2
37
When monitoring operation begins, the
compressor stops, and the indoor fan operates at
"LL" (very low) speed.
7-2. Protective Functions
NOTE
The numerical values such as temperature, frequency, time and current in parentheses are an example
of SAP-CMRV3144EH and the values are different from the other models.
7-2-1. Defrost Detection and Release
(1) Non-stop defrosting
Defrosting sequence
Heating operation
4-way valve ON
Defrost detection occurs in either of the following cases:
• The temperature of the heat exchanger remains at or below
the L1 line for 35 minutes after the start of HEAT operation.
• The temperature of the heat exchanger remains at or below
the L2 line for 120 minutes after the start of HEAT operation.
Outdoor heat
exchanger temperature
(–20)
0
Frost detection
L2
L1
Non-stop defrosting
Releasing of defrosting
Outdoor air
(– 6) temperature
(– 7)
(– 24)
(– 25)
(80 Hz) operation (4-way valve ON)
OFF
ON
• Compressor
• Outdoor fan
• Solenoid valve
(for hot gas bypass)
• Indoor fan
OFF
• Temperature of the outdoor heat exchanger is at or above the
temperature shown in the table below.
• Defrost operation has continued for 12 minutes (max. length).
Temperature of releasing
Defrost operation time
Less than 2 minutes
2 minutes or more
Coil temperature for
releasing of defrosting
No releasing
14 °C or higher (*1)
*1 The temperature for releasing of defrosting is (20 °C) or higher when the
outdoor air temperature is less than 0 °C.
NOTE
Defrost does not occur during HIGH POWER operation.
If other stopped indoor units are started duning defrost operation, they begin operating in
defrost mode.
(2) Clean defrost
If all indoor units are stopped during HEAT operation, and frost is detected at the L2 line, and the
conditions for defrost are met, then defrost operation occurs, and the unit stops after defrost is completed.
38
7-2-2. Current Control
The operating current may rise as a result of causes including increasing heating or cooling loads or decreases in power
voltage. In these cases, the operating frequency is automatically reduced, or operation is stopped, in order to control
the operating current so that it is (20 A) or less.
As a result:
• Power breakers and fuses will not be tripped.
• Operation can continue during this period with somewhat reduced heating or cooling capacity.
• Operation at normal capacity is restored when the cause of the current rise is eliminated.
Description of function
Example of operation for heating
Power Point C
Point B
Point A
Frequency
Current
(20A)
(17A)
(16.6A)
Target
frequency
Frequency
Stops operation
Approx.3 minutes
•
•
•
•
Operates at the target frequency at Point A and below.
Stops increases to the frequency between Points A and B.
Reduces the frequency by 1 Hz per 0.5 seconds when Point B is exceeded.
Stops operation, and restarts it appoximately 3 minutes later, if Point C is exceeded.
(May operate when sudden voltage fluctuations occur. Indicates trouble.)
(1) Automatic frequency control
The operating frequency is reduced automatically, or operation is stopped, in order to control the operating
current so that it is at or below the values shown in the table below.
(20A)
COOL
HEAT
Point C (peak cut trip)
(20.0)
(20.0)
Point B (Hz reduction)
(17.0)
(17.0)
Point A (Hz increase prohibit)
(16.6)
(16.6)
NOTE
During defrost operation, the COOL current setting value is used.
(2) Current control
The operating frequency upper limits shown in the figure below are established for frequency reduction and
increase-prohibit.
Current(A)
Example of operation during cooling
Trip
Hz reduction
Hz increase prohibit
Hz reduction
Hz increase
prohibit
Hz reduction
Hz increase prohibit
(16)
(15.6)
0
(30)
Frequency (Hz)
39
7-2-3. Low Start Current
Operation starts at (8 Hz), and the start current is less than the normal operating current. This prevents the flickering
of fluorescent lights or television screens that occurs when ordinary A/C units start.
7-2-4. Compressor Temperature Control
To protect the compressor coil from overheating, the operating frequency is controlled based on the compressor
discharge temperature.
Compressor discharge temperature
(°C)
Trip
(110)
5Hz every 30 sec. reduction
(106)
2Hz every 30 sec. reduction
(100)
No control
Increase
prohibit range
(Hz reduction)
(90)
* Within the increase-prohibit range, the range changes
to the Hz reduction range (2 Hz every 30 seconds) if
the compressor temperature rises by 2 °C.
7-2-5. Control at HEAT Start-up
If HEAT operation is started when the outdoor air temperature is 15 °C or below, the unit operates at the HEAT start-up
frequency (70 Hz or above).
Reset conditions
(1) The compressor frequency exceeds the start-up frequency of (70 Hz).
(2) The compressor thermostat is OFF.
(3) Frequency reduction for indoor high-load control has occurred.
(4) The outdoor air temperature is above 15 °C.
(5) The main-unit switch on one or more indoor units is set to TEST run.
40
8. TROUBLESHOOTING
8-1. Precautions before Performing Inspection or Repair
Both the indoor unit and outdoor unit include electronic control circuits.
Be sure to pay attention to the following before inspecting or repairing the outdoorside electronic circuits.
High-capacity electrolytic capacitors are used inside the outdoor unit controller (inverter). They retain an
electrical charge (charging voltage DC 311 V) even after the power is turned OFF, and some time is required
for the charge to dissipate.
Be careful not to touch any electrified parts before the control circuit board Power Lamp (red) turns OFF.
If the outdoor control circuit board is normal, approximately 180 seconds will be required for the charge to
dissipate. However, allow at least 30 minutes for the charge to dissipate if it is thought there might be trouble
with the outdoor control circuit board.
For example, if the outdoor control circuit board fuse has blown, approximately 30 minutes will be required to
discharge the high-capacity electrolytic capacitors.
41
8-2. Trouble Diagnosis by Error Monitor Lamps
WARNING
To pevent electric chock, do not inspect or repair until
the Power Lamp on the P.C.Board is turned off.
8-2-1. Location of the Error Monitor Lamps
Remove the top plate of outdoor unit and the cover of Electrical Component Box.
The Power Lamp and Error Monitor Lamps are located on the P.C.Board of Electrical Component Box. (Fig.1)
Heat Exchanger
Rear side
P.C.Board of Electrical Component Box.
Error Monitor Lamps
Power Lamp
Front side
Fig.1 View from top
ERR0
ERR1
ERR2
ERR3
8-2-2. Display of the Error Monitor Lamps
If a protective device has activated or there is a sensor failure in the outdoor unit, the 4 error monitor lamps on the
outdoor control circuit board will indicate the nature of the trouble.
: ON
Error Monitor Lamp
ERR0
ERR1
ERR2
: OFF
Error Contents
ERR3
Sensor for compressor discharge temp
Sensor for heat excharge temp
Sensor for branch pipe A (Narrow tube)
Sensor for branch pipe B (Narrow tube)
Sensor for branch pipe C (Narrow tube)
Sensor for branch pipe D (Narrow tube)
Outdoor temp sensor
Sensor for branch pipe A (Wide tube)
Sensor for branch pipe B (Wide tube)
Sensor for branch pipe C (Wide tube)
Sensor for branch pipe D (Wide tube)
HIC circuit trouble (current, temp)
Actuation of comp over load relay
Actuation of freeze protection function
Outdoor unit error detail of error message indicate on indoor LED
42
8-3. Checking the Outdoor System
8-3-1. Checking the outdoor unit
No.
1
Work procedure
Check items (unit operation)
• Apply 220 V AC between terminals L and N on the
• The LED (red) on the control board must illuminate.
outdoor unit terminal plate.
2
• Short-circuit the T-RUN terminal to the COM terminal
of TEST/T-RUN terminals.
• The compressor, fan mortar, 4-way valve, and solenoid
valve (for the hot gas bypass) must turn ON.
(They turn ON about (70) seconds later after the power
is turned ON.)
NOTE
If the above check items are okay, but the outdoor unit does not operate, there may be a faulty
connection between the indoor unit and the outdoor unit.
8-3-2. Checking the defrost operation
Using forced defrost operation to check this function.
No.
1
Work procedure
Check items (unit operation)
• Connect a dummy resistor of 39 k ohm to the outdoor
coil temperature sensor connector.
Non-stop defrost
30 sec.
Indoor fan
Setting LL Stop
Setting
(80 Hz)
CM
ON
Solenoid valve
(for hot gas
bypass)
5 sec.
10 sec.
OFF
ON
ON
OFF
OFF
Outdoor fan
Defrost start
ON
Release
• The maximum lenght of defrost operation is 12
minutes.
Defrost can also be released based on the below
conditions for the outdoor heat exchanger sensor.
Less than 2 minutes Not released
2 minutes or more 14 °C or higher
However, the condition is (20 °C) or higher when the
outdoor air temperature is below 0 °C.
43
8-4. Trouble Diagnosis of Each Part
8-4-1. Problems of Each Part and Inspection Points
For details about the inspection points, refer to the Inspection Points for Each Part.
Does not heat or heating
performance is inadequate.
Does not cool or cooling
performance is inadequate.
The electric expansion valve does
not operate.
Defrost operation does not occur.
Others
The outdoor air temperature is high,
however defrost operation occurs.
The compressor speed does not
increase.
The compressor stops on occasion.
4-way valve does not operate.
Outdoor fan dose not turn.
Outdoor unit does not operate.
Indoor fan dose not turn.
Operation lamp does not illuminate.
Operation lamp blinking.
Inspection
points
Indoor unit does not operate.
Problems
The compressor (only) does not
operate.
Outdoor unit
Indoor unit
No. of
Inspection
Points for
Each part
Self-Diagnostics check
Indoor controller
(control unit)
Indoor unit
Indoor fan motor
Room temperature
sensor
Heat exchanger
temperature sensor
Inter-unit cable
Switch circuit board
Outdoor control circuit
board
(1)
Diode module
HIC
Outdoor unit
Electrolytic capacitor
Fuse
(2)
Compressor
(3)
Compressor protective
sensor
(4)
Others
Outdoor fan motor
4-way valve
(5)
Coil thermistor
(6)
Electric expansion valve
(7)
Branch tubing
temperature sensor
(8)
Breaker
(9)
Refrigerant gas pressure
(10)
44
8-4-2. Inspection Points for Each Part
(1) Outdoor control circuit board
Refer to 8-3. Checking the outdoor unit.
NOTE
Do not remove or insert the outdoor control circuit board connector when power is being supplied to it.
(The controller will be damaged.)
(2) Fuse
Check it visually or the continuity with a tester.
(3) Compressor
Check for an open circuit in the compressor coil winding.
(4) Compressor protective sensor (compressor discharge temperature thermistor)
Check that the senseor is securely contained in the thermostart holder.
(5) 4-way valve
Short-circuit the T-RUN terminal to the COM terminal of TEST/T-RUN terminals. Perfrom a test run of the unit
alone, and check whether the 4-way valve inside the outdoor unit produces a click sound.
(6) Coil thermistor
Check that the sensor is securely contained in the thermostat holder.
(7) Electric expansion valve
When replacing the electric expansion valve and coil, be sure to attach the connectors in the correct positions.
Labels are applied to the valve body and coil, corresponding to the connector colors, to identify them.
Use a tester to measure the voltage (12 V).
When the power is turned ON, the needle will move in the
following seguence in approximately 10 to 20 seconds for
each point.
Controller check
No voltage on circuit board
Voltage varies
Model No.
Check the illumination
of the red LED.
MV0
MV1
SAP-CMRV1934EH
MV0
MV1
MV2
SAP-CMRV2444EH
SAP-CMRV3144EH
MV0
MV1
MV2
Check the coil resistance.
0 ohm
Sequence
SAP-CMRV1424EH
SAP-CMRV1924EH
MV3
Check the resistance between the gray lead
wire and the other wires.
Resistance is OK if it is 46 +/– 4ohm at 20 °C
Approx. 46 +/– 4 ohm
Replace the controller.
NOTE
Cool the main unit with
a damp cloth or other
means while welding.
When applying
vacuum, use the
special service magnet
and rotate at least 5
revolutions
counterclockwise to
fully open the electric
expansion valve.
*
Replace the coil.
Open and close the
electric expansion valve
by hand to check it.
No temperature change
Temperature changes
Replace the electric
expansion valve.
This part is normal.
Check elsewhere.
Use the special service magnet and
rotate 5 revolutions clockwise to fully
close the valve.
Then start the unit and measure the
temperature at the inlet and outlet
tubes of the electric expansion valve
is closed.
Then rotate 5 revolutions
counterclockwise to open the valve.
Operation is normal if the temperature
difference between the 2 tubes drops.
*If you have manually checked the electric expansion valve, be sure to reapply the outdoor power after you have
replaced the wiring. (The position of the elecric expansion valve will changed.)
45
(8) Branch tubing temperature sensor
Check that the sensor is securely contained in the thermostat holder.
(9) Breaker
Check whether or not the breaker has been tripped.
Check that the breakers and fuses used are of the specified capacity.
Check that the breaker and its line are exclusive for A/C use.
(10) Refrigerant gas pressure
Start a COOL test run, and messure the temperatures of the A/C intake air and discharge air. Compare the values
with the performance charts.
If the values are higher than the performance charts:
Check for refrigerant shortage or blockage of the refrigerant circuit.
Assessment of refrigerant shortage:
1. The pressure in the low-pressure section is 5 MPa or more below the value in the performance charts.
2. There is little condensation on the indoor heart exchanger, which overall appears dry.
Distinguishing between refrigerant shortage and refrigerant circuit blockage:
If the pressure in the low-pressure section does not change when the circuit is charged 2 to 3 times with
refrigerant gas (200 g each time), or if the change is small, then the problem may not be refrigerant shortage.
The problem may be a blockage of the refrigerant circuit.
1. Check that there is no internal leakage inside the 4-way valve:
At the low-pressure side tubing, check that there is no temperature difference between the intake and
discharge of the 4-way valve.
2. Check that the electric expansion valve is not blocked. Chesck as described on the preceding page.
46
8-5. Trouble Diagnosis of Fan Motor
This outdoor DC fan motor contains an internal control PCB. Therefore, it is not possible to measure the coil
resistance, and the following procedure should be used to check the motor.
To perform diagnosis, follow the instructions in "8-3-1. Checking the Outdoor Unit" and set the outdoor unit to
Test Run mode (compressor ON, outdoor fan motor ON).
Important: (A) Turn OFF the power before connecting or disconnecting the motor connectors.
(B) When performing voltage measurement at the outdoor controller connector for (3) in the table
below, the DC motor will trip and voltage output will stop approximately 10 seconds after
operation is started. For this reason, to measure the voltage again, first turn OFF the outdoor
unit power, then follow the instructions in "Checking the Outdoor Unit" and again set the unit to
Test Run mode.
[Trouble symptom 1]
The fan does not stop when the outdoor unit stops.
Outdoor unit controller trouble
[Trouble symptom 2] The fan motor does not rotate when the outdoor unit is operating.
(Diagnostic procedure)
* Disconnect the motor connectors and measure the voltage at the DC motor connectors on the outdoor
unit controller (3 locations).
Measurement location
(1) Vs-Gnd: Between pin 1 and pin 4
(2) Vcc-Gnd: Between pin 5 and pin 4
(3) Vsp-Gnd: Between pin 7 and pin 4
Normal value
DC 230V or more
DC 14V or more
After fluctuating 4 times between DC 1.0 to 4.3V
(1 sec. ON) and DC 0 V (1 sec. OFF), the DC
motor trips.
(Diagnostic results)
All of the above measured values are normal. Fan motor trouble (Replace the motor.)
Any one of the above measured values is not normal. Outdoor unit controller trouble
(Replace the controller .)
(Reference)
DC motor connector pin arrangement
SAP-CMRV1424EH
SAP-CMRV1924EH / -CMRV1934EH
SAP-CMRV2444EH / -CMRV3144EH
Pin 1: Vs (white)
Pin 2: Not used
Pin 3: Not used
Pin 4: Gnd (black)
Pin 5: Vcc (red)
Pin 6: FG (blue)
Pin 7: Vsp (yellow)
Pin 1: Vm (red)
Pin 2: Not used
Pin 3: Not used
Pin 4: Gnd (blue)
Pin 5: Vcc (brown)
Pin 6: PG (white)
Pin 7: Vsp (orange)
[Trouble symptom 3]
Motor rotates for some time (several seconds), but then quickly stops, when the outdoor
unit operates.
(There is trouble in the system that provides feedback of motor rotation speed from the
motor to the outdoor unit controller.)
[Trouble symptom 4]
Fan motor rotation speed does not change during outdoor unit operation.
[Trouble symptom 5]
Fan motor rotation speed varies excessively during outdoor unit operation.
(Remedy for symptom 3 to 5)
It is not possible to identify whether the trouble is outdoor unit controller trouble or motor trouble.
Therefore, first replace the outdoor unit controller, then (if necessary) replace the DC motor.
47
9. REFRIGERANT R410A:
SPECIAL PRECAUTIONS WHEN SERVICING UNIT
9-1. Characteristics of New Refrigerant R410A
9-1-1. What is New Refrigerant R410A?
R410A is a new refrigerant that contains two types of pseudo-non-azeotropic refrigerant mixture. Its
refrigeration capacity and energy efficiency are about the same level as the conventional refrigerant, R22.
9-1-2. Components (mixing proportions)
HFC32 (50%) / HFC125 (50%)
9-1-3. Characteristics
Less toxic, more chemically stable refrigerant
The composition of refrigerant R410A changes whether it is in a gaseous phase or liquid phase. Thus, when
there is a refrigerant leak the basic performance of the air conditioner may be degraded because of a change in
composition of the remaining refrigerant. Therefore, do not add new refrigerant. Instead, recover the
remaining refrigerant with the refrigerant recovery unit. Then, after evacuation, totally recharge the specified
amount of refrigerant with the new refrigerant at its normal mixed composition state (in liquid phase).
When refrigerant R410A is used, the composition will differ depending on whether it is in gaseous or liquid
phase, and the basic performance of the air conditioner will be degraded if it is charged while the refrigerant is in
gaseous state. Thus, always charge the refrigerant while it is in liquid phase.
CAUTION
Ether-type oil is used for compressor oil for R410A-type units, which is different
from the mineral oil used for R22. Thus more attention to moisture prevention and
faster replacement work compared with conventional models are required.
9-2. Checklist before Servicing
Use a clutch-type flare tool for R410A or the conventional flare tool. Note that sizes of the resultant flares differ
between these two tools. Where a conventional flare tool is used, make sure to observe A Specification (amount of
extrusion) by using the flare spacer.
Diameter of tube D
Specification A
Flare tool for R410A
Conventional flare tool (for R22)
0 to 0.5 mm
1.2 mm
Dia.6.35 mm (1/4")
Dia.9.52 mm (3/8")
Dia.12.7 mm (1/2")
Dia.15.2 mm (5/8")
Size of flare
D
D
A
Spacer
A
Flare tool for R410A
Conventional flare tool (R22)
48
Tubing precautions
Refrigerant R410A is more easily affected by dust or moisture compared with R22, thus be sure to temporarily
cover the ends of the tubing with caps or tape prior to installation.
Never use 0.7mm-thick copper tubing or tubing which is less than 0.8mm in thickness, since air conditioners with
R410A are subject to higher pressure than those using R22 and R407C.
No addition of compressor oil for R410A
No additional charge of compressor oil is permitted.
No use of refrigerant other than R410A
Never use a refrigerant other than R410A.
If refrigerant R410A is exposed to fire
Through welding, etc., toxic gas may be released when R410A refrigerant is exposed to fire. Therefore, be sure
to provide ample ventilation during installation work.
Caution in case of R410A leak
Check for possible leak points with the special leak detector for R410A. If a leak occurs inside the room,
immediately provide thorough ventilation.
49
9-3. Tools Specifically for R410A
For servicing, use the following tools for R410A
Tool Distinction
Tool Name
Gauge manifold
Charging hose
Gas leak detector
Refrigerant cylinder
Charging cylinder
Refrigerant recovery unit
Tools specifically for R410A
Vacuum pump with anti-reverse flow (*1)
(Solenoid valve-installed type, which prevents oil from flowing back into the
unit when the power is off, is recommended.)
Vacuum pump (*2)...can be used if the following adapter is attached.
Vacuum pump adapter (reverse-flow prevention adapter) (*3).
(Solenoid valve-installed adapter attached to a conventional vacuum pump.)
Electronic scale for charging refrigerant
Flare tool
Bender
Tools which can be commonly used for R22,
R407C, and R410A
CAUTION
Torque wrench
Cutter, reamer
Welding tool, nitrogen gas cylinder
The above tools specifically for R410A must not be used for R22 and R407C.
Doing so will cause malfunction of the unit.
For the above vacuum pump (*1, *2) and vacuum pump adapter (*3), those for
R22-type units can be used for R410A-type. However, they must be used
exclusively for R410A and never alternately with R22 and R407C.
To prevent other refrigerants (R22, R407C) from being mistakenly charged to this unit, shape and external
diameter of the service port screw has been altered.
<External diameter of service port> R410A : 7.94 mm (5/16")
R22, R407C : 6.35 mm (1/4")
9-4. Tubing Installation Procedures
When the tubes are connected, always apply HAB oil on the flare portions to improve the sealing of tubing.
The following is the HAB oil generally used:
Esso: ZERICE S32
NOTE
For details on tubing installation procedures, refer to the installation manuals attached to the indoor
unit and outdoor unit.
50
9-5. In Case of Compressor Malfunction
CAUTION
Should the compressor malfunction, be sure to make the switch to a replacement
compressor as quickly as possible.
Use only the tools indicated exclusively for R410A.
Specifically for R410A."
See "12-3. Tools
9-5-1. Procedure for Replacing Compressor
(1) Recovering refrigerant
Any remaining refrigerant inside the unit should not be
released to the atmosphere, but recovered using the
refrigerant recovery unit for R410A.
(1) Recover refrigerant
OK
Do not reuse the recovered refrigerant, since it will contain
impurities.
(2) Replacing Compressor
(2) Replace compressor
Soon after removing seals of both discharge and suction
tubes of the new compressor, replace it quickly.
OK
(3) Checking for sealing
Use nitrogen gas for the pressurized gas, and never use a
refrigerant other than R410A. Also do not use oxygen or
any flammable gas.
(3) Check for sealing
OK
(4) Evacuation
Use a solenoid valve-installed vacuum pump so that
even if power is cut off in the middle of evacuation of air
due to a power interruption, the valve will prevent the
pump oil from flowing back.
(4) Evacuation
OK
The equipment may be damaged if moisture remains in
the tubing, thus carry out the evacuation thoroughly.
When using a vacuum pump with exhaust air volume more
than 25L/min. and ultimate vacuum pressure rate of
0.05Torr.
Standard time for evacuation
Length of tubing
Less than 10 meters
More than 10 meters
Evacuation time
More than 10 minutes
More than 15 minutes
51
(5) Recharge
(5) Recharging
Configuration and characteristics of cylinders
Be sure to charge the specified amount of
refrigerant in liquid state using the service port
of the wide tube service valve. The proper
amount is listed on the unit's nameplate.
Valve
When the entire amount cannot be charged all at
once, charge gradually while operating the unit in
Cooling Operation.
Liquid
CAUTION
Never charge a large amount
of liquid refrigerant at once to
the unit. This may cause
damage to the compressor.
Single valve
Charge liquid refrigerant with
cylinder in up-side-down position.
When charging with a refrigerant cylinder, use an
electronic scale for charging refrigerant. In this
case, if the volume of refrigerant in the cylinder
becomes less than 20% of the fully-charged
amount, the composition of the refrigerant starts
to change. Thus, do not use the refrigerant if
the amount in the charging cylinder is less
than 20%.
Fig. 1
Valve
Also, charge the minimum necessary amount to
the charging cylinder before using it to charge
the air conditioning unit.
Liquid
Example:
In case of charging refrigerant to a unit requiring
0.76Kg using a capacity of a 10Kg cylinder, the
minimum necessary amount for the cylinder is:
0.76 + 10
Single valve (with siphon tube)
Charge with cylinder in normal position.
0.20 = 2.76Kg
Fig. 2
For the remaining refrigerant, refer to the
instructions of the refrigerant manufacturer.
If using a charging cylinder, transfer the specified
amount of liquid refrigerant from the refrigerant
cylinder to the charging cylinder.
Charging
cylinder
Prepare an evacuated charging cylinder
beforehand.
CAUTION
NO!
To prevent the composition
of R410A from changing,
never bleed the refrigerant
gas into the atmosphere
while transferring the
refrigerant. (Fig. 3)
Liquid
Open
Do not use the refrigerant if the amount in the
charging cylinder is less than 20%.
52
Refrigerant
cylinder
Fig. 3
9-6. In Case Refrigerant is Leaking
CAUTION
Never attempt to charge additional refrigerant when refrigerant has been leaking
from the unit. Follow the procedure described below to locate points of leaks and
carry out repairs, then recharge the refrigerant.
(1) Detecting Leaks
Use the detector for R410A to locate refrigerant leak
points.
(1) Detect leaks
(2) Recovering refrigerant
OK
Never release the gas to the atmosphere; recover
residual refrigerant using the refrigerant recovery unit for
R410A, instead.
Do not reuse the recovered refrigerant because its
composition will have been altered.
(2) Recover refrigerant
OK
(3) Welding leaking points
Confirm again that no residual refrigerant exists in the unit
before starting welding.
(3) Weld leaking points
Weld securely using flux and wax for R410A.
OK
Prevent oxide film from forming inside the tubes utilizing
substitution with nitrogen (N2) in the refrigerant circuit of
the unit. Leave ends of tubes open during welding.
(4) Checking for sealing
(4) Check for sealing
Use nitrogen gas for the pressurized gas, and never use
a refrigerant other than R410A. Also do not use oxygen or
any flammable gas.
(5) Evacuation
OK
(5) Evacuation
Use a solenoid valve-installed vacuum pump so that
even if power is cut off in the middle of evacuation of air
due to a power interruption, the valve will prevent the
pump oil from flowing back.
The equipment may be damaged if moisture remains in
the tubing, thus carry out the evacuation thoroughly.
When using a vacuum pump with exhaust air volume
more than 25L/min. and ultimate vacuum pressure rate of
0.05Torr.
Standard time for evacuation
Length of tubing
Less than 10 meters
More than 10 meters
Evacuation time
More than 10 minutes
More than 15 minutes
(6) Recharging
Recharge unit in the same manner explained on the
previous page "(5) Recharging."
53
OK
(6) Recharge
9-7. Charging Additional Refrigerant
9-7-1. When Tubes are Extended
Observe the proper amount of refrigerant as stated in this service manual or the installation manual that came
with the indoor unit. Charge additional refrigerant in liquid state only.
CAUTION
Never charge additional refrigerant if refrigerant is leaking from the unit. Follow
instructions given in "12-6. In Case Refrigerant is Leaking" and completely carry
out repairs. Only then should you recharge the refrigerant.
9-8. Retro-Fitting Existing Systems
9-8-1. Use of Existing Units
Never use new refrigerant R410A for existing units which use R22. This will cause the air conditioner to
operate improperly and may result in a hazardous condition.
9-8-2. Use of Existing Tubing
If replacing an older unit that used refrigerant R22 with a R410A unit, do not use its existing tubing. Instead,
completely new tubing must be used.
54
APPENDIX A INSTALLATION INSTRUCTIONS
SAP-CMRV1424EH
(II-852-6-4190-206-00-0)
A-1
06-048 KMRV74EH_out_ENG
2/8/06
2:34 PM
Page a
For Outdoor Unit
INSTALLATION INSTRUCTIONS
– Inverter Multi Split System Air Conditioner –
COOL / DRY/ HEAT Model
This air conditioner uses the new refrigerant R410A.
Model Combinations
Page
IMPORTANT!
Please Read Before Starting .................................. 2
2.
INSTALLATION SITE SELECTION ................... 4
2-1. Indoor Unit
2-2. Connecting Indoor Units
2-3. Outdoor Unit
2-4. Outer Dimensions of Outdoor Unit
2-5. Diagram of Outdoor Unit Installation
5.
WIRING INSTRUCTIONS ................................ 14
5-1. General Precautions on Wiring
5-2. Recommended Wire Length and Diameter
5-3. Wiring System Diagram
5-4. How to Connect Wiring to the Terminal
5-5. Wiring Instructions for the Outdoor Unit
TEST RUN......................................................... 18
7.
CONNECTING A HOME AUTOMATION
DEVICE ............................................................. 19
8.
INSTALLATION CHECK SHEET ...................... 19
9.
ELECTRIC WIRING DIAGRAM ........................ 20
85264190206000 © SANYO 2006
SAP-KMRV94EH
SAP-KMRV124EH
Combine indoor and outdoor units only as listed in
the combination tables for 2-room outdoor unit as
shown in its respective manual.
Power Source:
50 Hz, single-phase, 220 – 240 VAC
Be sure to read the yellow instruction sheet
attached to the outdoor unit for models using the
new refrigerant R410A.
Combination example
Indoor unit B
Indoor unit A
Outdoor unit
NOTE
The illustrations are based on the typical appearance of
a standard model. Consequently, the shape may differ
from that of the air conditioner that you are installing.
SANYO Electric Co., Ltd.
Osaka, Japan
EÏÏËÓÈο
6.
SAP-CMRV1424EH
Português
AIR PURGING................................................... 11
I Air Purging with a Vacuum Pump (for Test Run)
I Pump Down
SAP-KMRV74EH
Italiano
4.
Outdoor Unit
Deutsch
INSTALLATION PROCESS ............................... 8
3-1. Embedding the Tubing and Wiring
3-2. Drain Cap and Drain Elbow
3-3. Use of the Flaring Method
3-4. Flaring Procedure with a Flare Tool
3-5. Caution Before Connecting Tubes Tightly
3-6. Tubing Connections
3-7. Insulation of Refrigerant Tubing
3-8. Taping the Tubes
3-9. Finishing the Installation
Indoor Unit
Français
3.
GENERAL .......................................................... 3
1-1. Tools Required for Installation (not supplied)
1-2. Accessories Supplied with Unit
1-3. Optional Copper Tubing Kit
1-4. Type of Copper Tube and Insulation Material
1-5. Additional Materials Required for Installation
Español
1.
Combine indoor and outdoor units only as listed
below.
English
Contents
06-048 KMRV74EH_out_ENG
2/8/06
2:34 PM
Page 2
IMPORTANT!
Please Read Before Starting
When Installing…
English
This air conditioning system meets strict safety and operating standards. As the installer or service person, it is an
important part of your job to install or service the system so
it operates safely and efficiently.
…In a Ceiling or Wall
Make sure the ceiling/wall is strong enough to hold the
unit’s weight. It may be necessary to construct a strong
wood or metal frame to provide added support.
For safe installation and trouble-free operation, you
must:
G Carefully read this instruction booklet before beginning.
G Follow each installation or repair step exactly as
shown.
G Observe all local, state, and national electrical codes.
G Pay close attention to all warning and caution notices
given in this manual.
This symbol refers to a hazard or unsafe practice which
WARNING
can result in severe personal
injury or death.
This symbol refers to a hazard or unsafe practice which
can result in personal injury
CAUTION
or product or property damage.
…In a Room
Properly insulate any tubing run inside a room to prevent
“sweating” that can cause dripping and water damage to
walls and floors.
…In Moist or Uneven Locations
Use a raised concrete pad or concrete blocks to provide
a solid, level foundation for the outdoor unit. This prevents water damage and abnormal vibration.
…In an Area with High Winds
Securely anchor the outdoor unit down with bolts and a
metal frame. Provide a suitable air baffle.
…In a Snowy Area (for Heat Pump-type Systems)
• Position the outdoor unit in a protected location
where snow will not blow into it.
• Install the outdoor unit on a raised platform that is
If Necessary, Get Help
higher than drifting snow. Provide snow vents.
These instructions are all you need for most installation
sites and maintenance conditions. If you require help for
a special problem, contact our sales/service outlet or
your certified dealer for additional instructions.
When Connecting Refrigerant Tubing
• Use the flare method for connecting tubing.
• Apply refrigerant lubricant to the matching surfaces
of the flare and union tubes before connecting
them, then tighten the nut with a torque wrench for
a leak-free connection.
In Case of Improper Installation
The manufacturer shall in no way be responsible for
improper installation or maintenance service, including
failure to follow the instructions in this document.
• Check carefully for leaks before starting the test run.
SPECIAL PRECAUTIONS
WARNING
•
•
•
•
When Servicing
When Wiring
• Turn the power OFF at the main power box (mains)
before opening the unit to check or repair electrical
parts and wiring.
ELECTRICAL SHOCK CAN CAUSE
SEVERE PERSONAL INJURY OR DEATH.
ONLY A QUALIFIED, EXPERIENCED
ELECTRICIAN SHOULD ATTEMPT TO
WIRE THIS SYSTEM.
Do not supply power to the unit until all wiring and tubing are completed or reconnected and checked.
Highly dangerous electrical voltages are used in this
system. Carefully refer to the wiring diagram and
these instructions when wiring. Improper connections
and inadequate grounding can cause accidental
injury or death.
Ground the unit following local electrical codes.
Connect all wiring tightly. Loose wiring may cause
overheating at connection points and a possible fire
hazard.
• Keep your fingers and clothing away from any moving
parts.
• Clean up the site after you finish, remembering to
check that no metal scraps or bits of wiring have been
left inside the unit being serviced.
Others
CAUTION
• Ventilate any enclosed areas when installing or testing the refrigeration system. Escaped refrigerant
gas, on contact with fire or heat, can produce dangerously toxic gas.
When Transporting
• Confirm upon completing installation that no refrigerant
gas is leaking. If escaped gas comes in contact with a
stove, gas water heater, electric room heater or other
heat source, it can produce dangerously toxic gas.
Be careful when picking up and moving the indoor and
outdoor units. Get a partner to help, and bend your knees
when lifting to reduce strain on your back. Sharp edges or
thin aluminum fins on the air conditioner can cut your fingers.
• Do not install only a single indoor unit.
2
06-048 KMRV74EH_out_ENG
2/8/06
2:34 PM
Page 3
1. General
1-1. Tools Required for Installation (not supplied)
1. Standard screwdriver
2. Phillips head screwdriver
3. Knife or wire stripper
4. Tape measure
Carpenter’s level
Sabre saw or key hole saw
Hacksaw
Core bits
Hammer
Drill
Tube cutter
Tube flaring tool
Torque wrench
Adjustable wrench
Reamer (for deburring)
Vacuum pump (For R410A)
Manifold valve
English
5.
6.
7.
8.
9.
10.
11.
12.
13.
14.
15.
16.
17.
This booklet briefly outlines where and how to install
the air conditioning system. Please read over the
entire set of instructions for the indoor and outdoor
units and make sure all accessory parts listed are with
the system before beginning. If the electric wiring diagram does not appear in this manual, please check for
the diagram on the indoor unit.
1-2. Accessories Supplied with Unit
Table 1
Parts
Figure
Labels for inter-unit
cable and tube
A B C D
Q’ty
Parts
Figure
Q’ty
Parts
4
Drain elbow
4 each Cushion rubber
Drain cap
Figure
Q’ty
1
Packed in the outdoor unit.
4
1-3. Optional Copper Tubing Kit
2.
Copper tubing for connecting the outdoor unit to the
indoor unit is available in kits which contain the narrow
and wide tubing, fittings and insulation. Consult your
nearest sales outlet or A/C workshop.
Foamed polyethylene insulation for the specified
copper tubes as required to precise length of tubing. Wall thickness of the insulation should be not
less than 8 mm.
3.
Use insulated copper wire for field wiring.
Wire size varies with the total length of wiring.
Refer to 5. Wiring Instructions for details.
1-4. Type of Copper Tube and Insulation Material
If you wish to purchase these materials separately
from a local source, you will need:
1.
Deoxidized annealed copper tube for refrigerant
tubing as detailed in Table 2.
CAUTION
Cut each tube to the appropriate lengths +30 cm
to 40 cm to dampen vibration between units.
Table 2
Narrow Tube
Wide Tube
Model
Outer Dia.
Thickness
Outer Dia.
Thickness
KMRV74
6.35 mm
0.8 mm
9.52 mm
0.8 mm
KMRV94
6.35 mm
0.8 mm
9.52 mm
0.8 mm
KMRV124
6.35 mm
0.8 mm
9.52 mm
0.8 mm
3
Check local electrical codes
and regulations before
obtaining wire. Also, check
any specified instructions or
limitations.
06-048 KMRV74EH_out_ENG
2/8/06
2:34 PM
Page 4
1-5. Additional Materials Required for Installation
English
1.
2.
Refrigeration (armored) tape
Insulated staples or clamps for connecting wire
(See local codes)
Putty
Refrigeration lubricant
Clamps or saddles to secure refrigerant tubing
3.
4.
5.
Indoor unit
2. Installation Site Selection
2-1. Indoor Unit
WARNING
To prevent abnormal heat generation
and the possibility of fire, do not
place obstacles, enclosures and
grilles in front of or surrounding the
air conditioner in a way that may
block air flow.
Drain hose
AVOID:
Outside drainage
G
direct sunlight.
G
nearby heat sources that may affect performance of the
unit.
G
areas where leakage of flammable gas may be expected.
Fig. 1
G
placing or allowing any obstructions near the A/C inlet or
outlet.
G
installing in rooms that contain instant-on (rapid-start)
fluorescent lamps. (These may prevent the A/C from
receiving signals.)
G
places where large amounts of oil mist exist.
G
installing in locations where there are devices that
generate high-frequency emissions.
5 cm
min.
Front View
Fig. 2
INDOOR
UNIT (1)
DO:
G
15 cm min.
5 cm
min.
select an appropriate position from which every corner of
the room can be uniformly cooled. (High on a wall is best.)
G
select a location that will hold the weight of the unit.
G
select a location where tubing and drain hose have the
shortest run to the outside. (Fig. 1)
G
allow room for operation and maintenance as well as
unrestricted air flow around the unit. (Fig. 2)
G
install the unit within the maximum elevation difference
(H1, H2) above or below the outdoor unit and within a total
tubing length (L1+L2) from the outdoor unit as detailed in
Table 3 and Fig. 3a.
Elevation
difference (H1)
Tubing length (L1)
INDOOR
UNIT (2)
L2
OUTDOOR
UNIT
H2
Fig. 3a
CAUTION
Indoor unit
For stable operation of the air
conditioner, do not install
wall-mounted type indoor
Minimum height
units less than 1.5 m from
from floor level
floor level.
1.5 m
Floor level
Fig. 3b
4
Wall
06-048 KMRV74EH_out_ENG
2/8/06
2:34 PM
Page 5
Install the indoor unit more than 1 meter away from any
antenna or power lines or connecting wires used for television, radio, telephone, security system, or intercom.
Electrical noise from any of these sources may affect
operation.
G
install in a sturdy manner to avoid increased operating
noise.
Table 3
Model
Max. Allowable
Tubing Length
per unit (m)
Max. Allowable
Total Tubing Length
at Shipment (L1+L2) (m)
Limit of
Total Tubing Length
(L1+L2) (m)
Limit of Elevation
Difference
(H1, H2) (m)
Required Amount
of Additional
Refrigerant (g/m)*
CMRV1424
20
30 (L1+L2)
30 (L1+L2)
15
–
2-2. Connecting Indoor Units
(1) Connecting indoor unit for SAP-CMRV1424
Outdoor unit
Indoor unit
ø9.52
B
ø9.52
(SAP-KMRV74EH,KMRV94EH,KMRV124EH)
ø6.35
ø9.52
A
ø9.52
(SAP-KMRV74EH,KMRV94EH,KMRV124EH)
ø6.35
Fig. 4
unit: mm
5
English
G
2:34 PM
Page 6
2-3. Outdoor Unit
NO
AVOID:
G
heat sources, exhaust fans, etc. (Fig. 5a)
G
damp, humid or uneven locations.
Hot air
Heat source
Outdoor unit
English
DO:
G
position the outdoor unit in a protected location
where snow will not blow into it.
G
choose a place as cool as possible.
G
choose a place that is well ventilated.
G
allow enough room around the unit for air intake/
exhaust and possible maintenance. (Fig. 5b)
G
provide a solid base (level concrete pad, concrete
block, 10 × 40 cm beams or equal), a minimum of
10 cm above ground level to reduce humidity and
protect the unit against possible water damage and
decreased service life. (Fig. 5c)
G
Install cushion rubber under unit’s feet to reduce
vibration and noise. (Fig. 5d)
G
use lug bolts or equal to bolt down unit, reducing
vibration and noise.
G
Install in a location where no antenna of a television
or radio exists within 3 meters.
Exhaust fan
Fig. 5a
Obstacle above
Air intake
Min.
5 cm
Min. 10 cm
Air discharge
Valve
side
Min.
25 cm
Min.
2m
Min.
2m
Obstacle
2/8/06
Air discharge
06-048 KMRV74EH_out_ENG
Min.
40 cm
Ground
Fig. 5b
Min. 10 cm
Air intake
Anchor bolts
(4 pcs.)
Min. 10 cm
Air intake
Concrete
or equal
t 10
Abou
Ab
ou
t4
cm
0c
m
Fig. 5c
Cushion rubber
Fig. 5d
6
06-048 KMRV74EH_out_ENG
2/8/06
2:34 PM
Page 7
2-4. Outer Dimensions of Outdoor Unit
A
85
70
Service valve on
narrow tube side
(Outer diameter ø6.35)
122 70
158 70
569
15
Service valve on
wide tube side
(Outer diameter ø9.52)
46
142
unit: mm
Fig. 6a
2-5. Diagram of Outdoor Unit Installation
Never install only a single indoor unit.
Be sure to connect indoor and outdoor units only in
combinations that are listed in the catalog or in the
combination table that was provided with the outdoor unit.
(Use caution. Connecting any other model may result in
operation failure and malfunction.)
The dimensions indicated by
in the figure below are
spaces that are required in order to maintain
performance. Install in a location where the dimensions
indicated by
are ensured, and where 2 or more faces
of the unit are unobstructed. In principle, the top direction
should be unobstructed.
Indoor unit B
Indoor unit A
Ov
er
er
Ov
5c
cm
10
Power breaker
m
Service space
Ensure 15cm
of space if a
drain hose is to
be used.
m
0c
4
er
Ov
Ov
er
25
cm
Access panel C
B
A
Base (not provided)
(concrete or similar material)
Ground
wire
(not
provided)
Fasten with anchor bolts
(not provided)
(3/8" or M10, 4 locations)
Fig. 6b
7
English
A
790
285
310
336
608
06-048 KMRV74EH_out_ENG
2/8/06
2:34 PM
Page 8
3. Installation Process
English
3-1. Embedding the Tubing and Wiring
G
Do not connect tubes to locations that are embedded.
G
Be sure to bind refrigerant tubing and inter-unit cables
together with vinyl tape.
G
The power cable must be obtained on-site.
(ø3.5: Less than 26 m)
G
Be sure to apply the provided labels to both ends of
the inter-unit cables to prevent miswiring.
G
Securely seal the end of embedded tubing with vinyl
tape in order to prevent dirt or moisture entry.
G
In order to prevent insulation breakdown and ground
faults, do not allow the wire ends to contact rainwater,
or be subject to dew condensation.
3-2. Drain Cap and Drain Elbow
First refer to Section 2. Installation Site Selection.
NOTE
Outdoor unit
The drain hole at the bottom of the outdoor unit was not
plugged at the time of factory shipment. If necessary,
plug the drain hole with the accessory drain cap or
mount the accessory drain elbow before installing the
outdoor unit. (Fig. 7)
CAUTION
When installing in a cold
area where drainage water
may freeze, do not attach the
provided drain cap or drain
elbow to the bottom plate of
the unit.
Accessory
drain cap
Accessory
drain elbow
Accessory
drain cap
Fig. 7
3-3. Use of the Flaring Method
Deburring
Many of the conventional split system air conditioners
employ the flaring method to connect refrigerant tubes
which run between indoor and outdoor units. In this
method, the copper tubes are flared at each end and
connected with flare nuts.
After
Before
3-4. Flaring Procedure with a Flare Tool
(1) Cut the copper tube to the required length with a
tube cutter. It is recommended to cut approx. 30 –
50 cm longer than the tubing length you estimate.
(2) Remove burrs at the end of the copper tube with a
tube reamer or file. This process is important and
should be done carefully to make a good flare.
(Fig. 8)
Fig. 8
8
06-048 KMRV74EH_out_ENG
2/8/06
2:34 PM
Page 9
NOTE
Copper
tubing
When reaming, hold the tube end downward and be sure
that no copper scraps fall into the tube. (Fig. 9)
(3) Remove the flare nut from the unit and be sure to mount
it on the copper tube.
Reamer
(*Use “RIGID” or equivalent.)
Fig. 9
If the previous flare tool
(clutch-type) is used:
If the special R410A
flare tool is used:
NOTE
A good flare should have the following characteristics:
G
inside surface is glossy and smooth.
G
edge is smooth.
G
tapered sides are of uniform length.
1.2 mm
0 – 0.5 mm
Adjust so that the amount of tube
protrusion is as shown in the figure.
Fig. 10
3-5. Caution Before Connecting Tubes Tightly
a)
b)
c)
Be sure to apply a sealing cap or water-proof tape to
prevent dust or water from getting into the tubes before
they are used.
Flare nut
Copper
tubing
Be sure to apply refrigerant lubricant to the matching
surfaces of the flare and union before connecting them
together. This is effective for reducing gas leaks.
(Fig. 12)
Flare tool
Fig. 11
For proper connection, align the union tube and flare
tube straight with each other, then screw in the flare nut
lightly at first to obtain a smooth match. (Fig. 13)
Apply refrigerant
lubricant here and here
3-6. Tubing Connections
Fig. 12
a)
Temporary connection:
Screw in 3 – 5 rotations by hand. (Fig.14)
b)
To fasten the flare nuts, apply specified torque as:
Table 4
Tube Dia.
Tightening Torque
6.35 mm
14 – 18 N·m (140 – 180 kgf · cm)
9.52 mm
34 – 42 N·m (340 – 420 kgf · cm)
12.70 mm
49 – 61 N·m (490 – 610 kgf · cm)
15.88 mm
68 – 82 N·m (680 – 820 kgf · cm)
Union
Flare nut
Fig. 13
Service valve on
narrow tube side
B
A
Service valve on
wide tube side
Fig. 14
9
Apply the provided labels
to the indoor and outdoor
unit tubing connectors to
prevent errors in
connections.
English
(4) Make a flare at the end of copper tube with a flare tool.*
(Figs. 10 and 11)
06-048 KMRV74EH_out_ENG
2/8/06
English
CAUTION
2:34 PM
Page 10
Be sure to match refrigerant
tubing and electric wiring
between indoor and outdoor
units. For more details, refer to
“Tubing Check Control” in the
Technical & Service Manual.
Torque wrench
Spanner
Indoor unit
Outdoor unit
Fig. 15
3-7. Insulation of Refrigerant Tubing
IMPORTANT
To prevent heat loss and wet floors due to dripping of condensation, both tubes must be well insulated with a
proper insulation material.
The thickness of the insulation should be a minimum
8 mm. (Fig. 17)
Insulation
Fig. 16
Insulation
3-8. Taping the Tubes
CAUTION
After a tube has been insulated,
never try to bend it into a
narrow curve, as this may
cause the tube to break or
crack.
Thickness:
min. 8 mm
Min.
8 mm
Fig. 17
(1) At this time, the 2 refrigerant tubes (and electrical wire
if local codes permit) should be taped together with
armoring tape. The drain hose may also be included
and taped together as 1 bundle with the tubing.
Clamp
(2) Wrap the armoring tape from the bottom of the outdoor
unit to the top of the tubing where it enters the wall. As
you wrap the tubing, overlap half of each previous tape
turn. (Fig. 18)
(3) Clamp the tubing bundle to wall, using 1 clamp approx.
every 120 cm.
Insulated tubes
Fig. 18
NOTE
Do not wind the armoring tape too tightly, since this will
decrease the heat insulation effect. Also, be sure the condensation drain hose splits away from the bundle and drips
clear of the unit and the tubing.
Apply putty here
3-9. Finishing the Installation
Tubing
After finishing insulating and taping over the tubing, use
sealing putty to seal off the hole in the wall to prevent rain
and draft from entering. (Fig. 19)
10
Fig. 19
06-048 KMRV74EH_out_ENG
2/8/06
2:34 PM
Page 11
4. Air Purging
Air and moisture remaining in the refrigerant system
have undesirable effects as indicated below.
Therefore, they must be purged completely.
pressure in the system rises
G
operating current rises
G
cooling efficiency drops
G
moisture in the air may freeze and block capillary
tubing
G
water may lead to corrosion of parts in the
refrigerant system
I
G
Air Purging with a Vacuum Pump
(for Test Run)
In order to protect the earth’s environment, be sure to
use a vacuum pump to perform the air purge.
(Never perform an air purge by using the refrigerant
gas cylinder or other external gas, or by using the gas
inside the outdoor unit.)
Perform the air purge for tubes A and B. Use the same
procedures for all tubes.
CAUTION
English
G
Service
valve on
narrow
Service
valve on
wide tube
side
B
A
With push-pin
Hex wrench
(nominal size 4mm,
not provided)
Vacuum
pump
In order to prevent charging errors with
A/C that uses R410A, the screw diameter
at the service valve charging port has
been changed. When recharging or performing other servicing, use the special
charging hose and manifold gauge.
Stopper
Spindle
Screw diameter: 1/2
UNF 20 threads
Cap tightening torque:
20 – 25 N·m
(200 – 250 kgf·cm)
(Tighten by hand, then
use a wrench to turn.)
Valve core
(2) Using an adjustable wrench or box wrench,
remove the valve caps from the service valve on
both narrow and wide tubes.
Cap nut tightening torque:
7 – 11 N·m
(70 – 110 kgf·cm)
(Tighten by hand, then use a
wrench to turn approximately 30 .)
(3) Connect a vacuum pump and a manifold valve
(with pressure gauges) to the service port on the
wide tube service valve. (Fig. 20).
CAUTION
Charging hose
(special for R410A)
Fig. 20
(1) Check that each tube (both narrow and wide
tubes) between the indoor and outdoor units have
been properly connected and all wiring for the test
run has been completed. Note that both narrow
and wide tube service valves on the outdoor unit
are kept closed at this stage.
CAUTION
Manifold gauge
(special for R410A)
High-pressure valve
Low-pressure
Vacuum pump
valve
adapter
Lo
Hi
(for preventing
Leave the
reverse flow)
valve open.
(special for
Open
R410A)
<Structure of service valve on wide tube side>
Before using the vacuum pump
adapter, read the vacuum pump
adapter manual, and use the
adapter correctly.
Be sure to use a manifold valve
for air purging. If it is not
available, use a stop valve for
this purpose. The “Hi” knob of
the manifold valve must always
be kept closed.
11
Fig. 21
G
When using a hex wrench to open the spindle, an
extremely small amount of refrigerant may leak.
This does not indicate a problem.
G
Use a hex wrench of a type to which force can be
easily applied.
English
06-048 KMRV74EH_out_ENG
2/8/06
2:34 PM
Page 12
(4) With the “Lo” knob of the manifold valve open and
high-pressure valve (“Hi”) closed completely, run
the vacuum pump. Run the pump until the pressure is –101 kPa (–76 cmHg). The operation time
for the vacuum pump varies with tubing length and
the capacity of the pump. The following table
shows the amount of time required for evacuation:
Table 5
Required time for evacuation when capacity
of 100 liter/h vacuum pump is used
20 min. or more
NOTE
The required time in the above table is calculated
based on the assumption that the ideal (or target) vacuum condition is around 10 mmHg abs.
(5) With the vacuum pump still running, close the “Lo”
knob of the manifold valve. Then stop the vacuum
pump. Fully close the low-pressure valve and stop
the vacuum pump. (Wait 1 – 2 minutes and check
that the manifold gauge pointer does not return. If
it does return, find and repair the leak, then apply
the vacuum again.)
(6) With a hex wrench, turn the valve stem on the narrow tube service valve counter-clockwise by 90
degrees (1/4 turn) for 10 seconds, and then turn
the stem clockwise to close it again.
CAUTION
Be sure to completely insert
the hex wrench before
attempting to turn the valve.
(7) With a standard screwdriver, turn the wide tube
service valve stem counterclockwise to fully open
the valve.
(8) Turn the narrow tube service valve stem counterclockwise to fully open the valve.
(9) Loosen the vacuum hose connected to the wide
tube service port slightly to release the pressure.
Then, remove the hose.
(10) Leak test all joints at the tubing (both indoor and
outdoors) with liquid soap. Bubbles indicate a leak.
Be sure to wipe off the soap with a clean cloth.
CAUTION
If a CFC gas detector is used,
use a special detector for HFC
refrigerant (such as R410A and
R134a).
12
06-048 KMRV74EH_out_ENG
2/8/06
2:34 PM
Page 13
(11) Replace the flare nut on the wide tube service port and fasten the flare nut securely with an adjustable wrench or
box wrench. Next, mount the valve cap and tighten it with a torque wrench (the cap needs to be tightened with the
torque of 20 N·m (200 kgf · cm)). This process is very important to prevent gas from leaking from the system.
(12) Test run the air conditioner. (See page 23.)
(13) While the air conditioner is running, apply liquid soap to check for any gas leaks around the service valves or caps.
English
(14) If there is no leakage, stop the air conditioner.
(15) Wipe off the soap on the tubing.
This completes air purging with a vacuum pump and the air conditioner is ready for actual operation.
I
Pump Down
In order to protect the earth’s environment, be sure to perform pump-down to recover refrigerant
gas without releasing it into the atmosphere.
G
When relocating or disposing of the A/C, request this service
from the dealer where the unit was purchased, or from an
appropriate agent. Perform pump-down as described below.
Close
Charging port
What is pump-down?
G Pump-down refers to recovering the refrigerant gas from the
refrigerant cycle at the outdoor unit. This work must be
performed during cooling operation. The refrigerant gas
cannot be recovered during heating operation.
G During winter, or if the temperature sensor prevents cooling
operation, perform “forced cooling operation.”
B
Narrow tube side
Close
A
Fig. 22
Pump-down procedure
(1) Fully close the spindles at the valves on the narrow tube
side of tubes A and B. (Refer to Fig. 22.)
(2) Connect the manifold gauge to the charging port at the valve
on the wide tube side of tube B. Purge the air from the
charging hose. (Refer to Fig. 23.)
A
(3) Perform cooling operation or forced cooling operation.
When the pressure at the low-pressure side is 0.15 – 0.2
MPa (0.5 – 1 kg/cm2G), fully close the spindles at the
valves on the wide tube side of tubes A and B, and
immediately stop operation. (Refer to Fig. 23.)
In the winter, the outdoor unit may stop after 5 – 10
minutes of operation. This is in order to protect the indoor
unit heat exchanger from freezing and does not indicate a
problem.
(4) Disconnect the manifold gauge and the inter-unit tubes,
and attach the caps and flare nuts. At this point, pumpdown is completed. (If the caps and flare nuts are not
reattached, there is the danger of gas leakage.)
(Refer to Fig. 24.)
If pump-down is not possible
If the A/C cannot be operated because of a malfunction or
other cause, use a refrigerant recovery device to recover the
refrigerant.
13
B
Wide tube side
Manifold gauge
Fig. 23
Cap
After disconnecting
the inter-unit tubes,
attach the flare nuts
with flare bonnets.
Cap
Fig. 24
06-048 KMRV74EH_out_ENG
2/8/06
2:34 PM
Page 14
5. Wiring Instructions
5-1. General Precautions on Wiring
English
(1) Before wiring, confirm the rated voltage of the unit as
shown on its nameplate, then carry out the wiring
closely following the wiring diagram.
(2) Provide a power outlet to be used exclusively for each
unit, with a power supply disconnect and circuit breaker for overcurrent protection provided in the exclusive
line.
(3) To prevent possible hazard due to insulation failure,
the unit must be grounded.
(4) Each wiring connection must be done tightly and in
accordance with the wiring system diagram. Wrong
wiring may cause the unit to misoperate or become
damaged.
(5) Do not allow wiring to touch the refrigerant tubing,
compressor, or any moving parts of the fan.
(6) Unauthorized changes in the internal wiring can be
very dangerous. The manufacturer will accept no
responsibility for any damage or misoperation that
occurs as a result of such unauthorized changes.
5-2. Recommended Wire Length and Diameter
Regulations on wiring diameter differ from locality to locality.
For field wiring requirements, please refer to your local electrical codes. Carefully observe these regulations when carrying out the installation.
Table 6 shows maximum wire lengths for control line and
power line and fuse or circuit capacity.
NOTE
Refer to the wiring system diagram (Fig. 25) for the
meaning of (A), (B), and (C) in Table 6.
Table 6
Cross-Sectional
Area (mm2)
Model
SAP-CMRV1424
Max. Power Line Length (m)
(A)
Max. Control Line Length (m)
(B) (C)
3.5
1.0
26
25
14
Fuse
or
Circuit Capacity
20 A
06-048 KMRV74EH_out_ENG
2/8/06
2:34 PM
Page 15
WARNING
G
G
G
G
Be sure to comply with local codes on running
the wire from the indoor unit to the outdoor unit
(size of wire and wiring method, etc.).
Each wire must be firmly connected.
No wire should be allowed to touch refrigerant
tubing, the compressor, or any moving part.
Be sure to connect power wires correctly
matching up numbers on terminals of the
outdoor unit and respective indoor units A – B.
G
G
G
CAUTION
G
G
Be sure to connect the power supply line to the
outdoor unit as shown in the wiring diagram.
The indoor unit draws its power from the
outdoor unit.
Do not run wiring for antenna, signal, or power
lines of television, radio, stereo, telephone,
security system, or intercom any closer than
1 meter from the power cable and wires between
the indoor and outdoor units. Electrical noise
may affect the operation.
(B)
1
OUTDOOR UNIT
Terminal(8P)
(C)
3
4
1
2
Grounding
line
3
(B)
(B)
1
2
4
5
(C)
3
4
UNIT A
2
6
Grounding line
UNIT B
B
INDOOR UNIT
Terminal
A
INDOOR UNIT
Terminal
5-3. Wiring System Diagram
(B)
Power supply
Single-phase 220-240VAC 50Hz
220VAC 60Hz
7
8
Grounding line
(A)
Fig. 25
15
To avoid the risk of electric shock, each air
conditioner unit must be grounded.
For the installation of a grounding device,
please observe local electrical codes.
Grounding is necessary, especially for units
using inverter circuits, in order to release
charged electricity and electrical noise
caused by high tension.
Otherwise, electrical shock may occur.
Place a dedicated ground more than 2 meters
away from other grounds and do not have it
shared with other electric appliances.
English
G
WARNING
06-048 KMRV74EH_out_ENG
2/8/06
2:34 PM
Page 16
5-4. How to Connect Wiring to the Terminal
Loose wiring may cause the
terminal to overheat or result
in unit malfunction. A fire
hazard may also exist. Therefore, be sure all wiring is
tightly connected.
When connecting each power wire to the corresponding
terminal, follow the instructions “How to connect wiring
to the terminal” and fasten the wire securely tight with
the fixing screw of the terminal plate.
STRIP
SIZE
How to connect wiring to the terminal
7 mm (ACTUAL
SIZE)
Fig. 26
a) For Indoor Unit
Solid wire
25 mm
(1) Cut the wire end with a cutting pliers, then strip the
insulation to expose the wire about 7 mm. See the
label (Fig. 26) near the terminal plate.
(2) Using a screwdriver, loosen the terminal screw on
the terminal plate.
Loop
Insulation
(3) Insert the wire and tighten the terminal screw completely using a screwdriver.
Fig. 27
Stranded wire
b) For Outdoor Unit
10 mm
English
WARNING
I For solid core wiring (or F-cable)
Ring
connector
(1) Cut the wire end with a cutting pliers, then strip the
insulation to expose the solid wire about 25 mm.
(Fig. 27)
Fig. 28
(2) Using a screwdriver, remove the terminal screw(s)
on the terminal plate.
(3) Using the pliers, bend the solid wire to form a loop
suitable for the terminal screw.
Twist wire ends
(4) Shape the loop wire properly, place it on the terminal plate and fix it securely with the removed terminal screw using a screwdriver.
I For stranded wiring
Fig. 29
(1) Cut the wire end with a cutting pliers, then strip the
insulation to expose the stranded wiring about
10 mm and tightly twist the wire ends.
(Figs. 28 and 29)
Special
washer
(2) Using a screwdriver, remove the terminal screw(s)
on the terminal plate.
Screw
Ring connector
(3) Using a ring connector fastener or pliers, securely
clamp each stripped wire end with a ring connector.
(Fig. 28)
Wire
Terminal plate
Wire
(4) Place the ring connector wire, and replace and
tighten the removed terminal screw using a screwdriver. (Fig. 30)
Fig. 30
16
Screw and
special washer
Ring
connector
06-048 KMRV74EH_out_ENG
2/8/06
2:34 PM
Page 17
5-5. Wiring Instructions for the Outdoor Unit
CAUTION
G
Be sure to correctly align inter-unit cables A and B.
English
Outdoor unit A
Terminal board
1 2 3 4 5 6 7 8
Power:
Single-phase,
220/240VAC 50HZ
Power switch
(not provided)
Indoor unit A
A is the indoor unit with
refrigerant tubing that is
connected to service valve 1 2 3
A (top) of the outdoor unit.
Terminal board
Inter-unit cables
ø1.0 (not provided)
Ground
Power cable (not provided)
(ø3.5 mm: Less than 26 m)
Label A
Indoor unit B
B is the indoor unit with
refrigerant tubing that is
connected to service valve 1 2 3
B (top) of the outdoor unit.
A
Be sure to perform grounding.
Attach a ground wire to either the
outdoor unit or indoor unit.
If there is a grounding terminal
inside the room, use the grounding
screw inside the indoor unit.
Terminal board
Inter-unit cables
ø1.0 (not provided)
Label B
B
Be sure to apply the provided labels to both
ends of the inter-unit cables to prevent miswiring. The units will not function if the wiring
connections are incorrect.
Fig. 31
G
G
G
G
G
Use a dedicated A/C circuit for power.
To make connections to the outdoor unit, remove the
inspection panel and tubing panel.
Do not bring the inter-unit cables or power cable into
contact with tubing or service valves.
Use outdoor unit cable fasteners and fasten the
inter-unit cables at the location where the cables are
double-sheathed.
Arrange the wiring so that the inter-unit cables are
contained in the inspection panel and tubing panel,
as shown in Fig. 31.
17
06-048 KMRV74EH_out_ENG
2/8/06
2:34 PM
Page 18
Regulations on wire size differ from locality to locality.
For field wiring requirements, please refer to your local
electrical codes. Make sure that the installation fully
complies with all local and national regulations.
English
(1) Remove access panel “C”. (Fig. 32)
(2) Connect the inter-unit wiring and power line
according to the drawing on the panel side.
Access panel “C”
(3) Be sure to size each wire allowing approx. 10 cm
longer than the required length for wiring. Store
excess wiring inside the cabinet.
(4) When connections are completed, check that all
connections are correct as shown in the wiring
system diagram on panel side.
(5) Be sure to ground the unit according to your local
codes.
6. Test Run
Fig. 32
Performing a test run
G
Refer to the test run procedures in the indoor unit
installation manual.
G
Perform the test run separately for each connected
indoor unit. If 2 units are operated simultaneously, it is
not possible to correctly check for errors in tubing and
wiring.
G
If the room temperature is 15°C or below, it may not
be possible to check for tubing errors with cooling
operation. If this occurs, perform heating operation for
each unit individually, and check that warm air is discharged from each unit. If there is cold air mixed in
with the warm air, check the tubing connections
again.
Checking tubing and wiring
Perform the test run and check that operation is normal.
If there is an error in tubing or wiring, the refrigerant may
flow to indoor unit B when indoor unit A is operated (for
example).
CAUTION
G
Stop operation immediately if there is an error in tubing or wiring. Turn the power (breaker) to OFF, and
check whether the inter-unit cables are connected
incorrectly, or whether the narrow tubes A and B are
connected in reverse. Correct the connections.
G
If there is an error in tubing, pump-down must be
performed. Be sure to perform pump-down. After
making corrections, again purge the air from the
tubes.
18
06-048 KMRV74EH_out_ENG
2/8/06
2:34 PM
Page 19
7. Connecting a Home Automation Device
The HA (white) 4P terminal is located on the indoor unit PCB. If a HA device will be used,
connect it to this terminal.
Also, refer to Section 9. ELECTRIC WIRING DIAGRAM in the outdoor unit installation manual.
The strength of the installation location is sufficient to support the A/C weight.
The indoor and outdoor units are installed level and vertically.
The power and voltage are as specified.
Inter-unit cables are securely fastened to the terminal board.
Inter-unit cables are securely fixed.
The power cord and inter-unit cables are not connected anywhere along their paths.
The ground wire is securely connected.
An air purge of the refrigerant circuit has been conducted.
A leak test of the tubing connections has been performed.
Thermal insulation has been applied to the tubing connections.
Drain connections are secure and water drains properly.
Putty has been used to close the hole in the wall.
All service valves are fully open.
Remote controller signals are being positively received.
19
English
8. Installation Check Sheet
06-048 KMRV74EH_out_ENG
2/8/06
2:34 PM
Page 20
9. Electric Wiring Diagram
Indoor unit
SAP-KMRV74/94/124EH
1 2 3 4
1 2 3 4
ION ASSY
ION
TERMINAL
BLK
HA
JEM-A
4P(WHT)
1 2 3 4
1 1
ION 2 2
3P(WHT)
3 3
1 1
WHT
2 2
RED
3 3
BLK
CONNECTOR
ROOM THERMISTOR
BLK
BLK
BLK
BLK
COIL THERMISTOR
1
2
3
4
1
2
3
4
FAN MOTOR
BLK
WHT
YEL
BLU
RED
FM
YEL/GRN
WHT
RED
BLK
BLK
1
2
3
4
5
6
CONTROLLER
1
2
FLAP
3 5P(WHT) LAMP
4
10P(WHT)
5
CONNECTOR
RED
1 1
PNK
2 2
BLU
3 3
FLAP
BRN
4 4
YEL
5 5
FLAP MOTOR
EVAPORATOR
1
2
3
4
5
AC1 AC2 SI
1 1
2 2
3 3
4 4
5 5
6 6
7 7
8 8
9 9
10 10
RED
WHT
WHT
WHT
WHT
WHT
WHT
WHT
WHT
WHT
4
3
2
RED
WHT
BLK
1
1 1
2 2
3 3
4 4
5 5
6 6
7 7
8 8
9 9
10 10
TERMINAL BASE
IND LAMP ASSY
1
ROOM/COIL
2
4P(WHT)
3 DCM
4 6P(BLU)
5
6
English
TO OUTDOOR UNIT
8FA-2-5257-72600-1
Fig. 33
W
W
DEF1 DEF0
GRN/YEL
GRN/YEL
GRN/YEL
2P-CONNECTOR
WHT
WHT
WHT
W
W
W
W
W
W
W
RV1
RV0
L2
L1
E-2
E-1
E
W
BLK
ACIN1
1
2
ACIN2
RED
W
BLU
1 2 3 4 5
1 2 3 4 5
1 2 3 4 5
1 2 3 4 5
MV1
MV0
MAGNETIC COIL
MAGNETIC COIL
1 2 3 4 5
1 2 3 4 5
FM
GRN/YEL
FAN MOTOR
MV0
1 2 3 4 5
TERMINAL
PLATE
1
2
REACTANCE
BLK
BLK
1 2 3 4 5
1 2 3 4 5
WHT
3
4
5
6
BLK
WHT
7
L
BLK
RED
BLU
YEL
3P-CONNECTOR
1 1 RED(PNK)
2 2 WHT
BLU
3 3
WHT
FERRITE
CORE
MV1
1 2 3 4 5
8
N
CN04 DCFM
1 2 3 4 5 6 7
5P-CONNECTOR
ORG
ORG
RED
RED
YEL
YEL
BLK
BLK
GRY
GRY
RED
W
5P-CONNECTOR
ORG
ORG
RED
RED
YEL
YEL
BLK
BLK
GRY
GRY
BLU
W
WHT
V W
W
BLK
RED
BLU
YEL
U
GND
8FA-2-5257-56900-1
Fig. 34
Meaning of Abbreviations
ABBREV.
WARNING
To prevent electric shock, do not
inspect or repair until the Power Lamp
on the P.C.Board is turned off.
20
TO INDOOR UNIT
W
S1-B
B INDOOR A INDOOR
UNIT
UNIT
S1-A
OLR1
POWER
SUPPLY
OLR0
W
1 2 3 4 5 6 7
1 2 3 4 5 6 7
RED(PNK)
R/V
WHT
C/W
BLU
WHT
W
(OLR)
OVERLOAD RELAY
COMPRESSOR
MOTOR
S/U
W
CONTROLLER
7P-CONNECTOR
WHT
WHT
RED
WHT
1 1
WHT
2 2
2P-CONNECTOR
25A
COMP
WHT
BLK
1 1
BLK
2 2
2P-CONNECTOR
WHT
WHT
CM
2 1
2 1
2 1
2 1
WHT
WHT
1 2 3 4
B-TH
2 1
2 1
1 2 3 4
1 2 3 4
REACTANCE
RV
2P-CONNECTOR
WHT
BLU
BLU
1 2 3 4
A-TH
DEF
BLK
BLK
BN THERMISTOR
1 2 3 4
COIL/OUTDOOR
COIL
COIL
DEFROST VALVE 4WAY VALVE
2P-CONNECTOR
BLK
BLK
BLU
BLK
BLU
BW THERMISTOR
1 2 3 4
1 2 3 4
4P-CONNECTOR
YEL
YEL
YEL
YEL
YEL
YEL
YEL
YEL
BLU
AN THERMISTOR
OUTDOOR
THERMISTOR
1 2 3 4
1 2 3 4
4P-CONNECTOR
YEL
YEL
YEL
YEL
YEL
YEL
YEL
YEL
RED
COIL
THERMISTOR
4P-CONNECTOR
YEL
YEL
YEL
YEL
BLK
BLK
BLK
BLK
WHT
COMPRESSOR
THERMISTOR
BLK
BLK
AW THERMISTOR
Electric wiring diagram for 2-room multi outdoor unit (CMRV1424EH)
MEANING
1
BLK
BLACK
2
BLU
BLUE
3
BRN
BROWN
4
GRN/YEL
GREEN/YELLOW
5
GRY
GREY
6
ORG
ORANGE
7
PNK
PINK
8
RED
RED
9
VLT
VIOLET
10
WHT
WHITE
11
YEL
YELLOW
APPENDIX B INSTALLATION INSTRUCTIONS
SAP-CMRV1924EH
SAP-CMRV1934EH
SAP-CMRV2444EH
SAP-CMRV3144EH
(II-852-6-4189-992-00-2)
A-2
06-108 KMRV74-244EH ENG
2/8/06
7:03 PM
Page a
For Outdoor Unit
INSTALLATION INSTRUCTIONS
– Inverter Multi Split System Air Conditioner –
COOL / DRY/ HEAT Model
This air conditioner uses the new refrigerant R410A.
Model Combinations
Page
IMPORTANT!
Please Read Before Starting .................................. 2
2.
INSTALLATION SITE SELECTION ................... 4
2-1. Indoor Unit
2-2. Connecting Indoor Units
2-3. Outdoor Unit
2-4. Outer Dimensions of Outdoor Unit
2-5. Diagram of Outdoor Unit Installation
5.
WIRING INSTRUCTIONS ................................ 19
5-1. General Precautions on Wiring
5-2. Recommended Wire Length and Diameter
5-3. Wiring System Diagram
5-4. How to Connect Wiring to the Terminal
5-5. Wiring Instructions for the Outdoor Unit
SAP-CMRV1924EH
SAP-KMRV94EH
SAP-CMRV1934EH
SAP-KMRV124EH
SAP-CMRV2444EH
SAP-KRV184EH
SAP-CMRV3144EH
SAP-KRV244EH
Combine indoor and outdoor units only as listed in
the combination tables for 2-room, 3-room or
4-room outdoor unit as shown in its respective
manual.
Power Source:
50 Hz, single-phase, 220 – 240 VAC
Be sure to read the yellow instruction sheet
attached to the outdoor unit for models using the
new refrigerant R410A.
Combination example
Indoor unit B
Indoor unit A
Indoor unit C
Português
AIR PURGING................................................... 16
I Air Purging with a Vacuum Pump (for Test Run)
I Pump Down
SAP-KMRV74EH
Outdoor unit
Indoor unit D
TEST RUN......................................................... 23
7.
CONNECTING A HOME AUTOMATION
DEVICE ............................................................. 24
8.
INSTALLATION CHECK SHEET ...................... 24
9.
ELECTRIC WIRING DIAGRAM ........................ 25
85264189992002 © SANYO 2006
NOTE
The illustrations are based on the typical appearance of
a standard model. Consequently, the shape may differ
from that of the air conditioner that you are installing.
SANYO Electric Co., Ltd.
Osaka, Japan
EÏÏËÓÈο
6.
Italiano
4.
Outdoor Unit
Deutsch
INSTALLATION PROCESS .............................. 13
3-1. Embedding the Tubing and Wiring
3-2. Drain Cap and Drain Elbow
3-3. Use of the Flaring Method
3-4. Flaring Procedure with a Flare Tool
3-5. Caution Before Connecting Tubes Tightly
3-6. Tubing Connections
3-7. Insulation of Refrigerant Tubing
3-8. Taping the Tubes
3-9. Finishing the Installation
Indoor Unit
Français
3.
GENERAL .......................................................... 3
1-1. Tools Required for Installation (not supplied)
1-2. Accessories Supplied with Unit
1-3. Optional Copper Tubing Kit
1-4. Type of Copper Tube and Insulation Material
1-5. Additional Materials Required for Installation
Español
1.
Combine indoor and outdoor units only as listed
below.
English
Contents
06-108 KMRV74-244EH ENG
2/8/06
7:03 PM
Page 2
IMPORTANT!
Please Read Before Starting
When Installing…
English
This air conditioning system meets strict safety and operating standards. As the installer or service person, it is an
important part of your job to install or service the system so
it operates safely and efficiently.
…In a Ceiling or Wall
Make sure the ceiling/wall is strong enough to hold the
unit’s weight. It may be necessary to construct a strong
wood or metal frame to provide added support.
For safe installation and trouble-free operation, you
must:
G Carefully read this instruction booklet before beginning.
G Follow each installation or repair step exactly as
shown.
G Observe all local, state, and national electrical codes.
G Pay close attention to all warning and caution notices
given in this manual.
This symbol refers to a hazard or unsafe practice which
WARNING
can result in severe personal
injury or death.
This symbol refers to a hazard or unsafe practice which
can result in personal injury
CAUTION
or product or property damage.
…In a Room
Properly insulate any tubing run inside a room to prevent
“sweating” that can cause dripping and water damage to
walls and floors.
…In Moist or Uneven Locations
Use a raised concrete pad or concrete blocks to provide
a solid, level foundation for the outdoor unit. This prevents water damage and abnormal vibration.
…In an Area with High Winds
Securely anchor the outdoor unit down with bolts and a
metal frame. Provide a suitable air baffle.
…In a Snowy Area (for Heat Pump-type Systems)
• Position the outdoor unit in a protected location
where snow will not blow into it.
• Install the outdoor unit on a raised platform that is
If Necessary, Get Help
higher than drifting snow. Provide snow vents.
These instructions are all you need for most installation
sites and maintenance conditions. If you require help for
a special problem, contact our sales/service outlet or
your certified dealer for additional instructions.
When Connecting Refrigerant Tubing
• Use the flare method for connecting tubing.
• Apply refrigerant lubricant to the matching surfaces
of the flare and union tubes before connecting
them, then tighten the nut with a torque wrench for
a leak-free connection.
In Case of Improper Installation
The manufacturer shall in no way be responsible for
improper installation or maintenance service, including
failure to follow the instructions in this document.
• Check carefully for leaks before starting the test run.
SPECIAL PRECAUTIONS
WARNING
•
•
•
•
When Servicing
When Wiring
• Turn the power OFF at the main power box (mains)
before opening the unit to check or repair electrical
parts and wiring.
ELECTRICAL SHOCK CAN CAUSE
SEVERE PERSONAL INJURY OR DEATH.
ONLY A QUALIFIED, EXPERIENCED
ELECTRICIAN SHOULD ATTEMPT TO
WIRE THIS SYSTEM.
Do not supply power to the unit until all wiring and tubing are completed or reconnected and checked.
Highly dangerous electrical voltages are used in this
system. Carefully refer to the wiring diagram and
these instructions when wiring. Improper connections
and inadequate grounding can cause accidental
injury or death.
Ground the unit following local electrical codes.
Connect all wiring tightly. Loose wiring may cause
overheating at connection points and a possible fire
hazard.
• Keep your fingers and clothing away from any moving
parts.
• Clean up the site after you finish, remembering to
check that no metal scraps or bits of wiring have been
left inside the unit being serviced.
Others
CAUTION
• Ventilate any enclosed areas when installing or testing the refrigeration system. Escaped refrigerant
gas, on contact with fire or heat, can produce dangerously toxic gas.
When Transporting
• Confirm upon completing installation that no refrigerant
gas is leaking. If escaped gas comes in contact with a
stove, gas water heater, electric room heater or other
heat source, it can produce dangerously toxic gas.
Be careful when picking up and moving the indoor and
outdoor units. Get a partner to help, and bend your knees
when lifting to reduce strain on your back. Sharp edges or
thin aluminum fins on the air conditioner can cut your fingers.
• Do not install only a single indoor unit.
2
06-108 KMRV74-244EH ENG
2/8/06
7:03 PM
Page 3
1. General
1-1. Tools Required for Installation (not supplied)
1. Standard screwdriver
2. Phillips head screwdriver
3. Knife or wire stripper
4. Tape measure
Carpenter’s level
Sabre saw or key hole saw
Hacksaw
Core bits
Hammer
Drill
Tube cutter
Tube flaring tool
Torque wrench
Adjustable wrench
Reamer (for deburring)
Vacuum pump (For R410A)
Manifold valve
English
5.
6.
7.
8.
9.
10.
11.
12.
13.
14.
15.
16.
17.
This booklet briefly outlines where and how to install
the air conditioning system. Please read over the
entire set of instructions for the indoor and outdoor
units and make sure all accessory parts listed are with
the system before beginning. If the electric wiring diagram does not appear in this manual, please check for
the diagram on the indoor unit.
1-2. Accessories Supplied with Unit
Table 1
Parts
Reducer
(ø9.52 ø12.70)
Labels for inter-unit
cable and tube
Figure
Q’ty
Parts
1
Reducer
(ø12.70 ø9.52)
CMRV1924
CMRV1934
A B C D
Figure
Q’ty
CMRV2444
1
CMRV3144
2
4 each Cushion rubber
4
Parts
Figure
Q’ty
Drain elbow
1
Drain cap
5
Packed in the outdoor unit.
1-3. Optional Copper Tubing Kit
2.
Copper tubing for connecting the outdoor unit to the
indoor unit is available in kits which contain the narrow
and wide tubing, fittings and insulation. Consult your
nearest sales outlet or A/C workshop.
Foamed polyethylene insulation for the specified
copper tubes as required to precise length of tubing. Wall thickness of the insulation should be not
less than 8 mm.
3.
Use insulated copper wire for field wiring.
Wire size varies with the total length of wiring.
Refer to 5. Wiring Instructions for details.
1-4. Type of Copper Tube and Insulation Material
If you wish to purchase these materials separately
from a local source, you will need:
1.
Deoxidized annealed copper tube for refrigerant
tubing as detailed in Table 2.
CAUTION
Cut each tube to the appropriate lengths +30 cm
to 40 cm to dampen vibration between units.
Table 2
Narrow Tube
Wide Tube
Model
Outer Dia.
Thickness
Outer Dia.
Thickness
KMRV74
6.35 mm
0.8 mm
9.52 mm
0.8 mm
KMRV94
6.35 mm
0.8 mm
9.52 mm
0.8 mm
KMRV124
6.35 mm
0.8 mm
9.52 mm
0.8 mm
KRV184
6.35 mm
0.8 mm
12.70 mm
0.8 mm
KRV244
6.35 mm
0.8 mm
15.88 mm
1.0 mm
3
Check local electrical codes
and regulations before
obtaining wire. Also, check
any specified instructions or
limitations.
06-108 KMRV74-244EH ENG
2/8/06
7:03 PM
Page 4
1-5. Additional Materials Required for Installation
English
1.
2.
Refrigeration (armored) tape
Insulated staples or clamps for connecting wire
(See local codes)
Putty
Refrigeration lubricant
Clamps or saddles to secure refrigerant tubing
3.
4.
5.
Indoor unit
2. Installation Site Selection
2-1. Indoor Unit
WARNING
To prevent abnormal heat generation
and the possibility of fire, do not
place obstacles, enclosures and
grilles in front of or surrounding the
air conditioner in a way that may
block air flow.
Drain hose
AVOID:
Outside drainage
G
direct sunlight.
G
nearby heat sources that may affect performance of the
unit.
G
areas where leakage of flammable gas may be expected.
Fig. 1
G
placing or allowing any obstructions near the A/C inlet or
outlet.
G
installing in rooms that contain instant-on (rapid-start)
fluorescent lamps. (These may prevent the A/C from
receiving signals.)
G
places where large amounts of oil mist exist.
G
installing in locations where there are devices that
generate high-frequency emissions.
Fig. 2
INDOOR
UNIT (1)
Tubing length (L1)
Elevation
difference (H1)
select an appropriate position from which every corner of
the room can be uniformly cooled. (High on a wall is best.)
G
select a location that will hold the weight of the unit.
G
select a location where tubing and drain hose have the
shortest run to the outside. (Fig. 1)
G
allow room for operation and maintenance as well as
unrestricted air flow around the unit. (Fig. 2)
G
install the unit within the maximum elevation difference
(H1, H2, H3, H4) above or below the outdoor unit and
within a total tubing length (L1+L2, L1+L2+L3,
L1+L2+L3+L4) from the outdoor unit as detailed in
Table 3 and Fig. 3a.
5 cm
min.
Front View
DO:
G
15 cm min.
5 cm
min.
INDOOR
UNIT (2)
L2
OUTDOOR
UNIT
H2
L3
H4
INDOOR
UNIT (4)
L4
INDOOR
UNIT (3)
H3
Fig. 3a
CAUTION
Indoor unit
For stable operation of the air
conditioner, do not install
wall-mounted type indoor
Minimum height
units less than 1.5 m from
from floor level
floor level.
1.5 m
Floor level
Fig. 3b
4
Wall
06-108 KMRV74-244EH ENG
2/8/06
7:03 PM
Page 5
Install the indoor unit more than 1 meter away from any
antenna or power lines or connecting wires used for television, radio, telephone, security system, or intercom.
Electrical noise from any of these sources may affect
operation.
G
install in a sturdy manner to avoid increased operating
noise.
Table 3
Max. Allowable
Tubing Length
per unit
(m)
Model
Max. Allowable Total
Tubing Length
at shipment
(L1+L2) or (L1+L2+L3)
or (L1+L2+L3+L4)
(m)
Limit of
Total Tubing Length
(L1+L2) or (L1+L2+L3)
or (L1+L2+L3+L4)
(m)
Limit of Elevation
Difference
(H1, H2, H3, H4)
(m)
Required Amount
of Additional
Refrigerant
(g/m)*
CMRV1924
25
45 (L1+L2)
45 (L1+L2)
15
–
CMRV1934
25
45 (L1+L2+L3)
45 (L1+L2+L3)
15
–
CMRV2444
25
45 (L1+L2+L3+L4)
60 (L1+L2+L3+L4)
15
20
CMRV3144
30
45 (L1+L2+L3+L4)
70 (L1+L2+L3+L4)
15
20
* If total tubing length becomes 45 to 60 m (max.) or 45 to 70 m (max.), charge additional refrigerant (R410A) by 20 g/m.
No additional charge of compressor oil is necessary.
2-2. Connecting Indoor Units
(1) Connecting indoor unit for SAP-CMRV1924
(A)
Outdoor unit
Indoor unit
ø9.52
B
(SAP-KMRV74EH,KMRV94EH,KMRV124EH)
ø9.52
ø6.35
ø9.52
A
(SAP-KMRV74EH,KMRV94EH,KMRV124EH)
ø9.52
ø6.35
Fig. 4
(B)
Outdoor unit
Indoor unit
ø9.52
B
ø9.52
(SAP-KMRV74EH,KMRV94EH,KMRV124EH)
ø6.35
ø12.70
A
ø9.52
Flare ø9.52
(SAP-KRV184EH)
ø6.35
Union ø12.70
A joint for connecting tubes of
different sizes
(ø9.52
ø12.70) Supplied Reducer
Fig. 4a
unit: mm
5
English
G
06-108 KMRV74-244EH ENG
2/8/06
7:04 PM
Page 6
(2) Connecting indoor unit for SAP-CMRV1934
(A)
Outdoor unit
Indoor unit
ø9.52
English
C
(SAP-KMRV74EH, KMRV94EH, KMRV124EH)
ø9.52
ø6.35
ø9.52
B
(SAP-KMRV74EH, KMRV94EH, KMRV124EH)
ø9.52
ø6.35
ø9.52
A
(SAP-KMRV74EH, KMRV94EH, KMRV124EH)
ø9.52
ø6.35
Fig. 4b
(B)
Outdoor unit
Indoor unit
ø9.52
C
(SAP-KMRV74EH, KMRV94EH, KMRV124EH)
ø9.52
ø6.35
ø9.52
B
(SAP-KMRV74EH, KMRV94EH, KMRV124EH)
ø9.52
ø6.35
ø12.70
A
(SAP-KRV184EH)
ø9.52
Flare ø9.52
ø6.35
Union ø12.70
A joint for connecting tubes of
different sizes
(ø9.52
ø12.70) Supplied Reducer
Fig. 4c
(3) Connecting indoor unit for SAP-CMRV2444
(A)
Outdoor unit
Indoor unit
ø9.52
D
(SAP-KMRV74EH, KMRV94EH, KMRV124EH)
ø9.52
ø6.35
ø9.52
C
(SAP-KMRV74EH, KMRV94EH, KMRV124EH)
ø9.52
ø6.35
ø9.52
B
(SAP-KMRV74EH, KMRV94EH, KMRV124EH)
ø9.52
ø6.35
ø9.52
A
(SAP-KMRV74EH, KMRV94EH, KMRV124EH)
ø12.70
ø6.35
Flare ø12.70 Union ø9.52
(ø12.70
ø9.52) Supplied Reducer
Fig. 4d
unit: mm
6
06-108 KMRV74-244EH ENG
2/8/06
7:04 PM
Page 7
(B)
Outdoor unit
Indoor unit
ø9.52
D
(SAP-KMRV74EH, KMRV94EH, KMRV124EH)
ø9.52
ø6.35
ø9.52
C
(SAP-KMRV74EH, KMRV94EH, KMRV124EH)
ø6.35
ø9.52
B
(SAP-KMRV74EH, KMRV94EH, KMRV124EH)
ø9.52
ø6.35
ø12.70
A
(SAP-KRV184EH)
ø12.70
ø6.35
Fig. 4e
(C)
Outdoor unit
Indoor unit
ø9.52
D
(SAP-KMRV74EH, KMRV94EH, KMRV124EH)
ø9.52
ø6.35
ø9.52
C
(SAP-KMRV74EH, KMRV94EH, KMRV124EH)
ø9.52
ø6.35
ø9.52
B
(SAP-KMRV74EH, KMRV94EH, KMRV124EH)
ø9.52
ø6.35
ø15.88
A
(SAP-KRV244EH)
ø12.70
ø6.35
Flare ø12.70 Union ø15.88
(ø12.70
ø15.88) Locally purchased
Fig. 4f
(D)
Outdoor unit
Indoor unit
ø9.52
D
ø9.52
(SAP-KMRV74EH, KMRV94EH, KMRV124EH)
ø6.35
ø9.52
C
ø9.52
(SAP-KMRV74EH, KMRV94EH, KMRV124EH)
ø6.35
ø12.70
B
(SAP-KRV184EH)
ø9.52
ø6.35
ø15.88
A
ø12.70
(SAP-KRV244EH)
ø6.35
Flare ø12.70 Union ø15.88
Flare ø9.52
Union ø12.70
(ø12.70
ø15.88)
Locally purchased
(ø9.52
ø12.70)
Locally purchased
Fig. 4g
unit: mm
7
English
ø9.52
06-108 KMRV74-244EH ENG
2/8/06
7:04 PM
Page 8
(4) Connecting indoor unit for SAP-CMRV3144
(A)
Outdoor unit
Indoor unit
ø9.52
D
(SAP-KMRV74EH, KMRV94EH, KMRV124EH)
English
ø9.52
ø6.35
ø9.52
C
(SAP-KMRV74EH, KMRV94EH, KMRV124EH)
ø9.52
ø6.35
ø9.52
B
(SAP-KMRV74EH, KMRV94EH, KMRV124EH)
ø12.70
ø6.35
ø9.52
A
(SAP-KMRV74EH, KMRV94EH, KMRV124EH)
ø12.70
ø6.35
Flare ø12.70 Union ø9.52
(ø12.70
ø9.52) Supplied Reducer
Fig. 4h
(B)
Outdoor unit
Indoor unit
ø9.52
D
(SAP-KMRV74EH, KMRV94EH, KMRV124EH)
ø9.52
ø6.35
ø9.52
C
(SAP-KMRV74EH, KMRV94EH, KMRV124EH)
ø9.52
ø6.35
ø9.52
B
(SAP-KMRV74EH, KMRV94EH, KMRV124EH)
ø12.70
ø6.35
ø12.70
A
(SAP-KRV184EH)
ø12.70
ø6.35
Flare ø12.70 Union ø9.52
(ø12.70
ø9.52) Supplied Reducer
Fig. 4i
(C)
Outdoor unit
Indoor unit
ø9.52
D
ø9.52
(SAP-KMRV74EH, KMRV94EH, KMRV124EH)
ø6.35
ø9.52
C
ø9.52
(SAP-KMRV74EH, KMRV94EH, KMRV124EH)
ø6.35
ø12.70
B
ø12.70
(SAP-KRV184EH)
ø6.35
ø12.70
A
ø12.70
(SAP-KRV184EH)
ø6.35
Fig. 4j
unit: mm
8
06-108 KMRV74-244EH ENG
2/8/06
7:04 PM
Page 9
(D)
Outdoor unit
Indoor unit
ø9.52
D
(SAP-KMRV74EH, KMRV94EH, KMRV124EH)
ø6.35
ø9.52
C
(SAP-KMRV74EH, KMRV94EH, KMRV124EH)
ø9.52
ø6.35
ø9.52
B
(SAP-KMRV74EH, KMRV94EH, KMRV124EH)
ø12.70
ø6.35
ø15.88
A
(SAP-KRV244EH)
ø12.70
ø6.35
Flare ø12.70 Union ø15.88
Flare ø12.70 Union ø9.52
(ø12.70
ø15.88)
Locally purchased
(ø12.70
ø9.52)
Supplied Reducer
Fig. 4k
(E)
Outdoor unit
Indoor unit
ø9.52
D
(SAP-KMRV74EH, KMRV94EH, KMRV124EH)
ø9.52
ø6.35
ø9.52
C
(SAP-KMRV74EH, KMRV94EH, KMRV124EH)
ø9.52
ø6.35
ø12.70
B
(SAP-KRV184EH)
ø12.70
ø6.35
ø15.88
A
(SAP-KRV244EH)
ø12.70
ø6.35
Flare ø12.70 Union ø15.88
(ø12.70
ø15.88) Locally purchased
Fig. 4l
unit: mm
9
English
ø9.52
7:04 PM
Page 10
2-3. Outdoor Unit
NO
AVOID:
G
heat sources, exhaust fans, etc. (Fig. 5a)
G
damp, humid or uneven locations.
Hot air
Heat source
Outdoor unit
English
DO:
G
position the outdoor unit in a protected location
where snow will not blow into it.
G
choose a place as cool as possible.
G
choose a place that is well ventilated.
G
allow enough room around the unit for air intake/
exhaust and possible maintenance. (Fig. 5b)
G
provide a solid base (level concrete pad, concrete
block, 15 ¥ 40 cm beams or equal), a minimum of
15 cm above ground level to reduce humidity and
protect the unit against possible water damage and
decreased service life. (Fig. 5c)
Fig. 5a
Obstacle above
Air intake
Min.
G
Install cushion rubber under unit’s feet to reduce
vibration and noise. (Fig. 5d)
G
use lug bolts or equal to bolt down unit, reducing
vibration and noise.
G
Install in a location where no antenna of a television
or radio exists within 3 meters.
Exhaust fan
10 cm
Min. 20 cm
Air discharge
Valve
side
Min.
25 cm
Min.
2m
Min.
50 cm
Ground
Fig. 5b
Min.
2m
Obstacle
2/8/06
Air discharge
06-108 KMRV74-244EH ENG
Min. 20 cm
Air intake
Anchor bolts
(4 pcs.)
Min. 15 cm
Air intake
Concrete
or equal
Ab
t 15
ou
Abou
t4
cm
0c
m
Fig. 5c
Cushion rubber
Fig. 5d
10
06-108 KMRV74-244EH ENG
2/8/06
7:04 PM
Page 11
2-4. Outer Dimensions of Outdoor Unit
(1) SAP-CMRV1924
A
136
12
85
113 75
18
150 72
740
Service valve on
narrow tube side
(Outer diameter ø6.35)
Service valve on
wide tube side
(Outer diameter ø9.52)
51
Fig. 6a
English
A
900
320
345
369
608
114
(2) SAP-CMRV1934
A
136
12
85
Service valve on narrow tube side
(Outer diameter ø6.35)
740
A
900
320
345
369
608
113 75 70
18
150 72 70
Service valve on wide tube side
(Outer diameter ø9.52)
51
Fig. 6b
114
(3) SAP-CMRV2444
A
136
12
85
Service valve on narrow tube side
(Outer diameter ø6.35)
Service valve on wide tube side
(Outer diameter ø9.52)
113 75 70 70
150 72 70 70
18
740
A
900
320
345
369
608
51
Fig. 6c
Service valve on wide tube side
(Outer diameter ø12.70)
114
(4) SAP-CMRV3144
A
136
12
Service valve on narrow tube side
(Outer diameter ø6.35)
Service valve on wide tube side
(Outer diameter ø9.52)
113 75 70 70
150 73 70 70
890
18
A
85
900
320
345
369
608
51
Fig. 6d
11
114
Service valve on wide tube side
(Outer diameter ø12.70)
unit: mm
06-108 KMRV74-244EH ENG
2/8/06
7:04 PM
Page 12
2-5. Diagram of Outdoor Unit Installation
Never install only a single indoor unit.
English
Be sure to connect indoor and outdoor units only in
combinations that are listed in the catalog or in the
combination table that was provided with the outdoor unit.
(Use caution. Connecting any other model may result in
operation failure and malfunction.)
Indoor unit D
The dimensions indicated by
in the figure below are
spaces that are required in order to maintain
performance. Install in a location where the dimensions
indicated by
are ensured, and where 2 or more faces
of the unit are unobstructed. In principle, the top direction
should be unobstructed.
er
Ov
Indoor unit C
Indoor unit B
cm
20
Indoor unit A
Service space
Ov
er
10
Power breaker
cm
Ov
er
Ensure 15cm
of space if a
drain hose is to
be used.
m
0c
r5
e
Ov
25
cm
Access panel C
D
C
B
A
Base (not provided)
(concrete or similar material)
Ground
wire
(not
provided)
Fasten with anchor bolts
(not provided)
(3/8" or M10, 4 locations)
Fig. 6e
12
06-108 KMRV74-244EH ENG
2/8/06
7:04 PM
Page 13
3. Installation Process
3-1. Embedding the Tubing and Wiring
Do not connect tubes to locations that are embedded.
G
Be sure to bind refrigerant tubing and inter-unit cables
together with vinyl tape.
G
The power cable must be obtained on-site.
(ø3.5: Less than 26 m)
G
Be sure to apply the provided labels to both ends of
the inter-unit cables to prevent miswiring.
G
Securely seal the end of embedded tubing with vinyl
tape in order to prevent dirt or moisture entry.
G
In order to prevent insulation breakdown and ground
faults, do not allow the wire ends to contact rainwater,
or be subject to dew condensation.
English
G
3-2. Drain Cap and Drain Elbow
First refer to Section 2. Installation Site Selection.
NOTE
Outdoor unit
The drain hole at the bottom of the outdoor unit was not
plugged at the time of factory shipment. If necessary,
plug the drain hole with the accessory drain cap or
mount the accessory drain elbow before installing the
outdoor unit. (Fig. 7)
CAUTION
Accessory
drain cap
When installing in a cold
area where drainage water
may freeze, do not attach the
provided drain cap or drain
elbow to the bottom plate of
the unit.
Accessory
drain elbow
Accessory
drain cap
Fig. 7
3-3. Use of the Flaring Method
Deburring
Many of the conventional split system air conditioners
employ the flaring method to connect refrigerant tubes
which run between indoor and outdoor units. In this
method, the copper tubes are flared at each end and
connected with flare nuts.
After
Before
3-4. Flaring Procedure with a Flare Tool
(1) Cut the copper tube to the required length with a
tube cutter. It is recommended to cut approx. 30 –
50 cm longer than the tubing length you estimate.
(2) Remove burrs at the end of the copper tube with a
tube reamer or file. This process is important and
should be done carefully to make a good flare.
(Fig. 8)
Fig. 8
13
06-108 KMRV74-244EH ENG
2/8/06
7:04 PM
Page 14
NOTE
Copper
tubing
When reaming, hold the tube end downward and be sure
that no copper scraps fall into the tube. (Fig. 9)
English
(3) Remove the flare nut from the unit and be sure to mount
it on the copper tube.
Reamer
(4) Make a flare at the end of copper tube with a flare tool.*
(Figs. 10 and 11)
Fig. 9
(*Use “RIGID” or equivalent.)
If the previous flare tool
(clutch-type) is used:
If the special R410A
flare tool is used:
NOTE
A good flare should have the following characteristics:
G
inside surface is glossy and smooth.
G
edge is smooth.
G
tapered sides are of uniform length.
1.2 mm
0 – 0.5 mm
Adjust so that the amount of tube
protrusion is as shown in the figure.
Fig. 10
3-5. Caution Before Connecting Tubes Tightly
a)
b)
c)
Be sure to apply a sealing cap or water-proof tape to
prevent dust or water from getting into the tubes before
they are used.
Flare nut
Copper
tubing
Be sure to apply refrigerant lubricant to the matching
surfaces of the flare and union before connecting them
together. This is effective for reducing gas leaks.
(Fig. 12)
Flare tool
Fig. 11
For proper connection, align the union tube and flare
tube straight with each other, then screw in the flare nut
lightly at first to obtain a smooth match. (Fig. 13)
Apply refrigerant
lubricant here and here
3-6. Tubing Connections
Fig. 12
a)
Temporary connection:
Screw in 3 – 5 rotations by hand. (Fig.14)
b)
To fasten the flare nuts, apply specified torque as:
Table 4
Tube Dia.
Tightening Torque
6.35 mm
14 – 18 N·m (140 – 180 kgf · cm)
9.52 mm
34 – 42 N·m (340 – 420 kgf · cm)
12.70 mm
49 – 61 N·m (490 – 610 kgf · cm)
15.88 mm
68 – 82 N·m (680 – 820 kgf · cm)
Union
Flare nut
Fig. 13
Service valve on
narrow tube side
Service valve on
wide tube side
Fig. 14
14
D
C
B
A
Apply the provided labels
to the indoor and outdoor
unit tubing connectors to
prevent errors in
connections.
06-108 KMRV74-244EH ENG
2/8/06
CAUTION
7:04 PM
Page 15
Be sure to match refrigerant
tubing and electric wiring
between indoor and outdoor
units. For more details, refer to
“Tubing Check Control” in the
Technical & Service Manual.
Torque wrench
Spanner
Indoor unit
English
Outdoor unit
Fig. 15
3-7. Insulation of Refrigerant Tubing
IMPORTANT
To prevent heat loss and wet floors due to dripping of condensation, both tubes must be well insulated with a
proper insulation material.
The thickness of the insulation should be a minimum
8 mm. (Fig. 17)
Insulation
Fig. 16
Insulation
3-8. Taping the Tubes
CAUTION
After a tube has been insulated,
never try to bend it into a
narrow curve, as this may
cause the tube to break or
crack.
Thickness:
min. 8 mm
Min.
8 mm
Fig. 17
(1) At this time, the 2 refrigerant tubes (and electrical wire
if local codes permit) should be taped together with
armoring tape. The drain hose may also be included
and taped together as 1 bundle with the tubing.
Clamp
(2) Wrap the armoring tape from the bottom of the outdoor
unit to the top of the tubing where it enters the wall. As
you wrap the tubing, overlap half of each previous tape
turn. (Fig. 18)
(3) Clamp the tubing bundle to wall, using 1 clamp approx.
every 120 cm.
Insulated tubes
Fig. 18
NOTE
Do not wind the armoring tape too tightly, since this will
decrease the heat insulation effect. Also, be sure the condensation drain hose splits away from the bundle and drips
clear of the unit and the tubing.
Apply putty here
3-9. Finishing the Installation
Tubing
After finishing insulating and taping over the tubing, use
sealing putty to seal off the hole in the wall to prevent rain
and draft from entering. (Fig. 19)
15
Fig. 19
06-108 KMRV74-244EH ENG
2/8/06
7:04 PM
Page 16
4. Air Purging
English
Air and moisture remaining in the refrigerant system
have undesirable effects as indicated below.
Therefore, they must be purged completely.
G
pressure in the system rises
G
operating current rises
G
cooling efficiency drops
G
moisture in the air may freeze and block capillary
tubing
G
water may lead to corrosion of parts in the
refrigerant system
I
G
Service
valve on
narrow
D
C
B
A
Service
valve on
wide tube
side
Air Purging with a Vacuum Pump
(for Test Run)
With push-pin
Manifold gauge
(special for R410A)
High-pressure valve
Low-pressure
Vacuum pump
valve
adapter
Lo
Hi
(for preventing
Leave the
reverse flow)
valve open.
(special for
Open
R410A)
Hex wrench
(nominal size 4mm,
not provided)
In order to protect the earth’s environment, be sure to
use a vacuum pump to perform the air purge.
(Never perform an air purge by using the refrigerant
gas cylinder or other external gas, or by using the gas
inside the outdoor unit.)
Perform the air purge for tubes A, B, C, and D. Use the
same procedures for all tubes.
CAUTION
In order to prevent charging errors with
A/C that uses R410A, the screw diameter
at the service valve charging port has
been changed. When recharging or performing other servicing, use the special
charging hose and manifold gauge.
Stopper
Spindle
Screw diameter: 1/2
UNF 20 threads
Cap tightening torque:
20 – 25 N·m
(200 – 250 kgf·cm)
(Tighten by hand, then
use a wrench to turn.)
Valve core
(2) Using an adjustable wrench or box wrench,
remove the valve caps from the service valve on
both narrow and wide tubes.
Cap nut tightening torque:
7 – 11 N·m
(70 – 110 kgf·cm)
(Tighten by hand, then use a
wrench to turn approximately 30 .)
(3) Connect a vacuum pump and a manifold valve
(with pressure gauges) to the service port on the
wide tube service valve. (Fig. 20).
CAUTION
Vacuum
pump
Fig. 20
(1) Check that each tube (both narrow and wide
tubes) between the indoor and outdoor units have
been properly connected and all wiring for the test
run has been completed. Note that both narrow
and wide tube service valves on the outdoor unit
are kept closed at this stage.
CAUTION
Charging hose
(special for R410A)
<Structure of service valve on wide tube side>
Before using the vacuum pump
adapter, read the vacuum pump
adapter manual, and use the
adapter correctly.
Be sure to use a manifold valve
for air purging. If it is not
available, use a stop valve for
this purpose. The “Hi” knob of
the manifold valve must always
be kept closed.
16
Fig. 21
G
When using a hex wrench to open the spindle, an
extremely small amount of refrigerant may leak.
This does not indicate a problem.
G
Use a hex wrench of a type to which force can be
easily applied.
06-108 KMRV74-244EH ENG
2/8/06
7:04 PM
Page 17
English
(4) With the “Lo” knob of the manifold valve open and
high-pressure valve (“Hi”) closed completely, run
the vacuum pump. Run the pump until the pressure is –101 kPa (–76 cmHg). The operation time
for the vacuum pump varies with tubing length and
the capacity of the pump. The following table
shows the amount of time required for evacuation:
Table 5
Required time for evacuation when capacity
of 100 liter/h vacuum pump is used
20 min. or more
NOTE
The required time in the above table is calculated
based on the assumption that the ideal (or target) vacuum condition is around 10 mmHg abs.
(5) With the vacuum pump still running, close the “Lo”
knob of the manifold valve. Then stop the vacuum
pump. Fully close the low-pressure valve and stop
the vacuum pump. (Wait 1 – 2 minutes and check
that the manifold gauge pointer does not return. If
it does return, find and repair the leak, then apply
the vacuum again.)
(6) With a hex wrench, turn the valve stem on the narrow tube service valve counter-clockwise by 90
degrees (1/4 turn) for 10 seconds, and then turn
the stem clockwise to close it again.
CAUTION
Be sure to completely insert
the hex wrench before
attempting to turn the valve.
(7) With a standard screwdriver, turn the wide tube
service valve stem counterclockwise to fully open
the valve.
(8) Turn the narrow tube service valve stem counterclockwise to fully open the valve.
(9) Loosen the vacuum hose connected to the wide
tube service port slightly to release the pressure.
Then, remove the hose.
(10) Leak test all joints at the tubing (both indoor and
outdoors) with liquid soap. Bubbles indicate a leak.
Be sure to wipe off the soap with a clean cloth.
CAUTION
If a CFC gas detector is used,
use a special detector for HFC
refrigerant (such as R410A and
R134a).
17
06-108 KMRV74-244EH ENG
2/8/06
7:04 PM
Page 18
(11) Replace the flare nut on the wide tube service port and fasten the flare nut securely with an adjustable wrench or
box wrench. Next, mount the valve cap and tighten it with a torque wrench (the cap needs to be tightened with the
torque of 20 N·m (200 kgf · cm)). This process is very important to prevent gas from leaking from the system.
(12) Test run the air conditioner. (See page 23.)
English
(13) While the air conditioner is running, apply liquid soap to check for any gas leaks around the service valves or caps.
(14) If there is no leakage, stop the air conditioner.
(15) Wipe off the soap on the tubing.
This completes air purging with a vacuum pump and the air conditioner is ready for actual operation.
I
Pump Down
In order to protect the earth’s environment, be sure to perform pump-down to recover refrigerant
gas without releasing it into the atmosphere.
G
Close
When relocating or disposing of the A/C, request this service
from the dealer where the unit was purchased, or from an
appropriate agent. Perform pump-down as described below.
D
Narrow tube side
Close
C
What is pump-down?
G Pump-down refers to recovering the refrigerant gas from the
refrigerant cycle at the outdoor unit. This work must be
performed during cooling operation. The refrigerant gas
cannot be recovered during heating operation.
G During winter, or if the temperature sensor prevents cooling
operation, perform “forced cooling operation.”
Close
B
Charging port
Close
A
Fig. 22
Pump-down procedure
(1) Fully close the spindles at the valves on the narrow tube
side of tubes A, B, C and D. (Refer to Fig. 22.)
D
C
(2) Connect the manifold gauge to the charging port at the valve
on the wide tube side of tube D. Purge the air from the
charging hose. (Refer to Fig. 23.)
(3) Perform cooling operation or forced cooling
operation.
When the pressure at the low-pressure side is 0.15 – 0.2
MPa (0.5 – 1 kg/cm2G), fully close the spindles at the
valves on the wide tube side of tubes A, B, C, and D, and
immediately stop operation. (Refer to Fig. 23.)
In the winter, the outdoor unit may stop after 5 - 10 minutes
of operation. This is in order to protect the indoor unit heat
exchanger from freezing and does not indicate a problem.
(4) Disconnect the manifold gauge and the inter-unit tubes,
and attach the caps and flare nuts. At this point, pumpdown is completed. (If the caps and flare nuts are not
reattached, there is the danger of gas leakage.) (Refer to
Fig. 24.)
Wide tube side
B
A
Manifold gauge
Fig. 23
Cap
Cap
After disconnecting
the inter-unit tubes,
attach the flare nuts
with flare bonnets.
Cap
Cap
If pump-down is not possible
If the A/C cannot be operated because of a malfunction or
other cause, use a refrigerant recovery device to recover the
refrigerant.
18
Fig. 24
06-108 KMRV74-244EH ENG
2/8/06
7:04 PM
Page 19
5. Wiring Instructions
5-1. General Precautions on Wiring
(1) Before wiring, confirm the rated voltage of the unit as
shown on its nameplate, then carry out the wiring
closely following the wiring diagram.
English
(2) Provide a power outlet to be used exclusively for each
unit, with a power supply disconnect and circuit breaker for overcurrent protection provided in the exclusive
line.
(3) To prevent possible hazard due to insulation failure,
the unit must be grounded.
(4) Each wiring connection must be done tightly and in
accordance with the wiring system diagram. Wrong
wiring may cause the unit to misoperate or become
damaged.
(5) Do not allow wiring to touch the refrigerant tubing,
compressor, or any moving parts of the fan.
(6) Unauthorized changes in the internal wiring can be
very dangerous. The manufacturer will accept no
responsibility for any damage or misoperation that
occurs as a result of such unauthorized changes.
5-2. Recommended Wire Length and Diameter
Regulations on wiring diameter differ from locality to locality.
For field wiring requirements, please refer to your local electrical codes. Carefully observe these regulations when carrying out the installation.
Table 6 shows maximum wire lengths for control line and
power line and fuse or circuit capacity.
NOTE
Refer to the wiring system diagram (Figs. 25a, 25b or 25c)
for the meaning of (A), (B), and (C) in Table 6.
Table 6
Max. Power Line Length (m)
(A)
Max. Control Line Length (m)
(B) (C)
3.5
1.0
SAP-CMRV1924
26
25
20 A
SAP-CMRV1934
26
25
20 A
SAP-CMRV2444
26
25
20 A
SAP-CMRV3144
26
30
20 A
Cross-Sectional
Area (mm2)
Model
19
Fuse
or
Circuit Capacity
2/8/06
7:04 PM
Page 20
WARNING
G
G
CAUTION
G
G
2 indoor units with SAP-CMRV1924
Be sure to connect the power supply line to the
outdoor unit as shown in the wiring diagram.
The indoor unit draws its power from the
outdoor unit.
Do not run wiring for antenna, signal, or power
lines of television, radio, stereo, telephone,
security system, or intercom any closer than
1 meter from the power cable and wires between
the indoor and outdoor units. Electrical noise
may affect the operation.
A
B
(B)
1
OUTDOOR UNIT
2
Terminal(8P)
(C)
3
1
4
2
Grounding
line
3
(B)
(B)
1
4
2
5
(C)
3
6
4
Grounding line
(B)
Power supply
Single-phase 220-240VAC 50Hz
220VAC 60Hz
5-3. Wiring System Diagram
UNIT A
G
G
To avoid the risk of electric shock, each air
conditioner unit must be grounded.
For the installation of a grounding device,
please observe local electrical codes.
Grounding is necessary, especially for units
using inverter circuits, in order to release
charged electricity and electrical noise
caused by high tension.
Otherwise, electrical shock may occur.
Place a dedicated ground more than 2 meters
away from other grounds and do not have it
shared with other electric appliances.
INDOOR UNIT
Terminal
G
7
8
Grounding line
Fig. 25a
4
3
4
(C)
5
6
7
2
8
(C)
3
4
9
Grounding line (B)
1
2
B
(B)
3
1
2
(B)
4
3
4
5
(C)
6
C
1
Terminal
(3P)
(B) Grounding line (B)
1
2
7
4
8
(C)
3
(B)
9
Grounding line (B)
10
2
3
D
(A)
UNIT A
Terminal(12P)
Grounding
line
L
N
C
(B) Grounding line (B)
1
4
1
11
(C)
(B)
2
12
3
4
Power supply
Single-phase 220-240VAC 50Hz
220VAC 60Hz
Grounding line
(B)
OUTDOOR UNIT
L
N
2
(C)
3
UNIT B
3
1
2
UNIT C
(B)
UNIT B
B
INDOOR UNIT
Terminal
2
(B)
1
UNIT D
1
Power supply
Single-phase 220-240VAC 50Hz
220VAC 60Hz
Grounding line
Grounding
line
UNIT A
Terminal(9P)
INDOOR UNIT
Terminal
3
4
A
OUTDOOR UNIT
INDOOR UNIT
Terminal
(C)
INDOOR UNIT
Terminal
2
INDOOR UNIT
Terminal
(B)
1
UNIT C
INDOOR UNIT
Terminal
A
(A)
4 indoor units with SAP-CMRV2444, CMRV3144
3 indoor units with SAP-CMRV1934
INDOOR UNIT
Terminal
English
G
G
Be sure to comply with local codes on running
the wire from the indoor unit to the outdoor unit
(size of wire and wiring method, etc.).
Each wire must be firmly connected.
No wire should be allowed to touch refrigerant
tubing, the compressor, or any moving part.
Be sure to connect power wires correctly
matching up numbers on terminals of the
outdoor unit and respective indoor units A – D.
INDOOR UNIT
Terminal
G
WARNING
UNIT B
06-108 KMRV74-244EH ENG
Grounding line
Fig. 25b
1
Terminal
(3P)
2
3
(A)
Fig. 25c
20
06-108 KMRV74-244EH ENG
2/8/06
7:04 PM
Page 21
5-4. How to Connect Wiring to the Terminal
WARNING
When connecting each power wire to the corresponding
terminal, follow the instructions “How to connect wiring
to the terminal” and fasten the wire securely tight with
the fixing screw of the terminal plate.
STRIP
SIZE
How to connect wiring to the terminal
English
Loose wiring may cause the
terminal to overheat or result
in unit malfunction. A fire
hazard may also exist. Therefore, be sure all wiring is
tightly connected.
7 mm (ACTUAL
SIZE)
Fig. 26
a) For Indoor Unit
Solid wire
25 mm
(1) Cut the wire end with a cutting pliers, then strip the
insulation to expose the wire about 7 mm. See the
label (Fig. 26) near the terminal plate.
(2) Using a screwdriver, loosen the terminal screw on
the terminal plate.
Loop
Insulation
(3) Insert the wire and tighten the terminal screw completely using a screwdriver.
Fig. 27
Stranded wire
10 mm
b) For Outdoor Unit
I For solid core wiring (or F-cable)
Ring
connector
(1) Cut the wire end with a cutting pliers, then strip the
insulation to expose the solid wire about 25 mm.
(Fig. 27)
Fig. 28
(2) Using a screwdriver, remove the terminal screw(s)
on the terminal plate.
(3) Using the pliers, bend the solid wire to form a loop
suitable for the terminal screw.
Twist wire ends
(4) Shape the loop wire properly, place it on the terminal plate and fix it securely with the removed terminal screw using a screwdriver.
I For stranded wiring
Fig. 29
(1) Cut the wire end with a cutting pliers, then strip the
insulation to expose the stranded wiring about
10 mm and tightly twist the wire ends.
(Figs. 28 and 29)
Special
washer
(2) Using a screwdriver, remove the terminal screw(s)
on the terminal plate.
Screw
Ring connector
(3) Using a ring connector fastener or pliers, securely
clamp each stripped wire end with a ring connector.
(Fig. 28)
Wire
Terminal plate
Wire
(4) Place the ring connector wire, and replace and
tighten the removed terminal screw using a screwdriver. (Fig. 30)
Fig. 30
21
Screw and
special washer
Ring
connector
06-108 KMRV74-244EH ENG
2/8/06
7:04 PM
Page 22
5-5. Wiring Instructions for the Outdoor Unit
CAUTION
Be sure to correctly align inter-unit cables A, B, C and D.
English
G
Outdoor unit A
Terminal board
1
Indoor unit A
A is the indoor unit with
refrigerant tubing that is
connected to service valve 1 2 3
A (top) of the outdoor unit.
B is the indoor unit with
refrigerant tubing that is
connected to service valve 1 2 3
B (top) of the outdoor unit.
3
1 2 3 4 5 6 7 8 9 10 11 12
Power:
Single-phase,
220/240VAC 50HZ
Terminal board
Inter-unit cables
ø1.0 (not provided)
Power switch
(not provided)
Label A
Indoor unit B
2
A
Ground
Power cable (not provided)
(ø3.5 mm: Less than 26 m)
Terminal board
Inter-unit cables
ø1.0 (not provided)
Label B
Indoor unit C
C is the indoor unit with
refrigerant tubing that is
connected to service valve 1 2 3
C (top) of the outdoor unit.
B
Terminal board
Label C
Indoor unit D
D is the indoor unit with
refrigerant tubing that is
connected to service valve 1 2 3
D (top) of the outdoor unit.
Be sure to perform grounding.
Attach a ground wire to either the
outdoor unit or indoor unit.
If there is a grounding terminal
inside the room, use the grounding
screw inside the indoor unit.
Inter-unit cables
ø1.0 (not provided)
C
Terminal board
Label D
Be sure to apply the provided labels to both
ends of the inter-unit cables to prevent miswiring. The units will not function if the wiring
connections are incorrect.
Inter-unit cables
ø1.0 (not provided)
D
Fig. 31
G
G
G
G
G
Use a dedicated A/C circuit for power.
To make connections to the outdoor unit, remove the
inspection panel and tubing panel.
Do not bring the inter-unit cables or power cable into
contact with tubing or service valves.
Use outdoor unit cable fasteners and fasten the
inter-unit cables at the location where the cables are
double-sheathed.
Arrange the wiring so that the inter-unit cables are
contained in the inspection panel and tubing panel,
as shown in Fig. 31.
22
06-108 KMRV74-244EH ENG
2/8/06
7:04 PM
Page 23
Regulations on wire size differ from locality to locality.
For field wiring requirements, please refer to your local
electrical codes. Make sure that the installation fully
complies with all local and national regulations.
(1) Remove access panel “C”. (Fig. 32)
Access panel C
(3) Be sure to size each wire allowing approx. 10 cm
longer than the required length for wiring. Store
excess wiring inside the cabinet.
(4) When connections are completed, check that all
connections are correct as shown in the wiring
system diagram on panel side.
(5) Be sure to ground the unit according to your local
codes.
6. Test Run
Fig. 32
Performing a test run
G
Refer to the test run procedures in the indoor unit
installation manual.
G
Perform the test run separately for each connected
indoor unit. If 2 units are operated simultaneously, it is
not possible to correctly check for errors in tubing and
wiring.
G
If the room temperature is 15°C or below, it may not
be possible to check for tubing errors with cooling
operation. If this occurs, perform heating operation for
each unit individually, and check that warm air is discharged from each unit. If there is cold air mixed in
with the warm air, check the tubing connections
again.
Checking tubing and wiring
Perform the test run and check that operation is normal.
If there is an error in tubing or wiring, the refrigerant may
flow to indoor unit B when indoor unit A is operated (for
example).
CAUTION
G
Stop operation immediately if there is an error in tubing or wiring. Turn the power (breaker) to OFF, and
check whether the inter-unit cables are connected
incorrectly, or whether the narrow tubes A and B are
connected in reverse. Correct the connections.
G
If there is an error in tubing, pump-down must be
performed. Be sure to perform pump-down. After
making corrections, again purge the air from the
tubes.
23
English
(2) Connect the inter-unit wiring and power line
according to the drawing on the panel side.
06-108 KMRV74-244EH ENG
2/8/06
7:04 PM
Page 24
7. Connecting a Home Automation device
English
The HA (white) 4P terminal is located on the indoor unit PCB. If a HA device will be used,
connect it to this terminal.
Also, refer to Section 9. ELECTRIC WIRING DIAGRAM in the outdoor unit installation manual.
8. Installation Check Sheet
The strength of the installation location is sufficient to support the A/C weight.
The indoor and outdoor units are installed level and vertically.
The power and voltage are as specified.
Inter-unit cables are securely fastened to the terminal board.
Inter-unit cables are securely fixed.
The power cord and inter-unit cables are not connected anywhere along their paths.
The ground wire is securely connected.
An air purge of the refrigerant circuit has been conducted.
A leak test of the tubing connections has been performed.
Thermal insulation has been applied to the tubing connections.
Drain connections are secure and water drains properly.
Putty has been used to close the hole in the wall.
All service valves are fully open.
Remote controller signals are being positively received.
24
S/U
R
/
V
W
1 2 3
1 2 3
CM
HEATER1 HEATER0
W
WHT
2P-CONNECTOR
W
HEATER
CRANKCASE
2 2
1 1
W
CN04 DCFM
1 2 3 4 5 6 7
1 2 3 4 5 6 7
1 2 3 4 5 6 7
WARNING
To prevent electric shock, do not
inspect or repair until the Power Lamp
on the P.C.Board is turned off.
25
2 1
2 1
MV1
1 2 3 4 5
1 2 3 4 5
MV0
1 2 3 4 5
1 2 3 4 5
BLK
1 2 3 4 5
1 2 3 4 5
1 2 3 4 5
1 2 3 4 5
MV1
MV0
GRN/YEL
GRN/YEL
COIL
COIL
DEFROST VALVE 4WAY VALVE
GRN/YEL
Fig. 33a
W
W
W
W
W
W
W
RV1
RV0
L2
L1
E-2
E-1
E
25A
W
W
ACIN2
S1-A
W
RED
S1-B
W
BLU
REACTANCE
BLK
Fig. 34a
ABBREV.
WHT
BLK
WHT
FAN MOTOR
FM
GRN/YEL
BLK
WHT
YEL
BLU
RED
CONNECTOR
RED
1 1
PNK
2 2
BLU
3 3
FLAP
BRN
4 4
YEL
5 5
FLAP MOTOR
YEL/GRN
8FA-2-5257-72600-1
1
2
3
4
5
6
MAGNETIC COIL MAGNETIC COIL
7
8
TO INDOOR UNIT
2 1
2 1
2P-CONNECTOR
WHT
WHT
WHT
1
2
3
4
5
6
1
2
3
4
5
1
2
3
4
RED
WHT
BLK
E
1
2
3
4
1 1
2 2
3 3
4 4
5 5
6 6
7 7
8 8
9 9
10 10
ROOM THERMISTOR
BLK
BLK
BLK
BLK
COIL THERMISTOR
RED
WHT
WHT
WHT
WHT
WHT
WHT
WHT
WHT
WHT
4
3
2
1
Fig. 33b
Electric wiring diagram for 2-room multi outdoor unit (CMRV1924EH)
RV
REACTANCE
ACIN1
WHT
BLK
CONTROLLER
FERRITE
CORE
TERMINAL
PLATE
FM
GND
C/W
GRN/YEL
FAN MOTOR
COMPRESSOR
MOTOR
8FA-2-5257-84200-0
Meaning of Abbreviations
1
BLK
BLACK
MEANING
2
BLU
BLUE
3
BRN
BROWN
4
GRN/YEL
GREEN/YELLOW
5
GRY
GREY
6
ORG
ORANGE
7
PNK
PINK
8
RED
RED
9
VLT
VIOLET
10
WHT
WHITE
11
YEL
YELLOW
ION ASSY
1 2 3 4
1 2 3 4
WHT
RED
BLK
BLK
ION
TERMINAL
HA
JEM-A
4P(WHT)
1 2 3 4
1 1
ION 2 2
3P(WHT)
3 3
1
ROOM/COIL
2
4P(WHT)
3 DCM
4 6P(BLU)
5
6
1
2
3
4
AC1 AC2 SI
1 1
2 2
1
3 3
2
FLAP
3 5P(WHT) LAMP 4 4
4
10P(WHT) 5 5
6 6
5
7 7
8 8
9 9
10 10
CONTROLLER
ION ASSY
1 2 3 4
1 2 3 4
TERMINAL BASE
ION
TERMINAL
HA
JEM-A
4P(WHT)
1 2 3 4
1 1
WHT
2 2
RED
3 3
BLK
CONNECTOR
ROOM THERMISTOR
BLK
BLK
BLK
BLK
COIL THERMISTOR
BLK
B INDOOR A INDOOR
UNIT
UNIT
DEF1 DEF0
WHT
WHT
EVAPORATOR
1
2
3
4
1 1
ION 2 2
3P(WHT)
3 3
1
ROOM/COIL
2
4P(WHT)
3 DCM
4 6P(BLU)
5
6
1 1
2 2
3 3
4 4
5 5
6 6
7 7
8 8
9 9
10 10
IND LAMP ASSY
L
W
2P-CONNECTOR
WHT
BLU
BLU
BLK
WHT
YEL
BLU
1
2
3
4
5
6
RED
WHT
WHT
WHT
WHT
WHT
WHT
WHT
WHT
WHT
TO OUTDOOR UNIT
N
V W
W
W
BLK
BLK
FAN MOTOR
FM
RED
CONTROLLER
AC1 AC2 SI
1 1
2 2
1
3 3
2
FLAP
3 5P(WHT) LAMP 4 4
4
10P(WHT) 5 5
6 6
5
7 7
8 8
9 9
10 10
4
3
2
SAP-KMRV74/94/124EH
POWER
SUPPLY
U
2 1
2 1
ORG
RED
YEL
BLK
GRY
OLR1
2P-CONNECTOR
BLK
BLK
BLU
BLK
BLU
DEF
ORG
RED
YEL
BLK
GRY
W
BLU
BRN
WHT
ORG
BW THERMISTOR
YEL
YEL
YEL
YEL
BN THERMISTOR
1 2 3 4
1 2 3 4
B-TH
BLU
BRN
WHT
ORG
OLR0
RED
AW THERMISTOR
YEL
YEL
YEL
YEL
AN THERMISTOR
1 2 3 4
1 2 3 4
A-TH
OUTDOOR
THERMISTOR
YEL
YEL
BLK
BLK
1 2 3 4
1 2 3 4
COIL/OUTDOOR
RED
W
WHT
RED
BLK
BLK
WHT
RED
WHT 1 1 WHT
WHT 2 2 WHT
2P-CONNECTOR
COMP
1 1
2 2
WHT
(OLR)
OVERLOAD RELAY
7:04 PM
WHT
WHT
3P-CONNECTOR
RED(PNK)
RED(PNK)
WHT
WHT
BLU
BLU
WHT FERRITE
CORE
1
2
3
4
5
RED
WHT
1
TERMINAL BASE
BLK
IND LAMP ASSY
COIL
THERMISTOR
COMPRESSOR
THERMISTOR
BLK
BLK
CONNECTOR
RED
1 1
PNK
2 2
BLU
3 3
FLAP
BRN
4 4
YEL
5 5
FLAP MOTOR
YEL/GRN
2/8/06
BLK
8FA-2-5257-68200-0
English
EVAPORATOR
06-108 KMRV74-244EH ENG
Page 25
9. Electric Wiring Diagram
Indoor unit
SAP-KRV184/244EH
TO OUTDOOR UNIT
06-108 KMRV74-244EH ENG
2/8/06
7:04 PM
Page 26
Electric wiring diagram for 3-room multi outdoor unit (CMRV1934EH)
W
W
W
L2
L1
W
GRN/YEL
W
E-2 E-1
W
ACIN1
W
U
W
V
WHT
W
ACIN2
FERRITE
CORE
3
GND
KS23
1 2 3 4 5 6 7 8
KS22
1 2 3 4 5 6
SICOM2
KS10
1 2 3 4
MV1
1 2 3 4 5
1 2 3 4 5
W
S1-A
W
RED
MV0
S1-B
1 2 3 4 5
1 2 3 4 5
W
BLU
1
1 2 3 4
1 2 3 4
CNO1
ORG
RED
YEL
BLK
GRY
BLK
WHT
RED
BLU
1 2 3 4 5 6
1 2 3 4 5 6
CNO2
ORG
RED
YEL
BLK
GRY
BLK
WHT
RED
BLU
BLK
WHT
1 2 3 4 5 6 7 8
1 2 3 4 5 6 7 8
CNO3
WHT
BLK
WHT
RED
BLU
BLK
WHT
RED
BLU
BLU
BRN
WHT
ORG
RED
BLK
2
3
REACTANCE
C/W
FM
FAN MOTOR
OVERLOAD RELAY
(OLR)
RED
WHT 2 2
WHT
WHT 1 1
WHT
2P-CONNECTOR
1 2 3 4 5
1 2 3 4 5
1 2 3 4 5
1 2 3 4 5
W
SICOM2
MV2
1 2 3 4 5
1 2 3 4 5
BLK
4
WHT
5
BLK
MV1
SI-C
C-TH
1 2 3 4
1 2 3 4
ORG
RED
YEL
BLK
GRY
BLU
BRN
WHT
ORG
1 2 3 4 5 6 7
1 2 3 4 5 6 7
RED
2
CONTROLLER
W CNO4 DCFM
1 2 3 4 5 6 7
GRN/YEL
1
W
C INDOOR B INDOOR A INDOOR
UNIT
UNIT
UNIT
TO INDOOR UNIT
OLR1
TERMINAL
PLATE
BLK
W
E
L
W
HEATER1 HEATER0
N
W
RV0
POWER
SUPPLY
W
RV1
GRN/YEL
WHT
CRANKCASE
HEATER
GRN/YEL
W
2P-CONNECTOR
WHT
WHT
WHT
WHT
WHT
WHT
WHT
2P-CONNECTOR
WHT
BLU
BLU
BLK
BLK
OUTDOOR
THERMISTOR
W
CM
COMPRESSOR
MOTOR
2 1
2 1
CW THERMISTOR
YEL
YEL
YEL
YEL
CN THERMISTOR
S/U
REACTANCE
2 1
2 1
DEF1 DEF0
COMP
COMPRESSOR
THERMISTOR
BLK
BLK
3P-CONNECTOR
RED(PNK)
RED(PNK)
WHT
WHT
BLU
BLU
WHT FERRITE
CORE
OLR0
1 2 3
1 2 3
R
/
V
2 1
2 1
W
2P-CONNECTOR
WHT
1 1
2 2
25A
W
W
2P-CONNECTOR
BLK
BLU
BLU
BW THERMISTOR
YEL
YEL
YEL
YEL
BN THERMISTOR
1 2 3 4
1 2 3 4
B-TH
RV
BLK
BLK
AW THERMISTOR
YEL
YEL
YEL
YEL
AN THERMISTOR
1 2 3 4
1 2 3 4
A-TH
COIL
THERMISTOR
YEL
YEL
BLK
BLK
1 2 3 4
1 2 3 4
COIL/OUTDOOR
1 1
2 2
MV0
6
BLK
7
MAGNETIC COIL MAGNETIC COIL
8
WHT
9
BRN
GND
1 2 3 4 5
1 2 3 4 5
MV2
MAGNETIC COIL
8FA-2-5257-57000-0
Fig. 34b
Electric wiring diagram for 4-room multi outdoor unit (CMRV2444/3144EH)
W
GRN/YEL
W
E-2 E-1
TERMINAL
PLATE
BLK
W
W
E
ACIN1
WHT
W
ACIN2
FERRITE
CORE
3
GND
S1-A
W
RED
MV1
1 2 3 4 5
1 2 3 4 5
MV0
S1-B
1 2 3 4 5
1 2 3 4 5
W
BLU
V
KS10
1 2 3 4
BLK
WHT
RED
BLU
BLK
WHT
RED
BLU
BLK
WHT
RED
BLU
BLK
WHT
BLK
WHT
RED
BLU
W
WHT
BLU
BRN
WHT
ORG
KS22
1 2 3 4 5 6
RED
SICOM2
KS23
1 2 3 4 5 6 7 8
BLK
FM
FAN MOTOR
OVERLOAD RELAY
(OLR)
D-TH
1 2 3 4
1 2 3 4
1 2 3 4 5 6
1 2 3 4 5 6
CNO2
C-TH
1 2 3 4
1 2 3 4
MV3
1 2 3 4 5
1 2 3 4 5
1 2 3 4
1 2 3 4
CNO1
W
1 2 3 4 5
1 2 3 4 5
3
1 2 3 4 5
1 2 3 4 5
SICOM2
SI-D SI-C
MV2
W
W
1 2 3 4 5
1 2 3 4 5
ORG
RED
YEL
BLK
GRY
C/W
1 2 3 4 5 6 7 8
1 2 3 4 5 6 7 8
CNO3
ORG
RED
YEL
BLK
GRY
BLU
BRN
WHT
ORG
1 2 3 4 5 6 7
1 2 3 4 5 6 7
1 2 3 4 5
1 2 3 4 5
1 2 3 4 5
1 2 3 4 5
MV3
MV2
BLK
4
WHT
5
BLK
MV1
1
2
REACTANCE
GRN/YEL
2
CONTROLLER
W CNO4 DCFM
1 2 3 4 5 6 7
RED
WHT 2 2
WHT
WHT 1 1
WHT
2P-CONNECTOR
1
L
W
L1
N
W
L2
POWER
SUPPLY
W
GRN/YEL
W
HEATER1 HEATER0
GRN/YEL
2P-CONNECTOR
WHT
WHT
WHT
WHT
WHT
WHT
WHT
WHT
2P-CONNECTOR
WHT
BLU
BLU
W
RV0
D INDOOR C INDOOR B INDOOR A INDOOR
UNIT
UNIT
UNIT
UNIT
TO INDOOR UNIT
U
CM
COMPRESSOR
MOTOR
W
RV1
ORG
RED
YEL
BLK
GRY
W
W
W
CRANKCASE
HEATER
ORG
RED
YEL
BLK
GRY
OLR1
DW THERMISTOR
YEL
YEL
YEL
YEL
DN THERMISTOR
CW THERMISTOR
YEL
YEL
YEL
YEL
CN THERMISTOR
S/U
OUTDOOR
THERMISTOR
W
W
2 1
2 1
2 1
2 1
DEF1 DEF0
COMP
OLR0
1 2 3
1 2 3
R
/
V
W
REACTANCE
25A
W
RED
COMPRESSOR
THERMISTOR
BLK
BLK
1 1
2 2
2 1
2 1
BLK
BLK
1 2 3 4
1 2 3 4
B-TH
2P-CONNECTOR
BLK
BLU
BLU
BW THERMISTOR
YEL
YEL
YEL
YEL
BN THERMISTOR
1 2 3 4
1 2 3 4
A-TH
RV
BLK
BLK
AW THERMISTOR
YEL
YEL
YEL
YEL
AN THERMISTOR
1 2 3 4
1 2 3 4
COIL/OUTDOOR
COIL
THERMISTOR
YEL
YEL
BLK
BLK
DEF
2P-CONNECTOR
WHT
1 1
2 2
WHT
COIL
COIL
DEFROST VALVE 4WAY VALVE
3P-CONNECTOR
RED(PNK)
RED(PNK)
WHT
WHT
BLU
BLU
WHT FERRITE
CORE
English
DEF
WHT
COIL
COIL
DEFROST VALVE 4WAY VALVE
MV0
6
BLK
BLK
MAGNETIC COIL MAGNETIC COIL
WHT
7
8
9
10
BRN
WHT
WHT
GRY
11
12
GND
MAGNETIC COIL MAGNETIC COIL
8FA-2-5257-57100-0
Fig. 34c
Meaning of Abbreviations
ABBREV.
WARNING
To prevent electric shock, do not
inspect or repair until the Power Lamp
on the P.C.Board is turned off.
26
MEANING
1
BLK
BLACK
2
BLU
BLUE
3
BRN
BROWN
4
GRN/YEL
GREEN/YELLOW
5
GRY
GREY
6
ORG
ORANGE
7
PNK
PINK
8
RED
RED
9
VLT
VIOLET
10
WHT
WHITE
11
YEL
YELLOW
APPENDIX C UNIT COMBINATION TABLES
< List of Combination Table >
Name of Combination Table
Model No. of Outdoor Unit
Remarks
2-Room Outdoor Unit Combination Table
SAP-CMRV1424EH
OI-852-6-4180-810-00-0
2-Room Outdoor Unit Combination Table
SAP-CMRV1924EH
OI-852-6-4180-865-00-0
3-Room Outdoor Unit Combination Table
SAP-CMRV1934EH
OI-852-6-4180-811-00-0
4-Room Outdoor Unit Combination Table
SAP-CMRV2444EH
OI-852-6-4180-812-00-1
4-Room Outdoor Unit Combination Table
SAP-CMRV3144EH
OI-852-6-4180-804-00-0
NOTE
Be sure to operate the air conditioning system only when 2 or
more indoor units have been installed. If operated with only a
single unit installed, the returning fluid to the compressor may
cause a malfunction.
A-3
CombinationTable-1424EH.fm Page 2 Tuesday, February 14, 2006 4:20 PM
Save this Combination Table!
Please be sure to hand over this sheet to the user.
2-Room Outdoor Unit Combination Table
SAP-CMRV1424EH
<Combinations of Connectable Indoor Units>
The combinations of the indoor units listed in Table 1 on the next page are combinations solely of those units which can be
operated concurrently. In addition to the combinations listed in the table, other combinations of indoor units are possible
provided that the following conditions are satisfied.
Conditions:
1. At least two or more indoor units must be connected to the multi outdoor unit. It is not acceptable for only one indoor
unit to be connected.
2. The total rated cooling capacity of the indoor units to be connected must be no more than 200% of the rated cooling
capacity of the outdoor unit.
CAUTION
In this case, all the indoor units installed must not be operated concurrently under any
circumstances. Otherwise, the air conditioner may not run properly and trouble may
occur.
Example: When two indoor units are connected
If the following holds true
• Rated cooling capacity of SAP-CMRV1424EH outdoor unit: C=4 (kW)
• Rated cooling capacity of indoor units: K1, K2, ... (kW)
Then:
C x 2 (200%) K1 + K2 + .......
4 x 2 3.5 + 3.5
8 7
It is therefore possible to connect two units with respective capacities of 3.5 + 3.5. However, since this combination is not
found in the 2-room operation column of Table 1, operating all these units concurrently may result in trouble. At a time like
this, shut down at least one of the two indoor units to match one of the combinations found in the single-room operation column of Table 1.
NOTE
Be sure to operate the air conditioning system only when 2 or more
indoor units have been installed. If operated with only a single unit
installed, the returning fluid to the compressor may cause a malfunction.
Pub. OI-85264180810000
© SANYO 2006
CombinationTable-1424EH.fm Page 2 Tuesday, February 14, 2006 4:20 PM
< Combinations of operatable indoor units >
SAP-CMRV1424EH
(Rated cooling capacity: 4.0 kW)
NOTE
2.2: SAP-KMRV74EH
2.65: SAP-KMRV94EH
3.5: SAP-KMRV124EH
Table 1
Indoor Unit Combination
Single-room
Operation
2-room
Operation
2.2
2.65
3.5
2.2
2.2
2.2
2.65
2.65
+
+
+
+
+
2.2
2.65
3.5
2.65
3.5
=
=
=
=
=
=
=
=
2.2
2.65
3.5
4.4
4.85
5.7
5.3
6.15
Room Room
A
B
2.2
2.65
3.5
1.8
1.8
1.68 2.02
1.51 2.39
2
2
1.72 2.28
Indoor Unit Capacity (kW)
COOLING
HEATING
Total Performance
Total Performance
Room Room
Capacity ( Min. - Max. )
Capacity ( Min. - Max.
A
B
2.2 ( 1.2 2.6 )
2.5
2.5 ( 1.4 3.5
2.65 ( 1.2 3.2 )
3.6
3.6 ( 1.4 4.0
3.5 ( 1.3 3.6 )
4.2
4.2 ( 1.5 4.2
3.6 ( 2.0 4.5 )
2.1
2.1
4.2 ( 2.0 5.0
3.7 ( 2.0 4.8 )
1.72 2.48
4.2 ( 2.0 5.0
3.9 ( 2.0 4.9 )
1.64 2.76
4.4 ( 2.2 5.3
4.0 ( 2.0 5.0 )
2.25 2.25
4.5 ( 2.2 5.5
4.0 ( 2.1 5.0 )
2.08 2.42
4.5 ( 2.4 5.5
• The table lists the wall-mounted type of indoor units as representative models.
• For details on the connection of indoor units other than the wall-mounted type, refer to the catalog.
)
)
)
)
)
)
)
)
)
CombinationTable-1924EH.fm Page 2 Tuesday, February 14, 2006 4:34 PM
Save this Combination Table!
Please be sure to hand over this sheet to the user.
2-Room Outdoor Unit Combination Table
SAP-CMRV1924EH
<Combinations of Connectable Indoor Units>
The combinations of the indoor units listed in Table 1 on the next page are combinations solely of those units which can be
operated concurrently. In addition to the combinations listed in the table, other combinations of indoor units are possible
provided that the following conditions are satisfied.
Conditions:
1. At least two or more indoor units must be connected to the multi outdoor unit. It is not acceptable for only one indoor
unit to be connected.
2. The total rated cooling capacity of the indoor units to be connected must be no more than 200% of the rated cooling
capacity of the outdoor unit.
CAUTION
In this case, all the indoor units installed must not be operated concurrently under any
circumstances. Otherwise, the air conditioner may not run properly and trouble may
occur.
Example: When two indoor units are connected
If the following holds true
• Rated cooling capacity of SAP-CMRV1924EH outdoor unit: C=5.6 (kW)
• Rated cooling capacity of indoor units: K1, K2, ... (kW)
Then:
C x 2 (200%) K1 + K2 + .......
5.6 x 2 5.15 + 5.15
11.2 10.3
It is therefore possible to connect two units with respective capacities of 5.15 + 5.15. However, since this combination is not
found in the 2-room operation column of Table 1, operating all these units concurrently may result in trouble. At a time like
this, shut down at least one of the two indoor units to match one of the combinations found in the single-room operation column of Table 1.
NOTE
Be sure to operate the air conditioning system only when 2 or more
indoor units have been installed. If operated with only a single unit
installed, the returning fluid to the compressor may cause a malfunction.
Pub. OI-85264180865000
© SANYO 2006
CombinationTable-1924EH.fm Page 2 Tuesday, February 14, 2006 4:34 PM
< Combinations of operatable indoor units >
NOTE
SAP-CMRV1924EH
(Rated cooling capacity: 5.6 kW)
2.2: SAP-KMRV74EH
2.65: SAP-KMRV94EH
3.5: SAP-KMRV124EH
5.15: SAP-KRV184EH
Table 1
Indoor Unit Combination
Single-room
Operation
2-room
Operation
2.2
2.65
3.5
5.15
2.2
2.2
2.2
2.2
2.65
2.65
2.65
3.5
3.5
+
+
+
+
+
+
+
+
+
2.2
2.65
3.5
5.15
2.65
3.5
5.15
3.5
5.15
=
=
=
=
=
=
=
=
=
=
=
=
=
2.2
2.65
3.5
5.15
4.4
4.85
5.7
7.35
5.3
6.15
7.8
7
8.65
Room Room
A
B
2.2
2.65
3.5
5.15
2.2
2.2
2.2 2.65
1.97 3.13
1.65 3.85
2.50 2.50
2.24 2.96
1.9
3.7
2.7
2.7
2.27 3.33
Indoor Unit Capacity (kW)
COOLING
HEATING
Total Performance
Room Room
Total Performance
Capacity ( Min. - Max. )
Capacity ( Min. - Max.
A
B
2.2 ( 1.4 2.6 )
2.5
2.5 ( 1.8 4.3
2.65 ( 1.4 3.2 )
3.6
3.6 ( 1.8 4.7
3.5 ( 1.5 3.6 )
4.2
4.2 ( 1.9 5.1
5.15 ( 1.6 5.8 )
6.0
6.0 (
2 7.8
4.4 ( 2.0 5.1 )
2.5
2.5
5.0 (
2 6.4
4.85 ( 2.0 5.8 )
2.5
3.6
6.1 ( 2.1 7.5
5.1 ( 2.0 6.7 )
2.4
3.9
6.3 ( 2.1 8.3
5.5 ( 2.1 6.8 )
2.03 4.87
6.9 ( 2.4 8.4
5 ( 2.0 6.3 )
3.2
3.2
6.45 ( 2.3 8.4
5.2 ( 2.1 6.8 )
3.07 3.58
6.65 ( 2.3 8.4
5.6 ( 2.1 6.8 )
2.74 4.56
7.3 ( 2.4 8.4
5.4 ( 2.0 6.8 )
3.45 3.45
6.9 ( 2.3 8.4
5.6 ( 2.1 6.8 )
3.01 4.29
7.3 ( 2.4 8.4
• The table lists the wall-mounted type of indoor units as representative models.
• For details on the connection of indoor units other than the wall-mounted type, refer to the catalog.
)
)
)
)
)
)
)
)
)
)
)
)
)
)
CombinationTable-1934EH.fm Page 2 Tuesday, February 14, 2006 4:27 PM
Save this Combination Table!
Please be sure to hand over this sheet to the user.
3-Room Outdoor Unit Combination Table
SAP-CMRV1934EH
<Combinations of Connectable Indoor Units>
The combinations of the indoor units listed in Table 1 on the next page are combinations solely of those units which can be
operated concurrently. In addition to the combinations listed in the table, other combinations of indoor units are possible
provided that the following conditions are satisfied.
Conditions:
1. At least two or more indoor units must be connected to the multi outdoor unit. It is not acceptable for only one indoor
unit to be connected.
2. The total rated cooling capacity of the indoor units to be connected must be no more than 200% of the rated cooling
capacity of the outdoor unit.
CAUTION
In this case, all the indoor units installed must not be operated concurrently under any
circumstances. Otherwise, the air conditioner may not run properly and trouble may
occur.
Example: When three indoor units are connected
If the following holds true
• Rated cooling capacity of SAP-CMRV1934EH outdoor unit: C=5.6 (kW)
• Rated cooling capacity of indoor units: K1, K2, ... (kW)
Then:
C x 2 (200%) K1 + K2 + .......
5.6 x 2 2.2 + 3.5 + 5.15
11.2 10.85
It is therefore possible to connect three units with respective capacities of 2.2 + 3.5 + 5.15. However, since this combination
is not found in the 3-room operation column of Table 1, operating all these units concurrently may result in trouble. At a time
like this, shut down at least one of the three indoor units to match one of the combinations found in the 2-room operation
column of Table 1.
NOTE
Be sure to operate the air conditioning system only when 2 or more
indoor units have been installed. If operated with only a single unit
installed, the returning fluid to the compressor may cause a malfunction.
Pub. OI-85264180811000
© SANYO 2006
CombinationTable-1934EH.fm Page 2 Tuesday, February 14, 2006 4:27 PM
< Combinations of operatable indoor units >
SAP-CMRV1934EH
(Rated cooling capacity: 5.6 kW)
NOTE
2.2: SAP-KMRV74EH
2.65: SAP-KMRV94EH
3.5: SAP-KMRV124EH
5.15: SAP-KRV184EH
Table 1
Indoor Unit Combination
Single-room
Operation
2-room
Operation
3-room
Operation
2.2
2.65
3.5
5.15
2.2
2.2
2.2
2.2
2.65
2.65
2.65
3.5
3.5
2.2
2.2
2.2
2.2
2.2
2.2
2.2
2.2
2.65
2.65
2.65
3.5
+
+
+
+
+
+
+
+
+
+
+
+
+
+
+
+
+
+
+
+
+
2.2
2.65
3.5
5.15
2.65
3.5
5.15
3.5
5.15
2.2
2.2
2.2
2.2
2.65
2.65
2.65
3.5
2.65
2.65
3.5
3.5
+
+
+
+
+
+
+
+
+
+
+
+
2.2
2.65
3.5
5.15
2.65
3.5
5.15
3.5
2.65
3.5
3.5
3.5
=
=
=
=
=
=
=
=
=
=
=
=
=
=
=
=
=
=
=
=
=
=
=
=
=
2.2
2.65
3.5
5.15
4.4
4.85
5.7
7.35
5.3
6.15
7.8
7
8.65
6.6
7.05
7.9
9.55
7.5
8.35
10
9.2
7.95
8.8
9.65
10.5
Room Room
A
B
2.2
2.65
3.5
5.15
2.2
2.2
2.2 2.65
1.97 3.13
1.65 3.85
2.50 2.50
2.24 2.96
1.9
3.7
2.7
2.7
2.27 3.33
1.77 1.77
1.69 1.69
1.56 1.56
1.29 1.29
1.63 1.96
1.48 1.78
1.23 1.48
1.34 2.13
1.87 1.87
1.69 1.69
1.54 2.03
1.87 1.87
Indoor Unit Capacity (kW)
COOLING
HEATING
Total Performance
Total Performance
Room
Room Room Room
Capacity ( Min. - Max. )
C Capacity ( Min. - Max. )
A
B
C
2.2 ( 1.4 - 2.6 )
2.5
2.5 ( 1.8 - 4.3 )
2.65 ( 1.4 - 3.2 )
3.6
3.6 ( 1.8 - 4.7 )
3.5 ( 1.5 - 3.6 )
4.2
4.2 ( 1.9 - 5.1 )
5.15 ( 1.6 - 5.8 )
6.0
6.0 (
2 - 7.8 )
4.4 ( 2.0 - 5.1 )
2.5
2.5
5.0 (
2 - 6.4 )
4.85 ( 2.0 - 5.8 )
2.5
3.6
6.1 ( 2.1 - 7.5 )
5.1 ( 2.0 - 6.7 )
2.4
3.9
6.3 ( 2.1 - 8.3 )
5.5 ( 2.1 - 6.8 )
2.03 4.87
6.9 ( 2.4 - 8.4 )
5 ( 2.0 - 6.3 )
3.2
3.2
6.45 ( 2.3 - 8.4 )
5.2 ( 2.1 - 6.8 )
3.07 3.58
6.65 ( 2.3 - 8.4 )
5.6 ( 2.1 - 6.8 )
2.74 4.56
7.3 ( 2.4 - 8.4 )
5.4 ( 2.0 - 6.8 )
3.45 3.45
6.9 ( 2.3 - 8.4 )
5.6 ( 2.1 - 6.8 )
3.01 4.29
7.3 ( 2.4 - 8.4 )
1.77
5.3 ( 2.5 - 6.8 )
2.18 2.18 2.18
6.55 ( 2.7 - 8.4 )
2.03
5.4 ( 2.9 - 6.8 )
2.02 2.02 2.91
6.95 (
3 - 8.4 )
2.48
5.6 ( 2.9 - 6.8 )
1.94 1.94 3.26
7.15 ( 3.2 - 8.4 )
3.02
5.6 ( 2.9 - 6.8 )
1.66 1.66 3.98
7.3 ( 3.4 - 8.4 )
1.96
5.55 ( 2.9 - 6.8 )
1.88 2.71 2.71
7.3 ( 3.4 - 8.4 )
2.35
5.6 ( 2.9 - 6.8 )
1.77 2.55 2.98
7.3 ( 3.4 - 8.4 )
2.88
5.6 ( 2.9 - 6.8 )
1.51 2.17 3.62
7.3 ( 3.4 - 8.4 )
2.13
5.6 ( 2.9 - 6.8 )
1.67 2.81 2.81
7.3 ( 3.4 - 8.4 )
1.87
5.6 ( 2.9 - 6.8 )
2.43 2.43 2.43
7.3 ( 3.4 - 8.4 )
2.23
5.6 ( 2.9 - 6.8 )
2.31 2.31 2.69
7.3 ( 3.4 - 8.4 )
2.03
5.6 ( 2.9 - 6.8 )
2.19 2.56 2.56
7.3 ( 3.4 - 8.4 )
1.87
5.6 ( 2.9 - 6.8 )
2.43 2.43 2.43
7.3 ( 3.4 - 8.4 )
• The table lists the wall-mounted type of indoor units as representative models.
• For details on the connection of indoor units other than the wall-mounted type, refer to the catalog.
CombinationTable-2444EH.fm Page 2 Thursday, March 2, 2006 4:46 PM
Save this Combination Table!
Please be sure to hand over this sheet to the user.
4-Room Outdoor Unit Combination Table
SAP-CMRV2444EH
<Combinations of Connectable Indoor Units>
The combinations of the indoor units listed in Table 1 on the next page are combinations solely of those units which can be
operated concurrently. In addition to the combinations listed in the table, other combinations of indoor units are possible
provided that the following conditions are satisfied.
Conditions:
1. At least two or more indoor units must be connected to the multi outdoor unit. It is not acceptable for only one indoor
unit to be connected.
2. The total rated cooling capacity of the indoor units to be connected must be no more than 200% of the rated cooling
capacity of the outdoor unit.
CAUTION
In this case, all the indoor units installed must not be operated concurrently under any
circumstances. Otherwise, the air conditioner may not run properly and trouble may
occur.
Example: When four indoor units are connected
If the following holds true
• Rated cooling capacity of SAP-CMRV2444EH outdoor unit: C=6.8 (kW)
• Rated cooling capacity of indoor units: K1, K2, ... (kW)
Then:
C x 2 (200%) K1 + K2 + .......
6.8 x 2 2.2 + 2.2 + 2.2 + 5.15
13.6 11.75
It is therefore possible to connect four units with respective capacities of 2.2 + 2.2 + 2.2 + 5.15. However, since this combination is not found in the 4-room operation column of Table 1, operating all these units concurrently may result in trouble. At
a time like this, shut down at least one of the four indoor units to match one of the combinations found in the 3-room operation column of Table 1.
NOTE
Be sure to operate the air conditioning system only when 2 or more
indoor units have been installed. If operated with only a single unit
installed, the returning fluid to the compressor may cause a malfunction.
Pub. OI-85264180812001
© SANYO 2006
CombinationTable-2444EH.fm Page 3 Thursday, March 2, 2006 4:46 PM
< Combinations of operatable indoor units >
NOTE
SAP-CMRV2444EH
(Rated cooling capacity: 6.8 kW)
2.2: SAP-KMRV74EH
2.65: SAP-KMRV94EH
3.5: SAP-KMRV124EH
5.15: SAP-KRV184EH
7.1: SAP-KRV244EH
Table 1
Indoor Unit Combination
Single-room
Operation
2-room
Operation
3-room
Operation
2.2
2.65
3.5
5.15
7.1
2.2
2.2
2.2
2.2
2.2
2.65
2.65
2.65
2.65
3.5
3.5
3.5
5.15
2.2
2.2
2.2
2.2
2.2
2.2
2.2
2.2
2.2
2.65
2.65
2.65
2.65
2.65
3.5
3.5
+
+
+
+
+
+
+
+
+
+
+
+
+
+
+
+
+
+
+
+
+
+
+
+
+
+
+
+
+
2.2
2.65
3.5
5.15
7.1
2.65
3.5
5.15
7.1
3.5
5.15
7.1
5.15
2.2
2.2
2.2
2.2
2.65
2.65
2.65
3.5
3.5
2.65
2.65
2.65
3.5
3.5
3.5
3.5
+
+
+
+
+
+
+
+
+
+
+
+
+
+
+
+
2.2
2.65
3.5
5.15
2.65
3.5
5.15
3.5
5.15
2.65
3.5
5.15
3.5
5.15
3.5
5.15
=
=
=
=
=
=
=
=
=
=
=
=
=
=
=
=
=
=
=
=
=
=
=
=
=
=
=
=
=
=
=
=
=
=
2.2
2.65
3.5
5.15
7.1
4.4
4.85
5.7
7.35
9.3
5.3
6.15
7.8
9.75
7
8.65
10.6
10.3
6.6
7.05
7.9
9.55
7.5
8.35
10
9.2
10.9
7.95
8.8
10.5
9.65
11.3
10.5
12.2
IMPORTANT
4-room
Operation
Room Room Room
A
B
C
2.2
2.65
3.5
5.15
6.8
2.2
2.2
2.2 2.65
2.2
3.5
1.98 4.62
1.61 5.19
2.65 2.65
2.54 3.36
2.28 4.42
1.85 4.95
3.3
3.3
2.75 4.05
2.25 4.55
3.4
3.4
2.2
2.2
2.2
2.06 2.06 2.48
1.88 1.88 2.99
1.57 1.57 3.67
1.97
2.4
2.4
1.79 2.16 2.85
1.5
1.8
3.5
1.63 2.59 2.59
1.38 2.19 3.23
2.27 2.27 2.27
2.05 2.05
2.7
1.72 1.72 3.35
1.87 2.47 2.47
1.59 2.11
3.1
2.27 2.27 2.27
1.96 1.96 2.88
Indoor Unit Capacity (kW)
COOLING
HEATING
Total Performance
Total Performance
Room
Room Room Room Room
D
Capacity ( Min. - Max.)
A
B
C
D
Capacity ( Min. - Max. )
2.2 ( 1.4 - 2.6 )
2.5
2.5 ( 1.8 - 4.3 )
2.65 ( 1.4 - 3.2 )
3.6
3.6 ( 1.8 - 4.7 )
3.5 ( 1.5 - 3.6 )
4.2
4.2 ( 1.9 - 5.1 )
5.15 ( 1.6 - 5.8 )
6.0
6.0 (
2 - 7.8 )
6.8 ( 1.6 - 6.8 )
8.0
8.0 (
2 - 8.0 )
4.4 ( 2.0 - 5.1 )
2.50 2.50
5.0 (
2 - 6.4 )
4.85 ( 2.0 - 5.8 )
2.50 3.60
6.1 ( 2.1 - 7.5 )
5.7 ( 2.0 - 6.7 )
2.50 4.20
6.7 ( 2.1 - 8.3 )
6.6 ( 2.1 - 7.7 )
2.44 5.86
8.3 ( 2.4 - 9.0 )
6.8 ( 2.1 - 8.1 )
1.95 6.65
8.6 ( 2.4 - 9.0 )
5.3 ( 2.0 - 6.3 )
3.60 3.60
7.2 ( 2.3 - 8.5 )
5.9 ( 2.0 - 6.8 )
3.51 4.09
7.6 ( 2.3 - 8.5 )
6.7 ( 2.1 - 8.1 )
3.15 5.25
8.4 ( 2.4 - 9.0 )
6.8 ( 2.1 - 8.1 )
2.56 6.04
8.6 ( 2.4 - 9.0 )
6.6 ( 2.0 - 8.1 )
4.00 4.00
8.0 ( 2.3 - 8.5 )
6.8 ( 2.1 - 8.1 )
3.50 5.00
8.5 ( 2.4 - 9.0 )
6.8 ( 2.1 - 8.1 )
2.84 5.76
8.6 ( 2.4 - 9.0 )
6.8 ( 2.1 - 8.1 )
4.3
4.3
8.6 ( 2.4 - 9.0 )
6.5 ( 2.5 - 7.7 )
2.5
2.5
2.5
7.5 ( 2.7 - 8.5 )
6.6 ( 2.9 - 8.1 )
2.3
2.3
3.3
8 (
3 - 9.0 )
6.75 ( 2.9 - 8.1 )
2.26 2.26 3.79
8.3 ( 3.2 - 9.0 )
6.8 ( 2.9 - 8.1 )
1.95 1.95 4.69
8.6 ( 3.4 - 9.0 )
6.7 ( 2.9 - 8.1 )
2.16 3.12 3.12
8.4 ( 3.4 - 9.0 )
6.8 ( 2.9 - 8.1 )
2.06 2.97 3.47
8.5 ( 3.4 - 9.0 )
6.8 ( 2.9 - 8.1 )
1.78 2.56 4.26
8.6 ( 3.4 - 9.0 )
6.8 ( 2.9 - 8.1 )
1.97 3.31 3.31
8.6 ( 3.4 - 9.0 )
6.8 ( 2.9 - 8.1 )
1.69 2.84 4.06
8.6 ( 3.4 - 9.0 )
6.8 ( 2.9 - 8.1 )
2.87 2.87 2.87
8.6 ( 3.4 - 9.0 )
6.8 ( 2.9 - 8.1 )
2.72 2.72 3.17
8.6 ( 3.4 - 9.0 )
6.8 ( 2.9 - 8.1 )
2.35 2.35 3.91
8.6 ( 3.4 - 9.0 )
6.8 ( 2.9 - 8.1 )
2.58 3.01 3.01
8.6 ( 3.4 - 9.0 )
6.8 ( 2.9 - 8.1 )
2.24 2.62 3.74
8.6 ( 3.4 - 9.0 )
6.8 ( 2.9 - 8.1 )
2.87 2.87 2.87
8.6 ( 3.4 - 9.0 )
6.8 ( 2.9 - 8.1 )
2.51 2.51 3.58
8.6 ( 3.4 - 9.0 )
(Concurrent operation of 4 indoor units prohibited)
This multi outdoor unit allows up to four indoor units to be connected.
However, all four indoor units must not be operated concurrently.
Otherwise, the air conditioner may not run properly.
Up to three indoor units may be operated concurrently.
• The table lists the wall-mounted type of indoor units as representative models.
• For details on the connection of indoor units other than the wall-mounted type, refer to the catalog.
CombinationTable-3144EH.fm Page 2 Friday, February 3, 2006 9:48 AM
Save this Combination Table!
Please be sure to hand over this sheet to the user.
4-Room Outdoor Unit Combination Table
SAP-CMRV3144EH
<Combinations of Connectable Indoor Units>
The combinations of the indoor units listed in Table 1 on the next page are combinations solely of those units which can be
operated concurrently. In addition to the combinations listed in the table, other combinations of indoor units are possible
provided that the following conditions are satisfied.
Conditions:
1. At least two or more indoor units must be connected to the multi outdoor unit. It is not acceptable for only one indoor
unit to be connected.
2. The total rated cooling capacity of the indoor units to be connected must be no more than 200% of the rated cooling
capacity of the outdoor unit.
CAUTION
In this case, all the indoor units installed must not be operated concurrently under any
circumstances. Otherwise, the air conditioner may not run properly and trouble may
occur.
Example: When four indoor units are connected
If the following holds true
• Rated cooling capacity of SAP-CMRV3144EH outdoor unit: C=8 (kW)
• Rated cooling capacity of indoor units: K1, K2, ... (kW)
Then:
C x 2 (200%) K1 + K2 + .......
8 x 2 2.2 + 2.2 + 3.5 + 7.1
16 15
It is therefore possible to connect four units with respective capacities of 2.2 + 2.2 + 3.5 + 7.1. However, since this combination is not found in the 4-room operation column of Table 1, operating all these units concurrently may result in trouble. At a
time like this, shut down at least one of the four indoor units to match one of the combinations found in the 3-room operation column of Table 1.
NOTE
Be sure to operate the air conditioning system only when 2 or more
indoor units have been installed. If operated with only a single unit
installed, the returning fluid to the compressor may cause a malfunction.
Pub. OI-85264180804000
© SANYO 2006
CombinationTable-3144EH.fm Page 3 Friday, February 3, 2006 9:48 AM
< Combinations of operatable indoor units >
SAP-CMRV3144EH
(Rated cooling capacity: 8.0 kW)
NOTE
2.2: SAP-KMRV74EH
2.65: SAP-KMRV94EH
3.5: SAP-KMRV124EH
5.15: SAP-KRV184EH
7.1: SAP-KRV244EH
Table 1
Indoor Unit Combination
2.2
2.65
Single-room
3.5
Operation
5.15
7.1
2.2
2.2
2.2
2.2
2.2
2.65
2-room
2.65
Operation 2.65
2.65
3.5
3.5
3.5
5.15
5.15
2.2
2.2
2.2
2.2
2.2
2.2
2.2
2.2
2.2
2.2
2.2
2.2
3-room
2.2
Operation
2.2
2.65
2.65
2.65
2.65
2.65
2.65
2.65
2.65
3.5
3.5
3.5
3.5
2.2
2.2
2.2
2.2
2.2
2.2
2.2
2.2
2.2
2.2
2.2
2.2
4-room
2.2
Operation
2.2
2.2
2.2
2.2
2.2
2.2
2.65
2.65
2.65
2.65
2.65
2.65
3.5
+
+
+
+
+
+
+
+
+
+
+
+
+
+
+
+
+
+
+
+
+
+
+
+
+
+
+
+
+
+
+
+
+
+
+
+
+
+
+
+
+
+
+
+
+
+
+
+
+
+
+
+
+
+
+
+
+
+
+
+
+
+
+
+
+
+
2.2
2.65
3.5
5.15
7.1
2.65
3.5
5.15
7.1
3.5
5.15
7.1
5.15
7.1
2.2
2.2
2.2
2.2
2.2
2.65
2.65
2.65
2.65
3.5
3.5
3.5
5.15
5.15
2.65
2.65
2.65
2.65
3.5
3.5
3.5
5.15
3.5
3.5
3.5
5.15
2.2
2.2
2.2
2.2
2.2
2.2
2.2
2.2
2.2
2.2
2.2
2.2
2.65
2.65
2.65
2.65
2.65
3.5
3.5
2.65
2.65
2.65
2.65
2.65
3.5
3.5
+
+
+
+
+
+
+
+
+
+
+
+
+
+
+
+
+
+
+
+
+
+
+
+
+
+
+
+
+
+
+
+
+
+
+
+
+
+
+
+
+
+
+
+
+
+
+
+
+
+
+
+
2.2
2.65
3.5
5.15
7.1
2.65
3.5
5.15
7.1
3.5
5.15
7.1
5.15
7.1
2.65
3.5
5.15
7.1
3.5
5.15
7.1
5.15
3.5
5.15
7.1
5.15
2.2
2.2
2.2
2.2
2.2
2.65
2.65
2.65
2.65
3.5
3.5
5.15
2.65
2.65
2.65
3.5
3.5
3.5
3.5
2.65
2.65
2.65
3.5
3.5
3.5
3.5
+
+
+
+
+
+
+
+
+
+
+
+
+
+
+
+
+
+
+
+
+
+
+
+
+
+
2.2
2.65
3.5
5.15
7.1
2.65
3.5
5.15
7.1
3.5
5.15
5.15
2.65
3.5
5.15
3.5
5.15
3.5
5.15
2.65
3.5
5.15
3.5
5.15
3.5
3.5
=
=
=
=
=
=
=
=
=
=
=
=
=
=
=
=
=
=
=
=
=
=
=
=
=
=
=
=
=
=
=
=
=
=
=
=
=
=
=
=
=
=
=
=
=
=
=
=
=
=
=
=
=
=
=
=
=
=
=
=
=
=
=
=
=
=
=
=
=
=
=
2.2
2.65
3.5
5.15
7.1
4.4
4.85
5.7
7.35
9.3
5.3
6.15
7.8
9.75
7
8.65
10.6
10.3
12.3
6.6
7.05
7.9
9.55
11.5
7.5
8.35
10
12
9.2
10.9
12.8
12.5
14.5
7.95
8.8
10.5
12.4
9.65
11.3
13.3
13
10.5
12.2
14.1
13.8
8.8
9.25
10.1
11.8
13.7
9.7
10.6
12.2
14.2
11.4
13.1
14.7
10.2
11
12.7
11.9
13.5
12.7
14.4
10.6
11.5
13.1
12.3
14
13.2
14
Room
A
2.2
2.65
3.5
5.15
7.1
2.2
2.2
2.2
2.14
1.81
2.65
2.54
2.46
2.11
3.4
3.03
2.63
3.95
3.36
2.2
2.2
2.03
1.77
1.53
2.11
1.95
1.72
1.47
1.82
1.6
1.38
1.41
1.22
2.43
2.26
2.0
1.71
2.13
1.88
1.6
1.64
2.65
2.3
1.99
2.03
1.88
1.82
1.71
1.5
1.28
1.76
1.66
1.44
1.24
1.54
1.35
1.2
1.7
1.6
1.39
1.49
1.3
1.39
1.23
2
1.85
1.62
1.72
1.52
1.61
2
Room
B
2.2
2.65
3.5
5.01
5.84
2.65
3.36
4.79
5.64
3.4
4.47
5.33
3.95
4.64
2.2
2.2
2.03
1.77
1.53
2.54
2.35
2.07
1.77
2.89
2.55
2.19
3.3
2.85
2.43
2.26
2.0
1.71
2.81
2.48
2.11
3.18
2.65
2.3
1.99
2.99
1.88
1.82
1.71
1.5
1.28
1.76
1.66
1.44
1.24
1.54
1.35
1.2
2.05
1.93
1.68
1.79
1.57
2.2
1.95
2
1.85
1.62
1.72
1.52
2.13
2
Room
C
2.2
2.65
3.23
4.15
4.94
2.54
3.1
4.02
4.75
2.89
3.75
4.44
3.3
3.93
2.43
2.98
3.89
4.58
2.81
3.65
4.29
3.18
2.65
3.39
4.03
2.99
1.88
1.82
1.71
1.5
1.28
2.12
2
1.74
1.5
2.46
2.15
2.8
2.05
1.93
1.68
2.36
2.07
2.2
1.95
2
1.85
1.62
2.28
2.01
2.13
2
Indoor Unit Capacity (kW)
COOLING
Total Performance
Room
Room
Room Room
D
Capacity ( Min. - Max. )
A
B
C
2.2 (
1.5 - 2.6
)
2.5
2.65 (
1.5 - 3.2
)
3.6
3.5 (
1.6 - 3.6
)
4.2
5.15 (
1.7 - 5.8
)
6
7.1 (
1.8 - 7.4
)
8.5
4.4 (
2.0 - 5.1
)
2.5
2.5
4.85 (
2.0 - 5.8
)
2.5
3.6
5.7 (
2.0 - 6.7
)
2.5
4.2
7.15 (
2.2 - 7.7
)
2.5
6
7.65 (
2.3 - 8.8
)
2.01
6.84
5.3 (
2.0 - 6.5
)
3.6
3.6
5.9 (
2.0 - 7.4
)
3.51
4.09
7.25 (
2.3 - 8.5
)
3.24
5.41
7.75 (
2.3 - 8.8
)
2.68
6.32
6.8 (
2.2 - 8.4
)
4
4
7.5 (
2.6 - 8.8
)
3.6
5.15
7.95 (
2.6 - 8.8
)
3.02
6.12
7.9 (
2.6 - 8.8
)
4.5
4.5
8 (
2.7 - 8.8
)
3.89
5.51
6.6 (
2.0 - 7.7
)
2.5
2.5
2.5
7.05 (
2.2 - 8.4
)
2.47
2.47
3.56
7.3 (
2.4 - 8.6
)
2.34
2.34
3.93
7.7 (
2.7 - 9.0
)
2.01
2.01
4.83
8 (
2.9 - 9.0
)
1.71
1.71
5.82
7.2 (
2.3 - 8.6
)
2.23
3.21
3.21
7.4 (
2.6 - 9.0
)
2.12
3.06
3.57
7.8 (
2.9 - 9.0
)
1.86
2.68
4.46
8 (
2.9 - 9.0
)
1.61
2.32
5.47
7.6 (
2.7 - 9.0
)
2.03
3.41
3.41
7.9 (
2.9 - 9.0
)
1.79
3.01
4.3
8 (
2.9 - 9.0
)
1.55
2.6
5.26
8 (
2.9 - 9.0
)
1.62
3.89
3.89
8 (
2.9 - 9.0
)
1.38
3.32
4.7
7.3 (
2.5 - 8.6
)
2.95
2.95
2.95
7.5 (
2.7 - 9.0
)
2.81
2.81
3.28
7.9 (
2.9 - 9.0
)
2.51
2.51
4.18
8 (
2.9 - 9.0
)
2.16
2.16
5.09
7.75 (
2.7 - 9.0
)
2.7
3.15
3.15
8 (
2.9 - 9.0
)
2.43
2.83
4.04
8 (
2.9 - 9.0
)
2.08
2.42
4.9
8 (
2.9 - 9.0
)
2.17
3.62
3.62
7.95 (
2.9 - 9.0
)
3.03
3.03
3.03
8 (
2.9 - 9.0
)
2.73
2.73
3.9
8 (
2.9 - 9.0
)
2.34
2.34
4.73
8 (
2.9 - 9.0
)
2.44
3.48
3.48
1.88
7.5 (
2.9 - 9.2
)
2.18
2.18
2.18
2.19
7.65 (
2.9 - 9.2
)
1.99
1.99
1.99
2.72
7.85 (
2.9 - 9.2
)
1.91
1.91
1.91
3.51
8 (
2.9 - 9.2
)
1.71
1.71
1.71
4.15
8 (
2.9 - 9.2
)
1.47
1.47
1.47
2.12
7.75 (
2.9 - 9.2
)
1.85
1.85
2.67
2.64
7.95 (
2.9 - 9.2
)
1.79
1.79
2.57
3.38
8 (
2.9 - 9.2
)
1.61
1.61
2.32
4.01
8 (
2.9 - 9.2
)
1.37
1.37
1.98
2.46
8 (
2.9 - 9.2
)
1.72
1.72
2.88
3.16
8 (
2.9 - 9.2
)
1.55
1.55
2.6
2.8
8 (
2.9 - 9.2
)
1.38
1.38
3.32
2.05
7.85 (
2.9 - 9.2
)
1.73
2.49
2.49
2.55
8 (
2.9 - 9.2
)
1.67
2.41
2.41
3.26
8 (
2.9 - 9.2
)
1.5
2.16
2.16
2.36
8 (
2.9 - 9.2
)
1.62
2.33
2.72
3.05
8 (
2.9 - 9.2
)
1.44
2.08
2.42
2.2
8 (
2.9 - 9.2
)
1.56
2.61
2.61
2.87
8 (
2.9 - 9.2
)
1.39
2.34
2.34
2
8 (
2.9 - 9.2
)
2.35
2.35
2.35
2.45
8 (
2.9 - 9.2
)
2.26
2.26
2.26
3.15
8 (
2.9 - 9.2
)
2.01
2.01
2.01
2.28
8 (
2.9 - 9.2
)
2.17
2.17
2.53
2.95
8 (
2.9 - 9.2
)
1.94
1.94
2.27
2.13
8 (
2.9 - 9.2
)
2.09
2.44
2.44
2
8 (
2.9 - 9.2
)
2.35
2.35
2.35
HEATING
Total Performance
Room
D
Capacity ( Min. - Max.
2.5 (
1.8 - 4.3
3.6 (
1.8 - 4.7
4.2 (
1.9 - 5.1
6 (
2.0 - 7.8
8.5 (
2.0 - 8.8
5 (
2.0 - 6.4
6.1 (
2.1 - 7.5
6.7 (
2.3 - 8.3
8.5 (
3.0 - 9.4
8.85 (
3.0 - 9.8
7.2 (
2.4 - 8.5
7.6 (
2.6 - 8.5
8.65 (
3.3 - 9.4
9 (
3.3 - 9.8
8 (
2.9 - 8.5
8.75 (
3.4 - 9.8
9.14 (
3.4 - 9.8
9 (
3.4 - 9.8
9.4 (
3.4 - 9.8
7.5 (
2.7 - 9.0
8.5 (
3.0 - 9.2
8.6 (
3.2 - 9.8
8.85 (
3.4 - 9.8
9.25 (
3.4 - 9.8
8.65 (
3.3 - 9.3
8.75 (
3.4 - 9.8
9 (
3.4 - 9.8
9.4 (
3.4 - 9.8
8.85 (
3.4 - 9.8
9.1 (
3.4 - 9.8
9.4 (
3.4 - 9.8
9.4 (
3.4 - 9.8
9.4 (
3.4 - 9.8
8.85 (
3.4 - 9.4
8.9 (
3.4 - 9.8
9.2 (
3.4 - 9.8
9.4 (
3.4 - 9.8
9 (
3.4 - 9.8
9.3 (
3.4 - 9.8
9.4 (
3.4 - 9.8
9.4 (
3.4 - 9.8
9.1 (
3.4 - 9.8
9.35 (
3.4 - 9.8
9.4 (
3.4 - 9.8
9.4 (
3.4 - 9.8
2.18
8.7 (
3.4 - 9.8
2.87
8.85 (
3.4 - 9.8
3.21
8.95 (
3.4 - 9.8
4.11
9.25 (
3.4 - 9.8
4.99
9.4 (
3.4 - 9.8
2.67
9.05 (
3.4 - 9.8
3
9.15 (
3.4 - 9.8
3.86
9.4 (
3.4 - 9.8
4.67
9.4 (
3.4 - 9.8
2.88
9.2 (
3.4 - 9.8
3.71
9.4 (
3.4 - 9.8
3.32
9.4 (
3.4 - 9.8
2.49
9.2 (
3.4 - 9.8
2.81
9.3 (
3.4 - 9.8
3.59
9.4 (
3.4 - 9.8
2.72
9.4 (
3.4 - 9.8
3.46
9.4 (
3.4 - 9.8
2.61
9.4 (
3.4 - 9.8
3.34
9.4 (
3.4 - 9.8
2.35
9.4 (
3.4 - 9.8
2.63
9.4 (
3.4 - 9.8
3.36
9.4 (
3.4 - 9.8
2.53
9.4 (
3.4 - 9.8
3.24
9.4 (
3.4 - 9.8
2.44
9.4 (
3.4 - 9.8
2.35
9.4 (
3.4 - 9.8
• The table lists the wall-mounted type of indoor units as representative models.
• For details on the connection of indoor units other than the wall-mounted type, refer to the catalog.
)
)
)
)
)
)
)
)
)
)
)
)
)
)
)
)
)
)
)
)
)
)
)
)
)
)
)
)
)
)
)
)
)
)
)
)
)
)
)
)
)
)
)
)
)
)
)
)
)
)
)
)
)
)
)
)
)
)
)
)
)
)
)
)
)
)
)
)
)
)
)
)
SANYO Electric co., Ltd.
Osaka, Japan
March / 2006
Printed in Japan (T)