1
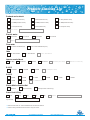
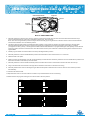
General Residential Installation Check List
Water Pressure
Minimum 25 PSI
Electrical Supply
Uninterrupted AC.Check voltage compatibility
Existing
Free of any deposits or build-ups inside pipes
Softener
Locate close to drain and connect according to plumbing codes
Bypass Valves
Always provide for bypass valve if unit is not equipped with one
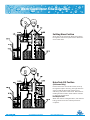
CAUTION
¤ Do not exceed 120 PSI water pressure
¤ Do not exceed 100°F water temperature
WARNING
¤ Do not subject unit to freezing conditions
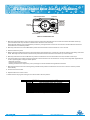
General Valve Installation Procedure
Note: Install the water softener with the inlet, outlet and drain connections made according to manufacturer’s recommendations and to
meet applicable plumbing codes.
1. Locate the softener tank close to a drain where you wish to install the unit.
Note: Be sure the tank is level and on a firm base.
2. Perform all plumbing according to local plumbing codes.
— Use a 1/2" minimum pipe size for the drain.
— Use a 3/4" drain line for backwash flow rates that exceed 7 gpm or length that exceeds 20′ (6 m).
3. Cut the 1" distributor tube (1.050 O.D.) flush with top of each tank.
Note: Only use silicone lubricant.
4. Lubricate the distributor o-ring seal and tank o-ring seal. Screw the valve on to the tank.
5. Use only Teflon tape on the drain fitting. Solder joints near the valve must be done before connecting any piping to the valve.
Always leave at least 6" (152 mm) between the valve and solder joints when soldering pipes that are connected to the valve. Failure
to do this could cause damage to the valve.
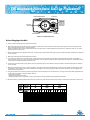
6. Be sure the floor under the brine tank is clean and level.
7. Add water until there is approximately 1" (25 mm) of water above the grid plate. If a grid is not utilized, fill to the top of the air check
in the brine tank. Do not add salt to the brine tank at this time.
8. On units with a bypass, place in Bypass position.
— Turn on the main water supply.
— Open a cold soft water tap nearby and let water run a few minutes or until the system is free of foreign material (usually solder)
resulting from the installation. Close the water tap when water runs clean.
9. Place the bypass in the In Service position and let water flow into the mineral tank. When water flow stops, slowly open a cold water
tap nearby and let water run until air is purged from the unit. Then close tap.
10.Plug the valve into an approved power source.
Page 2
Tel-(8625)025-51180528
For Bright Future
http://www.fobrite.com