1
741-306
INSTALL/REMOVAL INSTRUCTIONS: WINDOW REGULATOR
ATTENTION: Refer to the appropriate shop manual for your vehicle to obtain specific service procedures for this part. If you do not have
a service manual or lack the skill to install this part, it is recommended that you seek the services of a qualified technician. Pay special
attention to all cautions and warnings included in the shop manual. Read and follow all instructions carefully.
REMOVAL/INSTALL OF WINDOW REGULATOR (741-306)
Honda Accord 2003–07
General Tech Tips:
•
Use painter’s tape rather than duct tape to secure window. It will not damage paint or leave sticky residue.
•
A plastic pry tool is useful. It will not easily damage delicate trim like a screwdriver or metal pry bar.
•
The replacement regulator should have a liberal amount of grease on slide area. If there is not much grease
present, white lithium grease works well to lubricate the slide area.
•
Aftermarket window tinting can cause the window to travel slower and put additional strain on the window
regulator assembly.
•
Window run channels should be cleaned and lubricated before installation of a new window regulator
assembly. Silicone spray works well.
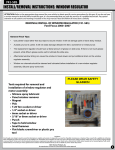
PLEASE WEAR SAFETY
GLASSES!
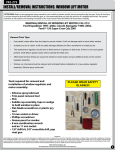
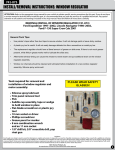
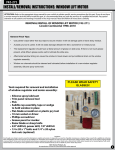
Tools required for removal and
installation of Window Regulator and
motor assembly:
• Silicone spray lubricant
• Panel retainer remover
• Pick
• Tape or wedge to hold window
• Flat-blade screwdriver or plastic pry
tool
• 10mm socket or driver
• Phillips screwdriver
Disclaimer:
Even though every attempt is made to ensure this information is complete and accurate, it is impossible to account for all possible circumstances or situations. Please consult with a qualified auto technician
before attempting to perform any work you are not qualified to do. Automobiles can be hazardous to work on; be sure to take all necessary safety precautions. Failure to do so may result in property damage
or personal injury. Certain motor vehicle standards and performance requirements may apply to your motor vehicle (such as Federal Motor Vehicle Safety Standards by the National Highway Traffic Safety
Administration). Be sure that your work is performed in accordance with such standards and that you do not disable any motor vehicle safety feature.
©2011 Dorman Products, Inc.
No reproductions in whole or in part without prior written approval.
1
741-306
INSTALL/REMOVAL INSTRUCTIONS: WINDOW REGULATOR
ATTENTION: Refer to the appropriate shop manual for your vehicle to obtain specific service procedures for this part. If you do not have
a service manual or lack the skill to install this part, it is recommended that you seek the services of a qualified technician. Pay special
attention to all cautions and warnings included in the shop manual. Read and follow all instructions carefully.
Removal Instructions
STEP 1: Gain access to the Window Regulator assembly by removing the interior trim
panel.
STEP 1a: Gently pry underneath plastic
triangular trim piece in the upper right-hand
corner above the trim panel. Remove trim
piece.
Pry under plastic
near arrows
STEP 1b: Remove rubber screw cover from
door handle area. A pick is useful to help pry
up. Remove Phillips screw.
Plastic removed
Remove rubber
screw cover
Remove screw
Disclaimer:
Even though every attempt is made to ensure this information is complete and accurate, it is impossible to account for all possible circumstances or situations. Please consult with a qualified auto technician
before attempting to perform any work you are not qualified to do. Automobiles can be hazardous to work on; be sure to take all necessary safety precautions. Failure to do so may result in property damage
or personal injury. Certain motor vehicle standards and performance requirements may apply to your motor vehicle (such as Federal Motor Vehicle Safety Standards by the National Highway Traffic Safety
Administration). Be sure that your work is performed in accordance with such standards and that you do not disable any motor vehicle safety feature.
©2011 Dorman Products, Inc.
No reproductions in whole or in part without prior written approval.
2
741-306
INSTALL/REMOVAL INSTRUCTIONS: WINDOW REGULATOR
ATTENTION: Refer to the appropriate shop manual for your vehicle to obtain specific service procedures for this part. If you do not have
a service manual or lack the skill to install this part, it is recommended that you seek the services of a qualified technician. Pay special
attention to all cautions and warnings included in the shop manual. Read and follow all instructions carefully.
Gently pry under
switch bezel
using a plastic
pry tool
STEP 1c: Gently pry around switch bezel
and pop switch up out of the door handle
assembly. Use a plastic pry tool if available. It
will not easily leave marks on the trim panel.
Unplug both switch connectors.
Unplug switch
connectors
STEP 1d: Remove the plastic trim piece
behind the interior door handle. Insert a pick
in the left-hand corner to depress the catch
and pull the piece out. Remove the two
Phillips screws.
Depress
trim catch
Remove
Phillips
screws
STEP 1e: Gently pry door handle bezel away
from the door panel. Use a plastic pry tool if
available. It will not easily leave marks on the
trim panel. Pop bezel out away from panel.
Disclaimer:
Even though every attempt is made to ensure this information is complete and accurate, it is impossible to account for all possible circumstances or situations. Please consult with a qualified auto technician
before attempting to perform any work you are not qualified to do. Automobiles can be hazardous to work on; be sure to take all necessary safety precautions. Failure to do so may result in property damage
or personal injury. Certain motor vehicle standards and performance requirements may apply to your motor vehicle (such as Federal Motor Vehicle Safety Standards by the National Highway Traffic Safety
Administration). Be sure that your work is performed in accordance with such standards and that you do not disable any motor vehicle safety feature.
©2011 Dorman Products, Inc.
No reproductions in whole or in part without prior written approval.
3
741-306
INSTALL/REMOVAL INSTRUCTIONS: WINDOW REGULATOR
ATTENTION: Refer to the appropriate shop manual for your vehicle to obtain specific service procedures for this part. If you do not have
a service manual or lack the skill to install this part, it is recommended that you seek the services of a qualified technician. Pay special
attention to all cautions and warnings included in the shop manual. Read and follow all instructions carefully.
STEP 1f: Disconnect door lock cable from
door handle by lifting plastic retainer clip
up and away from cable and then sliding
the metal cable end out of retainer. Remove
plastic cable mounting grommet by
popping it out of the metal bracket. Remove
door handle and set aside.
Lift plastic retainer clip up and away
from the cable. Slide the metal cable
end out of retainer.
Remove plastic cable
mounting grommet
STEP 1g: The door panel is now only held to the
door frame by the upper lip of the door frame
and six hidden plastic panel retainers that are
located at the bottom and sides of the panel.
Remove the door panel by inserting a door panel
retainer tool or flat-blade screwdriver between
the door panel and the door frame and gently
prying upward to release the clips. A door panel
retainer tool works best because it has a notch
that fits around the door panel retainer clips
which allows for better leverage. The door panel
retainer clips can be brittle and may break easily
if not removed with caution. Start at the bottom
of the panel and move to the side retainers once
the bottom of the panel is loose from the door
frame. Be careful when prying the door panel up.
If you are prying in an area away from a retainer
clip, too much flex on the panel can result in it
cracking. Once all of the door panel retainers are
loose, lift the panel off of the upper door frame
lip and off of the door lock rod.
Disclaimer:
Even though every attempt is made to ensure this information is complete and accurate, it is impossible to account for all possible circumstances or situations. Please consult with a qualified auto technician
before attempting to perform any work you are not qualified to do. Automobiles can be hazardous to work on; be sure to take all necessary safety precautions. Failure to do so may result in property damage
or personal injury. Certain motor vehicle standards and performance requirements may apply to your motor vehicle (such as Federal Motor Vehicle Safety Standards by the National Highway Traffic Safety
Administration). Be sure that your work is performed in accordance with such standards and that you do not disable any motor vehicle safety feature.
©2011 Dorman Products, Inc.
No reproductions in whole or in part without prior written approval.
4
741-306
INSTALL/REMOVAL INSTRUCTIONS: WINDOW REGULATOR
ATTENTION: Refer to the appropriate shop manual for your vehicle to obtain specific service procedures for this part. If you do not have
a service manual or lack the skill to install this part, it is recommended that you seek the services of a qualified technician. Pay special
attention to all cautions and warnings included in the shop manual. Read and follow all instructions carefully.
STEP 1h: While supporting the door panel,
twist the light bulb socket counter-clockwise
to remove it from the panel. Also remove the
retaining clip that attaches the light bulb
wire harness to the door panel by prying it
away from the panel. Do not let the panel
hang by the wiring harness or damage to
the harness may occur. Set the panel aside.
Remove
retaining
clip
Turn light
bulb
socket
counterclockwise
to remove
STEP 2: Remove the two Phillips screws that
hold the door handle bracket to the door
frame. Remove the bracket and set aside.
Disclaimer:
Even though every attempt is made to ensure this information is complete and accurate, it is impossible to account for all possible circumstances or situations. Please consult with a qualified auto technician
before attempting to perform any work you are not qualified to do. Automobiles can be hazardous to work on; be sure to take all necessary safety precautions. Failure to do so may result in property damage
or personal injury. Certain motor vehicle standards and performance requirements may apply to your motor vehicle (such as Federal Motor Vehicle Safety Standards by the National Highway Traffic Safety
Administration). Be sure that your work is performed in accordance with such standards and that you do not disable any motor vehicle safety feature.
©2011 Dorman Products, Inc.
No reproductions in whole or in part without prior written approval.
5
741-306
INSTALL/REMOVAL INSTRUCTIONS: WINDOW REGULATOR
ATTENTION: Refer to the appropriate shop manual for your vehicle to obtain specific service procedures for this part. If you do not have
a service manual or lack the skill to install this part, it is recommended that you seek the services of a qualified technician. Pay special
attention to all cautions and warnings included in the shop manual. Read and follow all instructions carefully.
STEP 3: Remove the rubber grommet in the
upper right-hand corner of the door frame.
Remove the vapor barrier by peeling it back.
A putty knife may help if it does not peel off
easily. Once the vapor barrier is removed, set
it aside being careful not to get the sealant
on clothes or interior of the car. It is very
difficult to remove from cloth. Sealant can
be removed from metal surfaces with some
gum cutter or a similar chemical. Check to
make sure the chemical will not damage the
paint surface.
STEP 4: Plug the window switch back
into the vehicle connector. If the Window
Regulator still operates, it is helpful to
move the Regulator up and down using the
switch. If the Window Regulator operates,
move the Window Regulator so that the two
10mm glass-to-Regulator mounting bolts
are accessible through the holes in the door
frame.
Move the Regulator so that the two glass-toRegulator mounting bolts are accessible through
these holes. Remove the bolts.
Disclaimer:
Even though every attempt is made to ensure this information is complete and accurate, it is impossible to account for all possible circumstances or situations. Please consult with a qualified auto technician
before attempting to perform any work you are not qualified to do. Automobiles can be hazardous to work on; be sure to take all necessary safety precautions. Failure to do so may result in property damage
or personal injury. Certain motor vehicle standards and performance requirements may apply to your motor vehicle (such as Federal Motor Vehicle Safety Standards by the National Highway Traffic Safety
Administration). Be sure that your work is performed in accordance with such standards and that you do not disable any motor vehicle safety feature.
©2011 Dorman Products, Inc.
No reproductions in whole or in part without prior written approval.
6
741-306
INSTALL/REMOVAL INSTRUCTIONS: WINDOW REGULATOR
ATTENTION: Refer to the appropriate shop manual for your vehicle to obtain specific service procedures for this part. If you do not have
a service manual or lack the skill to install this part, it is recommended that you seek the services of a qualified technician. Pay special
attention to all cautions and warnings included in the shop manual. Read and follow all instructions carefully.
STEP 5: If the Window Regulator does not operate or is bound up, you may need to cut
the Window Regulator cable in order to move the window glass into position. Be sure to
fully support the window glass before cutting the cable so that it does not fall and break.
Cut the cable using a heavy duty cable cutter. After the cable is cut, move the glass so that
the Regulator mounting bolts are accessible while supporting the glass. You may need a
helper to support the glass for this step.
STEP 6: Remove the two 10mm glass-to-Regulator mounting bolts. If you did not cut the
cable, the window glass will be supported by the shelf on the Window Regulator slide. If
you did cut the cable, there will be nothing supporting the window glass. You may need
someone to help support the glass for this step.
STEP 7: Use the window switch or manually
move the window glass into the full upright
position. Secure the window glass to the
door frame using tape. Painter’s tape works
well because it will not damage the door
paint or leave a sticky residue. A wooden or
rubber door stop wedge will also work well
to hold glass in position. Install the wedge
between the glass and the inside door frame
to hold the glass in position.
Disclaimer:
Even though every attempt is made to ensure this information is complete and accurate, it is impossible to account for all possible circumstances or situations. Please consult with a qualified auto technician
before attempting to perform any work you are not qualified to do. Automobiles can be hazardous to work on; be sure to take all necessary safety precautions. Failure to do so may result in property damage
or personal injury. Certain motor vehicle standards and performance requirements may apply to your motor vehicle (such as Federal Motor Vehicle Safety Standards by the National Highway Traffic Safety
Administration). Be sure that your work is performed in accordance with such standards and that you do not disable any motor vehicle safety feature.
©2011 Dorman Products, Inc.
No reproductions in whole or in part without prior written approval.
7
741-306
INSTALL/REMOVAL INSTRUCTIONS: WINDOW REGULATOR
ATTENTION: Refer to the appropriate shop manual for your vehicle to obtain specific service procedures for this part. If you do not have
a service manual or lack the skill to install this part, it is recommended that you seek the services of a qualified technician. Pay special
attention to all cautions and warnings included in the shop manual. Read and follow all instructions carefully.
Remove the
seven 10mm
bolts that are
circled
STEP 8: Unplug the window lift motor
connector. Remove the seven 10mm bolts
that hold the Window Regulator to the door
frame. Tilt the Window Regulator to the left
and downward and remove from the door
through the large hole in the bottom lefthand corner.
Tilt the Regulator to the left and
downward and remove from door
through this hole
Reach
through
this hole
to unplug
window
lift motor
connector
STEP 9: The door is now ready for the installation of the replacement part.
Disclaimer:
Even though every attempt is made to ensure this information is complete and accurate, it is impossible to account for all possible circumstances or situations. Please consult with a qualified auto technician
before attempting to perform any work you are not qualified to do. Automobiles can be hazardous to work on; be sure to take all necessary safety precautions. Failure to do so may result in property damage
or personal injury. Certain motor vehicle standards and performance requirements may apply to your motor vehicle (such as Federal Motor Vehicle Safety Standards by the National Highway Traffic Safety
Administration). Be sure that your work is performed in accordance with such standards and that you do not disable any motor vehicle safety feature.
©2011 Dorman Products, Inc.
No reproductions in whole or in part without prior written approval.
8
741-306
INSTALL/REMOVAL INSTRUCTIONS: WINDOW REGULATOR
ATTENTION: Refer to the appropriate shop manual for your vehicle to obtain specific service procedures for this part. If you do not have
a service manual or lack the skill to install this part, it is recommended that you seek the services of a qualified technician. Pay special
attention to all cautions and warnings included in the shop manual. Read and follow all instructions carefully.
Installation Instructions
STEP 1: There are three of the 10mm
mounting bolts that can be started before
installing the part in the door. Starting these
bolts before hand makes the installation
easier because the Regulator can be
supported on these bolts helping align
the rest of the mounting bolts. The door
frame holes that align with these bolts are
elongated for this purpose. These three bolts
are slightly longer than the other four.
Original Window Regulator
Replacement Window Regulator.
Start threads on the three circled bolts.
Disclaimer:
Even though every attempt is made to ensure this information is complete and accurate, it is impossible to account for all possible circumstances or situations. Please consult with a qualified auto technician
before attempting to perform any work you are not qualified to do. Automobiles can be hazardous to work on; be sure to take all necessary safety precautions. Failure to do so may result in property damage
or personal injury. Certain motor vehicle standards and performance requirements may apply to your motor vehicle (such as Federal Motor Vehicle Safety Standards by the National Highway Traffic Safety
Administration). Be sure that your work is performed in accordance with such standards and that you do not disable any motor vehicle safety feature.
©2011 Dorman Products, Inc.
No reproductions in whole or in part without prior written approval.
9
741-306
INSTALL/REMOVAL INSTRUCTIONS: WINDOW REGULATOR
ATTENTION: Refer to the appropriate shop manual for your vehicle to obtain specific service procedures for this part. If you do not have
a service manual or lack the skill to install this part, it is recommended that you seek the services of a qualified technician. Pay special
attention to all cautions and warnings included in the shop manual. Read and follow all instructions carefully.
STEP 2: Maneuver the Window Regulator
into place by installing it through the
bottom left door hole and lining up the bolts
with the elongated door holes. While the
Regulator is supported by the three already
started bolts, line up the other four door
holes with the proper Regulator threaded
holes and start each bolt. Tighten down all
of the bolts evenly and torque to 8 N-m or 6
ft-lb.
Support Regulator by hanging it on
the three started bolts
STEP 3: Reconnect the window lift motor plug.
STEP 4: Plug the window switch back into vehicle connector. Move the Window
Regulator so that the two glass-to-Regulator mounting bolts holes are accessible
through the holes in the door frame.
STEP 5: Remove the tape or wedge from the window glass and gently slide the
window glass into position on the Window Regulator slide. You may need a helper to
support the glass for this and the next step. Although the window glass is supported
by the shelf on the slide, it can slip off and fall.
STEP 6: Align the Regulator slide holes with the window glass support holes and
thread in the two 10mm bolts. Tighten the bolts evenly and torque to 9.8 N-m or 7.2
ft-lb.
STEP 7: Lubricate the window run channel with silicone spray or silicone-based
grease. Honda recommends Shin-Etsu brand grease for lubrication of window slides
and run channels. Honda part # is 08798-9013.
STEP 8: Operate the Window Regulator to ensure that the glass travels up and down
smoothly and is aligned properly in its run channel.
Disclaimer:
Even though every attempt is made to ensure this information is complete and accurate, it is impossible to account for all possible circumstances or situations. Please consult with a qualified auto technician
before attempting to perform any work you are not qualified to do. Automobiles can be hazardous to work on; be sure to take all necessary safety precautions. Failure to do so may result in property damage
or personal injury. Certain motor vehicle standards and performance requirements may apply to your motor vehicle (such as Federal Motor Vehicle Safety Standards by the National Highway Traffic Safety
Administration). Be sure that your work is performed in accordance with such standards and that you do not disable any motor vehicle safety feature.
©2011 Dorman Products, Inc.
No reproductions in whole or in part without prior written approval.
10
741-306
INSTALL/REMOVAL INSTRUCTIONS: WINDOW REGULATOR
ATTENTION: Refer to the appropriate shop manual for your vehicle to obtain specific service procedures for this part. If you do not have
a service manual or lack the skill to install this part, it is recommended that you seek the services of a qualified technician. Pay special
attention to all cautions and warnings included in the shop manual. Read and follow all instructions carefully.
STEP 9: Close the window and disconnect the window switch.
STEP 10: Reinstall the vapor barrier making sure to push the door handle cable and
any wiring through the proper holes. Replace the rubber grommet that was removed.
STEP 11: Reattach the door handle bracket to the door frame using the two Phillips
screws that were removed.
STEP 12: Look at the back of the interior door panel and make sure that all six of the
plastic retaining clips are in good shape and are attached to the door panel. If any
retainer is stuck in the door frame, remove it and attach to panel.
STEP 13: While supporting the door panel, insert the light bulb socket into the panel
and twist it clockwise to reattach it. Reattach the wire harness retaining clip. Do not let
the panel hang by the wiring harness or damage to the harness may occur.
STEP 14: Move the interior door panel into position by lining up the door lock rod with
the hole in the panel. Maneuver the panel over the door lock rod and hang the panel
on the upper lip of the door frame.
STEP 15: Guide the door handle cable and the window switch wire harnesses through
the proper door panel holes and snap the panel to the door frame by applying
pressure to it in the areas of the panel retainers.
STEP 16: Reconnect the door lock cable to the door handle by sliding the metal cable
end into the retainer and then locking the plastic retainer clip over the cable. Reattach
the plastic cable mounting grommet by snapping it into the metal bracket. Position
the door handle into the hole in the door panel and snap into place.
STEP 17: Replace the two Phillips screws that hold the door handle to the door frame.
Cover the screws with the trim piece that was removed.
STEP 18: Plug the window switch connectors back into the window switch. Position
the window switch over the hole in the door panel and snap it back into place. Make
sure that the wires are not pinched when reinstalling the switch.
STEP 19: Replace the Phillips screw that holds the door pull to the door frame. Cover
with rubber trim piece that was removed.
Disclaimer:
Even though every attempt is made to ensure this information is complete and accurate, it is impossible to account for all possible circumstances or situations. Please consult with a qualified auto technician
before attempting to perform any work you are not qualified to do. Automobiles can be hazardous to work on; be sure to take all necessary safety precautions. Failure to do so may result in property damage
or personal injury. Certain motor vehicle standards and performance requirements may apply to your motor vehicle (such as Federal Motor Vehicle Safety Standards by the National Highway Traffic Safety
Administration). Be sure that your work is performed in accordance with such standards and that you do not disable any motor vehicle safety feature.
©2011 Dorman Products, Inc.
No reproductions in whole or in part without prior written approval.
11
741-306
INSTALL/REMOVAL INSTRUCTIONS: WINDOW REGULATOR
ATTENTION: Refer to the appropriate shop manual for your vehicle to obtain specific service procedures for this part. If you do not have
a service manual or lack the skill to install this part, it is recommended that you seek the services of a qualified technician. Pay special
attention to all cautions and warnings included in the shop manual. Read and follow all instructions carefully.
STEP 20: Replace plastic triangular trim piece in upper right-hand corner by snapping
into place.
STEP 21: Operate the window up and down to make sure the window travels
smoothly and closes in the proper position.
STEP 22: Check for proper operation of auto-up and auto-down function.
STEP 23: If the window closes and opens properly but the auto-up or auto-down
function does not operate you may be able to do a simple reset procedure to activate.
This procedure is as follows:
STEP 23a: Operate the window up until it stops in a fully closed position.
STEP 23b: Hold the switch up for a few seconds after the window closes.
STEP 23c: Operate the window down until it stops in a fully open position.
STEP 23d: Hold the switch down for a few seconds after the window is stopped in an
open position.
STEP 23e: The auto features should now be activated.
STEP 24: If when operating the auto-up feature the window travels part of the way
up but then reverses on its own, you may need to complete a more involved reset
procedure. This procedure is as follows:
STEP 24a: Sit in the vehicle and close the door.
STEP 24b: Turn ignition switch to ON position.
STEP 24c: Operate the window switch so that the window travels all of the way down.
STEP 24d: Open the driver’s door.
Note: Complete steps e through h within 5 seconds of each other. Complete
these steps a total of 4 times in a row. This will clear the window switch
controls unit’s memory.
STEP 24e: Turn the ignition switch to the LOCK position.
STEP 24f: Push down and hold the window switch.
Disclaimer:
Even though every attempt is made to ensure this information is complete and accurate, it is impossible to account for all possible circumstances or situations. Please consult with a qualified auto technician
before attempting to perform any work you are not qualified to do. Automobiles can be hazardous to work on; be sure to take all necessary safety precautions. Failure to do so may result in property damage
or personal injury. Certain motor vehicle standards and performance requirements may apply to your motor vehicle (such as Federal Motor Vehicle Safety Standards by the National Highway Traffic Safety
Administration). Be sure that your work is performed in accordance with such standards and that you do not disable any motor vehicle safety feature.
©2011 Dorman Products, Inc.
No reproductions in whole or in part without prior written approval.
12
741-306
INSTALL/REMOVAL INSTRUCTIONS: WINDOW REGULATOR
ATTENTION: Refer to the appropriate shop manual for your vehicle to obtain specific service procedures for this part. If you do not have
a service manual or lack the skill to install this part, it is recommended that you seek the services of a qualified technician. Pay special
attention to all cautions and warnings included in the shop manual. Read and follow all instructions carefully.
STEP 24g: Turn the ignition switch to ON.
STEP 24h: Release the window switch.
Note: Make sure that the auto-up feature does not work. If it does, complete
steps e through h again making sure that they are done in the 5 second time
limit. Complete a total of 4 times.
STEP 24i: Operate the window switch so that the window travels all the way down.
STEP 24j: Operate the window switch so that the window travels all of the way up and
then hold the switch in the up position for one additional second.
STEP 24k: Check for proper operation of auto-up and auto-down function. Repeat the
above steps if the auto functions still do not work properly.
We appreciate your opinions regarding this product!
Please call our technical assistant with any challenges or suggestions
regarding the installation or operation of this product.
1-800-523-2492
Disclaimer:
Even though every attempt is made to ensure this information is complete and accurate, it is impossible to account for all possible circumstances or situations. Please consult with a qualified auto technician
before attempting to perform any work you are not qualified to do. Automobiles can be hazardous to work on; be sure to take all necessary safety precautions. Failure to do so may result in property damage
or personal injury. Certain motor vehicle standards and performance requirements may apply to your motor vehicle (such as Federal Motor Vehicle Safety Standards by the National Highway Traffic Safety
Administration). Be sure that your work is performed in accordance with such standards and that you do not disable any motor vehicle safety feature.
©2011 Dorman Products, Inc.
No reproductions in whole or in part without prior written approval.
13