1
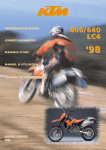
BEDIENUNGSANLEITUNG
OWNER’S HANDBOOK
MANUEL D’UTILISATION
ART. NR. 320532
11/97
50 SXR
Adventure
Pro Junior
Pro Senior
’98
IMPORTANT
PLEASE READ THIS MANUAL THOROUGHLY BEFORE LETTING YOUR
YOUNGSTER RIDE THE MOTORCYCLE FOR THE FIRST TIME. THIS MANUAL
CONTAINS IMPORTANT INFORMATION AND RECOMMENDATIONS THAT
WILL HELP YOU AND YOUR YOUNGSTER TO OPERATE AND HANDLE THE
MOTORCYCLE PROPERLY.
WARNING
IGNORING THESE INSTRUCTIONS, CAN ENDANGER YOUR BODY
AND YOUR LIFE.
!
CAUTION
!
IGNORING THESE INSTRUCTIONS COULD CAUSE DAMAGE TO
PARTS OF THE MOTORCYCLE OR THAT THE MOTORCYCLE IS
NOT ROAD-SAFE ANYMORE.
ENGLISH
IN THE INTEREST OF EVERYBODY INVOLVED, WE URGE YOU TO PAY PARTICULAR ATTENTION TO INSTRUCTIONS AND INFORMATION MARKED AS
FOLLOWS:
1
Please insert below the series numbers of the motorcycle
Frame number
Engine number
Stamp of dealer
Introduction
Now you own a modern motorcycle that you and your youngster will certainly enjoy, provided
that you service and maintain it properly. This manual contains important information on the
operation and maintenance of your new KTM motorcycle. It went to press describing your
model’s latest state of development. Nevertheless, the descriptions may deviate slightly from the
current design as our motorcycles are permanently improved.
ENGLISH
2
Maybe you are one of those riders who have acquired good technical skills and can perform
many of the maintenance tasks themselves using the instructions contained in this manual. If this
is not the case, please keep in mind that the maintenance tasks marked with an asterisk (*) in
the chapter „Maintenance of chassis and engine“ should rather be performed by a KTM dealer
to protect you and your youngster.
Please strictly observe the prescribed running-in periods and inspection and maintenance intervals. Compliance with these instructions will significantly prolong the life of your motorcycle.
Maintenance work should only be performed by a KTM dealer.
When special needs arise, please contact a KTM dealer, who will seek the assistance of the KTM
importer if necessary.
PARENTS SHOULD KEEP IN MIND that the safety of their youngsters always depends on the
efforts made by the parents to ensure that the motorcycle is kept in good working order and
only used on safe terrains. Nevertheless, driving the motorcycle, like driving any other vehicle,
involves a potential risk. Therefore, please make sure that all fundamental precautions are taken.
Please also read the „INFORMATION ON SAFE DRIVING FOR PARENTS“ on page 4.
Riding an off-highway motorcycle is a wonderful form of outdoor recreation and we certainly
hope that you and your youngsters will enjoy it to the full. However, this enjoyable outdoor
activity can cause environmental problems or lead to conflicts with other people. Responsible use
of the motorcycle will prevent such problems and conflicts. You can contribute to securing the
future of motorcycling by making sure that you and your youngsters only use the motorcycle
within the limits established by the applicable laws, making environmental protection one of
your top priorities and never violating other people’s rights.
In this spirit, we hope that you and your youngsters will always safely enjoy your motorcycle!
KTM Austria’s certificate of achievement for its Quality
System ISO 9001 is the beginning of an on-going total reengineering quality plan for a brighter tomorrow.
KTM SPORTMOTORCYCLE AG
5230 MATTIGHOFEN, AUSTRIA
Attachments:
1 spare parts manual chassis
1 spare parts manual engine
ALL RIGHTS RESERVED TO MAKE ALTERATIONS TO DESIGN AND MODEL.
INDEX
Page
IMPORTANT INFORMATION ON SAFE DRIVING FOR PARENTS ............4
OPERATION INSTRUMENTS .....................................................................5
Throttle grip ..........................................................................................5
Right hand brake lever ..........................................................................5
Short circuit button................................................................................6
Left hand brake lever ............................................................................6
Filler cap................................................................................................6
Refueling, fuel .......................................................................................6
Fuel tap .................................................................................................7
Choke (Dell’orto carburetor SHA 1412).................................................7
Choke (Mikuni carburetor VM18-144)..................................................7
Choke (Mikuni carburetor VM20-352)..................................................7
Kickstarter .............................................................................................7
DRIVING INSTRUCTIONS..........................................................................8
What you should check before each start..............................................8
Instructions for the first ride ..................................................................8
Running in.............................................................................................8
Starting when engine is cold..................................................................8
Starting when engine is warm ...............................................................9
What to do when the engine is „flooded“ ............................................9
Starting off ............................................................................................9
Driving ..................................................................................................9
Braking ..................................................................................................9
Stopping................................................................................................9
PERIODIC MAINTENANCE SCHEDULE ...................................................10
MAINTENANCE WORK ON CHASSIS AND ENGINE ...............................11
Checking and adjusting the steering head bearing ..............................11
Cleaning the dust scrabbers of the telcopic fork ..................................11
Telescopic fork maintenance (50 SXR Adventure)................................12
Telescopic fork maintenance (50 SXR Pro JR, Pro SR)..........................12
Check chain tension ............................................................................13
Correct chain tension...........................................................................13
Chain maintenance..............................................................................13
Adjusting the front wheel brake cable .................................................14
Checking the front brake linings for wear............................................14
Adjusting the rear wheel brake cable...................................................14
Checking the rear brake linings for wear .............................................14
Drum brake maintenance ..........................................................................14
Removing and mounting the front wheel............................................15
Removing and mounting the rear wheel .............................................15
Tires, air pressure.................................................................................15
Checking spoke tension.......................................................................15
Removing the seat...............................................................................16
Cleaning the air filter...........................................................................16
Adjusting the throttle cable .................................................................16
Adjusting the idle speed ......................................................................17
Checking the gear oil level ..................................................................17
Changing the gear oil..........................................................................18
Changing the seat hight ......................................................................18
TECHNICAL DATA - ENGINE...................................................................19
TECHNICAL DATA - CHASSIS .................................................................21
ENGLISH
SERIAL NUMBER LOCATIONS ..................................................................5
Chassis number .....................................................................................5
Engine number, engine type..................................................................5
3
IMPORTANT INFORMATION ON SAFE DRIVING FOR PARENTS
ENGLISH
4
SXR mini motorcycles are off-road motorcycles designed for one person only. They are not allowed on public
roads.
Motorcycle dimensions and components are designed for the following age and weight groups:
50 SXR Adventure: age 4 - 6 years, maximum weight 35 kg (78 lbs), maximum body height 130 cm (51 in)
50 SXR Pro Junior: age 4 - 6 years, maximum weight 35 kg (78 lbs), maximum body height 130 cm (51 in)
50 SXR Pro Senior: age 7 - 8 years, maximum weight 35 kg (78 lbs), maximum body height 130 cm (51 in)
– Have your youngster wear proper protective gear whenever he or she rides the motorcycle: helmet, eye protection, chest, back, arm and leg protectors, gloves and boots. To set a good example, be sure to wear protective gear yourself whenever riding a motorcycle!
– Adjust the hand brake levers to your youngster’s hand size (with gloves).
– Before your youngster takes his or her first ride, explain how each of the controls works and check if your
youngster has understood what you explained. We recommend to review the entire owner’s manual with
your youngster item by item, paying particular attention to the specially marked warnings and pointing out
the danger of injury.
– Instruct your youngster about riding and falling techniques, explain how the motorcycle will respond to shifting of the rider’s weight, etc.
– Before using the motorcycle you should always check all components for proper operation (see mainenance schedule). Have your youngster perform these technical checks himself / herself as well.
– Whenever you go for a ride with your youngster, keep in mind that the speed should be adjusted to your
youngster and not the other way around.
– Your youngster must understand that all instructions he or she receives from you or any other supervising
adult must be followed.
– Your child must be physically ready to ride a motorcycle. This means that he or she must at least be able to
ride a bicycle. Being good at sports that require fast reactions is an additional advantage. Your youngster
should be strong enough to pick up the motorcycle after a fall.
– Never demand too much of your youngster. Give him or her time to get used to the motorcycle and to
improve his / her riding skills. Do not even consider letting your youngster participate in a race before his /
her physical condition, riding skills and motivation have sufficiently developed.
– Explain to your youngster that he / she should always adjust his / her riding speed to the local conditions
as well as to his / her own riding skills and that excessive speed can cause falls and severe injuries. Always
keep in mind that youngsters tend to underestimate dangers or fail to recognize them altogether. The riding
speed must be reduced, in particular, on unknown terrain.
– Never let your youngster ride the motorcycle without supervision. An adult should always be present.
– The motorcycle is designed for one rider only. Your youngster is not allowed to transport a passenger.
– When you go for a ride, somebody at home should always know where you are going and when you will
be back. This makes it easier to send you help, should problems occur.
SERIAL NUMBER LOCATIONS
Chassis number
Engine number
The engine number is stamped into the right half of the engine case next to
the kickstarter. Write this number into the relevant area on page 1.
Engine typ
Motorcycle typ
Engine typ
50 SXR Adventure............................S5-E
50 SXR Pro Junior ............................S5-GS
50 SXR Pro Senior ............................S5-GS
ENGLISH
The chassis number is located on the type plate on the steering head. Write
this number into the field on page no 1.
5
OPERATION INSTRUMENTS
Throttle grip
The throttle grip is located on the right side of the handlebar. It is used to
reduce the engine speed and, thus, the driving speed.
Right hand brake lever
The right hand brake lever is used to operate the front wheel brake via a
control cable.
Use stud 1 to adjust the basic position of the hand brake lever to your
youngster's hand size.
CAUTION
!
!
AFTER CHANGING THE BASIC POSITION OF THE HAND BRAKE LEVER, ALWAYS CHECK IF THE
FRONT WHEEL IS TURNING EASILY. IF THIS IS NOT THE CASE, READJUST THE BRAKE CONTROL CABLE.
1
Short circuit button
The short circuit button 1 turns off the engine. When pressing this button,
the ignition circuit is short-cicuited.
1
ENGLISH
Left hand brake lever
The left hand brake lever is used to operate the rear wheel brake via a control cable.
Use stud 2 to adjust the basic position of the hand brake lever to your
youngster's hand size.
CAUTION
!
!
AFTER CHANGING THE BASIC POSITION OF THE HAND BRAKE LEVER, ALWAYS CHECK IF THE
REAR WHEEL IS TURNING EASILY. IF THIS IS NOT THE CASE, READJUST THE BRAKE CONTROL CABLE.
2
6
Filler cap
To open it: turn filler cap counter-clockwise.
To close it: put filler cap back on and tighten it by turning it clockwise.
Install tank breather hose 3 without kinks.
3
Refueling, fuel
Oil (high-grade two-stroke engine oil) must be mixed with the fuel (ROZ
95) at a mixing ratio of 1:40.
WARNING
GASOLINE IS HIGHLY FLAMMABLE AND POISONOUS. EXTREME CAUTION SHOULD BE USED
WHEN HANDLING GASOLINE. NEVER REFUEL THE MOTORCYCLE NEAR OPEN FLAMES OR
BURNING CIGARETTES. ALWAYS SWITCH OFF THE ENGINE BEFORE REFUELING. BE CAREFUL
NOT TO SPILL GASOLINE ON THE ENGINE OR EXHAUST PIPE WHILE THE ENGINE IS HOT.
WIPE UP SPILLS PROMPTLY. IF GASOLINE IS SWALLOWED OR SPLASHED IN THE EYES, SEEK
A DOCTOR’S ADVICE IMMEDIATELY.
!
CAUTION
!
USE PREMIUM-GRADE GASOLINE ROZ 95 MIXED WITH HIGH-GRADE TWOSTROKE ENGINE OIL. OTHER TYPES OF GASOLINE CAN CAUSE ENGINE FAILURE.
ONLY USE KNOWN BRANDS OF HIGH-GRADE 2-STROKE ENGINE OIL (SHELL ADVANCE
RACING X).
– ONLY
–
– NOT ENOUGH OIL OR LOW-GRADE OIL CAN CAUSE EROSION OF THE PISTON. WHEN
USING TOO MUCH OIL, THE ENGINE MAY START SMOKING AND FOUL THE SPARK PLUG.
– FUEL EXPANDS WHEN ITS TEMPERATURE RISES. THEREFORE DO NOT FILL THE TANK TO
THE TOP. (SEE FIG.)
40 mm
Fuel tap
The fuel tap 1 is located at the front of the motorcycle on the left side of
the tank.
Opening the fuel tap: Turn the knob all the way to the left.
Closing the fuel tap: Turn the knob all the way to the right.
1
!
CAUTION
!
FUEL TAP SHOULD BE LOCKED WHENEVER THE MOTORCYCLE IS PARKED. IF THE TAP
IS NOT CLOSED THE CARBURETOR MAY OVERFLOW AND FUEL GET INTO THE ENGINE.
Choke (Dell'Orto carburetor SHA 1412)
2
The choke lever 2 is located on the right side of the carburetor. Squeezing
and engaging the choke lever reduces the air intake of the carburetor, thus
achieving the "rich" fuel air mixture needed for cold starting.
To restore the choke lever to its original position, thus deactivating the
choke, briefly open the throttle all the way.
ENGLISH
THE
7
Choke (Mikun carburetor VM18-144)
3
The choke lever 3 is located on the left side of the carburetor. Squeezing
the lever opens a bore in the carburetor through which the engine can take
in additional fuel, thus achieving the "rich" fuel air mixture needed for cold
starting.
To close the bore in the carburetor simply pull the choke lever upwards into
the original position.
Choke (Mikuni carburetor VM20-352)
4
When pulling the choke knob 4 fully outwards, a bore is opened in the carburetor. Through this bore the engine can take in additional fuel. This
encoure the rich fuel-air mixture, that is needed for a cold start.
When pressing the choke knob downward in the carburetor, the bore is closed again.
Kickstarter
The kickstarter is mounted on the right side of the engine. Its upper part can
be swivelled.
WARNING
WHEN STARTING THE ENGINE, PUT ON MOTORCYCLE BOOTS IN ORDER TO AVOID INJURIES.
YOU MAY SLIP OFF THE KICKSTARTER, OR THE ENGINE MAY STRIKE BACK WHEN KICKING
NOT VEHEMENTLY ENOUGH.
DRIVING INSTRUCTIONS
What you should check before each start
ENGLISH
8
When you start off, the motorcycle must be in a perfect
technbical condition. For safety reasons, you should make it a
habit to perform an overall check of your motorcycle before
each start.
The following checks should be performed:
1 CHECK TRANSMISSION OIL LEVEL.
A lack of gear oil leads to premature wear and finally results
in destruction of the gear wheels.
2 FUEL
Check that there is sufficient fuel in the tank; when closing the
filler cap, check that the tank venting hose is free of kinks.
3 CHAIN
A loose chain was fall off the chain wheels; an extremely
worn chain may tear, and insufficient lubrication may result
in unnecessary wear of chain and chain wheels.
4 TIRES
Check for damaged tyres. Tires showing cuts or dents must
be replaced. Also check the air pressure. Insufficient tread
and incorrect air pressure deteriorate the driving performance.
5 BRAKES
Check the brakes for proper adjustment and correct operation.
6 Throttle cable
Check the throttle cable for proper adjustment and smooth operation.
– HAVE YOUR
–
WARNING
– To improve his/her riding skills, your youngster should practise to ride the motorcycle standing on the footpegs or to
ride at the slowest possible speed. Additionally, you can
arrange a series of obstacles and have your youngster drive
around them, etc.
– Tell your youngster to look 3-10 m ahead, depending on the
speed, to recognize and avoid obstacles. When riding
through curves, the rider should also look far ahead into the
curve.
WARNING
– SXR MODELS ARE DESIGNED FOR ONE PERSON ONLY. PASSENGERS ARE
NOT ALLOWED.
– THESE MODELS DO NOT COMPLY WITH THE REGULATIONS AND SAFETY
STANDARDS ESTABLISHED BY THE LAW. THEREFORE, THEY ARE NOT PERMITTED ON PUBLIC ROADS.
– ALWAYS KEEP IN MIND THAT OTHER PEOPLE FEEL MOLESTED BY EXCESSIVE NOISE.
Running in
– EVEN
VERY PRECISELY MACHINED SECTIONS OF ENGINE COMPONENTS
HAVE ROUGHER SURFACES THAN COMPONENTS WHICH HAVE BEEN SLIDING ACROSS ONE ANOTHER FOR QUITE SOME TIME. THEREFORE,
EVERY ENGINE NEEDS TO BE BROKEN IN. FOR THIS REASON, DURING ITS
FIRST 5 HOURS THE ENGINE MUST NOT BE REVVED UP TO ITS PERFORMANCE LIMITS.
APPLY LOW BUT CHANGING LOADS FOR RUNNING-IN.
YOUNGSTER WEAR PROPER PROTECTIVE GEAR WHENEVER
HE OR SHE RIDES THE MOTORCYCLE: HELMET, EYE PROTECTION, CHEST,
BACK, ARM AND LEG PROTECTORS, GLOVES AND BOOTS. TO SET A
GOOD EXAMPLE, BE SURE TO WEAR PROTECTIVE GEAR YOURSELF WHENEVER RIDING A MOTORCYCLE!
ONLY USE ACCESSORY PARTS RECOMMENDED BY KTM.
–
– DO NOT DRIVE AT FULL LOAD FOR THE FIRST 5 HOURS!
Starting when the engine is cold
Instructions for the first ride
– Verify that your KTM dealer performed the PREPARATION
OF VEHICLE jobs (see Customer Service Manual).
– Before your youngster takes his or her first ride, explain how
each of the controls works and check if your youngster has
understood what you explained. We recommend to review
the entire owner’s manual with your youngster item by item,
paying particular attention to the specially marked warnings
and pointing out the danger of injury.
– Adjust the basic hand brake lever position to your youngster's hand size. Your youngster should, of course, wear
gloves!
– To prevent injury, teach your youngster the basic riding skills
on soft ground, e.g. on a meadow or in the garden. Be sure
that there is room enough to maneuver, and that no other
riders are close.
– To ensure that your youngster gets the feel of the brakes,
have your youngster operate the brakes while you push the
motorcycle. Do not start the engine before your youngster
has learned to apply both brakes with appropriate pressure.
– Now your youngster must get the feel of the throttle. Start
the engine, hold the motorcycle and have your youngster
slowly open the throttle. Then, your youngster can take
his/her first ride. Initially, your youngster should ride back
and forth between two persons who help the young rider to
stop the motorcycle. However, you should also teach your
youngster how to stop the motorcycle himself/herself.
1
2
3
4
5
Open fuel tap
Operate the choke
Swing the side stand all the way up.
Squeeze both brake levers.
Operate the kickstarter, depressing it all the way, without
opening the throttle.
WARNING
– TO AVOID INJURY WHEN STARTING THE ENGINE, ALWAYS WEAR BOOTS!
– WHEN STARTING THE ENGINE, ALWAYS KEEP THE BRAKE LEVERS SQUEEZED. AS SOON AS THE ENGINE IS RUNNING, SLOWLY RELEASE THE BRAKE
LEVERS. AN ACTIVATED CHOKE INCREASES THE IDLE SPEED OF THE ENGINE, THE CENTRIFUGAL CLUTCH THUS BEGINNING TO ENGAGE.
THEREFORE, THE MOTORCYCLE CAN BEGIN TO MOVE WHEN THE BRAKE
LEVERS ARE RELEASED.
– THE MOTORCYCLE HAS A CENTRIFUGAL CLUTCH. THE MOTORCYCLE
BEGINS TO MOVE AS SOON AS THE THROTTLE IS OPENED.
– DO NOT START THE ENGINE AND ALLOW IT TO IDLE IN A CLOSED AREA.
EXHAUST FUMES ARE POISONOUS AND CAN CAUSE LOSS OF CONSCIOUSNESS AND DEATH. ALWAYS PROVIDE ADEQUATE VENTILATION
WHILE THE ENGINE IS RUNNING.
1
2
3
4
Open fuel tap
Swing the side stand all the way up.
Squeeze both brake levers.
Operate the kickstarter, depressing it all the way, without
opening the throttle.
What to do when the engine is „flooded”
CAUTION
!
!
– DRIVING A COLD ENGINE AT HIGH SPEED WILL REDUCE THE LIFE OF THE
ENGINE. WE RECOMMEND TO WARM THE ENGINE UP AT A MEDIUM
–
–
1 Close fuel tap
2 Squeeze both brake levers.
3 Start engine with full throttle. If necessary, unscrew spark
plug and dry it.
4 Once the engine is running, open fuel tap again.
ENGINE SPEED FOR SEVERAL MINUTES BEFORE SWITCHING TO FULL
LOAD.
IN NO CASE THE MOTORCYCLE MUST BE TILTED OVER THE SIDESTAND
DURING THE WARM UP PERIOD (SEE ILL.). PARTS OF THE KICKSTARTER
COULD BE DAMAGED.
IN THE EVENT THAT, WHILE YOUR CHILD IS RIDING ON THE MOTORCYCLE, YOU NOTICE ANY UNUSUAL OPERATION-RELATED NOISE, YOUR
CHILD SHOULD STOP IMMEDIATELY, TURN THE ENGINE OFF, AND
CONTACT AN AUTHORIZED KTM DEALER.
9
Starting off
Slowly release the brake lever while simultaneously opening the
throttle.
WARNING
BEFORE
YOU START OFF, CHECK THAT THE SIDE STAND HAS BEEN SWUNG
RIGHT UP TO THE TOP. IF THE STAND DRAGS ON THE FLOOR, YOU MAY
LOSE CONTROL OF YOUR MOTORCYCLE.
WARNING
– YOUR YOUNGSTER'S DRIVING SPEED SHOULD ALWAYS BE ADJUSTED TO
HIS/HER DRIVING SKILLS AS WELL AS TO THE TERRAIN.
– YOUR YOUNGSTER SHOULD NEVER BE ALLOWED TO RIDE THE
MOTORCYCLE WITHOUT SUPERVISION.
– WHEN THE ENGINE SPEED DROPS TO THE LEVEL AT WHICH THE CENTRIFUGAL CLUTCH DISENGAGES, BRAKING WITH THE ENGINE IS NO LON–
–
DON’T
O.K.
Driving
The engine speed, and thus the driving speed, are regulated by
the throttle grip.
The choke must always be deactivated as soon as the engine
has warmed up.
If your motorcycle has a Dell'orto carburetor, briefly open the
throttle all the way to restore the choke lever to its original position.
If your motorcycle has a Mikuni carburetor, pull the choke lever
upwards into the original position.
GER POSSIBLE AND THE MOTORCYCLE CAN ONLY BE SLOWED DOWN
USING THE BRAKES.
REPLACE THE HELMET VISOR OR GOGGLE GLASSES EARLY ENOUGH.
WHEN LIGHT SHINES DIRECTLY ON A SCRATCHED VISOR OR GOGGLES,
YOU WILL BE PRACTICALLY BLIND.
AFTER FALLING WITH THE MOTORCYCLE, CHECK ALL ITS FUNCTIONS
THOROUGHLY BEFORE USING IT AGAIN.
ENGLISH
Starting when the engine is warm
Braking
Close the throttle and squeeze both brake levers simultaneously. On sandy, wet or slippery terrain the rear wheel brake should
be preferred. The brakes should always be operated carefully as
locking wheels can cause skidding or falls.
WARNING
BRAKE
DRUM AND LININGS HEAT UP DURING BRAKE OPERATION, THUS
REDUCING THE EFFECT OF THE BRAKES.
Stopping
Reduce the speed. Immediately before the motorcycle comes to
a stop, put the left foot down. To turn off the engine, press the
short circuit button until the engine stops. Close the fuel tap.
WARNING
– NEVER LEAVE YOUR MOTORCYCLE WITHOUT SUPERVISION AS LONG AS
THE ENGINE IS RUNNING.
– MOTORCYCLES PRODUCE GREAT HEAT DURING OPERATION.
THEREFORE, KEEP IN MIND THAT THE ENGINE, THE EXHAUST SYSTEM
AND THE BRAKES CAN HEAT UP CONSIDERABLY. MAKE SURE THAT THESE
PARTS ARE NOT TOUCHED AND ALWAYS TAKE CARE, WHEN PARKING
THE MOTORCYCLE, THAT OTHER PERSONS WILL NOT BURN THEMSELVES.
!
CLOSE
CAUTION
!
THE FUEL TAP WHEN LEAVING THE MOTORCYCLE. OTHERWISE THE
CARBURETOR MAY GET FLOODED AND FUEL WILL ENTER THE ENGINE.
KTM
rider
PERIODIC MAINTENANCE SCHEDULE 50 SXR
KTM
dealer
●
Check transmission oil level
●
Change transmission oil
●
Check spark plug and electrode gap
ENGLISH
10
Check carburetor for tight fit on the intake flange
●
●
Drain and clean carburetor float chamber
●
●
●
Check idle setting when engine is warm
Check air filter, filter box and filter boot
●
Check sprockets, chain guides and chain for wear
●
●
●
●
Clean and lube chain
●
Check chain tension
●
●
Check exhaust system for leaks
●
●
Check exhaust brackets
●
●
Check brake lining thickness
●
Check brake drums
●
Check freeplay and operation of hand brake levers
●
●
●
Check fork for function and tightness
●
●
Service front fork completely
●
Check steering head bearing clearance / adjust
●
●
Clean and grease steering head bearings
Check shock absorber for function and tightness
●
●
●
Check bearings of swingarm for play
●
Clean and grease bearings of swingarm
Check tightness of spokes and rim join
●
●
●
Check wheel bearings for clearance
●
Check tire condition and air pressure
●
●
Check cables for damage, correct instalment and easy working
●
●
●
Lube and adjust cables
Check all screws, nuts and hose clamps for proper tightness
Grease or lube all pivot points and sliding components
once a year
hours
Service after 10
after washing
before each start
11.97
●
●
●
●
●
MAINTENANCE WORK ON CHASSIS AND ENGINE
WARNING
CAUTION
!
!
– WHEN CLEANING THE MOTORCYCLE, DO NOT USE A HIGH PRESSURE CLEANING UNIT IF POSSIBLE, OTHERWISE WATER WILL PENETRATE THE BEARINGS, CARBURETOR, ELECTRIC CONNECTORS ETC.
– WHEN TRANSPORTING YOUR MOTORCYCLE, SECURE IT WITH ELASTIC STRAPS OR OTHER MECHANICAL DEVICES IN AN UPRIGHT POSITION. BE
SURE THAT THE FUEL TAP IS CLOSED. IF THE MOTORCYCLE TOPPLES OVER, FUEL CAN FLOW OUT OF THE CARBURETOR OR FUEL TANK.
– DO NOT USE TOOTHED WASHERS OR SPRING RINGS WITH THE ENGINE FASTENING SCREWS, AS THESE WORK INTO THE FRAME PARTS AND KEEP
WORKING LOOSE. INSTEAD, USE SELF-LOCKING NUTS.
– LET YOUR MOTORCYCLE COOL DOWN BEFORE BEGINNING ANY MAINTENANCE WORK IN ORDER TO AVOID GETTING BURNED.
– REMOVE OILS, FATTY MATTERS, FILTERS, FUELS, WASHING DETERGENTS ETC. ORDERLY.
– UNDER NO CIRCUMSTANCES MAY USED OIL BE DISPOSED OF IN THE SEWAGE SYSTEM OR IN THE OPEN COUNTRYSIZE. 1 LITER USED OIL CONTAMINATES 1.000.000 LITERS WATER.
ENGLISH
MAINTENANCE WORK AND ADJUSTMENTS MARKED WITH AN ASTERISK (*) MUST BE PERFORMED BY AN EXPERT. TO PROTECT YOUR YOUNGSTER, ALWAYS HAVE SUCH WORK PERFORMED
BY A SPECIALIZED KTM DEALER.
11
Checking and adjusting the steering head bearing *
2
1
3
The steering head bearing should regularly be checked for play. For this purpose, jack up the motorcycle by the frame so that the front wheel is in the
air. Now try to move the fork forward and backward. There should be no
play. For readjustment, release the two clamp screws 1 of the top triple
clamp and the counter nut 2. Turn the adjusting nut 3 until almost no play
is left. Do not tighten the adjusting nut! Tightening the adjusting nut can
damage the bearings! Keep in mind that tightening the counter nut 2 reduces the play of the bearing. Slightly tap the top triple clamp with a rubber
hammer to prevent jamming. Then tighten the 2 clamp screws with 15 Nm
(11 ft.lb).
WARNING
IF
THE STEERING HEAD BEARING IS NOT ADJUSTED TO BE FREE OF PLAY, THE MOTORCYCLE WILL EXHIBIT UNSTEADY DRIVING CHARACTERISTICS AND CAN GET OUT OF CONTROL.
CAUTION
!
!
– THE HANDLEBAR MUST MOVE EASILY. OTHERWISE THE BEARINGS WILL BE DAMAGED.
– IF YOU DRIVE WITH PLAY IN THE STEERING HEAD BEARING FOR LONGER PERIODS, THE
BEARINGS AND SUBSEQUENTLY THE BEARING SEATS IN THE FRAME WILL BE DESTROYED.
2
At least once a year, the steering head bearings should be smeared with
waterproof grease.
1
3
Cleaning the dust scrabbers of the telescopic fork
The dust scrabbers 4 should be cleaned on a regular basis.
For this purpose, use a screwdriver to lever the dust scrabbers out of the slider tubes, clean them thoroughly with compressed air, spray the fork tubes
and dust scrabbers with silicon oil and press the scrabbers back into the slider tubes.
4
Telescopic fork maintenance (50 SXR Adventure) *
The telescopic fork must be serviced at least once a year:
– Jack up the motorcycle by the frame to take the weight off the front
wheel.
– Remove the front wheel and the brake cable guide.
– Release the clamp screws 1 at the triple clamps and pull the fork legs
downwards out of the triple clamps.
1
ENGLISH
– Clamp the fork leg into a vise (use protective jaws) and remove the plugs 2.
– Take the preload spacer and the spring out of the fork tube.
– Remove screws 3 at the underside of the slider tubes and pull the fork
tubes out of the slider tubes.
– Remove the dust scrabbers 4.
2
12
3
4
– Thoroughly clean all parts and check for wear.
– Grease gaskets and springs and reassemble the telescopic fork.
– Tighten the screws at the underside of the slider tubes with 30 Nm (22
ft.lb).
– Insert the fork legs into the triple clamps (the fork tube must be flush
with the top triple clamp) and tighten the clamp screws with 15 Nm (11
ft.lb).
– Mount the front wheel.
Changing the telescopic fork oil (50 SXR Pro JR, Pro SR) *
–
–
–
–
Remove front wheel and fork legs (see above).
Remove plugs, preload spacers and springs.
Drain the fork oil into an appropriate container.
Clean the dust scrabbers.
– Fill the fork tubes with new fork oil (SAE 7.5)
Pro JR: 150 ccm per fork tube
Pro SR: 160 ccm per fork tube
– Insert springs and preload spacers into the fork tube.
– Check and grease O-rings and mount the plugs.
– Mount fork legs and front wheel (see above), then mount the cable
guide.
Check chain tension
– Put the motorcycle on the sidestand.
– Check the chain tension approximately in the middle between the two
chain guides A and B. In this area, the chain should easily move approximately 10 mm (0.4 in) upward and downward.
– If necessary, correct chain tension.
WARNING
– IF CHAIN TENSION IS TOO GREAT, PARTS WITHIN THE SECONDARY TRANSMISSION
(CHAIN, CHAIN WHEELS, GEAR BOX AND REAR WHEEL BEARINGS) WILL BE SUBJECTED
TO UNNECESSARY STRESS, RESULTING IN PREMATURE WEAR AND EVEN CHAIN BREAKAGE.
– TOO MUCH SLACK IN THE CHAIN, ON THE OTHER HAND, CAN RESULT IN THE CHAIN
JUMPING OFF THE CHAIN WHEELS. IF THIS HAPPENS, THE CHAIN COULD ALSO BLOCK
THE REAR WHEEL OR DAMAGE THE ENGINE.
– IN EITHER CASE THE OPERATOR IS LIKELY TO LOSE CONTROL OF THE MOTORCYCLE.
A
ENGLISH
B
10 mm
13
Correct chain tension
– Release the hexagon nut of the wheel spindle 1 and turn the left and
the right hexagon nut 2 equally far.
– Before tightening the hexagon nut of the wheel spindle with 30 Nm (22
ft.lb), ensure that the supporting plates 3 are resting against the swing
arm. Additionally, check that the rear wheel is aligned with the front
wheel.
1
3
2
3
2
Chain maintenance
For long chain life, good maintenance is very important. Chains without Orings should be cleaned in fireproof solvent regularly and afterwards treated
with hot grease or chain spray (Shell Advance Bio Chain).
KEEP
✓
WARNING
GREASE! GREASE ON THE
THE REAR WHEEL FREE OF
REAR WHEEL WILL SIGNIFICANTLY
REDUCE THE GRIP OF THE REAR TIRE AND THE MOTORCYCLE COULD EASILY GET OUT OF CONTROL.
!
CAUTION
!
MOUNTING THE CHAIN MASTERLINK CLIP, THE CLOSED SIDE OF THE MASTERLINK
CLIP MUST POINT IN RUNNING DIRECTION.
WHEN
Also check sprockets and chain guides for wear, and replace if necessary.
Adjusting the front wheel brake cable
1
10 -15 mm
The hand brake lever should travel between 10 and 15 mm (0.4-0.6 in)
before the front wheel is actually slowed down.
To adjust the brake control cable, use either the adjusting screw 1 at the
hand brake lever or the adjusting screw 2 at the brake backing plate. Before
commencing to adjust the cable, always release the counter nut 3.
Afterwards, the counter nut must be retightened.
!
AFTER
CAUTION
!
ADJUSTING THE CABLE, ALWAYS CHECK IF THE WHEEL TURNS SMOOTHLY.
3
Checking the front brake linings for wear
ENGLISH
2
The brake linings must be replaced when the distance between the hub
brake lever and the cable support, measured with the brake lever squeezed,
is less than 50 mm (2 in) (see illustration).
3
!
IF
CAUTION
REPLACED TOO LATE, I.E.
!
THE BRAKE LININGS ARE
WHEN THE LINING IS PARTLY OR
FULLY WORN AWAY, THE METAL SHOES WILL RUB AGAINST THE BRAKE DRUM, THUS
REDUCING THE BRAKING EFFECT AND DESTROYING THE BRAKE DRUM.
min 50 mm
14
Adjusting the rear wheel brake cable
4
10 -15 mm
The hand brake lever should travel between 10 and 15 mm (0.4-0.6 in)
before the front wheel is actually slowed down.
To adjust the brake control cable, use eigher the adjusting screw 4 at the
hand brake lever or the adjusting screw 5 at the brake backing plate. Before
commencing to adjust the cable, always release the counter nut 6.
Afterwards, the counter nut must be retightened.
!
AFTER
CAUTION
!
ADJUSTING THE CABLE, ALWAYS CHECK IF THE WHEEL TURNS SMOOTHLY.
6
Checking the rear brake linings for wear
The brake linings must be replaced when the distance between the hub
brake lever and the cable support, measured with the brake lever squeezed,
is less than 50 mm (2 in) (see illustration).
6
min 50
mm
!
CAUTION
!
THE BRAKE LININGS ARE REPLACED TOO LATE, I.E. WHEN THE LINING IS PARTLY OR
FULLY WORN AWAY, THE METAL SHOES WILL RUB AGAINST THE BRAKE DRUM, THUS
REDUCING THE BRAKING EFFECT AND DESTROYING THE BRAKE DRUM.
IF
5
Drum brake maintenance
Drum brake maintenance is limited to occasional blowing out of brake drum
and brake shoes. Brake drum and brake linings can be slightly roughened
with an abrasive cloth.
Removing and mounting the front wheel
– Jack up the motorcycle by the frame.
– Remove the right hexagon nut of the wheel spindle 1 together with the
washer.
– Pull the wheel spindle halfway out and remove the spacer 2.
– Now pull out the wheel spindle out until the wheel is free but not so far
that the brake backing plate comes off.
– Turn both wheel and fork slider tube to the left and remove wheel.
1
– To mount the wheel reverse the procedure described above.
– Tighten the hexagon nut with 30 Nm (22 ft.lb).
Removing and mounting the rear wheel
3
– Jack up the motorcycle by the frame.
– Remove the right hexagon nut of the wheel spindle 3 together with the
washer.
– Hold the rear wheel and remove the wheel spindle.
– Move the rear wheel downward, remove the chain and take the rear
wheel out of the swing arm.
4
ENGLISH
2
15
– To mount the wheel reverse the procedure described above.
– Always hook the brake backing plate into the swing arm support.
– Before tightening the hexagon nut of the wheel spindle, ensure that the
supporting plates 4 are resting against the swing arm. Additionally,
check that the rear wheel is aligned with the front wheel.
– Tighten the hexagon nut with 30 Nm (22 ft.lb).
4
Tires, air pressure
Tire type, tire condition, and air pressure level affect the way your motorcycle rides, and they must therefore be checked whenever you are getting
ready to go anywhere on your motorcycle.
– Tire size can be found in the technical specifications.
– Tire condition has to be checked every time you want to ride your
motorcycle. Before leaving, check tires for punctures and nails or other
sharp objects that might have become embedded in them.
– Regularly check the "cold" tire pressure. Correct tire pressure (1.0 bar /
14 psi) guarantees optimum grip and maximum tire life.
WARNING
– DAMAGED TIRES MUST BE REPLACED IMMEDIATELY TO PROTECT YOUR YOUNGSTER.
– WORN TIRES CAN HAVE A NEGATIVE EFFECT ON HOW THE MOTORCYCLE PERFORMS,
ESPECIALLY ON WET SURFACES
PRESSURE BELOW THE NORMAL LEVEL WILL LEAD TO PREMATURE TIRE WEAR.
– TIRE
Checking spoke tension
The correct spoke tension is very important for the stability of the wheels
and thus for riding safety. A loose spoke causes the wheel to become unbalanced and before long other spokes will have come loose. Check spoke tension, especially on a new motorcycle, in regular intervals. If necessary, have
the spokes retightened and the wheel centered by a KTM dealer.
SPOKES
WARNING
CAN TEAR IF YOU CONTINUE TO RIDE WITH THEM LOOSE.
UNSTABLE HANDLING OF YOUR MOTORCYCLE.
THIS
MAY LEAD TO AN
Removing the seat
1
The quick-release mechanism 1 allows removal of the seat without tools.
Turn the quick-release device approximately 180° anticlockwise, lift the rear
portion of the seat and pull the seat off backwards.
When mounting the seat ensure that the hook 2 engages at the tank.
2
ENGLISH
Cleaning the air filter *
The air filter must be cleaned at intervals depending on the amount of dust
accumulated. To clean the air filter, first remove the seat. Then remove the
two screws 3, the filter holder and the air filter 4. The air filter consists of
a foam rubber insert soaked with filter oil.
CAUTION
!
!
DO NOT CLEAN FOAM FILTER WITH FUEL OR PETROLEUM SINCE THESE WILL DAMAGE THE
FOAM. KTM RECOMMENDS THE PRODUCTS MADE BY PUTOLINE FOR AIR FILTER
MAINTENANCE.„ACTION CLEANER” FOR CLEANING PURPOSES AND „ACTION FLUID” TO
OIL THE FOAM FILTER.
Thoroughly wash the foam filter in special cleaning fluid and allow it to dry
well. Only press out the filter, do not wring it out under any circumstances.
Oil the dry foam filter with a high-grade filter oil. Also clean the air filter
box. Check carburetor collar for damage and that it is filled correctly.
3
3
16
4
Insert the air filter in the opening and fasten it with the filter holder. Then
mount the seat.
3-5 mm
6
7
Adjusting the throttle cable *
5
There must always be a 3-5 mm (0.1-0.2 in) play in the throttle cable. To
check this, move back the protective cover 5 on the throttle grip. You must
be able to lift the outer covering of the cable 3-5 mm from the adjusting
screw 7, until resistance is felt.
To adjust, loosen the counter nut 6 and turn the adjusting screw accordingly. Finally tighten counter nut and slide the protective cover back on.
Adjusting the idle speed (Dell’Orto SHA 1412) *
The idle speed can be adjusted with idle screw 1.
Turning in clockwise direction will increase the idle speed.
Turning in counterclockwise direction will reduce the idling speed.
1
ENGLISH
Adjusting the idle speed (Mikuni VM18-144) *
The idle speed can be adjusted with idle screw 2.
Turning in clockwise direction will increase the idle speed.
Turning in counterclockwise direction will reduce the idling speed.
2
17
Adjusting the idle speed (Mikuni VM20-352) *
The idle speed can be adjusted with idle screw 3.
Turning in clockwise direction will increase the idle speed.
Turning in counterclockwise direction will reduce the idling speed.
3
Checking the gear oil level
To check the gear oil level, first remove the plug 4. With the motorcycle
parked in an upright position, a small quantity of oil should flow out of the
indicator opening 5. If oil must be added, tilt the motorcycle and pour gear
oil SAE 30 (ex. Shell Advance VSX 4) into the opening.
4
5
CAUTION
!
!
TOO LITTLE OIL OR A POOR OIL QUALITY LEAD TO PREMATURE TRANSMISSION
THEREFORE, ONLY USE BRANDED PRODUCTS (EX. SHELL ADVANCE VSX 4).
WEAR.
Changing the gear oil *
The engine must be warmed up before changing the gear oil. Park the
motorcycle on a horizontal surface, remove the oil drain plug 3 and drain
the used oil into an appropriate container. Clean the sealing surface, mount
the oil drain plug together with the gasket and tighten with 15 Nm (11 ft.lb).
3
ENGLISH
Lay the motorcycle on its side and add 0.25 l gear oil SAE 30 (ex. Shell
Advance VSX 4). Mount the plug 1 and check the engine for leaks.
1
2
CAUTION
!
TOO LITTLE OIL OR A POOR OIL QUALITY LEAD TO PREMATURE
THEREFORE, ONLY USE BRANDED PRODUCTS.
!
TRANSMISSION WEAR.
18
Changing the seat height
25 mm
The seat height of all 50 SXR models can easily be increased by 25 mm (1 in).
The frame is provided with additional fastening points on which the tank
and the tail can be mounted. Thus, you can easily adjust the seat height as
your youngster grows.
helical gears, 15 : 52 t, cast
Primary drive
Air filter
Carburetor
Electrode gap
Spark plug
DellOrto SHA 14
1 L-ring, 1 rectangular ring
Piston rings
helical gears, 15 : 52 t, milled
2 rectangular ring
ENGLISH
Pro Jr.: Mikuni VM 18-144 / Pro Sr.: Mikuni VM 20-352
wet foam type air filter insert
0.6 mm
Bosch W 4 AC
0.25 l SAE 30 (Shell Advance VSX4)
needle bearing
Piston pin bearing
2 grooved ball bearing
mixture lubrication
1 : 40 when using high grade 2-stroke oil, When in doupt, please contact your importer or
use 1 : 33 mix ratio to be on the safe side
needle bearing
Transmission oil
air cooled single cylinder 2-stroke engine with reed valve inlet
SUPER fuel, research octane no 95, mixed with 2-stroke oil
Connecting rod bearing
Crankshaft bearing
Lubrication
Oil/gasoline ratio
Fuel
9:1
39 / 41.7 mm
Bore/Stroke
Compression ratio
49.8 ccm
air cooled single cylinder 2-stroke engine
Design
S5-GS (Pro Junior, Pro Senior)
S5-E, S5-GS ‘98
Displacement
S5-E (Adventure)
Engine
TECHNICAL DATA – ENGINE
19
fitting clearance
piston ring end gap
Piston
Piston ring
M 10
M6
M6
M8
M5
M6
Nut for clutch hub
Nuts cylinder head
Nuts exhaust pipe
Oil drain plug
Other screws engine
58
––
––
––
––
––
––
Needle jet
Idling jet
Jet needle
Needle position from top
Mixt. reg. screw open
Throttle valve
Dell’Orto SHA 1412
Main jet
Type
BASIC CARBURETOR SETTING
M8
Hexagon nut flywheel
35 Nm (25 ft.lb)
40 Nm (30 ft.lb)
max. 0.55 mm
1
1.5 turn
4.
4F18-4
30
145
70
Mikuni VM 18-144
7 Nm (5 ft.lb)
10 Nm (7 ft.lb)
15 Nm (10 ft.lb)
12 Nm (8 ft.lb)
12 Nm (8 ft.lb)
max. 0.55 mm
max. 0.028 mm
max. 39.024 mm
max. 0.045 mm
max. 0.022 mm
max. 0.050 mm
S5-GS
2
1.5 turn
3.
4J13-3
30
0-6
170
Mikuni VM 20-352
max. 0.070 mm
max. 39.026 mm
Loctite 242 + 35 Nm (25 ft.lb)
M 12x1,25
Hexagon nut primary gear
TIGHTENING TORQUES - ENGINE
diameter bore
max. 0.045 mm
axial play
Cylinder
max. 0.022 mm
radial play
Conrod bearing
max. 0.050 mm
run out of crank stud
S5-E
Crankshaft
Engine
TOLERANCES AND FITTING CLEARANCES
ENGLISH
20
140/160 mm (5.5/6.3 in)
63°
4 to 6 years
10 Nm (7 ft.lb)
25 Nm (18 ft.lb)
M6
Other screws chassis
15 Nm (11 ft.lb)
15 Nm (11 ft.lb)
50 Nm (37 ft.lb)
M8
Clamping screw lower fork bridge
20 Nm (15 ft.lb)
M8
M8
Clamping screw upper fork bridge
30 Nm (22 ft.lb)
30 Nm (22 ft.lb)
M 10
M 10
Hexagon nuts rear axle
Hexagon nut swing arm bolt
M 12x1
M 12x1
Hexagon nuts front axle
TIGHTENING TORQUES
Engine
Recommended age of rider
max 35 kg (78 lbs)
39.5 kg (87.2 lbs)
Rider’s body weight
S5-E
230 mm (9.05 in)
max. 130 cm (51 in)
39 kg (86 lbs)
585 / 610 mm (23 / 24 in) (adjustable)
910 mm (35.8 in)
1/2 x 3/16" (415) 94 rolls
Rider’s body height
Dead weight without fuel
Ground clearance
Seat height, unloaded
Wheel base
Steering angle
Chain
Final drive ratio
1030 mm (40.5“)
1/2 x 3/16" (415) 102 rolls
7 to 8 years
Fork oil
Capacity per fork leg
Spring preload
Spring
20 mm (0.8 in)
ca 150 ccm
SAE 7.5
10 mm (0.4 in)
––
––
ENGLISH
Pro Junior
2,55 N/mm
Adventure
2,55 N/mm
STANDARD-ADJUSTMENT – FORK
S5-GS
40.5 kg (89.4 lbs)
255 mm (10“)
650 / 675 mm (25.6 / 26.6 in) (adjustable)
11 : 45 t
front / rear: 1.0 bar (14 psi) / 1.0 bar (14 psi)
Air pressure
2.9 liter (0,75 USgal)
front / rear: Cheng Shin 2.50x10“ C-755
internal expanding, single/cam drum brake Ø 90 mm (3.5“)
Tyres
Fuel tank capacity
Pro Senior
165/170mm (6.5/6.7 in)
Rear brake
central shock absorber (Paioli)
internal expanding, single/cam drum brake Ø 90 mm (3.5“)
10 : 45 t
140/160 mm (5.5/6.3 in)
Front brake
Rear suspension
Wheel travel front/rear
telescopic fork (Paiolo)
Fork
Pro Junior
single downtube, split-cradle
Pro Senior
2,55 N/mm
SAE 7.5
ca 160 ccm
20 mm (0.8 in)
50 SXR Adventure, Pro Junior, Pro Senior ‘98
Frame
Adventure
TECHNICAL SPECIFICATIONS - CHASSIS
21
KTM-SPORTMOTORCYCLE AG
A-5230 Mattighofen • Postfach 91 • Austria
I n t e r n e t : h t t p : / / w w w. k t m . c o . a t
FN 102019 d - Landesgericht Ried im Innkreis