1
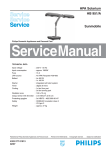
HPA Solarium
HB 975/A
Sun &
Relaxmobile
Domestic Appliances and Personal Care
TECHNICAL DATA
Input voltage
Input consumption
Fuse
UVA source
Ballast
: 230V - 50Hz
: approx. 2550W
: 16 A
: 4x HPA Flexpower 400-600
: 2x 400W
: 2x 500W
Starter
: integrated soft start system
Timer
: digital 30 mins
Cooling
: 1x fan floor part
: 3x fan tanning part
Radiation area
: 190 x 70 cm
Output (min) UVX-36 meter : 4.2 mW/cm2 at 65 cm
in centre facial unit
Protecting goggles
: 2x HB072 - 4822 690 80147
Safety
: CENELEC insulation class 2
: UV type 3
Weight
: approx. 45 kg
AS THE APPLIANCE IS HIGHLY SUSCEPTIBLE TO SCRATCHING, YOU SHOULD BE
EXTRA CAREFUL DURING DISASSEMBLY.
TO PREVENT THE MULTI-CORE CABLES FROM GETTING DAMAGED AT THE HINGES,
THEY MUST BE ASSEMBLED AND CLAMPED AT THE ORIGINAL PLACES.
Published by Philips Domestic Appliances and Personal Care
4322 277 00911
02/01
Printed in The Netherlands
©
Copyright reserved
Subject to modification
L
Tr1
C2
C1
C4
C2
C3
C1
Tr2
C3
L
C4
M1
Tr3
N
IR
B1
Tr4
NC
IR1
C7
L6
C8
L7
Tr7
M4
C9
L8
C10
L9
La
2
SK5
La
3
B5
L4
SK6
TCO3
La
4
B4
TCO4
M3
SK3
M3
L3
B2
Tr8
L
L2
B6
B3
M2
SK2
La
1
B7
B8
Tr6
TCO2
L1
B9
Tr5
IR
SK4
M4
IR2
TCO1
"C
R9
R7
R5
R8
N
N
R10
C11
C12
T1
R6
safety
Re1
M2
N
M1
TECHNICAL INFORMATION
Tanning appliance HB975 is equipped with a universal
power PCB.
This means that the specific characteristics of the
appliance have to be programmed in a microcontroller
to determine the way in which various components
are activated.
When the mains plug is inserted into the wall socket,
the display of the remote control will show all functions
available to the user.
Including the various combinations, these functions
are:
time setting
full body tanning
half body tanning
relax session
The UV lamps may produce a humming sound just
after start-up. This humming sound will stop as soon
as the lamps burn properly, which is after about
20 seconds. At this point the light intensity clearly
increases.
During the last minute of the session the beeper
produces an intermittent signal to alert the user to the
fact that a new session can be set.
After pressing the key, the display showing
and,
the UV working hours will be shown. After 750
operating hours, an L will automatically appear on the
display to indicate that the HPA lamps need to be
replaced or the tanning time must be slightly
increased.
The clock speed of the µ-controller is derived from the
50 Hz mains frequency.
This frequency is also used to control the 8 triacs that
determine the switch-in point (soft start) of the cos !
capacitors and the HPA and IR lamps.
The fans are switched via the safety relay.
This relay is part of the (one fault condition) timer
circuit.
If the control of the triacs is disturbed due to a fault in
the µ-controller, the UV lamps may not be switched
off.
As the µ-controller also generates a pulsating direct
voltage to power the relay, the relay will be
de-energised in case of a fault, thereby interrupting
the lamp circuit.
Conversely, the appliance will not start if the switch
contacts of the relay are closed at that moment
(sticking contacts).
The remote control is galvanically isolated from the
mains, with power supply and control taking place via
a 4-core cable.
The remote control only functions as input/output
terminal.
The IR lamps are started by means of the
conventional phase cut-in principle and burn at full
power after about 8 seconds.
DISASSEMBLY
1. FLOOR PART (item 37)
- Remove the cord holders (item 28) and
detach the cord clamps at the back.
- Remove the covers (item 29 and 39).
The cover on the flex side can only be
removed last.
2. REMOTE CONTROL (item 41)
- Remove the cord holder and pull the
connector loose.
3. WHEEL (item 49)
- Remove the covers (item 29,39).
- Remove the locking plate and the nearest
frame screw.
- Push the shaft out of its clamping.
4. GAS SPRING (item 14)
- Remove the covers (item 29,39).
- Put the appliance in its highest operating
position (to ensure that no pressure is
excerted on the gas spring) and tighten the
ornamental screw (item 26).
- Loosen the 10-core cable so that the cable
can easely slide through the cable duct.
- Remove a retaining ring from the hinge shaft
at A.
- Tilt the appliance carefully so that the
radiation part rests on the floor.
- Support the floor part to remove the
pressure from the hinge shaft.
- Remove the hinge shaft and lower the floor
part onto the floor.
- Remove the 2 bearing bushes.
- Loosen the ornamental screw (item 26),
slide the top part of the stand approx. 20 cm
inwards and tighten the screw again.
- Remove the 2 screws from the upper part of
the stand at B and pull this part loose from
the hinge.
- After the shafts have been removed, the gas
spring can be slid out of the stand.
5. HIGHT ADJUSTMENT (item 27)
- Loosen the lower attachment of the gas
spring in the manner described under 4.
- Remove the cord with its clamping by
pressing the snap clamping on the inside.
- Remove the outer tube.
- Remove the 2 guide blocks and slide the
clamping block from the inner tube.
6. HINGE WITH GAS SPRING (item 12)
- Remove the stand part in the manner
described under 4 and 5.
- Remove the upper ornamental strips from
the hinge part.
- Remove the cover (item 17) from the
radiation part.
- Remove the cover from the connector
compartment.
- Detach the 10-core cable.
- Remove the retaining ring from the locking
shaft at C and push the shaft out of the
stand.
- Remove the hinge part.
7. HPA LAMP (item 23) or IR LAMP (item 23A)
- Remove the glass filter from the lamp unit in
question.
The lamp unit will continue to cling to the
upper part.
- Remove the reflector clamps.
- Remove the reflector and take the lamp
from the holder.
NB: When checking or replacing HPA lamps,
pay attention to the following:
a. HPA lamps only start burning when they
have cooled down sufficiently.
b. Never touch a lamp with your fingers.
Clean the lamp with a cloth moistened with
alcohol, if necessary.
c. After assembly the glass filter should be free
from finger prints and dust. Clean the glass
filter with a cloth moistened with alcohol, if
necessary.
8. COVER OUTER SECTION (item 19)
- Remove the cover (item 17) and the cover
of the connector compartment.
- Detach the wires of the outer section.
- Support this section and remove the 3 fixing
screws at D.
9. COVER INNER SECTION (item 1)
- Disassembly of the cover is not advisable,
since the non-visible parts of the pivot can
only be fitted with special tools.
For this reason, the cover is supplied as a
whole with grip plate and wiring.
- Remove the centre glass filter and assemble
it onto the new cover.
- Remove the outer sections (see under 8)
and attach them to the inner section.
- Detach the wiring that runs through the tube
of the stand.
- Remove the upper ornamental strips.
- Remove the retaining ring from the locking
shaft at C and push the shaft out of the
stand.
- Pull the inner section out of the stand.
10. POWER PCB (item 30)
- Pull the mains plug out of the wall socket.
- Remove the cover (item 29, see under .1)
- Replace the power PCB and connect all
connectors.
- Place the cover on the base. The display of
the remote control will now show error code
E06 or E05.
- This indicates that the power PCB still
needs to be programmed (code A09) for use
in the HB975 according to the input in the
table.
The following fault codes have been defined:
E01 - Safety circuit interrupted
This code will appear on the display for
5 seconds, while the beeper produces a
loud beep.
Check whether the lamp units are in the
correct position, whether all fans work
or whether any UV filter is missing,
broken or damaged.
E02 - Safety relay does not work according
to specification
Replace the power module (item 30).
E03 / Fault in microprocessor
E04 - Replace the power module (item 30).
E05 / Application code not programmed
E06 - This only occurs in case of a new
power module supplied by Service.
Program the application code,
beginning at line 1, step 3.
0
1
1
2
Open Service Mode
2
Set Application Code
3
Close Service Mode
E5
E6
3
4
5
6
7
8
9
10
11
C00
Press
+ 1x
C02
2x
+ 1x
+ 1x
A00
+ 1x
+ 1x
A09
1x
9x
+ 1x
C02
1x
C00
2x
00
1x
1
2
3
4
5
4222
4822
4222
4822
4822
062
442
062
271
214
94940
01238
94970
30619
12662
housing with grip
end cover
flex l/r 6c
micro switch
14-tabs pcb
24
25
26
27
28
4222
4222
4222
4822
4822
062
062
062
401
256
94770
94780
94750
11732
10435
orn. strips (2x3)
orn. caps (4x)
adj. knob
clamping unit
flexholder L/R
6
7
8
9
10
4222
4822
4822
4822
4222
062
252
380
450
062
94960
11236
10228
10449
94930
lamphousing L/R
automatic cutout 120C
reflector M
distance indicator
lamphousing M
29
30
31
32
33
4822
4222
4222
4222
4222
442
062
062
062
062
01236
94720
94860
94870
94850
cover R.C.-side
power module
4-s connector mains
4-s connector capacitors
9-s connector ballasts
11
12
13
14
15
4822
4222
4222
4822
4822
530
062
062
529
530
70444
94760
94910
10401
70126
spring washer
hinge complete
flex in stand 10c
gasspring
retaining ring
34
35
36
37
38
=5
4222
4222
4222
4222
062
062
062
062
94730
95010
94900
94920
fan complete
pcb frame
housing floorpart
orn. prop (4+2)
16
17
18
19
20
4822
4222
4822
4222
4822
401
062
265
062
361
11733
94950
11215
94980
11042
flex clamping
grip cover
tab connector
cover L/R
fan complete M
39
40
41
42
43
4822
4822
4222
4822
4222
442
321
062
146
062
01235
11395
94710
10935
94330
cover flex-side
mains flex EU
remote control
ballast 500W/230V
ballast 400W/230V
21
22
23
23A
4222
4822
4222
4822
9245
062
325
062
134
424
94810
20102
94220
30032
44225
fan complete L/R
lampholder UV/IR
reflector L/R
HPA lamp
IRK lamp
44
45
47
48
49
4222
4822
4222
4822
4822
062
528
062
265
528
94740
70519
94600
20234
11215
bar grip
wheel small
capacitor 50µF/250V
connecting block mains
wheel large
HB 975/A
17
1
18
D
19
2
3
4
5
20
6
7
21
8
9
10
22
23
23A
11
C
24
12
13
25
B
14
A
26
15
16
27
38
28
29
39
30
40
31
32
41
33
42
34
43
35
36
44
A
45
37
47
48
49
HB 975/A