1
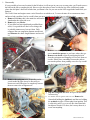
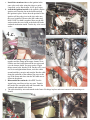
f. There’s also a spot at the right rear corner where
the softening of a sharp edge seems like it would be
a good idea. Stick the tank in, mark what’s covered,
pull the tank back out and radius that corner a little
where it’s close to the tank.
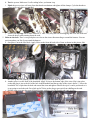
g. Now would also be a good time to install the tank
strap and check the length of the bolts just to be
sure they won’t poke the tank. There should be
plenty of room, but you never know if someone
substituted a bolt that’s too long and this should be
checked. Take the strap back off.
h. Using touchup paint, paint any spots where you’ve
broken the painted surface. While you are at it you
can also touchup where the stock tank chaffed.
4. Relocate Ignition, (if applicable for your model.)
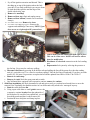
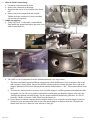
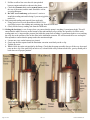
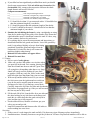
a. Take the ignition over to a clean surface where tiny
parts cannot fall to the floor and get lost. Remove
the 3x T10 Torx screws. Be very careful here,
there’s 2 springs and 2 pads in there you don’t want
to lose. It will also come apart much further and
you really don’t want to do that, leave the ignition
barrel alone. Carefully extract the stock seat latch
cable. Unscrew the spring from the stock cable and
screw it back on the extended cable.
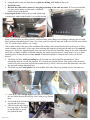
Install the extended cable in the switch. Make
sure the springs and pads are still in place and put
the ignition back together w/ the 3x torx screws.
Reinstall the screws and TEST it. Make sure the ignition
works properly.
The time to find out you didn’t get the cable in there
right isn’t when it’s all zip tied in place.
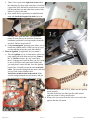
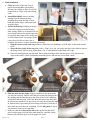
b. Remove the two screws from the valve cover where the
ignition bracket will attach.
Page 6 of 16
Rev 3.7
©2007 Unlimited, Inc.