1
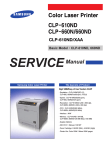
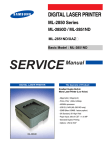
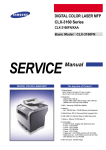
Alignment & Troubleshooting
4.2.2 Error Message and Troubleshooting
Messages appear on the Smart Panel program window or on the control panel to indicate machine status or
errors. Refer to the tables below to correct the problem.
Error Code
Error Message
Troubleshooting Page
01-000
Door Open/Check Transfer Belt
21 page
01-004
Paper Jam in MP Tray
22 page
01-005
Paper Jam in Tray1
23 page
01-006, 01-018
Paper Jam in tray2
24 page
01-009
Paper Jam inside machine
25 page
01-010
Paper Jam in exit area
26 page
01-014
Paper Jam bottom of duplex
27 page
01-017
Output bin Full Remove paper
28 page
02-000
Error #02-000. Turn off then on
29 page
02-001, 02-006
Error #02-001/02-006. Turn off then on
30 page
02-002
Error #02-002. Turn off then on
31 page
02-005
Error #02-005. Turn off then on
31 page
03-007
Error #03-007. Turn off then on
32 page
03-008
Error #03-008. Turn off then on
32 page
03-009
Error #03-009. Turn off then on
32 page
03-015
Error #03-015. Turn off then on
33 page
04-001
Error #04-001. Turn off then on
34 page
04-002
Error #04-002. Turn off then on
34 page
06/25/26/27-006
Error #06/25/26/27-006
[XXX] toner
[XXX] : color
35 page
06/25/26/27-007
Error #06/25/26/27-007
[XXX] toner
[XXX] : color
35 page
06/25/26/27-020
Error #06/25/26/27-020
[XXX] toner
[XXX] : color
35 page
12-000
Load [Letter] in Tray1
36 page
12-001
Load [Letter] in Tray2
36 page
12-004
Load [Letter] in MP
37 page
21-002
Paper Empty in Tray1
38 page
21-003
Pulled Out Tray1 Cassette
39 page
21-010
Paper Empty in MP Tray
40 page
21-018
Paper Empty in Tray2
41 page
21-019
Pulled Out Tray2 Cassette
42 page
28-001
Not installed Transfer belt
43 page
28-002
Not Compatible Transfer belt
44 page
28-004
Replace new Fuser unit
44 page
28-005
Not Installed Fuser unit
44 page
Service Manual
4-23
Samsung Electronics
Alignment & Troubleshooting
01-000
Door Open/Check
Transfer Belt
The front cover or the top cover is not securely latched or the transfer belt is not installed.
1. Harness is defective, Connector is not connected properly.
2. Sensor is defective.
1. Close the front cover or top cover perfectly.
2. If the PTB is not installed, install it.
3. Check the cover switch harness between Main PBA and HVPS.
4. Check the 24V enable signal on Main PBA. If the voltage is high(5V), replace the Main PBA.
5. Check the 24V1 on SMPS. If there is no output, replace the SMPS board.
Cover Switch
Connector
CN27 Connector
24V1
No. 2,4,6,8 Pin
No. 24 Pin
24V enable
Service Manual
4-24
Samsung Electronics
Alignment & Troubleshooting
01-004
Paper Jam in MP tray
At printing, the paper from the MP tray has not reached to the feed sensor within a programmed period of time after
pick up.
1. Pickup Clutch does not work.
2. Pickup roller rubber is worn out.
3. Feed Sensor is defective.
1. Remove the jammed paper in MP tray.
2. Check the MP empty sensor of the Cassette. If it is defective, replace it.
3. If the pick up roller does not rotate, replace the pick up solenoid.
4. Check the feed sensor by using EDC mode after feed a paper from Cassette. Reconnect the harness. If the
problem persists, replace the defective part.
* Actuator-Feed (JC66-02294A)
* Photo-Interrupter (0604-001095)
Flat
Pickup
Solenoid
6p Feed/Tray
empty
Service Manual
7p MP empty/MP
solenoid
4-25
Samsung Electronics
Alignment & Troubleshooting
01-005
Paper jam in tray 1
At printing, the paper from the tray1 has not reached to a feed sensor within a programmed period of time after pick
up.
1. Pickup Clutch does not work.
2. Pickup roller rubber is worn out.
3. Feed Sensor is defective.
1. Take out the cassette and remove the jammed paper.
2. Check if the Guide-adjust is adjusted for paper accurately.
3. Check the separator pad of the cassette. If it become loose or life has expired, replace it.
* MEA-HOLDER PAD SHEET (JC97-03077A)
UP(JC33-00022A). If it is defective, replace it.
5. If the pick up roller rotates but the paper is not feeding, replace the Feed motor (JC31-00112A).
6. Reconnect connector of CN4,5,9 on HVPS.
8. Check if the life of pick up roller(JC90-00932A) has expired. If so, replace it.
After replacing the pick up roller, enter the tech mode and reset the count of the pick up roller.
9. Check Actuator-Feed. If it does not work correctly, check the feed-sensor.
Service Manual
4-26
Samsung Electronics
Alignment & Troubleshooting
01-006
01-018
Paper jam in tray 2
At printing, the paper from the tray2 has not reached to a feed sensor within a programmed period of time after pick
up.
1. Pickup Clutch does not work.
2. Pickup roller rubber is worn out.
3. Feed Sensor is defective.
1. Take out the 2nd cassette and remove the jammed paper.
2. If the pick up roller does not rotate, check the Gear Pick up(JC97-03228A). If it is defective, replace it.
3. If the pick up roller rotates but the paper is not feeding, replace the Clutch-Feed(JC97-03270A).
4. Reconnect the CN9 connector on Main PBA.
5. Check the sensor and connector in SCF.
Service Manual
4-27
Samsung Electronics
Alignment & Troubleshooting
01-009
Paper jam inside of machine
Paper jam inside of machine
2. At printing, the paper is detecting at Regi sensor or Feed sensor continually.
3. At printing, the paper is not detected at exit sensor within a regular time.
1. Feed sensor or Regi Sensor is defective.
2. Exit sensor is defective.
3. Feed Clutch is defective.
4. Regi Clutch is defective.
1. Check the Spring tension of the Regi. roller and Regi shaft. If the spring is defective, replace it.
2. Replace the actuator fuser and exit sensor.
4. Check the OPC motor working. / OPC lock.
5. Check PTB working condition, if PTB-Belt is torn.
Flat Cable
empty
Service Manual
4-28
Samsung Electronics
Alignment & Troubleshooting
01-010
Paper jam in exit area
Paper jam in exit area
- If there is no jammed paper but error has occurred at warm-up, exit sensor is defective.
1. If the actuator fuser sensing part has some problems, replace the actuator fuser and exit sensor.
Flat Cable
Service Manual
4-29
Samsung Electronics
Alignment & Troubleshooting
01-014
Paper jam at the bottom of duplex path
2. At Printing, Duplex sensor is not off within a programmed period of time after paper moves into duplex path.
1. Check the Duplex Ready Sensor Harness and Connector.
2. Check if the UI message is changed by the Duplex Ready Sensor operation.
3. Check the duplex ready sensor.
1. Open the Front Cover and separate the PTB unit. Remove the Jammed paper.
defective, replace it.
3. Check if exit actuator’s replace time is not accuracy. If so, check if the spring of exit actuator exists or not.
4. Check if exit motor reverses when the paper needs to reload to the printer.
Service Manual
4-30
Samsung Electronics
Alignment & Troubleshooting
01-017
Output bin Full.
Remove paper
The out-bin full sensor is on for 600ms.
1. Check the Out-Bin Full Sensor Harness and Connector.
2. Check if the UI message is changed by the Out-Bin Full Sensor operation.
3. Check the Out-Bin Full Sensor.
1. Clear the paper on exit tray.
2. Reconnect the CN3 connector on Main-PBA.
3. Replace the Actuator-Stacker and Actuator-OutFull.
* Actuator-Stacker (JC66-02065A)
* Actuator-Outfull (JC66-02064A)
* Photo-Interrupter (0604-001095)
Service Manual
4-31
Samsung Electronics
Alignment & Troubleshooting
02-000
Error :#02-000 Please turn off then on.
Fuser Unit is not installed and AC is not supplied to the Heat Lamp.
1. Turn off the power. And turn on the power.
2. If the problem persists, replace the fuser unit.
3. If the problem persists after replacing the fuser unit, reconnect the CN35 connector on Main-PBA.
4. If the problem persists, replace the Main-PBA.
CN35
Service Manual
Thermistor
4-32
Samsung Electronics
Alignment & Troubleshooting
02-001
02-006
Error :#02-001 Please turn off then on.
Fuser Unit is not installed and AC is not supplied to the Heat Lamp.
1. Turn off the power. And turn on the power.
2. Check the connection of the Fuser AC on FDB
3. Check the Fuser control harness
.
.
5. If the problem persists, replace the Fuser unit.
6. Replace the SMPS board or FDB (Fuser drive board).
Service Manual
4-33
Samsung Electronics
Alignment & Troubleshooting
02-002
System Error :#02-002 Please turn off then on.
The fuser unit is overheated. The machine does not work until power off/on.
The machine can not control fuser temperature.
1. Turn off the power. And turn on the power.
2. Replace the Fuser unit.
3. Replace the FDB.
4. Replace the Main-PBA.
02-005
System Error :#02-005 Please turn off then on.
The ADC port is short.
The machine can not control fuser temperature.
1. Turn the power off then on again.
2. If the problem persists, replace the Main PBA.
Service Manual
4-34
Samsung Electronics
Alignment & Troubleshooting
03-007
03-008
03-009
Error: #03-007 / 008 / 009
Turn off then on
Motor Signal is abnormal.
1. Harness is defective, Connector is not connected properly.
2. Corresponding motor is defective.
3. Main Board is defective.
1. Check the motor connector. Reconnect the harness.
2. If the problem persists, replace the BLDC motor.
3. If the problem persists after replacing BLDC motor, replace the Main PBA.
Fuser BLDC
OPC BLDC
Service Manual
4-35
Samsung Electronics
Alignment & Troubleshooting
03-015
Error: #03-015
Turn off then on
Fan does not operate.
Fan is defective.
1. Check the CN17 connector (FAN) on Main PBA.
2. If the FAN is defective, replace it.
3. If the problem persists, replace the Main PBA.
Fan
Service Manual
4-36
Samsung Electronics
Alignment & Troubleshooting
04-001
04-002
Error: #04-001. Turn off then on.
Error: #04-002. Turn off then on.
Laser beam detect signal has not occurred or is irregular.
LSU motor does not operate.
1. Harness is defective, Connector is not connected properly.
2. LSU is defective.
3. Main Board is defective.
1. Check the LSU connector on Main PBA. Reconnect it. If necessary, replace it.
2. If the problem persists, replace the LSU or Main PBA.
CN10/11
LSU LD, Hsync
Connector
CN15
LSU Motor
Connector
Service Manual
4-37
Samsung Electronics
Alignment & Troubleshooting
06-006/7/20
25-006/7/20
26-006/7/20
27-006/7/20
Error: #06/25/26/27-006/7/20
[XXX] toner
[XXX] : color
The toner cartridge is not installed properly or its connector is contaminated.
25 : Cyan Cartridge
26 : Magenta Cartridge
27 : Yellow Cartridge
1. Open the front cover.
2. Reinstall Cartridge.
3. Close the front cover perfectly.
Service Manual
4-38
Samsung Electronics
Alignment & Troubleshooting
12-000
12-001
Load [Letter] in Tray 1
Load [Letter] in Tray 2
The paper in tray is not proper.
1. Check the harness and connector of the Tray1/2 Size Sensor.
2. Tray1/2 Size Sensor is defective.
1. Pull out Tray1 Cassette.
2. Load [Letter] paper in Tray1 Cassette.
3. Install Tray1 Cassette.
4. If the problem persists, check if Feed-Actuator works correctly.
a. Check the spring is put in right place of Actuator Feed.
Service Manual
4-39
Samsung Electronics
Alignment & Troubleshooting
12-004
Load [Letter] in MP
The paper in MP tray is not proper.
1. Check the harness and connector of the MP Size Sensor.
2. MP Size Sensor is defective.
1. Open MP Tray.
2. Load [Letter] paper in MP Tray.
Service Manual
4-40
Samsung Electronics
Alignment & Troubleshooting
21-002
Paper Empty in tray1
There is the paper in tray1 but error message is displayed.
1. Tray1 empty sensor harness is not connected properly. .
2. Empty Sensor is defective.
1. Check the paper empty sensor connector. Reconnect it.
2. Check the paper empty sensor. If it is defective, replace it.
3. Check if the actuator is broken.
6p Feed/Tray empty
Service Manual
4-41
Samsung Electronics
Alignment & Troubleshooting
21-003
Pulled Out Tray1 Cassette
Tray1 cassette is inserted in machine but error message is displayed.
1. The connector of the Tray1 Home Position Sensor is not connected properly.
2. Tray1 Home Position Sensor is defective.
1. Reinstall the tray1 cassette.
2. Reconnect the / Feed sensor harness.
3.Check the CST Draw connector. Reconnect it.
Service Manual
4-42
Samsung Electronics
Alignment & Troubleshooting
21-010
Paper Empty in MP tray
There is the paper in MP tray but error message is displayed.
1. MP Paper Empty Sensor harness is not connected properly.
2. MP Paper Empty Sensor is defective.
1. Check the MP paper empty sensor connector. Reconnect it.
2. Check the MP paper empty sensor. If it is defective, replace it.
3. Check if the MP Empty actuator is broken.
Actuator-Empty
Service Manual
4-43
Samsung Electronics
Alignment & Troubleshooting
21-018
Paper Empty in Tray2
There is the paper in tray2 but error message is displayed.
1. Tray2 empty sensor harness is not connected properly. .
2. Empty Sensor is defective.
1. Check the paper Tray2 empty sensor connector. Reconnect it.
2. Check the paper Tray2 empty sensor. If it is defective, replace it.
3. Check if the Tray2 actuator is broken.
Actuator
Service Manual
4-44
Samsung Electronics
Alignment & Troubleshooting
21-019
Pulled Out Tray2 Cassette
Tray2 cassette is inserted in machine but error message is displayed.
1. The connector of the Tray2 Home Position Sensor is not connected properly.
2. Tray2 Home Position Sensor is defective.
1. Reinstall the tray2 cassette.
2. Check the Tray2 Open micro sensor connector. Reconnect it.
3. Check the Tray2 Open micro sensor. If it is defective, replace it
micro switch sensor
Service Manual
4-45
Samsung Electronics
Alignment & Troubleshooting
28-001
Not installed Transfer belt
The red LED is turning on and the machine does not operate.
1. Transfer belt is not installed properly.
2. Connector pin deformation or damaged harness
3. CRUM PBA or main board malfunction
1.Check if transfer belt unit is properly installed.
2. Check CRUM PBA connector pins.
Replace the CRUM PBA with normal thing and test it. If the CRUM PBA is defective, replace the transfer belt unit
or CRUM PBA.
3. Check if the Transfer Belt CRUM Harness is defective and connected on engine board properly.
4. Replace the main board with normal one and test it. If it works replace main board.
CRUM Harness and
connector
CRUM and Main
board connector
PBA CRUM
Service Manual
4-46
Samsung Electronics
Alignment & Troubleshooting
28-002
Not Compatible Transfer belt
The red LED is turning on and the machine does not operate.
2. Replace Transfer belt CRUM and check if machine works properly.
28-004
Replace new Fuser unit
Fuser unit over a lifetime.
Replace a current fuser unit with a new one
28-005
Not Installed Fuser Unit
Fuser unit is not installed properly.
Install the fuser unit.
Service Manual
4-47
Samsung Electronics