1
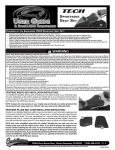
FEATURES:
•Second-to-none styling improves the appearance of your motorcycle and its function.
•Designed specifically for the rider that needs a seat that can do everything — canyon carving, track days, commuting, or 1000-mile days.
•Hard-line looks that can’t be matched by any seat on the market with contrasting colors that make it obvious it’s a custom accessory.
•Each seat is slightly bucketed in the rear section to contour to your body for better comfort and control during aggressive riding.
•Constructed using a variety of cover materials to specifically match your motorcycle’s colors and textures.
•Features Saddlemen’s Gel Channel technology (patent pending) which incorporates gel and a channel in the main foam to relieve pressure on the perineal area and
increase blood flow to keep you comfortable and in the saddle longer.
•Matching pillion cover included (so you can match your passenger’s seat to the rider’s seat).
•Lightweight & Made in the USA.
READ THESE INSTRUCTIONS THOROUGHLY BEFORE INSTALLATION!
Because of the variety of motorcycle configurations, other accessories, and the features and intended use of this Saddlemen accessory seat set, there may be different mounting options. You
are responsible for the proper installation of this accessory on your motorcycle. Your attention to these installation instructions and recommendations will permit safe and proper use of this
accessory. You must mount this accessory properly and securely before riding your motorcycle. If you lack the ability to safely and properly install this accessory, seek out a qualified motorcycle
technician for assistance. During installation, support the motorcycle with a suitable stand or lift so it will not tip over and injure you, or damage the vehicle. Using or mounting this accessory
improperly could result in a loss of control of the motorcycle which could result in damage to your motorcycle or other personal property, the property of third parties, and/or personal injury
to yourself or others, up to and including death.
BE SURE TO THOROUGHLY READ AND CLOSELY FOLLOW THE MOUNTING INSTRUCTIONS THAT ARE INCLUDED WITH THIS ACCESSORY:
•The seats must be installed and securely fastened to the motorcycle in the same fashion as the original seats. Refer to your vehicle’s Owner’s Manual or Service Manual for seat removal
and reinstallation instructions.
•If the vehicle’s passenger grab strap is removed during the installation of the accessory seat or passenger seat cover make sure it is reinstalled and secure before riding.
•If you do not understand the seat or cover installation instructions DO NOT mount the seat or cover. Remove any items you may have already installed on your motorcycle.
•If your seats are ever damaged, do not use them until they have been inspected by your local professional motorcycle dealer. Replace the seats immediately if they have damage that will
prevent them from being properly secured to your motorcycle.
DO NOT ATTEMPT TO USE THIS ACCESSORY IF:
•
You do not understand these installation and use instructions,
•
You do not understand any part of the accessory mounting system,
•
You have any doubts as to the security of the mounting system.
If you have any concerns or questions, seek help at your qualified motorcycle dealer or call the Saddlemen support line at (310) 638-1222.
Remember: Motorcycling can be a dangerous activity. Installation of any accessory can increase your risk if it is not installed properly. You are responsible to install this accessory so it will
not contact any portion of the drive train, suspension or steering, and so that it will in no way interfere with the operation of your motorcycle.
SPORTBIKE RIDER’S SEAT INSTALLATION INSTRUCTIONS:
Your Saddlemen Sportbike Seat has been developed so it will attach securely to your motorcycle using the same configuration
as the vehicle’s original seat. Simply refer to your motorcycle’s Owner’s Manual or Service Manual for the rider’s seat
removal and reinstallation instructions. Remove the original seat and install your new seat it its place.
NOTE: Compare the new seat base to your original seat and transfer any rubber grommets that may be absent. Use soapy
water as a lubricant when you remove and install grommets.
SPORTBIKE PILLION SEAT COVER INSTALLATION INSTRUCTIONS:
Included in your Sportbike Seat Set is a pillion cover you can install on your motorcycle’s passenger seat so the texture
will match your rider’s seat. The new cover 1 should be secured in place using an upholstery stapling device. The cover
was designed so it could be easily mounted over the original passenger seat cover 2. However the original cover may be
removed to achieve a tighter fit for the new cover and to protect the original cover if it is ever desired to return the pillion
to its original condition.
NOTE: Seat cover installation takes about 30 minutes. Mounting the new seat cover over the existing cover may scuff the
original cover’s finish. If you wish to preserve the original cover, remove it before installing the new cover. If you lack the
tools or the ability to install the cover, seek out a local upholstery shop for assistance. Bring your seats, the new cover
and this instruction sheet to the upholstery shop. If you cannot locate someone to perform this service in your community,
contact the Saddlemen support line (310-638-1222) as our upholstery technicians can install this cover for you for a
$35.00 fee (plus shipping).
The images in this instruction set may be different than your accessory or motorcycle
1
2
11-0810-rev 1(3-24-15)all
PILLION SEAT COVER INSTALLATION INSTRUCTIONS (continued):
3
Refer to your motorcycle’s Owner’s Manual or Service Manual for the passenger seat removal instructions. Before installing
the new seat cover, slip it over the passenger seat and mark the center of the seat on the underside of the new cover, as
this will aid you when you align the new cover on the seat base.
Using pliers, carefully pull up and remove at least one seat cover staple from the seat base for study. If you are removing
the original seat cover, carefully remove all of the staples and then gently peel the seat cover off, leaving the seat foam in
place on the seat base.
6
Avoid using a screwdriver or similar tool to pry the staples out so you will not damage the seat base or the cover (in case you
choose to remount a removed original cover to the seat in the future). Before installing any new staples, note the length of
the removed staple(s). Be sure you are using the same length staples as the one(s) you have removed. This precaution will
protect your new seat from potential damage which could occur when using staples that are too long. The incorrect length
staple could cause damage to the seat by protruding through the seat base and piercing the seat’s foam.
If the new cover is wrinkled, or you desire a very snug fit, warm the cover in the sun or use a hand-held hair-dryer (do not
use a heat gun as this can damage the cover). This heat will slightly expand the cover so after it is secured to the seat base
and it cools, its surface will be taut and firm.
With the cover 5 still warm, slip it on the seat base 6, using the mark you made on the inside of the cover to center it on
the seat base.
Pull gently on the sides of the cover and staple it into place at four initial points 7.
Insert the staples at the same approximate locations as the original staples. This precaution will protect your new seat
cover from damage which could occur if the staples are inserted too close to the seat’s edge where they could protrude
through the seat base and foam.
Verify that the cover is centered properly and evenly on the seat base, and that its surface is taut and firm. You may then
begin to insert other staples using your upholstery stapler 8. Pull gently on the cover as you staple it in place so the surface
of the cover will be tight. Space the staples approximately 1/2-inch apart around the perimeter of the seat base 9. Alternate
staple installation from side-to-side and top-to-bottom.
Work with deliberate care to avoid damaging the cover. As you staple the cover in place, frequently check its appearance on
the top of the seat. Do not hesitate to remove staples, adjust the seat cover location or tension, and reinstall the staples.
While you want the cover to be taut and firm after installation, take care to not apply too much tension to the cover when
you staple it in place. A tear in the cover material is not a defect and is not covered by the Saddlemen Limited Warranty.
If you removed a passenger grab strap from the seat or the chassis when installing the seat or cover, reinstall it when placing
the seat on your motorcycle. With the cover installation complete, reinstall the passenger seat per the instructions in your
vehicle’s Owner’s Manual or Service Manual.
5
7
8
9
Failure to install the accessory seat, any seat cover, or passenger grab straps properly may allow portions of the seats or related materials to contact the vehicle’s moving parts
or exhaust system. It is vital that you verify that the seats and any related parts will not touch, or interfere with other components throughout the vehicle’s entire range of motion.
After 50 miles (80 kilometers) of riding, verify that the seats’ mounting is still tight and secure. It is your responsibility to make sure that any accessory installation does not
create an unsafe or illegal situation.
CARE OF YOUR SADDLEMEN ACCESSORY SEATS:
Your Saddlemen seat and seat cover requires almost no maintenance, other than periodic cleaning. Use mild soap and water or for our LS version a fine mink oil.
SADDLEMEN LIMITED ONE-YEAR WARRANTY
Saddlemen warrants its products for defects in materials, design or workmanship for a period of one year after retail purchase. Items that are defective will be repaired or replaced
by Saddlemen at its sole discretion. Damage caused by improper use or improper installation is not a defect; therefore repair or replacement of a damaged accessory will not be
covered under this warranty. This warranty contains other provisions and conditions, so please visit www.saddlemen.com for additional information. Thank you for purchasing your
new Saddlemen accessory. You can count on Saddlemen’s quality, innovation, service and style. We want you to be completely satisfied. If you have any comments, or are not
satisfied with the performance of your Saddlemen accessory, please contact the Saddlemen support line at (310) 638-1222.
The images in this instruction set may be different than your accessory or motorcycle
11-0810-rev 1(3-24-15)all