1
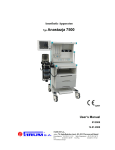
Aeon7500A service manual
Importance
This manual provides information needed to service the Aeon7500A anesthetic machine. This manual
is intended for use by certified biomedical engineering technicians or personnel with equivalent
experience and training in servicing this type of equipment. It is recommended that the user complete
the Aeonmed training class geared specifically to the Aeon7500A anesthetic machine.
While this manual covers the anesthetic machine configurations currently supported by Aeonmed, it
may not be all-inclusive and may not be applicable to your anesthetic machine. Contact Aeonmed for
questions regarding the applicability of the information.
Company:
Beijing Aeonmed Co., Ltd.
Add. :
No.9 Shuangyuan Road, Badachu Hi- tech Zone,
Shijingshan District, Beijing, China
P. C.:
100041
Tel:
+8610–88799987
Fax:
+8610–88791201
E-mail:
[email protected]
Website:
Http://www.aeonmed.com/
i
Aeon7500A service manual
Contents
1
2
INTRODUCTION.................................................................................................................................................... 1
1.1
WHAT THE MANUAL’S SYMBOLS MEAN? ............................................................................................................. 1
1.2
DEFINITIONS, ACRONYMS, AND ABBREVIATIONS ................................................................................................ 3
1.3
TOOLS AND EQUIPMENTS (FOR SERVICING AND TESTING).................................................................................... 4
STRUCTURE AND OPERATION PRINCIPLE .................................................................................................. 5
2.1
SYSTEM COMPONENTS ........................................................................................................................................ 5
2.2
PNEUMATIC SYSTEM ........................................................................................................................................... 7
2.2.1
Gas supply ..................................................................................................................................................... 7
2.2.2
Gas board ...................................................................................................................................................... 8
2.2.3
Pipe connection.............................................................................................................................................. 9
2.2.4
Absorber circuit ........................................................................................................................................... 11
2.2.5
Bellows assembly ......................................................................................................................................... 14
2.2.6
Vaporizer...................................................................................................................................................... 15
2.3
3
2.3.1
Power supply ............................................................................................................................................... 16
2.3.2
MV300 anesthetic ventilator ........................................................................................................................ 17
2.3.3
MV300 screen .............................................................................................................................................. 23
TESTING ................................................................................................................................................................ 29
3.1
5
PNEUMATIC SYSTEM TEST ................................................................................................................................. 29
3.1.1
Test pipeline leakage.................................................................................................................................... 29
3.1.2
Flowmeter linkage device ............................................................................................................................ 30
3.1.3
N2O cut-off device ....................................................................................................................................... 30
3.1.4
Oxygen lack alarm ....................................................................................................................................... 30
3.1.5
Oxygen flush ................................................................................................................................................ 30
3.1.6
Test breathing circuit leakage ...................................................................................................................... 31
3.1.7
Vaporizer...................................................................................................................................................... 31
3.2
4
ELECTRICAL SYSTEM ........................................................................................................................................ 16
TEST MV300 ANESTHETIC VENTILATOR............................................................................................................ 32
3.2.1
Testing equipments....................................................................................................................................... 32
3.2.2
MV300 standard operation parameters ....................................................................................................... 32
3.2.3
Debugging step ............................................................................................................................................ 33
TROUBLESHOOTING......................................................................................................................................... 40
4.1
ANESTHESIA MACHINE TROUBLESHOOTING AND ANALYZING ............................................................................ 40
4.2
MV300 TROUBLESHOOTING AND ANALYZING .................................................................................................. 41
SPECIFICATIONS ................................................................................................................................................ 44
5.1
5.1.1
SYSTEM TECHNICAL SPECIFICATION .................................................................................................................. 44
Drive ............................................................................................................................................................ 44
ii
Aeon7500A service manual
5.1.2
Flow ............................................................................................................................................................. 44
5.1.3
Classification ............................................................................................................................................... 45
5.2
5.2.1
6
POWER SUPPLY ................................................................................................................................................. 46
Power cord................................................................................................................................................... 46
5.3
ELECTROMAGNETIC COMPATIBILITY ................................................................................................................ 47
5.4
PHYSICAL SPECIFICATION.................................................................................................................................. 48
5.5
ENVIRONMENT REQUIREMENTS ........................................................................................................................ 48
5.6
BREATHING SYSTEM TECHNICAL SPECIFICATIONS ............................................................................................. 49
5.7
ANESTHETIC VENTILATOR ................................................................................................................................. 50
5.7.1
Performance of ventilator ............................................................................................................................ 50
5.7.2
Setting ventilation mode............................................................................................................................... 50
5.7.3
Setting ventilating parameters ..................................................................................................................... 50
5.7.4
Gas dynamics performance.......................................................................................................................... 51
5.7.5
Setting alarm parameters............................................................................................................................. 51
5.7.6
Volume ......................................................................................................................................................... 52
5.7.7
Monitoring performance.............................................................................................................................. 52
5.7.8
O2 monitoring specification ......................................................................................................................... 53
SCHEMATICS ....................................................................................................................................................... 54
iii
Aeon7500A service manual
1 Introduction
1.1
What the manual’s symbols mean?
Warnings and
Cautions indicate all the possible dangers in case of violation of the
stipulations in this manual. Refer to and follow them.
WARNING: indicates potential hazards to operators or patients
CAUTION: indicates potential damage to equipment
Instead of illustrations, other symbols may also be utilized. Not all of them may necessarily appear in
the equipment and manual. The symbols include:
ON(Power)
Type B equipment
OFF(Power)
Warning or
7000-0434
Alternating Current
NOTE: refer to the manual,
IEC601-1
Protectively earth
Dangerous Voltage
Equipotential
SN
Caution,
Serial Number
Input
Date of manufacture
Output
Address of manufacture
Inspiration flow
Expiration flow
1
ISO
Aeon7500A service manual
View the reading on the top
of float
Alarm Silence
Ventilator operate
ventilation
/
Auto
Bag operate
ventilation
/
Manual
Movement in one direction
Movement in two directions
Lock
Unlock
Oxygen flush
CE Representative
Directions of Drain Valve
The system, with this label
under the stipulations in the
operating manual, complies
with the requirements related
from 93/42/EEC. xxxx is the
certificate number used by
Aeonmed quality system to
certify authorizations
2
Aeon7500A service manual
1.2
Definitions, Acronyms, and Abbreviations
f
Respiratory rate, i.e. breaths per minute (setting)
fspont
Respiratory rate of spontaneous breathing by the patient (monitored)
ftotal
Total respiratory rate, i.e. sum of f and fspont (monitored)
FiO2
Delivered oxygen percentage (monitored data)
FiO2
Oxygen percentage (setting)
I:E
Inspiration to expiration time, I to E ratio, (monitored)
MV
Exhaled minute volume (monitored)
MVspont
Minute volume of spontaneous expiration by the patient (monitored)
Paw
Patient airway pressure
PEEP
Positive end expiratory pressure (monitored data)
Plimit
Inspiratory airway pressure in PCV (setting)
Pmean
Mean airway pressure is updated every at the end of last breath cycle, i.e. a
running mean (monitored)
Ppeak
Maximum patient airway pressure during a patient breath (monitored)
Pplat
Patient airway pressure measured at the end of inspiratory pause time
(monitored)
Vsens
Volume sensitivity (setting)
TP
Inspiratory pause time; increase inspiration time to facilitate increased patient
oxygenation (setting)
VT
Tidal volume of mechanically delivered breaths (setting)
VTE
Exhaled tidal volume (monitored)
VTI
Inhaled tidal volume (monitored)
3
Aeon7500A service manual
1.3
Tools and equipments (for servicing and testing)
Task
Equipment
Routine verification
Aeon7500A User Manual
Ventilation mode checkout
Respirometer (hand-held)
Stop Watch
Changing fuses
Small slotted screwdriver
Fuses
Power switchover test
External battery and cable
Cleaning
Mild detergent
Disassembly
One set of Allen keys
Cross-screwdriver
Wrench
4
Aeon7500A service manual
2 Structure and Operation principle
2.1
System components
1
3
5
7
9
11
13
Castor
Absorber circuit
MV300 Screen
O2 flush
N2O pressure gauge
Power switch
Manifold valve
2
4
6
8
10
12
5
Drawer
Bellows assembly
Common gas outlet
O2 pressure gauge
Air pressure gauge
Flowmeter
Aeon7500A service manual
1
Inhalation port
2
Exhalation port
3
O2 inlet
4
N2O inlet
5
Air inlet
6
Fuse
7
Analogue port
8
Auxiliary mains socket outlet switch
9
Auxiliary mains socket outlet
10
Fuse
11
Nameplate
12
Cable port
13
O2 sensor interface
14
P&V interface
15
Equipotential
16
Power socket
6
Aeon7500A service manual
2.2
2.2.1
Pneumatic system
Gas supply
1
Air inlet
2
Connect to Air
Pressure gauge
3
N2O inlet
4
Connect to N2O
Pressure gauge
5
O2 inlet
6
Connect to O2
pressure gauge
7
Air pipe
8
N2O pipe
9
O2 pipe
7
Aeon7500A service manual
2.2.2
Gas board
1
Checkvalve
2
Micro-checkvalve
3
reducer
4
N2O cut-off valve
5
Gas reservoir
6
Common gas outlet
7
O2 flush valve
8
Whistle
9
Reversal valve
8
Aeon7500A service manual
2.2.3
Pipe connection
1
Connect to O2 flowmeter
2
Connect to N2O flowmeter
3
Connect to MV300 gas box
4
Connect O2 inlet
5
Connect to N2O inlet
6
Connect to Air inlet
7
Connect to vaporizer
9
Aeon7500A service manual
1
Air inlet
2
N2O inlet
3
Connect to power supply
4
O2 inlet
5
Connect to Air pressure gauge
6
Connect to N2O pressure gauge
7
Connect to power board
8
Connect to N2O flowmeter
9
Connect to Air flowmeter
10
Connect to O2 flowmeter
11
Connect to O2 pressure gauge
13
Connect to vaporizer inlet
14
Connect to flowmeter outlet
10
12
Connect to vaporizer outlet
Aeon7500A service manual
2.2.4
Absorber circuit
1 patient
2 inhalation valve
3 exhalation valve
5 absorber
6 fresh gas compensation
7 manual reservior
11
4 APL valve
Aeon7500A service manual
1. Manual ventilation gas flow diagram
1
Exhalant gas from patient
2
Pressure sampling for exhalant gas
3
Pass exhalation valve (non-return)
4
Airway pressure gauge
5
Exhalant gas enter absorber
6
Non-absorbed gas leave absorber
7
Fresh gas compensation
8
Manual / Auto ventilation switch
9 Pressure sampling path for APL valve
11 Inhalant gas to patient
12
10 Inhalation valve (non-return)
Aeon7500A service manual
2. Auto ventilation gas flow diagram
1
Exhalant gas from patient
2
Pressure sampling for exhalant gas
3
Pass exhalation valve (non-return)
4
Airway pressure gauge
5
Exhalant gas enter absorber
6
Non-absorbed gas leave absorber
7
Fresh gas compensation
8
Flow from ventilator
9
Manual / Auto ventilation switch
10 Inhalation valve (non-return)
11 Inhalant gas to patient
13
Aeon7500A service manual
2.2.5
Bellows assembly
Ports
Figure 2-1 Ports of bellows assembly
1 Breathing system connector 2 Exhaust gas port 3 Driven gas connector 4 Adapter
WARNING:
Never connect exhaust gas port with sub-atmospheric system directly. Or
else leakage of breathing system generates.
The adapter can be used to connect the waste gas scavenging system to the bellows assembly if the
standard pipeline is used in the waste gas scavenging system.
Ventilating circulation
Inhalation primary phase:
1 Exhalation valve
2 Driving gas
3 Gas of patient circuit
4 Spill-over valve
5 To patient circuit
Exhalation primary phase:
6 Driving gas
7 From patient circuit
14
Exhalation end phase:
8 Excess gas of patient circuit
Aeon7500A service manual
2.2.6
Vaporizer
Structure
1
2
7
6
3
4
5
1
control dial
2
‘OFF’ lock position
3
filling cap
5
drain valve
6
color coding
7
label
Operational principle
15
4
liquid level indicator
Aeon7500A service manual
2.3
2.3.1
Electrical system
Power supply
1 connect with anesthetic ventilator 2 connect with power switch
3 Power socket 4 Auxiliary mains socket outlet
16
Aeon7500A service manual
2.3.2
MV300 anesthetic ventilator
2.3.2.1
Operation principle
The high-pressure oxygen enters the pressure reduction valve I, and the output pressure from the
pressure reduction valve I is stabilized at 0.25MPa (already adjusted before ex-factory). The output
gas from the pressure reduction valve I enters the electromagnetic valve. In inspiring, the
electromagnetic valve is open; the two-way outputs enter the flow valve and the pressure reduction
valve II respectively. The one entering the pressure reduction valve II presses on the diaphragm in the
expiration valve by means of the gas pressure to control the opening and closing of the expiration
valve, and the output pressure is stabilized at 0.05MPa (already adjusted before ex-factory). The other
one enters the flow valve; the tidal volume value could be changed through adjusting the flow valve.
The pure oxygen entering the gas line is mixed in accordance with a certain proportion in the gas room.
The air enters from the venturi-type valve, and a unidirectional valve is installed in the venturi-type
valve to prevent the gas overflowing.
The sponge gas entrance is adopted for the unidirectional valve to reduce noise and filtrate the gas to
be breathed in. A safety valve is installed on the side face of the gas room to prevent that the air
pressure is too high and will make hurt to a patient. When the air pressure exceeds the set value of the
safety valve (6kPa), the safety valve can open automatically and the gas will be discharged from the
safety valve. The electromagnetic valve will be closed in expiration, the pressure exerted on the
diaphragm of the expiration valve will disappear, and the diaphragm will loose. Thus the gas room
connects with the atmosphere directly. The gas compressed in the bellows by the ventilator will
discharge to the atmosphere through the expiration valve. The process above will be repeated along
with the breath rhythm.
During the above procedures, it is the electromagnetic valve that controls the gas flowing direction,
and is controlled by the mainframe board. In inspiration the electromagnetic valve will be opened while
in expiration it will be closed. In the Figure 2-2, the display plate is used for the digital display for the
respiration rate, breath frequency, the tidal volume and the oxygen concentration, the display of the
corresponding display lamps and the display of the luminous line of the pressure. The mainframe
board is the central processing unit of the ventilator circuit part. It not only controls the opening and
closing of the electromagnetic valve, but also receives and processes the pressure signal, the flow
signal. It receives the inputs from the panel and sends the signal that will be outputted to display to the
display plate. The voltage stabilizing power supply provides the circuit needed voltages. The functions
of the subsystems above are set and adjusted by the keys on the panel.
17
Aeon7500A service manual
Oxygen
Supply
Filter
Pressure
Regulator
Resistance
Adjust
Main Board
Display
Board
Gas cut-off
Valve
Secondary
Regulator
Expiratory
Valve
Atmosphere
Flow Control
Valve
Beep
Power
Pressure
Relief
Valve
Air,Oxygen
Mixer
Bellows
Absorber
Circuit
Oxygen
Concertration
Sensor
Flow Sensor
Input Air
Filter
Y-Piece
Pressure
Sampling
Pipe
Patient
Figure 2-2
Operation principle sketch diagram of ventilator
18
Aeon7500A service manual
2.3.2.2
MV300 components
Figure 2-3 MV300 components
Figure 2-4 MV300 backview
1
Cable interface
2
O2 sensor interface
3
P&V interface
4
Analogue interface
5
Connect with power supply
6
Fuse
7
Power board
8
Switch power supply
9
O2 inlet
10
Reducer
13
Sensor board
11
Flow valve
19
12
Exhalation valve
Aeon7500A service manual
2.3.2.3
Power board
Function: Providing miscellaneous power supply for internal circuit, such as logic power supply,
drive power supply for valve body, analogue power supply for amplifier circuit etc.
1 connect with sensor board 2 connect with top light
3 connect analogue interface 4 connect switch power supply
2.3.2.4
Sensor board
Function: Amplify system-control signal and drive executive element.
1 connect O2 sensor 2 connect flow valve 3 connect cable interface
4 connect exhalation valve 5 connect power baord
20
Aeon7500A service manual
2.3.2.5
Exhalation valve
It’s made up of gasket, spring and block seat as shown in the following figure.
Caution: Block seat can move freely after fixing.
2.3.2.6
Flow valve and reducer
Flow valve control-board: Drive circuit for flow valve.
21
Aeon7500A service manual
2.3.2.7
Switch power supply
Function:Change AC to DC for providing power required.
1
Switch power supply
2
4
capacitance(0.47uf/1600V) 5
Fuse 250V 1A φ5×20(T) 6
7
Connect power supply
Connect battery
8
Connect power board
22
3
Analogue harness
Connect absorber heater(optional)
Aeon7500A service manual
2.3.3
MV300 screen
Figure 2-5 MV300 screen frontview
On the back panel of MV300 screen, there are three interfaces: CRT interface, Cable interface and Analogue
interface.
CRT interface: used to connect external display.
Cable & Analogue interfaces: provide power supply and signal to the display.
Figure 2-6 MV300 screen rearview
23
Aeon7500A service manual
2.3.3.1
MV300 screen internal structure
Figure 2-7 MV300 screen internal structure
1
PC104 mainboard
2
Communication board
3
Knob PCB
4
Keyboard PCB
5
Inverter PCB
6
LCD harness
24
Aeon7500A service manual
2.3.3.2
PC104 mainboard
PC104 mainboard is the core controller of system. It’s intended for signal processing, signal control, equipments
management and information display etc.
Warning: Wrong connection may lead to mainboard burned.
2.3.3.3
Communication board
Communication board: A sort of extended control unit, connected with mainboard by serial interface. It’ used
for signal connection, keyboard input and power management and so on.
25
Aeon7500A service manual
2.3.3.4
PM510 collecting board
Function: signal acquisition for 104 buses.
2.3.3.5
Keyboard PCB
There are four keys and one power indicator on the face of keyboard PCB. And, one 8-pin male stitch on the
back used to connect with communication board.
26
Aeon7500A service manual
2.3.3.6
Inverter
Function: Providing high voltage for display startup required.
WARNING: No touching black part in the electrified surrounding (as shown in the following picture).
And, Each LCD manufacturer has a specified inverter, such as
NEC:
SHARP:
27
Aeon7500A service manual
2.3.3.7
Knob assembly
Knob PCB: intend for connecting coder.
28
Aeon7500A service manual
3 Testing
3.1
3.1.1
Pneumatic system test
Test pipeline leakage
Leak of the line from the inlet to flow valve:
a. Turn off the flowmeter on the anesthetic machine. Ventilate the machine. And connect another
flowmeter in series to air delivery pipe between air supply and anesthetic machine.
b. Adjust the pressure of air supply to normal working range (0.4~0.45MPa). Note the value of flow
meter after the pressure became steady (refer to figure 1).The value should be less than 25mL/min.
Leak of the line from flowmeter to the collective gas outlet:
a. Turn off the first flowmeter on the anesthetic machine. Connect another flow meter in series to the
outlet of the first flowmeter and the manometer to the collective gas outlet. (Refer to figure 2)
29
Aeon7500A service manual
b. Turn off the second flowmeter. Then adjust the first flowmeter on the anesthetic machine to 100ml.
slowly adjust the second flowmeter, making the value of manometer keep 3KPa. At this time, note the
value of the second flowmeter.
c. Turn on and turn off the vaporizer respectively, and do the check above again. The value of
flowmeter should less than 50mL/min.
3.1.2
Flowmeter linkage device
Turn off the controlling valve of oxygen. Then adjust the controlling valve of N2O slowly, making the
flux show of N2O flowmeter become 1.5L/ min, 3 L/ min,6 L/ min, 9L/ min in turn. The corresponding
flux show of oxygen should be no less than 0.5 L/ min ,1 L/ min ,2 L/ min ,3 L/ min.
3.1.3
N2O cut-off device
Connect the O2 and N2O (can replace by O2). Open the controlling valve of O2 and N2O on the
flowmeter. Then gradually reduce the pressure of the oxygen supply. Observe the change of flux of O2
and N2O. In the whole process, the ratio of flux O2 to N2O must be larger than 1:3. Namely, the flux of
oxygen must be three times of the flux of N2O all the time. N2O would be cut off if the pressure of
oxygen is in the range of 0.02MPa to 0.2MPa.
3.1.4
Oxygen lack alarm
a. Turn on the oxygen supply, making the pressure from 0Mpa to normal.
b. In the state of normal pressure of oxygen, ventilate the machine and last more than 30 seconds.
c. Cut off the oxygen supply.
In the process of turning on the oxygen supply, observe the value of O2 pressure gauge. The alarm
should disappear before the value get to 0.23Mpa.
In the process of turning off the oxygen supply, observe the value of O2 pressure gauge. The alarm
should happened when the value is in the range of 0.05MPa~0.22MPa, and the time of alarm longer
than 7s.
3.1.5
Oxygen flush
Connect the flowmeter which range is 10L/min~100 L/min to the common gas outlet when the input
pressure is 0.4~0.45MPa. Turn on the oxygen flush valve. And observe the indicated value which
should be in the range of 35 L/min ~75 L/min.
30
Aeon7500A service manual
3.1.6
Test breathing circuit leakage
a)
Stifled the joint which leads to air reservoir and the patient end of tee fitting.
b)
Turn off the APL valve.
c)
Insert a flowmeter in the circuit (See figure 3).
d)
Adjust the flow valve, making the valve of pressure gauge keep at 3KPa. The value of flowmeter
should not larger than 120ml/min.
3.1.7
Vaporizer
1.
Place the vaporizer into the testing room more than 3 hours (20±3℃). The vaporizer should be
tested solely.
2.
Pour the vaporizer until the value of anesthetic is beyond the lower limit with 10ml. test the
vaporizer 45 minutes later.
3. Place the anesthetic gas analyzer to the exit of vaporizer to testing.
4.
Adjust the flux of the vaporizer to 1 L/min and 5 L/min in turn. Observe the concentration show of
the anesthetic gas analyzer after one minute.
5.
When the vaporizer at the place of “OFF”,its output concentration should not larger than 0.1%.
6.
The error of gauged concentration should no less than 20% or 5% of the full range.
31
Aeon7500A service manual
3.2
3.2.1
Test MV300 anesthetic ventilator
Testing equipments
a) stopwatch;
b) ventilating meter;
c) digital pressure gauge or “U” manometer;
d) 3L- Reservoir Bag and fish joint haggis;
e) Oxygen cylinder, the concentration > 95%
f) digital multimeter;
g) oxygen monitor;
3.2.2
MV300 standard operation parameters
⎯⎯ ventilation mode:VCV mode
⎯⎯ tidal volume:600mL;
⎯⎯ breath frequency:20times per minute;
⎯⎯ I:E:1:2;
⎯⎯ Lower limit of airway pressure:0.5kPa;
⎯⎯ Upper limit of airway pressure:4kPa;
⎯⎯ Tp: OFF
32
Aeon7500A service manual
3.2.3
1.
Debugging step
adjust the voltage
Switch on the power supply. Adjust the potentiometer W2 and measure the first feet voltage of U3 on the
forward board using multimeter to make the output voltage is 8V±0.01V.
2.
Calibrate O2 sensor
Select the menu option of O2 sensor checking, check the 21% and 100% item in turn according with the
cue in the menu, then unbolt the O2 sensor from the machine. At this point, we can see the montor value
of O2 is ‘- -’.
3.
Calibrate flow sensor
Select the menu option of flow sensor, and check the flow sensor according with the cue in the menu.
4.
Calibrate flow valve
Install the ventilator onto the anesthesia, connect the pipeline, and use water lung as stimulant lung.
Ventilate at the standard working state and set the tidal volume as 200ml, 600ml respectively. If the error
of the output contrasted with the set point is more than +20% or -20% as each change of the set of tidal
volume, please check the proportioning valve.
The process is: under the menu of the sensor, select the check of the proportioning valve. And change
the water lunge with 3L bursa. Go into password “2020” then select OK to checking.
Note: At the process of checking, you can exit by pressing “menu”.
5.
Check the tidal volume
At the standard rating, fix the MV300 onto the anesthesia machine. connect the flow sensor and
pipelines,and then set the tidal volume to 0ml, 200mL, 400mL, 600mL, 800mL, 1500mL in turn.
Connect the 3L- bursa and the fish joint haggis with the patients respectively. (when use fish joint
haggis, the max of tidal volume should be less than 600mL.) After the display on the screen become
steady, measure the tidal volume using the ventilatory capacity meter. You should get a set of data as
follow: 0±15mL, 200mL±20mL, 400mL±40mL, 600mL±60mL, 800mL±80mL, 1500mL±150mL;
Compare the measured data with the monitor data by MV300, the error should in the range of ±10%.
At the standard rating, we can adjust the respiratory rate to 10 BPM if the tidal volume can not reach
1500mL.
33
Aeon7500A service manual
6.
The display of minute volume
At the standard setting, set the tidal volume to 0ml, 200mL, 400mL, 600mL, 800mL, and 1200mL in turn.
After the display on the screen become steady, measure the expiration tidal volume VTe using the
ventilatory capacity meter. Observe the monitoring value of minute volume after one minute. Compare it
with the calculated value of the expressions MV=VTe×T, the error should in the range of ±20%.
7.
The display of total frequency
Set the respiratory rate to 4 BPM, 20BPM, 40BPM, 100BPM in turn. Compare the monitor data with the
times of ventilating in one minute, if the rate is below 20BPM, the error should be in the range of ±2BPM,
otherwise, ±10%.
8.
I:E
At the standard rating,change the I:E from 1:0.5 to 1:8, we can see the respair time of ventilator
changed clearly, namely, the time of inspiration is shortening gradually.
9.
The display of pressure in air passage
Connect the manometer and pressure sampling outlet of ventilator to standard batching container.
Pressurize the pressure sampling outlet by the standard batching container to make the manometer
stabilize at 0kPa、1kPa、+2kPa、+4kPa、+6kPa. Note the undee data of airway pressure. If the pressure
is in the range of 0kPa~+2kPa, the error should be ±200Pa, if the pressure is 2kPa~6kPa, the error
be ±10%. You should check as the flow, if not meet the demand.
At the standard settings, put the pressure sampling outlet into the air, adjust the potentiometer W3 on
the front board. At the same time, observe the pressure waveform on the screen. Firstly, adjust the
peak value to above 2cmH2O. Secondly, adjust the potentiometer W3 negative direction till the peak
becomes 0. And then set the pressure upper limit of the ventilator to 60cmH2O. Connect the pressure
sampling and U model manometer to injector. Pressurize by injector to make the making the U model
manometer show 60cmH2O. At the same time, adjust the potentiometer W1 on the front board till the
peak value become 60cmH2O on the beam.
Set the time of hold breath to OFF, 5%, 25%,50%. When to OFF, there is not flat pressure, others the
flat pressure is in existence. At the same time, you would find the time when the velocity of flow is zero
is lengthening as the time of hold breath increased if you observe the waveform of flow.
34
Aeon7500A service manual
10. Display of oxygen concentration
Connect the O2 sensor with ventilator. Firstly, place the O2 sensor and oxygen analyzer in the air.
Secondly, note the display data of the ventilator and oxygen analyzer. Then place them into 100% pure
oxygen. Note the data again after 3 minutes. The error should be in the range of ±5%.
11. Monitor of the compliance C
At standrad rating, set the tidal volume to 0, 500 mL, 1000 mL in turn. Note the the volume of
inspiration tidal volume, the peak value of pressure Ppeak, and the pressure when the expiration is
end, Ppeep. Count the C by the expressions as follow. When the value of C is under 10 mL/hPa,the
error is ±2 mL/hPa, or else, the error is ±20%.
C = Vt /ΔP…………….…………….………………………..(1)
In the expressions:
ΔP=Ppeak-PEEP, hPa;
Ppeak——the peak value of pressure, hPa;
PEEP——the pressure when the expiration is end, hPa;
12. System submenu
Press MENU key, the menu window pop-up on the screen, showing as follow.
Go into this menu, you can select the mode of display between demo and real time waveform. There is
two choice of language: English and Chinese. Waveform includes Flow-t, Paw-t, V-t, CO2-t, P-V ring.
You can select the unit of pressure from 0.1kPa and cmH2O.
35
Aeon7500A service manual
13. Alarm setting
图3
a)
Alarm for exceeding the upper limit of per minute expiration volume
Set the upper limit value of per minute expiration to 1L, 5L, 10L, and 20L in turn. adjust the tidal
volume,until the alarm for exceeding the upper limit of per minute expiration volume occurs. Note
the data of per minute expiration volume inspecting by the breath inspecting machine. Compare it
with the setting data. If the per minute expiration volume is below 5L, the error is in the range of ±1
L. If it is above 5L, the error is in the range of ±20%.
b)
Alarm for exceeding the lower limit of per minute expiration volume
The method is same as the a).
c)
Alarm for exceeding the upper limit pressure of air passage
Set the upper limit pressure of air passage to 2kPa、4kPa、8kPa in turn. Connect the manometer
to the pressure sampling outlet. Then pressurize the sampling outlet with injector until the alarm of
exceeding the upper limit pressure of air passage occurs. Note the volume of the manometer, the
error should be in the range of ±8%.
36
Aeon7500A service manual
d)
Alarm for exceeding the lower limit of airway pressure
Set the lower limit pressure of air passage to 0, 0.5kPa, 1kPa, and 2kPa in turn. Pressurize the
pressure sampling outlet with standard measuring container to make the pressure of air passage
reach the setting of lower limit or a little short. Increase the pressure after the alarm occurs, till the
alarm disappeared. Note the indicate value of pressure gauge, the error should be in the range of
±15%. At the same time, quickly adjust the pressure of the air passage to the setting of lower limit or
a little short. Time with the stopwatch until the alarm occurs again. The time should be between 4s
and 15s.
e)
Alarm for exceeding the upper limit of respiratory rate
Set the data of upper limit of respiratory rate to 4bpm, 20 bpm, 100 bpm in turn. Adjust the
parameters of respiratory rate until the alarm for exceeding the upper limit of respiratory rate
happening. Note the count value of respiration rate. Compare it with the value of the setting. If the
respiratory rate is less than 20 BPM, the error is in the range of ±1 BPM. Others ,the the range is
±5%
f)
Alarm for exceeding the lower limit of respiratory rate
The method is same as e).
g)
Alarm for exceeding the upper limit of oxygen concentration
Adjust three O2 which concentrations are differ. Mix them enough. Connect the O2 sensor with probe
of the oxygen analyzer passing through the tee, and then put them in the air. Adjust the data of
upper limit of respiratory rate until the alarm for exceeding the upper limit of respiratory rate
happening.
h)
Alarm for exceeding the lower limit of oxygen concentration
The method is same as g).
37
Aeon7500A service manual
17. Ventilation Mode
a)
Standby Mode
At the state of Standby Mode, all parameters are effective.
b)
VCV mode
At the state of VCV Mode, the parameter of Plimit is ineffective, displaying‘- -’. Set the breathing rate
to 20 BPM. The respiratory rate should be 19~21 BPM.
c)
Pressure Mode
At the state of Pressure Mode, the parameter of Tp is ineffective, displaying‘- -’. Set the parameter
of Plimit, ventilate the machine, and then note the peak value of pressure. Compare the value with
the setting Plimit. If airway pressure can go up to the setting Plimit, the peak value should not
exceed the setting Plimit at 2cmH2O. At the same time, the machine stops ventilating and turn to
expiration after the inspiration was closed. If airway pressure can not go up to the setting Plimit, the
error between output tidal volume and setting tidal volume should be in the stated range.
d)
Manual Mode
At the state of Manual Mode, only the alarm parameter is effective. The invalidation shows ‘- -’.
Turn the Manual/Machine switch to Manual Mode. Press the bursa according to a stated rate. At
the same time the times of extrusion in one minute. Compare it with the monitor data of breathing
frequency, the error should be less than 2 BPM. Compared the monitor data of tidal volume with
the measured value of air flow meter, the error should be in the range of (±10%).
e)
SIMV Mode
At the state of SIMV, the parameter of Tp and Plimit are noneffective showing ‘- -’, the area of “f”
display fIMV. I:E display the time of inspiration(TI) with the unit of second. Vsens be come effective
with the unit of L/min. If we set the fIMV to 4 BPM, Vsens to 3 L/min, pressed the bursa, the ventilator
can also touch off and ventilate.
38
Aeon7500A service manual
18. Operating key
The key on the faceplate of the ventilator should accord with its function.
When an alarm accruing, press the key of Silence, the alarm should be muted. At the same time, there
is a figure which is degressioning from 110s in the area of alarm condition indication.
The key of Manual can switch come-and-go between Manual Mode and other Modes.
19. Safe working pressure of air passage
At the standard state, set the pressure upper limit of the ventilator to 80cmH2O, plug up the patient end,
and then note the pressure of the air passage when the safety valve deflating. This pressure should be
in the range of 5kPa ~6kPa. You should adjust the safety valve of air passage if it can not satisfy the
require.
39
Aeon7500A service manual
4 Troubleshooting
4.1
Anesthesia machine troubleshooting and analyzing
Symptom
Possible Cause
Recommended Action
Patient breathing circuit
gas leak
APL valve is on
Turn APL valve to off
soda lime in the cylinder port
is not sealed very well
Reinstall or remove the
natrium calcareousness grains
at the joint
Screw tubes are broken or
the connector loosens
Replace or reinstall
valves loosen
Tighten them
Bag / ventilator switch failure
Please contact eligible service
representative.
APL valve
incorrectly
Adjust it properly
Excessive
caused
by
ventilation
pressure
manual
is
adjusted
Switch to bag control,
bellows charging; switch
to ventilator control, bag
charging.
Leakage occurs at bag /
ventilator switch.
Please contact eligible service
representative.
APL valve doesn’t work
normally
APL valve failure
Please contact eligible service
representative.
40
Aeon7500A service manual
4.2
MV300 Troubleshooting and Analyzing
Malfunction
Causes
Solution
Press POWER key, the screen is not
bright.
Short occurs.
Contact our company.
For early machines, capacitance
may be not matched.
Suggest updating.
Press POWER key, not only the
screen and the keyboard’s lights do
not work, also high frequency sharp
voice occurs at the same time.
The circuit is abnormally.
Shut off power immediately, and
call professional to deal with it.
Warning: Do not attempt startup it
again, forbidden continuing to
supply current.
Press POWER key, no abnormal
phenomenon else, but screen and
keyboard’s light don’t work.
The circuit cut off, perhaps the
power-line
of
sensor-board
disconnected.
Reconnect it rightly.
Press POWER key, no any reaction
occurs, and indicator of switch
power supply is not bright.
Connection with power supply
failed. When to use battery, the
capacity of battery may be not
enough, or connection failed.
Make sure the power supply
working normally.
Charge the battery or reconnect it
rightly.
Switch power supply damaged, or
connection failed.
Replace the new one, or reconnect it
rightly.
Press POWER key, no any reaction
occurs, and indicator of switch
power supply is bright.
1. Pressing time too short.
2. 9-pin line is not connected.
3. Circuit failure.
Increase pressing time.
Connect 9-pin line correctly.
Turn to professionals.
Any operation for knob and keys is
invalid.
Program chip failure.
Turn off the apparatus, contact our
company.
Any operation for keys is invalid,
only the knob can be responded,
But rotating function failure, push
the knob, the tidal volume
increased.
Connection of keyboard is wrong.
Reconnect according to this manual.
SIMV mode can’t be found.
Optional function.
---
The bellows doesn’t work.
Flow valve controller lines
disconnected.
Flow valve calibration failure.
Connect the lines.
Recalibrate flow valve.
Caution: It takes longer time in the
calibrating process.
41
Aeon7500A service manual
The monitoring data of tidal
volume is inaccurate.
Differential pressure sensor failure.
Change with new one.
Flow valve calibration failure.
Breathing circuit leakage or seeper.
Use software to calibrate flow valve.
Replace flow valve.
Carry out maintenance.
Turn to experts.
Restart frequently.
Circuit-board can not match
The circuit damaged
Keep out the spot, not testing
oneself, turn to experts
There are black-line or color-line
on the screen
LCD failure.
The data-line and data-line interface
are not connected with LCD correctly.
Replace LCD.
Change data-line and reconnect, if
failed again, check the connectors.
Turn to experts.
LCD brightness is very dim.
LCD harness damaged or disconnect.
Reconnection.
The tidal volume monitoring
value is zero, but connection is
right and bellows works
normally.
The gas pressure valve failure.
Sensor-board failure.
Replace sensor-board.
No pressure-time waveform
Sampling tube fell off
Flow probe fell off
Flow probe blocked.
Reinstall sampling tube
Reinstall flow probe
Cleaning or change the sampling
probe
Tidal volume is inaccurate.
Perhaps sampling tube pond, leakage,
sampling probe damaged.
Flow sensor calibration failed.
Flow valve calibration failed.
Check up the part carefully, replace
it necessarily.
Recalibrate it.
Manual ventilation turn to
mechanical ventilation is slowly.
It needs 5 minutes to operate before
operation.
Flow valve calibration failed.
Keep the machine operate usually
Recalibrate it.
Small tidal volume is inaccurate.
Beyond the allowable range probably.
Perhaps ventilation mode used is not
correct
Flow sensor calibration may be
abnormal.
100mL is reachable, but 50mL is not
recommended.
Turn to pressure mode
Ensure that flow sensor calibration
can be performed correctly.
When
ventilator
working,
bellows does not work, Exhaust
port blowing
Exhalant block failure.
The connection of data line is failure.
The magnetic valve of exhalant block
is failure.
Check the exhalant block carefully.
Reconnect it rightly.
Check or change.
42
Aeon7500A service manual
The pressure of ventilator is on
the high side.
The alarm setting is not correct.
Sampling tube blocked.
Reset the alarm limits.
Check or change.
No power provide to ventilator.
Perhaps the power line disconnects.
Perhaps the power switch does not turn
on.
Power key on the screen is not pressed
for 3 seconds
Date line disconnects.
Check and reconnect it.
Turn the power switch on.
The knob can’t be operated, and
the cursor on the screen either.
Date line disconnects.
Reconnection.
Startup again, if the malfunction
exists, Check the knob PCB and
connection.
Turn to experts.
No patient parameters display.
Sampling probe falls off
Sampling tube falls off, connection is
wrong.
Date line disconnects.
Reset probe rightly.
Reset tube and connect it again.
Reconnection.
There’s a great difference
between inhale tidal volume and
exhale tidal volume.
Sampling probe and tube seeper.
Check the flow sensor.
The sampling tube leaks.
Eliminate the seeper.
Calibrate flow sensor.
Reconnect it rightly.
The ventilator works for some
time, and then power off.
Mains supply is not steady.
Battery capacity is not enough.
If the undulation of mains supply is
very strong, recommend to use
manostat.
Check and charge.
Flow sensor calibration failed.
Affected by temperature drift.
Avoid seeper, and calibrate it after
operating 20 minutes.
43
Press power key lasting for 3 secs.
Reconnection
Aeon7500A service manual
5 Specifications
5.1
5.1.1
System technical specification
Drive
Gas supply:
Pipeline:
O2, Air, N2O
Cylinder:
O2, N2O
Connect to cylinder:
PISS (pin-indexed safety system)
Reducer:
400kPa
Connect to pipeline:
DISS-male, DISS-female, NIST (ISO 5359)
All fittings used to connect O2, Air and N2O pipeline gas supply
are all ready.
Display pressure:
Gauges with color coded
Input pressure
inlets
at
pipeline
0.4MPa
WARNING:
All gas supplies must be in accordance with medical level.
CAUTION:
Pressure at pipeline inlets must be according to 280 to 600kPa when
delivering ceases in the anesthetic gas delivering system.
5.1.2
Flow
Gas component
Scale (thin tube)
Scale (thick tube)
O2
0.05 to 1 L/min
1.1 to 10 L/min
N2O
0.05 to 1 L/min
1.1 to 10 L/min
Air
----
0.1 to 10 L/min
44
Aeon7500A service manual
Accuracy: With regard to the flow between ±10% of full scale or 300 ml/min (higher is preferred) and
full scale under the condition of 20C, 101.3kPa, flow meter precision is within the ±10% of indicated
values. The precision is 4 degree when the flow is lower than 10% of full scale or 300 ml/min (higher is
preferred).
Adjust O2 and Nitrous oxide proportionally to ensure the O2 concentration is no less than 25%.
O2 flush: 35 to 75 L/min
O2 failure alarm and the associate cut-off device
O2 pressure
O2 failure alarm:
50 to 220kPa
N2O cut-off:
20 to 200kPa
CAUTION:
5.1.3
O2 failure alarm takes precedence of N2O cut-off.
Classification
According to IEC60601-1, Anesthesia 7500A belongs to the following classifications:
•
Class I equipment
•
Type B equipment
•
General equipment
•
Mobile equipment
•
Flammable anesthetic cannot be used
•
Operate continuously
45
Aeon7500A service manual
5.2
Power supply
Voltage:
230VAC 50Hz
Input power:
Not more than 50VA
Maximum input current:
5.5A
Fuse at mains supply inlet:
250V 6A φ5X20 (F)
Fuse above auxiliary mains socket
outlets outlet:
250V 2A φ5X20 (F)
Maximum output current
auxiliary mains socket outlets:
1.5A (each); 4.5A (total)
of
Fuse in rear of ventilator:
250V 1A φ5X20 (T)
Earth resistance:
<0.2Ω
WARNING:
Then connection of equipment to the auxiliary mains socket outlets can
increase the patient leakage currents to values exceeding the allowable
limits in the event of a defective protective earth conductor.
5.2.1
Power cord
Length:
5 meters
Rating voltage:
90 to 264VAC
Capacity of current:
220 to 240VAC 10A
Type:
Three-core cable (Medical level)
46
Aeon7500A service manual
5.3
Electromagnetic Compatibility
Changing or reassembling this equipment without authorization may cause electromagnetic
compatibility problems. Contact with our company for assistance. Designing and testing this
equipment is in accordance with the following stipulations.
WARNING:
using cell phone or other radio radiant equipment near this product may
cause malfunction. Closely monitor the working condition of this
equipment if there is any radio radiant supply nearby.
Using other electrical equipment in this system or nearby may cause interference. Check if the
equipment works normally in these conditions before using on a patient.
Be careful of the following when Anesthesia 7500A is connected:
Do not put any object which is not in accordance with EN60601-1 in the 1.5M range of patients.
An isolated transformer must be used for alternating current supply (in accordance with IEC60989), or
additional protective ground wires are equipped if all the devices (for medical or non-medical use) are
connected to Anesthesia 7500A by using signal input/signal output cable.
If a portable all-purpose outlet is used as the alternating current supply, it must be in accordance with
EN60601-1-1 and cannot be put on the floor. Using another portable all-purpose outlet is not
recommended.
Do not connect the non-medical equipment directly to the alternating current outlet on the wall. Only
the alternating current supply of the isolated transformer can be used. Otherwise, the surface leaking
current may exceed the range permitted by EN60601-1 under the normal conditions, and misoperation
may cause injury to patients or operators.
Anesthesia 7500A is equipped with all-purpose alternating current outlet for connecting other medical
equipments. Do not connect non-medical equipment to these outlets. Otherwise, the surface leaking
current may exceed the range permitted by EN60601-1 under normal conditions and misoperation
may be dangerous to patients or operators.
A complete system current leaking test (according to EN60601-1) must be performed after any
equipment is connected to these outlets.
WARNING:
medical electrical equipment operators contact non-medical electrical
equipment and patients at same time. It is dangerous of patients or
operators.
47
Aeon7500A service manual
5.4
Physical specification
All specifications are approximately, maybe changed at any moment without notice.
CAUTION:
Do not put Aeon7500A into the shock environment.
CAUTION:
Do not lay the heavy on the top or into the draws.
System
Height
1350mm
Width:
656mm
Depth:
622mm
Weight:
148kg
Castor
125mm (5 in.), with breakers on the front castors.
Drawer
130mm (H) ×465mm (W) ×360mm (D)
Display
10.4’ TFT LCD
Cylinder gauge
Scale: 0 to 25MPa. Resolution: 50kPa. Accuracy: ±2.5% of full scale.
Pipeline gauge
Scale: 0 to 1MPa. Resolution: 1MPa. Accuracy: ±2.5% of full scale.
Airway gauge
Scale: -2 to 10kPa. Resolution: 200Pa. Accuracy: ±2.5% of full scale.
5.5
Environment requirements
Temperature
Relative Humidity
Atmospheric pressure
Height
Operation:
10 to 40 ℃
Storage:
-10 to 40 ℃
Operation:
Not more than 80%, non-condensing
Storage:
Not more than 90%, non-condensing
Operation:
86 to 106kPa
Storage:
86 to 106kPa
Operation:
500 to 800 mmHg (3565 to -440m)
Storage:
375 to 800 mmHg (5860 to -440m)
48
Aeon7500A service manual
5.6
Breathing system technical specifications
Compensation of fresh gas
Flow compensation range: 0 to 10 L/min
Gas components: O2, N2O, air, anesthetic agent
Absorbent
Capacity: 1500 ml (each)
Connection
Common Gas Outlet: ISO 5356 connector
Leakage
system
Resistance
system
of
of
breathing
At pressure of 3 kPa:
Leakage of flow: ≤150 ml/min
breathing
At flow of 60L/min:
Resistance of exhalation: ≤0.6 kPa;
Resistance of inhalation: ≤0.6 kPa.
At flow of 30L/min:
Resistance of exhalation: 2.2 kPa;
Resistance of inhalation: 2.2 kPa.
Patient cycle of small resistance should be used in accordance with
the relevant standard.
Resistance of APL valve
At flow of 60L/min, resistance of flow: 0.05 to 3 kPa;
At flow of 30L/min, resistance of flow: 0.1 to 0.5 kPa.
Leakage of connector
Resistance of flow: ≤50 ml/min. (APL valve close fully)
Resistance of checkvalve
Dryness: ≤0.15 kPa
The pressure generated by a wet unidirectional valve: <0.14 kPa;
The pressure to open a wet unidirectional valve: <0.1 kPa
Compliance of absorber
<50 ml/ kPa
49
Aeon7500A service manual
5.7
5.7.1
Anesthetic ventilator
Performance of ventilator
Maximum security pressure
of airway system
Not more than 6kPa
Compliance:
Not more than 40mL/kPa
Electrical safety:
Meet requirements for Class I, type B equipment specified in EN60601-1
Medical Electrical equipment: Part one: General requirement for
safety.
Noise of whole unit:
Not more than 65dB(A)
5.7.2
Setting ventilation mode
Ventilation mode
Adjustable respiratory parameters
VCV mode
VT、f、I:E、TP(inspiratory pause)
Pressure mode
VT、f、I:E、Plimit(maximum airway pressure limit setting)
SIMV mode
VT、fIMV、TI、Vsens(trigger sensitivity of volume)
Manual mode
----
5.7.3
Setting ventilating parameters
Range
VT:
0, 50 to 1500mL
Resolution
10mL
Maximum VT output limited by 75L/min (see 10.8.5 flow valve)
f:
4 to 100bpm
1bpm
I:E:
1:0.5 to 1:8
0.5
TP:
5% to 50%, OFF (only available in VCV mode);
5%
Plimit:
0.5 to 7kPa (only available in Pressure mode);
0.1kPa
Vsens:
1 to 30 L/min (only available in SIMV mode);
1 L/min
50
Aeon7500A service manual
5.7.4
Gas dynamics performance
Anesthetic system
Gas source:
Gas component:
O2
Rating pressure:
250kPa
Input pressure range:
280 to 600kPa
Flow valve range:
5 to 75 L/min
Output:
Pressure range: 0 to 6kPa; flow range: 0 to 75 L/min
5.7.5
Setting alarm parameters
Item
Limit
Range
Resolution
MV
(minute volume)
Lower
0 to 20L/min
1L/min
Upper
1 to 25L/min
1L/min
Paw
(airway pressure)
Lower
0 to 2kPa
0.1kPa
Upper
2 to 8kPa
0.1kPa
f
(respiratory frequency)
Lower
0 to 100bpm
1bpm
Upper
4 to 110bpm
1bpm
FiO2
(Oxygen concentration)
Lower
OFF, 21% ~ 100%
1%
Upper
21% ~ 100%, OFF
1%
CAUTION:
If the alarm limits of FiO2 are OFF, and O2 sensor not connected, the “No
O2 sensor!” alarm will cancel.
CAUTION:
All lower limits of parameters in above table may not be set up the upper
limits, nor may the upper limits be set below the lower limits.
51
Aeon7500A service manual
5.7.6
Volume
Type of volume sensor
Pressure difference
Physiological dead space of
sampling probe
9.5mL
5.7.7
Monitoring performance
Item
Range
Resolution
Accuracy
VT:
0 to 2000mL
1mL
±30mL (below 200mL); ±15% (other)
MV:
0 to 30L/min
1L/min
±15%
f:
0 to 100bpm
1bpm
±5% (above 20bpm); ±1bpm (other)
Ppeak:
0 to 8kPa
0.1kPa
±200 Pa (below 2kPa); ±10% (other)
Pplat:
0 to 8kPa
0.1kPa
±200 Pa (below 2kPa); ±10% (other)
FiO2:
14 to 105%
1%
±3%
C:
0 to 99 mL/cmH2O
1 mL/cmH2O
±2 mL/cmH2O (below 10 mL/cmH2O)
±20% (other)
Electric quantity:
100%, 75%, 50%, 25%, 0%. If 0% displays, and mains supply not
connected, the system will shut down.
Paw-t waveform:
Pressure monitoring range:-20 to 80 cmH2O。Paw-t waveform display
pressure axis varies with the upper alarm limit of Paw:
0 to 30 cmH2O
-10 to 40 cmH2O
31 to 50 cmH2O
-15 to 60 cmH2O
51 to 80 cmH2O
-20 to 80 cmH2O
Paw-t waveform display time axis varies with the f setting:
0 to 20bpm
0 to 15 sec.
21 to 40bpm
0 to 10 sec.
41 to 100bpm
0 to 5 sec.
Flow-t waveform:
Flow scale: -90 to 90L/min. Time scale: 0 to 15s.
V-t waveform:
Y-Axis: Tidal volume, range: 0 to 1.2L.
Paw-V loop:
Y-Axis: pressure; X-Axis: tidal volume.
V-FLOW loop:
Y-Axis: flow; X-Axis: tidal volume.
52
Aeon7500A service manual
5.7.8
O2 monitoring specification
Response time:
Not more than 15 seconds
Type of O2 sensor:
Chemical fuel cell
Useful life:
12 months (normal operating)
Operational principle:
O2 monitoring modules can monitor and display oxygen concentration of
the patient circuit, and contain one oxygen sensor. The O2 sensor can
detect the proportionable voltage on its surface, generated with partial
pressure of O2.
The O2 sensor is chemical fuel cell, and its metal electrode can be
oxidated when oxygen diffuses into it. The current generated from
oxidation proportion O2 partial pressure on the surface of electrode. The
electrode will be used up gradually in oxidation process.
The voltage of sensor would be affected by the temperature of gas
mixture monitored. Thermistor on the shell of sensor will
auto-compensate temperature difference inside the sensor.
Signal processing and circuit analyzing can be used in the O2 monitoring
modules. So the signal of O2 sensor could be transformed to O2
concentration. Besides, the concentration displays on the screen, and
compares with alarm limit value saved, if the concentration exceeds the
limits, alarm should be occurred.
53
Aeon7500A service manual
6 Schematics
1.
N2O pipeline
22.
Absorber
2.
O2 pipeline
23.
O2 flush
3.
Air pipeline
24.
N2O-O2 linkage
4.
Pressure Gauge
25.
O2 flowmeter
5.
Checkvalve
26.
Air flowmeter
6.
Reducer (400kPa)
27.
N2O flowmeter
7.
O2 reservoir
28.
Vaporizer 1
8.
Reversal valve
(100 to 220kPa)
29.
Vaporizer 2
9.
Whistle
30.
Micro-checkvalve
10.
N2O cut-off (20 to 200kPa)
31.
To air
11.
Reducer (250kPa)
32.
Exhalation valve
12.
Magnetic valve
33.
Inhalation valve
13.
Flow valve
34.
O2 sensor
14.
Safety valve (6kPa)
35.
Probe
15.
Exhaust valve
36.
Patient
16.
Spill-over valve
(0.1 to 0.3kPa)
37.
Flow sensor
17.
Bellows
38.
Pressure sensor
18.
Manual reversal valve
39.
Ventilator
19.
Manual reservoir bag
40.
Display screen
20.
APL valve (0.19 to 0.6kPa)
21.
Airway pressure gauge
54
Aeon7500A service manual
55
Aeon7500A service manual
56
1
2
3
4
5
6
8
7
D
D
N
blue
brown
RV0.5
1
1
1
2
E
1
mark
wire color
J1
L
E
N
J2
E
J3
E
J4
E
L
N
RV0.5
blue
RV0.5
L
N
RV0.5
yellow&green
E yellow&green RV0.5
1
N
4F2
1
250V5A/F
L
brown
E
2
250V2A/F
2
250V5A/F
2
4F1
2
L
250V2A/F
1F2
E
2
J4
PLUG AC FEMALE
N
3F2
1F1
2F1
E
2
3F1
2
L
250V2A/F
1
J3
PLUG AC FEMALE
N
2F2
1
250V2A/F
L
250V2A/F
J2
PLUG AC FEMALE
MAINS EXPORT
N
250V2A/F
J1
PLUG AC FEMALE
L
L
N
RV0.5
1,2 3,4
J5
1,2 3,4
P5
F1
1
2
F2
1
2
1F1
L
brown
RV0.5
N
blue
RV0.5
K0
POWER SWITCH
T 1A 250V
1
2
1 F1
2
4
3
T 1A 250V
1 F2
2
A3
P5
1,2
1,2
1
3,4
3,4
2
CIRCLE WARMER
TOP LIGHT
1F2
2F1
5VAC1
AC 5.5V
blue
E yellow&green RV0.5
1
RV0.5
3
N
4
2
C
A2
CIRCLE WARMER UINTJ5
brown RV0.5 L220VAC*2 T1
DC5V
C
1
1
2
1
2F2
5VAC2
2
1
2
2
L
RV0.5
N
N
blue
yellow&green RV0.5
E
SWITCH MODE POWER
OUT DC28.6V
PE
GND AWG-18 black
A1U1
L
2 5V AWG-18 red
3F2
brown RV0.5
1
4F1
2
1
2
4F2
1
K0
1
3
2
L
E
2
A1U2-J5
A2
J5 DC5V
J1 DC28.6V
J2 CTRL
to Comm UINT
B
J4 OUT
to AMPLIFER
A1U2-J1
JBAT3
RV0.5
brownblue brownbrownblue blue
Acid Battery12V*2
AWG-18
yellowyellowyellowyellowbrownblue
5
1
2
3
1
2
blue
3 Batd+ AWG-18 yellow
5
2
brown
3
2
4
blue
3
X3
1
brown
2 GND AWG-18 black
1
2
2
T1
blue
2
1
1
brown
2
A3
POWER UINT MV300.2.6
1 +24V AWG-18 orange
blue
JBAT3
1
brown
1
1
yellow&green
A1U2
BAT. 24V
B
1
N
1
OUTPUT (AWG-18 red+, black-)
2
4
S1
A1U1
S1
MV300 VENTILATOR
2
1
3F1
1
2
red black red yellowgreen black
aeonmed
Aeon 7500A
A
revision-mark revises file
Anesthesia
signature&date
designator
technics
check
standard
sheet 1 of 1
A
MAIN WIRING
7500AJL
confirm
1
2
3
4
5
6
7
8
1
2
3
4
5
6
8
7
W2 210000585
DISPLAY TERMINAL
W15 210000586
TO TOP LIGHT
9Pins D-type Interface
1
25 25Pins D-type Interface
+
VENTILATOR
VALVE INSP.
10-1
1
2 11-1
W8
12-1
UaPvPv
W14 122000285
+24V
3-1
4-1
P3
red
BAT2
+
U1
210000163
C1
0.47uf/1600V
1
J4 1 2
14-1
15-1
A5
J8
5-1
1
J2
1
2
3
4
5
4-1
+28.6V
0V
3-1
6
0-1
L1+-
red X1 1
black 2
L2 +-
redX2 3
black 4
COM1
26
Verifier VAL.
210000312
122000468
1
1
210000313
26
64
PRN
PC104 bus
1 104
1
J5 1
P4
1
J1
J3
J6
Aux.Comm.Uint
1 J7
1
2
12V
GND
1
J10
10
10
LCD
16
3 J5
2
J2
4
W11
1
1
W12
W9 122000289
122000284
W13 122000363
L N
(AC )
1-1
7
PC104
26
122000294
CRT
+
10
PM510 Sampler
J9
26 J4
J6
1
1
A8
A1
+5V AMPLIFIER UINT
GND
122000293
+12V
-12V
+24V
A12V
1 2 J5
A2
10
1 J9
COM2
A4
26 J6 3 2 1
J1
+V
COM
COM
J3 1
1
+V
POWER SUPPLY
3-2
2
C
W9 122000289
W4 122000287
J3
8
KeyPad
W5122000465
1 34
-
122000465
J1
1
A3
3
2
+
DC/AC reverser
W10 122000282
W1
5
210000151 -
J1 1 2 3 4 5 6
1
2
10
2
BAT1
A6
15
1
1
red
1
LCD BackLight harness
Acid-battery (2X12V2AH)
5-3
VGA interface
25
J2
122000288
5V
12V
GND
5V
V+
B+
5-1
3-2
1
9
ISA
V-
C
J1
1
2
3
4
1
13-1
B+
B-
POWER UNIT
122000290
Ue
1 2 3 4 5
A7
13-1
J4
910
1
J2
14-1
2 1
J5
15-1
0V
5V
654321
8-1
9-1
+5V
+24V
-12V
+12V
GND
210000142
D25-CABLE Interface
D9-CABLE interface
VAL INSP. Controller
gnd
gnd
10-1
11-1
12-1
+
gnd
122000291
PvPv
240000080
122000283
-
W16 122000287
Y1
8-1 +
9-1 -
D
B1
-
1
2
3
4
9
VGA LINE
1
W6
D
X3
2-1
B
B
1 7-1 N 1
210000130
1-1 2 X16
6-1
210000130
J1
J2
O2 Cell interface
122000405
1
10.4 ' TFT
L 2
A9
0-1
LCD1
34
34
J1
TO 7500A Anesthesia
1
red
2-1 2 X15
black
W7 lcd line
122000462
122000361
1
5
S1
E
aeonmed
MV300
A
revision-mark
revises file
designator
VENTILATOR
signature&date
standard
sheet 1 of
confirm
2
3
4
5
MAIN WIRING
technics
check
1
A
6
7
2
121000023JL
8