1
®
15,000 / 18,000
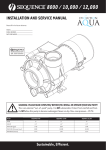
INSTALLATION AND SERVICE MANUAL
Please fill in for future reference:
MODEL: ___________________________
SERIAL NUMBER: ____________________
DATE PURCHASED: ___________________
EUROXXXXXX-SW
S/N: XXXX-XXXXXX
WARNING: PLEASE READ COMPLETELY BEFORE YOU INSTALL OR OPERATE YOUR NEW PUMP!
This is an external “out-of-pond” pump. It is NOT submersible. Protect from rainfall and frost.
Do NOT allow this pump to become submerged. Never run dry. Max. case pressure.- 25 PSI.
Model
INLET
OUTLET
MAX FLOW (gph)
MAX FLOW (litres per hour)
MAX HEAD (meters)
SEQUENCE 15,000
SEQUENCE 18,000
1.5”
1.5”
3300
15000
4.8m
1.5”
1.5”
3960
18000
4.9m
Sustainable, Efficient.
®
15,000 / 18,000
We congratulate you on your choice of the Sequence® 15,000 / 18,000 Centrifugal Pump! (Also referred to as the Sequence® 1000 pump
series) It has been carefully designed using the advantages of today’s technology and carefully constructed to give you the dependability of
yesterday. To insure proper performance, we urge you to carefully follow the instructions in this manual. If you have any questions, call your
nearest Evolution Aqua Dealer for assistance.
INSTALLATION
Please read carefully! When properly installed the Sequence® 15,000 / 18,000 pump will provide dependable trouble-free service.
1.
2.
3.
4.
5.
6.
7.
Do not submerse the unit in water - it is not a submersible pump. Do not allow the pump to become submerged during transient periods, such
as heavy rain, run-off, etc.
Locate the pump as near the water source as possible. We recommend a flooded suction installation. IT MUST NOT BE RUN DRY.
PLEASE READ CAREFULLY: No air intake into the pump.
The pump is not self-priming. Therefore, if the water level is below the pump, a non-return valve must be installed below water level. The pump
and inlet line must be primed prior to start up. For non-flooded installations, a strainer basket and check valve are recommended.
Mount the motor base to a secure, immobile foundation.
Use only plastic fittings on both the inlet and discharge ports. Seal the inlet & discharge fittings with PTFE tape. These fittings should be
self-supported and in neutral alignment with each port (i.e., Fittings must not be forced into port alignment which may cause premature line
failure or damage to the pump volute).
Never restrict the inlet! Keep both inlet and discharge lines as free of elbows and valves as possible. Always use pipe of adequate diameter.
This will reduce friction losses and maximize output. Never use an inlet line of smaller diameter than the discharge line. Minimize the suction lift.
Always protect your pump from rainfall.
BALL VALVE
FLOODED SUCTION
SUCTION LIFT
PUMP
NON RETURN VALVE
WARNING: DO NOT RUN DRY!
(Figure 2)
WARNING: ALWAYS SHUT OFF ELECTRICAL POWER BEFORE INSTALLATION AND / OR SERVICING THIS PUMP! ELECTRICAL INSTALLATIONS MUST BE
DONE BY A QUALIFIED ELECTRICIAN. A RESIDUAL CURRENT DEVICE (RCD), ALSO KNOWN AS THE RESIDUAL CURRENT CIRCUIT BREAKER (RCCB),
WITH A TRIPPING CURRENT NOT EXCEEDING 30mA MUST BE INSTALLED IN THE SUPPLY CIRCUIT. A MEANS OF DISCONNECTION FROM THE SUPPLY
HAVING A CONTACT SEPARATION OF AT LEAST 3MM IN ALL POLES MUST BE INCORPORATED IN THE WIRING.
ELECTRICAL HOOK-UP
1.
2.
3.
4.
Check that supply voltages match the motor’s requirements.
Check motor wiring and connect, according to instructions on motor, to match supply voltage.
Power cord should be protected by conduit or by cable and be of proper gauge. It should be no longer than necessary.
Power should be drawn directly from a box with circuit breaker protection.
Sustainable, Efficient.
®
15,000 / 18,000
PUMP END ASSEMBLY
1.
2.
3.
4.
5.
Clean and inspect all pump parts (0-ring, seal seats, motor shaft, etc.).
Apply silicone sealant to the bracket bore ID wall and around the seal case - follow sealant mfg. instructions.
Press carbon graphite seal into bracket while taking care not to damage carbon graphite face.
Place slinger (rubber washer) over motor shaft and mount bracket to motor.
C arefully, lubricate the seal seat elastomer OD and impeller hub ID with water. Press the seal seat into the impeller hub making certain that the ceramic
is in evenly - the sealing surface should be parallel with the impeller hub.
6. Carefully lubricate carbon-graphite and ceramic sealing surfaces with CLEAN water. Do not use silicon lubricants or grease!
7. Assemble Bracket to motor with four M-bolts
8. Thread impeller onto shaft and tighten! If required, remove motor end-cap and use a screwdriver on the back of motor shaft to prevent shaft
rotation while tightening. Replace motor end cap.
9. Seat large O-ring in volute slot and assemble volute to bracket with seven 1/4-20 x 2 3/4” hex cap screws, washers and nuts. Tighten in a cross
pattern (30 in-lbf).
10. Install drain plug with its O-ring in volute drain hole.
11. Before operating the Sequence® pumps, allow a proper cure time for the sealant used in step 2.
BRACKET
SLINGER
M BOLT
IMPELLER
VOLUTE
SEAL
DRAIN PLUG
& O-RING
LARGE
O-RING
WASHER &
LOCK NUT
DESCRIPTION
EVOLUTION AQUA
PART NUMBER:
DRAIN PLUG + O-RING
VOLUTE
LARGE O-RING
IMPELLER 15,000
IMPELLER 18,000
SEAL KIT
BRACKET
SLINGER
HARDWARE KIT
1000.111
K000.070LG
1000.061
1000.056
1000.057
1000.0414
K000.030LG
1000.010V
1000.502
69.85MM
51.82MM
P-BOLT
& WASHER
1 1/2” FNPT
88.90MM
Motor illustration is for reference only.
DISASSEMBLY
1.
2.
3.
4.
5.
6.
191.77MM
Shut off power to motor before disconnecting any electrical wiring from the back of the motor.
Disassemble volute from bracket by removing the seven 1/4” - 20 threads per inch x 2 3/4” hex cap screws.
Remove cap covering shaft at back of motor and with a large screwdriver, prevent shaft rotation
while unscrewing impeller.
Remove ceramic piece from impeller. (If you are replacing the seal)
Detach bracket from motor.
Remove carbon-graphite seal from bracket by pressing out from the back. Do not dig out from the front!
(If you are replacing the seal)
Sustainable, Efficient.
®
15,000 / 18,000
MAINTENANCE
Lubrication
Motor - Permanently Lubricated ball bearings - no service required.
Rotary Seal - Requires no lubrication after assembly.
Symptom
Problem
*The pump must be drained before servicing or if stored below
freezing temperatures. Periodic replacement of seals may be
required due to normal carbon wear.
Resolution
Prime system with water and purge all air from suction piping.
Insufficient Prime
Install non return valve.
Verify power supply and connection from panel to pump.
Insufficient Power
Verify proper voltage. Some models are dual voltage (115/230).
Ensure valves are open.
No Flow
Ensure plumbing is clear, including suction strainers, check valves, etc.
Flow Restriction
Verify check valve orientation and direction of permitted flow.
Clean out leaves or other debris from basket strainer (if applicable).
Air leak
Fix air leaks at fittings, connections, strainer basket etc. This typically occurs on the intake side.
System Incompatibility
Verify hydraulic compatibility: i.e. pump & pipe are sized for the system.
Air leak
Fix air leaks at fittings, connections, strainer basket etc. This typically occurs on the intake side.
System Incompatibility
Verify hydraulic compatibility: i.e. pump & pipe are sized for the system.
Insufficient Power
Verify power supply and connection from panel to pump.
Verify proper voltage. Some models are dual voltage (115/230).
Ensure valves are open.
Flow Restriction
Low Flow
Ensure plumbing is clear, including suction strainers, non return valves, etc.
Clean out leaves or other debris from basket strainer (if applicable).
Insufficient Prime
Prime system with water and purge all air from suction piping.
Verify airtight plumbing on the suction plumbing especially fittings!
Clean out leaves or other debris from basket strainer (if applicable).
Cavitation
Increase pipe size where possible.
Decrease suction pipe length, reduce the number of elbows, etc.
Verify hydraulic compatibility: i.e. pump and pipe are sized for the system.
Sporadic Operation
Insufficient Power
Poor Ventilation
Verify power supply and connection from panel to pump.
Verify proper voltage. Some models are dual voltage (115/230).
Ensure adequate airflow over motor to prevent overheating.
Verify airtight plumbing on the suction plumbing especially fittings!
Clean out leaves or other debris from basket strainer (if applicable).
Cavitation
Increase pipe size where possible.
Decrease suction pipe length, reduce the number of elbows, etc.
Verify hydraulic compatibility: i.e. pump and pipe are sized for the system.
Excessive Noise
Insufficient Power
Verify power supply and connection from panel to pump.
Verify proper voltage. Some models are dual voltage (115/230).
Ensure valves are open.
Flow Restriction
Ensure plumbing is clear, including suction strainers, non return valves, etc.
Verify non return valve orientation and direction of permitted flow.
Sustainable, Efficient.
®
15,000 / 18,000
GUARANTEE
Sequence Pumps are designed to give you many years of trouble free use, when operated under
normal conditions.
• Sequence Pumps are not for submersible use.
• Sequence pumps are not weatherproof, and should be protected at all times
• Failure to do so could invalidate your warranty
Your pump is covered against defects in manufacture and materials for a period of 1 year,
subject to the following conditions;
• The Pump must be installed, operated and regularly maintained in accordance with the
instruction manual.
• Any repairs or spare parts fitted during the warranty period must be undertaken by Evolution
Aqua Ltd or its authorised representatives.
• It is the customer’s responsibility to return the pump, at their cost, together with a valid proof
of purchase, along with a brief description of the fault and any other relevant information,
to Evolution Aqua at the address below. Evolution Aqua will not be liable for the costs of
returning the pump to our technical department, and accepts no responsibility for damage
during transit or consequential loss relating to this.
• Before returning any pump for warranty appraisal, you must contact Evolution Aqua to
obtain a customer returns number (CRN number). Please quote this CRN number on all
correspondence and ensure that the pump has this number clearly marked.
Evolution Aqua will examine the pump, and if the fault is covered by the warranty, will repair and
return to the customer at the earliest opportunity. The cost of returning the pump to the customer
will be met by Evolution Aqua.
If the Sequence pump is found not to be covered by the warranty, we will contact you and, if it is
possible to repair your pump, give you a quote for repairing and shipping it back to you.
Evolution Aqua will not guarantee the Sequence pump:
• When the fault is due to misuse or when unauthorised repairs have been attempted.
• If adequate steps have not been taken to protect the pump from water getting into the
electrics on the pump.
• When the fault is due to fire or any other natural cause, including frost damage.
• This warranty is not transferable.
Evolution Aqua Ltd. accepts no responsibility or liability for any consequential loss caused by
or arising from the use of any Evolution Aqua products. Therefore, any dispute arising from the
provisions of the warranty will be dealt with under the laws of England and Wales subject to the
exclusive jurisdiction of the English Courts.
Sustainable, Efficient.
®
15,000 / 18,000
EVOLUTION AQUA LTD.
Evolution House, Kellet Close, Wigan WN5 0LP
tel: +44 (0)1942 216554 • fax: +44 (0)1942 216562
The difference is clear at www.evolutionaqua.com
Sustainable, Efficient.