1
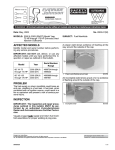
ADAPTOR HOUSING KIT - P/N 5007589
ASSEMBLY DIAGRAM
This adaptor housing kit services 2008 and older 90°V6 Evinrude® E-TEC® and DI outboards. Refer
to appropriate service manual for addition assembly information.
SAFETY INFORMATION
For safety reasons, this part should be installed by
an authorized Evinrude®/Johnson® dealer. This instruction sheet is not a substitute for work experience. Additional helpful information may be found
in other service literature for your engine.
This instruction sheet uses the following signal
words identifying important safety messages.
DANGER
Indicates an imminently hazardous situation which, if not avoided, WILL result in
death or serious injury.
WARNING
Indicates a potentially hazardous situation
which, if not avoided, CAN result in severe
injury or death.
CAUTION
Indicates a potentially hazardous situation
which, if not avoided, MAY result in minor
or moderate personal injury or property
damage. It also may be used to alert
against unsafe practices.
IMPORTANT: Identifies information that will help
prevent damage to machinery and appears next to
information that controls correct assembly and operation of the product.
Always follow common shop safety practices. If
you have not had training related to common shop
safety practices, you should do so to protect yourself, as well as the people around you.
It is understood that this instruction sheet may be
translated into other languages. In the event of any
discrepancy, the English version shall prevail.
DO NOT do any repairs until you have read the instructions and checked the pictures relating to the
repairs.
Be careful, and never rush or guess a service procedure. Human error is caused by many factors:
carelessness, fatigue, overload, preoccupation,
unfamiliarity with the product, and drugs and alcohol use, to name a few. Damage to a boat and outboard can be fixed in a short period of time, but
injury or death has a lasting effect.
When replacement parts are required, use
Evinrude/Johnson Genuine Parts or parts with
equivalent characteristics, including type, strength
and material. Using substandard parts could result
in injury or product malfunction.
Torque wrench tightening specifications must be
strictly followed. Replace any locking fastener
(locknut or patch screw) if its locking feature becomes weak. Definite resistance to turning must be
felt when reusing a locking fastener. If replacement
is specified or required because the locking fastener has become weak, use only authorized
Evinrude/Johnson Genuine Parts.
If you use procedures or service tools that are not
recommended in this instruction sheet, YOU
ALONE must decide if your actions might injure
people or damage the outboard.
These safety alert signal words mean:
TO THE INSTALLER: Give this sheet and the operating instructions to the owner. Advise the owner
of any special operation or maintenance information contained in the instructions.
ATTENTION!
BECOME ALERT!
YOUR SAFETY IS INVOLVED!
TO THE OWNER: Save these instructions in your
owner’s kit. This sheet contains information important to the future use and maintenance of your engine.
Printed in the United States.
© 2007 BRP US Inc. All rights reserved.
TM, ® Trademarks and registered trademarks of Bombardier Recreational Products Inc. or its affiliates.
DSS07299I
1 of 2
F
22-24 Ft. lbs.
(30-33 N·m)
P
See Assembly
Instructions
E
B
F
60-84 In. lbs.
(7-9.5 N·m)
120-144 In. lbs.
(14-16 N·m)
64-72 Ft. lbs.
(87-98 N·m)
NEW TORQUE
A
L
B
B
144-168 In. lbs.
(16-19 N·m)
60-84 In. lbs.
(7-9.5 N·m)
Q
9-12 Ft. lbs.
(12-16 N·m)
B
C
60-84 In. lbs.
(7-9.5 N·m)
40-42 Ft. lbs.
(54-57 N·m)
144-168 In. lbs.
(16-19 N·m)
B
E
F
60-84 In. lbs.
(7-9.5 N·m)
B
Q
C
B
60-84 In. lbs.
(7-9.5 N·m)
B
60-84 In. lbs.
(7-9.5 N·m)
B
B
20-22 Ft. lbs.
(27-30 N·m)
NEW TORQUE
B
60-84 In. lbs.
(7-9.5 N·m)
C
C
C
A
A
B
C
D
E
F
L
P
Q
2 of 2
Triple-Guard Grease
A
156-180 In. lbs.
(18-20 N·m)
C
Gasket Sealing Compound
Adhesive 847
Moly Lube
Red Ultra Lock
Blue Nut Lock
Pipe Thread Sealing Compound
Permatex #2
Gel Seal II
See assembly
instructions in
Service Manual
C
A