1
TM
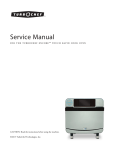
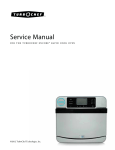
Service Manual
for the turbochef G5
©2013 TurboChef Technologies, Inc.
TM
rapid cook oven
For further information, call
800.90TURBO
or
+1 214.379.6000
The information contained in this manual is important for the proper installation, use, maintenance,
and repair of this oven. Follow these procedures and instructions to help ensure satisfactory baking
results and years of trouble-free service.
Errors – descriptive, typographic, or pictorial – are subject to correction. Specifications are subject to
change without notice.
Please carefully read this manual and retain it for future reference.
Table of Contents
Important Safety Instructions
General Safety Information
Reducing Fire Risk
Grounding Instructions
Power Cord Replacement
Precautions to Avoid Possible Exposure to Excessive Microwave Energy
RF Interference Considerations
i
i
ii
ii
ii
ii
Specifications and Installation
Theory of Operation
1
Dimensions1
Certifications2
Oven Construction
2
Electrical Specifications
2
Installation2
Unpacking Instructions
2
Installing the Oven
2
Installation Near Open Heat Source
3
ChefComm Pro®
4
TM
ChefComm Limited 4
Voltage Selection
4
Ventilation4
Daily Maintenance
5-6
Oven Modes
Manual Cook Mode
Menu Cook Mode
Menu Edit Mode
Edit Menu Name
Edit Menu Temperature
Edit Category Name
Edit Category Icon
View Edit Recipe Screen
Continued on next page...
7
8
10
11
11
12
13
14-15
Edit Recipe Cook Time
Edit Fan Reverse Time
Edit Recipe Icon
Edit Recipe Name
Run a Test Cook Cycle
Manager Mode
Set Calendar and Time
Set Fahrenheit/Celsius
Set Language to English/French
Set Speaker Volume
Access “Menu Edit Mode”
Set Oven Parameters
Set Oven Options
Manage Menu Data
Update UI Firmware
Update IO Firmware
16
16
17
17
18
19
20
21
21
22
22
23
24
25
26
26
Service Mode
27
28
Digital Outputs
Oven System
Convection System
Blower Motor
Blower Motor Speed Controller (BMSC)
Convection Heater
High Limit Thermostat
RTD
Solid State Relay
Troubleshooting
Oven Door
Replacing the Oven Door
Adjusting the Oven Door
Interlock Switches
Relay - K5 Monitor
Relay - K6 Primary Relay - K7 Secondary
Measuring RF Leakage for Microwave Safety
Troubleshooting
Microwave System
Capacitors
Testing a Capacitor
Fuses
High-Voltage Transformers
29
29
29
29
29
29
30
30
31
31
31
32
32
32
32
33
33
34
34
34
34
34
Wiring the High-Voltage Transformers
Testing a High-Voltage Transformer
High-Voltage Diodes
Testing a High-Voltage Diode
Magnetrons
Magnetron Cooling Fans
Magnetron Thermostats
Testing a Magnetron for an Open/Shorted Filament
Relay - K2, K3, K4 Anode
Relay - K8 Magnetron Cooling Fans
Tri-Amp Board
Waveguides
Troubleshooting
Control System
User Interface
Relay I/O Board
Speaker
USB Port
Troubleshooting
Electrical Components
Circuit Breaker
Electrical Compartment Cooling Fan
Electrical Compartment Cooling Fan Thermostat
EMI Filter
Power Supply
Relay - K1 Voltage
Voltage Transformer
Wire Harness
Troubleshooting
35
35
36
36
36
36
36
36
37
37
37
37
37
38
38
38
38
38
38
39
39
39
39
39
39
39
39
39
39
Overview of Troubleshooting
Fault Code Descriptions F1: Blower Running Status Bad
F2: Cook Temperature Low
F3: Magnetron Current Low
F4: Door Monitor Defective
F5: Magnetron Over Temperature
F8: Heat Low
41
41
43
44
45
46
47
48
Troubleshooting
Continued on next page...
“Oven Door Open” Message when Door is Closed
Cooling Verification
Inconsistent/Inaccurate Temperature Readings
No Display - Screen is Blank
No Display - Screen is Blinking or Resetting
Food Not Cooking Properly
49
50
50
51
51
52
Oven Schematic
U.S. and Canada
54-59
International60-65
Appendix
Replacing Oven Components
Oven Exterior
Convection System
Oven Door and Related Parts
Microwave System
Controls System
Electrical System
A-1
A-2
A-4
A-6
A-8
A-10
A-12
i
IMPORTANT SAFETY INSTRUCTIONS
WARNING: When operating this oven, strictly adhere to the following safety precautions to reduce the risk of burns, electric shock, fire, injury, damage to oven or property near oven, or possible exposure to excessive microwave energy.
GENERAL SAFETY INFORMATION
a Read all instructions before using this appliance.
a Read and follow the specific “Precautions to be Observed Before and During Servicing to Avoid Possible Exposure to Excessive Microwave Energy” found on page ii.
Instructions” on page ii.
authorized service facility for examination, repair, or adjustment.
a This appliance must be grounded. Connect only to a properly grounded outlet. See “Grounding a Install or locate this appliance only in accordance with the provided installation instructions.
a This appliance should be serviced by qualified service personnel only. Contact the nearest a Keep the cord away from heated surfaces.
a Liquids, such as water, coffee, or tea are able to be overheated beyond the boiling point without
appearing to be boiling. Visible bubbling or boiling when the container is removed from the microwave oven is not always present. this could result in very hot liquid suddenly boiling over when the container is disturbed or a utensil is inserted into the liquid.
a warning: The contents of feeding bottles and baby food jars must be stirred or shaken and the temperature checked before consumption, in order to avoid burns (IEC 60335-2-90).
a Use this appliance only for its intended uses as described in this manual.
a Only use utensils that are suitable for use in microwave ovens (IEC 60335-2-90).
a do not use corrosive chemicals or vapors in this appliance; it is not designed for industrial/laboratory use.
X warning: do not heat liquids or other foods in sealed containers (e.g., jars, whole eggs, etc.) since they are liable to explode.
X do not allow children to use this appliance.
X do not operate this appliance if it has a damaged cord or plug, is not working properly, or has been damaged or dropped. See “Power Cord Replacement” found on page ii.
X do not cover or block any openings on this appliance.
X do not store this appliance outdoors.
X do not use this product near water (e.g., near a kitchen sink, in a wet basement, near a swimming pool).
X do not immerse the cord or plug in water.
X do not let the cord hang over the edge of a table or counter.
X do not use a water jet for cleaning. See pages 5-6 in this manual for proper cleaning procedures.
X This appliance is not to be used by children or persons with reduced physical, sensory or mental capabilities, or lack of experience and knowledge, unless they have been given supervision or instruction.
REDUCING FIRE RISK
power cord or shut off power at the fuse or circuit breaker panel.
a If smoke is observed, switch off or unplug the oven. Keep the door closed to stifle any flames.
do not use the cook cavity for storage purposes.
X do not overcook food. Carefully attend to the oven if paper, plastic, or other combustible materials are placed inside the oven to facilitate cooking.
X do not leave paper products, cooking utensils, or food in the cavity when the oven is not in use.
X
SAVE THESE INSTRUCTIONS
safety instructions
a Remove wire twist-ties from paper or plastic bags used to facilitate cooking in the oven.
a If materials inside the oven ignite, keep the oven door closed, turn the oven off, and disconnect the ii
safety instructions
GROUNDING INSTRUCTIONS
This appliance must be grounded. In the event of an electrical short circuit, grounding reduces the risk of electric
shock by providing an escape wire for the electric current. This oven is equipped with a cord that has a grounding
wire with a grounding plug, which must be plugged into an outlet that is properly installed and grounded.
Consult a qualified electrician or serviceman if uncertain about the ability to follow grounding instructions or if
doubt exists as to whether the appliance is properly grounded.
X
do not use an extension cord. If the power cord is too short, have a qualified electrician or
service agent install an outlet near the appliance.
WARNING: Improper grounding can result in risk of electric shock.
POWER CORD REPLACEMENT
If the power cord is damaged, it must be replaced by the manufacturer, its service agent, or a similarly
qualified person.
PRECAUTIONS TO BE OBSERVED BEFORE AND
DURING SERVICING TO AVOID POSSIBLE EXPOSURE
TO EXCESSIVE MICROWAVE ENERGY
(a) Do not operate or allow the oven to be operated with the door open.
(b) Make the following safety checks on all ovens to be serviced before activating the magnetron or other microwave source, and make repairs as necessary: (1) interlock operation, (2) proper door closing, (3) seal and sealing surfaces (arcing, wear, and other damage), (4) damage to or loosening of hinges and latches, (5) evidence of dropping or abuse.
(c) Before turning on microwave power for any service test or inspection within the microwave
generating compartments, check the magnetron, wave guide or transmission line, and cavity for
proper alignment, integrity, and connections.
(d) Any defective or misadjusted components in the interlock, monitor, door seal, and microwave
generation and transmission systems shall be repaired, replaced, or adjusted by procedures described
in this manual before the oven is released to the owner.
(e) A microwave leakage check to verify compliance with the Federal Performance Standard should be
performed on each oven prior to release to the owner. Refer to page 33 for leakage test procedures.
RF INTERFERENCE CONSIDERATIONS
The G5 oven generates radio frequency signals. This device has been tested and was determined to be in
compliance with applicable portions of FCC part 18 requirements and to the protection requirements of Council
Directive 89/336/EEC on the approximation of the laws of the Member States relating to electromagnetic
compatibility at the time of manufacture. However, some equipment with sensitivity to signals below these limits
may experience interference.
If your equipment experiences interference:
a Increase the physical separation between this oven and the sensitive equipment.
a If the sensitive device can be grounded, do so following accepted grounding practices.
a If battery-powered microphones are being affected, ensure that the batteries are fully charged.
a Keep sensitive equipment on separate electrical circuits if possible.
a Route intercom wires, microphone wires, speaker cables, etc. away from the oven.
SAVE THESE INSTRUCTIONS
Specifications and
Installation
1
38.12” (968 mm)
32.29”
(820 mm)
31.24” (793 mm)
35.70” (907 mm)
55.29”
(1404 mm)
32.29”
(820 mm)
23”
(584 mm)
30.08”
(764 mm)
G5 Oven Dimensions
Theory of Operation
Dimensions
The TurboChef G5 oven maximizes throughput
by cooking up to five shelves of food without
compromising quality. Variable G5 cooking features
include temperature selection, high-speed air
convection, fan reverse, and microwave assist.
Oven Dimensions
This manual includes instructions for installing,
cleaning, and operating the G5 oven. If you have
questions that are not addressed in this manual,
contact Customer Support at 800.90TURBO
(USA) or +1 214.379.6000 (International), or your
Authorized Distributor.
Height: 32.29” (820 mm)
Height with cart: 55.29” (1404 mm)
Width: 31.24” (793 mm)
Depth (footprint): 35.70” (907 mm)
Depth (door closed): 38.12” (968 mm)
Depth (door open): 57.12” (1451 mm)
Weight: 475 lb. (215 kg)
Cook Cavity Dimensions - Overall
min: 3.25” (83 mm) per shelf
max: 18” (457 mm)
15” (381 mm)
21” (533 mm)
min: 0.59 ft (16.7 l) per shelf
max: 3.28 ft (92.88 l)
3
3
Cooking Rack
Width: 14.6” (371 mm)
Depth: 18.1” (460 mm)
Max food height: 17” (432 mm)
Wall Clearance
Top: 2” (51 mm)
Sides: 2” (51 mm)
Specifications and Installation
Height: Width:
Depth:
Volume:
2
Specifications and Installation
Certifications
Installation
cULus, UL EPH, FDA, TÜV
Install or locate this appliance only in accordance
with the instructions below.
Unpacking Instructions
Oven Construction
Exterior
- 304 stainless steel side panels
- 430 stainless steel door
- Single-stage, locking door handle
Interior
- 316 stainless steel
- Welded and insulated cook chamber
- Removable baffle for easy cleaning
Electrical Specifications
TurboChef recommends a Type D circuit breaker
for all installations outside the United States.
United States/Canada
Phase and voltage: 3 Phase, 208/240 VAC
Frequency: 50/60 Hz
Current draw: 42-45 Amp
Cord and plug: 4-Wire, NEMA 15-50P
Fuses: 20 Amp
Aux Breaker: 20 Amp
International
Phase and voltage: 3 Phase, 380-415 VAC
Frequency: 50 Hz
Current draw: 25-28 Amp
Cord and plug: 5-Wire, WYE (32A - 6H)
Fuses: 12 Amp
Aux Breaker: 20 Amp
* US/Canada models include a voltage transformer located on the I/O relay board that detects 208 or 240 VAC. The voltage transformer and K1 voltage selection relay work in conjunction to detect lack-of or over-voltage installations. They do not compensate for lack-of or over-voltage installations.
1. Remove the oven from its packaging.
2. Before throwing the packaging away, check it
thoroughly for accessories and literature.
NOTE: Keeping the packaging is recommended in
case the oven may be shipped to another location.
3. Check the cook cavity thoroughly for
packaging, accessories, and oven literature.
Installing the Oven
1. The TurboChef G5 is mounted to a cart at the
factory and shipped secured to the cart.
Minimal to no lifting should be required.
2.
3.
WARNING: The oven weighs approximately
475 lb. (215 kg). If lifting is required, to
prevent serious injury, at least four people are
required for lifting.
Ensure the oven racks are properly installed.
Plug in the oven.
CAUTION: This oven is not intended for built-in installation (i.e., installing the oven in any structure that surrounds the oven by five or more sides). Be sure to provide a minimum of 2” (51 mm) clearance for all surfaces.
WARNING: Do not attempt to stack this oven without the proper stacking hardware. Contact the factory for more information.
3
Installation Near Open Heat Source
When placing a TurboChef oven near an open heat source (see illustration below), strictly adhere to the
following:
- If the oven is being placed near a grill or stove, a divider must exist between the oven and the open heat source, with a minimum of 6” (152 mm) between the oven and the divider.
- If the oven is being placed near a fryer, a divider must exist between the oven and fryer, with a minimum of 12” (305 mm) between the oven and the divider.
- The height of the divider must be greater than or equal to the height of the oven (32.3” or 820 mm).
- Verify the oven location has a minimum 2” (51 mm) clearance on the top and each side.
Cart / Stand
Partition
Partition
32.3” (820 mm)
Above Counter Top
32.3” (820 mm)
Above Counter Top
TurboChef
G5 Oven
Grill
6”
(152 mm)
Minimum
12”
(305 mm)
Minimum
Specifications and Installation
Installation Near Open Heat Source
Deep Fryer
4
Specifications AND
SPECIFICATIONS
and INSTALLATION
Installation
ChefComm Pro
Voltage Selection
Part Number: CON-7006
For US/Canada oven models, the oven will detect
208 or 240 incoming voltage.
ChefComm Pro® lets you easily create menu settings on a computer and upload them to an oven
via USB thumb drive. For more information, call
TurboChef Customer Support at 800.90TURBO
or +1 214.379.6000.
ChefComm Limited
Part Number: CON-7016
ChefComm LimitedTM is a “read-and-transfer only”
version of ChefComm Pro that helps ensure menu
settings are easy to distribute, while preventing
them from being changed at the store level.
If incoming voltage for the store is different than the
factory-preset voltage, the operator will be required
to select either 208 or 240 after connecting power to
the oven. The correct voltage will be enlarged on the
screen, identifying which option to select.
Ventilation
The TurboChef G5 oven must be installed under a
ventilation hood, in accordance with local HVAC
codes and jurisdictions.
Daily Maintenance
5
Daily Maintenance
Supplies and Equipment
Follow the steps below when cleaning the G5 oven.
TurboChef ® Oven Cleaner (Product #: 103180),
TurboChef ® Oven Guard (Product #: 103181),
nylon scrub pad, cleaning towel, disposable gloves,
protective eyewear, dust mask (optional)
1
TOOLS
08:35
Select
option
Step 1: Cool the Oven
WARNING: The oven operates at temperatures up to 550°F (288°C) and may
cause injury if not allowed to cool properly.
• Turn off the oven by touching “ESC” until the main power screen returns.
• Slightly open the oven door.
• Cooling takes approximately 40 minutes.
POWER
Door
Closed
Status
Off
Status Off =
Ready to Clean
DO NOT clean the oven until the display reads “Status Off.”
2
Step 2: Remove the Wire Racks
3
Step 3: Remove Large Food Particles
• Use a vacuum hose or damp towel.
Step 4: Spray Stains with Oven Cleaner
4
Do Not
Spray this
Area
DO NOT spray cleaner near the heater elements or convection fan blade.
Step 5: Scrub Stains
• Scrub stains with a nylon scrub pad.
Continued on page 6...
daily maintenance
5
• Spray cleaner onto stains/debris build-up and allow it to set for five minutes.
6
daily maintenance
6
Step 6: Wipe the Oven Cavity
• Wipe the oven cavity and door with a damp towel to collect any remaining
cleaner residue.
• Thoroughly dry the cavity and door with a dry towel.
7
Step 7: Clean the Lower Tray
• Remove the lower tray to remove large particles and clean with a damp towel.
8
Step 8: Apply TurboChef Oven Guard
• Spray TurboChef Oven Guard onto a clean towel.
• Wipe the oven’s interior walls and the inside of the oven door.
CAUTION: DO NOT spray Oven Guard directly into the cavity, as it may settle
and build up on the heater elements or the convection fan blade, resulting in a
non-warranty service call.
9
Step 9: Reinstall the Oven Racks
10
Step 10: Clean the Oven Exterior
• Wipe the oven exterior with a clean, damp towel.
11
CAUTION: DO NOT spray chemicals into any openings, such as the louvers on
the back panel or the rear filter. Doing so can damage critical oven components,
resulting in a non-warranty service call.
Step 11: Check the Rear Filter
• Remove the filter and rinse it gently in water.
• Reinstall the clean filter.
• If the filter is damaged, replace it using part number i5-9039.
• The oven is ready to turn on.
Oven Modes
- Manual Cook
- Menu Cook
- Menu Edit
- Manager
7
Manual Cook Mode
Manual Cook Mode allows cooking “on the fly,” whereas Menu Cook Mode (page 8) allows cooking from pre-set
cook settings.
NOTE: If the Manual Mode icon is not present, see pages 19 and 24 to make it appear.
Select
Menu
Off /
Cool Down
Breakfast
Dinner
Lunch
Prep
If required, enter passcode 9428. See page 24 to
enable/disable passcode options.
Manual Mode
135/450°F
Door
Closed
Status
Heating
Oven temperature
Touch to exit
Manual Mode.
Touch to add 30 seconds to a shelf timer,
or hold to rapidly
increase shelf timer.
Touch
to clear a
shelf timer.
Touch
to begin
counting down the
shelf timer.
Touch to set the
temperature.
Touch to modify the
fan speed.
Touch to modify the
fan reverse time.
While a shelf timer is
counting down, touch
to pause the shelf
timer.
Touch to set Microwave Assist to low, medium, high, or off.
Microwave energizes only when the timer is set to greater than zero.
NOTE: Whenever the oven door is opened, the Microwave Assist is
set to off and the microwave circuit de-energizes.
NOTE: Cook options are not available while the oven is heating up.
oven modes - manual cook
“Microwave Assist”
note will appear after
the oven has completed
warming up.
8
oven modes - menu cook
Menu Cook Mode
The oven is programmed
with recipe settings at the
time of manufacture and
is ready to operate out of
the box. New menu settings
can be loaded via USB
(page 25) or programmed
manually (page 10).
4.Select an item.
To view more items,
touch the arrows at the
top and bottom of the
item list.
1.Turn the oven on.
5.Select how many
shelves of product will
be cooked.
2.Select a menu, or select “Manual Mode” to enter Manual Cook Mode (see page 7 for details).
6.The oven may require
additional heating time
before cooking can
begin. Progress is
displayed at the bottom
of the screen.
3.Select a food group.
To view more groups,
touch the arrow at the
top of the screen.
7.If the oven is heating up for the first time,
it may require an
additional “soak” time, to ensure the cavity
walls retain enough
heat so that cooking
performance will not
be affected.
9
8.When the oven is
done heating, place
the food on the shelves
as shown on the screen.
d.To stop cooking
immediately, touch
the Stop icon.
WARNING: Inside
of oven and oven
door are hot!
10. Cook the food:
a.Touch “Start
Cooking.”
e.When cooking is
done, check the food
or remove it from the
oven.
WARNING: Inside
of oven and oven
door are hot!
b.The timer will begin counting down.
To resume cooking,
touch the Start icon.
oven modes - menu cook
c.To pause cooking,
touch the Pause icon.
f.Additional options:
- Select “Cook More”
if the inside of the
food is not done.
- Select “Brown
More” if the outside
of the food needs
more browning.
- Select “Cook +
Brown” if both the
inside and outside
of the food require
more cooking.
- To cook another
batch of the same
product, touch
“Cook Another.”
- To cook something
else, or to select a
different number of
shelves for cooking the
same product, touch
“Cook Something
Else.”
10
oven modes - menu edit
Menu Edit Mode
Follow the steps below to access the “Menu Edit Mode” screen. From this screen, users can:
• Edit setting names
• Set menu temperature
• Edit icons
• Edit cook settings
• Test cook
• Delete menus, categories, and items
Start Here
Enter passcode 9428.
To select a menu, touch the menu
name.
NOTE: A G5 menu file consists
of 12 menus, each containing 18
categories, each containing 18
items, each containing 5 shelf
configurations. There are 19,440
total uniquely-programmable
cooking profiles.
CAUTION: If “Delete” is selected
(blue), touching a menu will delete
it from the oven. In this illustration,
“Edit” is selected (blue).
11
Edit Menu Name
From the “Menu Edit Mode” screen (page 10), touch the “Edit Menu Name” icon.
Displays the menu selected.
Use keypad to type new name.
Touch to access special characters.
Use arrow keys to move the cursor
without deleting existing text.
Touch “Enter” to save changes.
Edit Menu Temperature
From the “Menu Edit Mode” screen (page 10), touch the “Edit Menu Temperature” icon.
Touch “Save & Exit” to save
temperature.
oven modes - menu edit
Use numeric keypad to enter new
temperature.
12
oven modes - menu edit
Edit Category Name
From the “Menu Edit Mode” screen (page 10), touch “Select Category” icon.
Touch a category name to access
the screen below.
CAUTION: If “Delete” is selected
(blue), touching a menu will delete
it from the oven. In the adjacent
illustration, “Edit” is selected (blue).
Touch “Edit Category Name”
Touch to save the new name.
Use keypad to type new name.
Touch to access special characters.
Use arrow keys to move the cursor
without deleting existing text.
13
Edit Category Icon
From the “Menu Edit Mode” screen (page 10), touch “Select Category” icon.
Touch a category name to access
the screen below.
CAUTION: If “Delete” is selected
(blue), touching a menu will delete
it from the oven. In the adjacent
illustration, “Edit” is selected (blue).
Touch “Edit Category Icon.”
Select the name of the category. Touch to save
the new icon.
Touch an image to select it as
the new category icon.
oven modes - menu edit
CAUTION: If “Delete” is selected
(blue), touching a menu will delete
it from the oven. In the adjacent
illustration, “Edit” is selected (blue).
14
oven modes - menu edit
View Edit Recipe Screen
From the “Menu Edit Mode” screen (page 10), touch “Select Category” icon.
Touch a category name to access
the screen below.
CAUTION: If “Delete” is selected
(blue), touching a menu will delete
it from the oven. In the adjacent
illustration, “Edit” is selected (blue).
Touch “Select Item to Edit”
CAUTION: If “Delete” is selected
(blue), touching a menu will delete
it from the oven. In the adjacent
illustration, “Edit” is selected (blue).
See adjacent page for
a larger view.
15
Edit Recipe Screen Overview
From the “Edit Recipe Screen” users can:
• Edit recipe cook time
• Edit fan reverse time
• Edit recipe icon
• Edit recipe name
• Run a test cook cycle
Each food item
includes up to five shelf
configurations. The
settings on the adjacent
screen are for two
shelves of product (i.e.,
“Shelves 2”).
NOTE: The sum of event
time percentages must
always equal 100. In this
example, there are two
events, each set to 50% of
the cook time.
Touch “Save” when
finished.
NOTE: Event settings can be stored for up to
5 different shelf configurations (i.e., “shelves
in use”) per item.
oven modes - menu edit
Events are phases of a cook cycle. Up to 6
events can be added, each with varying levels
of air and microwave. Increase or decrease the
amount of time for each event by changing
the %Time.
16
oven modes - menu edit
Edit Recipe Cook Time
From the “Edit Recipe” screen (pages 14-15), touch the cook time icon.
Touch to toggle between minutes
and seconds (MM:SS) and hours
and minutes (HH:MM).
Use numeric keypad to enter time.
Touch “Enter” to save time.
Edit Fan Reverse Time
From the “Edit Recipe” screen (pages 14-15), touch the fan reverse icon.
Use numeric keypad to input
new fan reverse time.
Touch “Enter” to save new time.
17
Edit Recipe Icon
From the “Edit Recipe” screen (pages 14-15), touch “Edit Icon” located at the top-center
of the screen.
Touch arrow to advance to the next screen.
Touch any icon to select it.
Edit Recipe Name
From the “Edit Recipe” screen (pages 14-15), touch “Edit Name” located at the topcenter of the screen.
Touch “Enter” to save new recipe name.
oven modes - menu edit
Use keypad to edit the recipe name.
18
oven modes - menu edit
Run a Test Cook Cycle
From the “Edit Recipe” screen (pages 14-15), touch the green arrow icon.
19
Manager Mode
Follow the steps below to access the “Manager Mode” screen. From this screen, users can:
• Set calendar and time
• Set temperature to Fahrenheit/Celsius
• Set language to English/French
• Set speaker volume
• Load/save menu files
• Access “Menu Edit Mode”
• Set oven options
• Update oven firmware
• Set oven parameters
Enter passcode 9428.
oven modes - manager
20
oven modes - manager
Set Calendar and Time
From the “Manager Mode” screen (page 19), touch the calendar/time icon to edit the time and date.
Touch to edit the time or date screens below.
Touch to toggle
between AM
and PM.
Use numeric
keypad to enter
time.
Use numeric
keypad to enter the
date (mm/dd/yy).
Touch “Enter” to
save time.
Touch “Enter” to
save date.
21
Set Fahrenheit/Celsius
The default for the temperature settings is Fahrenheit. From the “Manager Mode” screen (page 19),
touch the °F icon.
Touch to save changes.
Touch to toggle between Fahrenheit (°F) and
Celsius (°C). Touch the “Save” icon once the
changes are made.
Set Language to English/French
From the “Manager Mode” screen (page 19), touch English/French icon.
Touch to save changes.
oven modes - manager
Touch to toggle between English and French.
Touch the “Save” icon once the changes are made.
22
oven modes - manager
Set Speaker Volume
From the “Manager Mode” screen (page 19), touch the speaker icon.
Touch to save changes.
Touch up or down arrow keys to increase or
decrease the volume.
Menu Edit Mode
From the “Manager Mode” screen (page 19), touch the “Menu Edit” time icon to view
the existing menu. See pages 10-18 for details on “Menu Edit Mode.”
NOTE: A G5 menu file consists of 12
menus, each containing 18 categories, each
containing 18 items, each containing 5
shelf configurations. There are 19,440 total
uniquely-programmable cooking profiles.
23
Set Oven Parameters
From the “Manager Mode” screen (page 19), touch the “Parameters” icon to edit:
Default Temperature
The temperature to which the oven preheats until a menu is selected (Menu Cook Mode,
see page 8) or the set temperature is changed in Manual Cook Mode (see page 7).
Default Fan
The fan speed to which the oven is set when the oven is cooling down.
Default Fan Rev Time
The interval of time between fan direction reversals.
Cool Down Temp
The temperature to which the cavity must cool before the cooling fan turns off.
Energy Savings Time
The oven will go into energy savings mode if idle for the amount of time entered here. A setting of 00:00 turns this feature off.
Hot Air Energy Savings Temperature
Temperature at which the oven will hold during “Energy Savings” mode.
The selected parameter is
displayed here.
Use numeric keypad to
input new parameter.
Touch one of the icons above to
select and edit it.
oven modes - manager
Touch “Save & Exit” to
save new parameter.
24
oven modes - manager
Set Oven Options
From the “Manager Mode” screen (page 19), touch the “Options” icon to set:
• Manual Mode Passcode
• Ready Beep
• Cook Done
• Bypass Manual/Menu Selection
• Keep Manual Settings While Off
Yes = oven will require a passcode to access Manual
Mode (page 7).
Yes = Manual Mode cannot be accessed.
No = Manual Mode can be accessed.
Yes = Last settings used in Manual Mode are saved.
25
Manage Menu Data
From the “Manager Mode” screen (page 19), touch the “Manage Menu Data” icon.
Touch to add a new menu to the oven.
Touch to download a menu from the oven.
USB Port beneath
oven display
Touch
“Get Menu Data
from USB”
Touch
“Store Menu Data
to USB”
Display shows
menus loaded
to the thumb
drive. Touch a
menu name to
load it to the
oven.
Name the
menu file to
be saved to the
thumb drive.
oven modes - manager
26
oven modes - manager
Update UI Firmware
From the “Manager Mode” screen (page 19), touch the “Update UI Firmware” icon. To
download the latest G5 firmware, visit www.turbochef.com/firmware.
USB Port beneath
oven display
Once the firmware has been downloaded from the TurboChef website
and saved to a USB thumb drive, insert the thumb drive and touch
the “Update UI Firmware” icon. The oven may take several minutes to
complete the update.
NOTE: Some previous versions of the firmware may not have this icon. If
the icon does not exist, unplug the oven, insert the thumb drive with the
new firmware, and then plug the oven back in. The oven will detect the
new firmware and begin loading it.
Update IO Firmware
From the “Manager Mode” screen (page 19), touch the “Update IO Firmware” icon. To
download the latest G5 firmware, visit www.turbochef.com/firmware.
USB Port beneath
oven display
Once the firmware has been downloaded from the TurboChef website
and saved to a USB thumb drive, insert the thumb drive and touch
the “Update IO Firmware” icon. The oven may take several minutes to
complete the update.
NOTE: Some previous versions of the firmware may not have this icon. If
the icon does not exist, unplug the oven, insert the thumb drive with the
new firmware, and then plug the oven back in. The oven will detect the
new firmware and begin loading it.
Service Modes
- Digital Outputs
27
Service Mode
Service Mode allows access to troubleshooting and diagnostic screens.
Start Here
Select
Option
ESC
Enter passcode 9428.
Manager
Service
Factory
Door
Closed
Touch to toggle
between Fahrenheit
and Celsius.
Set calendar time
and date.
Status
Test
Select
Option
ESC
°F
Touch to toggle
between English and
French.
English
Set speaker volume.
View Counters
Fault Log
Touch to view, erase,
or export fault log.
View fault code
descriptions on
page 41.
Touch to view counters.
Test Digital Outputs
Touch to access Digital
Outputs (see page 28 for
additional information).
Door
Closed
Status
Test
service mode
28
service mode
Digital Outputs
Digital Outputs allows testing of oven system components.
Start Here
Select
Option
Select
Option
ESC
ESC
°F
Manager
English
View Counters
Service
Fault Log
Factory
Door
Closed
Test Digital Outputs
Status
Test
Door
Closed
Status
Test
Touch to exit Digital
Outputs screen.
Touch to increase the
BMSC in increments
of 10%. Pressing
at 100% scrolls the
number back to 10%.
Touch to toggle the
motor direction
between Clockwise
(CW) and
Counterclockwise
(CCW).
Touch to set the
Microwave to low,
medium, high, or off.
Select
Option
ESC
BMSC Rotation
CW
BMSC(+)
10%
K8 MW Stirrer /
Cooling Fans
Heaters
Off
Microwave
Off
Mag 1
Mag 2
Mag 3
Burn-in
MW Leak
Test
MW Power
Output Test
RTD
Cavity
MAG 1
MAG 2
MAG 3
Other Inputs
Drive at Spd:
Drive Fault:
MAG 3 Current:
MAG 2 Current:
MAG 1 Current:
Closed
Closed
Closed
Door
Closed
Touch to operate
individual magnetrons.
Touch to initiate a
Microwave Leak Test (see
page 33 for additional
information).
AC Line ADC: 627
AC Line Voltage: 212
Primary:
Secondary:
Monitor:
Touch to turn the
heaters off and on.
Do not use - for
manufacturer use only.
Temp(F)
144
76
74
72
Door Switches
Touch “Burn In” to
begin a 30-minute burn
in. This feature helps
ensure the reliability
of test results by
adequately warming the
cavity walls. Burn in
is not usually required
unless instructed by
TurboChef.
Touch to energize or
de-energize K8.
Status
Test
Displays door switch status.
X
Displays individual RTD
probe(s) diagnostics.
When testing these
inputs, an ‘X’ indicates
that a component is
operating.
Oven Systems
29
Convection System
The convection system rapidly heats and
recirculates air into the cook cavity.
To
From
Description
Expected Resistance
Blue
Brown
Winding (A-B)
6.0-6.3 Ohms
Blue
Black
Winding (A-C)
6.0-6.3 Ohms
Brown
Black
Winding (B-C)
6.0-6.3 Ohms
Blue, Brown,
or White
Ground
Winding to
chassis
Open
This section contains information about the
following components:
- Convection fan
- Frequency drive
- Convection heater
- High-limit thermostat
- RTD (Cavity)
- Solid state relay
Blower Motor Ohm Chart (Motor Windings)
For information on accessing and removing parts,
see the Appendix.
3. If no voltage is present, inspect the wire harness
for damage or open circuit (pages 42 and 45).
Blower Motor
4. If wire harness is intact and undamaged, the
frequency drive is damaged or defective and must be replaced.
The blower motor is 3 phase, thermally protected
and reversible. Its top speed is approximately 1400
RPM at 5 HP, and it is controlled by a frequency
drive controller.
Frequency Drive
The speed of the blower motor is controlled by the
frequency output of the frequency drive. The
frequency drive receives an input voltage (0-10
VDC) from the I/O control board and adjusts the
frequency output to the blower motor. Refer to the
oven schematic on pages 54-65 for voltage to RPM
specifications.
Testing Procedure
CAUTION: Capacitors on the frequency drive may retain charge after power is removed. Wait for the capacitors to discharge for further safety. The display on the frequency drive will be blank once fully discharged.
2. Check the input voltage on terminals L1 and L2
(208-240 VAC) and the DC voltage input on
terminals A1 and AC (0.1-10 VDC).
Convection Heater
The convection heater is a sheathed-style and
is rated at 3000 watts at 208 VAC, with a
resistance of 14.4 Ohms at room temperature. The
convection heater is controlled by the solid state
relay. For steps on testing the heater, see page 37.
High Limit Thermostat
The high limit thermostat is a 250 VAC, 3-pole,
manual-reset thermostat with a trip point of
572ºF (300ºC). The thermostat interrupts power
to the main convection heater in the event of
an abnormal condition. Reset the high-limit
thermostat by pressing the reset button on the
front of the oven near the USB port.
WARNING: DO NOT connect incoming AC power to output terminals U, V, or W.
RTD
RTD Testing Procedure:
1. Ensure that no faults appear on the display
during the operation of the frequency drive. The
control will display the frequency output if
the system is operating correctly.
1.Disconnect the RTD from the control harness (see pages 54-65).
2.Place the RTD in ice water for two minutes.
3.Take a resistance reading of the RTD.
4.If RTD resistance is not 100 Ω (+/- 2 Ω), the
RTD is defective and must be replaced.
oven systems
WARNING: DO NOT change or access parameters unless instructed by TurboChef. Changing the parameters to other than those preset by TurboChef can damage critical oven components.
The RTD probe measures temperature of product
in the oven. If the measurement reads “999°F/C”,
the RTD is open. See page 29 for troubleshooting.
30
oven systems
Solid State Relay
The solid state relay is a 3 channel, single control,
400 VAC, 75-amp relay. It switches power to the
heater at a digital rate for accurate control at 208
and 240 VAC.
Troubleshooting
The following faults may occur in relation to the
convection system:
-F1: Blower (see page 43)
-F2: Low Temp (see page 44)
-F8: Heat Low (see page 48)
The following cooking performance issues may
occur in relation to the convection system:
-Inconsistent/Inaccurate Temperature Readings: (see page 50)
-Food not cooking properly (see page 52)
31
Oven Door
Adjusting the Oven Door
This section contains information about the
following components:
- Oven door
- Interlock switches
- Relay (K5 - Monitor)
- Relay (K6 - Primary)
- Relay (K7 - Secondary)
The oven door must be parallel to the oven frame.
If it is not, it will not seat properly in the capture
pin. See the below illustration; instructions continued on page 32.
This section also contains procedures for:
- Removing/reinstalling the oven door
Top
Top
- Adjusting the oven door
- Measuring RF leakage for microwave safety
Top
For information on accessing and removing parts,
see the Appendix.
The oven door assembly consists of a shunt plate,
skin, and handle. Each of these items can be
serviced and replaced independently.
Oven Door Aligned Properly
NOTE: The proper fit and adjustment of the oven door is essential for safe and reliable oven operation.
Replacing the Oven Door
To remove or reinstall the oven door, follow
Topthe
steps below. For illustrations, see page A-6 of the
Appendix.
Top
1.Ensure the oven has cooled to 150°F (66°C).
2.Remove the tray below the oven door. This will
allow access to the bottom hex bolts securing
the door to the hinge.
Oven Door Misaligned (A)
3.Open the oven door. This will ensure that strain is not placed on the strike pin when the door is removed from its hinges.
4.Remove the two hex bolts on the top-right, where the door meets the hinge.
Top
6.Remove the oven door.
7.Replace the oven door.
8.Complete a microwave leakage test (page 33).
Oven Door Misaligned (B)
oven systems
5.Support the bottom of the door to prevent it from falling off, and remove the two hex screws on the bottom-right, where the door meets the hinge.
32
oven systems
WARNING: This procedure is performed while the oven is hot. To avoid burns, be careful when adjusting the door.
1.Place the oven in manual cook mode (page 7)
and allow it to warm up.
2.Close the oven door.
3.Loosen the hex screws at the top and bottom of the door hinge.
4.Adjust the position of the door/screws/slide
bracket until the door is parallel to the oven
frame and it seats properly in the capture pin.
5.Tighten the screws.
Relay - K6 Primary
The K6 relay is a 240 VAC, 30 amp, double-pole,
double-throw, 24 VDC relay coil. If the primary
switch is opened during cooking, the K6 relay
sends a signal to the control board to interrupt the
microwave circuit and pause cooking.
Relay - K7 Secondary
The K7 relay is a 240 VAC, 30 amp, double-pole,
double-throw, 24 VDC relay coil. If the secondary switch is opened during cooking, the K7 relay
sends a signal to the control board to interrupt the
microwave circuit and pause cooking.
6.Perform a microwave leakage test (see page 33).
Interlock Switches
The primary, secondary, and monitor interlock
switches engage and disengage in sequence to ensure
a proper seal. When the door is opened, the primary
(P) and secondary (S) switches are open, and the
monitor (M) switch is closed. When the door is
closed, the primary (P) and secondary (S) switches
are closed, and the monitor (M) switch is open.
The primary (P) and secondary (S) switches us N/O
contacts, and the monitor (M) switch uses N/C
contacts.
Primary
Monitor
There is no adjustment procedure for the switches.
If a switch is not opening or closing properly,
replace the switch or verify the capture pin assembly
is not damaged.
Relay - K5 Monitor
The K5 monitor relay is a fail safe for the power to
the high-voltage transformers T1, T2, and T3. In
the event of the door opening during microwave
operation, the sole purpose of the K5 monitor
relay is to short L1 to L2, L2 to L3, and L3 to
L1 causing two of the three fuses to open (blow)
immediately to ensure the microwave is disrupted
until authorized repairs are completed.
Secondary
Door Switch Identification
33
Measuring RF Leakage for Microwave Safety
WARNING: This procedure requires work with hot surfaces and water loads. To avoid burns, be careful when testing.
An RF (microwave) leakage test must be performed at
the conclusion of the following service tasks:
- Door removal, replacement, and/or adjustment
- Waveguide removal and/or replacement
- Magnetron removal and/or replacement
- Door switch adjustment and/or replacement
WARNING: If the unit fails the microwave
leakage test (leakage greater than 5mW/cm2), the oven must be taken out of service immediately until the defect is corrected. In addition, the CDRH Regulation 21 Subpart C, 1002.20 requires that leakage readings of over 5mW/cm2 must be reported to the manufacturer.
6. As microwave leakage is observed while moving the sensor, note any meter spike areas that come close to 5mW/cm2 for later re-measurement.
7. Replace the water load every 60 seconds until the test is completed, and also after scanning the door.
8.
Close the oven door and return the meter probe to any “meter spike” areas and allow the probe to remain in the “spike” area for 17 seconds. Note the highest reading obtained.
NOTE: There may be several places on the door
where this procedure needs to be done. If so, start out
with a fresh water load each time a new area is measured, or if measurement of an area takes longer than
60 seconds.
10.After each test is complete, open the oven door and dispose of the hot water.
To measure RF leakage,
1. Turn the oven on and allow it to warm up to the set temperature (approximately 15 minutes if the oven starts cold).
2.
Once the oven has warmed up, go to the Digital Outputs screen (page 28). From the Digital Outputs screen, select “MW Leak Test” and follow the instructions on the screen (also detailed in the following steps).
3. Place a water load into the cook cavity. The water load must conform to the following specifications:
- Volume: 275 ml ± 15 ml
- Temperature: 68ºF ± 9ºF (20ºC ± 5ºC)
- Vessel: Low form, 600 ml beaker with an inside diameter of approximately 3.35” (85 mm) and made of Pyrex or equivalent.
5. Measure microwave emission around the door as shown in the adjacent illustration, moving the meter sensor at 0.5 inches/second.
The following faults may occur in relation to the
oven door:
- F4: Monitor (see page 46)
The following issues may occur in relation to the
oven door:
- “Oven Door Open” message when door is closed (see page 49)
oven systems
4. Close the oven door and press the Enter key. The microwave system will turn on.
Troubleshooting
34
oven systems
Microwave System
Testing a Capacitor
The G5 oven employs a microwave system with three
magnetrons. In the case of an over-current situation, the
F3 fuse will blow, shutting off the system immediately.
This section contains information about the
following components:
- Capacitors
- Fuses
- High-voltage transformers
- High-voltage diodes
- Magnetrons
- Magnetron cooling fans
- Magnetron thermostats
- Relay (K2 - Mag 1)
- Relay (K3 - Mag 2)
- Relay (K4 - Mag 3)
- Relay (K8 - Cooling Fans and Stirrer)
- Stirrer
- Tri-Amp Board
- Waveguides
This section also contains procedures for:
- Testing a capacitor
- Testing a high-voltage diode
- Wiring the high-voltage transformers
- Testing a high-voltage transformer
- Testing a magnetron for an open/shorted
filament
For information on accessing and removing parts, see
the Appendix.
Capacitors
- Capacitor rating is 0.91uF, 2500 VDC for all 60 Hz installations (except Japan).
- Capacitor rating is 1.15uF, 2500 VDC for all 50 Hz installations.
- Capacitor rating is 0.85uF, 2500 VDC for
60 Hz Japan installations.
DANGER: Never attempt any measurement
of the capacitors while they are enabled. Lethal voltage will be present. Measure only
in compliance with these procedures.
1.Disconnect the oven from the power source.
2.Fully discharge the capacitor.
3.Isolate the capacitor from the circuit.
4.Check for an open or shorted capacitor by placing
ohmmeter leads between the capacitor terminals:
- Escalating ohm readings = capacitor OK
- Constant infinite resistance = capacitor open
- Constant very low resistance = capacitor shorted
5.If the capacitor is not open or shorted, set the meter to measure capacitance and again place the leads between the capacitor terminals. The meter reading should equal the label value, plus or minus 10%. If not, replace the capacitor.
Fuses
The F1, F2, and F3 fuses are 20-amp, ATMR, class CC
for delta configurations and 12-amp, ATMR, class CC for
WYE configurations.
The F1 fuse (via white wire) is designed to blow if
an over-current situation is encountered by mag 1 or
mag 3. The F2 fuse (via red wire) is designed to blow
if an over-current situation is encountered by mag 1
or mag 2, and the F3 fuse (via black wire) is designed
to blow if an over-current situation is encountered by
mag 1 or mag 3.
High-Voltage Transformers
High-voltage transformers are ferro-resonant, which
limits faulty currents and minimizes magnetron
power changes due to input voltage changes. The
high-voltage transformer supplies the high voltage for
the voltage doubler circuit. The high-voltage transformers also preheat the magnetron filament, supplying approximately 3.15 VAC at 10 amps to each
magnetron filament.
35
Wiring the High-Voltage Transformers
DANGER: Never attempt to wire or
measure the secondary voltage values of the high-voltage transformers. Lethal voltage will be present.
The proper reinstallation of a high-voltage transformer is critical. Upon removing a high-voltage
transformer, make sure to note where each wire was
installed. Refer to the oven schematic (pages 54-65)
for wiring detail.
As shown in the schematic, the G5 is a 3-phase system with L1 and L2 at T1, L2 and L3 at T2, and
L3 and L1 at T3. The international model (5-wire,
400 VAC, 50 Hz) uses L1 and N for T1, L2 and
N for T2, and L3 and N for T3. This places the
magnetrons out-of-phase by 120º. It is essential for
longevity that the high-voltage transformers and
magnetron tubes remain 120º out-of-phase.
With the microwave system energized, the volt
meter will read the incoming voltage (different readings for different electrical installations). If the meter
reads 0 VAC, the high-voltage transformer’s primary or secondary is open. If shorted, this would
blow a fuse and the high-voltage transformer would
need to be removed and replaced. As a last check,
energize the microwave system and verify the volt-
ages between the primary taps on each high-voltage
transformer. The wiring issue must be corrected
prior to returning the oven to service, as the voltages must be:
- u.s./canada: 208 VAC between 1 & 2 and 240 between 1 & 3.
- international: 230 VAC at terminal 1 and neutral at terminal 3
NOTE: The orange wire always goes to terminal 3
on US models.
Testing a High-Voltage Transformer
DANGER: Never attempt to measure the secondary voltage values of the HV transformers. Lethal voltage will be present.
1.Disconnect the AC power source and discharge the high-voltage capacitors.
2.Disconnect all the wires in question going to and
from the transformer.
3.Use an ohmmeter to check the resistance of the primary and secondary winding. Refer to the
table below to determine if the transformer is
operating properly. If the resistance is different
than the table indicates, replace the transformer.
High Voltage
Transformers
Primary Voltage, Frequency,
Taps, and Resistance
Secondary Taps and
Resistance
RWD-3032
208 VAC, 50/60 Hz, 1 & 2, 4, Ground, 70–72 Ω
1.2 Ω
240 VAC, 50/60 Hz, 1 & 3, 1.4 Ω
102103
230 VAC, 50 Hz, 1 & 2,
0.972–1.188 Ω
Filament Secondary
and Resistance
Solid red wires 5 & 6,
0.1–0.2 Ω
3, Ground, 57.52–70.30 Ω
oven systems
36
oven systems
High-Voltage Diodes
Magnetrons
The high-voltage diode (see below) is assembled by
connecting several 1000-1500 volt semi-conductor
diodes in a series to increase the reverse voltage capability.
In the circuit, the high-voltage diode conducts to prevent
the filament voltage from becoming positive, thus as the
high-voltage winding of the transformer goes to a peak of
2400 volts, the high-voltage capacitor is charged to 2400
volts.
Magnetrons supply the RF energy at 2.45 GHz and
begin to oscillate when they are supplied with approximately 4.1 kVDC at approximately .350 mA. During
operation, each magnetron will output a nominal 1 kW
of power.
Perform a microwave leakage test (page 33) after installing a new magnetron or reinstalling an old one.
CAUTION: Do not allow debris to enter
the waveguides when servicing the magnetrons.
Magnetron Cooling Fans
When the high-voltage winding starts to go toward
negative, the high-voltage diode becomes nonconducting with the charged high-voltage capacitor in series with the high-voltage winding. When the
transformer gets to its negative peak of -2400 volts, the voltage applied to the filament is -4500 volts. The
high-voltage diodes are rated at 16 kVDC.
Testing a High-Voltage Diode
DANGER: Never attempt to measure high
voltage directly. Death or serious injury could result.
1. Disconnect the oven from the power source.
2. Fully discharge the capacitors.
3.Connect the voltage meter in series with high voltage diode.
4.Using a multimeter set to DC voltage, connect
one meter lead to one side of a 9-volt battery and the other lead to one side of the high-voltage diode.
5.Connect the other side of the 9-volt battery to the other side of the high-voltage diode. DC voltage should be present on the meter in only one direction.
6.Switch the meter leads on the high-voltage diode,
which will cause the opposite reading to be visible. Depending on the voltage of the battery, voltage between 5-7 VDC should be present in only one direction and 0-0.1 VDC in the other direction.
Three magnetron cooling fans (located behind the
rear oven panel) are actuated by the K8 relay when the
magnetrons are in operation, and remain on for four
minutes and fifteen seconds after the magnetrons turn
off. They operate at:
-208/240 VAC (60 Hz with voltage sensing)
-220 VAC (60 Hz with no voltage sensing)
-230 VAC (50 Hz installations)
Magnetron Thermostats
The magnetron thermostats are “open-on rise.” They
are designed to open at 270ºF (132ºC), which triggers
an F5 fault.
NOTE: The magnetron thermostats are wired in series.
If one opens, the control will switch off all three magnetrons until the open thermostat closes. The thermostats are self-resetting.
Testing a Magnetron for an Open/Shorted
Filament
DANGER: The only safe way to test a
magnetron is by a resistance test of its
filament. Never attempt to measure the
magnetron using any other method while the
microwave system is on. Death or serious
injury could occur.
1.Disconnect the AC power source and discharge the
high-voltage capacitors.
37
2.Isolate the magnetron from the circuit by removing the wires from the F and FA terminals
(see below).
3.An ohmmeter connected between the filament
terminals (F, FA) should indicate a reading of less
than 1 ohm (see below).
fA
Tri-Amp Board
The tri-amp board contains three current transformers
for sensing magnetron current to K2, K3, and/or K4.
Mag 1 is measured at the top CT (white wire), mag 2
at the middle CT (red wire), and mag 3 at the bottom
CT (black wire).
Waveguides
f
fIlAMenT AnD
Filament
and High
HIGH VOlTAGe
Voltage Terminals
TerMInAlS
The waveguides channel microwave into the cook
cavity. If debris or contamination gets into the waveguides, the life of the magnetrons may be shortened.
Be careful to not allow debris into the waveguides
when servicing the magnetrons or stirrer assembly.
Troubleshooting
Antenna
AnTennA
4.A continuity check between either filament
terminal and the magnetron chassis should indicate an infinite resistance (open).
CAUTION: Do not allow debris to enter
the waveguides when servicing the magnetrons.
Relay - K2, K3, K4 Anode
The K2, K3, and K4 relays are 240 V, 30 amp,
DPDT type with a 24 VDC coil. They provide
power to the T1-1, T2-1, and T3-1 legs of the
high-voltage transformers T1, T2, and T3, respectively.
The following faults may occur in relation to the
microwave system:
F3-1 - Mag 1 current low
F3-2 - Mag 2 current low
F3-3 - Mag 3 current low
F5-1 - Mag 1 over temperature
F5-2 - Mag 2 over temperature
F5-3 - Mag 3 over temperature
The following issues may occur in relation to the
microwave system:
- Electrical component failure (blank or
scrambled display, damaged control board, etc.)
- Food not cooking properly (see page 52)
- Fuse blown (see page 34)
Relay - K8 Magnetron Cooling Fans
The K8 relay is 240 V, 30 amp, DPDT type with a
24 VDC coil. It switches power to the magnetron
cooling fans and stirrer motor when the magnetron filaments are actuated or when the RTD measures
150° F or greater. There is no timer control for the
circuit.
oven systems
38
oven systems
Control System
This section contains information about the
following components:
- User interface
- Relay I/O board
- Speaker
- USB port
User Interface
The G5 employs a resistive touch-screen display as
the primary user interface. 24 VDC is supplied from
the control board through the 4-pin power data
cable. 24 VDC is used for the backlighting and logic
systems.
Relay I/O Board
The relay board signals each oven component based
on commands from the keypad. 24 VDC can be
measured at pin 2 of the J7 connector to confirm
control voltage is being applied.
Speaker
The speaker provides audible feedback to the oven
operator whenever a key is pressed or a task (such as
a cook cycle) is completed.
USB Port
The USB port allows the user to upload or download menu settings to a USB storage device.
Troubleshooting
The control system could potentially be related to
the cause of any fault (see pages 41-48 for detailed
fault troubleshooting).
The control system might also be related to any
issue diagnosed in the section “Non-Fault Code
Troubleshooting” on pages 49-52.
39
Electrical Components
This section contains information about the
following components:
- Circuit breaker
- Electrical compartment cooling fan
- Electrical compartment cooling fan thermostat
- EMI filter
- Power supply, 24 VDC
- Relay (K1 - Voltage)
- 24 VAC transformer
- Wire harness(es)
Circuit Breaker
The auxiliary breaker is a 20-amp breaker that is
designed to trip in case any component within the auxiliary circuit (fans, stirrer, BMSC, relays, etc.) experiences
an over-current situation.
24 VAC Transformer
For North America models only. Voltage selection is
completed at the time of manufacture; however, if
incoming voltage for the store is different than the preset voltage, the operator will be required to switch the
taps to either 208 or 240 before plugging the oven in.
24 VAC
J19-1
Black
24 VAC
J19-3
White
COM
Voltage
Transformer
Electrical Compartment Cooling Fan
Wire Harness
The electrical compartment cooling fan is
actuated by the cooling fan thermostat when
the temperature of the electrical compartment reaches
120ºF (49ºC).
Troubleshooting
Electrical Compartment Cooling Fan
Thermostat
The cooling fan thermostat actuates the electrical compartment cooling fan when the electrical compartment
temperature reaches 120ºF (49ºC).
Blue
208 VAC
Brown
240 VAC
The wire harness distributes power to the oven’s electrical components. See pages 54-65 for a schematic.
The electrical components could potentially be related
to the cause of any fault (see pages 41-48 for detailed
fault troubleshooting).
The control system might also be related to any
issue diagnosed in the section “Non-Fault Code
Troubleshooting” on pages 49-52.
EMI Filter
The EMI filter helps suppress the amount of RF interference emitted by the oven.
Power Supply
The power supply outputs 24 VDC at 50 watts to the
control board and relays.
Relay - K1 Voltage
oven systems
The K1 relay is a 240 VAC, 30 amp, three-pole, double-throw, 24 VDC relay coil. Operational in North
America only, it switches between 208 and 240 VAC
on the HV transformer taps (depending on incoming
voltage). Through the voltage transformer, the oven
defaults to the 240V position and switches to 208 if
less than 227 volts is detected.
40
oven systems
This page intentionally
left blank.
Troubleshooting
41
Overview of Troubleshooting
This section contains information on the
following:
- Fault code descriptions
- Fault code troubleshooting
- Non-fault code troubleshooting
View the fault log from the Service Mode screen
(page 27). For information and illustrations on
replacing components, see the appendix.
Fault Code Descriptions
F1: Blower Running Status Bad
This fault is displayed when running status is not
detected for a continuous 30-second time period. If
a fault is detected, the control will terminate a cook
cycle and display “F1: Blower.”
A one-second “stop and retry” occurs 15 seconds
into this 30-second time period. If the restart is
successful, the fault code will be cleared from the
display. The fault is also cleared from the display at
the onset of cooking or when the blower motor
digital output is tested (page 16).
F2: Cook Temperature Low
This fault is displayed if the cook cavity temperature
is more than 84ºF (47ºC) below the set temperature
during a cook cycle.
The fault is cleared from the display at the onset
of cooking if the cook cavity temperature is within
84ºF (47ºC) of the set temperature or when the
heater is turned on when testing digital outputs
(page 16).
F4: Door Monitor Defective
This fault is displayed when the control detects
that the monitor interlock switch opens before the
primary or secondary interlock switches open. This
fault will blow the F3 fuse if the microwave high
voltage system is energized when the fault occurs.
The fault is cleared from the display when the oven
is powered off and then back on.
For switch identification, see page 20. To view a
schematic, see page 42-45. The fault is monitored
during a cook cycle when the microwave is on, as
well as when testing digital outputs (page 16).
F5 (-1, -2, or-3): Magnetron Over Temperature
This fault is displayed when magnetron 1, 2, or 3 thermostat reaches 270ºF (132ºC).
The thermostat will reset automatically; the magnetron thermostats are wired in series. The fault is
cleared from the display at the onset of a cook cycle
if the thermostat is closed.
F8: Heat Low
This fault displays when the oven is warming up if
the cook cavity temperature fails to rise at least 14ºF
(7ºC) within a given 30 seconds.
troubleshooting
F3 (-1, -2, -3): Magnetron Current Low
This fault is displayed when less than 10 amps of
current is detected at the tri-amp board (see schematic, page 44) for magnetron 1, 2, or 3 after it has
been on for at least 10 seconds. The fault is monitored when the microwave is on during a cook cycle
or while testing digital outputs (page 16).
The fault is cleared from the display at the onset of a
cook cycle if the current transformer on the tri-amp
board detects 10 amps, or when the magnetrons are
successfully energized while testing digital outputs
(page 16).
42
troubleshooting
Fault Code and Description
When Active
Warmup
F1: Blower Running Status Bad
a
Refer to...
Idle
Cooking
a
a
Test Digital
Outputs
a
Page 43
F2: Cook Temperature Low
a
F3 (-1, -2, -3): Magnetron 1, 2, or 3 Current Low
a
a
Page 45
F4: Door Monitor Defective
a
a
Page 46
F5 (-1, -2, or -3): Magnetron 1, 2, or 3 Over Temperature
a
a
Page 47
F8: H
eat Low
a
Page 44
Page 48
Fault codes are listed in order of hierarchy. For example, if during cooking the oven experiences an F1
and F2 fault, the oven will report only the F1 fault because the software will halt all actions upon
discovering the F1 fault.
All fault conditions except F8 will terminate a cook cycle upon discovery.
43
Fault Code Troubleshooting
For instructions on testing G5 oven components, refer to the oven systems section (pages 29-39). To
locate oven components for testing, adjustment, or replacement, see the Appendix.
Troubleshooting:
F1: BLOWER (Blower Running Status Bad)
Is the blower motor
spinning freely?
NO
Is the BMSC Alarm
LED lit?
YES
Replace the
BMSC.
NO
YES
Remove obstruction
or if necessary, replace
blower motor.
Replace the I/O
relay board.
Do resistance measurements between windings
and chassis agree with
values on motor windings
resistance table (below)?
Check 24 VAC unregulated
at J19 pins 1 and 3. Is the
unregulated VAC present?
YES
NO
NO
YES
Locate J7 on the I/O relay
board. Is 1-10 VDC present on
J7 pins 1 and 2?
YES
NO
Check J19 pins 1 and
3 to transformer. Is
there a connection?
Replace blower
motor.
Check 6 and 8 pin molex
connectors at BMSC (frequency drive).
NO
YES
Check continuity to BMSC, J7-1 to
pin 7 of 8 on BMSC 8 pin molex connector and pin 8 of 8 on BMSC 8 pin
molex connector. Is there continuity?
NO
YES
Repair wire.
Repair or adjust wires in connector for
proper point-to-point connections.
Replace transformer.
To
From
Description
Expected Resistance
1
Brown
Blue
Winding (A-B)
6.0-6.5 Ohms
2
Blue
Black
Winding (B-C)
6.0-6.5 Ohms
3
Black
Brown
Winding (C-A)
6.0-6.5 Ohms
1, 2, and 3
Black, Red, or White
Green/Ground
Windings to Chassis
Open – ∞ Ohms
Motor Windings Resistance Table
troubleshooting
Pin Number
44
troubleshooting
NOTE: Refer to the oven schematic on pages 54-65 for more details.
Troubleshooting:
F2: LOW TMP (Cook Temperature Low)
Reset and determine
why it tripped – excess
grease buildup, no blower,
shorted element, etc. The
reset button is on the front
of the oven beneath the
display.
YES
Is the high-limit
thermostat tripped?
NO
Determine if the elements are defective. Remove the wiring that connects
the elements to the current from the
SSR at the cold pin. At room temperature, the element resistance should
be 13.9 Ohms for 12 kW and 17.9
Ohms for 9 kW. Are the elements
defective?
YES
NO
Replace the defective
element set.
Is the wiring from the
solid state relay to the
I/O relay board okay? A
green LED on the solid
state relay indicates signal
from I/O relay board.
YES
NO
From the Digital Outputs screen
(see page 28), turn on the heat. Is
the solid state relay defective?
NO
YES
Replace the solid state relay.
Is the RTD functioning
properly? (See page 29
for testing instructions.)
YES
Replace the I/O
relay board.
Correct the wiring (black from
J9-2 and red +24 VDC from
the DC power supply.
NO
Ensure the wiring is correct for
RTD input on I/O relay board.
45
Troubleshooting:
F3 (-1, -2, or -3 refers to magnetron): MAG CURR (Magnetron Current Low)
From the Digital Outputs
WYE
screen (see page 28), energize the magnetrons. Are
there 9-10 amps (Delta) or
7-8 amps (WYE) present
on the current transformer
NO
wire, located on the tri-amp
board?
YES
Run test cook cycles
YES
to see if fault repeats
(page 18). If not, clear
faults. Does the F3
fault still appear?
NO
Remove and inspect the magnetrons for discolored antennas or
waveguide contaminants. Were
any defects found?
YES
Replace the
defective parts.
NO
Reinstall all
parts and
place the
oven back in
service.
NO
DELTA
HIGH
Confirm the F1 (L1),
F2 (L2), and F3 fuses
are 12 amp for WYE
and 20 amp for delta.
Are they open/blown?
Do you see the current
when the fault(s) occur?
NO
Replace the tri-amp
board.
Energize the magnetrons and test
for the same voltage drop at pin
A to relays K2,
K3, and/or K4.
Is there a voltage
drop at pin A?
NO
YES
LOW
Is the K1 relay energized?
NO
YES
NO
Determine if the voltage is 240 VAC or 208
VAC by looking at the
EMI filter (between
L1, L2, and L3). Is the
K1 relay controlled by
input from the J15 pin
9 (low) for 208 VAC or
I/O relay board (high)
for 240 VAC?
Replace the K1 relay.
Is primary voltage present at the
high-voltage transformers (208:
transformer to terminal 1 and 2
/ 240: transformer to terminal 1
and 3)?
NEVER TEST SECONDARY VOLTAGES
NO
Energize the magnetrons
effected and test for conYES
trol to relays K2, K3,
Replace the I/O
NO
and/or K4. Does the 24
relay board.
VDC drop when energizing the magnetrons?
Replace the
effected fuses
and verify the
operation of the
interlock switches (page 32).
YES
Inspect and repair
the wiring between
J15 at pins 6, 7, and
8 and K2, K3, and/
or K4 at pin A.
Is the 208/240
line voltage present at the respective transformers?
Remove and
replace the damaged capacitor.
YES
YES
Test transformers. Is there
damage to the transformers?
YES
Remove and replace the damaged transformer(s).
NO
Test the HV
diode. Is there
damage to the
diode?
NO
YES NO
Test the HV capacitor. Is
there damage to the capacitor?
Replace the HV diode.
Replace the magnetrons.
troubleshooting
Check line voltage
wires between the
K2, K3, and K4
anode relays. All
three loop out to
magnetrons and pass
across a snap switch
on each magnetron.
Is the oven wired at the EMI filter for
4-wire delta or 5-wire WYE?
46
troubleshooting
Warm oven to operating temperature for at least fifteen minutes. From the Digital Outputs screen (page
28), view the status indicators. Open and close the door repeatedly. The primary, secondary, and monitor
interlock switches engage and disengage in sequence to ensure a proper seal. When the door is open, the
primary (P) and secondary (S) switches are open, and the monitor (M) switch is closed. When the door is
closed, the primary (P) and secondary (S) switches are closed, and the monitor (M) switch is open.
NOTE: The order between the primary and secondary switches does not matter. When closing the door,
the monitor must open before the primary and secondary switches close. When opening the door, the primary and secondary switches must open before the monitor closes.
Troubleshooting:
F4: MONITOR (Door Monitor Defective)
NO
Are the switches
bent or damaged?
Are the switches opening in the correct sequence (P, S, M) while the
oven is hot? (Ensure the oven has
been at operating temperature for at
least fifteen minutes.) To access the
Digital Outputs screen or for info
on status indicators, see page 28.
YES
Lower the front control panel to
access the interlock mechanism.
Are there any loose wires going to
the switch(es)?
YES
Replace damaged
switch(es).
YES
Refer to the oven
schematic on
pages 54-65 for
proper wiring.
47
Troubleshooting:
F5: MAG TEMP (Magnetron Over Temperature)
Verify wiring and check K8
for control from J15, pin
9 (violet) on the I/O relay
board. Is there a voltage
drop?
NO
Replace the I/O
relay board.
YES
Switch the fan cord to see if
the magnetron fan is faulty.
If the problem follows the
wiring, check the wiring of
the other mag fans.
NO
Remove the back and left side panels. From the Digital Outputs screen
(page 28), check the magnetrons by
pressing K8/Mag Fans/Transformer.
Are all of the cooling fans operating?
YES
Is the air path into the electrical compartment blocked or
clogged with debris? Check
the cooling fan finger guards
and filter on the back panel.
NO
YES
Do the magnetrons operate at the
correct current on the tri-amp board?
Fault message
should disappear.
YES
Remove the debris
or reposition the
oven away from
obstruction.
NO
Verify wiring to mag blowers
and mag RTDs is correct. Is
the current continuous?
NO
YES
Check the wiring
and verify everything is correct.
YES
Replace the magnetron(s) and test
again from the Digital Outputs
screen (page 28). Do the magnetrons pass testing and do all of
the fans come on?
NO
Replace the I/O relay board.
troubleshooting
48
troubleshooting
Troubleshooting:
F8: HEAT LOW
YES
Is the high-limit
thermostat tripped?
NO
Is the blower motor moving air? From
the Digital Outputs screen (page 28),
select % Blower to toggle the blower
speed between 10% - 100%. Is the
blower motor operating correctly?
See page 43
to troubleshoot
F1: BLOWER
(Blower Running
Status Bad)
Are the convection heater elements defective?
YES
YES
Reset and determine
why it tripped –
excess grease buildup,
etc. The reset button
is on the front panel
near the USB port.
NO
Replace the defective elements.
Properly rewire
the elements and
plug the oven
back in. From the
Digital Outputs
screen (page 28),
select Heat. Does
the SSR green
LED flash?
YES
Let the oven come to temperature and then
check the SSR with an ammeter to ensure it
has not shorted.
NO
NO
YES
NO
Remove power from the oven. Next
remove the wires from the left side of the
elements’ power and jumper wires. The
resistance should be 13.9 Ohms for the
12kW set and 17.9 Ohms for the 9kW
set. Is the resistance correct?
Check J9 at pin 2 (black)
on the I/O relay board for
an active signal. Does the
meter show activity?
YES
NO
Replace the I/O relay
board.
49
Non-Fault Code Troubleshooting
This section provides troubleshooting tips for issues that may occur independently of an oven fault.
Troubleshooting:
“Oven Door Open” Message when Door is Closed
NOTE: There is no adjustment for the switch assembly.
From the Digital Outputs
screen (page 28), observe the
status indicators while slowly
opening and closing the door.
Do all three door switches
close (P, S, M) and open
(M,S,P)?
Is the “F4 MONITOR” fault present? YES
NO
Refer to troubleshooting procedures
on page 46.
YES
NO
Check the door-todoor hinge connection. Is the door loose
on the hinge arms?
YES
Adjust/replace pivots
(page 31).
NO
Check the door gasket
and sealing perimeter for
obstructions.
Is the switch wiring to the I/O
relay board intact and connected?
YES
YES
Check door switch
assembly. Do the bayonets contact the door
switches properly?
NO
Correct wiring.
NO
Replace broken or
jammed assembly.
troubleshooting
50
troubleshooting
Troubleshooting:
Cooling Verification
Is the oven in an area of moderate
temperature (120ºF [49ºC] or cooler)?
YES
Does the oven have
room to ventilate?
Required clearances:
Top: 5” (127 mm)
Back/Sides: 2” (51 mm)
NO
YES
Are the fans rotating
freely?
NO
YES
NO
Relocate oven to
cooler area.
Move oven to an open area or
remove items that are in close
proximity. See page 3.
Is the wire harness properly
connected? Check cooling
fan thermostat located on the SSR
by shorting it with an insulated tool
such as a nut driver.
NO
YES
Check for obstructions in
the airflow and remove
them and clean the filter.
Replace defective
component.
Correct wiring.
Troubleshooting:
Inconsistent/Inaccurate Temperature Readings
Test RTD resistance
(page 29). Is the RTD
open?
YES
Is the RTD properly connected to the
I/O relay board? (See pages 54-65 for
schematic.)
YES
Replace the RTD.
NO
Replace the I/O relay board.
Did this resolve the issue?
NO
NO
Correct connection.
Replace user interface.
51
Troubleshooting:
No Display – Screen is Blank
Does wiring from the
I/O relay board to the user
interface have any chafing,
cuts, pinching, etc?
NO
Is the 24 VAC from the step
down transformer coming to the
I/O relay board via J19, pins 1
and 3?
Reset the breaker located on the front panel.
YES
NO
Correct wiring or
replace the transformer. Is the
issue resolved?
NO
Correct wiring. If
ribbon cable is
damaged, replace it.
NO
Is the braided wire
from J5 pins 1-4
connected to J10 of
the user interface?
YES
Is the correct voltage, 24 VDC,
on J10 at pins 1 and 4? (Pins 2
and 3 are data lines.)
YES
NO
YES
Connect braided cable.
NO
Reset breaker on the lower panel.
Replace the user
interface.
Replace the I/O relay board.
Troubleshooting:
No Display – Screen is Blinking or Resetting
NO
Remove the speaker wire
from the touch screen. Does
the display come on?
Remove power from the oven and check outputs
from J15, J7, J9, etc. Did you find a short?
Replace the user interface.
Remove the speaker from the front
panel and isolate/insulate speaker
cone wires from the perforated holes.
Remove burrs from the panel and
reassemble using spacer washers on the
speaker so it will not short out.
troubleshooting
NO
YES
52
troubleshooting
Troubleshooting:
Food Not Cooking Properly
Does the problem occur for all
programmed recipes? For example, are all
recipes undercooked/overcooked/etc.?
YES
Are there any fault codes
present? See page 41.
Troubleshoot the
fault(s) using the steps
on pages 43-48.
NO
Is the food item in the
correct starting state
(e.g., frozen, fresh, etc.)?
YES
Are the menu settings correct?
Verify with customer or
contact TurboChef Customer
Service.
NO
NO
NO
Is the correct amount
of food (portion) being
cooked?
NO
Are the menu settings correct?
Verify with customer or
contact TurboChef Customer
Service.
YES
NO
Replace the I/O relay
board.
YES
Ensure the food item
is being properly
stored/prepared
before cooking.
YES
Contact Customer
Service to obtain the
correct menu and load
it to the oven.
YES
NO
YES
Ensure that the correct amount is being
cooked - not more or
less than the recipe
specifies.
Does the problem
occur EVERY time the
food item is cooked?
Troubleshoot the
fault(s) using the steps
on pages 43-48.
Is the food item being prepared correctly
and consistently? For example, bread cuts
are straight and not “V” cuts, meat is
sliced at correct thickness, pizza dough is
correct consistency, etc.
YES
NO
YES
Are there any fault
codes present? See
page 41.
NO
Ensure that the food
item is properly
prepared.
Oven Schematic
53
G5 Oven Schematic
This section provides an overall wiring schematic for the G5 oven.
The following drawings are provided:
- Oven Schematic: U.S. and Canada (pages 54-59)
-
Oven Schematic: International (pages 60-65)
oven schematic
54
oven schematic
55
Schematic: U.S. and Canada
oven schematic
56
oven schematic
57
oven schematic
58
oven schematic
59
oven schematic
60
oven schematic
61
Schematic: International
oven schematic
62
oven schematic
63
oven schematic
64
oven schematic
65
oven schematic
66
oven schematic
This page intentionally
left blank.
Appendix: Replacing
Oven Components
A-1
Replacing Oven Components
This appendix provides illustrations for removing serviceable items, as well as the item numbers and
descriptions for those items. It also includes the item numbers and descriptions for the hardware
used to secure each component to the oven chassis.
The appendix is divided into the following sections:
- Oven Exterior (pages A-2 through A-3)
- Convection System (pages A-4 through A-5)
- Oven Door and Related Parts (pages A-6 through A-7)
- Microwave System (pages A-8 through A-9)
- Controls System (pages A-10 through A-11)
- Electrical System (pages A-12 through A-13)
If you have any questions that are not addressed in this manual or appendix, please contact
TurboChef Customer Service at 800.90TURBO or +1 214.379.6000.
APPENDIX - REPLACING OVEN COMPONENTS
A-2
APPENDIX - REPLACING OVEN COMPONENTS
Oven Exterior
DANGER: Before removing any oven part, be sure the oven has completed “cooling down” and is removed from the power source.
NOTE: Oven door, air filter, and oven racks not shown for clarity.
20
26
18
13
22 21
17
10
24
8
9
14
12
11
23
1
25 16
28
4
27
5
Figure A-1: Exterior, Front
6
24
7
29
19
Figure A-2: Exterior, Rear
2
3
15
A-3
Figure
Reference #
Item Description
Item Part Number
Hardware Description
Hardware Part Number(s)
1
Baffle
G5-9118
None
N/A
2
Bracket, Power Cord
G5-9035
Screw, #8 x 1/2, Serr Ph Truss Hd, Sheet Mtl 101688 (x3)
3
Bracket, Rear Fan
G5-9116
Screw, #10-32 X .38 LG, 100 Deg, Pflhd, SS 101401 (x4)
4
Cover, Back
G5-9030
Screw, #10-32 x 3/8, Phtrh, SS
101692 (x7) / 100104 (x1)
Screw, #10-32 X 1/2, Btn Hd, Torx w/ Post, Cres
5
Cover, Exhaust Vent
G5-9065
Screw, #8 x 1/2, Serr Ph Truss Hd, Sheet Mtl 101688 (x4)
6
Cover, Left Rear with Tabs
G5-9063
Screw, #10-32 X 1/2, Btn Hd, Torx w/ Post, Cres 100104
7
Cover, Left Side with Louvers
G5-9066
Screw, #10-32 X 1/2, Btn Hd, Torx w/ Post, Cres 100104
8
Cover, Right Rear with Louvers
G5-9067
Screw, #10-32 X 1/2, Btn Hd, Torx w/ Post, Cres 100104
9
Cover, Right Side with Tabs
G5-9062
Screw, #10-32 X 1/2, Btn Hd, Torx w/ Post, Cres 100104
10
Cover, Top
G5-9053
None
N/A
11
Cover, USB
100427
None
N/A
12
Decal, Lower
G5-9034
None
N/A
13
Decal, Upper
G5-9033
None
N/A
14
Filter, Air
i5-9039
None
N/A
15
Guard, Finger (x3)
100086
Screw, Hex Hd, #10-32 x 1/2 Lg, Cres, Type 23 101408 (x2 ea)
16
Gutter
G5-9107
None
17
Match Plate
G5-9281
Screw, 1/4-20 x .50, Hex Serr Washer Hd, SS 101394 (x4)
18
Panel, Control
G5-9043
Tape, Teflon, Gore-Tex, 1/4 X .04 Thk
102019 (as required)
19
Power Cord
Contact Factory
None
N/A
20
Rack (x5)
G5-9168
None
N/A
21
Rack Support, Left
G5-9247
None
N/A
22
Rack Support, Right
G5-9248
None
N/A
23
Trim, Center
G5-9102
None
N/A
24
Trim, Frame (x2)
G5-9101
None
N/A
25
Trim, Front
G5-9110
Screw, Pfh, SS, 82°, 1/4-20 X 1/2 Lg
101424 (x2)
26
Trim, Left Front Corner
G5-9103
None
N/A
27
Trim, Left Rear
G5-9106
None
N/A
28
Trim, Right Front
G5-9104
None
N/A
29
Trim, Right Rear
G5-9105
None
N/A
N/A
APPENDIX - REPLACING OVEN COMPONENTS
A-4
APPENDIX - REPLACING OVEN COMPONENTS
Convection System
DANGER: Before removing any oven part, be sure the oven has completed “cooling down” and is removed from the power source.
NOTE: For clarity, some components have been removed from the illustrations below.
14
9
7
10
2
8
4
1
6
11
12
5
Figure A-3: Electrical Compartment
3
Figure A-4: Interior, Baffle Removed
A-5
Figure
Reference #
1
Item Description
Item Part Number
Hardware Description
Hardware Part
Number(s)
Bracket, Motor Mount
G5-9138
Nut, 1/4 - 20, Serr Hex Flange, Plated
100906 (x4)
Spacer, G5, Blower Motor
Nut, Hex Washer Hd, 5/16 - 18
Key Stock, 3/16" Square X 1.75" Long, 316 SS
Shaft, Rotary Seal
Cover, Bearing
2
Convection Fan
G5-9141
3
Convection Wheel
G5-9140
4
Exhaust Vent
G5-9021
Nut, 1/4-20, Serr Hex Flange, Zinc
5
Heater
G5-9148
Screw, #10-32 x 3/8, Hex, Serr SS
Gasket, RF, Mesh Be/Cc, Wpsa
G5-9139 (x4)
100904 (x4)
103699
G5-9144
G5-9145
100906 (x5)
101018
102021
101397 (x9)
102021
6
Insulation, Convection Motor
G5-9264
None
N/A
7
Inverter Drive
100451
Screw, #8 x 1/2, Serr Ph Truss Hd, Sheet Mtl 101688 (x2)
8
Plate, Blower Insulation
G5-9142
See G5-9141
9
Resistor, Motor Braking
100452
Screw, #8 x 1/2, Serr Ph Truss Hd, Sheet Mtl 101688 (x2)
10
RTD, G5, 1000 OHM
G5-9090
Tape, High-Temp 2.5 Inch
11
SSR with Heatsink
G5-9064
Screw, #8 x 1/2, Serr Ph Truss Hd, Sheet Mtl 101688 (x4)
12
Thermostat Clamp (x2)
NGC-1152
Nut, #8-32, Kep, Ext Tooth, SS
102962 (1 ea)
Screw, M4 X 8mm LG, PFH 90 DEG, Steel-Zinc
Nut, #6-32, Kep, Ext Tooth, SS
Bracket, High-Limit
Screw, 1/4 - 20 X 3/4, Truss, Phil, Ms, Sst
Washer, Flat, SS, Sm Pattern, 1/4” ID, 1/2” Od
Nut, Hex, Locking, 1/4” X 20, Not Nylon
101735 (x2)
102961 (x2)
G5-9054
101399
102252 (x2)
101008
See G5-9141
102026
13
Thermostat, 3 Pole, High Limit
102075
14
Vent Cap
G5-9023
Not Shown
Housing, Motor Shaft Seal
G5-9143
None
N/A
Not Shown
Washer, Wave Spring
102436
None
N/A
Not Shown
Brass Plate, Shaft Seal
G5-9146
None
N/A
Not Shown
Sealing Block, Motor
NGC-1024
None
N/A
Not Shown
Seal, Rotary Shaft
G5-9144
None
N/A
G5-9145
Screw, #10 - 32 X 3/4, PPH SEMS
Screw, #10 - 32 X 1”, PPH SEMS
Nut, #10 - 32, Kep, Ext Tooth
102937 (x2)
102938 (x2)
102963 (x2)
Not Shown
Bearing Cover
Figure A-5: Control Panel
APPENDIX - REPLACING OVEN COMPONENTS
13
A-6
APPENDIX - REPLACING OVEN COMPONENTS
Oven Door and Related Parts
DANGER: Before removing any oven part, be sure the oven has completed “cooling down” and is removed from the power source.
NOTE: For clarity, some components have been removed from the illustrations below.
11
13
2
26
9
15
22
Figure A-7: Door Switch Assembly
8
27 18
6
7
Figure A-6: Door Detail
3
1
5
23
25
12
24
Figure A-8: Door Latch Assembly
10
Figure A-9: Door Mounting Detail
27
16 17
14
A-7
Figure
Reference #
Item Description
Item Part Number
1
Actuator, Lower Switch
G5-9214
2
Actuator, Monitor Switch
G5-9079
3
Actuator, Upper Switch
G5-9213
See Page A-12 Assy, Capacitor Monitor Relay
Hardware Description
Hardware Part Number(s)
Bearing, Flange .25 X .375 X .375L, Bronze
Washer, Flat, 1/4", SS
Nut, Hex, Locking, 1/4" X 20, Not Nylon
Bearing, Flange .25 X .375 X .375L, Bronze
SHLD Screw, #10-32, 1/4X1/2L, Skt Hd, SS
Washer, Thrust, 1/4" Id x 1/16 Thk, Bronze
Screw, #4-40 X 5/8 Lg, Pphd, Sems
Bearing, Flange .25 X .375 X .375L, Bronze
Washer, Flat, 1/4”, SS
Nut, Hex, Locking, 1/4” X 20, Not Nylon
100047
102200
101008
100047
100102
103474
102902
100047
102200
101008
i5-9390
None
N/A
5
Bracket, Door Switch
G5-9208
Nut, 1/4 - 20, Serr Hex Flange, Plated
100906 (x2)
6
Bracket, Hinge, Door, Top
G5-9193
1/4-20x1/2 FL phil m/s 18-8 100-Deg
101392 (x3)
7
Choke, Door
G5-9187
Screw, #10-32 x 3/8, Phtrh, SS
101692 (x14)
8
Cover, Door Latch
G5-9083
Screw, #8-32x.5", Pfh,100 Deg, SS
102810 (x3)
9
Cover, Door, Outer
G5-9042
Screw, #8-32x.5", Pfh,100 Deg, SS
102810 (x22)
10
Door Guide
G5-9032
1/4-20x1/2 FL phil m/s 18-8 100-deg
101392 (x2)
11
Frame, Door switch
G5-9077
Shld Screw, #10-32, 1/4X1/2L, Skt Hd, SS
100102 (x2)
12
Gasket, Door
G5-9309
None
N/A
13
Handle, Door Latch
102776
Screw, #10-32 x 3/8, Hex, Serr SS
101397 (x3)
14
Hinge, Bottom
G5-9190
1/4-20x1/2 FL phil m/s 18-8 100-deg
101392 (x3)
15
Plate, Door Bearing
G5-9189
Screw, #8-32x.5", Pfh,100 deg, SS
102810 (x2)
16
Plate, Hinge Bearing
G5-9197
See G5-9191
See G5-9191
Plate, Hinge Pin, Bottom
G5-9191
18
Plate, Hinge Pin, Top
G5-9194
Screw, 1/4-20X3/8" Lg Hex Serr Flange
102948 (x2)
Screw, #8 x 1/2, Serr Ph Truss Hd, Sheet Mtl
Diode Modification
Screw, #8 x 1/2, Serr Ph Truss Hd, Sheet Mtl
Diode Modification
Screw, #8 x 1/2, Serr Ph Truss Hd, Sheet Mtl
Diode Modification
101688 (x2)
700-1214 (x1)
101688 (x2)
700-1214 (x1)
101688 (x2)
700-1214 (x1)
G5-9186
See G5-9042
See G5-9042
See Page A-12 Relay, K5, Monitor
101272
See Page A-12 Relay, K6, Primary
101273
See Page A-12 Relay, K7, Secondary
101273
22
Skin, Door, Inner
23
Spacer, Door Latch
G5-9200
Striker, Door Handle
102770 (x1)
Screw, 1/4-20 X 3/4 Hex Wahser Hd Serr, Cres 101396 (x2)
Screw, #10-32 X 1/4", Soc Set Cp SST
101710 (x2)
24
Spring, Extension, 1" LG x 7.66#
101863
None
N/A
25
Spring, Extension, 1" x 8.92#
101864
None
N/A
26
Switch, Door
102013 (x3)
Screw, #4-40 X 5/8 Lg, Pphd, Sems
102902 (x2 ea)
27
Washer, Hinge
G5-9196 (x2)
See G5-9191 or G5-9194
See G5-9191 or G5-9194
APPENDIX - REPLACING OVEN COMPONENTS
17
Screw, 1/4-20 x 5/8, Hex Hd, Cres
101367 (x2)
Washer, Bronze Thrust, .63 Id x 1.188 Od x .063 Thk 102435
Washer, 1/4 Split Lock
102400 (x2)
A-8
APPENDIX - REPLACING OVEN COMPONENTS
Microwave System
DANGER: Before removing any oven part, be sure the oven has completed “cooling down” and is removed from the power source.
NOTE: For clarity, some components have been removed from the illustrations below.
2
1
17
7
14 19
12
11
17
15
3
5
9
6
18
20
13
17
1
3
7
1
4
8
19 14
Figure A-10: Microwave Assembly
10
Figure A-11: Interior, Baffle Removed
16
12
14 19
A-9
Figure
Reference #
Item Description
Item Part Number
Hardware Description
Hardware Part Number(s)
1
Blower, Magnetron #1 (x3)
100083
Screw, #10-32 X 2.5 Lg, Hwh, Zinc Pltd
101727 (x2)
2
Bracket, High Voltage Capacitor
G5-9222
Screw #8-32 X 3/8, Pphd, Sems, SS
102921 (x3)
3
Bracket, Magnetron Fan 1 & 3 (x2) G5-9249
Screw, 1/4 X .63, Hex Wshr Hd, Pltd Steel
101386 (x2)
4
Bracket, Magnetron Fan 2
G5-9246
Screw, 1/4 X .63, Hex Wshr Hd, Pltd Steel
101386 (x2)
5
Capacitor, High Voltage (x3)
100214
Screw, #8 x 1/2, Serr Ph Truss Hd, Sheet Mtl 101688 (x1 ea)
6
Clamp, Capacitor (x3)
100134
Nut, #8-32, Kep, Ext Tooth, SS
102962 (x2 ea)
7
Cooling Duct, Magnetron 1 & 3 (x2) G5-9011
None
N/A
8
Cooling Duct, Magnetron 2
G5-9014
None
N/A
9
Cover, insulation, Microwave
Launcher (Not Shown)
G5-9114
Screw, #8 x 1/2, Serr Ph Truss Hd, Sheet Mtl 101688 (x6)
10
Cover, Stirrer Mounting
G5-9172
Screw, #8 x 1/2, Serr Ph Truss Hd, Sheet Mtl 101688 (x4)
11
Cover, Waveguide
G5-9049
Tape, Teflon, Gore-Tex, 1/4 X .04Thk
12
Diode, High Voltage (x3)
100481
Screw, Sems, #6-32 X 1/2, Int Tooth, Pph, Cres 102912 (x2 ea)
13
Exit Duct, Magnetron (x3)
G5-9012
Plug, Hole, Cook Door
101191 (x4)
Screw, Hex Hd, #10-32 x 1/2 Lg, Cres, Type 23 101408 (x4)
See Page A-12 Fuse, 20 amp, Class CC, ATMR (x3) 100599
None
See Page A-12 Fuseblock
102019 (as required)
N/A
103566
Screw, #8 x 1/2, Serr Ph Truss Hd, Sheet Mtl 101688 (x2)
14
Insulation, Launcher Side (x2)
(Not Shown)
G5-9265
None
15
Magnetron (x3)
100862
Screw, #8 x 1/2, Serr Ph Truss Hd, Sheet Mtl 101688 (x8)
16
Microwave Launcher
G5-9175
Nut, 1/4-20, Serr Hex Flange, Zinc
100906 (x13)
Screw, #8 x 1/2, Serr Ph Truss Hd, Sheet Mtl
Diode Modification
Screw, #8 x 1/2, Serr Ph Truss Hd, Sheet Mtl
Diode Modification
Screw, #8 x 1/2, Serr Ph Truss Hd, Sheet Mtl
Diode Modification
Screw, #8 x 1/2, Serr Ph Truss Hd, Sheet Mtl
Diode Modification
101688 (x2)
700-1214 (x1)
101688 (x2)
700-1214 (x1)
101688 (x2)
700-1214 (x1)
101688 (x2)
700-1214 (x1)
See Page A-12 Relay, K2, Mag 1
101273
See Page A-12 Relay, K3, Mag 2
101273
See Page A-12 Relay, K4, Mag 3
101273
See Page A-12 Relay, K8, Motors
101273
N/A
Retainer, Waveguide Cover
G5-9089
Nut, 8-32, Acorn, SS
100912 (x22)
18
Set Screw, Waveguide (x3)
101773
None
N/A
19
Stirrer Motor
G5-9172
20
Thermostat, 270F, Open on Rise (x3) 104228
Screw, #6-32 X 3/16”, Soc Set Cp Sst
Nut, #6-32, Small Pattern, Ext Tooth, Keps, SS
Plate, Rotating Choke
Screw, #6 X 3/8, Pph, Drill Point, Zinc
Cho-Therm 1674, Insulator (3/4 X 3/4)F
101721 (x1)
102966 (x3)
G5-9173 (x1)
101684 (x2)
NGC-1163 (x1)
21
Transformer, High Voltage (x3)
Screw #8-32 X 3/8, Pphd, Sems, SS
102921 (x4 ea)
104137
APPENDIX - REPLACING OVEN COMPONENTS
17
A-10 APPENDIX - REPLACING OVEN COMPONENTS
Controls System
DANGER: Before removing any oven part, be sure the oven has completed “cooling down” and is removed from the power source.
NOTE: For clarity, some components have been removed from the illustrations below.
5
2
7
3
6
1
4
Figure A-12: Control Panel
A-11
Figure
Reference #
Item Description
Item Part Number
Hardware Description
Hardware Part Number(s)
1
Bracket, Control Board
G5-9047
Nut, #6-32, Kep, Ext Tooth, SS
102961 (x4)
2
Bracket, Touch Screen Display
G5-9113
Nut, #6-32, Kep, Ext Tooth, SS
102961 (x4)
3
Cable, USB
103196
None
N/A
4
Circuit Breaker
103175
None
N/A
5
Control Board
CON-7044
Screw, 6-32 X 3/8 Pan Phil M/S 18-8 Sems Int Lw 102911 (x8)
6
Speaker
G5-9112
Retainer, Speaker
Nut, #6-32, Kep, Ext Tooth, SS
Washer, Flat, Uss, #6, 18-8
G5-9111
102961 (x3)
102170 (x3)
7
Touch Screen, VGA Display
CON-7046
Screw, #6-32 X 1/2 Lg Pph SS
101570 (x4)
102075
Screw, M4 X 8mm LG, PFH 90 DEG, Steel-Zinc 101735 (x2)
Nut, #6-32, Kep, Ext Tooth, SS
102961 (x2)
Bracket, High-Limit
G5-9054
See page A-5 Thermostat, 3 Pole, High Limit
APPENDIX - REPLACING OVEN COMPONENTS
A-12 APPENDIX - REPLACING OVEN COMPONENTS
Electrical System
DANGER: Before removing any oven part, be sure the oven has completed “cooling down” and is removed from the power source.
NOTE: For clarity, some components have been removed from the illustrations below.
2
8
9
10
11
1
12
13
14
15
3
17
6
5
18
7
16
Figure A-13: Electrical Compartment
4
Figure A-14: Exterior, Rear
A-13
Figure
Reference #
Item Description
Item Part Number
Hardware Description
Hardware Part Number(s)
N/A
1
Assembly, Capacitor Monitor Relay i5-9390
None
2
Bracket, Electrical
G5-9026
Screw, #8 x 1/2, Serr Ph Truss Hd, Sheet Mtl 101688 (x8)
3
EMI Filter, 50 Amp
G5-9037
Screw, #10-32 X .38 LG, 100 Deg, Pflhd, SS 101401 (x2)
4
Fan, Cooling (x3)
TC3-0433
Screw, 10-32 x 1/2, PPHD Type F Thread
Cutting, SS
101694 (x2 ea)
5
Fuse, 20 amp, Class CC, ATMR (x3) 100599
None
N/A
6
Fuseblock
103566
Screw, #8 x 1/2, Serr Ph Truss Hd, Sheet Mtl 101688 (x2)
7
Power Supply, 24VDC, 1.8A
101211
Screw, M3 X 8mm, Pph, Sems, Cres
103444 (x3)
Screw, #8 x 1/2, Serr Ph Truss Hd, Sheet Mtl
Diode Modification
Screw, #8 x 1/2, Serr Ph Truss Hd, Sheet Mtl
Diode Modification
Screw, #8 x 1/2, Serr Ph Truss Hd, Sheet Mtl
Diode Modification
Screw, #8 x 1/2, Serr Ph Truss Hd, Sheet Mtl
Diode Modification
Screw, #8 x 1/2, Serr Ph Truss Hd, Sheet Mtl
Diode Modification
Screw, #8 x 1/2, Serr Ph Truss Hd, Sheet Mtl
Diode Modification
Screw, #8 x 1/2, Serr Ph Truss Hd, Sheet Mtl
Diode Modification
Screw, #8 x 1/2, Serr Ph Truss Hd, Sheet Mtl
Diode Modification
101688 (x2)
700-1214 (x1)
101688 (x2)
700-1214 (x1)
101688 (x2)
700-1214 (x1)
101688 (x2)
700-1214 (x1)
101688 (x2)
700-1214 (x1)
101688 (x2)
700-1214 (x1)
101688 (x2)
700-1214 (x1)
101688 (x2)
700-1214 (x1)
8
Relay, K1, Voltage Select
101272
9
Relay, K2, Mag 1
101273
10
Relay, K3, Mag 2
101273
11
Relay, K4, Mag 3
101273
12
Relay, K5, Monitor
101272
13
Relay, K6, Primary
101273
14
Relay, K7, Secondary
101273
15
Relay, K8, Motors
101273
16
Terminal Block
102049
Screw, #10-32 X 3/4 Lg, Pph Sems, Int Tth
102937 (x2)
17
Thermostat, 120F, Close On Rise
102086
Screw, #6 X 3/8, Pph, Drill Point, Zinc
101684 (x2)
18
Transformer, 40VA, 208-240 P/245 102107
Screw, #8 x 1/2, Serr Ph Truss Hd, Sheet Mtl 101688 (x2)
APPENDIX - REPLACING OVEN COMPONENTS
For service or information:
wi thin no rth a me r ica ca l l
Customer Support at 800.90 T U R B O
outsid e n o rth a me r ica ca l l
+1 214.379.6000 or Your Authorized Distributor
TM
Part Number: G5-9231 / Revision B / November 2013
Country Code: NA/EU
Global Operations
Customer Support:
2801 Tr ade Center Dr ive
Carrollton, Texas 75007 usa
+1 214.379.6000 phone
+1 214.379.6073 fa x
800.90 T U R B O
+1 214.379.6000
tur boch ef.com