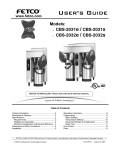
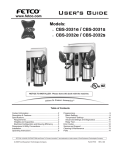
1
PowerFlex® 700L Liquid-Cooled
Adjustable Frequency AC Drive
HARDWARE SERVICE MANUAL
Frame 2
Important User
Information
Solid state equipment has operational characteristics differing from those of
electromechanical equipment. Safety Guidelines for the Application, Installation and
Maintenance of Solid State Controls (Publication SGI-1.1 available from your local
Rockwell Automation sales office or online at http://www.rockwellautomation.com/
literature) describes some important differences between solid state equipment and
hard-wired electromechanical devices. Because of this difference, and also because of
the wide variety of uses for solid state equipment, all persons responsible for applying
this equipment must satisfy themselves that each intended application of this
equipment is acceptable.
In no event will Rockwell Automation, Inc. be responsible or liable for indirect or
consequential damages resulting from the use or application of this equipment.
The examples and diagrams in this manual are included solely for illustrative
purposes. Because of the many variables and requirements associated with any
particular installation, Rockwell Automation, Inc. cannot assume responsibility or
liability for actual use based on the examples and diagrams.
No patent liability is assumed by Rockwell Automation, Inc. with respect to use of
information, circuits, equipment, or software described in this manual.
Reproduction of the contents of this manual, in whole or in part, without written
permission of Rockwell Automation, Inc. is prohibited.
Throughout this manual, when necessary we use notes to make you aware of safety
considerations.
!
WARNING: Identifies information about practices or
circumstances that can cause an explosion in a hazardous
environment, which may lead to personal injury or death, property
damage, or economic loss.
Important: Identifies information that is critical for successful application and
understanding of the product.
!
ATTENTION: Identifies information about practices or
circumstances that can lead to personal injury or death, property
damage, or economic loss. Attentions help you identify a hazard,
avoid a hazard, and recognize the consequences.
Shock Hazard labels may be located on or inside the equipment
(e.g., drive or motor) to alert people that dangerous voltage may be
present.
Burn Hazard labels may be located on or inside the equipment
(e.g., drive or motor) to alert people that surfaces may be at
dangerous temperatures.
Allen-Bradley and PowerFlex are registered trademarks of Rockwell Automation, Inc.
PowerFlex® 700L Frame 2 Drive Hardware Service Manual
Summary of Changes
This is the first release of the PowerFlex 700L Liquid-Cooled AC Drive
Frame 2 Hardware Service Manual.
PowerFlex® 700L Frame 2 Drive Hardware Service Manual
Publication 20L-TG002A-EN-P
soc-ii
Summary of Changes
PowerFlex® 700L Frame 2 Drive Hardware Service Manual
Publication 20L-TG002A-EN-P
Table of Contents
Preface
Overview
Who Should Use this Manual? . . . . . . . . . . . . . . . . . . . . . . . . . . . . . . . . . . . . . . . . . . . . .
What is in this Manual . . . . . . . . . . . . . . . . . . . . . . . . . . . . . . . . . . . . . . . . . . . . . . . . . . .
What is Not in this Manual . . . . . . . . . . . . . . . . . . . . . . . . . . . . . . . . . . . . . . . . . . . . . . . .
Reference Materials . . . . . . . . . . . . . . . . . . . . . . . . . . . . . . . . . . . . . . . . . . . . . . . . . . . . .
Understanding Manual Conventions . . . . . . . . . . . . . . . . . . . . . . . . . . . . . . . . . . . . . . . . .
Terms . . . . . . . . . . . . . . . . . . . . . . . . . . . . . . . . . . . . . . . . . . . . . . . . . . . . . . . . . . . . . . .
Cross References . . . . . . . . . . . . . . . . . . . . . . . . . . . . . . . . . . . . . . . . . . . . . . . . . . . . . .
Additional Support Available on Internet . . . . . . . . . . . . . . . . . . . . . . . . . . . . . . . . . . . . .
General Precautions . . . . . . . . . . . . . . . . . . . . . . . . . . . . . . . . . . . . . . . . . . . . . . . . . . . . .
Class 1 LED Product . . . . . . . . . . . . . . . . . . . . . . . . . . . . . . . . . . . . . . . . . . . . . . . . . . .
Chapter 1
Troubleshooting and Error Codes
Creating Fault Reports . . . . . . . . . . . . . . . . . . . . . . . . . . . . . . . . . . . . . . . . . . . . . . . . . . .
Addressing Active Converter Hardware Faults. . . . . . . . . . . . . . . . . . . . . . . . . . . . . . . . .
Addressing 700 Vector Control Hardware Faults . . . . . . . . . . . . . . . . . . . . . . . . . . . . . . .
Addressing 700S Phase II Control Hardware Faults. . . . . . . . . . . . . . . . . . . . . . . . . . . . .
Diagnostic Procedures by Symptom . . . . . . . . . . . . . . . . . . . . . . . . . . . . . . . . . . . . . . . . .
No HIM Display . . . . . . . . . . . . . . . . . . . . . . . . . . . . . . . . . . . . . . . . . . . . . . . . . . . . . .
Circuit Breaker Tripped – Blown Input Fuses . . . . . . . . . . . . . . . . . . . . . . . . . . . . . . .
Over-Temperature Faults. . . . . . . . . . . . . . . . . . . . . . . . . . . . . . . . . . . . . . . . . . . . . . . .
Chapter 2
P-1
P-1
P-3
P-3
P-4
P-4
P-4
P-4
P-5
P-5
1-1
1-2
1-4
1-6
1-7
1-7
1-8
1-9
Component Test Procedures
Drive Status . . . . . . . . . . . . . . . . . . . . . . . . . . . . . . . . . . . . . . . . . . . . . . . . . . . . . . . . . . . .
Viewing the PowerFlex 700 Vector Control Diagnostic Indicators . . . . . . . . . . . . . . . . .
Status Indicators . . . . . . . . . . . . . . . . . . . . . . . . . . . . . . . . . . . . . . . . . . . . . . . . . . . . . .
Viewing the PowerFlex 700S Control Diagnostic Indicators . . . . . . . . . . . . . . . . . . . . . .
Status Indicators . . . . . . . . . . . . . . . . . . . . . . . . . . . . . . . . . . . . . . . . . . . . . . . . . . . . . .
Removing Power from the Drive . . . . . . . . . . . . . . . . . . . . . . . . . . . . . . . . . . . . . . . . . . .
Periodic Inspections with No Power Applied . . . . . . . . . . . . . . . . . . . . . . . . . . . . . . . . . .
Coolant Hoses/Connections . . . . . . . . . . . . . . . . . . . . . . . . . . . . . . . . . . . . . . . . . . . . .
Terminal Bolts, Mounting Bolts, etc. . . . . . . . . . . . . . . . . . . . . . . . . . . . . . . . . . . . . . .
Periodic Inspections with Power Applied . . . . . . . . . . . . . . . . . . . . . . . . . . . . . . . . . . . . .
Checking the Power Module Fan . . . . . . . . . . . . . . . . . . . . . . . . . . . . . . . . . . . . . . . . .
Checking the Input Filter Fans . . . . . . . . . . . . . . . . . . . . . . . . . . . . . . . . . . . . . . . . . . . . .
Forward Biased Diode Tests for the Power Module . . . . . . . . . . . . . . . . . . . . . . . . . . . . .
2-1
2-2
2-2
2-3
2-3
2-4
2-5
2-5
2-5
2-5
2-5
2-6
2-6
PowerFlex® 700L Frame 2 Drive Hardware Service Manual
Publication 20L-TG002A-EN-P
ii
Table of Contents
Chapter 3
Access Procedures
Torque Specifications. . . . . . . . . . . . . . . . . . . . . . . . . . . . . . . . . . . . . . . . . . . . . . . . . . . . . 3-2
Understanding Torque Figures in Assembly Diagrams . . . . . . . . . . . . . . . . . . . . . . . . . 3-3
Removing Power from the Drive . . . . . . . . . . . . . . . . . . . . . . . . . . . . . . . . . . . . . . . . . . . . 3-3
Removing the Drive Front Cover. . . . . . . . . . . . . . . . . . . . . . . . . . . . . . . . . . . . . . . . . . . . 3-4
Removal . . . . . . . . . . . . . . . . . . . . . . . . . . . . . . . . . . . . . . . . . . . . . . . . . . . . . . . . . . . . . 3-4
Installation . . . . . . . . . . . . . . . . . . . . . . . . . . . . . . . . . . . . . . . . . . . . . . . . . . . . . . . . . . . 3-4
Removing the HIM Option . . . . . . . . . . . . . . . . . . . . . . . . . . . . . . . . . . . . . . . . . . . . . . . . 3-4
Removal/Installation . . . . . . . . . . . . . . . . . . . . . . . . . . . . . . . . . . . . . . . . . . . . . . . . . . . 3-4
Removing the Communications Adapter Option. . . . . . . . . . . . . . . . . . . . . . . . . . . . . . . . 3-5
Removal . . . . . . . . . . . . . . . . . . . . . . . . . . . . . . . . . . . . . . . . . . . . . . . . . . . . . . . . . . . . . 3-5
Installation . . . . . . . . . . . . . . . . . . . . . . . . . . . . . . . . . . . . . . . . . . . . . . . . . . . . . . . . . . . 3-5
Removing the Inverter Control Cassette . . . . . . . . . . . . . . . . . . . . . . . . . . . . . . . . . . . . . . 3-6
700 Vector Control Cassette (24V or 115V) . . . . . . . . . . . . . . . . . . . . . . . . . . . . . . . . . 3-6
700S Phase II Control Cassette . . . . . . . . . . . . . . . . . . . . . . . . . . . . . . . . . . . . . . . . . . . 3-7
Removing the Active Converter Control Cassette . . . . . . . . . . . . . . . . . . . . . . . . . . . . . . . 3-8
Removal . . . . . . . . . . . . . . . . . . . . . . . . . . . . . . . . . . . . . . . . . . . . . . . . . . . . . . . . . . . . . 3-8
Installation . . . . . . . . . . . . . . . . . . . . . . . . . . . . . . . . . . . . . . . . . . . . . . . . . . . . . . . . . . . 3-8
Removing the Power Section Stirring Fan. . . . . . . . . . . . . . . . . . . . . . . . . . . . . . . . . . . . . 3-9
Removal . . . . . . . . . . . . . . . . . . . . . . . . . . . . . . . . . . . . . . . . . . . . . . . . . . . . . . . . . . . . . 3-9
Installation . . . . . . . . . . . . . . . . . . . . . . . . . . . . . . . . . . . . . . . . . . . . . . . . . . . . . . . . . . . 3-9
Removing the Drive Front Panel . . . . . . . . . . . . . . . . . . . . . . . . . . . . . . . . . . . . . . . . . . . 3-10
Removal . . . . . . . . . . . . . . . . . . . . . . . . . . . . . . . . . . . . . . . . . . . . . . . . . . . . . . . . . . . . 3-10
Installation . . . . . . . . . . . . . . . . . . . . . . . . . . . . . . . . . . . . . . . . . . . . . . . . . . . . . . . . . . 3-11
Replacing the Inverter Power Interface PCB . . . . . . . . . . . . . . . . . . . . . . . . . . . . . . . . . . 3-12
Removal . . . . . . . . . . . . . . . . . . . . . . . . . . . . . . . . . . . . . . . . . . . . . . . . . . . . . . . . . . . . 3-12
Installation . . . . . . . . . . . . . . . . . . . . . . . . . . . . . . . . . . . . . . . . . . . . . . . . . . . . . . . . . . 3-12
Replacing the Converter Power Interface PCB . . . . . . . . . . . . . . . . . . . . . . . . . . . . . . . . 3-13
Removal . . . . . . . . . . . . . . . . . . . . . . . . . . . . . . . . . . . . . . . . . . . . . . . . . . . . . . . . . . . . 3-13
Installation . . . . . . . . . . . . . . . . . . . . . . . . . . . . . . . . . . . . . . . . . . . . . . . . . . . . . . . . . . 3-14
Replacing the PCB Power Supply . . . . . . . . . . . . . . . . . . . . . . . . . . . . . . . . . . . . . . . . . . 3-14
Removal . . . . . . . . . . . . . . . . . . . . . . . . . . . . . . . . . . . . . . . . . . . . . . . . . . . . . . . . . . . . 3-14
Installation . . . . . . . . . . . . . . . . . . . . . . . . . . . . . . . . . . . . . . . . . . . . . . . . . . . . . . . . . . 3-15
Replacing the Input Filter Fan Power Supply . . . . . . . . . . . . . . . . . . . . . . . . . . . . . . . . . 3-16
Removal . . . . . . . . . . . . . . . . . . . . . . . . . . . . . . . . . . . . . . . . . . . . . . . . . . . . . . . . . . . . 3-16
Installation . . . . . . . . . . . . . . . . . . . . . . . . . . . . . . . . . . . . . . . . . . . . . . . . . . . . . . . . . . 3-16
Replacing the Control Transformer Fuses . . . . . . . . . . . . . . . . . . . . . . . . . . . . . . . . . . . . 3-17
Removal . . . . . . . . . . . . . . . . . . . . . . . . . . . . . . . . . . . . . . . . . . . . . . . . . . . . . . . . . . . . 3-17
Installation . . . . . . . . . . . . . . . . . . . . . . . . . . . . . . . . . . . . . . . . . . . . . . . . . . . . . . . . . . 3-17
Replacing the Control Transformer . . . . . . . . . . . . . . . . . . . . . . . . . . . . . . . . . . . . . . . . . 3-18
Removal . . . . . . . . . . . . . . . . . . . . . . . . . . . . . . . . . . . . . . . . . . . . . . . . . . . . . . . . . . . . 3-18
Installation . . . . . . . . . . . . . . . . . . . . . . . . . . . . . . . . . . . . . . . . . . . . . . . . . . . . . . . . . . 3-18
Replacing the Input Filter Fan Assembly . . . . . . . . . . . . . . . . . . . . . . . . . . . . . . . . . . . . 3-19
Removal . . . . . . . . . . . . . . . . . . . . . . . . . . . . . . . . . . . . . . . . . . . . . . . . . . . . . . . . . . . . 3-19
Installation . . . . . . . . . . . . . . . . . . . . . . . . . . . . . . . . . . . . . . . . . . . . . . . . . . . . . . . . . . 3-19
Replacing the J1-to-J6 Power Interface Harness . . . . . . . . . . . . . . . . . . . . . . . . . . . . . . . 3-20
Removal . . . . . . . . . . . . . . . . . . . . . . . . . . . . . . . . . . . . . . . . . . . . . . . . . . . . . . . . . . . . 3-20
Installation . . . . . . . . . . . . . . . . . . . . . . . . . . . . . . . . . . . . . . . . . . . . . . . . . . . . . . . . . . 3-20
Replacing the J3-to-J4 Power Interface Harness . . . . . . . . . . . . . . . . . . . . . . . . . . . . . . . 3-21
Removal . . . . . . . . . . . . . . . . . . . . . . . . . . . . . . . . . . . . . . . . . . . . . . . . . . . . . . . . . . . . 3-21
Installation . . . . . . . . . . . . . . . . . . . . . . . . . . . . . . . . . . . . . . . . . . . . . . . . . . . . . . . . . . 3-22
PowerFlex® 700L Frame 2 Drive Hardware Service Manual
Publication 20L-TG002A-EN-P
Table of Contents
Replacing the J2-to-J5 Power Interface Harness. . . . . . . . . . . . . . . . . . . . . . . . . . . . . . .
Removal. . . . . . . . . . . . . . . . . . . . . . . . . . . . . . . . . . . . . . . . . . . . . . . . . . . . . . . . . . . .
Installation. . . . . . . . . . . . . . . . . . . . . . . . . . . . . . . . . . . . . . . . . . . . . . . . . . . . . . . . . .
Replacing the PWR (Power) Interface Jumper . . . . . . . . . . . . . . . . . . . . . . . . . . . . . . . .
Removal. . . . . . . . . . . . . . . . . . . . . . . . . . . . . . . . . . . . . . . . . . . . . . . . . . . . . . . . . . . .
Installation. . . . . . . . . . . . . . . . . . . . . . . . . . . . . . . . . . . . . . . . . . . . . . . . . . . . . . . . . .
Replacing the Voltage Feedback Harness . . . . . . . . . . . . . . . . . . . . . . . . . . . . . . . . . . . .
Removal. . . . . . . . . . . . . . . . . . . . . . . . . . . . . . . . . . . . . . . . . . . . . . . . . . . . . . . . . . . .
Installation. . . . . . . . . . . . . . . . . . . . . . . . . . . . . . . . . . . . . . . . . . . . . . . . . . . . . . . . . .
Replacing the Motor Voltage Feedback PCB (700S Phase II Control only) . . . . . . . . .
Removal. . . . . . . . . . . . . . . . . . . . . . . . . . . . . . . . . . . . . . . . . . . . . . . . . . . . . . . . . . . .
Installation. . . . . . . . . . . . . . . . . . . . . . . . . . . . . . . . . . . . . . . . . . . . . . . . . . . . . . . . . .
Chapter 4
iii
3-22
3-22
3-22
3-23
3-23
3-23
3-24
3-24
3-24
3-25
3-25
3-25
Start-Up After Repair
Performing the Power Circuit Diagnostic Test (700S Phase II Control only) . . . . . . . . . 4-1
Testing With the Motor . . . . . . . . . . . . . . . . . . . . . . . . . . . . . . . . . . . . . . . . . . . . . . . . . . . 4-2
Appendix A
Service Tools and Equipment
Software Tools. . . . . . . . . . . . . . . . . . . . . . . . . . . . . . . . . . . . . . . . . . . . . . . . . . . . . . . . . . A-1
Service Tools . . . . . . . . . . . . . . . . . . . . . . . . . . . . . . . . . . . . . . . . . . . . . . . . . . . . . . . . . . . A-1
Appendix B
Connector Descriptions
J1-to-J6 Power Interface Harness . . . . . . . . . . . . . . . . . . . . . . . . . . . . . . . . . . . . . . . . . . .
J2-to-J5 Power Interface Harness . . . . . . . . . . . . . . . . . . . . . . . . . . . . . . . . . . . . . . . . . . .
J3-to-J4 Power Interface Harness . . . . . . . . . . . . . . . . . . . . . . . . . . . . . . . . . . . . . . . . . . .
PWR (Power) Interface Jumper . . . . . . . . . . . . . . . . . . . . . . . . . . . . . . . . . . . . . . . . . . . .
Voltage Feedback Harness . . . . . . . . . . . . . . . . . . . . . . . . . . . . . . . . . . . . . . . . . . . . . . . .
Motor Voltage Feedback PCB. . . . . . . . . . . . . . . . . . . . . . . . . . . . . . . . . . . . . . . . . . . . . .
Converter Power Interface Board to Terminal Block . . . . . . . . . . . . . . . . . . . . . . . . . . . .
Converter Control Board to Power Supply and DC Bus. . . . . . . . . . . . . . . . . . . . . . . . . .
Temperature Switches to Fan . . . . . . . . . . . . . . . . . . . . . . . . . . . . . . . . . . . . . . . . . . . . . .
Power and Ground to Contactors and Voltage Feedback . . . . . . . . . . . . . . . . . . . . . . . . .
Control Transformer and Converter Control to Contactors . . . . . . . . . . . . . . . . . . . . . . .
Power Supply to Stirring Fan . . . . . . . . . . . . . . . . . . . . . . . . . . . . . . . . . . . . . . . . . . . . . .
Appendix C
B-1
B-1
B-2
B-2
B-2
B-3
B-3
B-4
B-4
B-4
B-5
B-5
Connection Diagram and Schematics
Frame 2 Connection Diagram . . . . . . . . . . . . . . . . . . . . . . . . . . . . . . . . . . . . . . . . . . . . . . C-2
Frame 2 Schematics . . . . . . . . . . . . . . . . . . . . . . . . . . . . . . . . . . . . . . . . . . . . . . . . . . . . . C-4
PowerFlex® 700L Frame 2 Drive Hardware Service Manual
Publication 20L-TG002A-EN-P
iv
Table of Contents
PowerFlex® 700L Frame 2 Drive Hardware Service Manual
Publication 20L-TG002A-EN-P
Preface
Overview
Who Should Use this
Manual?
This manual is intended for qualified service personnel responsible for
troubleshooting and repairing PowerFlex 700L Liquid-Cooled Frame 2
Drives. You should have previous experience with, and basic understanding
of, electrical terminology, procedures, required troubleshooting equipment,
equipment protection procedures and methods, and safety precautions.
What is in this Manual
This manual contains hardware service information for PowerFlex 700L
Frame 2 drives only. Verify that you are working on a Frame 2 drive by
checking the data nameplates on the inside of the bay doors and on the
Power Modules. The frame number is printed just above the serial number.
Figure P.1 shows the data nameplate locations.
PowerFlex® 700L Frame 2 Drive Hardware Service Manual
Publication 20L-TG002A-EN-P
P-2
Overview
Figure P.1 PowerFlex 700L Frame 2 Drive Data Nameplate Locations
Cat No.
20LC360N3ENNAN10WA
NEMA Type
Complete Regenerative Drive
Series: A
Original Firmware V. x.xxx
Nominal Voltage
Normal Duty Power
Input: 3 Phase, 47-63 Hz
AC Voltage Range
Amps
Output: 3 Phase, 0-400Hz
AC Voltage Range
Base Hz (default)
Continuous Amps
Rated Coolant
Nom. Coolant Pressure
MFD. in 2007 on JUL 05
Frame: 2
Serial Number: MEAE2WJ0
Made in the U.S.A. (FAC1C)
SIDE VIEW
Cat No.
20LC360N3ENNAN10WA
NEMA Type
Complete Regenerative Drive
Nominal Voltage
Normal Duty Power
Series: A
Original Firmware V. x.xxx
Input: 3 Phase, 47-63 Hz
AC Voltage Range
Amps
Output: 3 Phase, 0-400Hz
AC Voltage Range
Base Hz (default)
Continuous Amps
Rated Coolant
Nom. Coolant Pressure
MFD. in 2007 on JUL 05
Frame: 2
Serial Number: MEAE2WJ0
Made in the U.S.A. (FAC1C)
FRONT VIEW (Cover Removed)
PowerFlex® 700L Frame 2 Drive Hardware Service Manual
Publication 20L-TG002A-EN-P
Overview
P-3
What is Not in this Manual
This manual does not contain in-depth fault information for
troubleshooting. Depending on the control cassette installed in the drive,
that information is available in the PowerFlex 700 Adjustable Frequency AC
Drive - Series B User Manual (publication 20B-UM002) or the PowerFlex
700S High Performance AC Drive - Phase II Control User Manual
(publication 20D-UM006). Additional information is also contained in the
PowerFlex 700L Liquid-Cooled Adjustable Frequency AC Drive User
Manual (publication 20L-UM001) and the PowerFlex 700L Active
Converter Power Module User Manual (publication PFLEX-UM002).
Reference Materials
You can view or download publications at www.rockwellautomation.com/
literature. To order paper copies of technical documentation, contact your
local Rockwell Automation distributor or sales representative.
To find your local Rockwell Automation distributor or sales representative,
visit www.rockwellautomation.com/locations.
The following publications provide general drive information.
Title
Wiring and Grounding Guidelines for Pulse Width Modulated (PWM) AC Drives
Safety Guidelines for the Application, Installation and Maintenance of Solid State
Control
A Global Reference Guide for Reading Schematic Diagrams
Guarding Against Electrostatic Damage
Publication
DRIVES-IN001
SGI-1.1
0100-2.10
8000-4.5.2
The following publications provide specific PowerFlex drive information.
Title
PowerFlex 700L Liquid-Cooled Adjustable Frequency AC Drive User Manual
PowerFlex 700L Active Converter Power Module User Manual
PowerFlex 700 Adjustable Frequency AC Drive User Manual - Series B
PowerFlex 700S High Performance AC Drive - Phase II Control User Manual
Hi-Resolution Feedback Option Card Installation Instructions for PowerFlex 700S
Drives
Multi-Device Interface Option Card Installation Instructions for PowerFlex 700S
Drives
PowerFlex Adjustable Frequency Drive Reference Manual (Volume 1 - 70 & 700)
PowerFlex Adjustable Frequency Drive Reference Manual (Volume 2 - 700S)
Publication
20L-UM001
PFLEX-UM002
20B-UM002
20D-UM006
20D-IN001
20D-IN004
PFLEX-RM001
PFLEX-RM002
The following publications provide information that is necessary when
applying the DriveLogix Controller.
Title
User Manual - DriveLogix System
Installation Instructions - DriveLogix Controller
Installation Instructions - Memory Expansion for DriveLogix Controller
ControlNet Daughtercard Installation Instructions
ControlNet Daughtercard Installation Instructions
Publication
20D-UM002
20D-IN002
20D-IN007
1788-IN002
1788-IN005
PowerFlex® 700L Frame 2 Drive Hardware Service Manual
Publication 20L-TG002A-EN-P
P-4
Overview
Understanding Manual
Conventions
Terms
The following words are used throughout the manual to describe an action:
Word
Can
Cannot
May
Must
Shall
Should
Should Not
Meaning
Possible, able to do something
Not possible, not able to do something
Permitted, allowed
Unavoidable, you must do this
Required and necessary
Recommended
Not recommended
Cross References
“Figure 2.1 on page 2-2” is a hyperlinked cross reference to Figure 2.1 on
page 2 of Chapter 2.
Additional Support
Available on Internet
PowerFlex® 700L Frame 2 Drive Hardware Service Manual
Publication 20L-TG002A-EN-P
Additional troubleshooting information and software tools are available on
the Allen-Bradley Drives Support Web site:
www.ab.com/support/abdrives
Overview
General Precautions
P-5
Class 1 LED Product
!
!
!
!
!
!
ATTENTION: Hazard of permanent eye damage exists when
using optical transmission equipment. This product emits intense
light and invisible radiation. Do not look into module ports or
fiber-optic cable connectors.
ATTENTION: This drive contains ESD (Electrostatic
Discharge) sensitive parts and assemblies. Static control
precautions are required when installing, testing, servicing or
repairing this assembly. Component damage may result if ESD
control procedures are not followed. If you are not familiar with
static control procedures, refer to Allen-Bradley publication
8000-4.5.2, “Guarding Against Electrostatic Damage” or any
other applicable ESD protection handbook.
ATTENTION: An incorrectly applied or installed drive can
result in component damage or a reduction in product life. Wiring
or application errors, such as undersizing the motor, incorrect or
inadequate AC supply, or excessive ambient temperatures may
result in malfunction of the system.
ATTENTION: Only qualified personnel familiar with
PowerFlex 700L Drives and associated machinery should plan or
implement the installation, start-up, and subsequent maintenance
of the system. Failure to comply may result in personal injury
and/or equipment damage.
ATTENTION: To avoid an electric shock hazard, verify that the
voltage on the bus capacitors has discharged completely before
servicing. After removing power to the drive, wait 5 minutes for
the bus capacitors to discharge. With the cover of the drive
removed, measure the DC bus voltage at the DC+ and DCTESTPOINT sockets on the lower front of the power module (see
Figure 2.2 on page 2-5 for details). The measured voltage must be
zero (0).
ATTENTION: Potentially fatal voltages may result from
improper usage of an oscilloscope and other test equipment. The
oscilloscope chassis may be at a potentially fatal voltage if not
properly grounded. If an oscilloscope is used to measure high
voltage waveforms, use only a dual-channel oscilloscope in the
differential mode with X 100 probes. It is recommended that the
oscilloscope be used in the A minus B Quasi-differential mode
with the oscilloscope chassis correctly grounded to an earth
ground.
PowerFlex® 700L Frame 2 Drive Hardware Service Manual
Publication 20L-TG002A-EN-P
P-6
Overview
Notes:
PowerFlex® 700L Frame 2 Drive Hardware Service Manual
Publication 20L-TG002A-EN-P
Chapter
1
Troubleshooting and Error Codes
!
!
!
!
Creating Fault Reports
ATTENTION: To avoid an electric shock hazard, ensure that all
power to the drive has been removed before performing the
following.
ATTENTION: To avoid an electric shock hazard, verify that the
voltage on the bus capacitors has discharged completely before
servicing. After removing power to the drive, wait 5 minutes for
the bus capacitors to discharge. With the cover of the drive
removed, measure the DC bus voltage at the DC+ TESTPOINT
and DC- TESTPOINT sockets on the lower front of the power
module. The voltage must be zero.
ATTENTION: HOT surfaces can cause severe burns. Do not
touch the heatsink surface during operation of the drive. After
disconnecting power allow time for cooling.
ATTENTION: This drive contains ESD (Electrostatic
Discharge) sensitive parts and assemblies. Static control
precautions are required when installing, testing, servicing or
repairing this assembly. Component damage may result if ESD
control procedures are not followed. If you are not familiar with
static control procedures, reference Allen-Bradley publication
8000-4.5.2, “Guarding Against Electrostatic Damage” or any
other applicable ESD protection handbook.
Clear and complete fault reports are critical for analysis and repair of
modules returned to the factory.
At a minimum, perform and record the following:
• Record the contents of the fault queue (faults and times of occurrence).
• Make record of any burn marks on the input inductor, filter capacitor
assembly, precharge resistors, precharge contactors, printed circuit
boards, bus bar, and cabling.
• Make record of any liquid or condensation marks on printed circuit
boards, complete drive hose assemblies, and other mechanical parts.
• Make record of the amount of dust and other additional particles on drive
and drive components.
PowerFlex® 700L Frame 2 Drive Hardware Service Manual
Publication 20L-TG002A-EN-P
1-2
Troubleshooting and Error Codes
• Make record of any mechanical damage to the drive and drive
components.
• Record the size and type of main fuses.
• Record any other important marks and damages.
Addressing Active
Converter Hardware Faults
The following table describes active converter hardware faults.
Fault
HW Over Current
No.
1
HW Over Voltage
2
HW Ground Fault
3
HW Disabled
4
HW Latch Error
5
Precharge Open
6
Precharge Closed
7
DPI Mastr ComLos
8
Inverter Fault
9
PS1 Desat Phase R 10
PowerFlex® 700L Frame 2 Drive Hardware Service Manual
Publication 20L-TG002A-EN-P
PS1 Desat Phase S
11
PS1 Desat Phase T
12
PS1 Over Current
13
PS1 Over Voltage
14
PS1 Asym DC Link
15
PS1 Power Supply
16
PS1 HW Disable
17
PS1 Latch Error
18
PwrBd Incompat
30
PB Ver Corrupted
31
Description
Control board detected excessive
phase current.
Action
Check cables and motor.
Verify that the grounding tabs in
the back of the control
cassettes are making a solid
connection.
Control board detected excessive DC Check input voltage.
Link voltage.
Control board detected a ground fault. Check cables and motor.
Verify that the grounding tabs in
the back of the control
cassettes are making a solid
connection.
Enable signal is not present.
Verify hardware enable is
present.
Control board detected an unidentified Verify that the grounding tabs in
fault.
the back of the control
cassettes are making a solid
connection.
Contact Technical Support.
The precharge contactor opened
Verify operation of precharge
when it was commanded closed.
contactor.
The precharge contactor closed when Verify operation of precharge
it was commanded open.
contactor.
DPI communication with the inverter Verify DPI cable installation.
was lost.
Inverter detected a fault.
Examine inverter fault code.
Power structure 1 detected a desat
Contact Technical Support.
fault on phase R.
Power structure 1 detected a desat
Contact Technical Support.
fault on phase S.
Contact Technical Support.
Power structure 1 detected a desat
fault on phase T.
Power structure 1 detected excessive Check motor, cables, and
phase current.
application for cause.
Power structure 1 detected excessive Check input power and
DC Link voltage.
application for cause.
Power structure 1 detected an
Verify load balance resistors.
asymmetrical DC Link voltage.
Power structure 1 detected a power Replace power supply if
supply out of tolerance.
problem persists.
Power structure 1 hardware enable is Verify drive enable is present.
not present.
Power structure 1 detected an
Contact Technical Support.
unidentified fault.
Power board incompatible with control Load new file into power board.
board.
Power board version number is
Load new file into power board.
corrupted.
Troubleshooting and Error Codes
Fault
Default Corrupted
No.
32
Rating Corrupted
33
New ControlBoard
34
Elapsed Checksum
35
Param Checksum
36
Param Checksum B
37
Param Checksum W 38
Param Checksum L
39
Ac Line Lost
40
Ac Phase Lost
41
Ac Sync Low Vac
42
AC Sync Low Freq
43
AC Sync High Freq
44
AC Sync Conflict
45
PWM Sync Lost
46
Ac Low Voltage
50
Ac High Voltage
51
Ac Low Frequency
52
Ac High Frequency
53
Ac High dFdT
54
Ac I Imbalance
55
Ac V Imbalance
56
DcLink Low Volt
57
Ride Thru Expire
58
Ride Thru Expire
59
IT Over Load
60
Ambnt Over Temp
61
Description
Power board default data file is
corrupted.
Power board rating data file is
corrupted.
New converter control board was
detected.
Elapsed operation checksum is invalid
at power up.
Parameter data checksum is invalid at
power up.
Parameter data checksum error when
writing a BYTE value.
Parameter data checksum error when
writing a WORD value.
Parameter data checksum error when
writing a LONG value.
AC line synchronization was lost when
power turned off.
AC line synchronization was lost when
when a phase was lost.
AC line synchronization was lost
because voltage was low.
AC line synchronization was lost
because frequency was low.
AC line synchronization was lost
because frequency was high.
Conflict in AC line synchronization
state machine.
PWM Carrier synchronization was
lost.
AC line voltage was below the
configured limit for the configured
time.
AC line voltage exceeded the
configured limit for the configured
time.
AC line frequency was below the
configured limit for the configured
time.
AC line frequency exceeded the
configured limit for the configured
time.
Change in line frequecy exceeded the
configured limit.
AC current balance exceeded the
configured limit for the configured
time.
AC voltage balance exceeded the
configured limit for the configured
time.
DC link voltage was below the
precharge open level.
Power dip ride through expired with
the precharge open.
Power dip ride through expired with
the precharge closed.
Operating current levels exceeded the
rated overload.
Measured ambient temperature
exceeded the maximum limit.
1-3
Action
Load new file into power board.
Load new file into power board.
Reset to defaults is required.
Reset to defaults is required.
Reset to defaults is required.
Reset to defaults is required.
Reset to defaults is required.
Reset to defaults is required.
Verify proper input line voltage
is present.
Verify proper input line voltage
is present.
Verify proper input line voltage
is present.
Verify proper input line voltage
is present.
Verify proper input line voltage
is present.
Contact Technical Support.
Verify wiring of carrier
synchronization twisted pair.
Verify proper input line voltage
is present.
Verify proper input line voltage
is present.
Verify proper input line voltage
is present.
Verify proper input line voltage
is present.
Verify proper input line voltage
is present.
Verify proper input line voltage
is present.
Verify proper input line voltage
is present.
Verify proper input line voltage
is present.
Verify proper input line voltage
is present.
Verify proper input line voltage
is present.
Verify application operates
within limits.
Take steps to lower ambient.
PowerFlex® 700L Frame 2 Drive Hardware Service Manual
Publication 20L-TG002A-EN-P
1-4
Troubleshooting and Error Codes
Fault
Base Over Temp
No.
62
Jnct Over Temp
63
Ntc Range Low
64
Ntc Range High
65
PS1 Fan Loss
66
PS1 Reactor Temp
67
Description
IGBT base temperatures exceeded
the maximum limit.
IGBT junction temperature exceeded
the maximum limit.
NTC temperature below rated
temperature range.
NTC temperature above rated
temperature range.
Power structure 1 detected a
circulating fan was lost.
Power structure 1 detected the reactor
thermal switch opened.
Action
Verify the required drive cooling
is present.
Verify drive cooling and
excessive current levels.
Check for open or shorted NTC
device.
Check for open or shorted NTC
device.
Verify internal circulating fans
are turning.
Verify reactor cooling fans are
turning.
For additional information regarding the active converter, please refer to the
PowerFlex 700 Active Converter Power Module User Manual (publication
PFLEX-UM002).
Addressing 700 Vector
Control Hardware Faults
PowerFlex® 700L Frame 2 Drive Hardware Service Manual
Publication 20L-TG002A-EN-P
The following table describes two groups of 700 Vector Control faults. The
first group contains faults common to both the 20B and 20L products. The
second group contains faults existing only in the 20L product.
Fault
No.
Auxiliary Input
Power Loss
2
3
Under Voltage
4
Over Voltage
5
Motor Overload
7
Heatsink OvrTemp
8
Trnsistr OvrTemp
9
HW OverCurrent
12
Ground Fault
13
Load Loss
15
Description
Action
Faults Common to 20B and 20L Products
Auxiliary input interlock is open.
Check remote wiring.
DC bus voltage remained below 85% Monitor input voltage for low
of nominal longer than [Power Loss voltage or line power
Time].
interruptions.
DC bus level fell below minimum
Monitor input voltage for low
value.
voltage or line power
interruptions.
DC bus level exceeded maximum
Monitor input voltage for high
value.
line or transient voltage.
Internal electronic overload trip.
Reduce load so drive output
current does not exceed the
current set by [Motor NP FLA].
Heatsink temperature exceeded
Check water loop.
100% of [Drive Temp].
Check for excess load.
Output transistors have exceeded
Check water loop.
their maximum operating limit.
Check for excess load.
The drive output current has
Check programming. Check for
exceeded the hardware current limit. excess load, improper DC
boost or other causes of excess
load.
Verify that the grounding tabs in
the back of the control
cassettes are making a solid
connection.
A current path to ground greater than Check motor and external
25% of drive rating exists.
wiring to drive output terminals
for a grounded condition.
Verify that the grounding tabs in
the back of the control
cassettes are making a solid
connection.
Drive output current is below [Load
Verify the connections between
Loss Level] for a time greater than
motor and load. Verify level and
[Load Loss Time].
time.
Troubleshooting and Error Codes
Fault
Motor Thermistor
Output Phase Loss
Phase U to Grnd
Phase V to Grnd
Phase W to Grnd
Phase UV Short
Phase VW Short
Phase UW Short
Drive Overload
Port 1-6 Adapter
Port 1-6 DPI Fault
700L Dsat U
700L Dsat V
700L Dsat W
700L OvrCurnt
700L OvrVolt
700L Asym Vdc
700L PwrSply
700L HW Disable1
700L Latch Err
700L Fan Loss
Cnv NotLogin
Cnv Not Start
700L NTC Open
No.
16
1-5
Description
Thermistor output is out of range.
Action
Verify the thermistor is
connected. Motor is
overheated. Reduce load.
21
Current in one or more of the phases Check the drive and motor
has been lost or is below a preset
wiring.
level.
Check the wiring between the
38
A phase to ground short has been
detected between the drive and the drive and the motor. Check
39
motor in this phase.
motor for ground. Replace
40
power module.
41
Excessive current has been detected Check the motor and the drive
between these two output terminals. output terminal wiring for a
42
shorted condition. Replace
43
power module.
64
Drive rating of 110% for 1 minute or Reduce load.
150% for 3 seconds has been
exceeded.
71-76 Communications adapter on port
Check communication cable
reported a fault.
and check adapter fault queue
for information about the fault.
81-86 DPI communications to port was lost. If adapter was not intentionally
disconnected, check wiring.
Replace wiring, port expander,
or Main Control Board as
needed. Check HIM
connection.
Faults Existing Only in 20L Products
170 Phase U Desat fault on 700L power Contact Technical Support.
structure.
171 Phase V Desat fault on 700L power Contact Technical Support.
structure.
172 Phase W Desat fault on 700L power Contact Technical Support.
structure.
173 Over current on 700L power structure. Check programming. Check for
cause of excessive current.
174 Over voltage on 700L power structure. Check programming. Check for
cause of excessive voltage.
175 Asymmetrical voltage on 700L power Verify load balance resistors.
structure DC link.
176 Power supply failed on 700L power
Replace power supply if
structure.
problem persists.
177 Hardware disable asserted on 700L Verify drive enable is present.
power structure.
178 Fault reporting failure on 700L power Verify that the grounding tabs in
structure.
the back of the control
cassettes are making a solid
connection.
Contact Technical Support.
179 Fan failure on 700L power structure. Verify internal circulating fans
are turning.
190 Active converter did not begin
Check DPI connection. Check
communication.
for proper versions.
191 Active converter did not start when
Check start inhibits. Check
requested.
parameter 214 - [Start Inhibit].
192 Thermal sensor failed on 700L power Contact Technical Support.
structure.
For additional information regarding 700 Vector Control, please refer to the
PowerFlex 700 Adjustable Frequency AC Drive User Manual - Series B
(publication 20B-UM002).
PowerFlex® 700L Frame 2 Drive Hardware Service Manual
Publication 20L-TG002A-EN-P
1-6
Troubleshooting and Error Codes
Addressing 700S Phase II
Control Hardware Faults
The following table describes two groups of 700S Phase II faults. The first
group contains faults common to both the 20D and 20L products. The
second group contains faults existing only in the 20L product.
Name
Motor OLoad Trip
Inv OTemp Trip
Inv OLoad Trip
DC Bus OverVolt
Ground Fault
DC Bus Undervolt
DPI Loss Port 1-6
Net Loss DPI 1-6
700L Dsat U1
700L Dsat V1
700L Dsat W1
700L OvrCurnt1
700L OvrVolt1
700L AsymDcLink1
700L PwrSply1
700L HW Disable1
700L Latch Err 1
700L Fan Fail 1
700L Cnv Faulted
PowerFlex® 700L Frame 2 Drive Hardware Service Manual
Publication 20L-TG002A-EN-P
No.
Description
Action
Faults Common to 20D and 20L Products
11
Internal electronic overload trip.
Reduce load so drive output
current does not exceed the
current set by [Motor NP FLA].
15
P313 [Heatsink Temp] is above the
Reduce the mechanical load.
maximum limit.
Check cooling loop.
17
The drive’s operating point has
Reduce the mechanical load
exceeded the intermittent current
configured with P377 [Inv OL
rating and a foldback to the
Trip Cnfg].
continuous rating has occurred.
24
An over voltage has occurred on the Check programming. Check for
DC bus.
cause of excessive voltage.
26
A current to earth exceeds 35% of the Check the motor and external
peak drive rating.
wiring to the drive output
terminal for a grounded
condition.
Verify that the grounding tabs in
the back of the control
cassettes are making a solid
connection.
42
Bus voltage has fallen below the level Monitor input voltage for low
configured by P409 [Line Undervolts]. voltage.
49-54 The device at DPI Port 1-6 has
Verify the DPI device is present
stopped communicating.
and functional at the port.
55-60 A communication fault has occurred Verify network connection.
between the adapter at port 1-6.
Verify status of network.
Faults Existing Only in 20L Products
97
Phase U Desat fault on 700L power Contact Technical Support.
structure 1.
98
Phase V Desat fault on 700L power Contact Technical Support.
structure 1.
99
Phase W Desat fault on 700L power Contact Technical Support.
structure 1.
100 Over current on 700L power structure Check programming. Check for
1.
cause of excessive current.
Verify that the grounding tabs in
the back of the control
cassettes are making a solid
connection.
101 Over voltage on 700L power structure Check programming. Check for
1.
cause of excessive voltage.
102 Asymmetrical voltage on 700L power Verify load balance resistors.
structure 1 DC link.
103 Power supply failed on 700L power
Replace power supply if
structure 1.
problem persists.
104 Hardware disable asserted on 700L Verify drive enable is present.
power structure 1.
105 Fault reporting failure on 700L power Verify that the grounding tabs in
structure 1.
the back of the control
cassettes are making a solid
connection.
Contact Technical Support.
106 Fan failure on 700L power structure 1. Verify internal circulating fans
are turning.
110 Active converter has faulted.
Check active converter fault
log.
Troubleshooting and Error Codes
Name
Cnv NotLogin
No.
111
Cnv Not Start
112
Description
Active converter did not begin
communication.
Active converter did not start when
requested.
1-7
Action
Check DPI connection. Check
for proper versions.
Check start inhibits. Check
parameter 214 [Start Inhibits].
For additional information regarding 700S Phase II Control, please refer to
the PowerFlex 700S High Performance AC Drive - Phase II User Manual
(publication 20D-UM006).
Diagnostic Procedures by
Symptom
The following charts list drive symptom, symptom descriptions, and
recommended actions.
No HIM Display
Use this procedure when the HIM does not function:
Check HIM
Connection
and Seating
Properly
Connected?
No
Reseat or
Reconnect HIM
Properly
Connected?
No
Reseat or
Reconnect Cables
Display?
No
Replace
Power Supply
PCB
Yes
Check Cable Connections:
34-Pin Power Supply Cable
40-Pin MCB Cable
30-Pin Comm. I/F Cable
Comm. I/F PCB
Internal DPI Cables
External DPI Cables
Yes
Replace HIM
PowerFlex® 700L Frame 2 Drive Hardware Service Manual
Publication 20L-TG002A-EN-P
1-8
Troubleshooting and Error Codes
Circuit Breaker Tripped – Blown Input Fuses
Use this procedure when a drive clears any of its circuit breaker or power
fuses (branch circuit protection):
Disconnect Power
Lock Out/Tag Out
Inspect for
Visible Damage
Damage Visible?
Yes
Replace Drive or
Damaged Components
Control
Transformer
Fuses Blown?
Yes
Replace Transformer
Fuses and Check/Repair
Control Wiring
Is Transformer
Damaged?
Yes
Replace
Transformer
Measures less
than 100 ohms?
Yes
Short is on the Load Side
of the Contactors or
Wiring to the Converter or
Filter Section -Isolate and Repair
Did Converter
Module Fail Test?
Yes
Replace the
Converter Module
Did Inverter
Module Fail Test?
Yes
Replace the
Inverter Module
Any Problems
Found?
Yes
Contact Allen-Bradley
Drives
Technical Support
No
Check Control
Transformer
Primary
No
Check Control
Transformer for
Shorts/Visible Damage
No
Temporarily
Remove (1) Control
Transformer Fuse
Disconnect Converter
Module AC Terminals
from the Input Filter
Check for Line-to-Line
and Line-to-Ground
Shorts at the Drive Input
No
Perform Diode
Tests on the
Converter Module
No
Perform Diode
Tests on the
Inverter Module
No
Perform
Start-Up Procedure
PowerFlex® 700L Frame 2 Drive Hardware Service Manual
Publication 20L-TG002A-EN-P
Troubleshooting and Error Codes
1-9
Over-Temperature Faults
Use this procedure to troubleshoot drive over-temperature faults:
Check Surrounding
Air Temperature
Temperature
Exceeds
Specification?
Yes
Provide Additional
Airflow or Air
Conditioning
Current
Exceeds
Specification?
Yes
Reduce Load or
Procure a Drive with a
Higher Rating
Frequency Too High
for Lead Length and
Surrounding Temp?
Yes
Lower PWM
Frequency
Fluid
Meets
Specification?
No
Remedy Fluid Flow
Rate and Temperature
Proper Space
at Inlet?
No
Remedy Space at Inlet
Yes
Remove Air Flow
Blockages
No
Check Motor Current
and Load Levels
No
Check PWM
Frequency
No
Check Fluid Flow
Through the Drive
Yes
Check Fan and Air Flow
Through the Drive
Yes
Air Flow
Blockages?
No
Fan Running
Properly?
Yes
Connection
Good?
No
Repair
Connection
Resistance =
7.3 Ohms
± 5%?
No
Replace Fan
No
Check Connection Between
Power Module Fan and
Power Supply PCB
Yes
Check Fan Winding
Resistance
No
Contact Allen-Bradley
Drives
Technical Support
PowerFlex® 700L Frame 2 Drive Hardware Service Manual
Publication 20L-TG002A-EN-P
1-10
Troubleshooting and Error Codes
Notes:
PowerFlex® 700L Frame 2 Drive Hardware Service Manual
Publication 20L-TG002A-EN-P
Chapter
2
Component Test Procedures
!
ATTENTION: To avoid an electric shock hazard, ensure that all
power to the drive has been removed before performing the
following.
!
ATTENTION: To avoid an electric shock hazard, verify that the
voltage on the Power Module DC bus capacitors has discharged
completely before performing any work on the drive.
1. Turn off and lock out input power. Wait 5 minutes.
L1
L2
L3
I
O
2. With the cover of the drive removed, measure the DC bus
voltage at the DC+ and DC- TESTPOINT sockets on the
lower front of the power module (see Figure 2.2 on page 2-5
for details). The measured voltage must be zero (0).
!
!
Drive Status
ATTENTION: HOT surfaces can cause severe burns. Do not
touch the heatsink surface during operation of the drive. After
disconnecting power allow time for cooling.
ATTENTION: This drive contains ESD (Electrostatic
Discharge) sensitive parts and assemblies. Static control
precautions are required when installing, testing, servicing or
repairing this assembly. Component damage may result if ESD
control procedures are not followed. If you are not familiar with
static control procedures, refer to Allen-Bradley publication
8000-4.5.2, “Guarding Against Electrostatic Damage” or any
other applicable ESD protection handbook.
The condition or state of your 700L drive is constantly monitored. Any
changes will be indicated through the HIM option (if present) and/or four
sets of status indicators:
•
•
•
•
Power Module status indicators (for both 700S and 700 vector control).
SynchLink option indicators (for 700S control only).
DriveLogix communications option indicators (for 700S control only).
Network communication adapter option indicators (if installed).
PowerFlex® 700L Frame 2 Drive Hardware Service Manual
Publication 20L-TG002A-EN-P
2-2
Component Test Procedures
The drive status indicators are located on the top front of the drive.
Figure 2.1 Drive Status Indicators
POWER
STS
➊
➋
PORT
MOD
NET A
NET B
➌
Viewing the PowerFlex 700
Vector Control Diagnostic
Indicators
The PowerFlex 700L power module contains Power and Status indicators
and, if installed, Communication Adapter indicators (Figure 2.1). These
indicators are only operational when the drive is energized.
!
ATTENTION: The indicators are only operational when the
drive is energized. Servicing energized equipment can be
hazardous. Severe injury or death can result from electrical
shock, burn or unintended actuation of controlled equipment.
Follow Safety related practices of NFPA 70E, ELECTRICAL
SAFETY FOR EMPLOYEE WORKPLACES. DO NOT work
alone on energized equipment!
Status Indicators
Item Name
➊ POWER
Color
Green
➋
STS
(Status)
Green
➌
PORT
MOD
NET A
NET B
PowerFlex® 700L Frame 2 Drive Hardware Service Manual
Publication 20L-TG002A-EN-P
State
Steady
Flashing
Steady
Yellow
Flashing,
Drive Stopped
Flashing,
Drive Running
Steady,
Drive Running
Red
Flashing
Steady
Refer to the Communication
Adapter User Manual.
Description
Illuminates when power is applied to the drive.
Drive ready, but not running and no faults are present.
Drive running, no faults are present.
A type 2 alarm condition exists, the drive cannot be started.
Check parameter 211 [Drive Alarm 2].
An intermittent type 1 alarm condition is occurring.
Check parameter 211 [Drive Alarm 1].
A continuous type 1 alarm condition exists.
Check parameter 211 [Drive Alarm 1].
Fault has occurred. Check [Fault x Code] or Fault Queue.
A non-resettable fault has occurred.
Status of DPI port internal communications (if present).
Status of communications module (when installed).
Status of network (if connected).
Status of secondary network (if connected).
Component Test Procedures
2-3
Viewing the PowerFlex 700S In addition to the PowerFlex 700L power module indicators (Figure 2.1),
the 700S control cassette contains Run, controller, and SynchLink
Control Diagnostic
indicators. These indicators are only operational when the drive is energized
Indicators
and only visible when the drive door is open. The status of these indicators
can also be viewed from the HIM or from an applications program (for
example, DriveExplorer) in parameter 554 (LED Status). This feature is
only available with PowerFlex 700S Phase II control version 3.001 or later.
!
ATTENTION: The Run and controller indicators are only
operational when the drive is energized. Servicing energized
equipment can be hazardous. Severe injury or death can result
from electrical shock, burn or unintended actuation of controlled
equipment. Follow Safety related practices of NFPA 70E,
ELECTRICAL SAFETY FOR EMPLOYEE WORKPLACES.
DO NOT work alone on energized equipment!
Status Indicators
State
Steady
Green
Flashing
Steady
Flashing
Description
Illuminates when power is applied to the drive.
Drive ready, but not running & no faults are present.
Drive running, no faults are present.
Yellow
When running, a type 2 (non-configurable) alarm
condition exists, drive continues to run. When stopped, a
start inhibit exists and the drive cannot be started.
Steady
A type 1 (user configurable) alarm condition exists, but
drive continues to run.
Red
Flashing
A fault has occurred.
Steady
A non-resettable fault has occurred.
Red /
Flashing
The drive is in flash recovery mode. The only operation
Yellow Alternately permitted is flash upgrade.
Status of DPI port internal communications (if present).
Refer to the
Communication
Status of communications module (when installed).
Adapter User Manual Status of network (if connected).
Status of secondary network (if connected).
PORT
MOD
NET A
NET B
(1)
SYNCHLINK Green
ENABLE
(1)
Color
Green
➌
Control
Control Assembly
Communications
DRIVE
Power Structure
Item Name
➊ PWR
(Power)
➋ STS
(Status)
Steady
Green
Red
Flashing
Flashing
Green
Green
On
Off
The module is configured as the time keeper.
– or –
The module is configured as a follower and
synchronization is complete.
The follower(s) are not synchronized with the time keeper.
The module is configured as a time master on SynchLink
and has received time information from another time
master on SynchLink.
The drive’s enable input is high.
The drive’s enable input is low.
SynchLink LEDs are located on the SynchLink daughtercard on the main circuit board in the control cassette.
PowerFlex® 700L Frame 2 Drive Hardware Service Manual
Publication 20L-TG002A-EN-P
2-4
Component Test Procedures
Removing Power from the
Drive
1. Turn off and lock out input power. Wait five (5) minutes.
L1
L2
L3
I
O
2. Remove and save the drive cover (see Removing the Drive Front
Cover on page 3-4).
(5 Captive Screws)
3. Check for zero (0) volts between the DC+ and DC- testpoints. Using 4
mm (0.158 in.) socket probes, connect the voltmeter to DC+ and DCTESTPOINT sockets on the lower front of the power module. The
measured voltage must be zero (0).
PowerFlex® 700L Frame 2 Drive Hardware Service Manual
Publication 20L-TG002A-EN-P
Component Test Procedures
2-5
Figure 2.2 Measuring the DC Bus Voltage at the DC Testpoint Sockets
DC+
Testpoint
A
DCTestpoint
A
Section A-A
Periodic Inspections with
No Power Applied
Coolant Hoses/Connections
Visually inspect the inlet and outlet coolant hose assemblies, and filter
section-to-power section coolant connections for leaks. Replace hoses if
leaks cannot be stopped.
Terminal Bolts, Mounting Bolts, etc.
Ensure all power conductor terminal bolts and mounting bolts are tight.
Tighten loose bolts. Refer to Chapter 3 for torque specifications.
Periodic Inspections with
Power Applied
Checking the Power Module Fan
Check for vibration and noise. Fan failure may be imminent if vibration
and/or increasing noise in the fan bearings occurs. Fan replacement is
recommended at this time. Refer to Removing the Power Section Stirring
Fan on page 3-9.
PowerFlex® 700L Frame 2 Drive Hardware Service Manual
Publication 20L-TG002A-EN-P
2-6
Component Test Procedures
Checking the Input Filter
Fans
The Frame 2 input filter has two fans just above the input terminals of the
drive.
!
ATTENTION: Fans are only operational when the drive is
energized and only visible with cabinet doors open. Servicing
energized equipment can be hazardous. Severe injury or death
can result from electrical shock, burn or unintended actuation of
controlled equipment. Follow safety-related practices of NFPA
70E, ELECTRICAL SAFETY FOR EMPLOYEE
WORKPLACES. DO NOT work alone on energized equipment!
Check for vibration and noise. Fan failure may be imminent if vibration
and/or increasing noise in the fan bearings occurs. Fan replacement is
recommended at this time.
Forward Biased Diode Tests
for the Power Module
A forward biased diode test checks the semiconductor junctions between
the terminals and measures the voltage drop across those junctions. To run
the test, use a digital multi-meter with a diode check mode. To pass each
test, the meter must display a voltage within the specification shown in the
table. If the test finds a short, the meter will display “.000.” If the test finds
an open circuit or reversed polarity, the meter will display “.0L.”
1. Remove power from the drive (see Removing Power from the Drive on
page 2-4).
2. Disconnect power conductors from R/L1, S/L2, T/L3, U/T1, V/T2, and
W/T3 terminals on the power module. For power module terminal
names and locations, refer to Figure 2.1 or Figure 2.11 in the PowerFlex
700L User Manual.
3. Perform forward biased diode tests on the points listed in Table 2.A. If
the power module fails any of these tests, then replace the power
module.
Table 2.A Forward Biased Diode Tests for the Power Module
Meter Leads
+
DC+
DCR/L1
DC+
S/L2
DC+
T/L3
DC+
DCR/L1
DCS/L2
DCT/L3
U/T1
DC+
V/T2
DC+
W/T3
DC+
DCU/T1
DCV/T2
DCW/T3
PowerFlex® 700L Frame 2 Drive Hardware Service Manual
Publication 20L-TG002A-EN-P
Nominal Meter Reading
Value should gradually rise to 0.75V or greater.
0.30…0.40V
Chapter
3
Access Procedures
!
!
ATTENTION: To avoid an electric shock hazard, ensure that all
power to the drive has been removed before performing the
following.
ATTENTION: To avoid an electric shock hazard, verify that the
voltage on the bus capacitors has discharged completely before
servicing. Measure the DC bus voltage at the DC+ and DCTESTPOINT sockets on the lower front of the power module.
The measured voltage must be zero (0).
!
ATTENTION: The sheet metal cover and mounting screws on
the ASIC Board located on the power structure are energized at
(-) DC bus potential high voltage. Risk of electrical shock, injury,
or death exists if someone comes into contact with the assembly.
!
ATTENTION: HOT surfaces can cause severe burns. Do not
touch the heatsink surface during operation of the drive. After
disconnecting power allow time for cooling.
!
ATTENTION: Hazard of permanent eye damage exists when
using optical transmission equipment. This product emits intense
light and invisible radiation. Do not look into fiber-optic ports or
fiber-optic cable connectors.
!
ATTENTION: This drive contains ESD (Electrostatic
Discharge) sensitive parts and assemblies. Static control
precautions are required when installing, testing, servicing or
repairing this assembly. Component damage may result if ESD
control procedures are not followed. If you are not familiar with
static control procedures, reference Allen-Bradley publication
8000-4.5.2, “Guarding Against Electrostatic Damage” or any
other applicable ESD protection handbook.
PowerFlex® 700L Frame 2 Drive Hardware Service Manual
Publication 20L-TG002A-EN-P
3-2
Access Procedures
Torque Specifications
The following table lists fastener torque specifications for the Frame 2
complete drive spare parts kits:
Kit Catalog Number Description
SK-L1-CVR1-F2
Front Cover
20L-VECTB-C0
20L-VECTB-D0
20D-P2-CKE1
20D-DL2-CKE1
SK-L1-FAN2-F2
Inverter Vector Control Cassette, 24V
Inverter Vector Control Cassette, 115V
Inverter 700S Phase II Control Cassette
Inverter 700S Phase II Control Cassette
with DriveLogix 5730
Active Converter Control Cassette,
400/480V
Active Converter Control Cassette,
600/690V
Power Section Stirring Fan
SK-L1-PIABI1-F2
SK-L1-PIAC1-F3
Inverter Power Interface PCB
Converter Power Interface PCB
SK-L1-PWRS1-F2
PCB Power Supply
SK-L1-PWRS2-F2
Input Filter Fan Power Supply
SK-L1-FUSE1-F2
SK-L1-XFMR1-F2
SK-L1-FAN1-F2
Control Transformer Fuses
Control Transformer, 200VA
Input Filter Fan Assembly
SK-L1-HPWRS1-F2
J1-to-J6 Power Interface Harness
SK-L1-HPWRS2-F2
J3-to-J4 Power Interface Harness
SK-L1-HPWRS2-F3
SK-L1-CBL2-F2
J2-to-J5 Power Interface Harness
Converter-to-Inverter PWR (Power)
Interface Jumper
Voltage Feedback Harness
Motor Voltage Feedback PCB, 400V
SK-L1-ACC1-F3D
SK-L1-ACC1-F3F
SK-L1-HGD1-F2
SK-L1-MVF1-C
Phillips® is a registered trademark of the Phillips Screw Company.
PowerFlex® 700L Frame 2 Drive Hardware Service Manual
Publication 20L-TG002A-EN-P
Fastener
Slotted captive
screw
Slotted captive
screw
Torque
Final
3.1 N•m
(27 lb•in)
0.6 N•m
(5 lb•in)
M5 x 10 mm
Torx screw
M5 x 10 mm
Torx screw
M4 x 10 mm
Torx screw
M5 x 10 mm
Torx screw
M4 x 10 mm
Torx screw
M5 x 10 mm
Torx screw
M4 x 10 mm
Torx screw
M5 x 10 mm
Torx screw
3.2 N•m
(28 lb•in)
3.2 N•m
(28 lb•in)
1.7 N•m
(15 lb•in)
3.2 N•m
(28 lb•in)
1.7 N•m
(15 lb•in)
3.2 N•m
(28 lb•in)
1.7 N•m
(15 lb•in)
3.2 N•m
(28 lb•in)
M4 x 20 mm
Torx screw
M5 x 10 mm
Torx screw
M5 x 10 mm
Torx screw
M6 x 12 mm
Torx screw
M5 x 10 mm
Torx screw
1.7 N•m
(15 lb•in)
3.2 N•m
(28 lb•in)
3.2 N•m
(28 lb•in)
6.8 N•m
(60 lb•in)
3.2 N•m
(28 lb•in)
Nylon snap-on standoffs —
and nylon rivets
Access Procedures
3-3
Understanding Torque Figures in Assembly Diagrams
Icons and numbers in the assembly diagrams indicate how to tighten
hardware:
Tool Type and Size
T indicates Torx driver bit
Symbol Fastener Type
Torx Head
Screw
Slotted Captive
Screw
Removing Power from the
Drive
!
T25
3.2 N•m
(28 lb•in)
Tightening Torque
ATTENTION: To avoid an electric shock hazard, verify that the
voltage on the Power Module DC bus capacitors has discharged
completely before performing any work on the drive.
1. Turn off and lock out input power. Wait 5 minutes.
L1
L2
L3
I
O
2. Measure the DC bus voltage at the DC+ and DCTESTPOINT sockets on the lower front of the power module
(see Figure 2.2 on page 2-5 for details). The measured
voltage must be zero (0).
Remove power before making or breaking cable connections.
When you remove or insert a cable connector with power
applied, an electrical arc may occur. An electrical arc can cause
personal injury or property damage by:
• Sending an erroneous signal to your system’s field devices,
causing unintended machine motion.
• Causing an explosion in a hazardous environment.
Electrical arcing causes excessive wear to contacts on both the
module and its mating connector. Worn contacts may create
electrical resistance.
PowerFlex® 700L Frame 2 Drive Hardware Service Manual
Publication 20L-TG002A-EN-P
3-4
Access Procedures
Removing the Drive Front
Cover
Removal
1. Remove power from the drive (see Removing Power from the Drive on
page 3-3).
2. Unfasten the five (5) M5 x 16 mm (0.63 in.) long slotted captive screws
that secure the drive cover, and remove the cover.
(5 Captive Screws)
Installation
1. Place the cover on the front of the drive and align it to the edges of the
drive.
2. Tighten the five (5) M5 x 16 mm (0.63 in.) long slotted captive screws
to secure the cover to the drive.
Removing the HIM Option
Removal/Installation
The HIM can be removed or installed while the drive is powered.
Important: HIM removal is only permissible in Auto mode. If the HIM is
removed while in Manual mode or the HIM is the only
remaining control device, a fault will occur.
Step
To remove the HIM:
1. Press ALT and then Enter (Remove). The
Remove HIM confirmation screen appears.
2. Press Enter to confirm you want to remove HIM.
3. Remove the HIM from the drive.
To install the HIM, insert into drive or connect cable.
PowerFlex® 700L Frame 2 Drive Hardware Service Manual
Publication 20L-TG002A-EN-P
Key(s)
ALT +
Example Displays
Remove Op Intrfc:
Press Enter to
Disconnect Op Intrfc?
(Port 1 Control)
Access Procedures
Removing the
Communications Adapter
Option
3-5
Removal
1. Remove power from the drive (see Removing Power from the Drive on
page 3-3).
2. Remove the drive front cover (see Removing the Drive Front Cover on
page 3-4).
3. Disconnect the communications adapter cable from its mating
connector on the communications adapter.
4. Unfasten the four (4) M3 x 6 mm (0.24 in.) long Phillips captive screws
that secure communications adapter, and remove the adapter.
HIM Bezel
Phillips Captive Screw
M3 x 6 mm Long
4X
P0
0.6 N•m
(5 lb•in)
Cable Connector
Communications Adapter
Communications
Adapter Cable
Installation
Install the communications adapter in reverse order of removal, while
referring to the torque specification shown in the drawing.
PowerFlex® 700L Frame 2 Drive Hardware Service Manual
Publication 20L-TG002A-EN-P
3-6
Access Procedures
Removing the Inverter
Control Cassette
Depending on the drive control option, the inverter is equipped with either
the 700 Vector Control or the 700S Phase II Control cassette.
700 Vector Control Cassette (24V or 115V)
Removal
1. Remove power from the drive (see Removing Power from the Drive on
page 3-3).
2. Remove the drive front cover (see Removing the Drive Front Cover on
page 3-4).
3. Follow standard ESD procedures.
4. Disconnect the 700 vector control synchronization cable terminal block
TB2.
5. Disconnect the 40-Pin MCB cable from connector J2. Leave the cable's
other end connected to the addressable power PCB.
6. Disconnect the 30-Pin communications interface cable from connector
J3. Leave the cable's other end connected to the communications
interface PCB.
7. Disconnect the I/O terminal block TB1.
8. Disconnect the encoder terminal block J1 (if installed).
9. Loosen the two (2) screw latches on the front of the cassette and slide
the cassette out from the cassette mounting bracket.
Pin 1
Detail
Installation
Install the cassette in reverse order of removal. Hand tighten the two (2)
cassette screw latches to the cassette mounting bracket.
PowerFlex® 700L Frame 2 Drive Hardware Service Manual
Publication 20L-TG002A-EN-P
Access Procedures
3-7
700S Phase II Control Cassette
Removal
1. Remove power from the drive (see Removing Power from the Drive on
page 3-3).
2. Remove the drive front cover (see Removing the Drive Front Cover on
page 3-4).
3. Follow standard ESD procedures.
4. Disconnect the 40-Pin MCB cable from connector P1. Leave the cable's
other end connected to the addressable power PCB.
5. Disconnect the 30-Pin communications interface cable from connector
P2. Leave the cable's other end connected to the communications
interface PCB.
6. Disconnect four (4) I/O terminal blocks TB1 and TB2.
7. Loosen the two (2) screw latches on the front of the cassette and slide
the cassette out from the cassette mounting bracket.
8. Disconnect the 700S synchronization cable connector P6. Remove and
save the tape holding the cable to the cassette.
Detail
TB1 Terminals
TB2 Terminals
Installation
Install the cassette in reverse order of removal. Hand tighten the two (2)
cassette screw latches to the cassette mounting bracket.
PowerFlex® 700L Frame 2 Drive Hardware Service Manual
Publication 20L-TG002A-EN-P
3-8
Access Procedures
Removing the Active
Converter Control Cassette
Removal
1. Remove power from the drive (see Removing Power from the Drive on
page 3-3).
2. Remove the drive front cover (see Removing the Drive Front Cover on
page 3-4).
3. Follow standard ESD procedures.
4. Disconnect the internal DPI cable from connector J4.
5. Disconnect the 700S control synchronization cable (if installed) from
connector J9.
6. Disconnect the 40-Pin MCB cable from connector J1. Leave the cable's
other end connected to the addressable power PCB.
7. Disconnect the I/O terminal block P1.
Important: Do not disconnect the 700 vector control synchronization
cable (if installed) from P1-7 and P1-8.
8. Disconnect the voltage feedback resistor PCB terminal block P2.
9. Loosen the (2) two screw latches on the front of the cassette and slide
the cassette out from the cassette mounting bracket.
Detail
Pin 1
Synchronization Cable
(For use with 700S Phase II Control only)
40-Pin
Ribbon Cable
Internal DPI Cable
P1
Synchronization Cable
(For use with 700 Vector Control only)
P2
Installation
Install the cassette in reverse order of removal. Hand tighten the two (2)
cassette screw latches to the cassette mounting bracket.
PowerFlex® 700L Frame 2 Drive Hardware Service Manual
Publication 20L-TG002A-EN-P
Access Procedures
Removing the Power
Section Stirring Fan
3-9
Removal
1. Remove power from the drive (see Removing Power from the Drive on
page 3-3).
2. Remove the drive front cover (see Removing the Drive Front Cover on
page 3-4).
3. Follow standard ESD procedures.
4. Unfasten the seven (7) M5 x 10 mm (0.39 in.) long Torx screws that
secure the bottom drive cover, and remove the cover.
Torx Screw
M5 x 10 mm Long
7X
T25
3.2 N•m
(28 lb•in)
5. Unfasten two (2) M5 x 10 mm (0.39 in.) long Torx bracket screws that
secure the fan, disconnect the fan power leads (two fastons), and lift the
fan from the drive.
Torx Screw
M5 x 10 mm Long
2X
T25
3.2 N•m
(28 lb•in)
Installation
Install the fans and fan harness in reverse order of removal while referring
to torque specifications shown in the drawings.
Important: Fan airflow direction is into the Power Section.
PowerFlex® 700L Frame 2 Drive Hardware Service Manual
Publication 20L-TG002A-EN-P
3-10
Access Procedures
Removing the Drive Front
Panel
In most cases, the drive front panel must be removed first to access the drive
component for its removal and replacement.
Removal
1. Remove the power section stirring fan from the drive (see Removing the
Power Section Stirring Fan on page 3-9).
2. Follow standard ESD procedures.
Black
Black
Red
Green/Yellow
Black
White 2X
Black
Black
Orange
Orange
Black 2X
Black 2X
Black 2X
Black
Black
Black
Black
Ib15
Ib14
Ib13
Ib12
Ib11
Ib10
Ib 9
Ib 8
Ib 7
Ib 6
Ib 5
Ib 4
Ib 3
Ib 2
Ib 1
PSPS+
PE1
PE2
Ia15
Ia14
Ia13
Ia12
Ia11
Ia10
Ia 9
Ia 8
Ia 7
Ia 6
Ia 5
Ia 4
Ia 3
Ia 2
Ia 1
PSPS+
PE1
PE2
Black
Red
Black
White
Black
Blue
White
Red
Black
Blue
3. Verify each wire connected to the TB1 terminal block is labeled with
the terminal designation to which it is connected. If not, label the wire
accordingly. Thereafter, disconnect all wires from TB1. The drawing
below shows all of the wires connected to TB1.
4. See Figure 3.1 and remove the three (3) tie wraps securing the PS(black) and PS+ (red) wires to the drive front panel.
PowerFlex® 700L Frame 2 Drive Hardware Service Manual
Publication 20L-TG002A-EN-P
Access Procedures
3-11
5. See Figure 3.1 and unfasten the nine (9) M5 x 10 mm (0.39 in.) long
Torx screws that secure the drive front panel. Then remove the drive
front panel.
Figure 3.1 Removing the Drive Front Panel
Torx Screw
M5 x 10 mm Long
9X
T25
3.2 N•m
(28 lb•in)
Red Wire
to PS+
on TB1
Black Wire
to PSon TB1
Installation
Install the drive front panel in reverse order of removal while referring to the
torque specification shown in the drawing.
PowerFlex® 700L Frame 2 Drive Hardware Service Manual
Publication 20L-TG002A-EN-P
3-12
Access Procedures
Replacing the Inverter
Power Interface PCB
Removal
1. Remove the drive front panel (see Removing the Drive Front Panel on
page 3-10).
2. Disconnect the stirring fan power leads (two fastons) from the input
filter fan power supply PCB.
3. Detach the eight (8) cable connectors (items ➊ through ➑ as shown in
the following drawing) from the inverter power interface PCB.
Torx Screw
M4 x 10 mm Long
6X
T20
1.7 N•m
(15 lb•in)
Inverter Power
Interface PCB
4. Remove the six (6) M4 x 10 mm (0.39 in.) long Torx screws that secure
the inverter power interface PCB, and remove the board.
Installation
Install the inverter power interface PCB in reverse order of removal, while
referring to the torque specifications shown in the drawings.
PowerFlex® 700L Frame 2 Drive Hardware Service Manual
Publication 20L-TG002A-EN-P
Access Procedures
Replacing the Converter
Power Interface PCB
3-13
Removal
1. Remove the drive front panel (see Removing the Drive Front Panel on
page 3-10).
2. Disconnect the stirring fan power leads (two fastons) from the input
filter fan power supply PCB.
3. Detach the six (6) cable connectors (items ➊ through ➏ as shown in the
following drawing) from the converter power interface PCB.
Torx Screw
M4 x 10 mm Long
6X
T20
1.7 N•m
(15 lb•in)
Converter Power
Interface PCB
PowerFlex® 700L Frame 2 Drive Hardware Service Manual
Publication 20L-TG002A-EN-P
3-14
Access Procedures
4. Remove the six (6) M4 x 10 mm (0.39 in.) long Torx screws that secure
the converter power interface PCB, and remove the board.
Installation
Install the converter power interface PCB in reverse order of removal, while
referring to the torque specifications shown in the drawings.
Replacing the PCB Power
Supply
Removal
1. Remove the drive front panel (see Removing the Drive Front Panel on
page 3-10).
2. See Figure 3.2 on page 3-15 and unfasten the ten (10) M5 x 10 mm
(0.39 in.) long Torx screws that secure the right side panel at the top,
side, and bottom of the panel. Then remove the right side panel.
3. Disconnect the three (3) ribbon cables from the inverter power interface
PCB.
4. Unfasten the four (4) M4 x 10 mm (0.39 in.) long Torx screws that
secure the PCB power supply, and remove the board.
PowerFlex® 700L Frame 2 Drive Hardware Service Manual
Publication 20L-TG002A-EN-P
Access Procedures
3-15
Figure 3.2 Removing the Drive Right Side Panel
Torx Screw
M4 x 10 mm Long
4X
T20
1.7 N•m
(15 lb•in)
Torx Screw
M5 x 10 mm Long
10X
T25
3.2 N•m
(28 lb•in)
Right
Side Panel
Installation
Install the PCB power supply in reverse order of removal, while referring to
the torque specifications shown in the drawings.
PowerFlex® 700L Frame 2 Drive Hardware Service Manual
Publication 20L-TG002A-EN-P
3-16
Access Procedures
Replacing the Input Filter
Fan Power Supply
Removal
1. Remove the drive front panel (see Removing the Drive Front Panel on
page 3-10).
2. Unfasten the seven (7) M5 x 10 mm (0.39 in.) long Torx screws that
secure the bottom drive cover. Then remove the bottom drive cover.
3. Disconnect the red and white wires from the DC bus, and the cable
connector from the filter fan.
4. Unfasten the four (4) M4 x 10 mm (0.39 in.) long Torx screws that
secure the input filter fan power supply, and remove the power supply.
Torx Screw
M4 x 10 mm Long
4X
T20
1.7 N•m
(15 lb•in)
Torx Screw
M5 x 10 mm Long
7X
T25
3.2 N•m
(28 lb•in)
Installation
Install the input filter fan power supply in reverse order of removal, while
referring to the torque specifications shown in the drawings.
PowerFlex® 700L Frame 2 Drive Hardware Service Manual
Publication 20L-TG002A-EN-P
Access Procedures
Removal
480V
400V
1. Remove the power section stirring fan (see Removing the Power
Section Stirring Fan on page 3-9) to access the control transformer
fuses.
690V
600V
Replacing the Control
Transformer Fuses
3-17
2. Replace the blown fuse(s) with the same type and equivalent-rated
fuse(s).
Installation
Install all drive components in reverse order of removal, while referring to
the torque specifications shown in the drawings.
PowerFlex® 700L Frame 2 Drive Hardware Service Manual
Publication 20L-TG002A-EN-P
3-18
Access Procedures
Replacing the Control
Transformer
Removal
1. Remove the power section stirring fan (see Removing the Power
Section Stirring Fan on page 3-9) to access the control transformer.
2. Remove the drive front panel (see Removing the Drive Front Panel on
page 3-10).
3. Disconnect the three (3) black wires from the control transformer.
4. Remove the four (4) M5 x 10 mm (0.39 in.) long Torx screws that
secure the control transformer, and remove the transformer.
Torx Screw
M5 x 10 mm Long
4X
T25
3.2 N•m
(28 lb•in)
Installation
Install the control transformer in reverse order of removal, while referring to
the torque specifications shown in the drawings.
PowerFlex® 700L Frame 2 Drive Hardware Service Manual
Publication 20L-TG002A-EN-P
Access Procedures
Replacing the Input Filter
Fan Assembly
3-19
Removal
1. Remove power from the drive (see Removing Power from the Drive on
page 3-3).
2. See Figure 3.2 and unfasten the ten (10) M5 x 10 mm (0.39 in.) long
Torx screws that secure the right side panel at the top, side, and bottom
of the panel. Then remove the right side panel.
3. Unfasten the seven (7) M5 x 10 mm (0.39 in.) long Torx screws that
secure the bottom drive cover. Then remove the bottom drive cover.
4. Unfasten the four (4) M4 x 20 mm (0.79 in.) long Torx screws that
secure the input filter fan assembly, and remove the assembly.
Input Filter Fan
Ass’y Power
Connector
Torx Screw
M5 x 10 mm Long
7X
T20
3.2 N•m
(28 lb•in)
Torx Screw
M4 x 20 mm Long
4X
T20
1.7 N•m
(15 lb•in)
5. Locate the input filter fan assembly power connector (see drawing
above) and disconnect it from the input filter fan power supply.
Installation
Install the input filter fan assembly in reverse order of removal, while
referring to the torque specifications shown in the drawings.
PowerFlex® 700L Frame 2 Drive Hardware Service Manual
Publication 20L-TG002A-EN-P
3-20
Access Procedures
Replacing the J1-to-J6
Power Interface Harness
Removal
1. Remove the drive front panel (see Removing the Drive Front Panel on
page 3-10).
2. See Figure 3.3 and unfasten the ten (10) M5 x 10 mm (0.39 in.) long
Torx screws that secure the right side panel at the top, side, and bottom
of the panel. Then remove the right side panel.
Figure 3.3 Drive Harness Locations
J2-to-J5 Power
Interface Harness
Torx Screw
M5 x 10 mm Long
10X
J1-to-J6 Power
Interface Harness
T25
3.2 N•m
(28 lb•in)
Right
Side Panel
PWR (Power)
Interface Jumper
Voltage Feedback Harness
3. Disconnect the J1-to-J6 power interface harness from both the power
supply PCB and the inverter power interface PCB.
Installation
Install the J1-to-J6 power interface harness in reverse order of removal,
while referring to the torque specifications shown in the drawings.
PowerFlex® 700L Frame 2 Drive Hardware Service Manual
Publication 20L-TG002A-EN-P
Access Procedures
Replacing the J3-to-J4
Power Interface Harness
3-21
Removal
1. Remove the drive front panel (see Removing the Drive Front Panel on
page 3-10).
2. See Figure 3.3 on page 3-20 and unfasten the ten (10) M5 x 10 mm
(0.39 in.) long Torx screws that secure the right side panel at the top,
side, and bottom of the panel. Then remove the right side panel.
3. Unfasten the three (3) M5 x 10 mm (0.39 in.) long Torx screws that
secure the left side panel. Then remove the left side panel.
Torx Screw
M6 x 12 mm Long
2X
T30
6.8 N•m
(60 lb•in)
J3-to-J4 Power
Interface Harness
(also includes two
ring lugs to the bus)
Torx Screw
M5 x 10 mm Long
3X
T25
3.2 N•m
(28 lb•in)
Left
Side Panel
PowerFlex® 700L Frame 2 Drive Hardware Service Manual
Publication 20L-TG002A-EN-P
3-22
Access Procedures
4. Unfasten the two (2) M6 x 12 mm (0.47 in.) long Torx screws that
secure the ring lugs of the J3-to-J4 power interface harness to the DC
bus. Then remove the ring lugs and disconnect the J3-to-J4 power
interface harness from the inverter power interface PCB.
Installation
Install the J3-to-J4 power interface harness in reverse order of removal,
while referring to the torque specifications shown in the drawings.
Replacing the J2-to-J5
Power Interface Harness
Removal
1. Remove the drive front panel (see Removing the Drive Front Panel on
page 3-10).
2. See Figure 3.3 on page 3-20 and unfasten the ten (10) M5 x 10 mm
(0.39 in.) long Torx screws that secure the right side panel at the top,
side, and bottom of the panel. Then remove the right side panel.
3. Disconnect the J2-to-J5 power interface harness from both the power
supply PCB and the inverter power interface PCB.
J2-to-J5 Power
Interface Harness
Installation
Install the J2-to-J5 power interface harness in reverse order of removal,
while referring to the torque specifications shown in the drawings.
PowerFlex® 700L Frame 2 Drive Hardware Service Manual
Publication 20L-TG002A-EN-P
Access Procedures
Replacing the PWR (Power)
Interface Jumper
3-23
Removal
1. Remove the drive front panel (see Removing the Drive Front Panel on
page 3-10).
2. Disconnect the PWR (Power) interface jumper from both the inverter
power interface PCB and the converter power interface PCB.
PWR (Power)
Interface Jumper
Installation
Install the PWR (Power) interface jumper in reverse order of removal, while
referring to the torque specifications shown in the drawings.
PowerFlex® 700L Frame 2 Drive Hardware Service Manual
Publication 20L-TG002A-EN-P
3-24
Access Procedures
Replacing the Voltage
Feedback Harness
Removal
1. Remove the drive front panel (see Removing the Drive Front Panel on
page 3-10).
2. See Figure 3.3 on page 3-20 and unfasten the ten (10) M5 x 10 mm
(0.39 in.) long Torx screws that secure the right side panel at the top,
side, and bottom of the panel. Then remove the right side panel.
3. Disconnect the voltage feedback harness from both the power supply
PCB and the inverter power interface PCB.
Voltage
Feedback
Harness
Installation
Install the voltage feedback harness in reverse order of removal, while
referring to the torque specifications shown in the drawings.
PowerFlex® 700L Frame 2 Drive Hardware Service Manual
Publication 20L-TG002A-EN-P
Access Procedures
3-25
Replacing the Motor Voltage Removal
Feedback PCB (700S Phase
1. Remove the drive front panel (see Removing the Drive Front Panel on
II Control only)
page 3-10).
2. Remove the two (2) nylon rivets that secure the Nomex insulator, and
remove the insulator. (Note: New rivets are included in the motor
voltage feedback PCB spare parts kit.)
3. Unsnap the five (5) nylon standoffs that secure the motor voltage
feedback PCB, and remove the board. (Note: New nylon standoffs are
included in the motor voltage feedback PCB spare parts kit.)
Nomex
Insulator
Motor Voltage
Feedback PCB
Nomex
Insulator
Nylon
Standoff
5X
Nylon Rivet
2X
Installation
Install the motor voltage feedback PCB in reverse order of removal, while
referring to the torque specifications shown in the drawings.
Important: Make sure that both Nomex insulators are in position as shown
in the drawing above when installing the replacement motor
voltage feedback PCB.
PowerFlex® 700L Frame 2 Drive Hardware Service Manual
Publication 20L-TG002A-EN-P
3-26
Access Procedures
Notes:
PowerFlex® 700L Frame 2 Drive Hardware Service Manual
Publication 20L-TG002A-EN-P
Chapter
4
Start-Up After Repair
!
Phone
ATTENTION: Power must be applied to the drive to perform
the following start-up procedure. Some of the voltages present
are at incoming line potential. To avoid electric shock hazard or
damage to equipment, only qualified service personnel should
perform the following procedure. Thoroughly read and
understand the procedure before beginning. If an event does not
occur while performing this procedure, Do Not Proceed. Remove
Power including user-supplied control voltages. User-supplied
voltages may exist even when main AC power is not applied to
the drive. Correct the malfunction before continuing.
United States/
Canada
1.262.512.8176 (7 AM - 6 PM CST)
1.440.646.5800 (24 hour support)
Outside United
States/Canada
You can access the phone number for your country via the
Internet:
Go to http://www.ab.com
Click on Support (http://support.rockwellautomation.com/)
Under Contact Customer Support, click on Phone Support
Internet
⇒
Go to http://www.ab.com/support/abdrives/
E-mail
⇒
[email protected]
Be prepared to provide the following information when you contact
support:
• Product Catalog Number
• Product Serial Number
• Firmware Revision Level
The Power Circuit Diagnostic Test, for the PowerFlex 700L with 700S
Performing the Power
Phase II Control, allows you to diagnose problems in the drive’s power
Circuit Diagnostic Test
(700S Phase II Control only) structure without applying large amounts of power.
1. Verify that input power wiring and grounding is connected.
2. Verify that the motor cables are connected.
3. Energize the drive.
PowerFlex® 700L Frame 2 Drive Hardware Service Manual
Publication 20L-TG002A-EN-P
4-2
Start-Up After Repair
4. From the Monitor menu on the HIM, press the
navigate to the Main menu.
Esc
(Escape) key to
5. Use the
(Down) key to select Start-Up and press the
(Enter) key to enter Start-Up. Then press the
(Enter) key again to
verify your intention to continue with the Start-Up menu.
6. Use the
(Down) key to select Pwr Circuit Diag and press the
(Enter) key to enter Power Circuit Diagnostics.
7. Press the
(Start) key to start the Power Circuit Diagnostic routine.
Follow indications and instructions on the HIM.
Testing With the Motor
This test allows you to measure several operating parameters and diagnose
problems without connecting the motor to its mechanical load.
1. Verify that input power wiring and grounding is connected.
2. Verify that the motor cables are connected.
3. Verify that the motor load is disconnected.
4. Energize the drive.
5. Start the drive and increase the speed from zero to base speed.
6. Measure drive output current on all three phases, and verify that the
value is reflected in:
– parameter 003 [Output Current] (700 Vector Control)
– parameter 308 [Output Current] (700S Phase II Control)
7. Stop the drive.
PowerFlex® 700L Frame 2 Drive Hardware Service Manual
Publication 20L-TG002A-EN-P
Appendix
A
Service Tools and Equipment
Software Tools
DriveTools™ SP, DriveExecutive, DriveExplorer™, and DriveObserver™
are software tools for uploading, downloading, and monitoring system
parameters.
Service Tools
Service of the PowerFlex 700L Frame 2 drive requires certain kinds of
tools, devices, and test equipment. Basic tools, devices, and test equipment
have to meet requirements of professional services. The tools have to be in
good condition and have to fit how and where they are going to be used.
This list of basic service tools covers the needs of tools for repair and
maintenance measurements.
Item
1
2
3
4
Description
Oscilloscope
Current clamp
Soldering station
Adjustable power supply
5
6
Adjustable power supply
Multi-meter
7
8
9
10
11
12
13
14
15
16
Insulation tester
Torque wrench
Torque wrench
Nose pliers
Flat blade screw driver
Phillips screw driver
Torx screw driver
ESD-protected place of work
ESD-protective clothing
Power supply (service)
Details
Portable, digitizing, dual channel scope, with isolation
1000 A (AC, rms), signal output
Soldering / de-soldering
0…1300V DC, 1 A, adjustable current limit. Efore LPS
750-HV or equivalent.
0…690V AC (+10%), 10 A, three phase, galvanic isolation
Digital multi-meter, capable of AC and DC voltage, continuity,
resistance, capacitance measurements, and forward diode
bias tests. Fluke model 87 III or equivalent.
1000V DC
1…12 N•m
6…50 N•m
2…7 mm
1, 2, 3
T25, T30, T35
Working surface, floor covering, seat, and earthings
Wrist wrap, shoes, overall clothing (coat)
Capacity of three phase service 400/500/690V AC, 250 A
PowerFlex® 700L Frame 2 Drive Hardware Service Manual
Publication 20L-TG002A-EN-P
A-2
Service Tools and Equipment
Notes:
PowerFlex® 700L Frame 2 Drive Hardware Service Manual
Publication 20L-TG002A-EN-P
Appendix
B
Connector Descriptions
For Details on…
J1-to-J6 Power Interface Harness
J2-to-J5 Power Interface Harness
J3-to-J4 Power Interface Harness
PWR (Power) Interface Jumper
Voltage Feedback Harness
Motor Voltage Feedback PCB
Converter Power Interface Board to Terminal Block
Converter Control Board to Power Supply and DC Bus
Temperature Switches to Fan
Power and Ground to Contactors and Voltage Feedback
Control Transformer and Converter Control to Contactors
Power Supply to Stirring Fan
J1-to-J6 Power Interface
Harness
J2-to-J5 Power Interface
Harness
See Page…
B-1
B-1
B-2
B-2
B-2
B-3
B-3
B-4
B-4
B-4
B-5
B-5
80W Power Supply Pin
Pin
Inverter Power
Board
Number to Number Interface Board
J1
1
…
1
J6
2
…
2
3
…
3
4
…
4
5
…
5
6
…
6
7
…
7
8
…
8
9
…
9
10
…
10
11
…
11
12
…
12
13
…
13
Description
FB Bus
AD Gnd
AD Gnd
+5V
+5V
-12VDC
AD Gnd
+12V
24V Com
+24VDC
24V Fan
—
—
80W Power Supply Pin
Pin
Board
Number to Number Terminal Block
J2
1
…
1
J5
2
…
2
3
…
3
4
…
4
5
…
5
6
…
6
7
…
7
8
…
8
Description
—
—
GPWR Rtn WGate PWR WGPWR Rtn VGate PWR VGPWR Rtn UGate PWR U-
PowerFlex® 700L Frame 2 Drive Hardware Service Manual
Publication 20L-TG002A-EN-P
B-2
Connector Descriptions
J3-to-J4 Power Interface
Harness
PWR (Power) Interface
Jumper
Voltage Feedback Harness
PowerFlex® 700L Frame 2 Drive Hardware Service Manual
Publication 20L-TG002A-EN-P
80W Power Supply Pin
Pin
Inverter Power
Board
Number to Number Interface Board
J3
1
…
1
J4
2
…
2
3
…
3
4
…
4
5
…
5
6
…
6
7
…
7
8
…
8
9
…
9
10
…
10
11
…
11
12
…
12
13
…
13
14
…
14
15
…
15
16
…
16
Description
+Bus
—
—
-Bus
—
—
Gate PWR W+
GPWR Rtn W+
—
—
Gate PWR V+
GPWR Rtn V+
—
—
Gate PWR W+
GPWR Rtn W+
Inverter Power
Interface Board
J8
Pin
Pin
Converter Power
Number to Number Interface Board
1
…
11
J6
2
…
10
3
…
9
4
…
8
5
…
7
6
…
6
7
…
5
8
…
4
9
…
3
10
…
2
11
…
1
Description
FB Bus
AD Gnd
AD Gnd
+5V
+5V
-12VDC
AD Gnd
+12V
24V Com
+24VDC
24V Fan
Inverter Power
Interface Board
J7
Pin
Pin
Number to Number Gate Board
1
…
1
2
…
2
3
…
3
4
…
4
5
…
5
6
…
6
7
…
7
8
…
8
9
…
9
10
…
10
11
…
11
12
…
12
13
…
13
14
…
14
15
…
15
Description
+DC
—
—
-DC
-DC
22V - ISO PWR
—
—
W
—
—
V
—
—
U
Connector Descriptions
Motor Voltage Feedback
PCB
Converter Power Interface
Board to Terminal Block
Motor Voltage
Feedback PCB
P3
Pin
Pin
Inverter Power
Number to Number Interface Board
1
…
1
J11
2
…
2
3
…
3
4
…
4
5
…
5
6
…
6
7
…
7
8
…
8
9
…
9
10
…
10
11
…
11
12
…
12
13
…
13
14
…
14
15
…
15
16
…
16
17
…
17
18
…
18
19
…
19
20
…
20
21
…
21
22
…
22
23
…
23
24
…
24
25
…
25
26
…
26
27
…
27
28
…
28
Converter Power
Interface Board
J3
Pin
Pin
Number to Number Terminal Block
1
…
1a-4 TB1
2
…
3
…
1a-1
4
…
1a-3
5
6
7
…
1a-9
8
… 1a-11
Converter Power
Interface Board
J2
Pin
Pin
Number to Number Terminal Block
1
…
1a-5 TB1
2
…
1a-6
3
…
1a-7
4
…
1a-8
B-3
Description
POS_BUS
—
—
WN_GATE (NC)
VN_GATE (NC)
UN_GATE (NC)
NEG_RTN
UVWN_EMIT
NEG_PWR (-DC)
BRAKE_GATE (NC)
—
—
W_POS_RTN (NC)
WP_EMIT
W_POS_PWR (NC)
WP_GATE (NC)
—
—
V_POS_RTN (NC)
VP_EMIT
V_POS_PWR (NC)
VP_GATE (NC)
—
—
U_POS_RTN (NC)
UP_EMIT
U_POS_PWR (NC)
UP_GATE (NC)
Description
Temp Switch
Precharge Aux
+24V (digin)
Precharge Coil
120V
Description
+12V from Cooling Loop
Cooling Loop Return
+24V (digin)
Gate Enable
PowerFlex® 700L Frame 2 Drive Hardware Service Manual
Publication 20L-TG002A-EN-P
B-4
Connector Descriptions
Converter Control Board to
Power Supply and DC Bus
Temperature Switches to
Fan
Power and Ground to
Contactors and Voltage
Feedback
Converter Control
Board
J2
Pin
Pin
Number to Number
9
… 1a-12
10
… 1a-10
13
…
3
14
…
3
15
…
4
Pin
Pin
Fan
Temperature Switches
Number to Number Connector
3% Reactor Temp Sw
—
…
1b-3 TB1
9% Reactor Temp Sw
—
… 1b-13
Converter Snubber Temp Sw
—
… 1b-14
Inverter Snubber Temp Sw
—
… 1b-15
Description
3% Reactor Temp Sw
9% Reactor Temp Sw
Converter Snubber Temp Sw
Inverter Snubber Temp Sw
Pin
Pin
Power Section Stirring Fan Number to Number
E1-2
… PE-2 TB1
F1-2
… 1b-12
Description
Fan Terminal 1 (Ground)
Fan Terminal 2
Male Power
Connector
M1-m
Terminal Block - TB1
Ground - PE2
Pin
Pin
Number to Number Power - 3 Phase
1
…
1b-9 TB1
2
…
3
4
5
6
7
8
9
…
…
…
…
…
…
…
1b-10
PE2
PE2
7
4
1
Female Power Pin
Pin
Connector
Number to Number
M1-f
1
…
A1
2
…
A1
3
…
4
…
A2
5
…
A2
6
…
7
…
7
8
…
4
9
…
1
PowerFlex® 700L Frame 2 Drive Hardware Service Manual
Publication 20L-TG002A-EN-P
Power Supply Board
and DC Bus
Resistor Connector Description
TB1 Terminal Block Aux Out NO
Aux Out Com
M2-m - Male Signal Safety HWEN
Aux In 24V
Aux In
Description
Coil Terminal 1 on K2
Precharge Contactor
Coil Terminal 1 on K1
Filter Contactor
PE2
Ground
Ground
3 Phase
T Phase
S Phase
R Phase
Filter Contactor - K1
Precharge Contactor - K2
Voltage Feedback PCB - P3
K1
K2
Description
Coil Terminal 1
Coil Terminal 1
K2
K1
Coil Terminal 2
Coil Terminal 2
P3
T Phase
S Phase
R Phase
Connector Descriptions
Control Transformer and
Converter Control to
Contactors
Male Signal
Connector
M2-m
Pin
Pin
Number to Number
1
…
P1
2
…
P2
3
…
14
4
…
15
5
…
1b-1
6
…
1b-2
Female Signal Pin
Pin
Connector
Number to Number
M2-f
1
…
2
…
3
…
13
4
…
14
5
…
13
6
…
14
Power Supply to Stirring
Fan
80W Power
Supply
J1
Control Transformer - T1
Converter Control Board - P1
Terminal Block - TB1
T1
P1
B-5
Description
Primary In
Aux In 24V
Aux In
Aux Cont 1
Aux Cont 2
TB1
Filter Contactor - K1
Precharge Contactor - K2
K1
K2
Pin
Pin
Number to Number 2x Input Filter Stirring Fan
8
… +24V
7
…
Com
6
…
-24V
Description
T Phase
S Phase
Aux Cont 1
Aux Cont 2
Aux Cont 1
Aux Cont 2
Description
Fan1
Fan1/Fan2
Fan2
PowerFlex® 700L Frame 2 Drive Hardware Service Manual
Publication 20L-TG002A-EN-P
B-6
Connector Descriptions
Notes:
PowerFlex® 700L Frame 2 Drive Hardware Service Manual
Publication 20L-TG002A-EN-P
Appendix
C
Connection Diagram and Schematics
The connection diagram is shown on the following pages.
PowerFlex® 700L Frame 2 Drive Hardware Service Manual
Publication 20L-TG002A-EN-P
C-2
Connection Diagram and Schematics
Frame 2 Connection Diagram
Green + Yellow strip (12 AWG)
1
2
Precharge Aux
3
+24V (digin)
4
Black
(18 AWG 280mm)
J4
Black
(18 AWG 280mm)
Blue
(18 AWG 280mm)
+300Vdc
Ps+
-300Vdc
Ps-
Red
(22AWG 875mm)
Black
(22AWG 875mm)
7
120V
8
J2
+12V/+24V from
Cooling Loop
1
Cooling Loop Return
2
+24V (digin)
3
Gate Enable
4
Red
(22 AWG 450mm)
White
(22 AWG 450mm)
Blue
(22 AWG 450mm)
Black
(22 AWG 450mm)
10
Safety HW EN
13
2
1a-1
1b-1
1a-2
1b-2
Customer
Aux Vdc
Supply
Black (18 AWG 435mm)
1a-4
1b-4
1a-5
1b-5
1a-6
1b-6
1a-7
1b-7
1b-8
1a-9
1b-9
1a-10
1b-10
1a-11
1b-11
1a-12
Black (18 AWG 435mm)
1b-3
Jumper
Aux out Com
2 -PS
1a-8
P1
9
1
1a-3
J2 on Converter
Power Interface PCB
Aux Out NO
1 +PS
TB1
White
(18 AWG 280mm)
Red
(18 AWG 280mm)
J3 on Converter
Power Interface PCB
PE2
Jumper
Precharge Coil
PE2
Black (Common)
80W Power Supply
5
6
PE1
Jumper
J13
Temp Switch
PE1
1b-12
1a-13
1b-13
1a-14
1b-14
1a-15
1b-15
Yellow (18 AWG 900mm)
Aux IN 24V
14
Yellow (18 AWG 900mm)
Aux In
Terminal Block
15
P1 on Converter
Control PCB
Inv Snubber
Temp Switch
Black (22 AWG 900mm)
Black 2x (22 AWG 900mm)
Conv Snubber
Temp Switch
9% Reactor
Temp Switch
Black 2x (22 AWG 900mm)
Black 2x (22 AWG 900mm)
Black (22 AWG 600mm)
3% Reactor
Temp Switch
Fans Terminal 1
E1-2
Fans Terminal 2
F1-2
Power Section
Stirring Fan
PowerFlex® 700L Frame 2 Drive Hardware Service Manual
Publication 20L-TG002A-EN-P
White (22 AWG 304mm)
Black (22 AWG 304mm)
Connection Diagram and Schematics
Tap
Changing
T1-Control
Transformer
Fuse F1 (¾ Amp)
Fuse F2 (¾ Amp)
Black
Secondary S3
Out
C-3
(Molex)
Primary In
P1
Black
(18 AWG 290mm)
Black
(18 AWG 200mm)
P2
Fuse F3 (2 ½ Amp)
M2-m
M2-f
Black (18 AWG 350mm)
1
Black (18 AWG 350mm)
2
Phase S
2
3
3
4
4
Yellow (18 AWG 1100mm)
Yellow (18 AWG 1100mm)
Orange (18 AWG 1100mm)
Orange (18 AWG 900mm)
5
Orange (18 AWG 900mm)
Phase T
1
5
6
6
Male
Signal
Connector
Orange (18 AWG 1100mm)
13
Aux Cont 1
14
Aux Cont 2
A1
Coil terminal 1
A2
Coil terminal 2
Female
Signal
Connector
K1-Filter
Contactor
(Molex)
M1-m
Customer
Terminal Block
1
Black (18 AWG 585mm)
Black (18 AWG 585mm)
P3
S phase
R phase
White (18 AWG 535mm)
7
Red (18 AWG 535mm)
4
Blue (18 AWG 535mm)
1
P3 on Voltage
Feedback PCB
+DC Bus
-DC Bus
1
2
2
3
3
4
White 2X (18 AWG 585mm)
T phase
M1-f
4
5
5
6
6
7
7
8
8
9
Male
Signal
Connector
9
Black (18 AWG 1016mm)
White (18 AWG 965mm)
13
Aux Cont 1
14
Aux Cont 2
A1
Coil terminal 1
A2
Coil terminal 2
White (18 AWG 1016mm)
K2-Precharge
Contactor
White (18 AWG 584mm)
Red (18 AWG 584mm)
Blue (18 AWG 584mm)
Phase T
Phase S
Phase R
Female
Signal
Connector
Red (22 AWG 660mm)
Red (22 AWG 225mm)
J3-1
White (22 AWG 225mm)
Black (18 AWG 965mm)
+24Vdc
Com
J3-4
-24Vdc
J1-8
J1-7
J1-6
80W Power Supply
(319433-A07)
Blue (22 AWG 660mm)
Black (22 AWG 660mm)
+24V
Fan1
Com
Fan1
Com
Fan2
-24V
Fan2
2X Input Filter
Stirring Fan
PowerFlex® 700L Frame 2 Drive Hardware Service Manual
Publication 20L-TG002A-EN-P
C-4
Connection Diagram and Schematics
Frame 2 Schematics
PowerFlex® 700L Frame 2 Drive Hardware Service Manual
Publication 20L-TG002A-EN-P
For PowerFlex 700L Frame 2 schematics, see the PowerFlex 700L
Liquid-Cooled Adjustable Frequency AC Drive User Manual (publication
20L-UM001).
U.S. Allen-Bradley Drives Technical Support - Tel: (1) 262.512.8176, Fax: (1) 262.512.2222, Email: [email protected], Online: www.ab.com/support/abdrives
www.rockwellautomation.com
Power, Control and Information Solutions Headquarters
Americas: Rockwell Automation, 1201 South Second Street, Milwaukee, WI 53204-2496 USA,Tel: (1) 414.382.2000, Fax: (1) 414.382.4444
Europe/Middle East/Africa: Rockwell Automation, Vorstlaan/Boulevard du Souverain 36, 1170 Brussels, Belgium,Tel: (32) 2 663 0600, Fax: (32) 2 663 0640
Asia Pacific: Rockwell Automation, Level 14, Core F, Cyberport 3, 100 Cyberport Road, Hong Kong,Tel: (852) 2887 4788, Fax: (852) 2508 1846
Publication 20L-TG002A-EN-P – November, 2008
P/N 385509-P01
Copyright © 2008 Rockwell Automation, Inc. All rights reserved. Printed in USA.