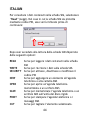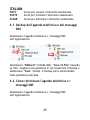
1
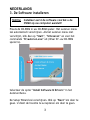
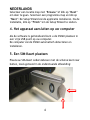
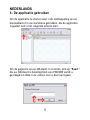
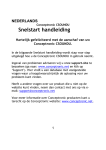
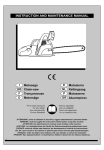
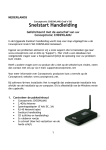
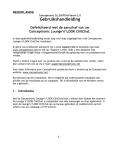
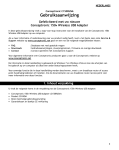
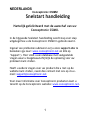
NEDERLANDS Conceptronic CSIMU Snelstart handleiding Hartelijk gefeliciteerd met de aanschaf van uw Conceptronic CSIMU. In de bijgaande Snelstart handleiding wordt stap voor stap uitgelegd hoe u de Conceptronic CSIMU in gebruik neemt. Ingeval van problemen adviseren wij u onze support-site te bezoeken (ga naar: www.conceptronic.net en klik op ‘Support’). Hier vindt u een database met veelgestelde vragen waar u hoogstwaarschijnlijk de oplossing voor uw probleem kunt vinden. Heeft u andere vragen over uw product die u niet op de website kunt vinden, neem dan contact met ons op via email: [email protected] Voor meer informatie over Conceptronic producten kunt u terecht op de Conceptronic website: www.conceptronic.net. 1 NEDERLANDS 1. Introductie Lees, wijzig en maak een back-up van uw telefoonboek gegevens en SMS berichten via uw computer. Deze GSM SIM kaartlezer stelt u in staat om uw opgeslagen informatie op uw SIM kaart te lezen, te schrijven en te bewerken met gebruik van een computer. Het is de perfecte methode om een back-up te maken van uw SIM kaart. Vanaf nu kunt u gemakkelijk uw telefoon gegevens veranderen en invoeren, sms berichten printen en samenstellen (zodat u deze later kunt versturen vanaf uw mobiele telefoon). 2. Inhoud van de verpakking: De volgende onderdelen dienen aanwezig te zijn in de verpakking van de CSIMU: • Conceptronic CSIMU USB Simcard Reader • USB Kabel • Product CD-ROM • Snelstart Handleiding • Garantiekaart 2 NEDERLANDS 3. De Software installeren Notitie: Installeer eerst de software voordat u de CSIMU op uw computer aansluit! Plaats de CD-ROM in uw CD-ROM speler. Het autorun menu zal automatisch verschijnen. Als het autorun menu niet verschijnt, klik dan op “Start”, “Uitvoeren” en voer het commando “D:\autorun.exe” uit (Waar D:\ uw CD-ROM speler is). Selecteer de optie “Install Software & Drivers” in het Autorun Menu. De Setup Wizard zal verschijnen. Klik op “Next” om door te gaan. U dient de licentie te accepteren om door te gaan. 3 NEDERLANDS Selecteer een locatie map met “Browse” of klik op “Next” om door te gaan. Selecteer een programma map en klik op “Next”. De Setup Wizard zal de applicatie installeren. Na de installatie, klik op “Finish” om de Setup Wizard te sluiten. 4. Het apparaat aansluiten op uw computer Als de software is geïnstalleerd kunt u de CSIMU plaatsen in een vrije USB poort op uw computer. De computer zal de CSIMU automatisch detecteren en installeren. 5. Een SIM-Kaart plaatsen Plaats uw SIM-Kaart ondersteboven met de schuine kant naar buiten, zoals getoond in de onderstaande afbeelding: 4 NEDERLANDS 6. De applicatie gebruiken Om de applicatie te starten kunt u de snelkoppeling op uw bureaublad of in uw startmenu gebruiken. Als de applicatie is gestart zult u het volgende scherm zien: Om de gegevens op uw SIM-Kaart in te lezen, klik op “Read”. Als uw SIM-Kaart is beveiligd met een PINCODE wordt u gevraagd om deze in te voeren voor u door kunt gaan. 5 NEDERLANDS Als uw SIM-Kaart is ingelezen heeft u de volgende opties beschikbaar: READ WRITE SECURITY NEW OPEN SAVE PRINT CUT COPY PASTE CLEAR Lees de Data van uw SIM-Kaart in. Schrijf de Data terug naar uw SIM-Kaart. Schakel uw PINCODE in of uit, of wijzig deze. Voeg een nieuw onderdeel toe aan uw telefoonboek of SMS map. Open een opgeslagen telefoonboek of SMS archief. Sla uw telefoonboek of SMS archief op op HDD. Print uw telefoonboek of SMS berichten. Knip het geselecteerde onderdeel. Kopieer het geselecteerde onderdeel. Plak het geselecteerde onderdeel. Verwijder het geselecteerde onderdeel. 6.1. Back-up uw telefoonboek / SMS berichten Selecteer uw telefoonboek of SMS berichten in de applicatie: 6 NEDERLANDS Selecteer “SIMCard”, “Save To File”. Selecteer een locatie om uw back-up op te slaan en klik op “Save”. De back-up zal weggeschreven worden naar de gekozen locatie. 6.2. Uw telefoonboek / SMS berichten terugzetten Selecteer uw telefoonboek of SMS berichten in de applicatie: Selecteer “SIMCard”, “Read From To File”. Kies uw backup bestand van het telefoonboek of van de SMS berichten en klik op “Open”. Kies bij het bericht “Are you sure” voor “Yes” om de onderdelen op uw SIM-Kaart te overschrijven. NOTITIE: Om de gemaakte wijzigingen op te slaan, klik op “Write”. Als u de applicatie afsluit zonder “Write” te selecteren worden alle wijzigingen ongedaan gemaakt! 7 ENGLISH Conceptronic CSIMU Quick Installation Guide Congratulations on the purchase of your Conceptronic CSIMU. The enclosed Hardware Installation Guide gives you a step By step explanation of how to install the Conceptronic CSIMU. When problems occur, we advise you to go to our support-site (go to www.conceptronic.net and click ‘Support’. Here you will find the Frequently Asked Questions Database. When you have other questions about your product and you cannot find it at our website, then contact us by e-mail: [email protected] For more information about Conceptronic products, please visit the Conceptronic Web Site: www.conceptronic.net 8 ENGLISH 1. Introduction Backup, read and modify your phonebook and SMS messages from your GSM SIM card on your computer. This GSM SIM card reader allows you to read, write and edit the information stored on the SIM card using your computer. It’s a perfect tool to backup your complete mobile phone. From now on, you can simply change and enter phone book details, print messages and compose SMS messages (in order to send them later from your mobile phone). 2. Package Contents The following items should be included in your CSIMU package: • Conceptronic CSIMU USB Simcard Reader • USB Cable • Product CD-ROM • Quick Installation Guide • Warranty Card 9 ENGLISH 3. Install the Software Note : First install the software before you connect the CSIMU to your computer! Place the CD-ROM in your CD-ROM drive. The autorun menu will appear automatically. If the autorun menu does not appear, press “Start”, “Run” and execute “D:\autorun.exe” (Where D:\ is your CD-ROM drive). Select the option “Install Software & Drivers” in the Autorun Menu. The Setup Wizard will appear. Press “Next” to continue. You need to accept the license agreement to continue. 10 ENGLISH Choose a destination folder with “Browse” or press “Next” to continue. Select a program folder and press “Next”. The Setup Wizard will install the application. After installing, press “Finish” to close the Setup Wizard. 4. Connecting the device to your Computer When the software is installed, you can connect the CSIMU to a free USB port on your computer. The computer will recognize and install the new hardware automatically. 5. Inserting a SIM-Card Insert your SIM-Card upside down with the cutted edge outside as shown in the pictures below: 11 ENGLISH 6. Using the application To start the application, use the shortcut on your desktop or the shortcut created in your start menu. When you start the application, you will see the following screen: To read the data on your SIM-Card, select “Read”. If your SIM-Card is protected with a PIN-CODE, you will be prompted to enter your PIN-CODE before you can proceed: 12 ENGLISH When your SIM-Card is read, you have the following options available: READ WRITE SECURITY NEW OPEN SAVE PRINT CUT COPY PASTE CLEAR Read your SIM-Card Data Write the Data back to your SIM-Card Enable, disable or change your PIN-CODE Add a record to your Phonebook or SMS Folder Open a stored Phonebook or SMS archive. Save the Phonebook or SMS archive to your HDD. Print your Phonebook or SMS Messages Cut the selected record. Copy the selected record. Paste the selected record. Delete the selected record. 6.1. Backup your Phonebook / SMS Messages Select your Phonebook or SMS Messages in the application: Select “SIMCard”, “Save To File”. Choose a location to save your backup and select “Save”. The backup will be written to the chosen location. 13 ENGLISH 6.2. Restore your Phonebook / SMS Messages Select your Phonebook or SMS Messages in the application: Select “SIMCard”, “Read From To File”. Choose your backup file of the Phonebook or SMS Messages and select “Open”. At the message “Are you sure”, select “Yes” to overwrite the records on your SIM-Card. NOTE: To save the made changes, select “Write”. If you exit the application without selecting “Write, all changes will be abandoned. 14 ESPAÑOL Conceptronic CSIMU Guía de iniciación rápida Enhorabuena por la compra de su Conceptronic CSIMU. La Guía de instalación del hardware incluida le ofrece una explicación paso a paso de cómo instalar Conceptronic CSIMU. Si encuentra problemas, le aconsejamos que se dirija a nuestra página web www.conceptronic.net y haga clic en «Support». Aquí encontrará la base de datos de las preguntas más frecuentes o FAQ. Si tiene otras preguntas sobre su producto y no las encuentra en nuestro sitio web, póngase en contacto con nuestro servicio técnico por correo electrónico: [email protected] Para obtener más información acerca de productos de Conceptronic por favor visite el lugar Web de Conceptronic: www.conceptronic.net 15 ESPAÑOL 1. Introducción Realice copias de seguridad, lea y modifique en su ordenador la agenda telefónica y los mensajes SMS de su tarjeta SIM del teléfono móvil. El lector de tarjetas SIM GSM le permite leer, escribir y editar toda la información almacenada en su tarjeta SIM con la ayuda de un ordenador. Es la herramienta perfecta para hacer una copia de seguridad de su teléfono móvil al completo. A partir de ahora, será muy sencillo cambiar e introducir información en la agenda telefónica, imprimir mensajes y crear mensajes SMS (para enviarlos después desde su teléfono móvil). 2. Contenido del paquete El paquete CSIMU debe incluir los siguientes elementos: • Lector de tarjetas SIM USB CSIMU de Conceptronic • Cable USB • CD-ROM del producto • Guía de instalación rápida • Tarjeta de garantía 16 ESPAÑOL 3. Instalación del software Nota: Instale el software antes de conectar el CSIMU al ordenador. Coloque el CD-ROM en la unidad de CD-ROM. El menú autoejecutable aparecerá automáticamente. En caso de que el menú autoejecutable no aparezca, pulse “Iniciar” y “Ejecutar”, y ejecute “D:\autorun.exe” (en el que D:\ corresponde a la unidad de CD-ROM de su ordenador). Seleccione la opción “Instalar software y drivers” del menú autoejecutable. 17 ESPAÑOL A continuación aparecerá el Asistente de Configuración. Hacer clic en “Siguiente” para continuar. Para continuar, es necesario que acepte el contrato de licencia. Elija una carpeta de destino en “Examinar” o pulse “Siguiente” para continuar. Seleccione una carpeta del programa y pulse “Siguiente”. El Asistente de Configuración instalará la aplicación. Una vez finalizada la instalación, pulse “Finalizar” para cerrar el Asistente de Configuración. 4. Conexión del dispositivo a su ordenador Cuando el software esté instalado podrá conectar el CSIMU a un puerto USB libre de su ordenador. El ordenador reconocerá e instalará el nuevo hardware automáticamente. 5. Introducción de la tarjeta SIM Introduzca la tarjeta SIM del revés con el borde cortado hacia fuera tal y como muestra la imagen siguiente: 18 ESPAÑOL 6. Uso de la aplicación Para empezar a utilizar la aplicación, use el acceso directo de su escritorio o del acceso directo creado en el menú de inicio. Cuando inicie la aplicación, verá la pantalla siguiente: 19 ESPAÑOL Para leer los datos almacenados en su tarjeta SIM, seleccione “Leer”. Si su tarjeta SIM está protegida con un código PIN, deberá introducir dicho código antes de continuar: Cuando el sistema lea la tarjeta SIM, tendrá a su alcance las opciones siguientes: LEER ESCRIBIR SEGURIDAD NUEVO ABRIR GUARDAR IMPRIMIR CORTAR COPIAR PEGAR BORRAR Lea los datos de su tarjeta SIM. Escriba datos para incorporar en su tarjeta SIM. Active, desactive o modifique su código PIN. Añada un registro a su agenda telefónica o a su carpeta de mensajes SMS. Abra un archivo guardado de la agenda telefónica o un archivo SMS. Guarde los archivos de la agenda telefónica o de mensajes SMS en la unidad de disco duro. Imprima su agenda telefónica o mensajes SMS. Corte el registro seleccionado. Copie el registro seleccionado. Pegue el registro seleccionado. Borre el registro seleccionado. 20 ESPAÑOL 6.1. Copias de seguridad de la agenda telefónica y de mensajes SMS Seleccione la agenda telefónica o mensajes SMS de la aplicación: Seleccione “TarjetaSIM” y “Guardar en archivo”. Elija una ubicación para guardar su copia de seguridad y seleccione “Guardar”. La copia de seguridad quedará grabada en la ubicación seleccionada. 6.2. Restauración de la agenda telefónica y de mensajes SMS Seleccione la agenda telefónica o mensajes SMS de la aplicación: 21 ESPAÑOL Seleccione “TarjetaSIM” y “Leer desde archivo”. Elija el archivo correspondiente a la copia de seguridad de la agenda telefónica o mensajes SMS y seleccione “Abrir”. Cuando aparezca el mensaje “¿Está seguro?”, seleccione “Sí” para sobrescribir en los registros de su tarjeta SIM. NOTA: Para guardar los cambios efectuados, seleccione “Escribir”. Si abandona la aplicación sin seleccionar “Escribir”, se perderán todos los cambios. 22 DEUTSCH Conceptronic CSIMU Schnellstart Anleitung Herzlichen Glückwunsch zum Erwerb des Conceptronic CSIMU. In der beigefügten Intallationsanweisung für die Hardware finden Sie schrittweise Erklärungen für die Installation ihres Conceptronic CSIMU. Sollten irgendwelche Probleme auftreten, empfehlen wir ihnen, auf unsere Support-Seite im Internet zu gehen (www.conceptronic.net) und auf 'Support’ zu klicken. Dort werden sie die "Frequently Asked Questions" Datenbank finden. Falls sie andere Fragen zu ihrem Produkt haben und sie diese nicht auf unserer Website finden können, kontaktieren sie uns bitte per E-Mail: [email protected] Weitere Informationen zu den Conceptronic Produkte finden Sie auf der Website von Conceptronic: www.conceptronic.net 23 DEUTSCH 1. Einleitung Speichern, lesen und bearbeiten Sie Ihr Telefonbuch und Ihre SMS-Nachrichten über Ihre GSM SIM-Karte auf Ihrem Computer. Mit diesem GSM SIM Kartenleser können Sie über Ihren Computer auf der SIM-Karte gespeicherte Informationen lesen, schreiben und bearbeiten. Die ideale Lösung für ein Backup aller Daten auf Ihrem Mobiltelefon. Von jetzt an können Sie auf einfache Weise Informationen in Ihrem Telefonbuch ändern und eingeben, Nachrichten ausdrucken und SMS-Nachrichten verfassen (um sie dann später von Ihrem Mobiltelefon aus zu senden). 2. Packungsinhalt Die Verpackung Ihres CSIMU sollte Folgendes enthalten: • Conceptronic CSIMU USB Simcard Reader • USB-Kabel • Produkt-CD-ROM • Schnellinstallationsanleitung • Garantiekarte 24 DEUTSCH 3. Installieren der Software Hinweis: Installieren Sie zuerst die Software, bevor Sie den CSIMU an Ihren Computer anschließen! Legen Sie die CD-ROM in Ihr CD-ROM-Laufwerk ein. Das Autorun-Menü startet automatisch. Wenn das Autorun-Menü nicht startet, klicken Sie auf „Start“, „Ausführen“, geben Sie „D:\autorun.exe“ ein und klicken Sie auf „OK“ (wobei D:\ Ihr CD-ROM-Laufwerk ist). Wählen Sie die Option „Install Software & Drivers [Software und Treiber installieren]“ im Autorun-Menü. 25 DEUTSCH Es erscheint der Einrichtungsassistent. Klicken Sie auf „Next [Weiter]“, um fortzufahren. Sie müssen die Lizenzvereinbarung akzeptieren, um fortfahren zu können. Wählen Sie über “Browse [Durchsuchen]” einen Speicherort oder klicken Sie auf “Next [Weiter]”, um fortzufahren. Wählen Sie einen Programmordner aus und klicken Sie auf „Next [Weiter]”. Der Einrichtungsassistent installiert die Anwendung. Sobald die Installation beendet ist, klicken Sie auf „Finish [Fertigstellen]“, um den Einrichtungsassistenten zu schließen. 4. Anschließen des Geräts an den Computer Nachdem Sie das Programm installiert haben, können Sie den CSIMU an einen freien USB-Port Ihres Computers anschließen. Der Computer erkennt und installiert die neue Hardware automatisch. 5. Einsetzen einer SIM-Karte Setzen Sie Ihre SIM-Karte umgekehrt und mit der abgeschnittenen Ecke nach außen gemäß der folgenden Abbildung ein: 26 DEUTSCH 6. Verwendung des Programms Starten Sie das Programm über den Schnellstart auf Ihrem Desktop oder über den Schnellstart in Ihrem Start-Menü. Wenn Sie das Programm starten, erscheint folgende Anzeige: 27 DEUTSCH Um die Daten auf Ihrer SIM-Karte zu lesen, wählen Sie „Read [Lesen]”. Wenn Ihre SIM-Karte mit einem PIN-CODE geschützt ist, werden Sie dazu aufgefordert, Ihren PIN-CODE einzugeben, bevor Sie fortfahren können: Beim Lesen Ihrer SIM-Karte haben Sie folgende Möglichkeiten: READ WRITE SECURITY NEW OPEN SAVE Die Daten Ihrer SIM-Karte werden gelesen Die Daten werden auf Ihre SIM-Karte zurückgeschrieben Damit können Sie Ihren PIN-CODE aktivieren, deaktivieren oder ändern Damit können Sie Ihrem Telefonbuch oder SMSOrdner einen Eintrag hinzufügen Ein gespeichertes Telefonbuch oder SMS-Archiv wird geöffnet Das Telefonbuch oder SMS-Archiv wird auf Ihrer Festplatte gespeichert 28 DEUTSCH PRINT CUT COPY PASTE CLEAR Damit können Sie Ihr Telefonbuch oder SMSNachrichten ausdrucken Der ausgewählte Eintrag wird ausgeschnitten Der ausgewählte Eintrag wird kopiert Der ausgewählte Eintrag wird eingefügt Der ausgewählte Eintrag wird gelöscht 6.1. Backup von Telefonbüchern / SMS-Nachrichten Wählen Sie Ihr Telefonbuch oder SMS-Nachrichten in der Anwendung. Wählen Sie „SIMCard [Sim-Karte]”, „Save To File [in Datei speichern]”. Wählen Sie einen Speicherort für Ihr Backup und klicken Sie auf „Save [Speichern]”. Der Backup wird in den gewählten Speicherort geschrieben. 6.2. Wiederherstellen von Telefonbüchern / SMS Nachrichten Wählen Sie Ihr Telefonbuch oder SMS-Nachrichten in der Anwendung. 29 DEUTSCH Wählen Sie „SIMCard [Sim-Karte]”, „Read From To File [von auf Datei lesen]”. Wählen Sie die Backup-Datei des Telefonbuchs oder der SMS-Nachrichten und klicken Sie auf „Open [Öffnen]”. Wenn die Meldung “Are you sure [sind Sie sicher]” erscheint, klicken Sie auf “Yes [Ja]”, um die Daten auf Ihrer SIM-Karte zu überschreiben. HINWEIS: Um die vorgenommenen Änderungen zu speichern, wählen Sie „Write [Schreiben]“. Wenn Sie die Anwendung schließen, ohne auf „Write“ zu klicken, gehen alle Änderungen verloren. 30 FRANÇAIS Conceptronic CSIMU Guide de démarrage rapide Nous vous félicitons d'avoir acheté le Carte CSIMU de Conceptronic. Le Guide d'Installation du Matériel ci-joint vous expliquera pas à pas comment installer le CSIMU de Conceptronic. En cas de problèmes, nous vous recommandons de vous adresser à notre service technique (allez à www.conceptronic.net et cliquez sur « support »). Vous trouverez dans cette section la Base de Données des Foires Aux Questions. Si vous avez d’autres questions concernant votre produit et que vous ne trouvez pas la solution sur notre site web, contactez-nous par e-mail : [email protected] Pour plus d'informations sur les produits de Conceptronic, visitez notre Site Internet Conceptronic: www.conceptronic.net 31 FRANÇAIS 1. Introduction Sauvegardez, lisez et modifiez votre répertoire téléphonique et vos messages SMS à partir de votre carte SIM GSM sur votre ordinateur. Le lecteur de carte SIM GSM vous permet de lire, écrire et éditer avec votre ordinateur les informations enregistrées sur la carte SIM. C'est l'outil idéal pour sauvegarder toutes les données de votre téléphone portable. Vous pourrez dorénavant modifier et enregistrer les informations de votre répertoire téléphonique en toute simplicité, imprimer les messages et composer des messages SMS (pour les envoyer ensuite avec votre téléphone portable). 2. Contenu du Coffret Les éléments suivants sont fournis dans ce coffret CSIMU : • Lecteur de Carte SIM CSIMU USB de Conceptronic. • Câble USB • CD-ROM du produit • Guide d'installation rapide • Carte de garantie 32 FRANÇAIS 3. Installation du Software Remarque : Installez d'abord le software avant de connecter le CSIMU sur votre ordianteur ! Placez le CD-ROM dans votre lecteur de CD-ROM. Le menu de démarrage apparaît automatiquement. Si le menu d'exécution ne s'affiche pas, appuyez sur "Démarrage", "Exécuter" et exécutez "D:\autorun.exe" (Où D:\ est votre lecteur de Cd-Rom). Sélectionnez l'option "Installation du Software et des Drivers" dans le menu à lancement automatique. 33 FRANÇAIS L'Assistant de Configuration apparaît. Cliquez sur "Suivant" pour continuer. Vous devez accepter l'accord de licence pour continuer. Choisissez un répertoire de destination avec "Naviguer" ou appuyez sur "Suivant" pour continuer. Choisissez un dossier de programme et cliquez sur “Suivant”. L'Assistant de Configuration installera l'application. Après l'installation, appuyez sur "Terminer" pour fermer l'Assistant de Configuration. 4. Branchement du dispositif sur votre ordinateur. Lorsque le software est installé, vous pouvez connecter le CSIMU sur un port USB libre sur votre ordinateur. L'ordinateur reconnaît et installe le nouveau dispositif automatiquement. 5. Connexion de la carte SIM. Insérez votre Carte SIM face vers le bas avec le bord à encoche tourné vers l'extérieur comme illustré dans l'image ci-après : 34 FRANÇAIS 6. Utilisation de l'application Pour démarrer l'application, utilisez le raccourci de votre bureau ou le raccourci créé dans votre menu de démarrage. Lorsque vous démarrez l'application, vous voyez s’afficher l’écran suivant : 35 FRANÇAIS Pour lire les données sur votre Carte SIM, sélectionnez "Lire". Si votre Carte SIM est protégée avec un CODE PIN, le programme vous demande d'entrer votre CODE PIN avant de continuer : Lorsque votre Carte SIM est lue, les options suivantes sont disponibles : READ Lire les Données de votre Carte SIM. WRITE Écrire de nouveau les Données sur votre Carte SIM. SECURITY Activer, désactiver ou modifier votre CODE PIN NEW Ajouter un enregistrement dans votre Répertoire téléphonique ou votre Dossier SMS. OPEN Ouvrir un répertoire téléphonique enregistré ou un fichier SMS. SAVE Enregistrer le Répertoire téléphonique ou un fichier SMS sur votre disque dur. PRINT Imprimer votre Répertoire téléphonique ou vos Messages SMS. CUT Couper l'enregistrement sélectionné. COPY Copier l'enregistrement sélectionné. PASTE Coller l'enregistrement sélectionné. CLEAR Effacer l'enregistrement sélectionné. 36 FRANÇAIS 6.1. Sauvegarder votre Répertoire téléphonique / Messages SMS. Sélectionnez votre Répertoire téléphonique ou vos Messages SMS dans l'application : Sélectionnez "Carte SIM", "Enregistrer dans Fichier" Choisissez un emplacement pour enregistrer votre sauvegarde et sélectionnez "Enregistrer". La sauvegarde sera enregistrée dans l'emplacement choisi. 6.2. Récupérer votre Répertoire téléphonique / Messages SMS. Sélectionnez votre Répertoire téléphonique ou vos Messages SMS dans l'application : 37 FRANÇAIS Sélectionnez "Carte SIM", "Lire dans Fichier" Choisissez le fichier de sauvegarde du Répertoire Téléphonique ou des Messages SMS, et sélectionnez "Ouvrir". Lorsque le logiciel envoie le message "Êtes-vous sûr", sélectionnez "Oui" pour écraser les enregistrements de votre Carte SIM. REMARQUE : Pour enregistrer les modifications réalisées, sélectionnez "Écrire". Si vous quittez l'application sans sélectionner "Écrire", toutes les modifications seront perdues. 38 ITALIAN Conceptronic CSIMU Guida d’installazione rapida Grazie per l’acquisto del CSIMU Conceptronic. La guida per l’installazione dell’hardware acclusa spiegherà passo a passo la CSIMU Conceptronic. Se dovessero esserci dei problemi, vi consigliamo di visitare il nostro sito di supporto (andate su www.conceptronic.net e cliccate ‘support’), dove potrete trovare il Database delle Risposte alle Domande più Frequenti (FQA). Se doveste avere altre domande riguardanti il prodotto che non trovate sul nostro sito Web vi preghiamo di contattarci attraverso l’e-mail: [email protected] Per ulteriori informazioni dei prodotti Conceptronic, la preghiamo di visitare il sito Web della Conceptronic: www.conceptronic.net 39 ITALIAN 1. Introduzione Realizzate backup, consultate e modificate la vostra agenda telefonica e qualsiasi messaggio SMS della scheda SIM GSM direttamente sul computer. Grazie a questo lettore di schede SIM GSM potrete consultare, scrivere e modificare qualsiasi informazione contenuta nella scheda SIM attraverso il computer. Si tratta della soluzione ideale per realizzare backup completi del cellulare. D’ora in poi modificare i dati contenuti nella vostra agenda telefonica e comporre messaggi SMS (per poi inviarli attraverso il cellulare) sarà un gioco da ragazzi. 2. Contenuto della confezione La confezione contenente la CSIMU deve essere composta dai seguenti elementi: • Lettore di schede SIM USB CSIMU Conceptronic • Cavo USB • CD-ROM del prodotto • Guida d’installazione rapida • Scheda di garanzia 40 ITALIAN 3. Installazione del software NB: Prima di inserire il CSIMU nel computer è necessario installare il software! Introdurre il CD-ROM nell’apposita unità e apparirà automaticamente il menu di esecuzione automatica. In caso contrario, premere “Start”, “Esegui” e scrivere “D:\autorun.exe” (nel caso in cui D:\ corrisponda all’unità CD-ROM del computer in uso). Selezionare l’opzione “Install software & drivers” (Installa software e driver) nel menu di esecuzione automatica. Apparirà l’assistente per la configurazione; premere “Avanti” per continuare. 41 ITALIAN È necessario accettare il contratto di licenza per poter continuare. Selezionare una cartella di destinazione utilizzando l’opzione “Sfoglia” o premere “Avanti” per continuare. Selezionare una cartella di programma e premere “Avanti”. L’assistente per la configurazione installerà l’applicazione; una volta terminata, premere “Fine” pèr uscire dal programma di installazione. 4. Collegamento del dispositivo al computer Dopo aver installato il software sarà possibile collegare il CSIMU a una porta USB disponibile del computer. Il computer rileverà e installerà automaticamente il nuovo hardware. 5. Come introdurre la scheda SIM Inserire la scheda SIM sottosopra, con l’angolo smussato verso l’esterno, come da immagine mostrata qui di seguito: 42 ITALIAN 6. Uso dell’applicazione Per avviare l’applicazione, utilizzare la scorciatoia presente nel desktop o quella creata nel menu di avvio. Dopo aver aperto l’applicazione, apparirà la seguente videata: 43 ITALIAN Per consultare i dati contenuti nella scheda SIM, selezionare “Read” (Leggi). Nel caso in cui la scheda SIM sia protetta mediante codice PIN, esso verrà richiesto prima di continuare: Dopo aver acceduto alla lettura della scheda SIM disporrete delle seguenti opzioni: READ WRITE SECURITY NEW OPEN SAVE PRINT CUT Serve per leggere i dati contenuti nella scheda SIM Serve per riscrivere i dati sulla scheda SIM Serve per attivare, disattivare o modificare il codice PIN Serve per aggiungere un elemento all’agenda telefonica o alla cartella SMS Serve per aprire un’agenda telefonica memorizzata o un archivio SMS Serve per memorizzare l’agenda telefonica o un archivio SMS sull’unità del disco rigido Serve per stampare l’agenda telefonica o i messaggi SMS Serve per tagliare l’elemento selezionato. 44 ITALIAN COPY PASTE CLEAR Serve per copiare l’elemento selezionato. Serve per incollare l’elemento selezionato. Serve per eliminare l’elemento selezionato. 6.1. Backup dell’agenda telefonica e dei messaggi SMS Selezionare l’agenda telefonica o i messaggi SMS nell’applicazione: Selezionare “SIMCard” (Scheda SIM), “Save To File” (Guarda su file). Scegliere una posizione in cui conservare il backup e selezionare “Save” (Salva). Il backup verrà memorizzato nella posizione prescelta. 6.2. Come ripristinare l’agenda telefonica o i messaggi SMS Selezionare l’agenda telefonica o i messaggi SMS nell’applicazione: 45 ITALIAN Selezionare “SIMCard” (Scheda SIM), “Read From To File” (Leggi dal file). Selezionare il file di backup file dell’agenda telefonica o dei messaggi SMS e selezionare “Open”(Apri). Quando appare il messaggio “Are you sure” (Siete sicuri), Selezionare “Yes” (Sì) per sovrascrivere gli elementi sulla scheda SIM. NB: Per salvare i cambiamenti realizzati, selezionare “Write” (Scrivi). Se si esce dall’applicazione senza aver selezionato tale opzione, qualsiasi modificazione verrà persa. 46 PORTUGUESE Conceptronic CSIMU Iniciação Rápida Os nosso parabéns pela compra do seu CSIMU Conceptronic. O Guia de Instalação do Hardware que se inclui fornece-lhe uma explicação passo a passo de como instalar CSIMU Conceptronic. Se tiver algum problema, aconselhamos consultar o nosso site de assistência (vá a www.conceptronic.net e clique em ‘assistência’ Aqui pode encontrar a Base de Dados das Perguntas Mais Frequentes. Se tiver outras questões relativas ao nosso produto e não as conseguir encontrar no nosso webiste, pode-nos contactar através do e-mail: [email protected] Para mais informações sobre produtos de Conceptronic, por favor visite o Web Site da Conceptronic: www.conceptronic.net 47 PORTUGUESE 1. Introdução Faça cópias de segurança, leia e modifique a sua agenda telefónica e mensagens SMS do seu cartão SIM GSM no seu computador. Este leitor de cartões SIM GSM permite-lhe ler, gravar e editar todas as informações guardadas no cartão SIM usando o seu computador. É uma ferramenta perfeita para fazer uma cópia de segurança completa do seu telemóvel. A partir de agora pode fazer alterações e introduzir informações na sua agenda telefónica, imprimir mensagens e escrever SMS (para os mandar mais tarde através do seu telemóvel) de uma forma muito simples. 2. Conteúdo da Embalagem Devem existir os seguintes elementos na embalagem do seu CSIMU: • Leitor Simcard USB CSIMU da Conceptronic • Cabo USB • CD-ROM do produto • Manual de Instalação Rápida • Cartão de Garantia 48 PORTUGUESE 3. Instalar o Software Nota: Primeiro instale o software antes de ligar o CSIMU ao seu computador! Coloque o CD-ROM na sua unidade de CD-ROM. O menu de execução automática aparece automaticamente. Se o menu de execução automática não aparecer, vá a “Start” (Iniciar), “Run” (Executar) e execute “D:\autorun.exe” (em que D:\ é a sua unidade de CD-ROM). Seleccione a opção “Install Software & Drivers” (Instalar o Software e os Controladores) no menu de Execução automática. 49 PORTUGUESE O Assistente de Configuração aparece. Clique em “Next” (Seguinte) para continuar. Tem de aceitar o acordo de licença para continuar. Seleccione uma pasta de destino com a opção “Browse” (Procurar…) ou carregue em “Next” (Seguinte) para prosseguir. Seleccione uma pasta de programa e seleccione “Next” (Seguinte). O Assistente de Configuração vai instalar a aplicação. Depois de instalar, clique em “Finish” (Terminar) para fechar o Assistente de Configuração. 4. Ligar o dispositivo ao seu computador Quando o software estiver instalado, pode ligar o CSIMU a uma porta USB livre do seu computador. O computador vai reconhecer e instalar o novo hardware automaticamente. 5. Inserir o Cartão SIM Insira o seu Cartão SIM de cima para baixo com a beira cortada para fora, como se mostra nas figuras seguintes: 50 PORTUGUESE 6. Usar a aplicação Para iniciar a aplicação, use o atalho do seu ambiente de trabalho ou o atalho que se criou no seu menu de início. Quando iniciar a aplicação, vai poder ver o ecrã seguinte: 51 PORTUGUESE Para ler os dados do seu Cartão SIM, seleccione “Read” (Ler). Se o seu Cartão SIM estiver protegido com um CÓDIGO PIN, é-lhe pedido para introduzir o CÓDIGO PIN antes de prosseguir: Quando o seu Cartão SIM for lido, tem as seguintes opções à disposição: READ WRITE SECURITY NEW OPEN SAVE PRINT CUT COPY PASTE CLEAR Ler os dados do seu Cartão SIM Gravar os dados no seu Cartão SIM Activar, desactivar ou alterar o seu CÓDIGO PIN Adicionar um registo à sua Agenda ou Pasta SMS Abrir uma Agenda guardada ou um ficheiro de SMS. Gravar a Agenda ou o ficheiro de SMS no seu HDD. Imprimir a sua Agenda ou Mensagens SMS Remover o registo seleccionado. Copiar o registo seleccionado. Colar o registo seleccionado. Eliminar o registo seleccionado. 52 PORTUGUESE 6.1. Cópia de segurança da sua Agenda/Mensagens SMS Seleccione a sua Agenda ou Mensagens SMS na aplicação: Seleccione “SIMCard” (Cartão SIM), “Save To File” (Gravar no ficheiro). Seleccione uma localização para guardar a sua cópia de segurança e seleccione “Save” (Guardar). A cópia de segurança é guardada na localização escolhida. 6.2. Restaurar a sua Agenda/Mensagens SMS Seleccione a sua Agenda ou Mensagens SMS na aplicação: Seleccione “SIMCard” (Cartão SIM), “Read From To File” (Ler do ficheiro). Seleccione o ficheiro de cópia de segurança da Agenda ou das Mensagens SMS e seleccione 53 PORTUGUESE “Open” (Abrir). Quando a aparecer a mensagem “Are you sure” (Tem a certeza?), seleccione “Yes” (Sim) para reescrever os registos no seu Cartão SIM. NOTA: Para guardar as alterações feitas, seleccione “Write” (Gravar). Se sair da aplicação sem seleccionar “Write” (Gravar), as alterações não terão qualquer efeito. 54 MAGYAR Conceptronic CSIMU Gyors installációs kalauz Gratulálunk Önnek amiért a Conceptronic CSIMU. A mellékelt Hardver Installációs Kalauz részletes magyarázatot nyújt a Conceptronic CSIMU installálásához. Probléma esetén javasoljuk, hogy vegye igénybe a Supportsite-en nyújtott segítséget(menjen a www.conceptronic.netre és kattintson a ‘Support’-ra, ahol megtalálja a Gyakran Ismételt Kérdések adatbázist. Ha termékünkkel kapcsolatban további kérdése lenne, és weboldalunkon nem talál rá választ, forduljon hozzánk emailben: [email protected] A Conceptronic termékekkel kapcsolatos további információért kérjük tekintse meg a Conceptronic weboldalát: www.conceptronic.net A továbbiakban leírt szoftver installáció kis mértékben eltérhet az Ön számítógépére való installációtól attól függően, hogy Ön melyik Windows változatot használja. 55 MAGYAR 1. Bevezetés Készítsen biztonsági másolatot telefonkönyvéről és SMSüzeneteiről, olvassa ki, illetve módosítsa azokat a számítógépén lévő GSM SIM-kártyáról. Ez a GSM SIM-kártyaolvasó – az Ön számítógépének alkalmazásával – a SIM-kártyán tárolt adatok kiolvasását, beírását és szerkesztését teszi lehetővé. Tökéletes eszköz, ha az egész mobiltelefonjáról tartalékmásolatot kíván készíteni. Mostantól fogva egyszerűen tudja telefonkönyvének részleteit cserélni, illetve beírni, üzeneteket nyomtatni, valamint SMS-üzeneteket összeállítani (annak érdekében, hogy később mobiltelefonjáról ezeket majd elküldhesse). 2. A csomag tartalma A CSIMU-csomaghoz az alábbiak tartoznak: • Conceptronic CSIMU USB Sim-kártyaolvasó • USB-kábel • Terméktájékoztató CD-ROM • Gyorstelepítési útmutató • Garanciakártya 56 MAGYAR 3. A szoftver telepítése Megjegyzés: Még a CSIMU-nak a számítógéphez történő csatlakoztatása előtt telepítse a szoftvert! Tegye be a CD-ROM-ot a CD-ROM meghajtóba. Ezután az autorun-menü automatikusan megjelenik. Ha az autorunmenün nem jelenik meg, nyomja le a „Start”-ot, a „Run”-t, majd hajtsa végre a „D:\autorun.exe”-t (ahol a D:\ az ön CD-ROM meghajtója). Jelölje ki az autorun-menün az „Install Software & Drivers” opciót. 57 MAGYAR Ezután a telepítővarázsló jelenik meg. Ha folytatni kívánja, nyomja le a „Next”-et. Ahhoz, hogy folytathassa, el kell fogadnia a licencszerződést. Válasszon a „Browse” segítségével célmappát, vagy nyomja le – ha folytatni kívánja – a „Next”-et. Jelöljön ki programmappát, majd nyomja le a „Next”–et. A telepítővarázsló az alkalmazást ezután telepíti. Telepítés után nyomja le a „Finish”-t, ha be akarja zárni a telepítővarázslót. 4. Az eszköz csatlakoztatása számítógéphez Amikor a szoftver már telepítve van, a CSIMU csatlakoztatható a számítógép szabad USB-portjához. A számítógép felismeri és automatikusan telepíti az új hardvert. 5. SIM-kártya behelyezése A SIM-kártyát fejjel lefelé helyezze be úgy, hogy a levágott perem – az alább látható módon – kívül legyen: 58 MAGYAR 6. Az alkalmazás használata Az alkalmazás elindításához használjuk az asztalon megjelenő parancsikont vagy a saját startmenünkön előállított parancsikont. Az alkalmazás indításakor az alábbi képernyő látható: 59 MAGYAR A SIM-kártyán lévő adatok kiolvasásához jelölje ki a „Read”et. Ha a SIM-kártya PIN-KÓDDAL védett, a program – mielőtt Ön folytathatná – kérni fogja a PIN-KÓDOT: SIM-kártya kiolvasásakor az alábbi lehetőségek állnak rendelkezésre: READ SIM-kártya adatainak kiolvasása WRITE Adatok visszaírása a SIM-kártyára SECURITY PIN-KÓDJÁNAK engedélyezése, letiltása, illetve megváltoztatása NEW Feljegyzés hozzáadása a telefonkönyvhöz vagy SMS-mappához OPEN Eltárolt telefonkönyv vagy SMS-archívum megnyitása SAVE A telefonkönyv vagy SMS-archívum elmentése HDD-re. PRINT Telefonkönyvének vagy SMS-üzeneteinek kinyomtatása. CUT A kijelölt feljegyzés kivágása COPY A kijelölt feljegyzés másolása PASTE A kijelölt feljegyzés beillesztése CLEAR A kijelölt feljegyzés törlése 60 MAGYAR 6.1. Tartalékmásolat készítése telefonkönyvéről/SMS-üzeneteiről Jelölje ki telefonkönyvét vagy SMS-üzeneteit az alkalmazásban: Jelölje ki a „SIMCard”-ot, majd a „Save To File”-t. Válasszon helyet a tartalékmásolat elmentéséhez, majd jelölje ki a „Save”. A tartalékmásolat a kiválasztott helyre íródik be. 6.2. Telefonkönyvének/SMS-üzeneteinek helyreállítása Jelöljeki telefonkönyvét vagy SMS-üzeneteit az alkalmazásban: 61 MAGYAR Jelöljeki a „SIMCard”-ot, majd a „Read From To File”-t. Válassza ki a telefonkönyvről vagy az SMS-üzeneteiről készített biztonsági másolat fájlját és jelölje ki az „Open”-t. Amikor megjelenik az „Are you sure” üzenet, jelölje ki a „Yes”-t, amennyiben felül kívánja írni a SIM-kártyán található feljegyzéseket. MEGJEGYZÉS: Az eszközölt változtatások elmentéséhez jelölje ki a „Write”-ot. Ha a „Write” kijelölése nélkül kíván az alkalmazásból kilépni, az annyit jelent, hogy minden változtatást felad. 62 Declaration of CE Conformity The manufacturer Address Conceptronic Databankweg 7 3821 AL Amersfoort, the Netherlands Hereby declares that the product Type USB SIM card reader Product CSIMU Complies with following directives: • 89/336/EEC EMC directive: Electromagnetic Compatibility • 73/23/EEC Low Voltage Directive: Electrical equipment designed for use within certain voltage limits The following standards were consulted to assess conformity: EN 301 489-17-2000 EN 301 489-1-2000 EN55022/9.98 Class B EN 61000-3-2/3/4/1995 EN 50082-1/1994 EN 60950/1995 The CE symbol confirms that this product conforms to the above named standards and regulations. This product is suitable for all EU countries. Place and date of issue : Amersfoort, September 30, 2005 Herman Looijen, Product Marketing Manager 63