1
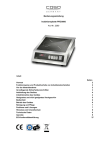
PLACA VITROCERÂMICA GLASS-CERAMIC HOB GLASKERAMIKPLATTE GEBRAUCHSANLEITUNG MV 1312 INSTRUÇÕES TÉCNICAS TECHNICAL INSTRUCTIONS TECHNISCHE ANWEISUNGEN Instalação Utilização Manutenção PT Installation - Use - Maintenance EN Installation - Bedienung - Pflege DE 2 MANUAL DE INSTRUÇÕES Caro(a) cliente, Agradecemos a sua compra deste artigo. Este aparelho foi sujeito a diversos testes laboratoriais, que atestam a sua qualidade. Para que a utilização do aparelho seja mais fácil, junto enviamos as instruções detalhadas do mesmo. Estas deverão assegurar uma rápida e segura utilização. Queira ler atentamente as instruções e medidas de segurança que se encontram descritas neste manual. Desejamos aos nossos clientes uma grande satisfação na utilização do seu novo aparelho. MANUAL DE INSTRUÇÕES íNDICE 1 Instruções de Segurança 4 2 Utilização e Funcionamento 6 2.1. Instalação 6 2.2. Ligação Eléctrica 6 2.3. Utilização 6 2.4. Recipientes 6 2.5. Funções 6 2.6. Função Golpe de Calor 10 2.7. Nível de Potência 11 2.8. Limite de Tempo em Funcionamento 11 3 Imagens 12 4 Pós Venda 13 5 Conservação do Ambiente 13 3 4 MANUAL DE INSTRUÇÕES 1 INSTRUÇÕES DE SEGURANÇA ATENÇÃO Risco de choque eléctrico Não Abrir Atenção: para evitar o risco de choque eléctrico não retire a tampa. O interior não contém peças que possam ser reparadas pelo utilizador. S olicite assistência a pessoal qualificado. Avisos Importantes Antes de utilizar o seu aparelho, leia atentamente este manual de instruções e guarde-o num sítio seguro, pois poderá precisar dele para consultas futuras ou no caso de transferência de propriedade. Para evitar perigos e deterioração do seu aparelho por utilizações incorrecta, aconselha-se uma leitura atenciosa e cuidadosa do manual de instruções. Antes de pôr o seu aparelho em funcionamento, e de forma a garantir uma utilização correcta, não o utilize se: - Caiu ao chão; - Notar algum vestígio de dano; - Durante o seu funcionamento surgir alguma anomalia; A instalação do aparelho à rede eléctrica deve ser efectuada por pessoal técnico qualificado, conhecedor das normas de instalação e regulamentação em vigor. Antes de proceder à ligação da placa, verificar se a instalação eléctrica e o dispositivo de protecção estão de acordo com as características técnicas do aparelho. Designação do cabo de alimentação: H05RR-F Secção nominal dos condutores do cabo de alimentação: 3x1,5 mm2 AVISO: O aparelho e as suas partes acessíveis podem aquecer com o uso. Devem ser tomados cuidados para evitar tocar nos elementos de aquecimento. Este aparelho não foi previsto para ser utilizado ( incluindo crianças ) cujas capacidades físicas, sensoriais ou mentais sejam reduzidas, ou que possuam pouca experiência e conhecimento, a menos que elas tenham supervisão ou instrução respeitante à utilização do aparelho por uma pessoa responsável pela sua segurança. Crianças deverão ser vigiadas para garantir que não brincam com o aparelho. AVISO: cozinhar numa placa com gordura ou óleo sem vigilância, pode ser perigoso e pode resultar em incêndio. Nunca tente apagar um incêndio com água, mas desligar o aparelho e depois cobrir com uma tampa ou um cobertor de incêndio. AVISO: Perigo de incêndio : não armazenar itens na superfície de cozedura. Atenção: o processo de cozimento deve ser supervisionado, um processo de cozimento curto tem de ser supervisionado de forma contínua MANUAL DE INSTRUÇÕES AVISO: cozinhar num fogão com gordura ou óleo pode ser perigoso e pode resultar em um incêndio AVISO: Se a superfície estiver partida desligue o aparelho (retirando a ficha da tomada de corrente ), para evitar a possibilidade de choque eléctrico. Não utilizar aparelho de limpeza a vapor. Este aparelho não se destina a ser operado por meio de um temporizador externo ou sistemas de controlo remoto. AVISO: usar protecções de placas apenas projectadas pelo fabricante ou indicadas pelo fabricante nas instruções de uso como protecções adequadas ou as incorporadas na placa. O uso de protecções inadequadas pode causar acidentes. Antes de proceder às operações de limpeza e de manutenção desligar o aparelho da electricidade e aguardar que o mesmo esteja completamente frio. Se o cabo de alimentação do aparelho se danificar, deve ser substituído por técnico qualificado a fim de evitar perigos. O seu aparelho não deverá ser utilizado para outros fins que não estejam previstos no manual de instruções. A sua segurança está prevista apenas para uso doméstico e não para uso comercial. A utilização incorrecta não será abrangida e cancela automaticamente o direito da garantia. Assistência Certifique-se que, em caso de avaria, entrega o seu aparelho para assistência a um técnico qualificado. No caso de eventuais reparações contactar sempre um Centro de Assistência Técnica autorizado e exigir peças sobresselentes originais. As reparações efectuadas por pessoal não competente podem causar danos. Humidade e Água Não utilize o seu aparelho em locais húmidos. Não deixe que o seu aparelho apanhe água sobre qualquer forma, já que tal poderá ser perigoso. PARA EVITAR O PERIGO DE INCÊNCIO OU CHOQUE ELÉCTRICO NÃO EXPONHA O APARELHO À ÁGUA OU HUMIDADE. LIMPEZA - Deixe arrefecer a placa e limpe-a completamente, pois os restos podem ficar muito difíceis de remover quando reaquecidos. - Utilize produtos adequados à limpeza das placas vitrocerâmicas. - Não utilize esponjas abrasivas ou detergentes em pó que podem arranhar a superfície do vidro. - Não use spray de limpar fornos, pois é muito agressivo e pode danificar a superfície de vidro. - A limpeza da placa vitrocerâmica não deve ser efectuada com aparelho de limpeza a vapor ou similar. - Para remover pequenos resíduos utilize água quente e um pouco de detergente, passe água limpe e seque com um pano macio ou papel. - Eliminar qualquer detergente residual, pois pode prejudicar o vidro quando aquecido. - Para incrustações severas recomenda-se a utilização de uma espátula adequada para a limpeza do vidro (ver figura 5). - Atenção: No caso de derreterem na placa objectos de plástico, açúcar ou alimentos açucarados, devem ser eliminados enquanto quentes com o auxílio de uma espátula e com todo o cuidado para evitar queimaduras. 5 6 MANUAL DE INSTRUÇÕES 2 UTILIZAÇÃO E FUNCIONAMENTO 2.1. Instalação Cortar o plano de trabalho respeitando as medidas indicadas na figura 1 A placa deve instalar-se numa superfície completamente plana, para evitar o risco de partir o vidro. Se existem travessas de reforço na zona de encaixe devem ser retiradas. Introduzir a placa na abertura do móvel de modo a ficar centrada. Para evitar infiltrações aplicar o material de vedação (fornecido) em toda a periferia da placa tendo o cuidado para que os extremos coincidam sem se sobreporem (ver figura 2). Não utilizar silicone para vedar a placa dado que se tornará impossível retirá-la, no caso de uma eventual futura manutenção. Fixar a placa com as abraçadeiras fornecidas. A tracção dos parafusos será suficiente para fixar a placa (ver figuras 3). A placa deve ser instalada à distância mínima de 50 mm da parede posterior e de 100 mm de uma parede lateral. A eventual presença de um móvel suspendido por cima do plano de trabalho deve estar à distância mínima do plano de 600 mm. A eventual presença lateral de um móvel mais alto do que a placa deve estar à distância mínima de 300 mm. Materiais combustíveis, como por exemplo cortinas, devem estar à distância mínima de 500 mm. Se a placa estiver instalada por cima de uma gaveta deve existir uma divisória entre a parte inferior da placa e a gaveta, de forma a evitar contacto acidental com o fundo quente da placa. A placa deverá ser colocada a uma distância mínima de 60 mm da divisória ou do forno que se encontrar imediatamente debaixo dela (ver figura 4). 2.2. Ligação Eléctrica No caso de instalação da placa por cima de um forno, a ligação eléctrica dos dois aparelhos deve ser efectuada separadamente, quer para facilitar a extracção dos aparelhos quer por motivos de segurança eléctrica. O cabo de alimentação deve ser posicionado de modo a que nenhum ponto possa atingir uma temperatura superior a 50º C relativamente à temperatura ambiente. Ligar a ficha do aparelho a uma tomada com contacto de terra. O fabricante declina qualquer responsabilidade no caso em que as normas em vigor não sejam respeitadas e não se considera responsável por danos e/ou prejuízos resultantes de instalação e/ou utilização incorrectas. 2.3. Utilização As zonas de trabalho podem estar muito quentes sem estarem com cor vermelha (zona ligada com termóstato activado ou zona desligada com calor residual). Se o vidro partir desligar imediatamente a placa da rede eléctrica, retirando a ficha da tomada de corrente. Os alimentos embrulhados em papel de alumínio não se podem cozinhar directamente sobre o vidro. Não deixar as zonas de trabalho em funcionamento sem recipientes sobre elas. Cada zona de trabalho está definida por um contorno. Para realizar operações que não necessitem de calor intenso aproveite o calor residual das zonas de aquecimento, digito " " no display. Mantenha a ebulição com o nível de potência mais baixo possível, para poupar energia. Não deixar nenhum objecto sobre a zona de cozinhado da placa, mesmo que esta não esteja em funcionamento. 2.4. Recipientes Não use recipientes com diâmetro inferior a área onde pretende cozinhar (ver figuras 6). Deve usar um recipiente com um diâmetro semelhante ao da área a utilizar e de fundo espesso. MANUAL DE INSTRUÇÕES Os recipientes não devem ter fundo áspero para evitar riscar o vidro e devem estar limpos e secos antes de serem colocados sobre a placa vitrocerâmica. Se utilizar recipientes não adequados, o termóstato desactivará antes de alcançar a temperatura requerida, prolongará o tempo de cozinhado e desperdiça energia. Recomenda-se tapar os recipientes enquanto cozinha, com isto economizará uma quantidade considerável de energia. Recomendamos a utilização de recipientes em aço inoxidável que possuem fundo plano e com boa condutibilidade térmica, permitindo reduzir os tempos de cozinhado. Os recipientes de ferro fundido, à base de alumínio ou de cobre não são recomendáveis dado que podem manchar a superfície em vidro. 2.5 sensores Para comandar a placa não use luvas, use o dedo limpo. O comando da placa é efectuado colocando um dedo sobre o(s) sensor(s). O comando é assumido após se ouvir um sinal sonoro. A zona dos sensores deve permanecer desocupada ou as ordens dadas não serão reconhecidas. Não coloque objectos na zona dos sensores. Quando a placa é ligada pela primeira vez, ou cada vez que a alimentação eléctrica da placa é retomada (ex depois de falha de energia ou disparo do disjuntor) o modulo electrónico faz uma calibração. Durante esse processo de calibração: a zona de comandos deve estar limpa e sem objectos em cima a zona de comandos, não pode estar exposta a forte iluminação tal como luz solar ou lâmpadas de halogéneo potentes. Por favor desligar a alimentação eléctrica geral da placa, esperar 10 segundos e ligar de novo, tendo em atenção as condições acima descritas. Se o processo de calibração não for concluído, o comando exibe o erro " F L", ou simplesmente não conseguirá comandar a placa. 7 8 MANUAL DE INSTRUÇÕES Zona 1 Zona 2 Display Zona 1 Sensor Diminuir Display Zona 2 Sensor Aumentar Sensor Ligar/Desligar Sensor Bloqueio MANUAL DE INSTRUÇÕES Para activar as diferentes funções, colocar um dedo sobre os sensores conforme os esquemas 1 - Ligar geral - Desligar geral Usar sensor ligar - desligar Zona 2 Seleccionada 2 - Escolher a zona a comandar Selecção de zona que pretende Zona 1 ou Zona 2 Aumentar níivel na zona 2 3 - Aumentar o nível de potência Escolher a zona a comandar de acordo com o esquema Usar sensor aumentar. Diminuir nível na zona 2 4 - Diminuir o nível de potência Escolher a zona a comandar de acordo com o esquema. Usar sensor diminuir. Desligar zona 2 5 - Desligar zona Escolher a zona a comandar de acordo com o esquema Usar em simultâneo sensores aumentar e diminuir. Ou usar só sensor diminuir até ao nível 0. 9 10 MANUAL DE INSTRUÇÕES Depois de desligadas, as zonas ainda quentes são sinalizadas com um " H " no display. A temperatura nas zonas excede os 65ºC. Zona 1 Fria Display Zona 1 6 - Bloquear / Desbloquear Bloquear a placa: Usar sensor de bloqueio durante 3 segundos. Aparece um sinal vermelho que indica que a placa está bloqueada Desbloquear a placa Usar o sensor bloqueio durante 3 segundos Placa desbloqueada 2.6. Função Golpe de Calor Esta função permite utilizar, inicialmente, uma zona de modo continuo durante um determinado período de tempo. Uma vez superado este tempo, a zona escolhida funcionará de acordo com o nível de potência escolhido (de 1 a 8). Duração do golpe de calor (funcionamento contínuo): nível 1 - 1 minuto nível 3 - 4 minutos e 48 segundos nível 5 - 8 minutos e 30 segundos nível 7 - 3 minutos e 30 segundos nível 2 - 2 minutos nível 4 - 6 minutos e 30 segundos nível 6 - 2 minutos e 30 segundos nível 8 - 4 minutos e 30 segundos MANUAL DE INSTRUÇÕES 11 A função é activada após a execução de 3 passos: Display Zona 1 Escolher a zona que pretende utilizar Usar sensor diminuir para seleccionar nível 9. Com o nível 9 seleccionado usar o sensor É visível um ponto junto ao digito seleccionado De imediato usar o sensor no nível desejado. para colocar Função pré aquecimento ou golpe de calor activa 2.7. Nível de Potência Cada zona tem um ciclo de funcionamento consoante o nível seleccionado de acordo com: nível 1 - 39 segundos desligado / 1 segundo ligado nível 2 - 37 segundos desligado / 3 segundos ligado nível 3 - 34 segundos desligado / 6 segundos ligado nível 4 - 32 segundos desligado / 8 segundos ligado nível 5 - 30 segundos desligado / 10 segundos ligado nível 6 - 27 segundos desligado / 13 segundos ligado nível 7 - 22 segundos desligado / 18 segundos ligado nível 8 - 14 segundos desligado / 26 segundos ligado nível 9 - sempre ligado (a menos que o termóstato de segurança actue) 2.8. Limite de Tempo em Funcionamento Por razões de segurança, quando é excedido um tempo máximo de funcionamento, a zona desactivar-se-á automaticamente. O tempo máximo de funcionamento depende do nível escolhido para a zona: nível 1 - 10 horas nível 3 - 5 horas nível 5 - 3 horas nível 7 - 2 horas nível 9 - 1 hora nível 2 - 5 horas nível 4 - 4 horas nível 6 - 2 horas nível 8 - 2 horas 12 MANUAL DE INSTRUÇÕES 3 IMAGENS Fig. 1 Fig. 2 Fig. 3 Fig. 5 Fig. 4 Fig. 6 Fig. 6 Fig. 7 MANUAL DE INSTRUÇÕES 13 4 PÓS VENDA A BECKEN concebeu este aparelho de forma a garantir a máxima fiabilidade. Não abra o aparelho - risco de choque eléctrico. Se não conseguir solucionar o problema, contacte o vendedor ou fabricante. AVISO: qualquer tentativa de arranjar o aparelho sem contactar o fabricante irá invalidar a garantia. Caso o problema persista, leve o seu aparelho a um balcão de pós-venda de qualquer loja Worten, Modelo ou Continente, para a resolução do problema. A Worten Equipamentos para o Lar garante por um período de 2 anos, após a data de compra deste aparelho, uma garantia contra qualquer defeito de fabrico encontrado. A garantia pressupõe o correcto uso e manutenção do artigo, nomeadamente de acordo com as instruções expressas neste manual. Caso não se verifiquem estas condições, as avaria não estarão cobertas pela garantia. As reparações de aparelhos eléctricos deverão ser efectuadas apenas por técnicos especializados, já que, não sendo feito pelos mesmos, poderão surgir posteriores complicações nos aparelhos. Para evitar perigos desnecessários, caso surjam avarias quer nos cabos ou em outro tipo de componentes, as reparações devem ser efectuadas nos postos de assistência técnica especializados, para as quais são necessárias ferramentas apropriadas. 5 CONSERVAÇÃO DO AMBIENTE Tentamos reduzir ao máximo o volume das embalagens que se limitam a três materiais de fácil separação: cartão, papel e plástico. O aparelho é constituído por material reciclável, uma vez desmontado por uma empresa especializada. Siga a legislação local respeitante à reciclagem de todo o material. 14 INSTRUCTION MANUAL Instruction manual Dear customer, We would like to thank you for buying this product. This appliance has undergone various laboratory tests to prove its high quality. To ensure that this appliance is easy to use, we have enclosed detailed instructions. These should ensure that the product can be used quickly and safely. Please read the instructions and safety measures described in this manual carefully. We hope that our customers are very satisfied when using their new appliance INSTRUCTION MANUAL Contents 1 Safety Instructions 16 2 Use and Operation 18 2.1. Installation 18 2.2. Electrical Connection 18 2.3. Use 18 2.4. Cookwear 19 2.5. Sensors 19 2.6. Heat Boost Function 22 2.7. Power Level 23 2.8. Time Limit in Operation 23 3 Images 24 4 After-Sales 25 5 Environmental Conservation 25 15 16 INSTRUCTION MANUAL 1 SAFETY INSTRUCTIONS WARNING Electric shock risk Do not open WARNING: do not remove the cover to avoid the risk of electric shock. There are no parts inside that can be repaired by the user. Request assistance from qualified personnel. Important Notices Read this instruction manual carefully before using this appliance and keep it safe, as it might be needed for future reference or if the product is transferred to a new owner. It is recommended to read the instructions carefully to avoid hazards and to prevent your appliance from being damaged by incorrect use. Before turning on your appliance and ensure that it is used correctly by not operating it if: - It has been dropped; - You see any signs of damage; - Any anomalies arise during operation; The appliance must be connected to the power supply by a technically qualified person with knowledge of current installation standards and regulations. Before turning the hob on, make sure that the electrical connections and protection devices are suitable for the product's technical characteristics. Power supply cable designation: H05RR-F Nominal cross section of the power supply cable: 3 x 1,5 mm² WARNING: The appliance and its accessible parts may become hot with use. Care must be taken to avoid touching the heating elements. This appliance was not expected to be used by persons whose physical, sensory or mental capacities are reduced (including children) or those with little experience or knowledge, unless they are supervised by a person responsible for their safety. Children should be watched to make certain that they do not play with the appliance. WARNING: using fat or oil to cook on a hob can be dangerous and could cause a fire. Never attempt to extinguish a fire with water. Unplug the appliance and place a cover or fire blanket over the flames WARNING: Fire risk: do not store items on the cooking surface. WARNING: If the surface is broken, disconnect the appliance by removing the plug from the socket, to avoid the possibility of an electric shock. INSTRUCTION MANUAL Danger of fire: Do not store items on the cooking surfaces CAUTION: The cooking process has to be supervised. A short term cooking process has to be supervised continuously WARNING: Unattended cooking on a hob with fat or oil can be dangerous and may result in a fire. No not use steam cleaning devices. This oven is not designed to be operated by an external timer or remote control systems. WARNING: only use hob protectors designed by the manufacturer, or indicated by the manufacturer in the usage instructions as adequate protections, or protections included in the hob. Using unsuitable protection can cause accidents. Disconnect the appliance from the electricity supply and wait until it is completely cold before performing any maintenance operations. If the appliance's power supply cable is damaged, it must be replaced by a qualified technician in order to avoid hazards. Your appliance must not be used for any purpose other than that envisaged in the instruction manual. It is only designed to be safe for domestic use, not commercial use. Incorrect use is not covered by the warranty and will void it automatically. Assistance If a fault occurs, ensure that your appliance is repaired by a qualified technician. Should repairs be necessary, always contact an authorized technical assistance centre and demand original parts. Repairs made by incompetent personnel may cause damage. Humidity and Water Do not use your appliance in damp areas. Do not allow water to pool on your appliance, as this could be dangerous. TO AVOID DANGER OF FIRE OR ELECTRIC SHOCK, DO NOT EXPOSE THE APPLIANCE TO WATER OR HUMIDITY. CLEANING Set the hob cool and clean it completely, as dirt can be very difficult to remove when reheated. Use products that are suitable for cleaning glass-ceramic hobs. Do not use abrasive sponges or powder detergents that could scratch the glass surface. Do not use oven cleaning spray, as it is very aggressive and could damage the glass surface. The glass-ceramic hob should not be cleaned using steam or other similar methods To remove minor dirt, use hot water and a little detergent, rinse with clean water and dry with a soft cloth or paper. Remove any residual detergent, as it could damage the glass when hot. The use of an adequate spatula for cleaning glass is recommended for severe build-ups (see figure 5). Warning: If plastic objects, sugar or sugary foods melt onto the hob, they should be removed while hot using a spatula, taking care to avoid getting burnt. 17 18 INSTRUCTION MANUAL 2 USE AND OPERATION 2.1. Installation Cut the work area, as per the measurements indicated in figure 1 The hob should be installed on a completely flat surface to avoid the risk of breaking the glass Any reinforcements in the installation area must be removed. Insert the hob into the opening in the furniture such that it is centralised. To prevent seepage, apply the supplied sealant around the entire edge of the hob, ensuring that the ends touch without overlapping (see figure 2). Do not use silicone to seal the hob, as this will make it impossible to remove if maintenance is required in the future. Fix the hob in place with the supplied clamps. Bolts should be tightened sufficiently to fix the hob in place (see figure 3). The hob should be installed at a minimum distance of 50 mm from the rear wall and 100 mm from side walls. If any furniture is suspended above the work area, it must be at minimum height of 600 mm above the hob. If there is a piece of furniture higher than the hob, it must be at a minimum distance of 300 mm away. Combustible materials, such as curtains, should be at a minimum distance of 500 mm away. If the hob is installed above a drawer, there must be a division between the bottom of the hob and the drawer to avoid accidental contact with the hot base of the hob. As a minimum, the hob must be installed at a height of 60 mm above the division or the oven installed immediately below it (see figure 4). 2.2. Electrical Connection If the hob is installed above an oven, the electrical connections of the two appliances must be made separately, both to facilitate their extraction and for electrical safety reasons. The power supply cable must be positioned such that none of its points can reach a temperature in excess of 50°C above room temperature. Connect the plug of the appliance to an electrical outlet. The manufacturer shall not be liable if current standards are not followed, and shall not be considered liable for damage and/or injury resulting from incorrect installation and/or use. 2.3. Use Work zones can be very hot without being red (zone turned on with an activated thermostat or zone switched off with residual heat). If the glass breaks, disconnect the hob from the electricity supply, removing the plug from the socket. Food wrapped in aluminium foil cannot be cooked directly on the glass. Do not leave work zones switched on without cookwear on them. Each work area is marked by an outline. For cooking that does not require intense heat, take advantage of residual heat in the heating zones, digit " " on the display. Save energy by boiling liquids at the lowest possible power level. Do not leave any objects on the hob's cooking INSTRUCTION MANUAL zone, even if it is turned off. Do not leave any object on the cooking area of the hob, even if it is not operating. 2.4. Cookwear Do not use cookwear with a diameter less than the area where you intend to cook (see figure 6). Pots and pans with thick bases and diameters similar to that of the heating área must be used. To avoid scratching the glass, cookwear must not have rough bases and must be clean and dry before being placed on the glass-ceramic hob. If unsuitable cookwear is used, the thermostat will deactivate before the required temperature is reached. This will prolong cooking times and waste energy. It is recommended to cover cookwear while cooking. This saves a considerable amount of energy. We recommend the use of stainless steel cookwear with a flat base with good heat conductivity, as this allows cooking times to be reduced. Cast iron, aluminium and copper cookwear is not recommended, as they can stain the glass surface. 2.5 Sensores To control the hob do not use gloves, use a clean finger. . The hob is controlled by placing a finger on the sensors. The command is successful if an audio signal is heard. The sensor zone should remain clear, or the orders that are given will not be received. Do not place objects in the sensor zone. When the hob is turned on for the first time, or each time that the power supply of the hob is turned on again (eg. after a power outage or trip of the circuit breaker) the electronic module makes a calibration. During this calibration process: : the control area must be clean and without objects on the control area, and it may not be exposed to strong light such as sunlight or powerful halogen lamps. Please disconnect the main electrical supply, wait 10 seconds and reconnect, paying attention to the conditions described above. If the calibration process was not completed, the control area will display a "FL" error, or simply will not be able to control the hob.. 19 20 INSTRUCTION MANUAL Zone 1 Zone 2 Display Zone 2 Display Zone 1 Sensor Decrease Sensor Increase Sensor On - Off Sensor Block INSTRUCTION MANUAL To activate the different functions, place a finger on the sensors as shown on the diagrams 1 - General turn on - General turn off Use on - off sensor Selected zone 2 - Choose the zone to be controlled Zone 1 or Zone 2 Increase level in zone 2 3 - Increase the power level Choose the zone to be controlled as per diagram Use the increase sensor. Decrease level in the zone 4 - Decrease the power level Choose the zone to be controlled as per diagram Use the decrease sensor.. Turn off zone 2 5 - Turn off zone Choose the zone to be controlled as per diagram Use the increase and decrease sensors simultaneously. Or just use the decrease sensor to reduce it to level 0. 21 22 INSTRUCTION MANUAL After being turned off, the zones that are still hot are marked on the display with "H". The zone temperature exceeds 65°C. Zona 1 Fria Display Zona 1 6 - Block / Unblock Block the hob: Use the block sensor during 3 seconds A red light indicates that the hob is blocked. Unblock the hob Use the block sensor during 3 seconds Unblocked hob 2.6. Heat Boost Function Initially, this function allows a zone to be used continuously for a certain period of time. Once this time has passed, the selected zone will operate in accordance with the established power level (from 1 to 8 During the heat boost (continuous operation): level 1 - 1 minute level 3 - 4 minutes and 48 seconds level 5 - 8 minutes and 30 seconds level 7 - 3 minutes and 30 seconds level 2 - 2 minutes level 4 - 6 minutes and 30 seconds level 6 - 2 minutes and 30 seconds levell 8 - 4 minutes and 30 seconds INSTRUCTION MANUAL This function is activated by executing 3 steps: Choose the zone to be used Display Zona 1 Use the increase sensor to select level 9. After level 9 has been selected, use sensor A point is displayed alongside the selected digit Immediately use sensor . to set to the desired level Pre-heating or heat boost function active 2.7. Power Level Each zone has an operating cycle in accordance with the selected level, as follows: level 1- 39 seconds off / 1 second on level 2 - 37 seconds off / 3 seconds on level 3 - 34 seconds off / 6 seconds on level 4 - 32 seconds off / 8 seconds on level 5 - 30 seconds off / 10 seconds on level 6 - 27 seconds off / 13 seconds on level 7 - 22 seconds off / 18 seconds on level 8 -14 seconds off / 26 seconds on level 9 - always on (unless the safety thermostat operates) 2.8. Time Limit in Operation For safety reasons, the zone deactivates automatically when a certain maximum operating time is exceeded. The maximum operating time depends on the level selected for the zone: level 1- 10 hours level 3 - 5 hours level 5 - 3 hours level 7 - 2 hours level 2 - 5 hours level 4 - 4 hours level 6 - 2 hours level 8 - 2 hours level 9 -1 hour 23 24 INSTRUCTION MANUAL 3 IMAGENS Fig. 1 Fig. 2 Fig. 3 Fig. 5 Fig. 4 Fig. 6 Fig. 6 Fig. 7 INSTRUCTION MANUAL 4 AFTER-SALES António Meireles designed this appliance to guarantee maximum flexibility. Do not open the appliance - risk of electric shock. Contact the seller or manufacturer if you are not able to solve the problem. WARNING: Any attempt to fix the appliance without contacting the manufacturer will void the warranty. Repairs to electrical appliances must only be made by specialist technicians, as subsequent complications may arise in the appliances if the work is not done by such a technician To avoid unnecessary hazards, if faults occur in the cables or any other type of component, repairs must be made at specialist service centres, as appropriate tools are required. 5 ENVIRONMENTAL CONSERVATION We attempt to reduce the volume of packaging as much as possible and limit it to three materials that are easy to separate: cardboard, paper and plastic. The appliance is made from recyclable material, once dismantled by a specialised company. Follow local legislation regarding the recycling of all material. 25 26 GEBRAUCHSANLEITUNG Sehr geehrter Kunde, Wir danken Ihnen, dass Sie sich für unserer Glaskeramikplatte enstchieden haben. Dieses Gerät wurde unterschiedlichen Laborversuchen ausgesetzt, die dessen Qualität beweisen. Um die Gerätbedienung zu erleichtern, senden wir Ihnen anbei die entsprechenden detaillierten Anweisungen. Diese sollen eine schelle und sichere Bedienung gewährleisten. Bitte lesen Sie sorgfältig die Anweisungen und die Sicherheitsma?nahmen, die hier beschrieben werden, durch. Wir hoffen, dass Sie mit dem neuen Gerät zufrieden sind. GEBRAUCHSANLEITUNG INHALTSVERZEICHNIS 1 Sicherheitshinweise 28 2 Bedienung und Betrieb 30 2.1. Instalation 30 2.2. Elektrischer Anschluss 30 2.3. Bedienung 30 2.4. Kochgeschirr 31 2.5 Sensoren 31 2.6 Hitzschlag-Funktion 34 2.7 Leistungsstand 35 2.8 Zeitbegrenzung in Betrieb 35 3 Bilder 36 4 Kundendienst 37 5 Umweltschutz 38 27 28 GEBRAUCHSANLEITUNG 1 SICHERHEITSHINWEISE ACHTUNG Elektrische Gefährdung Nicht öffnen Achtung: Um eine elektrische Gefährdung zu verhindern, entfernen Sie den Deckel nicht. Die inneren Teile können nicht durch den Benutzer repariert werden. Wenden Sie sich an Fachleute für B etreuung. S olicite assistência a pessoal qualificado. Wichtige Hinweise Bevor Sie Ihr Gerät benutzen, lesen Sie diese Gebrauchsanleitung sorgfältig durch und bewahren Sie diese für einen späteren Gebrauch oder falls Sie dieses an einer anderen Person weitergeben. Um Gefährdungen und Störungen Ihres Gerätes wegen falscher Anwendung zu verhindern, empfehlen wir, die Anweisungen sorgfältig durchzulesen. Bevor Sie Ihr Gerät in Betrieb setzen und, um eine korrekte Benutzung zu gewährleisten, verwenden Sie diesen nicht wenn: - Das Gerät auf den Boden gefallen ist; - Ein Schaden aufgetreten st; - Während des Betriebs irgendein Fehler auftritt; Der elektrischer Anschluss des Geräts soll durch geschultes Fachpersonal, das die Montagenormen und anwendbaren Regelungen kennt, durchgeführt werden. Bevor Sie die Platte anschließen, überprüfen Sie, ob die elektrische Anlage und die Schutzvorrichtung in Übereinstimmung mit den technischen Eigenschaften des Geräts sind. Bezeichnung des Versorgungskabels: H05RR-F Nennquerschnitt der Leitungen des Versorgungskabels: WARNUNG: Das Gerät und dessen zugängliche Teile können durch den Gebrauch warm werden. Die notwendigen Maßnahmenmüssen getroffen werden, um die Berührung der Heizelemente zu verhindern. Das Gerät ist nicht geschaffen um von Personen (inbegriffen Kindern) verwendet zu werden, deren physische, sinnliche oder geistige Fähigkeiten beschränkt sind, oder Personen ohne Erfahrung oder Kenntnisse, außer wenn durch eine, für Ire Sicherheit verantwortliche Person eine Überwachung und/oder vorherige Anweisungen zur Verwendung des Geräts gewährleistet werden. Kinder müssen beaufsichtigt werden, damit sie nicht mit dem Gerät spielen WARNUNG: Das Kochen ohne Überwachung mit Fett oder Öl auf einer Platte kann gefährlich sein und einen Brand verursachen. Versuchen Sie niemals einen Brand mit Wasser zu löschen, sondern schalten Sie das Gerät aus und bedecken Sie die Flammen mit einem Deckel oder einer Flammenschutzdecke. WARNUNG: Brandgefahr: Legen Sie keine Gegenstände auf die Kochoberfläche. GEBRAUCHSANLEITUNG WARNUNG: Wenn die Oberfläche gebrochen ist, schalten Sie das Gerät aus durch Abziehen des Netzsteckers von der Steckdose, um eine elektrische Gefährdung zu verhindern. Benutzen Sie keinen Dampfreiniger. Dieses Gerät soll nicht mittels einer externen Zeitschaltuhr oder Fernbediedungssysteme bedient werden. WARNUNG: Nur durch den Hersteller hergestellte Plattenschutzvorrichtungen oder von ihm in der Gebrauchsanweisung angegebene Plattenschutzvorrichtungen als geeignete Schutzvorrichtungen benutzen oder diejenigen, die in der Platte eingebaut sind. Die Benutzung ungeeigneter Schutzvorrichtugen kann Unfälle verursachen. Vor den Pflege- und Reinigungsarbeiten, schalten Sie das Gerät von der Stromversorgung aus und warten Sie bis es kalt ist. Bei fehlerhaftem Versorgungskabel, muss dieses durch einen qualifizierten Fachmann ersetzt werden, um Gefahren zu vermeiden. Ihr Gerät soll nicht für andere Zwecke benutzt werden als die, die in dieser Gebrauchsanleitung vorgestellt werden. Die Gerätsicherheit ist nur für den Hausgebrauch vorgesehen und nicht für kommerzielle Nutzung. Eine falsche Benutzung fällt nicht unter der Garantie und macht diese automatisch rückgangig. Kundendienst Vergewissern Sie sich, dass Sie im Falle einer Störung Ihr Gerät einem qualifizierten Fachmann überlassen. Bei eventuellen Reparaturen kontaktieren Sie immer eine genehmigte Betreuungsstelle und verlangen Sie immer originelle Ersatzteile. Reparaturen, die nicht durch zuständiges Personal durchgeführt werden, können Schaden verursachen. Feuchtigkeit und Wasser Verwenden Sie Ihr Gerät nicht in feuchten Räumen. Lassen Sie Ihr Gerät nicht auf irgendeiner Weise in Kontakt mit Wasser kommen, da dies gefährlich sein kann. UM EINE BRANDGEFÄHRDUNG ODER ELEKTRISCHE GEFÄHRDUNG ZU VERHINDERN, SETZEN SIE DAS GERÄT NICHT AN WASSER ODER FEUCHTIGKEIT AUS. REINIGUNG - Lassen Sie die Platte abkühlen und reinigen Sie diese vollständig, da die Entfernung von Resten bei einer Wiedererwärmung sehr schwierigist. - Benutzen Sie geeignete Reinigungsmittel für Glaskeramikplatten. - Verwenden Sie keine abrasiven Schwämme oder Pulverreinigungsmittel, die die Glasoberfläche zerkratzen können. - Verwenden Sie keine Sprühmittel für Ofenreinigung, da diese sehr agressiv sind und die Glasoberfläche schadenkönnen. - Die Reinigung der Glaskeramikplatte soll nicht anhand Reinungsdampfgeräte oder ähnliches durchgeführt werden. - Um kleine Reste zu entfernen, verwenden Sie warmes Wasser und ein wenig Reinigungsmittel, danach spülen Sie diePlatte mit sauberem Wasser und trocknen Sie diese mit einem sanften Tuch oderPapier. - Entfernen Sie den restlichen Reinigungsmittel, da dieser den erhitzten Glas schadenkann. - Für schwierige Ablagerungen empfehlen wir die Verwendung einer für die Glasreinigung geeignete Spatel (siehe Bild 5). - Achtung: Falls Plastikgegenstände, Zucker oder Nahrungsmittel mit Zucker auf der Platte schmelzen, sollen diese während sie noch warm sind mit Hilfe einer Spatel sorgfältig entfernt werden, um Verbrennungen zu verhindern. 29 30 GEBRAUCHSANLEITUNG 2 BEDIENUNG UND BETRIEB 2.1. Instalation Die Arbeitsebene unter Einhaltung der in Bild 1 angegebenen Abmessungen schneiden. Die Platte soll auf einer vollkommenen ebenen Fläche aufgestellt werden, um eine Glasbruch-Gefährdung zu vermeiden. Bei vorhandenen Verstärkungsträgern im Einsatzbereich sollen diese entfernt werden. Die Platte in die Möbelöffnung einführen so dass diese zentriert ist. Um Einsickerungen zu verhindern, Abdichtungsmaterial (mitgeliefert) rund um die Platte anwenden und darauf achten, dass die Enden übereinstimmen, ohne sich zu überlappen (siehe Bild 2). Verwenden Sie kein Silikon, um die Platte abzudichten, da es dann unmöglich ist, dieses bei einer eventuellen zukünftigen Pflege zu entfernen. Die Platte mit den mitgelieferten Befestigungsringen fixieren. Der Schraubenzug ist ausreichend, um die Platte zu befestigen (siehe Bild 3). Die Platte muss in einem Abstand von 50 mm von der Rückwand und von 100 mm von der seitlichen Wand aufgestellt werden. Das eventuelle Vorhandensein eines seitlichen Möbels, der höher als die Platte ist, muss einen minimalen Abstand von 300 mm haben. Brennstoffe, wie zum Beispiel, Vorhänge müssen in einem Abstand von 500 mm sein. Falls die Platte über einer Schublade eingebaut ist, muss eine Trennwand zwischen den unteren Platteteil und der Schublade vorhanden sein, um einen möglichen Kontakt mit der warmenPlattenbasis zu vermeiden. Die Platte soll in einem minimalen Abstand von 600 mm von der Trennwand oder vom unmittelbar darunter stehenden Ofen eingebaut werden. 2.2. Elektrischer Anschluss Beim Platteneinbau über einem Ofen, muss der elektrischer Anschluss beider Geräte getrennt erfolgen, sowohl um den Ausbau der Geräte zu vereinfachen als auch aus elektrischen Sicherheitsgründen. Das Versorgungskabel muss so positioniert werden, dass kein Punkt Temperaturen über 50ºC gegenüber der Umgebungstemperatur erreicht. Der Stecker des Geräts an eine geerdete Steckdose anschließen. Die Hersteller haftet nicht, wenn die anwendbaren Normen nicht eingehalten werden und übernimmt keine Haftung für Schäden und/oder Verluste, die sich aus einer unvollständigen Aufstellung und/oder Benutzung ergeben. 2.3. Bedienung Die Arbeitszonen können sehr warm sei ohne rot zu werden (eingeschaltete Zone mit aktiviertem Thermostat oder ausgeschaltete Zone mit Abwärme). Bei Glasbruch die Platte unmittelbar von dem Stromversorgungnetz trennen durch Abziehen des Netzsteckers von der Steckdose. Das in Alufolie eingewickeltes Kochtgut kann nicht direkt auf das Glas vorbereitet werden. Lassen Sie die Kochzonen nicht in Betrieb ohne Kochgeschirr darauf. Jede Kochzone ist durch einen Umriss definiert. Um Zubereitungen, die keine intensive Wärme benötigen, nutzen Sie die restliche Wärme der Kochzonen aus, Zeichen " " am Bedienmodul. Halten Sie das Kochen auf dem möglichst niedrigeren Leistungsstand, um Energie zu sparen. Lassen sie keine Gegenstände auf dem Plattenkochfeld, auch wenn dieser ausgeschaltet ist. Benutzen Sie kein Kochgeschirr mit niedrigerem Durchmesser als der der Oberfläche, wo Sie kochen möchten (siehe Bild 6). Das Kochgeschirr soll einen ähnlichen Durchmesser wie der des Feldes, das benutzt wird haben. Das GEBRAUCHSANLEITUNG Kochgeschirr soll auch einen dicken Boden haben. 2.4. Kochgeschirr Benutzen Sie kein Kochgeschirr mit einem kleineren Durchmesser als den des Kochfelds (siehe Bilder 6). Der Durchmesser muss dem des Kochfelds identisch sein und der Topfboden muss dick sein. Das Kochgeschirr darf nicht einen rauen Boden haben, um das Kratzen am Glas zu verhindern und muss sauber und trocken sein bevor es auf der Glaskeramikplatte gelegen wird. Wenn Sie ungeeignetes Kochgeschirr benutzen, schaltet der Thermostat aus bevor es die gewünschte Temperatur erreicht hat, die Kochdauer verlängert sich und Energie wird verschwendet. Wir empfehlen das Kochgeschirr während des Kochens zu decken, um Energie zu sparen. Wir empfehlen die Benutzung von Edelstahltöpfe mit ebenem Boden und gute Wärmeleitfähigkeit, um die Kochdauer zu reduzieren. Gusseisen-, Aluminium- oder Kupfertöpfe werden nicht empfohlen, da diese die Glasoberfläche beflecken können. 2.5 Sensoren Die Plattensteuerung erfolgt unter Fingerberührung der Sensoren. Die Steuerung wird, nachdem man einen akustischen Signal hört, angenommen. Die Sensorenzone soll frei gehalten werden, sonst werden die angegebenen Anweisungen nicht erkannt. Legen Sie keine Gegenstände auf die Sensoren. Falls ein Sensor ununterbrochen für längere Zeit akitivert wird, wird die Steuerung nicht angenommen und die Sensoren gehen in Fehlermodus ein mit der Anzeige "FFFF". 31 32 GEBRAUCHSANLEITUNG Zone 1 Zone 2 Bedienmodul Zone 1 Sensor reduzieren Bedienmodul Zone 2 Sensor Erhöhen Sensor An-Aus Sensor sperren GEBRAUCHSANLEITUNG Um unterschiedliche Funktionen zu aktivieren, berühren Sie die Sensoren wie folgendes Schemas: 1 - Allgemeines An - Allgemeines Aus Sensor benutzen An - Aus Zone 2 ausgewählt 2 - Die zu steuernde Zone auswählen Auswahl der Zone Zone 1 oder Zone 2 Stand Zone 2 erhöhen 3 - Leistungsstand erhöhen Die zu steuernde Zone nachSchemaauswählen. Sensor"Erhöhung" benutzen. Stand Zone 2 reduzieren 4 - Leistungsstand reduzieren Die zu steuernde Zone nachSchema auswählen. Sensor reduzieren benutzen. Zone 2 ausschalten 5 - Zone ausschalten Die zu steuernde Zone nachSchema auswählen Sensoren "erhöhen" und "reduzieren" gleichzeitig benutzen. Oder Sensor "reduzieren" bis Stufe O benutzen. 33 34 GEBRAUCHSANLEITUNG Nach dem Ausschalten werden die Zonen, die immer noch warm sind, mit " H " am Bedienmodul angezeigt. Die Temperatur der Zonen überschreitet 65°C. Zona 1 Fria Zone 2 warm 6 - Sperren / Freigeben Platte sperren: Spersensor 3 Sekunden benutzen. Rote Signal erscheint, die Platte ist gesperrt Platte freigeben Spersensor 3 Sekunden benutzen Platte freigegeben 2.6. Hitzschlag-Funktion Durch diese Funktion kann anfangs eine Zone ununterbrochen während einer bestimmten Zeitdauer benutzt werden. Wenn diese Zeit vergangen ist, funktioniert die ausgewählte Zone entsprechend dem ausgewählten Leistungsstand (von 1 bis 8). Dauer der Hitzschlag-Funktion (ununterbrochener Betrieb): Stufe 1 - 1 Minute Stufe 2 - 2 minutos Stufe 3 - 4 Minuten und 48 Sekunden Stufe 4 - 6 Minuten und 30 Sekunden Stufe 5 - 8 Minuten und 30 Sekunden Stufe 6 - 2 Minuten und 30 Sekunden Stufe 7 - 3 Minuten und 30 Sekunden Stufe 8 - 4 Minuten und 30 Sekunden GEBRAUCHSANLEITUNG Die Funktion wird nach Durchführung von 3 Schritten aktiviert: Zona 1 Nivel 9 Die zu steuernde Zone auswählen Sensor "reduzieren" benutzen, um Stufe 9 auszuwählen. Mit Stufe 9 unter Auswählung des Sensors Ein Punkt bei dem ausgewählten Zeichen ist sichtbar Sensor unmittelbar benutzen um die gewünschte Stufe einzutellen. Die Funktion "vorheizen" oder "Hitzschlag" ist aktiv 2.7. Leistungsstand Jede Zone hat einen Funktionszyklus entsprechend der ausgewählten Stufe wie folgt: Stufe 1- 39 Sekunden ausgeschaltet / 1 Sekunden angeschaltet Stufe 2 - 37 Sekunden ausgeschaltet / 3 Sekunden angeschaltet Stufe 3 - 34 Sekunden ausgeschaltet / 6 Sekunden angeschaltet Stufe 4 - 32 Sekunden ausgeschaltet / 8 Sekunden angeschaltet Stufe 5 - 30 Sekunden ausgeschaltet / 10 Sekunden angeschaltet Stufe 6 - 27 Sekunden ausgeschaltet / 13 Sekunden angeschaltet Stufe 7 - 22 Sekunden ausgeschaltet / 18 Sekunden angeschaltet Stufe 8 -14 Sekunden ausgeschaltet / 26 Sekunden angeschaltet Stufe 9 - immer angeschaltet (au?er wenn der Sicherheitsthermostat in Betrieb ist) 2.8. Zeitbegrenzung in Betrieb Aus Sicherheitsgründen schaltet die Zone automatisch aus, wenn die maximale Betriebszeit überschreitet wird. Die maximale Betriebszeit hängt von der ausgewählten Stufe für die Zone ab: Stufe 1 - 10 Stunden Stufe 2 - 5 Stunden Stufe 3 - 5 Stunden Stufe 4 - 4 Stunden Stufe 5 - 3 Stunden Stufe 6 - 2 Stunden Stufe 7 - 2 Stunden Stufe 8 - 2 Stunden Stufe 9 - 1 Stunde 35 36 GEBRAUCHSANLEITUNG 3 BILDER Fig. 1 Fig. 2 Fig. 3 Fig. 5 Fig. 4 Fig. 6 Fig. 6 Fig. 7 GEBRAUCHSANLEITUNG 4 KUNDENDIENST António Meireles hat dieses Gerät so hergestellt, dass die höchste Zuverlässigkeit gewährleisten wird. Öffnen Sie das Gerät nicht - elektrische Gefährdung. Falls Sie ein Problem haben, setzen Sie sich in Verbindung mit der näheren Betreuungsstelle. WARNUNG: Jeder Versuch das Gerät zu reparieren ohne den Hersteller zu kontaktieren macht die Garantie ungültig. Die Reparaturen der elektrischen Geräte sollen nur durch spezialisierte Fachleute durchgeführt werden, andernfalls können später Störungen auftreten. Um unnötige Gefahren zu verhindern, falls Störungen an den Kabeln oder an andere Komponentearten auftreten, sollen die Reparaturen bei den technischen Betreuungsstellen durchfegührt werden, da diese die erforderlichen geeigneten Werkzeuge haben. 37 38 GEBRAUCHSANLEITUNG 5 UMWELTSCHUTZ Wir versuchen das Verpackungsvolumen zu reudzieren, das nur aus 3 Stoffe von leichter Treenung besteht: Karton, Papier und Plastik. Das Gerät wird mit wieder verwendbarem Material hergestellt, wenn es durch einen spezialisiertes Unternehmen demontiert wird. Halten Sie die örtlichen Regelungen bezüglich der Wiederverwendung des Materials ein. GEBRAUCHSANLEITUNG O Fabricante não se responsabiliza por erros de impressão O fabricante reserva-se no direito de introduzir alterações nos aparelhos, sem que essas alterações prejudiquem o funcionamento ou segurança dos mesmos. The manufacturer reserves the right to make changes to the appliances. These changes will not affect the operation or safety of the appliances. Der Hersteller behält sich das Recht vor, Änderungen an den Geräten vorzunehmen, ohne dass diese den Betrieb und die Sicherheit derselben beeinträchtigen. 39 PGQ1992/2 Rede de Assistência em Portugal http://goo.gl/qZ9s7 Red de Asistencia en España http://goo.gl/wqq1j 808 200 426 902 107 323