1
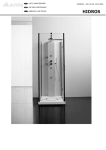
IT USO E MANUTENZIONE GB USE AND MAINTENANCE D GEBRAUCH UND PFLEGE UM000002 REV. 03 DEL 12/07/2010 KROMOS IT INDICE 1. INFORMAZIONI GENERALI..................................... 2. AVVERTENZE DI SICUREZZA.................................. 3. TARGHETTE DI SICUREZZA.................................... 3. GARANZIA................................................................. 4. SMALTIMENTO COMPONENTI................................ 5. RUBINETTERIA......................................................... 6. DISPLAY..................................................................... 7. MANUTENZIONE....................................................... 8. RISOLUZIONE PROBLEMI........................................ 02 03 04 05 05 06 07 13 14 GB CONTENTS 1. GENERAL INFORMATION........................................ 2. SECURITY WARNINGS............................................ 3. SECURITY LABELS.................................................. 3. WARANTY................................................................. 4. COMPONENTS DISPOSAL...................................... 5. FAUCETS.................................................................. 6. DISPLAY.................................................................... 7. MAINTENANCE........................................................ 8. PROBLEM RESOLUTIONS...................................... 02 03 04 05 05 06 07 13 14 D INHALTSVERZEICHNIS 1. ALLGEMEINE INFORMATIONEN................................ 2. SICHERHEITSMASSNAHMNEN............................. 3. SICHERHEITSETIKETTEN...................................... 3. GARANTIE............................................................... 4. KOMPONENTENTSORGUNG................................ 5. MISCHER................................................................ 6. DISPLAY.................................................................. 7. PFLEGE.................................................................. 8. PROBLEMLÖSUNGEN.......................................... IT DICHIARAZIONE DI CONFORMITA’ Il costruttore ARBLU S.r.l. Via Fossaluzza, n.5 33074 Fontanafredda, Pordenone - Italy dichiara sotto la propria responsabilità che la cabina doccia multifunzione modello KROMOS è conforme ai sensi delle direttive: 2006/95/CE 2004/108/CE e suoi successivi emendamenti 89/106/CE Con riferimento in tutto o in parte alle norme armonizzate: CEI EN 60335-2-105 + A1 del Giugno 2009 CEI EN 61000-6-3 CEI EN 61000-6-2 UN EN 15200 D 02 03 04 05 05 06 07 13 14 GB DECLARATION OF CONFORMITY The manufacturer ARBLU S.r.l. Via Fossaluzza, 5 33074 Fontanafredda, Pordenone -Italy declares under its own responsibility that multifunctional cabin model KROMOS is conform to the following directives: 2006/95/CE 2004/108/CE and its subsequent amendments 89/106/CE With the following European standards: CEI EN 60335-2-105 + A1 del June 2009 CEI EN 61000-6-3 CEI EN 61000-6-2 UN EN 15200 KONFORMITÄTSEKLÄRUNG Der Hersteller ARBLU S.r.l. Via Fossaluzza, 5 33074 Fontanafredda, Pordenone - Italien erklärt unter seiner verantwortung eigenen dass die Multifunktions-Duschkabine Modell KROMOS den nachstehenden Vorschriften entspricht: 2006/95/CE 2004/108/CE und seine folgender Berichtigungen 89/106/CE Sowie den folgenden Vorschriften entsprechen: CEI EN 60335-2-105 + A1 del Juni 2009 CEI EN 61000-6-3 CEI EN 61000-6-2 UN EN 15200 Fontanafredda, lì 15.09.2009 KROMOS IT 1. INFORMAZIONI GENERALI Prima di installare e di utilizzare il box doccia multifunzione si prega di leggere attentamente i manuali consegnati con il prodotto, in particolare le informazioni generali e le avvertenze di sicurezza riportate nelle pagine seguenti. L’originale del presente manuale è redatto in lingua italiana, pertanto ogni traduzione deve essere conforme a quanto previsto nella lingua originaria del manuale. Conservare il presente manuale per eventuali consultazioni future. Prima di installare il box doccia assicurarsi che: & L'alimentazione elettrica ed idraulica siano staccate; & L'impianto elettrico ed idraulico siano costruiti secondo la regola dell'arte prevista dalla normativa vigente in materia; & la predisposizione elettrica ed idraulica sia conforme alla tipologia di prodotto da installare (vedi scheda tecnica) & La pressione dell'impianto idraulico e la quantità d'acqua disponibile siano adeguate per la tipologia del prodotto da installare (vedi scheda tecnica); & In presenza di acque molto dure è opportuno installare un decalcificatore, al fine di evitare e/o ridurre il deposito calcareo; & Il locale di posizionamento del box sia idoneo per la tipologia di prodotto da installare, tenendo anche conto di quanto definito dalla scheda tecnica & deve essere garantita la perpendicolarità dei muri. & il contenuto dell'imballo sia integro. Non procedere all'installazione se mancano articoli o sono danneggiati. L'installazione deve essere eseguita da n.2 persone qualificate e si consiglia l'uso dei guanti. Non rimuovere le targhette che sono apposte nel prodotto. La pellicola trasparente apposta sulla parete del vano tecnico deve essere tolta solo a fine montaggio del box doccia. Ogni misura nel presente libretto si intende espressa in centimetri. GB 1. GENERAL INFORMATION Before proceeding with the installation and utilization of the multifunctional shower cabin please read carefully the manual provided, in particular the general information and the security warnings reported into the following pages. The original of the present manual is compiled in Italian language, therefore every translation has to be conforming to what foreseen in the native language of it. Keep the present manual for possible future consultations. Before the installation of the cabin make sure that: & The power and hydraulic supply are disconnected; & The wiring and hydraulic system are built according the rules foreseen by the industry standards; & The electrical and hydraulic predisposition must conform to the type of the product to install; (see specifications) & The pressure of the hydraulic system and the quantity of available water are adequate for the type of product to install (see specifications); & In the presence of particularly heavy water it D is appropriate to install a water softener in order to avoid and/or reduce the calcium deposits; & The positioning of the cabin must be suitable with the type of product to install, keeping in consideration all specifications; & A correct installation of the various components must be guaranteed by the perpendicularity of the walls; the content of the pack to be undamaged. Do & not proceed with the installation if any articles are missing or damaged. & The installation must be performed by at least two people and we do recommend the use of gloves. Do not remove the labels which are affixed on the product. The transparent film attached to the technical panel must be removed only at the end of the assembly of the cabin. Every reference to the measures in the present booklet are meant in centimeters. 1. ALLGEMEINE INFORMATIONEN Vor der Montage und der Benützung der Multifunktions-Duschkabine bitten wir die Anleitung, die mit dem Produkt geliefert wird, sorgfältig zu lesen, im Besonderem die allgemeinen Informationen und die Sicherheitsmaßnahmen, welche sich in den nachstehenden Seiten befinden.Das Original der Handhabung ist in italienischer Sprache verfasst und somit muss jede Uebersetzung originalgetreu uebereinstimmen Diese Anleitung für zukünftige Beratungen aufbewahren. Vor der Montage der Duschkabine sich versichern dass: & Die elektrische und hydraulische Versorgung geschlossen ist; & Die elektrische und hydraulische Anlage gemäß den Regeln der im Bereich geltenden Rechtsvorschriften gebaut worden sind; & Die elektrische und hydraulische Vorbereitung muss gemäß der montierenden Produkttypologie sein (siehe technische Beilage) & Der Wasserdruck der hydraulischen Anlage und die zur Verfügung stehende Wassermenge müssen sich der montierenden Produkttypologie anpassen (siehe technische Beilage); & In Zonen mit sehr kalkhaltigem Wasser ist es ratsam einen Entkalker zu montieren, um somit Kalkablagerungen zu vermeiden und/oder zu vermindern; & Der Raum, in dem die Duschkabine montiert wird, muss sich zur Montage des Produktes eignen, unter Berücksichtigung der Hinweise, die sich in der technischen Beilage befinden; & Um eine optimale Montage der verschiedenen Elemente zu garantieren, müssen die Wände lotrecht sein. Der Inhalt der Verpackung ist vollstaendig & Nicht mit der Montage beginnen, wenn Artikel fehlen oder beschädigt sind. !Die Montage muss von n.2 Personen ausgeführt werden und man empfiehlt 02 Handschuhe anzuziehen. Die Etiketten, die sich auf dem Produkt befinden, nicht entfernen. Die Transparentfolie, die sich auf dem technischen Paneel befindet, erst am Ende der Montage entfernen. Alle Maßhinweise in dieser Anleitung sind in Zentimeter angegeben. KROMOS IT 1. AVVERTENZE DI SICUREZZA La ditta Arblu Srl raccomanda di osservare le informazioni generali e le disposizioni di sicurezza. I prodotti idromassaggio venduti dalla ditta Arblu Srl sono costruiti nel rispetto delle norme di sicurezza vigenti. E' necessario, pertanto, seguire le seguenti avvertenze al fine di una corretta installazione e uno corretto utilizzo del prodotto: & l'installazione deve essere effettuata da personale qualificato, nel rispetto delle norme vigenti relative agli impianti elettrici ed idraulici; & Farsi rilasciare un attestato sulla conformità di corretta installazione; si suggerisce l’alimentazione del box & attraverso un interruttore differenziale con Id=30 mA, previa verifica della normativa vigente nel paese di installazione. & seguire attentamente le istruzioni di montaggio contenute nel manuale istruzioni d'uso, un'operazione impropria potrebbe causare danni a persone e/o cose; & porre attenzione alle targhette applicate al prodotto; & non manomettere le parti elettriche ed idrauliche che compongono il vano tecnico; & i collegamenti elettrici devono essere eseguiti in assenza di corrente elettrica; & Accertarsi che i tasselli forniti nel kit ferramenta siano idonei al tipo di muro, in caso contrario utilizzarne altri adatti. & il muro stesso sia adeguato all'utilizzo del box; & accertarsi che la pedana sia correttamente inserita nella propria sede, soprattutto la parte centrale; & si consiglia, durante tutto il processo di montaggio del box, di posizionare un panno o un cartone sopra il piatto doccia; & non utilizzare il box doccia in modo improprio, ma secondo le funzionalità descritte nel presente manuale; & il box doccia deve essere utilizzato da persone con adeguate conoscenze sul suo utilizzo in sicurezza; il prodotto non è adatto ad essere utilizzato da persone (inclusi i bambini) le cui ablità fisiche sensoriali e mentali, oppure per mancanza di esperienza e di conoscenza, impedisce loro di usare l’apparecchio in sicurezza senza supervisione né istruzioni; da bambini che usano l’apparecchio come gioco; & attenzione al gradino del piatto doccia; & spegnere il box doccia ad ogni fine utilizzo; & non toccare le parti calde dell'erogatore di vapore e mantenere una distanza di sicurezza al fine di evitare scottature; inserire gli aromi nell'apposito contenitore a box freddo e non in funzione. GB 1. SAFETY WARNING The firm Arblu Srl recommends to observe the general information and the safety guidelines. The hydro massage products sold by the firm Arblu Srl are built with respect for the safety norms in effect. It is hence necessary, to follow these warnings for a correct installation and use: & The installation must be performed by qualified personnel, respecting the norms relative to the electrical and hydraulic systems. & We advise the customer to request the issue of a certificate attesting the conformity of a correct installation; It is suggested to power supply the cabin & through a differential switch with Id=30 mA, upon verification of the normative in force in the country of installation. & Follow carefully the assembly instructions included in the user booklet; an improper operation could cause damages to people or things; & Pay attention to the labels applied on the product; & Do not alter the electric and hydraulic parts D composing the technical room; & The electrical connections must be performed in absence of electrical power. & Make sure that the plugs provided in the hardware kit are suitable to the type of wall use other adapters if needed any. Make sure, as well, that the wall itself is suitable for the utilization of the cabin; & Make sure the footboard is properly inserted into its place, especially in the central part; & We do advise, during the whole process of assembly of the cabin, to place a cloth or a cardboard above the shower tray; & Do not utilize the cabin in an improper way but in accordance with the functionality described in this manual; & The cabin must be utilized by persons with adequate knowledge of its safe use;the product is not suitable to be used by people (including children) whose ability physical and sensory and mental, or for lack of experience and knowledge, prevents them to use the appliance in safety without supervision neither instructions; from children that use the appliance as a game; & Attention to the step on the shower tray; Turn off the cabin after every end of utilisation; & & Do not touch the warm parts of the steam nozzle and maintain a safe distance in order to avoid burns; insert the aromas in the proper container when disconneted and the cabin is cold. 1. SICHERHETSMASSNAHMEN Die Firma Arblu Srl empfehlt die "Allgemeine Informationen“ und die Sicherheitsmaßnahmen zu berücksichtigen. Die Hydromassageprodukte, welche von der Firma Arblu Srl verkauft werden, sind gemäß den gültigen Sicherheitsvorschriften hergestellt. Es ist daher nötig, die nachstehenden Hinweise zu befolgen, sodass eine falsche Montage und ein falscher Gebrauch des Produktes vermeidet werden kann: & Die Montage muss anhand qualifiziertem Personal, gemäß den gültigen Vorschriften im Bereich der elektrischen und hydraulischen Anlagen, ausgeführt werden; & W i r e m p f e h l e n s i c h e i n e Konformitätsbescheinigung über die Montagerichtigkeit ausstellen zu lassen; Es wird bei elektr. Duschkabinen ein passender & Schalter mit Id=30 mA, empfohlen und bei Montage ist die Ueberpruefung der Norm einzuhalten & Die Montage-Anleitung, die sich in der Gebrauchsanleitung befindet, muss sorgfältig befolgt werden, eine unangebrachte Handlung könnte Leuten und/oder Sachen Schäden zufügen; & Den Etiketten, die sich auf dem Produkt befindet, Achtung schenken; & Die elektrischen und hydraulischen Elemente, welche den technischen Teil zusammenstellen, müssen nicht geändert werden; & Die elektrischen Verbindungen müssen mit ausgeschaltetem Strom ausgeführt werden; & Sich vergewissern, dass die Dübel, die mit dem Eisenwaren-Kit geliefert werden, sich dem Wandtypus anpassen. Andernfalls andere passende gebrauchen. Sich versichern, dass die Wand sich dem Gebrauch der Kabine anpasst; & Sich vergewissern, dass das Fußbrett korrekt in seinem Sitz eingefügt ist, vor allem das zentrale Teil; & Es ist empfehlenswert, während der ganzen Montage, ein Tuch oder einen Karton über der Duschtasse zu legen; & Die Duschkabine nicht in einer ungeeigneter Art benützen, aber gemäß den Zweckmässlichkeiten, die in dieser Anleitung beschrieben sind; & Die Duschkabine muss für einen sicheren Gebrauch von Leuten, welche angemessene 03 Kenntnisse haben, benützt werden; Das Produkt ist nicht fuer Personen mit physischen oder psychischen Stoerungen geeignet (auch Kinder), auch nicht bei mangelhaften Erfahrungen oder ungenuegenden Sicherheitsanleitungen . Das Produkt darf fuer Kinder nicht als Spielzeug & angesehen warden. Nach jeder Benutzung sollte die Duschkabine & ausgeschaltet werden.; & Am Ende jedes Gebrauchs die Duschkabine abschalten; & Die warmen Teile des Dampfversorgers nicht berühren und eine Sicherheitsdistanz einhalten, sodass Verbrennungen vermieden werden können; die Essenzen in den dazu bestimmten Behälter gießen, wenn die Kabine kalt und nicht funktionierend ist. KROMOS IT GB 3.TARGHETTE DI SICUREZZA 3.SAFETY LABELS D 3.SICHERHEITSETIKETTEN þ SUPERFICIE MOLTO CALDA: Da applicare vicino all’erogatore di vapore [simbolo IEC 60417-5041 (DB:2002-10)] þ VERY HOT SURFACE: To apply close to the steam nozzle [simbol IEC 60417-5041 (DB:2002-10)] þ SEHR WARME OBERFLÄCHE: In der Nähe des Dampfversorgers anheften [Zeichen IEC 60417-5041 (DB:2002-10)] þ NON COPRIRE: Da applicare vicino all’erogatore di vapore [simbolo IEC 60417-5041 (DB:2002-10)] þ DO NOT COVER: To apply close to the steam nozzle [simbol IEC 60417-5041 (DB:2002-10)] NICHT BEDECKEN: In der Nähe des Dampfversorgers anheften [Zeichen IEC 60417-5041 (DB:2002-10)] þ þ COLLEGARE A TERRA: Applicata vicino ai punti di messa a terra [simbolo 5019 della pubblicazione IEC 60417] þ EARTH CONNECTION: To apply close to the spots where to put the earth connection spots [simbol 5019 of the pubblication IEC 60417] þ BODENVERBINDUNG: In der Nähe der Punkte der Bodenverbindung anheften (Zeichen 5019 der Veröffentlichung IEC 60417) Arblu Srl Modello Tensione di lavoro Potenza Max Pressione IP þ TARGHETTA DI CONFORMITA' EUROPEA: Applicata dietro al vano tecnico þ EUROPEAN CONFORMITY LABEL: To apply behind the technical panel þ ETIKETTE DER EUROPÄISCHEN KONFORMITÄT: Hinter dem technischen Teil anheften Kromos 230Vac50/60Hz 2KW 0,01MPa 45 IDENTIFICATIVO DATA COLLAUDO þ TARGHETTA DI AVVERTIMENTO PERICOLO Utilizzo faretti a led (simbolo derivante dalla norma tecnica CEI EN 60825-1:2003-02) þ DANGER WARNING LABEL Use of led-spotlight (symbol resulting from the technical norm CEI EN 60825-1:2003-02) þ ETIKETTE FÜR GEFAHRWARNUNG Gebrauch von Led-Leuchte (Zeichen gemäß der technischen Vorschrift CEI EN 60825-1:2003-02) þ TARGHETTA INDICATRICE Classe di appartenenza faretto a led (simbolo derivante dalla norma tecnica CEI EN 60825-1:2003-02) þ INDICATING LABEL Belonging-class of led-spotlight (symbol resulting from the technical norm CEI EN 60825-1:2003-02) þ ANZEIGERETIKETTE Klassenzugehörichkeit der Led-Leuchte (Zeichen gemäß der technischen Vorschrift CEI EN 60825-1:2003-02) 04 KROMOS IT 4. GARANZIA La garanzia fornita da Arblu srl copre per difetti di conformità imputabili alla costruzione del prodotto che si manifestano al momento del ricevimento della merce, o successivamente la messa in funzione, per difetti derivanti da non conformità di prodotti imputabili all'azienda costruttrice. Non sono coperti i difetti che non preesistevano alla consegna del prodotto, i guasti derivanti da negligenza o trascuratezza nell'uso, da errata installazione o manutenzione, erroneo immagazzinaggio e/o conservazione, da manutenzione effettuata da personale non qualificato. Arblu srl declina, inoltre, ogni responsabilità qualora vengano sostituiti componenti del prodotto non idonei alla struttura originaria. GB 4. WARRANTY The warranty provided by Arblu srl covers defects of conformity that may be caused during the product construction are apparent at the time of the purchase, once started in function or for defects resulting from the non-conformity of products clearly imputable to the manufacturer. Not covered by the warranty are defects which were not pre-existent at the delivery of the product, damages resulting by carelessness or inaccuracy in utilization, from a mistaken installation or maintenance, wrong storage, and/or maintenance effected by non-qualified personnel. Arblu srl denies, furthermore, every responsibility in case of substitution of component parts of the product not suitable with the original structure D 4. GARANTIE Arblu srl garantiert Mängel, die sich während der Herstellung des Produktes ereignet haben die sich bei Empfang der Ware bestätigt werden, oder nachher, bei der Benützung, für Nichtkonformitätsmängel, die der Herstellerfirma zuzuschreiben sind . Mängel, die bei Empfang der Ware nicht vorher vorhanden waren, Schäden, die wegen nachlässiger Behandlung, falscher Montage oder Pflege, falscher Aufbewahrung und/oder Lagerung, Pflege bei nicht qualifiziertem Personal hervorkommen, werden nicht garantiert. Arblu srl weist jede Verantwortung ab, wenn Teile des Produktes ersetzt werden, und die neuen Teile sich der originellen Struktur nicht anpassen. IT 5. SMALTIMENTO COMPONENTI Il materiale d'imballo deve essere smaltito nel rispetto dell'ambiente, secondo quanto prescritto dalla legislazione vigente e secondo le buone norme di comportamento. Il prodotto box doccia multifunzione nella sua composizione presenta anche parti idrauliche. L'eventuale smaltimento di tutti i componenti deve essere conforme a quanto prescritto dalla legislazione vigente in materia ambientale. Attenzione: non disperdere nessun componente nell'ambiente. GB 5. COMPONENTS DISPOSAL The packaging material must be disposed respecting the environment, according to what described by legislation and according to good practice. The multifunctional shower cabin is partly composed of hydraulic parts. The eventual disposal of all the components must conform with legislation on environmental matters. Attention: do not disperse any component in the environment D 5. KOMPONENTENTSORGUNG Das Verpackungsmaterial muss gemäß den Umweltschutzvorschriften entsorgt werden, sowie der gültigen Gesetzreglementierung und den guten Verhaltensvorschriften. Das Produkt Multifunktion Duschkabine hat auch hydraulische Teile. Die eventuelle Entsorgung aller Komponente muss laut den gültigen Umweltschutzvorschriften und Gesetzregelung ausgeführt werden. Achtung: keine Elemente in der Umwelt entsorgen Vorsicht: keinen Bestandteil in die Umgebung auswerfen 05 KROMOS IT 5. RUBINETTERIA B GB 5. FAUCETS D 5. MISCHER DISPLAY DISPLAY DISPLAY SOFFIONE HEAD SHOWER KOPFBRAUSE A DOCCINO HAND SHOWER HANDBRAUSE C IT LEGENDA Il box multifunzione è dotato di un gruppo termostatico che permette di impostare la temperatura desiderata. Il gruppo termostatico è formato da: ? Manopola rubinetto A apertura/chiusura acqua; ? Manopola deviatore B seleziona la funzione; ? Manopola termostatico C regola la temperatura dell'acqua. Se si desidera una temperatura superiore ai 38°C premere il pulsante di sicurezza e ruotare la manopola fino a temperatura desiderata. Attenzione alle scottature. GB LEGEND The multifunctional cabin is furnished by a thermostatic group which allows to design the desired temperature. The thermostatic group is composed by: ? Faucet knob A for opening/closing flow. ? Switch knob B for selection of the function. ? Thermostatic knob C regulates the water temperature. If a temperature above the 38° is desired, push the button position on the knob and rotate Beware from burns . D LEGENDE Die Multifunktions-Kabine ist mit einer thermostatischer Gruppe ausgestattet, welche ermöglicht die gemünschte Temperatur einzustellen. Die thermostatische Gruppe ist gebildet aus: ? Hahnknauf A Öffnen/Schliessen des Flusses ? Ableiterknauf B Funktionswahl; ? Knauf C regelt die Wassertemperatur. Wünscht man eine Temperatur über 38°C, den auf dem Knauf befindenden Knopf drücken und bis zur gewünschten Temperatur drehen. Achtung von 06 KROMOS DISPLAY 1 2 4 3 Attiva/disattiva la funzione scelta o entra in un sottomenù start/end the stored function or enter in an under menu setzt in Betrieb/endet das gewählte Menu oder tritt in ein Untermenu ein Funzione rapida1 fast function 1 Schnellfunktion 1 Esce da menù o sottomenù esc from menu or under menu esc von Menu oder Untermenu Funzione rapida 2 fast function 2 Schnellfunktion 2 Scorre a destra/incrementa valore slide to right / increase the value gleitet nach rechts/erhöht den Wert Accende/spegne Display on/off the display on/off den Display Scorre a sinistra/decrementa valore slide to left / decrease the value gleitet nach links/erniedrigt den Wert Allarme alarm Allarm 6 5 IT LEGENDA All'accensione il display presenta il logo Arblu, attendere circa 10 secondi per accedere al menu o premere un tasto: il sistema esegueun ciclo di scarico della caldaia “PHASE DISCH” che dura circa 5 minuti. Per accedere subito alle funzioni doccia è sufficiente premere “ESC”.Durante la fase di scarico il bagno turco non si attiva. Accanto all'icona sono visualizzabili i seguenti simboli: 1 presenza di un sottomenù 1 attivazione o spegnimento della funzione 1 3 Funzione disattivata 3 Funzione attivata 4 Icona corrispondente alla funzione impostata sul tasti rapido 1 5 ora entrata nel menù di modifica dei parametri 6 Icona corrispondente alla funzione impostata sul tasti rapido 2 2 Tasti di scorrimento utilizzabili GB LEGEND At the switching on the display shows the Arblu logo, wait for about 10 seconds in order to choose the menu or push a button: the system will automatically proceed with a discharging cycle of the steam-kettle ”PHASE DISCH” (it lasts about 5 minutes). In order to choose immediately the shower menu, please select “ESC”. During the draining phase the Turkish bath does not operate. Near to the icon there are following symbols: 1 presence of an under menu 1 start / end of the function 1 3 function non-active 3 function active 4 Icon corresponding the chosen function by the fast key 1 5 time enter in the menu of parameter change 6 Icon corresponding the chosen function by the fast key 2 2 sliding keys D LEGENDE Bei der Einschaltung, das Display zeigt das Logo Arblu, ca. 10 Sekunden warten um den Menu auszuwählen oder eine Taste drücken: das System setzt fort mit dem Ablauf-Kreislauf der Dampfkessel “PHASE DISCH” (es dauert ca. 5 Minuten). Falls Sie sofort zu der Dusche Menu überwechseln möchten, wählen Sie “ESC” aus. Während des Abflusses-Phase das türkisches Bad funktioniert nicht. Folgende Zeichen sind bei dem Icon betrachten: 1 Gegenwart von einem Untermenu 1 In Betriebsetzung oder Löschung der Funktion 1 3 Funktion nicht aktiviert 3 Funktion aktiviert 4 Ikone übereinstimmend mit der auf der Schnelltaste 1 gewählten Funktion 5 Zeituhr Eingang ins Menu der Massstabänderungen 6 Ikone übereinstimmend mit der auf der Schnelltaste 2 gewählten Funktion 2 verwendbare Gleittasten DOCCE-SHOWERS-DUSCHEN IT LEGENDA Doccetta Soffione Doccia scozzese Accensione doccia scozzese Set Durata Scozzese Calda: regola la durata dell'apertura di acqua calda da un minimo di 1sec a 9sec. Set Durata Scozzese Freddo: regola la durata dell'apertura di acqua fredda da 1sec a 9sec. Set Durata tempo: impostato a 20min, è possibile variare la durata da 5min a 60 min. GB LEGEND Shower shower of the cold water-flow from min. 1 sec. to 9 sec. Head shower Scottish Turn on Scottish shower D Length-set for warm Scottish shower: adjust the length of the warm water-flow from min. 1 sec. to 9 sec. Time-set: stored at 20 min., it is possible to change the length from 5 min. to 60 min. Length-set for cold Scottish shower: adjust the length LEGENDE Handbrause Dusche Kopfbrause Schottische Dauer-Set für warme schottische Dusche: regelt die Dauer der Öffnung des warmen Wasserflusses von mind. 1 Sek. bis 9 Sek. Öffnen der schottischen Dusche Dauer-Set für kalte schottische Dusche: regelt die 07 Dauer der Öffnung des kalten Wasserflusses von mind. 1 Sek. bis 9 Sek. Dauer-Set: eingestellt auf 20 Min., es ist möglich die Länge von 5 bis 60 min zu ändern. KROMOS IDRO(Idrogetti orientabili 3FUNZIONI)-HYDRO(Water-jets with 3 functions)-HYDRO(Regulierbare Hydrodüsen 3 Funktionen) IT LEGENDA Accensione in sequenza delle Idro. -Idro centrale - Idro bassa Turbomassaggio Idro alto On/Off Set Durata: con i tasti di scorrimento è possibile variare la durata da 5 a 60 min. GB Set Apertura/Chiusura Idro: regola la durata di apertura e chiusura delle elettrovalvole della funzione Idromassaggio Set Chiusura Idro: regola il tempo di pausa delle elettrovalvole da 1sec a 9sec. Set Apertura Idro: regola il tempo di apertura delle elettrovalvole da 1sec a 9sec. LEGEND electromagnetic valve from 1 sec. to 9 sec. Turn on of the hydro in succession hydro - centre hydro - low hydro massage High On/off turbo Length-set: With the sliding keys, it is possible to change the length from 5 to 60 min. D Open / close hydro massage: adjust the length of opening / closing of the electromagnetic valve Hydro opening-set: adjust the opening time of the electromagnetic valve from 1 sec. to 9 sec. Hydro closing-set: adjust the break time of the LEGENDE Hydroöffnung in Sequenz mitte-hydro unten Hydro oben-hydro On/Off Turbomassage Dauer-Set: mit den Gleittasten ist es möglich die Dauer von 5 bis 60 Min. zu ändern Öffnung/Schliessung Hydro-Set: regelt die Dauer der Öffnung und Schliessung der Elektroventilen der Hydromassagefunktion Hydro Schliessungs-Set: regelt die Pause der Elektroventilen von 1 Sek. bis 9 Sek. Hydro Öffnungs-Set: regelt die Dauer der Öffnung der Elektroventilen von 1 Sek. bis 9 Sek. Esempio funzionamento display - idromassaggio (1-5) con opzione scozzese (6-9) 1 2 3 4 5 6 X4 7 8 9 08 KROMOS AROMATERAPIA-AROMATERAPIA-AROMATERAPIA BAGNO VAPORE-STEAM BATH-DAMPFBAD 1 IT Bagno Vapore, non interrompere lo scarico della caldaia segnalata con la scritta sul display “PHASE DISCHARGE”, che scomparirà con il termine dello scarico. Se accidentalmente viene spento il display prima dell'avvio dello scarico caldaia, attendere lo scarico al successivo riavvio della seduta Bagno a Vapore. Se durante il Bagno Vapore la sonda non rileva la presenza di acqua per 60 sec dà una segnalazione di “ ALL H2O”, in tale caso controllare la presenza di acqua, premere ESC per uscire. Set Durata Bagno Vapore: modifica la durata della seduta. Set Temperatura Bagno Vapore: modifica la temperatura della seduta. Attenzione: Attendere che il sistema termini la fase di scarico (3 min ca.) prima di agire sul master off. In caso contrario il sistema non si spegne. LEGEND On/off steam bath: The steam bath is divided in: 1 bath session 2 discharge phase and boiler rinse The steam bath session starts after a few seconds. At the end of the cycle, the boiler moves on with the water discharging. The timer of the steam bath starts only when, in the inside of the box, the shown temperature is reached. It is possible to stop the session at any time going with the cursor on the steam bath icon. Do not stop the D 3 LEGENDA On/off Bagno Vapore Il Bagno Vapore è diviso in: 1-Seduta di Bagno Vapore 2-Fase di scarico e risciacquo caldaia. La seduta del Bagno a Vapore si avvia, dopo pochi istanti. A fine ciclo la caldaia procede con lo scarico dell'acqua. Il Timer del Bagno Vapore inizia solo quando all'interno del Box si raggiunge la temperatura indicata. La seduta è comunque interrompibile in qualsiasi momento posizionando nuovamente il cursore sull'icona GB 2 discharging of the boiler signed on the visual display with the notice “PHASE DISCHARGE” (the notice will disappear at the end of the discharging) If accidentally, the visual display has been closed before the discharge of the boiler starts, at the following session wait until the discharge is completed, before starting a new session. If during the steam bath the probe doesn't register the presence of water for 60 sec., it shows the sign “ALL H2O”. Control the presence of water, press ESC for leaving. Steam bath length-set: adjust the session length Steam bath temperature-set: adjust the session temperature Attention: Await that the system finishes the unloading-phase (about 3 min.) before switching off the button “master off”. Otherwise the system won't Shut Down Properly. LEGENDE On/Off Dampfbad: der Dampfbad ist geteilt in: 1 Dampfbad-Sitzung 2 Ablauf-Phase und Heizkessel-Abspülung Die Sitzung des Dampfbades beginnt in wenigen Sekunden. Am Ende des Zyklus beginnt (des Heizkessels) der Wasserabfluss. Dampfbades Der Timer des startet nur, wenn in der Kabine die angezeigte Temperatur erreicht wird.Die Sitzung kann in jeden Moment unterbrochen werden, indem man sich mit dem Kursor auf die Ikone des Dampfbades stellt. Den Abfluss des Esempio 2: funzionamento display - bagno vapore(1-3) settaggio durata (4-7) spegnimento seduta scarico acqua (8-9) Heizkessels, der mit der Schrift “PHASE DISCHARGE” vermerkt ist, nicht unterbrechen.( Die Schrift verschwindet, wenn der Abfluss beendet ist.) Falls der Display zufälligerweise vor dem Beginn des Abflusses gelöscht wird, bei der nächsten Dampfbadsitzung den kompletten Abfluss abwarten. Erst dann mit der neuen Sitzung beginnen. Hebt die Sonde während dem Dampfbad für 60 Sek. keine Wasseranwesenheit hervor, erscheint auf dem Display die Schrift “ ALL H2O”, in diesem Fall die Wasseranwesenheit kontrollieren. Esc drücken um aus dem Menu herauszutreten. Dampfbad-Dauer: regelt die Dauer des Dampfbades Dampfbad-Temperatur-Set: regelt die Temperatur des Dampfbades. Achtung: Warten Sie, daß das System die Abladung- Phase endet (3 min zirka) bevor die Taste "Master off" auszuschalten. Andernfalls schaltet das System nicht aus. 2 3 4 5 6 7 8 9 1 X2 PHASE DISCH 09 KROMOS CROMOTERAPIA-CHROMOTHERAPY-CHROMOTHERAPIE (OPTIONAL) Luce Bianco White Light Weisses Licht Luce Verde Green Light Grünes Licht Luce Rosso Red Light Rotes Licht Luce Blu Blue Light Blaues Licht CICLO ENERGIZZANTE ENERGIZING CYCLE ENERGIESPENDENDER ZYKLUS CICLO TONIFICANTE TONIC CYCLE BELEBENDER ZYKLUS CICLO RILASSANTE RELAXING CYCLE ENTSPANNENDER ZYKLUS Ogni fase si ripete 2 volte poi si passa alla fase successiva COLORE COLOUR FARBE T(Sec) COLORE COLOUR FARBE COLORE COLOUR FARBE 3° FASE 3° PHASE 3° FASE 2° FASE 2° PHASE 2° FASE 1° FASE 1° PHASE 1° FASE T(Sec) COLORE COLOUR FARBE COLORE COLOUR FARBE T(Sec) T(Sec) 180 180 T(Sec) 120 180 30 10 30 30 10 30 30 10 30 30 10 30 90 90 60 60 60 60 90 90 120 IRIDE-IRIS-IRIS 180 Con i tasti di scorrimento è possibile variare tra 42 diverse tonalità di colore With the sliding keys it’s possible to choose between 42 different colours Mit den Gleittasten ist es möglich zwischen 42 verschiedenen Farbnuancen zu wählen Avvertenze: Quando si attiva la cromoterapia, si accende con l’ultimo colore impostato; per spegnere il colore premere il pulsante Enter sull’icona Notice: the chromotherapy starts with the last setted colour; to switch it off, press the key Enter Bemerkung: Die Chromotherapie setzt sich mit der letzt gewählten Farbe ein, um diese zu löschen, die Taste Enter drücken Esempio 3: funzionamento display - cromoterapia (1-2) luce rossa (3-4) spegnimento cromoterapia (5-6) 1 3 2 X2 4 X2 5 6 X2 10 KROMOS RADIO-RADIO-RADIO (OPTIONAL) IT INGRESSO AUDIO AUSILIARIO EXTERNAL AUDIO INPUT ZUSÄTZLICHER AUDIO EINGANG (OPTIONAL) LEGENDA IT LEGENDA On/off Radio:accensione/spegnimento della radio. La radio si accende nell'ultima stazione in cui si trovava al momento dello spegnimento. On/off Ingresso Audio Ausiliare:si ha la ricezione della sorgente audio desiderata (dopo aver collegato il jack della radio alla presa audio esterna) . Set Frequenza: variare la frequenza al fine di sintonizzarsi su di una emittente a scelta. Una volta individuata la stazione desiderata è possibile memorizzarla premendo il tasto Enter per 2/3 secondi. Sulla parte alta del display compare il numero della prima memoria libera. Con i tasti di scorrimento è possibile selezionare una posizione di memoria da 1 a 8 rimaste libere. Se si vuole memorizzare una frequenza su una esistente, ci si posiziona su di essa, si preme Enter e la stazione viene memorizzata. Volume Audio Ausiliario:regolazione del volume. Con i tasti di scorrimento è possibile modificare il volume dell'audio ausiliare. Volume Radio: entra in una schermata di cambio del volume. Con i tasti di scorrimento è possibile variare il volume. Richiamo Stazioni Radio: richiamare una delle stazioni memorizzate. Se non sono mai state memorizzate delle stazioni, premendo i tasti di scorrimento si vede sempre il numero 00.00 presente, mentre se sono state memorizzate delle stazioni, con i tasti di scorrimento si visualizza il cambio stazioni, in cui si può scegliere, mediante tasto Enter, una delle massimo 8 stazioni prescelte. GB LEGEND LEGEND On/Off external audio input: allows receiving the desired audio source, connecting the radio jack at the external audio socket. External audio volume: adjust the volume. Using the sliding keys, it's possible to change the volume of the external audio from 1 to 20. D LEGENDE On/Off zusätzlicher Audioeingang: ermöglicht die gewünschte Audioquelle zu empfangen (nachdem man den Radio-Jack an eine externe Audiosteckdose verbunden hat). Zusätzliche Audiolautstärke: regelt die Lautstärke. Mit den Gleittasten ist es möglich die Lautstärke einzustellen. On/Off radio: the radio transmits the last radio station you listened to, before the display was switched off. Frequency-set: changes the broadcasting-frequency in order to tune in the chosen channel. Once you have located the station, it's possible to store it pressing Enter for 2/3 sec. On the upper side of the display, the first free memory number is shown. With the sliding keys it's possible to select one of the free numbers from 1 to 8. If you wish to memorize a frequency over one already stored, go over the number, press Enter and the radio-station will be stored. Radio-volume: enter in a video that permits to change the volume. With the sliding keys, it's possible to change the volume. Call of radio-stations: call one of the stored stations. If none has been stored, pressing the sliding keys, the number 00.00 is shown, whereas stations has been stored, you can select the number from 1 to 8 with the sliding keys and confirm the station by pressing Enter. D GB LEGENDE On/Off Radio: Einschalten/Löschen des Radios. Das Radio schaltet sich auf dem letzt angehörten Sender ein. Frequenz-Set: ermöglicht die Frequenz zu wechseln, um den gewünschten Sender einzustellen. Hat man den Sender gewählt, kann man ihn speichern, indem man Enter für 2/3 Sek. drückt. Auf der oberen Hälfte des Displays erscheint die Nummer des ersten freien Speichers. Mit den Gleittasten ist es möglich eine freie Speicherposition von 1 bis 8 zu wählen. Will man eine neue Frequenz auf eine bereits besetzte Position speichern, positioniert man sich auf diese, drückt Enter, und der neue Sender wird somit gespeichert. Radiolautstärke: man tritt in ein Lautstärken-Menü ein. Mit den Gleittasten kann man die Lautstärke wechseln. Radiosender-Abruf: ermöglicht einen gespeicherten Sender abzurufen. Falls keine Sender gespeichert worden sind erscheint immer die Nummer 00.00, Sind jedoch Sender gespeichert worden, kann man mit den Gleittasten die gespeicherten Sender visualizieren und mit Enter einen der 8 gespeicherten Sender wählen. 11 KROMOS IT LEGENDA Faro(di serie ma non con cromoterapia) Allarme Orologio: premendo il tasto Enter si evidenziano sequenzialmente i minuti o le ore e con i tasti di scorrimento è possibile modificarne i valori. Con il tasto Enter viene memorizzata la nuova ora e si ritorna nel menù principale. Richiamo di Funzione Rapida 1: premendo il tasto Enter compare a video il simbolo 4 (pag.9), e l'utente premendo il pulsante , ha la possibilità di richiamare rapidamente la funzione scelta senza dover passare tutti i menù sopra riportati. GB simbolo 6 (pag.9), e l'utente premendo il pulsante , ha la possibilità di richiamare rapidamente la funzione scelta senza dover passare tutti i menù sopra riportati. Contrasto colore: premendo il tasto Enter, si ha l'inversione della polarità del display, consistente nel passaggio da sfondo blu/simboli bianchi a sfondo bianco/simboli blu e viceversa. Durata Retroilluminazione: premendo il tasto Enter si entra in una schermata dove è possibile regolare la durata di accensione della retroilluminazione. Con i tasti di scorrimento è possibile regolare la durata da un minimo di 15sec ad un massimo di 120sec. Visualizzazione Ora: premendo il tasto Enter si entra in una schermata dove, con i tasti di scorrimento, si può permettere o meno la visualizzazione dell'ora sul display. ON- Ora sempre presente a display OFF- Ora non presente Master Off (Posizionandosi): premendo il tasto Enter, si procede con lo spegnimento di tutte le funzioni attive in essere e contemporaneamente lo spegnimento del display. Lo spegnimento del display avviene dopo qualche secondo. LEGEND Floodlight (current but not with chromo therapy) Alarm Clock: pressing Enter the minutes and hours are shown and with the sliding keys, it's possible to modify the value. Pressing Enter the new time will be stored and the display goes back to the main menu. Call of the fast function 1: pressing Enter the sign is shown on the display 4 (page 9) and the user, pressing the key , has the opportunity to call quickly the chosen function without flowing through the menus listed above. Function of fast call 2: pressing Enter you enter D Funzione di Richiamo Rapida 2: premendo il tasto Enter si entra nel menù con tutte le funzioni presenti. Posizionandosi con il cursore sopra al simbolo desiderato e premendo il tasto Enter compare a video il in a visual-display with all functions. Putting the cursor over the desired sign and pressing Enter, the sign appears on video 6 (pag.9), and the user, pressing the key , has the opportunity to call quickly the chosen function without flowing through the menus listed above. Colour contrast: pressing Enter you have the inversion of the display-polarity. From background blue/signs white to background white/signs blue and the other way round. Time-display: pressing Enter you enter in a visualdisplay, where, using the sliding keys, you can choose to display the time or not. On time always displayed on the video Off time not displayed Master off: pressing Enter you close all functions. After a few seconds, the visual display turns off. Length backlighting: pressing Enter you enter in a visual display, where it is possible to adjust the length of the backlighting. With the sliding keys, you can change the length from min. 15 sec. to max. 120 sec. LEGENDE gehen. Leuchte ( serienmässig aber nicht mit Chromotherapie) Allarm Uhreinstellung: drückt man Enter werden die Minuten und Stunden in reihenfolge gezeigt. Mit den Gleittasten ist es möglich die Zeit zu regeln. Mit Enter wird die neue Zeiteinstellung gespeichert und man geht zum Hauptmenu zurück. Schnellfunktions-Abruf 1: drückt man Enter erscheint das Zeichen 4 auf dem Video(Seite 9), und der Benützer hat die Möglichkeit, indem er die Taste drückt, auf schneller Weise die gewählte Funktion abzurufen ohne durch alle obengenannten Menüs zu Schnellfunktions-Abruf 2: drückt man Enter, tritt man in ein Menü ein, wo alle Funktionen angegeben sind. Positioniert man sich mit dem Kursor auf dem gewünschten Zeichen und drückt dann Enter, erscheint das Zeichen auf dem Video 6 (Seite 9), und der Benützer hat die Möglichkeit, indem er die Taste drückt, auf schneller Weise die gewählte Funktion abzurufen ohne durch alle obengenannten Menüs zu gehen. Farbkontrast: drückt man Enter, hat man den Wechsel der Farben auf dem Display: Hintergrund blau/Zeichen weiss wird Hintergrund weiss/Zeichen blau und umgekehrt. 12 Hintergrundbeleuchtungsdauer: drückt man Enter, tritt man in ein Menü ein, wo es möglich ist die Dauer der Hintergrundbeleuchtung zu regeln. Mit den Gleittasten kann man die Dauer von min. 15 Sek. bis max. 120 Sek. einstellen. Zeitanzeiger: drückt man Enter, tritt man in ein Menü ein, womit man mit den Gleittasten wählen kann, ob die Uhrzeit auf dem Display erscheinen soll oder nicht. ON- Uhrzeit immer angezeigt OFF Uhrzeit nicht angezeigt Master Off: drückt man Enter, löscht man alle tätigen Funktionen aus, sowie der Display, der sich nach einigen Sekunden löscht. KROMOS IT 7. MANUTENZIONE PULIZIA DEL PIATTO DOCCIA E TETTO IN TECNOBLU Il TecnoBlu è un materiale compatto e non trattato con vernici, composto da un'altra percentuale di cariche minerali e da una bassa percentuale di resina che rende la superficie piacevole al tatto e resistente. Viene pulito con normali prodotti reperibili in commercio quali Cif multiuso, candeggina, mastro lindo,etc. Importante: non si devono utilizzare prodotti di pulizia contenenti solventi o con componenti chimici aggressivi come trielina, diluenti, acqua ragia, ammoniaca,… Per il ripristino della superficie da eventuali graffi dovuti all'uso o macchie di calcare, e ridare l'aspetto originale, è sufficiente levigare la superficie con una spugna abrasiva tipo scotch-brite e quindi passare con panno morbido. PULIZIA DELLE PARTI IN OTTONE CROMATO E ALLUMINIO BRILL Le parti in ottone cromato e alluminio brill vengono pulite con un panno morbido imbevuto di GB 7. MAINTENANCE CLEANING OF THE SHOWER TRAY AND ROOF IN TECNOBLU The TecnoBlu is a material thick and not treated with paints, composed by a high percentage of mineral filled and a low percentage of resin which makes the surface pleasant to the tact and resistant. TecnoBlu becomes clean with normal products available in commerce as Cif multipurpose, bleach, Mastro Lindo etc Important: Shall not be used any cleaning products containing solvent or with chemical components aggressive as ammonia, white spirit and similar. For the restoration of the surface from possible scratches because of the utilization or limestone spots and to give back the original aspect it is sufficient to rub up the surface with an abrasive sponge and then pass over it with a soft cloth. CLEANING OF THE PARTS IN CHROMED BRASS AND ALUMINIUM BRILL The chromed brass and aluminum brill become clean with a soft cloth soaked with alcohol or water and soap. D alcool o acqua e sapone. Importante: non si devono utilizzare detersivi in polvere e aggressivi contenenti acido cloridrico. Per evitare la formazione di macchie di calcare sulle rubinetteria è sufficiente asciugare i vari componenti dopo l'uso. Il soffione, il doccino e gli idrogetti verticali provvisti, negli ugelli, di parti in silicone anticalcare, devono essere puliti con panno morbido e acqua e sapone. PULIZIA PARTI IN VETRO Le parti del box doccia in vetro devono essere pulite utilizzando prodotti specifici esistenti in commercio, in particolare solo detergenti liquidi per parti in cristallo o alcool. Si consiglia, inoltre, di asciugare i vetri con un panno morbido ad ogni fine uso del box doccia. Per i vetri con il trattamento clearshield è sufficiente asciugare il vetro con un tira acqua o con un panno; qualora necessitino di pulizia utilizzare il prodotto specifico fornito dalla ditta Arblu o in alternativa un panno umido con detergente neutro, non aggressivo. Importante: non usare salviette abrasive, detersivi in polvere, acetone, ammoniaca o prodotti a base di tali sostanze perché danneggiano il box in modo irreversibile. Lo stesso vale per i prodotti contenenti acido formico o formaldeide. PULIZIA COLONNA DOCCIA Dopo la prima installazione passare la superficie con un panno in cotone o in microfibra per superfici delicate, utilizzando un prodotto antistatico (es. Pronto antistatico), questo farà in modo che protegga la superficie da graffiature per il normale utilizzo e impedisca alla polvere di rovinare la superficie. Per la pulizia normale del materiale utilizzare prodotti a base di acqua e sapone. Importante: non utilizzare solventi in genere. Important: Shall not to be used any washing powder or aggressive containing chloride acid. To avoid the formation of limestone spots on the faucets it's sufficient to dry up the various components after its utilization. The head shower, the hand shower and the vertical hydro jets provided on their nozzles of anti-limestone silicon parts, must be cleaned with a soft cloth with water and soap. CLEANING OF THE GLASS PARTS The shower cabin parts in glass must be cleaned using specific products existing in commerce; in particular only liquid detergents for glass of alcohol. We do recommend furthermore, to dry up the glasses with a soft cloth at every end of the cabin utilization. For the glasses with the treatment Clearshield it is sufficient to dry up the glass with a cloth; in the case the glasses need cleanliness utilize the specific product provided from Arblu or in alternative a damp cloth with neutral detergent not aggressive. Important: Don't utilize abrasive towels, washing powders, acetone, ammonia or similar products since they damage the cabin in an irreversible way. The same as well for products containing formic acid or formaldehyde. CLEANING OF THE SHOWER COLUMN After the first installation pass on the surface with a cotton cloth or microfiber for delicate surfaces, utilizing an antistatic product ; this will protect the surface from scratches due to normal utilization and prevent the dust to spoil the surface. For normal cleanliness of the material utilize products with basis of water and soap. Important: Do not utilize cleaning solvents. Aluminium reinigt man mit einem weichen in Alkohol getränktem Tuch oder mit Wasser und Seife. Wichtig: nicht pulverige oder angreifende Produkte, welche Salzsäure enthalten, gebrauchen. Um eventuelle Kalkflecken auf den Wasserhähnen zu vermeiden, reicht es die Elemente nach dem Gebrauch zu trocknen. Die Teile der Kopfbrause, der Handbrause und der vertikalen Wasserspritzer in Antikalk-Kiesel, reinigt man mit einem weichen Tuch, Wasser und Seife. REINIGUNG DER GLASOBERFLÄCHEN Die Glasteile der Duschkabine müssen mit spezifischen im Handel vorhandenen Produkte, wie flüssige Reinigungsmittel für Kristall oder Alkohol, gereinigt werden. Es empfiehlt sich die Glasoberflächen, nach jeder Dusche, mit einem weichen Tuch zu trocknen. Für das Glas mit Clearshild-Behandlung reicht es die Oberfläche mit einem weichen Tuch zu trocknen; falls sie eine Reinigung benötigen, den spezifischen von der Firma Arblu benützen oder als Alternative ein feuchtes Tuch mit neutralem, nicht aggressivem Reinigungsmittel. Wichtig: schleifende Servietten, Pulverreinigungsmittel, Aceton, Ammoniak oder Produkte welche solche Stoffe enthalten nicht benützen, weil sie die Kabine in nicht umkehrbarerweise beschädigen. Das gleiche gilt für Produkte welche Ameisensäure oder Formaldehyd enthält. REINIGUNG DES TECHNISCHEN PANEELS Sobald man den Schutzfilm entfernt, die Oberfläche mit einem weichen, Baumwoll- oder Tuch und einem antistatischen Produkt (z.B. Pronto-Antistatisch) reinigen. Das schützt die Oberfläche vor Kratzer während dem Gebrauch und behindert dem Staub die Oberfläche zu beschädigen. Für die normale Reinigung des Materials Produkte wählen, die Seife und Wasser enthalten. Wichtig: keine Verdünner gebrauchen. 7. WARTUNG REINIGUNG DER DUSCHWANNE UND DES DECKELS IN TECNOBLU Der Tecnoblu ist ein kompaktes, nicht mit Lack behandelndes Material, mit einem hohen Mineralgehalt und niedrigem Harzgehalt, das die Oberfläche widerstandsfähig macht und sich beim Antasten angenehm anfühlen lässt. Kann mit den normalen Produkten wie Vif, Bleichlauge, Meister Proper, usw. ,welche man im Handel findet, gereinigt werden. Wichtig: nicht Produkte gebrauchen, welche Verdünner beinhalten oder aggressive chemische Komponente wie Trichloräthylen, Verdünner, Terpentin, Ammoniak, usw. Enthält.Um eventuelle Kratzer, die sich während dem Gebrauch ereignet haben, oder um Kalkflecken von der Oberfläche zu beseitigen, reicht es die Oberfläche mit einem Schwamm wie „Scotch-Brite“ zu schleifen und dann mit einem weichen Tuch vorüberzugehen. REINIGUNG DER ELEMENTE IN VERCHROMTEN KUPFER BRILLALUMINIUM Die Teile in verchromten Kupfer und Breel- 13 KROMOS Per pulizia svitare For cleaning twist off Für Reinigung aufschrauben IT 8. RISOLUZIONE PROBLEMI Funzione Anomalia Possibile causa Soluzione Display Non si accende il display Manca alimentazione elettrica Collegare alimentazione Display Non funziona la doccetta/soffione Manca alimentazione idraulica Collegare l’acqua, ruotare manopola del rubinetto A in senso antiorario Per altri tipi di anomalie rivolgersi all’assistenza tecnica Arblu [email protected] GB 8. PROBLEM ANSWERS Function Anomaly Possible cause Answers Display the display doesn’t start up No power supply Link up power supply Display the shower/head shower doesn’t work No hydraulic supply Link up water, turn the water tap anticlockwise. For other kinds of anomalies apply to the Arblu customer service [email protected] D 8. LÖSUNGEN FÜR PROBLEME Funktion Anomalien Mögliche Ursache Lösung Display Der Display zündet sich nicht an Stromversorgung fehlt Stromversorgung anschliessen Display Hand oder kopf-dusche funktioniert nicht Wasserviersonrgung nicht angeschlossen Wasserviersonrgung verbinden, den Knauf des Hahnes A entgegen dem Uhrzeigersinn drehen Für andere Anomalien, sich an den Kundendienst von Arblu venden [email protected] 14