Download MANUAL DO OPERADOR
Transcript
Manual de Peças 4166235
744844H
JR SOCUTTER 6,5 CV B&S 305 mm
744845H
JR SOCUTTER 6,5 CV B&S 457 mm
744944C
JR SOCUTTER 5,5 CV HONDA 305 mm
744945C
JR SOCUTTER 5,5 CV HONDA 457 mm
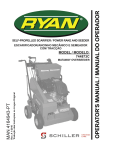
MANUAL DO OPERADOR
MAN 4166234-PT
Rev. A 12-2010
Tradução das Instruções na Língua Original
MÁQUINA DE CORTAR TORRÕES DE RELVA, COM
TRACÇÃO, PARA OPERADOR ATRÁS APEADO
CALIFORNIA
WARNING
Proposition 65 Warning
Diesel engine exhaust and some
of its constituents are known to the
State of California to cause cancer,
birth defects and other reproductive
harm.
The engine exhaust from this product
contains chemicals known to the State
of California to cause cancer, birth
defects or other reproductive harm.
CALIFORNIA
Proposition 65 Warning
Battery posts, terminals, wiring
insulation, and related accessories
contain lead and lead compounds,
chemicals known to the State of
California to cause cancer and birth
defects or other reproductive harm.
WASH HANDS AFTER HANDLING.
Jr.
Sodcutter
IMPORTANT MESSAGE
Thank you for purchasing this Schiller Grounds Care, Inc. product. You have purchased a world class product,
one of the best designed and built anywhere.
This machine comes with an Operation and Safety Manual and Parts/Service Manual. The useful life and good
service you receive from this machine depends to a large extent on how well you read and understand this
manual. Treat your machine properly, lubricate and adjust it as instructed, and it will give you many years of
reliable service.
Your safe use of this Schiller Grounds Care, Inc. product is one of our prime design objectives. Many safety
features are built in, but we also rely on your good sense and care to achieve accident-free operation. For best
protection, study the manual thoroughly. Learn the proper operation of all controls. Observe all safety precautions. Follow all instructions and warnings completely. Do not remove or defeat any safety features. Make sure
those who operate this machine are as well informed and careful in its use as you are.
See a Schiller Grounds Care, Inc. dealer for any service or parts needed. Schiller Grounds Care, Inc. service
ensures that you continue to receive the best results possible from Schiller Grounds Care, Inc. products. You
can trust Schiller Grounds Care, Inc. replacement parts because they are manufactured with the same high
precision and quality as the original parts.
Schiller Grounds Care, Inc. designs and builds its equipment to serve many years in a safe and productive manner. For longest life, use this machine only as directed in the manual, keep it in good repair and follow safety
warnings and instructions. You'll always be glad you did.
Schiller Grounds Care, Inc.
One Bob Cat Lane
Johnson Creek, WI 53038-0469
TABLE OF CONTENTS............................................................................................... PAGE
SAFETY..........................................................................................................................................................2-6
LABELS......................................................................................................................................................... 7, 8
CONTROLS....................................................................................................................................................... 9
OPERATION.............................................................................................................................................. 10, 11
ADJUSTMENTS.........................................................................................................................................12-14
MAINTENANCE/SERVICE.........................................................................................................................15-16
STORAGE....................................................................................................................................................... 17
TROUBLESHOOTING.................................................................................................................................... 18
SPECIFICATIONS........................................................................................................................................... 19
EC DECLARATIONS OF CONFORMITY.................................................................................................. 20, 21
See Manual 4166235 for Parts Information
12-2010
1
SAFETY
Jr.
Sodcutter
NOTICE !!!
Unauthorized modifications may present extreme
safety hazards to operators and bystanders and
could also result in product damage.
Schiller Grounds Care, Inc. strongly warns against,
rejects and disclaims any modifications, add-on
accessories or product alterations that are not
designed, developed, tested and approved by Schiller
Grounds Care, Inc. Engineering Department. Any
Schiller Grounds Care, Inc. product that is altered,
modified or changed in any manner not specifically
authorized after original manufacture–including the
addition of “after-market” accessories or component
parts not specifically approved by Schiller Grounds
Care, Inc. will result in the Schiller Grounds Care,
Inc. Warranty being voided.
Any and all liability for personal injury and/or
property damage caused by any unauthorized
modifications, add-on accessories or products not
approved by Schiller Grounds Care, Inc. will be
considered the responsibility of the individual(s) or
company designing and/or making such changes.
Schiller Grounds Care, Inc. will vigorously pursue
full indemnification and costs from any party
responsible for such unauthorized post-manufacture
modifications and/or accessories should personal
injury and/or property damage result.
This symbol means:
ATTENTION!
BECOME ALERT!
Your safety and the safety of others is involved.
Signal word definitions:
The signal words below are used to identify levels
of hazard seriousness. These words appear in this
manual and on the safety labels attached to Schiller
Grounds Care, Inc. machines. For your safety and
the safety of others, read and follow the information
given with these signal words and/or the symbol
shown above.
DANGER indicates a hazardous situation which,
if not avoided, will result in death or serious
injury.
WARNING indicates a hazardous situation which,
if not avoided, could result in death or serious
injury.
CAUTION indicates a hazardous situation which,
if not avoided, COULD result in minor or moderate
injury. It may also be used to alert against unsafe
practices or property damage.
CAUTION used without the safety alert symbol
indicates a potentially hazardous situation which, if
not avoided, may result in property damage.
MODEL NUMBER: This number appears on
sales literature, technical manuals and price lists.
SERIAL NUMBER: This number appears only
on your mower. It contains the model number
followed consecutively by the serial number.
Use this number when ordering parts or seeking
warranty information.
2
SAFETY
Jr.
Sodcutter
MACHINE PREPARATION
Operator preparation and training
Read the Operation & Safety
Manual
– If an operator or mechanic
cannot read English, it is
the owner's responsibility
to explain this material to
them. If any portion of this
material is unclear, contact
your factory representative
for clarification.
– Become familiar with the safe operation of the
equipment, operator controls and safety signs.
Be prepared to stop the engine quickly in an
emergency. Do not operate or allow another
person to operate this machine if there are any
questions about safety.
– All operators and mechanics should be trained.
The owner is responsible for training the users.
– Wear appropriate clothing, including safety
goggles or safety glasses with side shields when
operating. Wear substantial footwear. Do not
operate barefoot or wearing open sandals. Long
hair, loose clothing or jewelry may get tangled in
moving parts.
– Wear appropriate hearing protection.
– Wear safety glasses.
– Never allow children, unskilled or improperly
trained people to operate this equipment. Local
regulations can restrict the age of the operator.
– Keep warning labels and this operator's manual
legible and intact. Replacement labels and
manuals are available from the factory.
Site preparation and circumstances
– Evaluate the terrain to determine how to safely
perform the job. Only use accessories and
attachments approved by the manufacturer.
– Clear the area to be cut of objects such as rocks,
toys, wire or other debris that may be thrown or
get tangled in the sod cutter.
– Be sure the area is clear of pets and people,
especially young children. Never assume they
will remain where you last saw them. Stop the
machine if any enter the area.
– Cut sod only in daylight or in good artificial light.
MACHINE PREPARATION
– Check operator presence interlock system. Adjust or have any problems repaired before using.
– Do not tamper with or defeat safety devices.
Keep guards, shields and interlock safety devices
in place and in proper working condition. They
are for your protection.
– Keep all fasteners such as nuts, bolts and pins
well secured.
– Visually inspect blade and blade bolts for wear or
damage. Replace worn or damaged blades and
bolts.
– Verify that machine and attachments, if any, are
in good operating condition.
– Do not engage blade until ready to cut sod.
– Do not operate machine while under the
influence of drugs or alcohol, or any other
condition of impairment.
– The owner/user can prevent and is responsible
for accidents or injuries occurring to themselves,
other people or property.
3
SAFETY
OPERATING SAFELY
IN GENERAL
– Use extra care when loading or unloading the
machine into a trailer or truck.
– Use caution when making turns and crossing
roads and sidewalks. Stop blade when not
cutting sod.
Jr.
Sodcutter
-
Do not turn on slopes unless necessary, and then
turn slowly and downhill when possible.
-
Be sure of your footing on slopes.
-
With walk behind machines, operate across slopes,
not up and down.
-
Avoid starting or stopping on a slope. If wheels lose
traction, disengage the cutter blade and proceed
straight down the slope.
– Do not run the engine in an enclosed area where
dangerous carbon monoxide fumes can collect.
– Never leave a running machine unattended.
Always turn off blade and stop engine when
leaving the operator position. When leaving
the machine be sure the wheel drive clutch is
engaged.
– Use extreme caution when reversing or pulling
machine towards you.
INTERRUPTING OPERATION
- Before leaving the operator's position:
- Park on level ground.
- Disengage the master clutch.
- Shut off the engine.
-
– Stop operation if someone approaches.
– Never leave a running machine unattended.
Always disengage drive, and stop engine.
STARTING
– Start according to instructions in this manual or
on the machine.
-
– Before attempting to start the engine, make sure
the master clutch is disengaged.
_ When starting the engine, make sure hands and
feet are clear of the blade.
– Do not change engine governor settings or
overspeed the engine. Operating the engine
at excessive speed can increase the hazard of
personal injury.
-
Disengage the master clutch, stop the engine,
and wait until the blade stops moving:
- before refueling;
- before making blade adjustment .
Disengage the master clutch, stop the engine,
and disconnect the spark plug wire(s):
- before clearing blockages;
- before checking, cleaning or working on the
machine;
- after striking a foreign object. Inspect the
machine for damage and have repairs made
before restarting;
- if the machine begins to vibrate abnormally:
shut off machine immediately. Inspect
and have repairs made as needed before
restarting;
OPERATING ON SLOPES
Slopes are a major factor in loss of control and tip
over accidents that sometimes lead to severe injury
or death. All slopes require extra caution.
- Before operating on slopes, evaluate the risks
involved.
- except for repairs or adjustments as specifically
noted, such as for carburetor adjustment,
where the engine must be running. Keep
hands and feet clear of moving parts in these
circumstances.
-
Allow the blade to come to a complete stop when
stopping operation to clear blockages, unclog,
inspect the machine, do maintenance or repair.
-
Reduce the throttle setting during engine shutdown and, if the engine is provided with a shutoff valve, turn the fuel off at the conclusion of
operation.
-
- Do not operate on slopes if uneasy or uncertain.
Ultimate responsibility for safe operation on slopes
rests with the operator.
4
Disengage the master clutch and wait until the
blade stops moving then disengage the blade
clutch:.
- when not cutting sod;
- for transport;
- when crossing surfaces other than grass.
-
Do not operate on steep slopes.
-
Keep all movement on slopes slow and gradual.
-
Do not cut sod near drop-offs, ditches or embankments. The machine could suddenly turn over if a
wheel runs over the edge or an edge caves in.
SAFETY
Jr.
Sodcutter
MAINTENANCE SAFETY
In general
-
Maintain machine according to manufacturer's
schedule and instructions for maximum safety
and best results.
-
Park machine on level ground.
-
Never allow untrained personnel to service machine.
-
Guards should only be removed by qualified
maintenance technician for maintenance/service.
Replace when work is complete.
-
Adjust or repair only after the engine has been
stopped and the blade has stopped moving.
- Disconnect spark plug wire(s) before doing any
maintenance.
-
Replace parts if worn, damaged or faulty.
For best results, always replace with parts
recommended by the manufacturer.
-
Do not dismantle the machine without releasing
or restraining forces which may cause parts to
move suddenly.
-
Provide adequate support, e.g. jack stands for
lifted machine or parts if working beneath.
-
Do not put hands or feet near or under rotating
parts.
-
Clean up spilled oil or fuel thoroughly.
-
Replace faulty mufflers.
- To reduce fire hazards, keep the engine, muffler, and fuel storage area free of grass, leaves,
debris buildup or grease.
Blades
WARNING
The sod cutter blade is sharp
and can cut. Use extra caution when handling. Remove
obstructions with care. Wrap
the blade or wear gloves.
-
Only replace blade. Never
straighten or weld.
-
Keep other persons away from blades.
Fuel
WARNING
-
Petrol (gasoline) and
diesel fuels are flammable;
petrol (gasoline) vapors
are explosive. Use extra
care when handling.
-
Store only in containers
specifically designed for fuel.
-
When refueling or checking fuel level:
- Stop the engine and allow to cool;
- Do not smoke;
- Refuel outdoors only;
- Use a funnel;
- Do not overfill;
- If fuel is spilled, do not attempt to start the
engine until the spill is cleaned up and vapors
have cleared.
- Replace caps on fuel containers and tanks
securely.
Sparks from static electricity can start fires or cause
explosions. Flowing fuel can generate static electricity. To prevent static electricity sparks:
-
Keep fuel containers electrically grounded. Do
not fill containers in a vehicle or on a truck or
trailer bed with a plastic liner. Fill containers on
the ground away from the vehicle.
-
When practical, remove petrol (gas) powered
equipment from the truck or trailer and refuel it on
the ground. If equipment must be refueled on the
truck or trailer, refuel from a portable container
rather than a dispenser nozzle.
-
Keep the dispenser nozzle in contact with the rim
of the fuel tank or container opening until fueling
is complete. Do not use a nozzle lock-open
device.
5
SAFETY
Jr.
Sodcutter
STORAGE SAFETY
- Stop the engine and allow to cool before storing.
- Drain the fuel tank outdoors only.
- Store fuel in an approved container in a cool, dry place.
- Keep the machine and fuel containers in a locked storage place to prevent tampering and to keep children
from playing with them.
- Do not store the machine or fuel container near heating appliances with an open flame, such as a water
heater, or an appliance with a pilot light.
6
-
Keep petrol (gasoline) storage area free of grass, leaves and excessive grease to reduce fire hazard.
-
Clean grass and debris from cutting units, drives, mufflers and engine to help prevent fires.
LABELS
Jr.
Sodcutter
ATTENTION:
Read and understand Operator Manual.
Replace manual if lost or damaged.
ENGINE THROTTLE CONTROL:
Move forward to increase engine speed.
Move rearward to decrease engine speed.
ATTENTION:
Wear hearing protection and safety glasses.
MASTER CLUTCH:
Move lever forward to engage.
Move lever rearward to disengage.
UNDERGROUND UTILITY HAZARD:
Contacting underground utilities may cause leaks,
explosions or electrocutions.
-Check operation area for underground utilities
such as electrical, gas, and water lines.
-Do not operate where underground utilities are
present.
Moving blades/blade arms cut/crush Hazard
Stay clear of blade/blade arms while operating.
Stop engine before servicing or adjusting.
7
LABELS
Jr.
Sodcutter
ROTATING PARTS:
Entanglement / Amputation Hazard
Do not operate with cover removed.
Stop engine before servicing.
4163591
ATTENTION:
-Read Operator Manual before
servicing or repairing.
-Remove spark plug wire before servicing or repairing.
8
524485
524486
Rotate lever counter clockwise to
engage sodcutter blade drive.
Rotate lever clockwise to disengage
sodcutter blade drive.
Rotate lever counter clockwise to
engage wheel drive.
Rotate lever clockwise to disengage
wheel drive.
Jr.
Sodcutter
CONTROLS
MASTER CLUTCH CONTROL LEVER(A)
Engages / disengages drive belt. Applies brake
to drive belt when pulled FIRMLY to rear.
THROTTLE CONTROL (B)
Controls engine speed.
Engine Switch
(Located on the engine)
Move to "ON" position to start engine. Move to
"OFF" position to stop the engine.
Operator Presence Control (C)
With master clutch control engaged, engine will
stop if operator presence lever is not depressed.
Blade depth control lever (D)
Raises or lowers cutting blade.
blade depth control locking lever (E)
Locking lever holds blade depth control in
desired position.
blade angle locking lever (F)
Locks blade angle.
depth stop (G)
Allows resetting of blade depth to the previous
cutting height.
BLADE AND WHEEL SHIFTER HANDLES (H & J)
Engage and disengage blade for cutting and
gears for driving Sodcutter.
CASTER WHEEL LOCKING LEVER (K)
Allows for straight cutting when locked (down)
and curved cutting when unlocked (up).
9
OPERATION
Pre-Operation check list
(operator's responsibility)
-
Review and follow all safety rules and safety
decal instructions.
Jr.
Sodcutter
BEFORE STARTING THE ENGINE
1. Be familiar with the controls, how each functions,
and what each operates.
-
Check that all safety decals are installed and in
good condition. Replace if damaged.
2.. Check engine oil level. Add oil if necessary,
following the engine manufacturer's
recommendations. Refer to engine manual
supplied with machine.
-
Check to make sure all shields and guards are
properly installed and in good condition.
3. Open the fuel valve.
-
Check that all hardware is properly installed and
secured.
4. Fill the fuel tank with the amount and type of fuel
recommended by the engine manufacturer.
-
Check to be sure engine is free of dirt and
debris. Pay particular attention to the cooling
fins, governor parts and muffler. Clean air intake
screen. Check air cleaner; service is necessary.
5. CHOKE: For cold starts, set the throttle lever to
the half-open position and move the choke to the
ON position. For warm starts set the throttle to
the half-open position and the choke to the OFF
position.
-
Inspect area. Remove stones or other hard
objects that might cause damage.
OPERATOR PRESENCE INTERLOCK SYSTEM
-
Check that there are no underground utilities in
work area.
To start the engine:
- The master clutch must be disengaged.
-
Check all lubrication points and grease as
instructed in manual.
-
Perform a functional check of the safety interlock
system each time you operate the unit. If it
doesn't work, repair before using the machine.
To operate the machine:
- The operator must hold down the operator
presence lever or engaging the master clutch will
kill the engine.
Petrol(Gasoline) is
extremely flammable and
highly explosive under
certain conditions. BE
SURE to install fuel cap
after refueling.
Fill fuel tank with good quality, clean,
unleaded regular petrol (gasoline) to the level
recommended by the engine manufacturer.
TO CHECK OR ADD FUEL:
-
-
-
-
-
-
10
Use a funnel to avoid spilling.
Do it outdoors.
Do not smoke.
Stop the engine; allow to cool.
Do not overfill.
Clean up spilled fuel.
OPERATION
Jr.
Sodcutter
starting the engine
cutting sod
1. Move the engine switch to the "ON" position.
WARNING
2. Pull the recoil starter to start the engine.
3. If the choke is ON when the engine starts,
gradually back it off until the engine runs with no
choke at all.
Underground utilities. Electrocution, explosion,
service disruption risk.
Before beginning any work, check with the local
authorities for underground utility location and
depth. Do not operate where there is any risk
of contacting underground utilities. Contacting
buried utilities could result in a service outage.
Contacting buried electrical wires could result in
electrocution. Contacting a buried gas line could
result in an explosion.
This precaution is especially important when
using attachments such as the mole blade or
trencher which operate at greater depths.
moving of unit
To move unit without running blade:
1. Place blade shifter handle in "disengaged"
position (handle will point straight out from unit)
See Figure 1.
2. Set engine speed to slow.
3. Engage drive shifter handle.
4. Depress operator presence control.
5. Engage master clutch control lever.
6. Adjust throttle to desired walking speed.
To move unit without running the engine, put drive
shifter handle and clutch control lever in the
"disengaged" position. Push unit to move it.
1. Move machine to the area where sod is to be
cut. With the engine off and the master clutch
disengaged, stand on the right side of the
machine. Loosen the Blade Depth Control
Locking Lever with your right hand, then use the
handle bar to tip the machine forward and hold
it with your left hand. Lower the Blade Depth
Control Lever with your right hand until it hits the
preset Depth Stop. Tighten the Locking Lever.
2. Start the engine, then engage the wheel drive
and the blade drive with the Wheel Drive Shifter
Lever and the Blade Drive Shifter Lever.
3. For straight cutting, leave the caster wheel
locking lever down. For cutting irregular or
curved shapes, raise the caster wheel locking
lever up and forward.
4. Adjust the throttle to full speed. With the
machine tipped forward, engage the Master
Clutch. The machine will start moving forward
and the blade drive will operate. Lower the
machine into the sod and cut for a short distance.
5. Stop the machine and check the sod thickness.
Adjust the Depth Stop and blade if necessary.
See Adjustment section.
6. Continue cutting. At the end of each pass lift up
on the handle to raise the blade out of the sod
and turn around for the next pass.
11
ADJUSTMENTS
Jr.
Sodcutter
Drive Belt Adjustment
Keep belt free of oil and dirt, and adjusted to
proper tension at all times.
Belt tension is adjusted by loosening four (4)
engine mounting bolts and shifting engine on the
base.
Belt tension is correct when the distance between
the roll pin and sleeve on the master clutch rod is
1" to 1 1/4" (25-30mm)when the master clutch is
engaged.
BRAKE BAND Adjustment
When adjusted properly:
- With the Master Clutch Control Lever engaged, the
brake band is not braking the large drive pulley.
- When the Master Clutch Control Lever is disengaged, there will be some braking occurring on the
large drive pulley.
- When the Master Clutch Control Lever is disengaged, and pulled back firmly, the brake will fully stop
the large drive pulley.
Start the machine, and check for proper operation.
Readjust if necessary. IF the engine kills when
engaging the Master clutch Control Lever, the
brake may be set too tight.
1. For less braking, loosen the locknut, unscrew the
adjusting screw, then retighten the locknut.
2. For more braking, loosen the locknut, turn the
adjusting screw in, then retighten the locknut.
ADJUSTING DEPTH OF CUT
3/4" (20mm) is a good general starting depth of cut.
Depth of cut can be varied from there depending on
conditions and what you are trying to accomplish.
1. Make an initial depth setting. Park the machine
on a hard surface. Loosen depth control locking
lever E and lower depth control lever D until the
blade rests on the surface. 2. Loosen the depth gauge lock E and set top of
depth gauge G to the 3/4" (20mm) mark on
the label. Tighten the depth gauge lock knob to
secure the depth gauge setting.
3. Use your left hand to tip the machine forward
while lowering the depth control lever D until the
depth control crossbar hits the Depth Stop G.
Tighten the locking lever E to lock in the depth
setting, make a trial run in turf. Check the depth
of cut.
12
4. Re-adjust the depth gauge G and depth control
lever D if necessary.
NOTE: Numbers on depth gauge do not necessarily represent thickness of sod being cut. The
numbers are useful as a reference for making
changes.
Jr.
Sodcutter
ADJUSTMENTS
Adjusting Operator Presence Control
1. To adjust operator presence cable, pull clutch
control handle A rearward as far as possible.
2. Press operator presence handle (right handlebar)
down as far as possible.
3. Adjust cable until the pivot arm C contacts the
arm extending from the operator presence switch
B.
4. Tighten cable clamp to secure cable. Check for
proper operation.
Cover removed for clarity
Blade Angle (Pitch)
Under normal operating conditions, blade angle
is minimal (blade bottom is flat). In extremely
hard soil or when cutting with a dull blade, the
blade may want to ride out of the ground. It may
then help to adjust blade angle forward (see
Adjusting Blade Angle below). A short trial run
will indicate which is the best blade angle.
NOTE: Extreme blade angles put extra stress on
the side arms. To reduce stress on the machine,
operate with the flattest blade angle that gives
satisfactory results.
ADJUSTING BLADE ANGLE (PITCH)
1. Loosen blade angle control locking lever F and
move H-frame forward or backward until blade is
at desired angle (pitch).
2. Tighten blade angle control locking lever F.
13
ADJUSTMENTS
HANDLE SUPPORT SPRING
This spring S helps support the handle. If the four (4)
isolator handle mounts are sagging or distorted, the two
locking adjustment nuts T can be tightened downward to
increase the spring force and raise the handle.
HANDLE STOP BOLTS
These two bolts Y limit the amount of handle movement.
This prevents damage to the handle isolators, and provides
positive control of the machine when extra effort is required
to lift or turn. The rear stop bolt position is adjustable..
Loosen the two bolts X on the bolt centering plates on each
side and tighten with the stop bolts centered in the two
handle holes Z.
14
Jr.
Sodcutter
MAINTENANCE / SERVICE
Jr.
Sodcutter
When replacement parts are required, use genuine
Schiller Grounds Care, Inc. parts or parts with
equivalent characteristics, including type, strength
and material. Failure to do so may result in
product malfunction and possible injury to the
operator and/or bystanders.
Carbon monoxide present in the exhaust is an
odorless and deadly gas. Never start or run the
engine inside where exhaust fumes can collect.
Provide enough fresh air to keep fumes from getting
too strong.
Replace any warning decal that becomes illegible
immediately.
DAILY MAINTENANCE
Operator Presence System
For the engine to run, the Operator Presence Lever
must be held when the Master Clutch Control is
engaged.
To Check:
1. Start the engine and run at 1/2 throttle with the master
clutch disengaged.
2. Engage the master clutch holding the Operator
Presence Lever. Release the operator presence lever
and the engine should stop.
On all pressurized lubrication fittings use a good grade
of Lithium Based lubricant.
The Jr. Sodcutter has 6 lubrication fittings. Lubricate
pitman arms (1 each side) and side arms (1 each side)
after every 4 hours of use.
Lubricate side arm pivots (1 each side - top of unit)
after every 8 hours of use.
Check gear case lubricant level using dipstick E
located on top of gear case. Check lube with dipstick
sitting on threads, do not screw in.
Repair the machine before using if the Operator
Presence System does not kill the engine.
Blades:
Check for damage. Replace any broken, cracked or
otherwise damaged blades. Do not weld or straighten
blades. Replace or sharpen dull blades. See
sharpening instructions.
Hardware:
Tighten any nuts and bolts that are found loose.
Replace any broken or missing cotter pins. Repair any
other problems before operating.
Engine:
See engine manual for oil change intervals and oil
specifications. See engine manual for air cleaner
service intervals and service procedure.
Lubrication:
The gear case is initially filled with 3 1/2 pints (1.7 L) of
EP 140 Gear Lube. Do not add to this amount unless
oil is changed or lost through leakage. Gear case
drain plug D.
15
MAINTENANCE / SERVICE
BLADE SHARPENING
Wear the appropriate personal protective equipment
when sharpening blades.
1. Hand file bottom blade at 45O angle until no flat
remains.
2. To keep cutting edge less than 1/16" (1.5mm)
on 45O angle, grind milled surface back at 15O to
less than 1/16"(1.5mm).
3. Hand file side blades at 45O until no flat remains.
4. To keep cutting edge less than 1/16"(1.5mm) on
45O angle, grind milled surface back at 15O to
less than 1/16"(1.5mm).
Drive Belt REPLACEment
1. Remove shield on left side of unit.
2. Remove nut securing brake band to clutch
control rod.
3. Remove cotter pin on outside of guard support
rod and move brake band over to nut on rod.
4. Loosen two bolts A securing belt guide to
provide clearance when removing belt.
5. Remove belt from engine pulley. To do this,
loosen upper and lower belt guards, or remove
the engine pulley.
6. Install new belt in reverse procedure. Route the
belt as shown.
7. Adjust belt and brake band. See Adjustment
Section.
16
Jr.
Sodcutter
STORAGE
Jr.
Sodcutter
STORAGE INSTRUCTIONS
To prevent possible explosion or ignition of
vaporized fuel, do not store equipment with fuel
in tank or carburetor in enclosure with open flame
(for example, a furnace or water heater pilot
light).
Daily Storage
1. Check engine oil level and air filter element daily.
2. Check oil level in gear case.
3. Close fuel valve at bottom of fuel tank.
4. Clean cutting blade (grass, dirt, etc.).
EXTENDED STORAGE
Before the equipment is put into storage for any
period exceeding 30 days:
1. Drain all fuel from fuel tank and lines (use a
hose or fuel line, routed from fuel tank shut-off to
proper container).
2. Start engine and run until all fuel is used from the
carburetor float bowl.
3. While engine is warm, drain the crankcase
oil and refill with the proper weight of oil
corresponding to the season when the equipment
will next be used.
4. Remove the spark plug and squirt a small
quantity of engine oil into the cylinder. Turn the
engine over a few times to distribute the oil.
5. Lubricate all lubrication fittings.
6. Clean and oil cutting blade to prevent rust.
To put equipment into operation after an
extended storage:
1. Fill fuel tank with clean fresh fuel.
2. Check crankcase oil level, and start engine.
3. Check fuel system for fuel leaks.
17
TROUBLE SHOOTING
18
Jr.
Sodcutter
SPECIFICATIONS
Jr.
Sodcutter
Models: 744844H.....Jr. Sodcutter - 12 in.(30.5cm)
744845H......Jr. Sodcutter - 18 in.(45.7cm)
Engine
Model.............4 cycle 6.5H.P.(4.8KW) B&S Vanguard,
Model 12H332, Type 0159
Trim B8, 12.5 cu. in. (205 cc)
Starter......................................................Recoil
Governor..........
3600 RPM ± 100 RPM, no load
Clutch...............
spring loaded belt tightener type
Reduction
Engine to blade.......................................
Engine to drive wheels............................
2.94:1
55.8:1
Models: 744944C.....Jr. Sodcutter - 12 in.(30.5cm)
744945C.....Jr. Sodcutter - 18 in.(45.7cm0
Engine
Model................
4 cycle 5.5 H.P. Honda
Model GX160-K1QX2, GX160 OHV
9.9 cu. in. (163 cc)
Starter......................................................Recoil
Governor..........
3600 RPM ± 100 RPM, no load
Clutch...............
spring loaded belt tightener type
Reduction
Engine to blade.......................................
Engine to drive wheels............................
Blade pitch:
Hand lever adjustment...............
variable 0O to 9O
Blade speed: .....
1225 oscillations/min. @ 3600 engine RPM
Dimensions:
Width..........................................
Length........................................
Height.........................................
Wheelbase.................................
24" (600 mm)
49" (1244 mm)
33" (838 mm)
19" (483 mm)
Weight:
744844H & 744944C................
744845H & 744945C................
333 lbs. (151 Kg)
377 lbs. (171 Kg)
TOUCH -UP PAINT:
16OZ. (0.5L) Spray can, order P/N 65334
2.94:1
55.8:1
Wheels:
Drive.................
8" (203 mm) Dia. w/knobby
tread vulcanized to hub
Rear.............8 x 1.75 (203 X 45mm) semi-pneumatic
tires
with pre-packed ball bearings
Drive:
Engine to gear case.................
"A" section belt
Gear case to drive shaft
and blade drive...........................................roller chain
Gear case:
Lubrication..................................
Capacity......................................
EP140 Gear lube
3 1/2 Pints (1.7L)
Cutting width:
744844H & 744944C..................11 3/4" (298 mm)
744845H & 744945C........................18" (457 mm)
Cutting depth:................................up to 1.5" (38mm)
19
EC Declaration of Conformity
The Undersigned Manufacturer:
Schiller Grounds Care, Inc.
One Bob-Cat Lane
Johnson Creek, WI 53038
EU Authorized Representative:
Earlsmere Limited
Unit 18 Valley Road
Station Road Industrial Estate
Wombwell, Barnsley, South Yorkshire, S73 OBS UK
4166261 REV A
Chuck Clark
Director of Operations
Date: 24th January, 2011
Jim White
Managing Director
Date: 24th January, 2011
Declare that the machine Described Below:
Make & Type:....................................... Ryan, Jr. Sodcutter
Category:.............................................. Sodcutter
Series:.................................................. 744844H, 744845H
Engine:................................................. Briggs & Stratton
Type:.................................................... 13H3320159B8
Speed:.................................................. High idle governor setting 3600 RPM ±100RPM
Net Installed Power:............................. 4.8 KW (6.5hp)
Operation Width:.................................. 30.2 mm (11.75”) for 744844H
............................................................. 45.7 mm (18”) for 744845H
Complies with the provisions of the following European Directive, Amendments, and the Regulations
transposing it into national law:
Directives/Harmonized Standards
Machinery Directive.............................. .....................2006/42/EC
EMC Directive:..................................... .....................2004/108/EC
Noise in the Environment Directive...... .....................2000/14/EC
Vibration Directive................................ .....................2002/44/EC
Non Road Emissions............................ .....................2002/88EC
Sound: Sound levels were determined in accordance with Directives 2000/14/EC (Annex V), and
standards EN/ISO3744;1995 and ISO 11094;1991.
Guaranteed Sound Power Level.......... Model 744844H........................... 105dB
............................................................. Model 744845H........................... 107dB
Operator Ear........................................ Model 744844H............................. 83dB
............................................................. Model 744845H..............................83db
Vibration:
Hand/arm vibration was measured at the right and left operator handles per ISO 5349-1-2001 and
ISO 5349-2-2001. Levels were calculated using ISO/DIS 5395-1, in accordance with 2002/44/EC.
Only the highest of the left and right readings is given.
Guaranteed Vibration Level.................. 9.53m/s² ..........Model 744844H
Guaranteed Vibration Level................. 8.39m/s² ..........Model 744845H
Intended Use:
This machine is for cutting sod in grass areas grown for the purpose of harvesting sod, and
general sod removal. It is intended for use on flat areas and small slopes. Loss of control may
result on steeper slopes. It is not intended for use in rocky areas.
20
EC Declaration of Conformity
The Undersigned Manufacturer:
Schiller Grounds Care, Inc.
One Bob-Cat Lane
Johnson Creek, WI 53038
EU Authorized Representative:
Earlsmere Limited
Unit 18 Valley Road
Station Road Industrial Estate
Wombwell, Barnsley, South Yorkshire, S73 OBS UK
4164674 REV A
Chuck Clark
Director of Operations
Date: February 1, 2010
Jim White
Managing Director
Date: February 1, 2010
Declare that the machine Described Below:
Make & Type:....................................... Ryan, Jr. Sodcutter
Category:.............................................. Sodcutter
Series:.................................................. 744944C, 744945C
Engine:................................................. Honda
Type:.................................................... GX160-K1QX2
Speed:.................................................. 3600 R.P.M
Net Installed Power:............................. 3.6 KW (5.5hp)
Operation Width:.................................. 30.2 mm (11.75”) for 744944C
............................................................. 45.7 mm (18”) for 744945C
Complies with the provisions of the following European Directive, Amendments, and the Regulations
transposing it into national law:
Directives/Harmonized Standards
Machinery Directive.............................. .....................2006/42/EC
EMC Directive:..................................... .....................2004/108/EC
Noise in the Environment Directive...... .....................2000/14/EC
Vibration Directive................................ .....................2002/44/EC
Non Road Emissions............................ .....................2002/88EC
Sound: Sound levels were determined in accordance with Directives 2000/14/EC, 2006/42/EC and
standard ISO 11094
Guaranteed Sound Power Level.......... 103dB
Operator Ear........................................ 88dB
Vibration:
Hand/arm vibration was measured at the right and left operator handles per ISO 5349-1-2001 and
ISO 5349-2-2001. Levels were calculated using ISO/DIS 5395-1, in accordance with 2002/44/EC.
Only the highest of the left and right readings is given.
Guaranteed Vibration Level.................. 9 m/s²
Intended Use:
This machine is for cutting sod in grass areas grown for the purpose of harvesting sod, and
general sod removal. It is intended for use on flat areas and small slopes. Loss of control may
result on steeper slopes. It is not intended for use in rocky areas.
21
CALIFÓRNIA
AVISO
Aviso - Proposta 65
O Estado da Califórnia considera o
escape de motores a gasóleo e alguns
dos seus componentes cancerígenos,
causadores de anomalias à nascença
ou de outros riscos de gestação.
O escape do motor deste produto
contém substâncias que o Estado da
Califórnia considera cancerígenas,
causadoras de anomalias à nascença
ou de outros riscos de gestação.
CALIFÓRNIA
Aviso - Proposta 65
Baterias, terminais, isolamentos de
cabos e acessórios relacionados contêm
chumbo e compostos de chumbo, que
são produtos químicos reconhecidos
pelo Estado da Califórnia como
causadores de cancro e de problemas
de gestação. LAVE AS MÃOS DEPOIS
DO MANUSEAMENTO.
Jr.
Sodcutter
INFORMAÇÃO IMPORTANTE
Agradecemos-lhe ter comprado este produto Schiller Grounds Care, Inc. Acaba de comprar um produto de
classe mundial, um dos mais bem concebidos e construídos.
Esta máquina vem com um Manual de Utilização e Segurança e um Manual de peças e assistência. A vida útil
e o bom funcionamento desta máquina dependem largamente da boa leitura e compreensão deste manual.
Trate a máquina correctamente, lubrifique-a e afine-a como se indica para a ter muitos anos ao seu serviço.
A utilização segura deste produto Schiller Grounds Care, Inc. é um dos principais objectivos que pretendemos.
Há muitos dispositivos de segurança incorporados, mas também confiamos no bom senso e nos cuidados
do operador para um trabalho sem acidentes. Para a melhor protecção, é preciso estudar o manual a fundo.
Aprenda como funcionam os comandos. Cumpra todas as precauções de segurança. Siga todas as instruções
e os avisos. Não retire nem desactive dispositivos de segurança. Quem trabalhar com esta máquina tem de
estar bem informado e actuar com cuidado.
Para assistência técnica ou peças, contacte um revendedor de Schiller Grounds Care, Inc. A assistência de
Schiller Grounds Care, Inc. garante a continuação dos melhores serviços dos produtos Schiller Grounds Care,
Inc. Pode confiar nas peças sobressalentes de Schiller Grounds Care, Inc., porque são feitas com a mesma
elevada precisão e qualidade das peças originais.
Schiller Grounds Care, Inc. desenha e constrói equipamentos para servirem muitos anos de forma segura e
produtiva. Para duração máxima, use esta máquina só como se indica no manual, mantenha-a em boas condições e siga as instruções e os avisos de segurança. A vantagem será sua.
Schiller Grounds Care, Inc.
One Bob Cat Lane
Johnson Creek, WI 53038-0469
ÍNDICE.................................................................................................................................................. PÁGINA
SEGURANÇA.................................................................................................................................................2-6
SINALÉTICA.................................................................................................................................................. 7, 8
COMANDOS..................................................................................................................................................... 9
FUNCIONAMENTO................................................................................................................................... 10, 11
AFINAÇÕES...............................................................................................................................................12-14
MANUTENÇÃO / ASSISTÊNCIA...............................................................................................................15-16
ARMAZENAMENTO........................................................................................................................................ 17
REPARAÇÃO DE AVARIAS............................................................................................................................ 18
ESPECIFICAÇÕES......................................................................................................................................... 19
Declaração de Conformidade da CE......................................................................................... 20, 21
Consulte o Manual 4166235 para informações sobre peças
12-2010
1
SEGURANÇA
Jr.
Sodcutter
AVISO !!!
Modificações não autorizadas podem ser extremamente perigosas para operadores e pessoas próximas, e podem danificar o produto.
Schiller Grounds Care, Inc. desaconselha, rejeita
e não se responsabiliza por modificações, acessórios extra ou alterações ao produto que não tenham origem em desenhos, concepções, testes
e aprovações do Departamento de Engenharia
de Schiller Grounds Care, Inc. Qualquer produto
Schiller Grounds Care, Inc. que seja alterado, modificado ou trocado de qualquer forma não especificamente autorizada após a construção original
– incluindo acessórios comprados no mercado ou
componentes não especificamente aprovados por
Schiller Grounds Care, Inc. – provocam a anulação da garantia de Schiller Grounds Care, Inc.
DESCRIÇÃO DO MODELO
NÚMERO DO MODELO
NÚMERO DE SÉRIE
Toda e qualquer responsabilidade por ferimentos
e/ou danos materiais causados por modificações
não autorizadas, extras ou produtos não aprovados por Schiller Grounds Care, Inc. são da responsabilidade da pessoa/empresa que procedeu a
essas alterações. Schiller Grounds Care, Inc. procurará obter indemnização total e custos de qualquer parte responsável por tais alterações após a
construção não autorizadas e/ou acessórios, caso
haja ferimentos pessoais e/ou danos materiais.
NÚMERO DO MODELO: Este número aparece em
literatura de vendas, manuais técnicos e listas de
preços.
NÚMERO DE SÉRIE: Este número só aparece na
sua máquina de aparar relva. Inclui o número do
modelo seguido do número de série. Use este número ao encomendar peças ou para assuntos da
garantia.
2
Este símbolo significa:
ATENÇÃO!
ESTEJA ATENTO!
A sua segurança e a segurança dos outros está
em causa.
Definição dos avisos:
Os avisos abaixo identificam os níveis da gravidade do risco. Estas palavras aparecem neste manual e nos autocolantes de segurança nas máquinas
Schiller Grounds Care, Inc. Para sua segurança e
dos outros, leia e cumpra as informações dadas
com essas palavras e/ou esses símbolos acima.
PERIGO
PERIGO indica uma situação perigosa que, se
não for evitada, provocará a morte ou ferimentos graves.
AVISO
AVISO indica uma situação perigosa que, se não
for evitada, pode provocar a morte ou ferimentos
graves.
CUIDADO
CUIDADO indica uma situação perigosa que, se
não for evitada, PODERÁ provocar ferimentos
ligeiros a médios. Também pode ser usado para
alertar contra práticas inseguras.
CUIDADO
CUIDADO sem o símbolo de segurança indica
uma situação potencialmente perigosa que, se
não for evitada, pode provocar danos materiais.
SEGURANÇA
Jr.
Sodcutter
PREPARAÇÃO DA MÁQUINA
Preparação e formação do operador
Leia o Manual
de Funcionamento e Segurança
– Se um operador ou mecânico não souber ler inglês, é
da responsabilidade do proprietário explicar-lhes esta
matéria. Se alguma parte
desta matéria for confusa,
contacte o representante
da fábrica para esclarecimentos.
– Familiarize-se com o funcionamento seguro
do equipamento, com os comandos e com a
sinalética de segurança. Esteja preparado para
desligar o motor rapidamente numa emergência. Não trabalhe nem deixe trabalhar com esta
máquina se houver alguma dúvida quanto a
segurança.
– Todos os operadores e mecânicos devem receber formação. O proprietário é responsável pela
formação dos utilizadores.
– Durante o trabalho, use vestuário apropriado,
incluindo óculos de segurança com resguardos
laterais. Use sapatos resistentes. Não trabalhe
descalço nem com sandálias abertas. Peças em
movimento podem apanhar cabelo comprido,
vestuário largo e adereços.
– Use protecção adequada para os ouvidos.
– Use óculos de segurança.
– Nunca deixe que crianças ou pessoas com pouca ou nenhuma formação trabalhem com este
equipamento. Os regulamentos locais podem
restringir a idade do operador.
– Mantenha a sinalética de aviso e este manual
do operador legível e intacto. A fábrica fornece
sinalética e manuais sempre que necessário.
– Não trabalhe com a máquina sob a influência de
drogas ou álcool, ou em condições de deficiência.
– O proprietário/utilizador pode evitar e é responsável por acidentes ou ferimentos na própria
pessoa e em terceiros, e por danos materiais.
Preparação do local e condições
– Avalie as condições do terreno para determinar
como fazer o trabalho com segurança. Utilize
apenas acessórios e equipamentos complementares aprovados pelo fabricante.
– Limpe a área a cortar de objectos tais como
pedras, brinquedos, arame ou outros detritos
que podem ser lançados ou enrolar-se no rolo de
lâminas da máquina.
– Assegure-se de que a área está livre de animais
e pessoas, especialmente crianças pequenas.
Nunca assuma que vão permanecer onde estavam inicialmente. Pare a máquina se entrarem
na área de corte.
– Corte torrões somente à luz do dia ou com boa
iluminação artificial.
PREPARAÇÃO DA MÁQUINA
– Verifique o sistema interlock de presença do operador. Afine ou elimine problemas antes de usar
a máquina.
– Verifique o sistema interlock de presença do operador. Afine ou elimine problemas antes de usar
a máquina.
– Não altere nem desactive dispositivos de segurança. Mantenha resguardos, chapas e dispositivos interlock de segurança no lugar e em boas
condições. Existem para sua protecção.
– Mantenha todos os elementos de fixação - porcas, parafusos e pinos - bem apertados.
– Verifique se a lâmina e os seus parafusos têm
desgaste ou danos. Substitua lâminas e parafusos com desgaste ou danos.
– Verifique se a máquina e eventuais acessórios
estão em boas condições de funcionamento
– Não engate a lâmina sem estar pronto para cortar torrões.
3
SEGURANÇA
TRABALHAR COM SEGURANÇA
-
GENERALIDADES
– Seja muito cuidadoso ao carregar ou descarregar a
máquina num semi-reboque ou camião.
Não vire em taludes se não for preciso; nesse caso,
vire lentamente e sempre que possível a descer.
-
Atenção aos seus pés em taludes.
-
Em máquinas de conduzir atrás, trabalhe ao longo de
taludes e nunca para cima ou para baixo.
-
Evite arrancar ou parar num talude. Se as rodas perderam tracção, desengate a lâmina e desça o talude.
–
Seja cuidadoso ao fazer curvas e atravessar arruamentos e passeios. Páre a lâmina quando não estiver
a cortar.
–
Não ligue o motor em local fechado onde haja perigo
de acumulação de monóxido de carbono.
–
Nunca abandone uma máquina a trabalhar. Desligue
sempre a lâmina e o motor ao abandonar a posição
de operador. Ao abandonar a máquina, assegure-se
de que a embraiagem do accionamento da roda está
engatada.
– Use de extrema cautela ao inverter a marcha ou puxar
a máquina para si.
– Páre de trabalhar se alguém se aproximar.
– Nunca abandone uma máquina a trabalhar. Desengate sempre o accionamento e desligue o motor.
ARRANQUE
– Arranque de acordo com as instruções deste manual
ou da máquina.
– Antes de ligar o motor, assegure-se de que a
embraiagem principal está desengatada.
–
Ao ligar o motor, assegure-se de que as mãos e os pés
estão longe da lâmina.
–
Não altere os parâmetros do regulador de velocidade
do motor nem exceda o limite do regime do motor.
Trabalhar com o motor em regime excessivo pode
aumentar o risco de ferimentos pessoais.
-
4
Jr.
Sodcutter
TRABALHO EM TALUDES
Taludes são um dos principais factores de acidentes
por perda de controlo e capotamento, que por vezes
provocam ferimentos graves ou morte. Todos os taludes exigem cuidado extra.
-
Antes de trabalhar em taludes, avalie os riscos em
jogo.
-
Não trabalhe em taludes se não estiver seguro. A responsabilidade última pelo trabalho seguro em taludes
recai sobre o operador.
-
Não trabalhe em taludes íngremes.
-
Em taludes, todos os movimentos devem ser lentos e
graduais.
-
Não corte torrões perto de desníveis bruscos, valas ou
aterros. A máquina pode capotar subitamente se uma
roda ultrapassar a margem, ou uma margem descair.
INTERRUPÇÃO DO TRABALHO
- Antes de abandonar a posição do operador:
- Estacione em terreno horizontal.
- Desengate a embraiagem principal.
- Desligue o motor.
-
-
-
Desengate a embraiagem principal e aguarde que
as lâminas parem para desengatar a embraiagem da
lâmina:
- Quando não estiver a cortar torrões;
- Para transporte;
- Ao atravessar terrenos não relvados.
Desengate a embraiagem principal, desligue o motor e
aguarde a paragem da lâmina:
- Antes de reabastecer;
- Antes de afinar a lâmina.
Desengate a embraiagem principal, desligue o motor e
desligue o(s) cabo(s) da vela de ignição:
- Antes de eliminar bloqueios;
- Antes de inspeccionar, limpar ou trabalhar na máquina;
- Após bater num objecto estranho. Verifique se a
máquina sofreu danos e repare-os antes de recomeçar;
- Se a máquina começar a vibrar anormalmente:
desligue-a imediatamente. Inspeccione e mande
reparar o que for necessário antes de recomeçar;
- Excepto no caso de reparações ou afinações
especificamente referidas, tais como a afinação do
carburador, que tem de ser feita com o motor a trabalhar. Nesses casos, mantenha mãos e pés longe
de peças em movimento.
-
Deixe a lâmina parar completamente quando interromper o trabalho para eliminar bloqueios, desembaraçar
a lâmina, inspeccionar a máquina, fazer a manutenção
ou reparações.
-
Reduza a regulação da borboleta durante a paragem
do motor e, se este tiver uma válvula de corte, desligue o combustível no fim do trabalho.
SEGURANÇA
Jr.
Sodcutter
SEGURANÇA NA MANUTENÇÃO
Generalidades
Combustível
-
Gasolina e gasóleo são
inflamáveis; os vapores da
gasolina são explosivos.
Manuseie os combustíveis
com todo o cuidado.
AVISO
-
Faça a manutenção da máquina seguindo a tabela
do fabricante e as instruções para segurança máxima e os melhores resultados.
-
Estacione a máquina em terreno horizontal.
-
Nunca deixe que pessoas sem formação prestem
assistência à máquina.
-
-
Os resguardos só devem ser retirados por técnicos
de manutenção qualificados para manutenção/
assistêcia. Volte a instalá-los após o trabalho.
Guarde-os exclusivamente
em recipientes especificamente construídos para combustíveis.
-
Afine ou repare só após a paragem do motor e da
lâmina.
Para reabastecer ou verificar o nível do combustível:
-Desligue o motor e deixe-o arrefecer;
-Não fume;
-
- Desligue o(s) cabo(s) da vela antes de qualquer trabalho de manutenção.
-
Substitua peças gastas, danificadas ou em falta.
Para os melhores resultados, substitua sempre
por peças recomendadas pelo fabricante.
-
Não desmonte a máquina sem anular forças que
possam causar o movimento súbito de peças.
-
Ao trabalhar debaixo da máquina, garanta apoio
adequado, p.ex. cavaletes para a máquina ou
componentes.
-
Não coloque os pés nem as mãos perto ou debaixo de peças em rotação.
-
Limpe completamente derrames de óleo ou de
combustível.
-
Substitua silenciadores danificados.
- Reabasteça sempre ao ar livre;
- Use um funil;
- Não encha demasiado.
- Havendo derrame de combustível, não ligue
o motor antes de limpar e antes da dissipação
dos vapores.
- Volte a tapar bem os recipientes e o reservatório de combustível.
Faíscas de electricidade estática podem originar
incêndio ou explosão. Escorrência de combustível
pode gerar electricidade estática. Como evitar faíscas de electricidade estática:
-
- Para reduzir risco de incêndio, mantenha o motor, o silenciador e a zona onde guarda o combustível sem relva, folhas, resíduos ou lubrificantes.
Mantenha os recipientes de combustível com
ligação a terra. Não encha os recipientes num
veículo, camião ou reboque com revestimento
plástico. Encha os recipientes no chão e longe
do veículo.
-
Lâminas
Se for possível, retire o equipamento accionado
a gasolina do camião ou do reboque e reabasteça no chão. Se o equipamento tiver de ser
reabastecido no camião ou reboque,
-
Mantenha a ponteira em contacto com o bocal
do reservatório ou do recipiente até o reabastecimento ficar concluído. Não use um dispositivo
de fechar-abrir a ponteira.
AVISO
A lâmina da máquina de cortar torrões de relva está muito
afiada e pode cortar. Manuseie-a com todo o cuidado.
Elimine obstruções com
cuidado. Envolva a lâmina ou
use luvas.
-
A lâmina só deve ser substituída. Nunca a desempene nem solde.
-
Mantenha outras pessoas longe de lâminas.
5
SICUREZZA
Jr.
Sodcutter
ARMAZENAMENTO SEGURO
- Desligue o motor e deixe-o arrefecer antes de guardar.
- Esvazie o reservatório de combustível só ao ar livre.
- Guarde o combustível em recipiente aprovado em local fresco e seco.
- Mantenha a máquina e os recipientes de combustível em local fechado à chave para evitar manuseamento
indevido e o acesso a crianças.
- Não guarde a máquina nem o recipiente de combustível perto de aquecedores com chama nua nem com
chama piloto.
6
-
Para reduzir o risco de incêndio, mantenha a área de armazenar gasolina sem aparas de relva, folhas e
lubrificante excessivo.
-
Limpe relva e detritos das unidades de corte, dos accionadores, dos silenciadores e do motor para evitar
incêndios.
SINALÉTICA
Jr.
Sodcutter
ATENÇÃO:
Leia e compreenda o Manual do Operador.
Substitua o Manuel se estiver perdido ou danificado.
COMANDO DA BORBOLETA:
Desloque para a frente para acelerar o motor.
Desloque para trás para desacelerar o motor.
ATENÇÃO:
Use protecção para os ouvidos e óculos de
protecção.
EMBRAIAGEM PRINCIPAL:
Desloque a alavanca para a frente para
engatar.
Desloque a alavanca para trás para
desengatar.
RISCO DE DANIFICAR INSTALAÇÕES NO SUBSOLO:
O contacto com instalações no subsolo pode provocar
fugas, explosões ou electrocussão.
-Verifique se no subsolo da área do trabalho há cabos
eléctricos ou tubos de gás e de água.
-Não trabalhe onde houver instalações no subsolo.
Perigo de lâminas em movimento/corte /esmagamento
Afaste-se das lâminas e dos braços da lâmina ao
trabalhar.
Desligue o motor antes de trabalhos de assistência
ou afinação.
7
SINALÉTICA
Jr.
Sodcutter
PEÇAS ROTATIVAS:
Risco de prisão / amputação
Não trabalhe sem a cobertura.
Desligue o motor antes de prestar assistência.
4163591
ATENÇÃO:
-Leia o Manual do Operador antes
de trabalhos de assistência ou
reparação.
-Retire o cabo da vela antes de
trabalhos de assistência ou reparação.
8
524485
524486
Rode a alavanca no sentido contrário ao
do movimento dos ponteiros do relógio
para engatar o accionamento da lâmina
da máquina.
Rode a alavanca no sentido do movimento dos ponteiros do relógio para
desengatar o accionamento da lâmina
da máquina.
Rode a alavanca no sentido contrário ao
do movimento dos ponteiros do relógio
para engatar o accionamento das rodas.
Rode a alavanca no sentido do movimento dos ponteiros do relógio para
desengatar o accionamento das rodas.
COMANDOS
Jr.
Sodcutter
ALAVANCA (A) DE COMANDO DA EMBRAIAGEM PRINCIPAL
Engata / desengata a correia de transmissão. Aplica
o travão à correia de transmissão quando puxada
FIRMEMENTE para trás.
COMANDO DA BORBOLETA (B)
Controla o regime do motor.
Interruptor do motor
(Localizado no motor)
Desloque para a posição “ON” para ligar o motor.
Desloque para a posição “OFF” para desligar o motor.
Controlo de Presença do Operador (C)
Com o comando da embraiagem principal engatado,
o motor pára se a alavanca de presença do operador
não for accionada.
Alavanca de regulação da profundidade da lâmina (D)
Sobe ou desce a lâmina de corte.
Alavanca de bloqueio da regulação da profundidade da
lâmina (E)
A alavanca de bloqueio mantém a regulação da
profundidade da lâmina na posição pretendida.
Alavanca de bloqueio do ângulo da lâmina (F)
Bloqueia o ângulo da lâmina.
Batente de profundidade (G)
Permite repor a profundidade de corte da lâmina no
valor anterior.
MANÍPULOS DE MUDANÇAS DA LÂMINA E DA RODA
(H & J)
Engatam e desengatam a lâmina para cortar e as
engrenagens para accionamento da máquina.
ALAVANCA DE BLOQUEIO DO RODÍZIO (K)
Permite corte rectilíneo quando bloqueado (descido) e
corte curvo quando desbloqueado (subido).
CAIXA
DAS
GEAR
ENGRENAGENS
CASE
GEAR
CAIXA
DAS
ENGRENAGENS
CASE
‘DESENGATADAS’
"DISENGAGED"
‘ENGATADAS’
"ENGAGED"
MUDANÇAS
MANÍPULO DE MUDANÇAS
SHIFTER HANDLE
SHIFTER
9
FUNCIONAMENTO
Lista de verificações antes do trabalho
(da responsabilidade do operador)
-
Reveja e siga todas as regras de segurança e as
instruções da sinalética de segurança.
Jr.
Sodcutter
ANTES DE LIGAR O MOTOR
1. Familiarize-se com os comandos, como funcionam e o
que comandam.
-
Verifique que todas as etiquetas estão instaladas e em
boas condições. Substitua-as se tiverem danos.
2. Verifique o nível do óleo do motor. Ateste se
necessário, seguindo as recomendações do fabricante
do motor. Siga o manual do motor fornecido com a
máquina.
-
Verifique se as chapas e os resguardos estão nas
posições correctas e em boas condições.
3. Abra a válvula de combustível.
-
Verifique se todos os componentes estão bem
montados correctamente e bem fixos.
4. Encha o reservatório de combustível com a
quantidade e o tipo de combustival que o fabricante
recomendar.
-
Verifique se o motor está livre de sujidades e detritos.
Dê particular atenção às aletas de refrigeração, às
peças do regulador da velocidade e ao silenciador.
Limpe o crivo da admissão de ar. Verifique o filtro de
ar; é preciso prestar assistência.
-
Inspeccione a área. Retire pedras ou outros objectos
duros que possam causar danos.
-
Assegure-se de que não há instalações no subsolo da
área de trabalho.
-
Inspeccione todos os pontos de lubrificação e
lubrifique conforme o manual.
-
Faça uma verificação do funcionamento do sistema
interlock de segurança de cada vez que trabalha com
a máquina. Se não funcionar, repare-o antes de usar
a máquina.
5. COMANDO DE ADMISSÃO DO AR: Para arrancar
a frio, coloque a alavanca da borboleta na posição
média e desloque o comando do ar para a posição
ON. Para arrancar a quente, coloque a alavanca da
borboleta na posição média e desloque o comando do
ar para a posição OFF.
SISTEMA INTERLOCK DE PRESENÇA DO OPERADOR
Para o motor arrancar:
- A embraiagem principal tem de estar desengatada.
Para utilizar a máquina:
- O operador tem de manter em baixo a alavanca
de presença do operador, pois com o engate da
embraiagem principal o motor vai abaixo.
AVISO
A gasolina é extremamente
inflamável e altamente explosiva
em certas condições. NÃO
ESQUECER de colocar a
tampa do combustível após o
reabastecimento.
Encha o reservatório com gasolina normal de
boa qualidade, limpa e sem chumbo até ao nível
recomendado pelo fabricante do motor.
PARA VERIFICAR OU REABASTECER COMBUSTÍVEL:
-
-
-
-
-
-
10
Use um funil para evitar derrames.
Faça-o ao ar livre.
Não fume.
Desligue o motor e deixe-o arrefecer.
Não encha demasiadamente.
Limpe derrames.
FUNCIONAMENTO
Jr.
Sodcutter
Ligar o motor
Cortar torrões de relva
1. Rode o interruptor do motor para a posição “ON”
(ligado).
AVISO
Instalações no subsolo. Electrocussão, explosão,
risco de corte de abastecimento.
Antes de inicar qualquer trabalho, verifique junto das
autoridades locais se há instalações no subsolo e a
que profundidade. Não trabalhe se houver risco de
contacto com instalações no subsolo. O contacto
com instalações no subsolo pode provocar corte de
abastecimentos. O contacto com cabos eléctricos
no subsolo pode provocar electrocussão. O contacto
com tubagem de gás no subsolo pode provocar
explosão.
Esta precaução é particularmente importante ao usar
equipamentos para abrir valas, que trabalham a maior
profundidade.
2. Puxe o motor de arranque para o motor arrancar.
3. Se o ar estiver fechado (ON) quando o motor arranca,
abra-o gradualmente até o motor trabalhar com o ar
todo aberto.
Deslocação do equipamento
Deslocação do equipamento sem lâmina em movimento:
1. Coloque o manípulo de deslocação da lâmina na
posição “desengatada” (apontado para fora do
equipamento) - ver Fig. 1.
2. Regule o motor para velocidade lenta.
3. Engate o manípulo de deslocação de accionamento.
4. Carregue no comando de presença do operador.
5. Engate a alavanca de comando da embraiagem
principal.
6. Reponha a borboleta na velocidade pretendida.
Para deslocar o equipamento com motor parado, coloque
o manípulo de mudança e a alavanca de comando da embraiagem na posição “desengatada”. Empurre o equipamento para o deslocar.
CAIXA
DAS
GEAR
ENGRENAGENS
CASE
GEAR
CAIXA
DAS
ENGRENAGENS
CASE
‘DESENGATADAS’
"DISENGAGED"
‘ENGATADAS’
"ENGAGED"
MUDANÇAS
MANÍPULO DE MUDANÇAS
SHIFTER
HANDLE
SHIFTER
1. Desloque a máquina para a zona de corte dos torrões.
Com o motor desligado e a embraiagem principal
desengatada, coloque-se ao lado direito da máquina.
Com a mão direita solte a alavanca de bloqueio do
comando de profundidade da lâmina e com o guiador
incline a máquina para a frente, segurando-a com a
mão esquerda. Com a mão direita, baixe a alavanca
de comando de profundidade da lâmina até atingir o
batente de profundidade regulado. Aperte a alavanca
de bloqueio.
2. Ligue o motor e engate o accionamento das rodas
e o accionamento da lâmina com a alavanca
de velocidades das rodas e com a alavanca de
velocidades da lâmina.
3. Para corte rectilíneo, deixe a alavanca de bloqueio
do rodízio em baixo. Para cortes irregulares ou em
curva, levante e empurre para a frente a alavanca de
bloqueio do rodízio.
4. Regule a borboleta para velocidade máxima. Com a
máquina inclinada para a frente, engate a embraiagem
principal. A máquina começa a avançar e a lâmina é
accionada. Baixe a máquina para o relvado e corte
uma pequena extensão.
5. Páre a máquina e verifique a espessura do torrão.
Se necessário, regule o batente de profundidade e a
lâmina. Leia a secção Regulação.
6. Continue a cortar. No fim de cada passagem, levante
a alavanca para retirar a lâmina do torrão e rode para
a passagem seguinte.
11
AFINAÇÕES
Jr.
Sodcutter
Afinação da correia de transmissão
Mantenha a correia livre de óleo e sujidade e sempre
com a tensão correcta.
A tensão da correia é afinada soltando quatro (4)
parafusos de montagem do motor e deslocando o
motor na sua base.
A tensão da correia está correcta quando a distância
entre o pino do rolo e a manga na haste da
embraiagem principal for de 25 a 30 mm quando a
embraiagem principal está engatada.
Afinação da CINTA DO TRAVÃO
Depois da afinação correcta:
- Com a alavanca de comando da embraiagem principal
engatada, a cinta do travão não está a travar a polia
grande da correia.
- Quando a alavanca de comando da embraiagem
principal está desengatada, haverá algum efeito de
travagem na polia grande.
- Quando a alavanca de comando da embraiagem
principal está desengatada e firmemente puxada para
trás, o travão fará parar a polia motriz grande.
POLIA
DO
ENGINE
MOTOR
PULLEY
POLIA
DRIVEMOTRIZ
CORREIA
BELT
PULLEY
POLIA
IDLERINTERMEDIÁRIA
PULLEY
PARAFUSO
ENGINE DO
MOTOR
BOLT
MOTOR
ENGINE
PLACA
DE MONTAENGINE
GEM
DO MOTOR
MOUNT
PLATE
25,4 mm)
mm BLOCO
1" (25.4
BLOCK
Ligue a máquina e verifique se trabalha bem. Reajuste, se
necessário. SE o motor for abaixo ao engatar a alavanca
de comando da embraiagem principal, é porque o travão
está muito apertado.
Brake
Band
Cinta do travão
Porca
de aperto
Lock
Nut
1. Para menor efeito de travagem, solte a porca, desaperte o parafuso de ajuste e reaperte a porca.
2. Para maior efeito de travagem, solte a porca, aperte o
parafuso de ajuste e reaperte a porca.
AJUSTAMENTO DA PROFUNDIDADE DE CORTE
20 mm é uma boa profundidade de corte inicial. A
profundidade de corte pode variar com as condições e
com o trabalho a fazer.
1. Faça um ajustamento inicial da profundidade.
Estacione a máquina sobre uma superfície dura. Solte
a alavanca de bloqueio do comando da profundidade
E e desça a alavanca de comando da profundidade D
até que a lâmina assente na superfície. 2. Solte o bloqueio da bitola de profundidade E e coloque
o topo da bitola de profundidade G na marca 3/4”
(20 mm) na etiqueta. Aperte o botão de bloqueio da
bitola de profundidade para fixar o ajuste da bitola de
profundidade.
3. Com a mão esquerda, incline a máquina para a frente,
ao mesmo tempo que desce a alavanca de comando
da profundidade D até que a travessa do comando
da profundidade encoste ao batente de profundidade
G. Aperte a alavanca de bloqueio E para bloquear o
ajuste de profundidade. Faça uma passagem de teste
no relvado. Verifique a profundidade de corte.
12
Haste do suporte do resguardo
Guard Support Rod
Parafuso de ajuste
Adjusting
Screw
4. Reajuste a bitola de profundidade de corte G e
a alavanca de comando da profundidade D, se
necessário.
NOTA: Os números na bitola de profundidade não
representam necessariamente a espessura do torrão
cortado. Os números são úteis como referência para fazer
alterações.
AFINAÇÕES
Jr.
Sodcutter
Afinação do comando de presença do operador
1. Para afinar o cabo de presença do operador, puxe o
mais possível para trás o manípulo de comando da
embraiagem A.
2. Carregue o mais possível no manípulo de presença do
operador (guiador direito).
3. Afine o cabo até o braço do pivô C contactar o braço
que sai do interruptor de presença do operador B.
4. Aperte o grampo do cabo para o prender. Verifique o
funcionamento correcto.
Tampa retirada para se ver melhor
Ângulo da lâmina (passo)
Em condições de trabalho normais, o ângulo da
lâmina é mínimo (fundo da lâmina plano). Em solo
extremamente duro, ou ao cortar com lâmina gasta,
a lâmina pode tender a sair do solo. Nesses casos
poderá ser conveniente virar o ângulo da lâmina para
baixo (ver Afinação do ângulo da lâmina). Um teste
rápido permite determinar o melhor ângulo.
NOTA: Ângulos extremos da lâmina provocam cargas
suplementares nos braços laterais. Para reduzir a
carga na máquina, trabalhe com o menor ângulo da
lâmina que dê o melhor resultado.
DRIVE
GUIADOR
WHEEL
BRAÇO
LATERAL
SIDE ARM
BLADE
FUNDO DA
LÂMINA
BOTTOM
ÂNGULO
DA
BLADE
LÂMINA
ANGLE
(PASSO)
(Pitch)
AFINAÇÃO DO ÂNGULO DA LÂMINA (PASSO)
1. Solte a alavanca de bloqueio do comando do ângulo
da lâmina F e desloque o quadro H para a frente
ou para trás até a lâmina ficar no ângulo pretendido
(passo).
2. Aperte a alavanca de bloqueio do comando do ângulo
da lâmina F.
13
AFINAÇÕES
MOLA DE SUPORTE DO MANÍPULO
Esta mola S ajuda a suportar o manípulo. Se os quatro (4)
pontos de montagem do manípulo derem de si ou estiverem empenados, as duas porcas de ajuste do bloqueamento T podem ser apertadas para baixo para aumentar a
força da mola e subir o manípulo.
PARAFUSOS DE BATENTE DO MANÍPULO
Estes dois parafusos Y limitam a amplitude do movimento
do manípulo.
Isto evita danificar os isoladores do manípulo e dá mais
controlo da máquina quando é preciso mais força para levantar ou virar. A posição do parafuso do batente traseiro
é regulável.
Solte os dois parafusos X nas placas de centrar os parafusos de cada lado e aperte com os parafusos de batente
centrados nos dois furos Z do manípulo.
14
Jr.
Sodcutter
MANUTENÇÃO / ASSISTÊNCIA
Jr.
Sodcutter
AVISO
Use sempre peças genuínas Schiller Grounds Care, Inc.
ou peças com características equivalentes, incluindo tipo,
resistência e material. Caso contrário, o produto pode
funcionar mal e pode haver ferimentos no operador e em
pessoas próximas.
O monóxido de carbono dos gases de escape não tem
cheiro e é mortal. Nunca deixe o motor a trabalhar em
espaços fechados por causa dos gases de escape.
Garanta suficiente renovação do ar para não haver acumulação dos gases de escape.
Substitua imediatamente sinalética de aviso que se torne
ilegível.
MANUTENÇÃO DIÁRIA
Sistema de Presença do Operador
Para o motor arrancar, a alavanca de presença do
operador tem de ser segurada quando o comando da
embraiagem principal é engatada.
Em todas as guarnições de lubrificação sob pressão
deve ser usado um bom lubrificante à base de lítio.
Para verificar:
1. Ligue o motor e ande com a borboleta a 1/2, com a
embraiagem principal desengatada.
A máquina de cortar torrões tem 6 dispositivos de
lubrificação. Lubrifique os braços (1 em cada lado) e
os braços laterais (1 em cada lado) de 4 em 4 horas
de uso.
Lubrifique os pivôs dos braços laterais (1 em cada
lado - topo do equipamento) de 8 em 8 horas de uso.
2. Engate a embraiagem principal segurando na
alavanca de presença do operador. Solte a alavanca
de presença do operador: o motor deve parar.
Repare a máquina antes de a usar se o sistema de
presença do operador não fizer parar o motor.
Verifique o nível do óleo lubrificante com a vareta E
localizada no topo da caixa de engrenagens. Verifique
a lubrificação com a vareta nas rodas dentadas; não a
enrosque.
Lâminas:
Verifique se há danos. Substitua lâminas partidas,
fendidas ou danificadas. Não solde nem endireite
lâminas. Substitua ou afie lâminas rombudas. Leia as
instruções para afiar.
Componentes:
Aperte porcas e parafusos soltos. Substitua
contrapinos partidos ou em falta. Elimine outros
problemas antes de trabalhar.
Motor:
Leia o manual do motor para a periodicidade das
mudanças de óleo e suas características. Leia o
manual do motor para a periodicidade da assistência
ao filtro do ar e como proceder.
Lubrificação:
A caixa de engrenagens vem de fábrica cheia com 1,7
l de EP 140 Gear Lube. Não aumente a quantidade
excepto se houver mudança de óleo ou fugas. Bujão
de dreno D da caixa de engrenagens.
15
MANUTENÇÃO / ASSISTÊNCIA
AFIAÇÃO DA LÂMINA
Use o equipamento de protecção pessoal
apropriado ao afiar lâminas.
Jr.
Sodcutter
LÂMINA FIXA
BOTTOM
BLADE
45O
SENTIDO
DO
FILE
AFIAMENTO
DIRECTION
1. Afie à mão a lâmina fixa a 45º até ficar uniforme.
2. Para manter o gume de corte inferior a 1,5 mm
a 45º, afie a face fresada a 15º para menos de
1,5 mm.
3. Afie à mão as lâminas laterais a 45º até ficarem
uniformes.
4. Para manter o gume de corte inferior a 1,5 mm
a 45º, afie a face fresada a 15º para menos de
1,5 mm.
15O
ESTA
FACE
THIS
LISA (sem
SURFACE
SMOOTH
rebarba)
(No Burrs)
1,5 mm no máximo
1/16"(1.5mm)
Maximum
LÂMINA
LATERAL
SIDE BLADE
ESTA
FACE LISA
(sem
THIS
SURFACE
SMOOTH
(Norebarba)
Burrs)
1,51/16"
mm no
máximo
MAX
SENTIDO
FILE DO
AFIAMENTO
DIRECTION
MILLED
GUME
EDGE
FRESADO
DIREZIONE
FILE
DIRECTION
DELLA
LIMA
SUBSTITUIÇÃO DA CORREIA DE TRANSMISSÃO
1. Retire o resguardo lateral esquerdo.
2. Retire a porca que fixa a cinta do travão à haste
de comando da embraiagem.
3. Retire o contrapino do lado de fora da haste de
suporte do resguardo e passe a cinta do travão
para a porca na haste.
4. Solte os dois parafusos A que fixam a guia da
correia para haver espaço para retirar a correia.
5. Retire a correia da polia do motor. Para isso,
solte os resguardos superior e inferior, ou retire a
polia do motor.
6. Instale a nova correia procedendo de ordem
inversa. Encaminhe a correia como se indica.
7. Afine a correia e a cinta do travão. Leia a
secção Regulação.
16
Jr.
Sodcutter
INSTRUÇÕES PARA PARAGENS LONGAS
AVISO
Para evitar explosão ou ignição de gasolina
vaporizada, não guarde o equipamento com
gasolina no reservatório em recinto fechado
onde haja chamas nuas (fornalha ou chama
piloto de aquecedor de água).
Guardar diariamente
1. Verifique diariamente o nível do óleo do motor e
o elemento do filtro de ar.
2. Verifique o nível do óleo na caixa das
engrenagens.
3. Feche a válvula da gasolina no fundo do
reservatório.
4. Limpe a lâmina de corte (relva, sujidade, etc.).
ARMAZENAMENTO
ARMAZENAMENTO PROLONGADO
Antes de guardar o equipamento por um período
superior a 30 dias:
1. Drene todo o combustível do reservatório e da
tubagem (use uma mangueira ou tubo de combustível desde a válvula do reservatório até um
recipiente adequado).
2. Ponha o motor a trabalhar até esgotar todo o
combustível do carburador.
3. Com o motor ainda quente, deixe sair o óleo do
cárter e encha com o peso correcto de óleo em
relação à estação do ano em que a máquina vai
ser usada a seguir.
4. Retire a vela de ignição e deite no cilindro uma
pequena quantidade de óleo do motor. Rode o
motor várias vezes para distribuir o óleo.
5. Lubrifique todos os pontos de lubrificação.
6. Limpe e passe óleo na lâmina de corte para
evitar que enferruje.
Para trabalhar com o equipamento após armazenamento prolongado:
1. Encha o reservatório de combustível com combustível novo e limpo.
2. Verifique o nível do óleo do cárter e ligue o motor.
3. Verifique se o sistema de combustível tem fugas.
17
REPARAÇÃO DE AVARIAS
Jr.
Sodcutter
PROBLEMAS POSSÍVEIS
CAUSA PROVÁVEL
SOLUÇÃO
A lâmina não se mantém no solo.
A. A lâmina fixa está arredondada.
A. Afiar ou substituir a lâmina. Ver
página 15.
B. O ângulo da lâmina não está bem afinado.
B. Afinar o ângulo da lâmina. Ver
página 13.
Raízes na lâmina late- A. Alguns tipos de relvado e de solo provoral ou na lâmina fixa.
cam este problema.
A. Manter a lâmina extra afiada e
afiar para um ângulo baixo.
A correia solta-se.
A. Usar exclusivamente a correia
especial Ryan de fábrica.
A. Tipo errado de construção da correia.
B. Folga excessiva quando o esticador é
desengatado.
B. Avançar o motor e reajustar a haste de comando.
As alavancas de
bloqueio não apertam
quando puxadas para
limite da deslocação.
A. Porca de bloqueio com rosca moída.
A. Substituir a porca de bloqueio.
B. Porca de bloqueio mal ajustada.
B. Apertar a porca de bloqueio no
outro lado da haste.
Correia em contacto
com polias e a máquina avança lentamente
com a embraiagem
desengatada.
A. Correia velha e gasta, ou não é do tipo
fornecido com a máquina.
A. Substituir pela correia de fábrica,
construída para embraiagens de
aperto de correia.
B. Ferrugem ou tinta nos gornes das polias.
C. Motor demasiado avançado.
A roda intermediária
A. A cinta do travão não está ligada à emnão engata a correia
braiagem, ou está partida.
quando a alavanca da
embraiagem é movida
para a frente.
18
B. Limpar e polir as polias.
C. Recuar o motor.
A. Voltar a colocar a extremidade superior da cinta do travão na embraiagem, ou substituir a cinta do travão.
Jr.
Sodcutter
Modelos: 744844H............... Jr. Sodcutter - 30,5 cm
744845H............... Jr. Sodcutter - 45,7 cm
Motor:
Modelo.........4 tempos 6,5 CV B&S Vanguard, Modelo
12H332, Tipo 0159, Trim B8, 205 cc
Motor de arranque......................................Retrocesso
Controlador de velocidade......... 3600 rpm ± 100 rpm,
sem carga
Embraiagem.....................................Do tipo de aperto
de cinta sob carga de mola
Redução:
Motor para lâmina..............................................2.94:1
Motor para rodas motrizes................................ 55.8:1
Modelos: 744944C............... Jr. Sodcutter - 30,5 cm
744945C............... Jr. Sodcutter - 45,7 cm
Motor:
Modelo..................................Honda, 5,5 HP, 4 tempos
Modelo GX160-K1QX2,
GX160 OHV 163 cc
Motor de arranque..................................... Retrocesso
Controlador de velocidade......... 3600 rpm ± 100 rpm,
sem carga
Embraiagem....................... Do tipo de aperto de cinta
sob carga de mola
ESPECIFICAÇÕES
Passo da lâmina:
Afinação da alavanca manual........Variável de 0O a 9O
Velocidade da lâmina:
1225 oscilações/min a 3600 rpm do motor
Dimensões:
Largura............................................................600 mm
Comprimento................................................ 1244 mm
Altura...............................................................838 mm
Distância entre eixos...................................... 483 mm
Peso:
744844H & 744944C......................................... 151 kg
744845H & 744945C.........................................171 kg
TINTA PARA RETOQUES:
0,5 l spray, ref. N/P 65334
Redução:
Motor para lâmina..............................................2.94:1
Motor para rodas motrizes................................ 55.8:1
Rodas:
Accionamento.................... 203 mm diâm. c/maçaneta
rosca vulcanizada no cubo
Atrás...............Pneus semipneumáticos 203 X 45 mm
com rolamentos de esferas
com pré-lubrificação
Accionamento:
Motor à caixa de engrenagens......................... Correia
de secção “A”
Caixa de engrenagens ao veio motor
e accionamento das lâminas............Corrente de rolos
Caixa de engrenagens:
Lubrificação...................................... EP140 Gear lube
Capacidade...........................................................1,7 l
Largura de corte:
744844G & 744944C.......................................298 mm
744845G & 744945C...................................... 457 mm
Profundidade de corte:............................ Até 38 mm
19
Declaração de Conformidade da CE 4166261 REV A
O Fabricante abaixo assinado:
Schiller Grounds Care, Inc.
One Bob-Cat Lane
Johnson Creek, WI 53038
Chuck Clark
Director de Operações
Data: 24 de Janeiro de 2011
Representante Autorizado da UE:
Earlsmere Limited
Unit 18 Valley Road
Station Road Industrial Estate
Wombwell, Barnsley, South Yorkshire, S73 OBS Reino Unido
Jim White
Director
Data: 24 de Janeiro de 2011
Declara que a máquina a seguir descrita:
Marca e modelo:........................................................ Ryan, Jr. Sodcutter
Categoria:.................................................................... Cortador de torrões de relva
Séries:.......................................................................... 744844H, 744845H
Motor............................................................................ Briggs & Stratton
Tipo:............................................................................. 13H3320159B8
Velocidade:................................................................. 3600 rpm ± 100 rpm
Potência real instalada:............................................. 6,5 CV
Largura de trabalho:.................................................. 305 mm para 744844H
...................................................................................... 457 mm para 744845H
Cumpre as especificações da Directiva Europeia, dos Anexos e das Regulamentações seguintes, transpondo
para a legislação nacional:
Directivas/Normas harmonizadas:
Directiva Máquinas:................................................... 2006/42/EC
Directiva EMC:........................................................... 2004/108/EC
Nível sonoro na Directiva Ambiente:....................... 2000/14/EC
Directiva Vibração:..................................................... 2002/44/EC
Emissões Fora da Estrada:...................................... 2002/88/EC
Som:
Os níveis sonoros foram determinados segundo as Directivas 2000/14/EC, 2006/42/EC e a Norma
ISO 11094
Nível sonoro garantido......................................... Modelo 744844H ............105 dB
.............................................................................. Modelo 744845H.............107 dB
Ouvido do Operador............................................. Modelo 744844H...............83 dB
.............................................................................. Modelo 744845H...............83 db
Vibrações:
As vibrações mão/braço foram medidas nos manípulos direito e esquerdo do operador segundo
ISO 5349-1-2001 e ISO 5349-2-2001. Os níveis foram calculados aplicando ISO/DIS 5395-1, de
acordo com 2002/44/EC.
Só é indicado o valor mais elevado registado à esquerda e à direita.
Nível de vibrações garantido................................ 9,53 m/s² ..........Modelo 744844H
Nível de vibrações garantido............................... 8,39 m/s² ..........Modelo 744845H
Utilização adequada:
Esta máquina destina-se a cortar torrões em áreas relvadas semeadas para recolha de torrões e
remoção de torrões em geral. Destina-se a áreas planas e taludes ligeiros. Pode haver perda de
controlo em taludes íngremes. Não se destina a áreas com pedras.
20
Declaração de Conformidade da CE
O Fabricante abaixo assinado:
Schiller Grounds Care, Inc.
One Bob-Cat Lane
Johnson Creek, WI 53038
Representante Autorizado da UE:
Earlsmere Limited
Unit 18 Valley Road
Station Road Industrial Estate
Wombwell, Barnsley, South Yorkshire, S73 OBS Reino Unido
4164674 REV A
Chuck Clark
Director de Operações
Data: 1 de Fevereiro de 2010
Jim White
Director
Data: 1 de Fevereiro de 2010
Declara que a máquina a seguir descrita:
Marca e modelo:........................................................ Ryan, Jr. Sodcutter
Categoria:.................................................................... Cortador de torrões de relva
Séries:.......................................................................... 744944C, 744945C
Motor............................................................................ Honda
Tipo:............................................................................. GX160-K1QX2
Velocidade:................................................................. 3600 rpm
Potência real instalada:............................................. 5,5 CV
Largura de trabalho:.................................................. 305 mm para 744944C
...................................................................................... 457 mm para 744945C
Cumpre as especificações da Directiva Europeia, dos Anexos e das Regulamentações seguintes, transpondo
para a legislação nacional:
Directivas/Normas harmonizadas:
Directiva Máquinas:................................................... 2006/42/EC
Directiva EMC:........................................................... 2004/108/EC
Nível sonoro na Directiva Ambiente:....................... 2000/14/EC
Directiva Vibração:..................................................... 2002/44/EC
Emissões Fora da Estrada:...................................... 2002/88/EC
Som:
Os níveis sonoros foram determinados segundo as Directivas 2000/14/EC, 2006/42/EC e a Norma
ISO 11094
Nível sonoro garantido.............................................. 103 dB
Ouvido do Operador.................................................. 88 dB
Vibrações:
As vibrações mão/braço foram medidas nos manípulos direito e esquerdo do operador segundo
ISO 5349-1-2001 e ISO 5349-2-2001. Os níveis foram calculados aplicando ISO/DIS 5395-1, de
acordo com 2002/44/EC.
Só é indicado o valor mais elevado registado à esquerda e à direita.
Nível de vibrações garantido................................... 9 m/s²
Utilização adequada:
Esta máquina destina-se a cortar torrões em áreas relvadas semeadas para recolha de torrões e
remoção de torrões em geral. Destina-se a áreas planas e taludes ligeiros. Pode haver perda de
controlo em taludes íngremes. Não se destina a áreas com pedras.
21
SCHILLER GROUNDS CARE, INC.
ONE BOB-CAT LANE
P.O. BOX 469
JOHNSON CREEK, WI 53038
920-699-2000
www.schillergc.com
©Schiller Grounds Care, Inc. 2010


