1
Contact SAMSUNG WORLDWIDE
If you have any questions or comments relating to Samsung products, please contact the SAMSUNG customer care center.
Contate a SAMSUNG EM TODO O MUNDO
Caso tenha dúvidas ou comentários sobre os produtos da Samsung, entre em contato com o centro de atendimento ao cliente da
SAMSUNG.
Country
Customer Care Center
Web Site
ARGENTINA
0800-333-3733
www.samsung.com
BRAZIL
0800-124-421
4004-0000
www.samsung.com
CHILE
800-SAMSUNG(726-7864)
www.samsung.com
Nicaragua
00-1800-5077267
www.samsung.com
Honduras
800-7919267
www.samsung.com
COSTA RICA
0-800-507-7267
www.samsung.com
ECUADOR
800-6225
www.samsung.com
EL SALVADOR
1-800-299-0013
www.samsung.com
GUATEMALA
1-800-299-0013
www.samsung.com
JAMAICA
1-800-234-7267
www.samsung.com
PANAMA
800-7267
www.samsung.com
PUERTO RICO
1-800-682-3180
www.samsung.com
REP. DOMINICA
1-800-751-2676
www.samsung.com
TRINIDAD & TOBAGO
1-800-SAMSUNG(726-7864)
www.samsung.com
VENEZUELA
0-800-100-5303
www.samsung.com
COLOMBIA
01-8000112112
www.samsung.com
Plasma TV
user manual
imagine the possibilities
Thank you for purchasing this Samsung product.
To receive more complete service, please register
your product at
www.samsung.com/register
Model______________ Serial No.______________
© 2010 Samsung Electronics Co., Ltd. All rights reserved.
[PC450]BN68-02795A-01L02.indb 1
BN68-02795A-01
2010-03-30 오후 3:37:11
Figures and illustrations in this User Manual are provided for reference only and may differ from actual product appearance.
Product design and specifications may be changed without notice.
User Instructions
• Screen Image retention
Do not display a still image (such as on a video game) on the plasma display panel for more than several minutes as it can cause screen image
retention. This image retention is also known as ‘screen burn’. To avoid such image retention, refer to page 15 of this manual to reduce the degree of
brightness and contrast of the screen when displaying a still image.
• Heat on the top of the Plasma TV
The top side of the product may be hot after long periods of use as heat dissipates from the panel through the vent hole in the upper part of the
product.
This is normal and does not indicate any defect or operation failure of the product.
However, children should be prevented from touching the upper part of the product.
• The product is making a ‘cracking’ noise.
A ‘cracking’ noise may occur when the product contracts or expands due to a change in the surrounding environment such as temperature or
humidity. This is normal and not a defect of the unit.
• Cell Defects
The PDP uses a panel consisting of 2,360,000(HD-level) to 6,221,000(FHD-level) pixels which require sophisticated technology to produce. However,
there may be a few bright or dark pixels on the screen. These pixels will have no impact on the performance of the product.
• Avoid operating the TV at temperatures below 41°F (5°C)
• A still image displayed too long may cause permanent damage to the PDP Panel.
Watching the Plasma TV in 4:3 format for a long period of time may leave traces of borders displayed on the left, right and center of
the screen caused by the difference of light emission on the screen. Playing a DVD or a game console may cause similar effects to
the screen.
Damages caused by the above effect are not covered by the Warranty.
• After-images on the Screen.
Displaying still images from Video games and PC for longer than a certain period of time may produce partial after-images.
To prevent this effect, reduce the ‘brightness’ and ‘contrast’ when displaying still images for a long time.
• Warranty
Warranty does not cover any damage caused by image retention.
Burn-in is not covered by the warranty.
Securing the Installation Space
Keep the required distance between the product and other objects (e.g. walls) to ensure proper ventilation.
Failing to do so may result in fire or a problem with the product due to an increase in the internal temperature of the product.
✎✎ When using a stand or wall-mount, use parts provided by Samsung Electronics only.
xx If you use parts provided by another manufacturer, it may result in a problem with the product or an injury due to the product falling.
✎✎ The appearance may differ depending on the product.
Installation with a stand
Installation with a wall-mount
10 cm
10 cm
10 cm
10 cm
10 cm
10 cm
10 cm
2
English
[PC450]BN68-02795A-01L02.indb 2
2010-03-30 오후 3:37:11
Contents
Getting Started
yy Setup Menu............................................................. 20
yy
yy
yy
yy
yy
yy
yy Support Menu.......................................................... 23
List of Features.......................................................... 4
Accessories............................................................... 4
Viewing the Control Panel.......................................... 5
Viewing the Remote Control....................................... 6
Connecting to an Antenna......................................... 7
Plug & Play (Initial Setup)............................................ 7
Setting the Time
Using the Sleep Timer
Setting the On / Off Timer
Locking Programs
Other Features
Picture In Picture (PIP)
20
20
20
21
21
22
Connections
Advanced Features
yy
yy
yy
yy
yy Media Play............................................................... 24
Connecting to an AV Device....................................... 8
Connecting to an Audio Device.................................. 9
Connecting to a PC................................................... 9
Changing the Input Source...................................... 11
Setting Up Anynet+ Switching between Anynet+ Devices Recording Listening through a Receiver Troubleshooting for Anynet+
How to Navigate Menus........................................... 11
Using the INFO button (Now & Next guide).............. 12
Planning Your Viewing.............................................. 12
Channel Menu......................................................... 12
Seeing Channels
Using Favorite Channels
Memorizing Channels
Editing Channels
Other Features
12
13
13
14
14
yy FM Transmitter Setup............................................... 33
Frequency Configuration
FM Transmitter Installation Guide
Supported FM Transmitter formats
yy Sound Menu............................................................ 18
Changing the Preset Sound Mode
Adjusting Sound Settings
Sound Settings
18
18
18
33
33
34
yy Installing the Wall Mount.......................................... 35
yy Securing the TV to the wall...................................... 36
To Avoid the TV from Falling
36
ENGLISH
15
15
15
16
18
31
31
31
32
32
Other Information
yy Picture Menu........................................................... 15
Changing the Preset Picture Mode
Adjusting Picture Settings
Economical Solutions
Changing the Picture Options
Setting up the TV with Your PC
24
25
28
29
yy Anynet+................................................................... 30
Basic Features
yy
yy
yy
yy
Connecting a USB Device
Screen Display
Playing Multiple Files Media Play - Additional Functions
yy Troubleshooting....................................................... 37
yy Specifications.......................................................... 40
License
40
yy Index....................................................................... 41
Check the Symbol!
TO
O
LS
t
This function can be used by
pressing the TOOLS button on the
remote control.
Note
Step by Step Guide
Indicates additional information.
Check here for instructions on how to open the
relevant submenu within the OSD (on screen
display).
English
[PC450]BN68-02795A-01L02.indb 3
3
2010-03-30 오후 3:37:11
Getting Started
List of Features
yy Excellent Digital Interface & Networking: With a built-in HD digital tuner, nonsubscription HD broadcasts can be viewed
without a cable box / STB (Set-Top-Box) satellite receiver.
yy Media Play (USB): Allows you to play music files, pictures and movies saved on a USB device (p. 24).
yy Self Diagnosis: You can check to make sure picture and sound operate normally (p. 23).
Accessories
✎✎Please make sure the following items are included with your PDP TV. If any items are missing, contact your dealer.
✎✎The items’ colors and shapes may vary depending on the models.
yy Remote Control & Batteries (AAA x 2) (Not available in some locations)
yy Owner’s Instructions
yy Warranty Card / Safety Guide (Not available in some locations)
yy Blanking Bracket
yy Cleaning Cloth
yy Power Cord
yy FM Transmitter / FM Transmitter Clamp
(Not available in some locations)
Input Cables (Sold Separately)
HDMI
4
HDMI-DVI
Component
Composite (AV)
Coaxial (RF)
VGA
English
[PC450]BN68-02795A-01L02.indb 4
2010-03-30 오후 3:37:12
01 Getting Started
Viewing the Control Panel
✎✎The product color and shape may vary depending on the model.
Power Indicator
Remote control sensor
Speakers
SOURCEE
MENU
y
z
Power Indicator
P (Power)
Remote control sensor
Toggles between all the available input sources. In the on-screen menu, use this
button as you would use the ENTERE button on the remote control.
Displays an on-screen menu, the OSD (on screen display) of your TV’s features.
Adjusts the volume. In the OSD, use the y buttons as you would use the
◄ and ► buttons on the remote control.
Changes the channels. In the OSD, use the z buttons as you would use the
▼ and ▲ buttons on the remote control.
Blinks and turns off when the power is on and lights up in standby mode.
Turns the TV on or off.
Aim the remote control towards this spot on the TV.
Standby mode
Do not leave your TV in standby mode for long periods of time (when you are away on a holiday, for example). A small amount
of electric power is still consumed even when the power button is turned off. It is best to unplug the power cord.
English
[PC450]BN68-02795A-01L02.indb 5
5
2010-03-30 오후 3:37:13
Getting Started
Viewing the Remote Control
SOURCE
Displays and selects the available video
sources (p. 11).
Turns the TV on and off.
Press to directly access channels.
Press to select additional channels (digital)
being broadcasted by the same station.
For example, to select channel “54.3”,
press “54”, then press “-” and “3”.
Returns to the previous channel.
To mute all TV output sound.
Adjusts the volume.
Changes channels.
CH LIST
Brings up the OSD.
LS
GUIDE
IN
FO
Quickly select frequently used functions.
MEDIA.P
TO
O
Views Media Play (USB) (p. 24).
Displays the channel list on the screen
(p. 12).
Displays the EPG (Electronic Program
Guide) (p. 12).
Press to display information on the TV
screen.
Selects the on-screen menu items and
changes the values seen on the menu.
RN
Buttons used in the Channel list,
Media Play (USB) menu, etc.
Use these buttons in Media Play (USB)
and Anynet+ (HDMI-CEC) modes
(p. 24, 30).
(�: Controls recording for Samsung
recorders that have the Anynet+ feature)
A
Exits the menu.
EX
TU
IT
RE
Returns to the previous menu.
B
C
D
P.MODE
S.MODE
MTS
FAV.CH
P.SIZE
CC
P.MODE: Press to select the picture
mode (p. 15).
S.MODE: Press to select the sound mode
(p. 18).
MTS: Press to choose stereo, mono or
Separate Audio Program (SAP broadcast)
(p. 19).
FAV.CH: Displays Favorite channel lists on
the screen (p. 13).
P.SIZE: Selects the picture size (p. 16).
CC: Controls the caption decoder (p. 21).
Installing batteries (Battery size: AAA)
✎✎NOTE
xx Use the remote control within 23 feet from the TV.
xx Bright light may affect the performance of the remote
control. Avoid use when nearby fluorescent lights or neon
signs.
xx The color and shape may vary depending on the model.
6
English
[PC450]BN68-02795A-01L02.indb 6
2010-03-30 오후 3:37:13
01 Getting Started
Connecting to an Antenna
When the TV is initially powered on, basic settings proceed automatically.
✎✎Connecting the power cord and antenna.
VHF/UHF Antenna
or
Cable
ANT OUT
Power Input
Plug & Play (Initial Setup)
When the TV is initially powered on, a sequence of on-screen prompts will assist in configuring basic settings. Press the
POWERP button. Plug & Play is available only when the Input source is set to TV.
✎✎To return to the previous step, press the Red button.
1
2
Selecting a language
Selecting Store Demo
or Home Use
Press the ▲ or ▼ button, then press the ENTERE button.
POWER
Select the desired OSD (On Screen Display) language.
Press the ◄ or ► button, then press the ENTERE button.
yy Select the Home Use mode. Store Demo Mode is for retail
environments.
yy To return the unit’s settings from Store Demo to Home Use
(standard): Press the volume button on the TV. When you
see the volume OSD, press and hold MENU for 5 sec.
Press the ▲ or ▼ button, then press the ENTERE button.
yy If the antenna is connected to ANT 1 IN (AIR), select Air and if it is connected to
ANT 2 IN (CABLE), select Cable.
yy If both ANT 1 IN (AIR) and ANT 2 IN (CABLE) are connected, select Air+Cable.
After selecting the antenna source to memorize, select Search. The TV will begin
memorizing all of the available channels. For more information, refer to
Channel → Auto Program (p. 13).
yy Press the ENTERE button at any time to interrupt the memorisation process.
Set the Clock Mode automatically or manually.
yy Auto: Allows you to select time zone.
yy Manual: Allows you to manually set the current date and time (p. 20).
The connection method for the best HD screen quality is displayed.
3
Selecting an antenna
4
Selecting a channel
5
Setting the
Clock Mode.
6
7
Viewing the
HD Connection Guide.
Enjoy your TV.
Press the ENTERE button.
P
INFO
If You Want to Reset This Feature...
OO MENUm → Setup → Plug & Play → ENTERE
English
[PC450]BN68-02795A-01L02.indb 7
7
2010-03-30 오후 3:37:13
Connections
Connecting to an AV Device
Using an HDMI or HDMI/DVI cable: HD connection (up to 720p/1080i)
Available devices: DVD, Blu-ray player, HD cable box, HD STB (Set-Top-Box) satellite receiver.
R
W
Red
White
Device
Device
HDMI OUT
DVI OUT
AUDIO OUT
R
W
R-AUDIO-L
✎✎HDMI IN 1(DVI), 2, 3, PC/DVI AUDIO IN
xx When using an HDMI/DVI cable connection, you must use the HDMI IN 1(DVI) jack for video. A DVD, Blu-ray
player, HD cable box, or HD STB satellite receiver may require a DVI-HDMI (DVI to HDMI) cable or DVI-HDMI
(DVI to HDMI) adapter. The PC/DVI AUDIO IN jack is required for audio.
xx If an external device such as a DVD / Blu-ray player / HD cable box / HD STB satellite receiver supporting
HDMI versions older than 1.3 is connected, the TV may operate abnormally (e.g. no screen display / no sound
/ annoying flicker / abnormal color).
xx If there is no sound after connecting an HDMI cable, check the HDMI version of the external device. If you
suspect the version is older than 1.3, contact the provider of the device to confirm the HDMI version and
request an upgrade.
xx It is recommended you purchase an HDMI-certified cable. Otherwise, the screen may appear blank or a
connection error may occur.
Using a Component (up to 720p/1080i) or Audio/Video (480i only) Cable
Available devices: DVD, Blu-ray player, cable box, STB satellite receiver, VCR
Red
W
White
R
Red
B
R
G
Blue Green
Device
Red
R
W
R
B
G
R
W
R
B
G
AUDIO OUT
R-AUDIO-L
COMPONENT OUT
PR
PB
Y
Device
R
W
R
W
AUDIO OUT
W
Y
White Yellow
Y
Y
R
VIDEO OUT
R-AUDIO-L
✎✎When connecting to AV IN 1 the color of the AV IN 1 [Y/VIDEO] jack (green) will not match the video cable
(yellow).
✎✎To obtain the best picture quality, the Component connection is recomended over the A/V connection.
8
English
[PC450]BN68-02795A-01L02.indb 8
2010-03-30 오후 3:37:14
02 Connections
Connecting to an Audio Device
Using an Optical (Digital) or Audio (Analog) Cable Connection
Available devices: Digital Audio System, Amplifier, DVD home theater
AUDIO IN
Amplifier / DVD
home theater
R-AUDIO-L
Digital Audio System
OPTICAL
R
W
Red
White
✎✎DIGITAL AUDIO OUT (OPTICAL)
xx When a Digital Audio System is connected to the DIGITAL AUDIO OUT (OPTICAL) jack, decrease the volume
of both the TV and the system.
xx 5.1 CH (channel) audio is available when the TV is connected to an external device supporting 5.1 CH.
xx When the receiver (amplifier or DVD home theater) is set to on, you can hear sound output from the TV’s
optical jack. When the TV is receiving a DTV signal, the TV will send 5.1 CH sound to the amplifier or DVD
home theater. When the source is a digital component such as a DVD / Blu-ray player / cable box / STB
(Set-Top-Box) satellite receiver and is connected to the TV via HDMI, only 2 CH audio will be heard from the
amplifier or DVD home theater. If you want to hear 5.1 CH audio, connect the digital audio out jack from your
DVD / Blu-ray player / cable box / STB satellite receiver directly to an amplifier or home theater.
✎✎AUDIO OUT: Connects to the audio input jacks on your amplifier / DVD home theater.
xx When connecting, use the appropriate connector.
xx When an audio amplifier is connected to the AUDIO OUT jacks: Decrease the volume of the TV and adjust the
volume level with the Amplifier’s volume control.
Connecting to a PC
Using an HDMI/DVI cable or a D-sub cable
AUDIO OUT
DVI OUT
AUDIO OUT
PC OUT
English
[PC450]BN68-02795A-01L02.indb 9
9
2010-03-30 오후 3:37:15
Connections
Display Modes (D-Sub and HDMI/DVI Input)
Optimal resolution
yy 42" : 1024 X 768 @ 60Hz
yy 50" : 1360 X 768 @ 60Hz
Mode
Resolution
Horizontal
Frequency
(KHz)
Vertical
Frequency
(Hz)
Pixel Clock
Frequency
(MHz)
Sync Polarity
(H / V)
42"
50"
IBM
640 x 350
720 x 400
31.469
31.469
70.086
70.087
25.175
28.322
+/-/+
>
>
>
>
MAC
640 x 480
832 x 624
35.000
49.726
66.667
74.551
30.240
57.284
-/-/-
>
>
>
>
VESA CVT
720 x 576
1280 x 720
35.910
56.456
59.950
74.777
32.750
95.750
-/+
-/+
>
>
VESA DMT
640 x 480
640 x 480
640 x 480
800 x 600
800 x 600
800 x 600
1024 x 768
1024 x 768
1024 x 768
1280 x 720
1360 x 768
31.469
37.500
37.861
37.879
46.875
48.077
48.363
56.476
60.023
45.000
47.712
59.940
75.000
72.809
60.317
75.000
72.188
60.004
70.069
75.029
60.000
60.015
25.175
31.500
31.500
40.000
49.500
50.000
65.000
75.000
78.750
74.250
85.500
-/-/-/+/+
+/+
+/+
-/-/+/+
+/+
+/+
>
>
>
>
>
>
>
>
>
>
>
>
>
>
>
>
>
>
VESA GTF
1280 x 720
52.500
70.000
89.040
-/+
✎✎NOTE
xx For HDMI/DVI cable connection, you must use the HDMI IN 1(DVI) jack.
xx The interlace mode is not supported.
xx The set may operate abnormally if a non-standard video format is selected.
xx Separate and Composite modes are supported. SOG(Sync On Green) is not supported.
10
English
[PC450]BN68-02795A-01L02.indb 10
2010-03-30 오후 3:37:15
Edit Name
OO MENUm → Input → Edit Name → ENTERE
Source List
Use to select TV or an external input sources
such as a DVD / Blu-ray player / cable box /
STB satellite receiver.
SOURCE
OO MENUm → Input → Source List →
■■ VCR / DVD / Cable STB / Satellite STB / PVR STB /
AV Receiver / Game / Camcorder / PC / DVI PC /
DVI Devices / TV / IPTV / Blu-ray / HD DVD / DMA:
Name the device connected to the input jacks to make
your input source selection easier.
02 Connections
Changing the Input Source
✎✎When connecting an HDMI/DVI cable to the
ENTERE
HDMI IN 1(DVI) port, you should set the TV DVI PC or
DVI Devices mode under Edit Name.
■■ TV / PC / AV1 / AV2 / Component1 / Component2 /
HDMI1/DVI / HDMI2 / HDMI3 / USB
✎✎ You can only choose external devices that
are connected to the TV. In the Source List,
SOURCE
connected inputs will be highlighted.
✎✎ In the Source List, PC is always activated.
Basic Features
How to Navigate Menus
How to Operate the OSD (On Screen Display)
Before using the TV, follow the
below to learn how to
CH steps
LIST
navigate the menu and select and adjust different functions.
MEDIA.P
FO
TO
O
IN
2
RN
EX
TU
IT
RE
3
A
B
C
4
MENU m
2
3
4
5
▲/▼
S.MODE
6
7
ENTER E
ENTER E
▲/▼
◄/►
D
1 MENU button: Displays the main on-screen menu.
P.MODE
1
GUIDE
LS
1
The access step may differ depending on the selected menu.
MTS
2 ENTERE / Direction button: Move the cursor and
FAV.CH
P.SIZE
select an item. Confirm
the
setting.CC
3 RETURN button: Returns to the previous menu.
4 EXIT button: Exits the on-screen menu.
EXIT e
The main menu options appear on
the screen:
Picture, Sound, Channel, Setup,
Input, Application, Support.
Select an icon with the ▲ or ▼
button.
Press ENTERE to access the
sub-menu.
Select the desired submenu with
the ▲ or ▼ button.
Adjust the value of an item with the
◄ or ► button. The adjustment in
the OSD may differ depending on
the selected menu.
Press ENTERE to confirm the
selection.
Press EXIT.
English
[PC450]BN68-02795A-01L02.indb 11
11
2010-03-30 오후 3:37:16
Basic Features
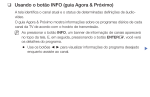
Using the INFO button (Now & Next guide)
*ORER+'
TELA QUENTE (HD)
HE-AAC
DTV Air
1080i HD | 10 | Muiti
05.1
FO
IN
The display identifies the current channel
and the status of certain audio-video
settings.
The Now & Next guide shows daily TV
program information for each channel
according to the broadcasting time.
yy Scroll ◄, ► to view information for a
desired program while watching the
current channel.
Using Scheduled View
Guide
Fri, 1 Jan 2:10 am
DTV Air 05.1 Globo HD
TELA QUENTE (HD)
10:05 pm - 12:10 pm
10
DESVENTURAS EM SERIE (HD)
05.1 TV GloboHD
Scheduled View
6:30 pm
7:15 pm
Today
Today
05.1
05.2
)Family Affairs
)Dark Angel
Mon, 29 Sep 10:15 pm
View Mode
Exit
1
4
five
five
Information E Cancel
10:06 pm - 12:10 am
E Watch
Information
DESVENTURAS EM SERIE (HD)
5
7
1 Red (View Mode): View the list of programs that are
playing now or coming up.
Planning Your Viewing
2
B Green (-2 Hours): Viewing the list of programs to be
broadcasted before 2 hours.
Guide
3
Yellow (+2 Hours): Viewing the list of programs to be
broadcasted after 2 hours.
The EPG (Electronic Program Guide)
GUIDE
information is provided by broadcasters. Using
program schedules provided by broadcasters,
you can specify programs you want to watch
in advance so that the channel automatically
changes to the selected program channel at
the specified time. Program entries may appear
blank or out of date depending on a channel status.
4
Using Channel View
Guide
Fri, 1 Jan 2:10 am
DTV Air 05.1 Globo HD
Blue (Exit): Exits the guide.
5 Information: Displays details of the selected
program.
6 k (Page): Move to next or previous page.
7 ENTERE button
–– When selecting the current program, you can watch
the selected program.
–– When selecting the future program, you can reserve to
watch the selected program. To cancel the schedule,
press the ENTERE button again and select
Cancel Schedules.
TELA QUENTE (HD)
10:05 pm - 12:10 pm
Channel Menu
10
DESVENTURAS EM SERIE (HD)
05.1 TV GloboHD
Channel View
Today
04.1
Globo HD
05.1
DiscoveryH&L
05.2
TV GloboSD
05.3
price-drop.tv
05.4
QVC
05.5
R4DTT
View Mode
B
10:00 pm - 11:00 pm
American Chopper
No Information
Home and...
)Family Affairs
No Information
QVC Selection
No Information
-2 Hours
+2 Hours
Exit
2
3
4
1
11:00 pm - 12:00 pm
Tine Team
Fiv...
)Dark Angel
Information k Page E Watch
5
6
7
¦¦ Seeing Channels
Channel List
Add, delete or set favorite channels and use
the program guide for digital broadcasts.
CH LIST
OO MENUm → Channel → Channel List
→ ENTERE
Select a channel in the All Channels,
Added Channels, Favorite or Programmed
screen by pressing the ▲ / ▼ and ENTERE
buttons. Then you can watch the selected channel.
12
English
[PC450]BN68-02795A-01L02.indb 12
2010-03-30 오후 3:37:18
SBT HD
05.1
Globo HD
7
Air
09.1
Read TV! HD
11.1
Gazeta HD
13
Air
14
Air
16.1
MIXTV HD
Antenna
B
Zoom
Select k Page T Tools
All Channels: Shows all currently available channels.
■■
Added Channels: Shows all added channels.
■■
* Favorite: Shows all favorite channels.
■■
Programmed: Shows all currently reserved
programs.
OO MENUm → Channel → Channel List → ENTERE
Add to Favorite / Delete from Favorite
t
Set channels you watch frequently as Favorites.
1. Select a channel and press the TOOLS button.
2. Add or delete a channel using the Add to Favorite or
Delete from Favorite menu respectively.
Added Channels
■■
¦¦ Using Favorite Channels
✎✎Using the color buttons with the Channel List.
xx Red (Antenna): Switches to Air or Cable.
xx B Green (Zoom): Enlarges or shrinks a channel
number.
xx
Yellow (Select): Selects multiple channel lists.
Select desired channels and press the Yellow button
to set all the selected channels at the same time. The
c mark appears to the left of the selected channels.
03 Basic Features
Added Channels
Air
04.1
Air
04.1
SBT HD
05.1
Globo HD
7
Air
Delete
09.1
to Favorite
Read TV!AddHD
11.1
Timer Viewing
Gazeta HD
13
Air
14
Air
16.1
MIXTV HD
Antenna
Lock
B
Zoom
Channel Name Edit
Select All
Select k Page T Tools
To show all Favorite channels, click on the
button shown on the nignt.
FAV.CH
xx k (Page): Move to next or previous page.
xx T (Tools): Displays the Channel List option menu.
(The options menus may differ depending on the
situation.)
Channel Status Display Icons
Icons
c
*
)
\
¦¦ Memorizing Channels
Operations
A channel selected.
A channel set as a Favorite.
A reserved Program.
OO MENUm → Channel → ENTERE
A locked channel.
Before your television can begin memorizing the available
channels, you must specify the type of signal source that is
connected to the TV (i.e. an Air or a Cable system).
Antenna (Air / Cable) t
✎✎If the antenna is connected to ANT 1 IN (AIR), select
Air and if it is connected to ANT 2 IN (CABLE), select
Cable.
English
[PC450]BN68-02795A-01L02.indb 13
13
2010-03-30 오후 3:37:19
Basic Features
Auto Program
■■ Air: Air antenna signal.
■■ Cable: Cable antenna signal.
■■ Air+Cable: Air and Cable antenna.
✎✎NOTE
xx If both ANT 1 IN (AIR) and ANT 2 IN (CABLE) are
connected, select the Air+Cable.
¦¦ Editing Channels
OO MENUm → Channel → Channel List → ENTERE
Channel Name Edit
1. Select a channel and press the TOOLS button.
2. Edit the channel name using the Channel Name Edit
menu.
■■ Channel Name Edit (analog channels only): Assign your
own channel name.
¦¦ Other Features
OO MENUm → Channel → ENTERE
Channel List
Channel List Option Menu
Set each channel using the Channel List menu options
(Add / Delete, Lock / Unlock, Timer Viewing,Select All /
Deselect All). Option menu items may differ depending on
the channel status.
1. Select a channel and press the TOOLS button.
■■ Lock / Unlock: Lock a channel so that the channel
cannot be selected and viewed.
✎✎ This function is available only when the
Child Lock is set to On.
✎✎ The PIN input screen appears. Enter your 4-digit
PIN, the default of which is “0-0-0-0”. Change the
PIN using the Change PIN option.
■■ Timer Viewing: You can set a desired channel to be
displayed automatically at the reserved time. Set the
current time first to use this function.
1. Press the ◄ / ► / ▲ / ▼ buttons to select the
desired channel in Channel List.
2. Press the TOOLS button, then select
Timer Viewing.
3. Scroll up or down to adjust the settings in the box,
or use the numeric buttons on your remote to enter
the date and time.
✎✎ If you selected Once, Every Week or
EveryDay in Repeat , you can enter the date
you want.
4. Select OK, then press the ENTERE button when
done.
✎✎ NOTE
xx Only memorized channels can be reserved.
xx Reserved programs will be displayed in the
Programmed menu.
xx When a digital channel is selected, press the ►
button to view the digital program.
■■ Select All: You can select all the channels in the
Channel List.
■■ Deselect All: You can deselect all the selected channels.
✎✎ You can only select Deselect All when one or
more channels are selected.
2. Select a function and change its settings.
■■ Add / Delete: Delete or add a channel to display the
channels you want.
Programmed
xx A gray-colored channel indicates the channel
(in Channel List)
You can view, modify or delete a show you have reserved
to watch. Programmed timer viewing is displayed here.
Highlight a program and press the TOOLS button to display
Options.
xx The Add menu only appears for deleted
■■ Change Info: Change a show you have reserved to
watch. Begin with step 3 of “Timer Viewing,” above.
xx Delete a channel from the Added Channels or
■■ Cancel Schedules: Cancel a show you have reserved
to watch.
✎✎ NOTE
xx All deleted channels will be shown on the
All Channels menu.
has been deleted.
channels.
Favorite menu in the same manner.
✎✎ This deletes the highlighted or selected
program(s).
14
English
[PC450]BN68-02795A-01L02.indb 14
2010-03-30 오후 3:37:19
✎✎ Alternatively, you can view Information by
highlighting a program and pressing the
ENTERE button.
■■ Select All / Deselect All: Select or deselect all reserved
programs.
¦¦ Adjusting Picture Settings
Cell Light / Contrast / Brightness /
Sharpness / Color / Tint (G/R)
OO MENUm → Picture → ENTERE
Your television has several setting options for picture quality
control.
03 Basic Features
■■ Information: Display a show you have reserved
to watch. (You can also change the reservation
Information.)
✎✎NOTE
Fine Tune
(analog channels only)
If the reception is clear, you do not have to fine tune the
channel, as this is done automatically during the search and
store operation. If the signal is weak or distorted, fine tune
the channel manually. Scroll to the left or right until the image
is clear.
✎✎Settings are applied to the channel you're currently
xx When you make changes to Cell Light, Contrast,
Brightness, Sharpness, Color or Tint (G/R), the
OSD will be adjusted accordingly.
xx In PC mode, you can only make changes to
Cell Light, Contrast and Brightness.
xx Settings can be adjusted and stored for each
external device connected to the TV.
watching.
✎✎Fine tuned channels that have been saved are marked
with an asterisk “*” on the right-hand side of the
channel number in the channel banner.
✎✎To reset the fine-tuning, select Reset.
(Low Noise Amplifier)
If the TV is operating in a weak-signal area, the LNA function
can improve the reception (a low-noise preamplifier boosts
the incoming signal).
Color System (Auto / PAL-M / PAL-N /
NTSC)
Normally the TV can receive image and sound with good
quality when in the mode auto. This mode detects the signal
color system automatically. In case of some signal reception
with color unsatisfactory, select the Color System Mode to
PAL-N or NTSC.
Picture Menu
¦¦ Changing the Preset Picture Mode
OO MENUm → Picture → Mode → ENTERE
Mode
■■ Dynamic: Suitable for a bright room.
OO MENUm → Picture → Eco Solution → ENTERE
The Eco Function can be used to enhance your power
savings.
LNA (On / Off)
Select your preferred picture type.
¦¦ Economical Solutions
P.MODE
Eco Solution
■■ Energy Saving (Off / Low / Medium / High /
Picture Off ): This adjusts the brightness of the TV
in order to reduce power consumption. If you select
Picture Off, the screen is turned off, but the sound
remains on. Press any button except volume button to
turn on the screen. Until the screen turns on again, a
distorted picture will be displayed for about 4 seconds.
■■ Eco Sensor (Off / On): To enhance your power savings;
the picture settings will automatically adapt to the light
in the room.
✎✎ If you adjust the Cell Light, the Eco Sensor will
be set to Off.
Min Cell Light: When Eco sensor is On, the minimum
screen brightness can be adjusted manually.
If Eco Sensor is On, the display brightness
may change (become slightly darker or brighter)
depending on the surrounding light intensity.
✎✎
■■ No Signal Power Off (Off / 15 min. / 30 min. /
60 min.):
To avoid unnecessary energy consumption, set how long
you want the TV to remain on if it's not receiving a signal.
Disabled when the PC is in power saving mode.
✎✎
■■ Standard: Suitable for a normal
environment.
■■ Movie: Suitable for watching movies in a
dark room.
English
[PC450]BN68-02795A-01L02.indb 15
15
2010-03-30 오후 3:37:19
Basic Features
¦¦ Changing the Picture Options
Picture Options
OO MENUm → Picture → Advanced Settings →
OO MENUm → Picture → Picture Options →
ENTERE
ENTERE
✎✎In PC mode, you can only make changes to the Color
Tone, Size and Screen Burn Protection.
Advanced Settings
(Advanced Settings are available in Standard / Movie mode)
Compared to previous models, new Samsung TVs have a
more precise pictures.
✎✎In PC mode, you can only make changes to
Dynamic Contrast, Gamma and White Balance.
Advanced Settings
Picture Options
Color Tone
: Normal ►
Size
: 16:9
Digital Noise Filter
: Auto
MPEG Noise Filter
: Auto
HDMI Black Level
: Normal
Film Mode
: Off
Black Tone : Off ►
Dynamic Contrast
: Medium
Gamma
:0
RGB Only Mode
: Off
Color Space
: Native
■■ Color Tone (Cool / Normal / Warm1 / Warm2)
:0
✎✎Warm1 or Warm2 will be deactivated when the picture
White Balance
Flesh Tone
▼
U Move E Enter R Return
■■ Black Tone (Off / Dark / Darker / Darkest): Select the
black level to adjust the screen depth.
■■ Dynamic Contrast (Off / Low / Medium / High): Adjust
the screen contrast.
■■ Gamma: Adjust the primary color intensity.
■■ RGB Only Mode (Off / Red / Green / Blue): Displays
the Red, Green and Blue color for making fine
adjustments to the hue and saturation.
■■ Color Space (Auto / Native): Adjust the range of colors
available to create the image.
■■ White Balance: Adjust the color temperature for a more
natural picture.
R-Offset / G-Offset / B-Offset: Adjust each color's
(red, green, blue) darkness.
R-Gain / G-Gain / B-Gain: Adjust each color's (red,
green, blue) brightness.
Reset: Resets the White Balance to it's default settings.
■■ Flesh Tone: Emphasize pink “Flesh Tone.”
■■ Edge Enhancement (Off / On): Emphasize object
boundaries.
Screen Burn Protection
U Move E Enter R Return
mode is Dynamic.
✎✎Settings can be adjusted and stored for each external
device connected to an input on the TV.
■■ Size: Your cable box / satellite receiver
may have its own set of screen sizes as
well. However, we highly recommend you
use 16:9 mode most of the time.
P.SIZE
16:9: Sets the picture to 16:9 wide mode.
Zoom1: Use for moderate magnification.
Zoom2: Use for a stronger magnification.
Wide Fit: Enlarges the aspect ratio of the picture to fit
the entire screen.
Available with HD 1080i / 720p signals in 16:9
mode.
✎✎
4:3 : Sets the picture to basic (4:3) mode.
Do not watch in 4:3 format for a long time. Traces
of borders displayed on the left, right and center
of the screen may cause image retention(screen
burn) which are not covered by the warranty.
✎✎
Screen Fit: Displays the full image without any cut-off
when HDMI (720p / 1080i / 1080p) or Component
(1080i / 1080p) signals are inputted.
✎✎NOTE
xx After selecting Zoom1, Zoom2 or Wide Fit:
1. Press the ► button to select Position.
2. Press the ENTERE button.
3. Press the ▲ or ▼ button to move the picture up
or down.
4. Press the ENTERE button.
5. Press the ► button to select Reset.
6. Press the ENTERE button to reset the picture
to its default position.
16
English
[PC450]BN68-02795A-01L02.indb 16
2010-03-30 오후 3:37:20
Component (1080i/1080p) mode, you made need to
center the picture:
1. Press the ◄ or ► button to select Position.
2. Press the ENTERE button.
3. Press the ▲, ▼, ◄ or ► button to move the
picture.
4. Press the ENTERE button.
5. Press the ◄ or ► button to select Reset.
■■ Screen Burn Protection: To reduce the possibility of
screen burn, this unit is equipped with screen burn
prevention technology. The Time setting allows you to
program the time between movement of the picture in
minutes.
Pixel Shift (Off / On): Using this function, you can
minutely move pixels on the PDP in horizontal or vertical
direction to minimize after-images on the screen.
Optimum condition for pixel shift
✎✎
Item
TV/AV/Component/
HDMI/PC
Horizontal
0~4
4
Vertical
0~4
4
Time (minute)
1~4 min.
4 min.
6. Press the ENTERE button.
xx HD (High Definition): 16:9 - 1080i/1080p (1920x1080),
720p (1280x720)
xx Settings can be adjusted and stored for each
external device you have connected to an input on
the TV.
Input Source
ATV, AV,
Component (480i, 480p)
DTV(1080i),
Component (1080i, 1080p),
HDMI (720p, 1080i, 1080p)
PC
Picture Size
16:9, Zoom1,
Zoom2, 4:3
16:9, 4:3, Wide Fit,
Screen Fit
16:9, 4:3
■■ Digital Noise Filter (Off / Low / Medium / High / Auto
/ Auto Visualisation): If the broadcast signal received by
your TV is weak, you can activate the
Digital Noise Filter feature to reduce any static and
ghosting that may appear on the screen.
✎✎ When the signal is weak, try other options until the
best picture is displayed.
Auto Visualisation: When changing analog channels,
displays signal strength.
Only available for analog channels.
✎✎
✎✎ When bar is green, is that the best possible signal.
■■ MPEG Noise Filter (Off / Low / Medium / High /
Auto): Reduces MPEG noise to provide improved
picture quality.
■■ HDMI Black Level (Normal / Low): Selects the black
level on the screen to adjust the screen depth.
✎✎ Available only in HDMI mode.
■■ Film Mode (Off / Auto1 / Auto2): Sets the TV to
automatically sense and process film signals from all
sources and adjusts the picture for optimum quality.
03 Basic Features
xx After selecting Screen Fit in HDMI (1080i/1080p) or
✎✎ The Pixel Shift value may differ depending on the
TV size (inches) and mode.
✎✎ This function is not available in the Screen Fit
mode.
Auto Protection Time (10 min. / 20 min. / 40 min. /
1 hour / Off): Set the time the screen remains idle with a
still image until the screen saver is activated. The screen
saver prevents the formation of ghost images on the
screen.
Scrolling: This function removes after-images on the
screen by moving all the pixels on the PDP according
to a pattern. Use this function when there are remaining
after-images or symbols on the screen, especially when
you displayed a still image on the screen for a long time.
The after-image removal function has to be
executed for a long time (approximately 1 hour)
to effectively remove after-images on the screen.
If the after-image is not removed after performing
the function, repeat the function again.
✎✎
✎✎ Press any key on the remote control to cancel this
feature.
Side Gray (Light / Dark): When you watch TV with the
screen ratio set to 4:3, the screen is prevented from any
damage by adjusting the white balance on both extreme
left and right sides.
Picture Reset (OK / Cancel)
Resets your current picture mode to its default settings.
✎✎ Available in TV, AV, COMPONENT (480i / 1080i)
and HDMI (480i / 1080i).
English
[PC450]BN68-02795A-01L02.indb 17
17
2010-03-30 오후 3:37:20
Basic Features
Sound Menu
¦¦ Setting up the TV with Your PC
Set the input source to PC.
OO MENUm → Picture → ENTERE
Auto Adjustment t
Adjust frequency values/positions and fine tune the settings
automatically.
✎✎Not available when connecting with an HDMI/DVI cable.
Screen
■■ Coarse / Fine: Removes or reduces picture noise. If the
noise is not removed by Fine-tuning alone, then adjust
the frequency as best as possible (Coarse) and Finetune again. After the noise has been reduced, readjust
the picture so that it is aligned to the center of screen.
■■ Position: Adjust the PC’s screen positioning if it does
not fit the TV screen. Press the ▲ or ▼ button to adjust
the Vertical-Position. Press the ◄ or ► button to adjust
the Horizontal-Position.
■■ Image Reset: Resets the image to default settings.
¦¦ Changing the Preset Sound Mode
OO MENUm → Sound → Mode → ENTERE
Mode
■■ Standard: Selects the normal sound
mode.
S.MODE
■■ Music: Emphasizes music over voices.
■■ Movie: Provides the best sound for
movies.
■■ Clear Voice: Emphasizes voices over
other sounds.
■■ Amplify: Increase the intensity of high-frequency sound
to allow a better listening experience for the hearing
impaired.
¦¦ Adjusting Sound Settings
OO MENUm → Sound → Equalizer → ENTERE
Using Your TV as a Computer (PC) Display
Setting Up Your PC Software (Based on Windows XP)
Depending on the version of Windows and the video card,
the actual screens on your PC will probably look different, but
the same basic set-up information will apply in most cases.
(If not, contact your computer manufacturer or Samsung
Dealer.)
1. Click on “Control Panel” on the Windows start menu.
2. Click on “Appearance and Themes” in the “Control
Panel” window and a display dialog-box will appear.
3. Click on “Display” and a display dialog box will appear.
4. Navigate to the “Settings” tab on the display dialog-box.
yy The correct size setting (resolution) [Optimum: 1920 x
1080 pixels]
yy If a vertical-frequency option exists on your display
settings dialog box, the correct value is “60” or “60 Hz”.
Otherwise, just click “OK” and exit the dialog box.
Equalizer
Adjusts the sound mode (standard sound mode only).
■■ Balance L/R: Adjusts the balance between the right and
left speaker.
■■ 100Hz / 300Hz / 1kHz / 3kHz / 10kHz (Bandwidth
Adjustment): Adjusts the level of specific bandwidth
frequencies.
■■ Reset: Resets the equalizer to its default settings.
¦¦ Sound Settings
OO MENUm → Sound → ENTERE
Virtual Surround (Off / On)
(standard sound mode only)
This function provides a virtual 5.1 channel surround sound
experience through a pair of speakers using HRTF (Head
Related Transfer Function) technology.
Dialog Clarity (Off / On)
(standard sound mode only)
This function allows you to increase the intensity of a voice
over background music or sound effects so that dialog can
be heard more clearly.
18
English
[PC450]BN68-02795A-01L02.indb 18
2010-03-30 오후 3:37:20
SPDIF Output
(digital channels only)
Change the default value for audio languages.
SPDIF (Sony Philips Digital Interface) is used to provide digital
sound, reducing interference going to speakers and various
digital devices such as an A/V Receiver/Home theater.
✎✎You can only select a language among the ones being
broadcasted.
Multi-Track Sound (MTS) t
■■ Mono: Choose for channels that are
broadcasting in mono or if you are having
difficulty receiving a stereo signal.
MTS
■■ Audio Format: During the reception of a digital TV
broadcast, you can select the Digital Audio output
(SPDIF) format from the options PCM or Dolby Digital.
■■ Audio Delay: Correct audio-video sync problems, when
watching TV or video, and when listening to digital audio
output using an external device such as an AV receiver
(0ms ~ 250ms).
■■ Stereo: Choose for channels that are
broadcasting in stereo.
FM Transmitter
■■ SAP: Choose to listen to the Separate
Audio Program, which is usually a foreign-language
translation.
(Not available in some locations)
You can listen to TV sound from FM receiver speaker by
transmitting audio signals by FM frequencies.
✎✎Depending on the particular program being broadcast,
you can listen to Mono, Stereo or SAP.
Auto Volume (Off / Normal / Night)
To equalize the volume level on each channel, set to Normal.
■■ Night: This mode provides an improved sound
experience compared to Normal mode, making almost
no noise. It is useful at night.
03 Basic Features
Audio Language t
✎✎For more detailed information, refer to “FM Transmitter
Setup”. (p. 33)
Connecting a FM Transmitter
Insert FM Transmitter Module into the Socket which is
located at the back side of TV.
TV Side Panel
Speaker Select (External Speaker /
TV Speaker)
A sound echo may occur due to a difference in decoding
speed between the main speaker and the audio receiver. In
this case, set the TV to External Speaker.
✎✎When Speaker Select is set to External Speaker, the
volume and MUTE buttons will not operate and the
sound settings will be limited.
✎✎When Speaker Select is set to External Speaker.
xx TV Speaker: Off, External Speaker: On
✎✎When Speaker Select is set to TV Speaker.
FM Transmitter
■■ FM Transmitter (Off / On): Turns FM transmitter on/off.
■■ FM Frequency: Sets FM transmitter frequency.
Sound Reset (OK / Cancel)
Reset all sound settings to the factory defaults.
xx TV Speaker: On, External Speaker: On
✎✎If there is no video signal, both speakers will be mute.
English
[PC450]BN68-02795A-01L02.indb 19
19
2010-03-30 오후 3:37:21
Basic Features
Setup Menu
■■ Timer 1 / Timer 2 / Timer 3: Three different on / off
timer settings can be made. You must set the clock first.
¦¦ Setting the Time
OO MENUm → Setup → Time → ENTERE
Timer 1
On Time
▲
00
Inactivate
▼
00
Off Time
00
Inactivate
Time
Source
Volume
■■ Clock: Setting the clock is for using various timer
features of the TV.
10
TV
Repeat
OO The current time will appear every time you press
Sun
the clock again.
Clock Mode (Auto / Manual)
–– Auto: Set the current time automatically using the
time from a digital channel.
The antenna must be connected in order to set
the time automatically.
✎✎
–– Manual: Set the current time manually.
Depending on the broadcast station and signal,
the auto time set up may not be correct. In this
case, set the time manually.
✎✎
Clock Set: Set the Day, Month, Year, Hour, Minute and
am/pm manually.
Available only when Clock Mode is set to
Manual.
✎✎
✎✎ You can set the Day, Month, Year, Hour and
Minute directly by pressing the number buttons
on the remote control.
Time Zone: Select your time zone.
This function is only available when the Clock
Mode is set to Auto.
✎✎
Channel
Air
Mon
Tue
Wed
1
Thu
Fri
Sat
Once
the INFO button.
✎✎ If you disconnect the power cord, you have to set
00
Antenna
L Move U Adjust
E Enter R Return
On Time / Off Time: Set the hour, minute, and activate
/ inactivate. (To activate the timer with the setting you’ve
chosen, set to Activate.)
Volume: Set the desired volume level.
Source: Select TV or USB content to be played when
the TV is turned on automatically. (USB can be selected
only when a USB device is connected to the TV)
Antenna (when the Source is set to TV): Select Air or
Cable.
Channel (when the Source is set to TV): Select the
desired channel.
Contents (when the Source is set to USB): Select a
folder in the USB device containing music or photo files
to be played when the TV is turned on automatically.
NOTE
✎✎
xx If there is no music file on the USB device or the
folder containing a music file is not selected, the
Timer function does not operate correctly.
xx When there is only one photo file in the USB,
the Slide Show will not play.
xx If a folder name is too long, the folder cannot be
selected.
¦¦ Using the Sleep Timer
OO MENUm → Setup → Time → Sleep Timer →
ENTERE
■■ Sleep Timer t: Automatically shuts off the TV
after a preset period of time. (30, 60, 90, 120, 150 and
180 minutes).
✎✎ To cancel the Sleep Timer, select Off.
¦¦ Setting the On / Off Timer
OO MENUm → Setup → Time → Timer 1 →
xx Each USB you use is assigned its own folder.
When using more than one of the same type of
USB, make sure the folders assigned to each
USB have different names.
Repeat: Select Once, Everyday, Mon~Fri, Mon~Sat,
Sat~Sun or Manual to set at you convenience. If you
select Manual, you can set up the day you want to
activate the timer.
The c mark indicates the day is selected.
✎✎
✎✎Auto Power Off (available only when the TV is turned
on by the Timer): The TV will be automatically turned off
after 3 hours of being left idle to prevent overheating.
ENTERE
You can set the TV to turn on automatically at a preset time.
20
English
[PC450]BN68-02795A-01L02.indb 20
2010-03-30 오후 3:37:21
¦¦ Other Features
OO MENUm → Setup → Security → ENTERE
OO MENUm → Setup → ENTERE
Security
Menu Language
✎✎The PIN input screen appears before the setup screen.
✎✎Enter your 4-digit PIN, the default of which is “0-0-0-0”.
Set the menu language.
1. Select Menu Language and press the ENTERE
button.
Change the PIN using the Change PIN option.
■■ Child Lock (Off / On): Lock channels in Channel List,
to prevent unauthorized users, such as children, from
watching unsuitable program.
✎✎ Available only when the Input source is set to TV.
■■ Parental Lock: Prevent unauthorized users, such as
children, from watching unsuitable program with a
user-defined 4-digit PIN code. If the selected channel is
locked, the ‘\’ symbol will be displayed.
Allow All: Unlock all TV ratings.
✎✎ The items of Parental Lock differs depending on
the country.
■■ Change PIN: The Change PIN screen will appear.
Choose any 4 digits for your PIN and enter them. As
soon as the 4 digits are entered, the
Confirm New PIN screen appears. Re-enter the same
4 digits. When the Confirm screen disappears, your PIN
has been memorized.
✎✎ If you forget the PIN, press the remote-control
buttons in the following sequence, which resets
the pin to “0-0-0-0”: POWER (off) → MUTE → 8
→ 2 → 4 → POWER (on).
2. Choose desired language and press the ENTERE
button.
Caption
(On-Screen Text Messages)
■■ Caption (Off / On): You can switch the
caption function on or off. If captions are
not available, they will not be displayed on
the screen.
CC
✎✎ The Caption feature doesn’t work in
Component, HDMI or PC modes.
■■ Caption Mode: You can select the desired
caption mode.
✎✎ The availability of captions depends on the
program being broadcast.
CC1~CC4 / Text1~Text4: (analog channels only) The
Analog Caption function operates in either analog
TV channel mode or when a signal is supplied from
an external device to the TV. (Depending on the
broadcasting signal, the Analog Caption function may or
may not work with digital channels.)
English
[PC450]BN68-02795A-01L02.indb 21
03 Basic Features
¦¦ Locking Programs
21
2010-03-30 오후 3:37:21
Basic Features
General
¦¦ Picture In Picture (PIP)
■■ Game Mode (Off / On): When connecting to a game
console such as PlayStation™ or Xbox™, you can enjoy
a more realistic gaming experience by selecting the
game mode.
PIP t
✎✎NOTE
xx Restrictions on game mode (caution)
−− To disconnect the game console and connect
another external device, set Game Mode to Off in
the setup menu.
−− If you display the TV menu in Game Mode, the
screen shakes slightly.
You can watch the TV tuner and one external video source
simultaneously. PIP (Picture-in-Picture) does not function in
the same mode.
OO MENUm → Setup → PIP → ENTERE
✎✎NOTE
xx For PIP sound, refer to the Sound Select
instructions.
xx Game Mode is not available when the input source
xx If you turn the TV off while watching in PIP mode, the
xx After connecting the game console, set Game Mode
xx You may notice that the picture in the PIP window
xx If Game Mode is On:
xx PIP Settings
is set to TV or PC.
to On. Unfortunately, you may notice reduced picture
quality.
−− Picture mode is set to Standard and Sound mode
is set to Movie.
−− Equalizer is not available.
■■ Menu Transparency (Bright / Dark): Set the
Transparency of the menu.
■■ Melody (Off / Low / Medium / High): Set so that a
melody plays when the TV is turned on or off.
■■ AV Color System (Auto / PAL-M / PAL-N / NTSC):
Normally the TV can receive image and sound with good
quality when in the mode Auto. This mode detects the
signal color system automatically. In case of some signal
reception with color unsatisfactory, select the AV Color
System Mode to PAL-M, PAL-N or NTSC.
PIP window will disappear.
becomes slightly unnatural when you use the main
screen to view a game or karaoke.
Main picture
Component1, Component2,
HDMI1/DVI, HDMI2, HDMI3,
HDMI4, PC
Sub picture
TV
■■ PIP (Off / On): Activate or deactivate the PIP function.
■■ Air/Cable (Air / Cable): Select either Air or Cable as the
input source for the sub-screen.
■■ Channel: Select the channel for the sub-screen.
■■ Size (Õ / Ã): Select a size for the sub-picture.
■■ Position (à / – / — / œ): Select a position for the
sub-picture.
■■ Sound Select (Main / Sub): You can choose the
desired sound (Main / Sub) in the PIP mode.
22
English
[PC450]BN68-02795A-01L02.indb 22
2010-03-30 오후 3:37:21
OO MENUm → Support → ENTERE
Self Diagnosis
✎✎Self Diagnostic might take few seconds, this is part of
Software Upgrade
Software Upgrade can be performed downloading the
latest firmware from “www.samsung.com,” to a USB memory
device.
Current Version - the software already installed in the TV.
✎✎Software is represented as “Year/Month/Day_Version”.
Software Upgrade
the normal operation of the TV.
■■ Picture Test: Use to check for picture problems.
Current Version
Yes: If the test pattern does not appear or there is
noise in the test pattern, select Yes. There may be a
problem with the TV. Contact Samsung’s Call Center for
assistance.
No: If the test pattern is properly displayed, select No.
There may be a problem with your external equipment.
Please check your connections. If the problem still
persists, refer to the external device’s user manual.
■■ Sound Test (Yes / No): Use the built-in melody sound to
check for sound problems.
✎✎ If you hear no sound from the TV’s speakers,
before performing the sound test, make sure
Speaker Select is set to TV Speaker in the
Sound menu.
✎✎ The melody will be heard during the test even if
Speaker Select is set to External Speaker or the
sound is muted by pressing the MUTE button.
Yes: If you can hear sound only from one speaker or not
at all during the sound test, select Yes. There may be a
problem with the TV. Contact Samsung’s Call Center for
assistance.
No: If you can hear sound from the speakers, select No.
There may be a problem with your external equipment.
Please check your connections. If the problem still
persists, refer to the external device’s user manual.
■■ Signal Information: (digital channels only) An HD
channel’s reception quality is either perfect or the
channels are unavailable. Adjust your antenna to
increase signal strength.
■■ Troubleshooting: If the TV seems to have a problem,
refer to this description.
✎✎ If none of these troubleshooting tips apply, contact
the Samsung customer service center.
2010/01/18_000001
By USB
►
Alternative Software
E Enter R Return
Installing the Latest Version
TV Side Panel
■■ By USB: Insert a USB drive
containing the firmware
upgrade file, downloaded
from “www.samsung.com,”
into the TV. Please be careful
not to disconnect the power
USB Drive
or remove the USB drive until
upgrades are complete. The
TV will be turned off and on
automatically after completing the firmware upgrade.
When software is upgraded, video and audio settings
you have made will return to their default settings. We
advise you to to write down your settings so that you
can easily reset them after the upgrade.
■■ Alternative Software (Not available)
HD Connection Guide
Refer to this information when connecting external devices
to the TV.
Contact Samsung
View this information when your TV does not work properly
or when you want to upgrade the software. You can find
information regarding our call centers and how to download
products and software.
English
[PC450]BN68-02795A-01L02.indb 23
03 Basic Features
Support Menu
23
2010-03-30 오후 3:37:22
Advanced Features
Media Play
MEDIA.P
Enjoy photos, music and/or movie files saved on
a USB Mass Storage Class (MSC) device.
O
MediaPlay
Videos
MENUm → Application → Media Play
(USB) → ENTERE
SUM
Change device
View devices E Enter R Return
¦ Connecting a USB Device
1. Turn on your TV.
TV Side Panel
2. Connect a USB device containing photo, music and/or movie files to the USB
jack on the side of the TV.
3. When USB is connected to the TV, popup window appears. Then you can select
Media Play.
USB Drive
✎ It might not work properly with unlicensed multimedia files.
✎ Need-to-Know List before using Media Play (USB)
x
x
x
x
MTP (Media Transfer Protocol) is not supported.
The file system supports FAT16, FAT32 and NTFS.
Certain types of USB Digital camera and audio devices may not be compatible with this TV.
Media Play only supports USB Mass Storage Class (MSC) devices. MSC is a Mass Storage Class Bulk-Only
Transport device. Examples of MSC are Thumb drives, Flash Card Readers and USB HDD (USB HUB are not
supported). Devices should be connected directly to the TV’s USB port.
x
Before connecting your device to the TV, please back up your files to prevent them from damage or loss of data.
SAMSUNG is not responsible for any data file damage or data loss.
x
x
x
x
x
x
x
Connect a USB HDD to the dedicated port, USB 1 (HDD) port.
x
x
Do not disconnect the USB device while it is loading.
The higher the resolution of the image, the longer it takes to display on the screen.
The maximum supported JPEG resolution is 15360X8640 pixels.
For unsupported or corrupted files, the “Not Supported File Format” message is displayed.
If the files are sorted by Basic View, up to 1000 files can be displayed in each folder.
MP3 files with DRM that have been downloaded from a non-free site cannot be played. Digital Rights Management
(DRM) is a technology that supports the creation, distribution and management of the content in an integrated and
comprehensive way, including the protection of the rights and interests of the content providers, the prevention of the
illegal copying of contents, as well as managing billings and settlements.
If more than 2 PTP devices are connected, you can only use one at a time.
If more than two MSC devices are connected, some of them may not be recognized. A USB device that requires high
power (more than 500mA or 5V) may not be supported.
x
If an over-power warning message is displayed while you are connecting or using a USB device, the device may not
be recognized or may malfunction.
x
x
x
x
If the TV has been no input during time set in Auto Protection Time, the Screensaver will run.
x
24
The power-saving mode of some external hard disk drives may be released automatically when connected to the TV.
If a USB extension cable is used, the USB device may not be recognized or the files on the device may not be read.
If a USB device connected to the TV is not recognized, the list of files on the device is corrupted or a file in the list is
not played, connect the USB device to the PC, format the device and check the connection.
If a file deleted from the PC is still found when Media Play is run, use the “Empty the Recycle Bin” function on the PC
to permanently delete the file.
English
[PC450]BN68-02795A-01L02.indb 24
2010-03-30 오후 3:37:22
Move to the desired file using the up/down/right/left buttons and then press the ENTERE or � (Play) button. The file is
played.
✎✎Supports the View Devices and Home in Media Play homepage.
Information:
You can ascertain the selected
file name and the number of files
and page.
Videos
Movie 01.avi
Movie 03.avi
Movie 05.avi
Sort List Section:
Displays the sorting standard.
Jan.10.2010
Jan.10.2010
Jan.10.2010
Movie 07.avi
Movie 02.avi
Movie 04.avi
Movie 06.avi
Movie 09.avi
SUM
Jan.10.2010
Jan.10.2010
Jan.10.2010
Movie 08.avi
Jan.10.2010
✎✎ The sorting standard is
different depending on the
contents.
1/1 Page
/Movie 01.avi
Jan.10.2010
File List Section:
You can confirm the files and
groups that are sorted by
category.
Jan.10.2010
Movie 10.avi
Select
Change Device
04 Advanced Features
¦¦ Screen Display
Jan.10.2010
Sorting T Tools
Operation Buttons
Red (Change Device): Selects a connected device.
B Green (Preference): Sets the file preference. (not supported in Basic view)
Yellow (Select): Selects multiple files from file list. Selected files are marked with a symbol.
Blue (Sorting): Selects the sort list.
T Tools: Displays the option menu.
✎✎ Using the � (REW) or µ (FF) button, file list can move to next or previous page.
Videos
Playing Video
1. Press the ◄ or ► button to select Videos, then press the ENTERE button in the Media Play menu.
2. Press the ◄/►/▲/▼ button to select the desired video in the file list.
3. Press the ENTERE button or � (Play) button.
–– The selected file is displayed on the top with its playing time.
–– If video time information is unknown, play time and progress bar are not displayed.
–– During video playback, you can search using the ◄ and ► button.
✎✎In this mode, you can enjoy movie clips contained on a Game,
but you cannot play the Game itself.
yy Supported Subtitle Formats
00:04:03 / 00:07:38
1/1
Movie 01.avi
Name
File extension
MPEG-4 time-based text
.ttxt
Format
XML
SAMI
.smi
HTML
SubRip
.srt
string-based
SubViewer
.sub
string-based
Micro DVD
.sub or .txt
string-based
SUM
E Pause L Jump T Tools R Return
English
[PC450]BN68-02795A-01L02.indb 25
25
2010-03-30 오후 3:37:24
Advanced Features
yy Supported Video Formats
File Extension
Video Codec
Resolution
Frame rate
(fps)
Bit rate
(Mbps)
Divx 3.11 / 4.x / 5.1 / 6.0
1920x1080
6 ~ 30
8
XviD
1920x1080
6 ~ 30
8
H.264 BP / MP / HP
1920x1080
6 ~ 30
25
MPEG4 SP / ASP
1920x1080
6 ~ 30
8
Container
*.avi
*.mkv
AVI
MKV
*.asf
ASF
*.wmv
ASF
*.mp4
1920x1080
6 ~ 30
8
XviD
1920x1080
6 ~ 30
8
H.264 BP / MP / HP
1920x1080
6 ~ 30
25
MPEG4 SP / ASP
1920x1080
6 ~ 30
8
Window Media Video v9
1920x1080
6 ~ 30
25
H.264 BP / MP / HP
1920x1080
6 ~ 30
25
MPEG4 SP / ASP
1920x1080
6 ~ 30
8
MP4
*.3gp
3GPP
*.vro
VRO
VOB
*.mpg
*.mpeg
PS
*.ts
*.tp
*.trp
Divx 3.11 / 4.x / 5.1 / 6.0
XVID
1920x1080
6 ~ 30
8
H.264 BP / MP / HP
1920x1080
6 ~ 30
25
MPEG4 SP / ASP
1920x1080
6 ~ 30
8
MPEG1
1920x1080
24 / 25 / 30
30
MPEG2
1920x1080
24 / 25 / 30
30
MPEG1
1920x1080
24 / 25 / 30
30
MPEG2
1920x1080
24 / 25 / 30
30
H.264
1920x1080
6 ~ 30
25
MPEG2
1920x1080
24 / 25 / 30
30
H.264
1920x1080
6 ~ 30
25
VC1
1920x1080
6 ~ 30
25
TS
Audio Codec
MP3 / AC3 / LPCM /
ADPCM / DTS Core
MP3 / AC3 / LPCM /
ADPCM / WMA
WMA
MP3 / ADPCM / AAC
ADPCM / AAC / HE-AAC
AC3 / MPEG / LPCM
AC3 / MPEG / LPCM / AAC
AC3 / AAC / MP3 / DD+ /
HE-AAC
Other Restrictions
✎✎ NOTE
xx If there are problems with the contents of a codec, the codec will not be supported.
xx If the information for a Container is incorrect and the file is in error, the Container will not be able to play
correctly.
xx Sound or video may not work if the contents have a standard bitrate/frame rate above the compatible Frame/sec
listed in the table above.
xx If the Index Table is in error, the Seek (Jump) function is not supported.
Video Decoder
Audio Decoder
• Supports up to H.264, Level 4.1
• H.264 FMO / ASO / RS, VC1 SP / MP / AP L4 and AVCHD are not
supported.
• GMC is not supported.
• H.263 is not supported.
• Supports up to WMA 7, 8, 9, STD
• WMA 9 PRO does not support 2 channel excess multi channel or
lossless audio.
• WMA sampling rate 22050Hz mono is not supported.
26
English
[PC450]BN68-02795A-01L02.indb 26
2010-03-30 오후 3:37:24
If you exit the playing movie function, the movie can be played later from the point where it was stopped.
✎✎If you press the ENTERE button (Chaptering) during playing the file, you can explore scene divided into 5 chapters
you want.
✎✎If the index information is damaged or unsupported, you will not be able to use the Chaptering function.
1. Select the movie file you want to play continuously by pressing
the ◄ or ► button to select it from the file list section.
2. Press the � (Play) / ENTERE button.
00:04:03 / 00:07:38
1/1
Movie 01.avi
3. Select Play Continuously (Resume Play) by pressing the Blue
button. The Movie will begin to play from where it was stopped.
✎✎ The Blue button is available when resuming play.
✎✎ If the Continuous Movie Play Help function is set to On
04 Advanced Features
Playing movie continuously (Resume Play)
Play continuously
Resumes playing from the last viewed
scene.
in the Settings menu, a pop-up message will appear
when you resume play a movie file.
SUM
Play continuously E Pause L Jump T Tools R Return
Music
Playing Music
1. Press the ◄ or ► button to select Music, then press the
ENTERE button in the Media Play menu.
Playlist
2. Press the ◄/►/▲/▼ button to select the desired Music file in
the file list.
3. Press the ENTERE button or � (Play) button.
–– During music playback, you can search using the ◄ and ►
button.
–– � (REW) and µ (FF) buttons do not function during play.
I Love you
Jhon
1st Album
Pop
2010
4.2MB
No Singer
3/15
Music 1
Music 2
No Singer
Music 3
No Singer
01:10 / 04:02
Music 4
No Singer
Music 5
✎✎Only displays the files with MP3 and PCM file extension. Other
file extensions are not displayed, even if they are saved on the
same USB device.
I Love You
Jhon
No Singer
SUM
E Pause L Jump T Tools R Return
✎✎If the sound is abnormal when playing MP3 files, adjust the Equalizer in the Sound menu. (An over-modulated MP3 file
may cause a sound problem.)
English
[PC450]BN68-02795A-01L02.indb 27
27
2010-03-30 오후 3:37:25
Advanced Features
Photos
Viewing a Photo (or Slide Show)
1. Press the ◄ or ► button to select Photos, then press the
ENTERE button in the Media Play menu.
Normal
Image1024.jpg
1024x768
2010/2/1
3/15
2. Press the ◄/►/▲/▼ button to select the desired photo in the
file list.
3. Press the ENTERE button or � (Play) button.
–– While a photo list is displayed, press the � (Play) /
ENTERE button on the remote control to start the slide
show.
–– All files in the file list section will be displayed in the slide show.
–– During the slide show, files are displayed in order.
✎✎Music files can be automatically played during the Slide Show if
E Pause L Previous/Next T Tools R Return
SUM
the Background Music is set to On.
✎✎The BGM Mode cannot be changed until the BGM has finished
loading.
¦¦ Playing Multiple Files
Playing selected video/music/photo files
Videos
1. Press the Yellow button in the file list to select the desired file.
Movie 01.avi
Movie 03.avi
✎✎ NOTE
Jan.10.2010
Movie 04.avi
Jan.10.2010
Movie 05.avi
xx The c mark appears to the left of the selected files.
Jan.10.2010
Movie 07.avi
xx To cancel a selection, press the Yellow button again.
xx To deselect all selected files, press the TOOLS button
Jan.10.2010
Movie 06.avi
Movie 09.avi
Jan.10.2010
Movie 10.avi
Jan.10.2010
Change Device
Jan.10.2010
Movie 08.avi
Jan.10.2010
SUM
1/1 Page
Movie 02.avi
Jan.10.2010
2. Repeat the above operation to select multiple files.
and select Deselect All.
2 files selected
/Movie 01.avi
Jan.10.2010
Select
Sorting T Tools
3. Press the TOOLS button and select Play Selected Contents.
Playing the video/music/photo file group
1. While a file list is displayed, move to any file in the desired group.
2. Press the TOOLS button and select Play Current Group.
28
English
[PC450]BN68-02795A-01L02.indb 28
2010-03-30 오후 3:37:26
Sorting the file list
Press the Blue button in the file list to sort the files.
Category
Videos
Music
Photos
Basic View
Displays the whole folder. You can view the photo by selecting the folder.
Operation
>
>
>
Title
Sorts and displays the file title in Symbol/Number/Alphabet/Special order.
>
>
>
Preference
Sorts and displays the file by preference. You can change the file preference in the file
list section using the Green button.
>
>
>
Latest Date
Sorts and shows files by the latest date.
>
Earliest Date
Sorts and shows files by the earliest date.
>
Artist
Sorts the music file by artist in alphabetical order.
>
Album
Sorts the music file by album in alphabetical order.
>
Genre
Sorts music files by the genre.
>
Mood
Sorts music files by the mood. You can change the music mood information.
>
Monthly
Sorts and shows photo files by month.
04 Advanced Features
¦¦ Media Play - Additional Functions
>
>
>
Videos/Music/Photos Play Option menu
During file playback, press the TOOLS button.
Category
Operation
Videos
Music
Photos
Title
You can move the other file directly.
>
Repeat Mode
You can play movie and music files repeatedly.
>
Picture Size
(Mode1 / Mode2 / Original)
You can adjust the picture size to your preference.
Picture Setting
You can adjust the picture setting. (p. 15, 16, 17, 18)
>
Sound Setting
You can adjust the sound setting. (p. 18, 19)
>
Subtitle Setting
You can play the video with Subtitles. This function only works if the subtitles are the
same file name as the video.
>
Stop Slide Show /
Start Slide Show
You can start or stop a slide show.
Slide Show Speed
You can select the slide show speed during the slide show.
>
Background Music
You can set and select background music when watching a slide show.
>
Zoom
You can zoom into images in full screen mode.
>
Rotate
You can rotate images in full screen mode.
Information
You can see detailed information about the played file.
>
>
>
>
>
>
>
>
>
>
Settings
Using the Setup Menu
■■ Continuous Movie Play Help (Resume Play) (On / Off): Select to display the help pop-up message for continuous movie
playback.
■■ Get DivX® VOD registration code: Shows the registration code authorized for the TV. If you connect to the DivX web site
and register, you can download the VOD registration file. If you play the VOD registration using Media Play, the registration
is completed.
✎✎ For more information on DivX® VOD, visit “www.DivX.com.”
■■ Get DivX® VOD deactivation code: When DivX® VOD is not registered, the registration deactivation code is displayed. If
you execute this function when DivX® VOD is registered, the current DivX® VOD registration is deactivated.
■■ Information: Select to view information about the connected device.
English
[PC450]BN68-02795A-01L02.indb 29
29
2010-03-30 오후 3:37:27
Advanced Features
Anynet+
What is Anynet+? t
Anynet+ is a function that enables you to control all connected Samsung devices that support Anynet+ with your Samsung
TV’s remote. The Anynet+ system can be used only with Samsung devices that have the Anynet+ feature. To be sure your
Samsung device has this feature, check if there is an Anynet+ logo on it.
To connect to a Samsung Home Theater
TV Rear Panel
Anynet+ Device 3
HDMI cable
Home Theater
Anynet+ Device 1, 2
HDMI cable
HDMI cable
Optical Cable
1. Connect the HDMI IN (1(DVI), 2 or 3) jack on the TV and the HDMI OUT jack of the corresponding Anynet+ device using
an HDMI cable.
2. Connect the HDMI IN jack of the home theater and the HDMI OUT jack of the corresponding Anynet+ device using an
HDMI cable.
✎✎NOTE
xx Connect the Optical cable between the DIGITAL AUDIO OUT (OPTICAL) jack on your TV and the Digital Audio Input
on the Home Theater.
xx When following the connection above, the Optical jack only outputs 2 channel audio. You will only hear sound from
the Home Theater’s Front, Left and Right speakers and the subwoofer. If you want to hear 5.1 channel audio, connect
the DIGITAL AUDIO OUT (OPTICAL) jack on the DVD / Satellite Box (i.e. Anynet Device 1 or 2) directly to the
Amplifier or Home Theater, not the TV.
xx You can connect only one Home Theater.
xx You can connect an Anynet+ device using the HDMI cable. Some HDMI cables may not support Anynet+ functions.
xx Anynet+ works when the AV device supporting Anynet+ is in the standby or on status.
xx Anynet+ supports up to 12 AV devices in total. Note that you can connect up to 3 devices of the same type.
30
English
[PC450]BN68-02795A-01L02.indb 30
30
2010-03-30 오후 3:37:27
The Anynet+ menu changes depending on the type and status of the Anynet+ devices connected to the TV.
Anynet+ Menu
View TV
Device List
(device_name) MENU
(device_name) INFO
Recording: (*recorder)
Stop Recording: (*recorder)
Receiver
Description
Changes Anynet+ mode to TV broadcast mode.
Shows the Anynet+ device list.
Shows the connected device menus. E.g. If a DVD recorder is connected, the disc menu of
the DVD recorder will appear.
Shows the play menu of the connected device. E.g. If a DVD recorder is connected, the
play menu of the DVD recorder will appear.
Starts recording immediately using the recorder. (This is only available for devices that
support the recording function.)
Stops recording.
Sound is played through the receiver.
04 Advanced Features
Anynet+ Menu
If more than one recording device is connected, they are displayed as (*recorder) and if only one recording device is
connected, it will be represented as (*device_name).
¦¦ Setting Up Anynet+
OO MENUm → Application → Anynet+ (HDMI-CEC) → ENTERE
■■ Setup
Anynet+ (HDMI-CEC) (Off / On): To use the Anynet+ Function, Anynet+ (HDMI-CEC) must be set to On.
✎✎ When the Anynet+ (HDMI-CEC) function is disabled, all the Anynet+ related operations are deactivated.
Auto Turn Off (No / Yes): Setting an Anynet+ Device to turn off automatically when the TV is turned off.
The active source on the TV must be set to TV to use the Anynet+ function.
✎✎
✎✎ Even if an external device is still recording, it may turn off.
¦¦ Switching between Anynet+ Devices
1. Anynet+ devices connected to the TV are listed.
✎✎ If you cannot find a device you want, press the Red button to refresh the list.
2. Select a device and press the ENTERE button. You can switch to the selected device.
✎✎ Only when you set Anynet+ (HDMI-CEC) to On in the Application menu, the Device List menu appears.
xx Switching to the selected device may take up to 2 minutes. You cannot cancel the operation during the switching
operation.
xx If you have selected external input mode by pressing the SOURCE button, you cannot use the Anynet+ function.
Make sure to switch to an Anynet+ device by using the Device List.
¦¦ Recording
You can make a recording of a TV Program using a Samsung recorder.
1. Select Recording.
✎✎ When there are more than two recording devices
xx When multiple recording devices are connected, the recording devices are listed. Select one recording device in
the Device List.
✎✎ When the recording device is not displayed, select Device List and press the Red button to search devices.
2. Press the EXIT button to exit.
✎✎ You can record the source streams by selecting Recording: (device_name).
✎✎ Pressing the � (REC) button will record whatever you are currently watching. If you are watching video from
another device, the video from the device is recorded.
✎✎ Before recording, check whether the antenna jack is properly connected to the recording device. To properly
connect an antenna to a recording device, refer to the recording device’s users manual.
English
[PC450]BN68-02795A-01L02.indb 31
31
2010-03-30 오후 3:37:27
Advanced Features
¦¦ Listening through a Receiver
You can listen to sound through a receiver (i.e Home Theater) instead of the TV Speaker.
1. Select Receiver and set to On.
2. Press the EXIT button to exit.
✎✎ If your receiver supports audio only, it may not appear in the device list.
✎✎ The receiver will work when you have properly connected the optical in jack of the receiver to the
DIGITAL AUDIO OUT (OPTICAL) jack of the TV.
✎✎ When the receiver (i.e Home Theater) is set to On, you can hear sound output from the TV’s Optical jack. When
the TV is displaying a DTV (air) signal, the TV will send out 5.1 channel sound to the receiver. When the source is a
digital component such as a DVD and is connected to the TV via HDMI, only 2 channel sound will be heard from
the receiver.
✎✎NOTE
xx You can only control Anynet+ devices using the TV remote control, not the buttons on the TV.
xx The TV remote control may not work under certain conditions. If this occurs, reselect the Anynet+ device.
xx The Anynet+ functions do not operate with other manufacturers’ products.
¦¦ Troubleshooting for Anynet+
Problem
Possible Solution
Anynet+ does not work.
•
•
•
•
•
•
•
•
I want to start Anynet+.
• Check if the Anynet+ device is properly connected to the TV and check if the Anynet+ (HDMI-CEC) is set to
On in the Anynet+ Setup menu.
• Press the TOOLS button to display the Anynet+ menu and select a menu you want.
I want to exit Anynet+.
• Select View TV in the Anynet+ menu.
• Press the SOURCE button on the TV remote control and select a non- Anynet+ device.
• Press z, PRE-CH, and FAV.CH to change the TV mode. (Note that the channel button operates only
when a tuner-embedded Anynet+ device is not connected.)
The message “Connecting to
Anynet+ device...” appears on the
screen.
• You cannot use the remote control when you are configuring Anynet+ or switching to a view mode.
• Use the remote control when the Anynet+ setting or switching to view mode is complete.
The Anynet+ device does not play.
• You cannot use the play function when Plug & Play (initial setup) is in progress.
The connected device is not
displayed.
•
•
•
•
•
The TV Program cannot be
recorded.
• Check whether the antenna jack on the recording device is properly connected.
The TV sound is not output
through the receiver.
• Connect the optical cable between TV and the receiver.
32
Check if the device is an Anynet+ device. The Anynet+ system supports Anynet+ devices only.
Only one receiver (home theater) can be connected.
Check if the Anynet+ device power cord is properly connected.
Check the Anynet+ device’s Video/Audio/HDMI cable connections.
Check whether Anynet+ (HDMI-CEC) is set to On in the Anynet+ setup menu.
Check whether the TV remote control is in TV mode.
Check whether the remote control is Anynet+ compatible.
Anynet+ doesn’t work in certain situations. (Searching channels, operating Media Play (USB) or Plug & Play
(initial setup), etc.)
• When connecting or removing the HDMI cable, please make sure to search devices again or turn your TV off
and on again.
• Check if the Anynet+ Function of Anynet+ device is set on.
Check whether or not the device supports Anynet+ functions.
Check whether or not the HDMI cable is properly connected.
Check whether Anynet+ (HDMI-CEC) is set to On in the Anynet+ setup menu.
Search Anynet+ devices again.
You can connect an Anynet+ device using the HDMI cable only. Some HDMI cables may not support Anynet+
functions.
• If connection is terminated because there has been a power interruption or the HDMI cable has been
disconnected, please repeat the device scan.
English
[PC450]BN68-02795A-01L02.indb 32
2010-03-30 오후 3:37:27
Other Information
(Not available in some locations)
¦¦ Frequency Configuration
yy FM transmitter’s frequency must be set differently from any FM radio frequency in the vicinity of the TV in order to achieve
good signal receptivity free of radio interference.
yy If a TV channel frequency falls within the FM frequency range, the FM transmitter will automatically update its permissible
frequency range.
yy Identical TV channel and FM transmitter frequency will result in signal interference. To prevent this, the FM transmitter’s
frequency range is automatically displayed.
yy If there is no TV channel frequency within the FM frequency range (83MHz to 108MHz), the entire range from 88.0MHz to
107.9MHz is available for use.
05 Other Information
FM Transmitter Setup
¦¦ FM Transmitter Installation Guide
The FM transmitter module features an integrated antenna. Antenna signal strength will vary depending on where the antenna
is installed and on the performance of the receiver. If you experience poor signal strength, try installing the antenna in one of
the methods shown below:
Method 1
Method 2
Connect the FM transmitter (fig. 1), attach the clamp (fig. 2) and hook the
antenna lead to the clamp.
If the reception is inadequate after using “Method 1”, we recommend
installing the transmitter using “Method 2”. Unwind and position an antenna
where the receiver gets best reception
Unwind and position an antenna where the
receiver gets best reception.
2
1
✎✎NOTE
(Not available in some locations)
xx Installing the antenna directly on the back of the TV may result in poor signal strength. Allow some room between the
TV and the antenna.
xx Having the FM transmitter antenna in direct contact with the TV antenna can result in signal interference.
xx If the FM Transmitter menu is not enabled, check that the FM transmitter is correctly inserted into the 1 FM
TRANSMITTER slot.
xx To hear audio, transmitted from the TV in FM frequency, on an FM receiver (radio, home theater, etc.), move the
antenna of the FM receiver until the audio is clear.
xx If you use an FM receiver (radio, home theater, etc.), you can enjoy quality audio transmitted from the TV via FM
frequency if your person is within 10 m of the receiver.
xx Be sure to use the provided FM transmitter. Otherwise, the product may be damaged.
xx Avoid using the provided FM transmitter with other products.
English
[PC450]BN68-02795A-01L02.indb 33
33
2010-03-30 오후 3:37:28
Other Information
xx Adjust the frequency of the FM receiver (radio, home theater, etc.) to the frequency of the FM transmitter on the TV. If
the frequency of the receiver does not match, the sound will not be heard.
xx Adjust the volume of the FM receiver to an appropriate level.
xx When the TV is turned off, the FM receiver (radio, home theater, etc.) emits static noise.
xx Due to interference from other electronics, which is a weakness of wireless communications, you may hear sound
stuttering or static.
¦¦ Supported FM Transmitter formats
Name
SPEC
Normal
Frequency Rang
Transfer distance
34
88.0MHz ~ 107.9MHz
Automatic range setting
Match the TV Frequency
(In 88.0MHz ~107.9MHz)
Maximum 5m : Depend on Antenna position and receiver quality
English
[PC450]BN68-02795A-01L02.indb 34
2010-03-30 오후 3:37:28
05 Other Information
Installing the Wall Mount
Attaching the Blanking Bracket
When installing the TV onto a wall, attach the Blanking Bracket as shown.
Blanking Bracket
Installing the Wall Mount Kit
The wall mount kit (sold separately) allows you to mount the TV on the wall.
For detailed information on installing the wall mount, see the instructions provided with the wall mount. Contact a technician for
assistance when installing the wall mount bracket.
Samsung Electronics is not responsible for any damage to the product or injury to yourself or others if you elect to install the
TV on your own.
Wall Mount Kit Specifications (VESA)
✎✎
The wall mount kit is not supplied, but sold separately.
Install your wall mount on a solid wall perpendicular to the floor. When attaching to other building materials, please contact
your nearest dealer. If installed on a ceiling or slanted wall, it may fall and result in severe personal injury.
✎✎NOTE
xx Standard dimensions for wall mount kits are shown in the table below.
xx When purchasing our wall mount kit, a detailed installation manual and all parts necessary for assembly are provided.
xx Do not use screws that do not comply with the VESA standard screw specifications.
xx Do not use screws that are longer than the standard dimension or do not comply with the VESA standard screw
specifications. Screws that are too long may cause damage to the inside of the TV set.
xx For wall mounts that do not comply with the VESA standard screw specifications, the length of the screws may differ
depending on the wall mount specifications.
xx Do not fasten the screws too strongly this may damage the product or cause the product to fall, leading to personal
injury. Samsung is not liable for these kinds of accidents.
xx Samsung is not liable for product damage or personal injury when a non-VESA or non-specified wall mount is used or
the consumer fails to follow the product installation instructions.
xx Do not mount the TV at more than a 15 degree tilt.
xx Always use two people to mount the TV to a wall.
Product Family
inches
VESA Spec.
(A * B)
42~50
400 X 400
58~63
600 X 400
70~79
800 X 400
80~
1400 X 800
PDP TV
Standard Screw
Quantity
M8
4
✎✎ Unscrew the hole around before installing Wall-Mount on the wall.
Do not install your Wall Mount Kit while your TV is turned on. It may result in personal injury due to
electric shock.
English
[PC450]BN68-02795A-01L02.indb 35
35
2010-03-30 오후 3:37:29
Other Information
Securing the TV to the wall
Caution: Pulling, pushing, or climbing on the TV may cause the TV to fall. In particular, ensure your children do
not hang over or destabilize the TV; doing so may cause the TV to tip over, causing serious injuries or death.
Follow all safety precautions provided on the included Safety Flyer. For added stability, install the anti-fall device
for safety purposes, as follows.
¦¦ To Avoid the TV from Falling
1. Put the screws into the clamps and firmly fasten them onto the wall.
Confirm that the screws have been firmly installed onto the wall.
✎✎ You may need additional material such as an anchor depending on
the type of wall.
✎✎ Since the necessary clamps, screws, and string are not supplied,
please purchase these additionally.
2. Remove the screws from the back center of the TV, put the screws into
the clamps, and then fasten the screws onto the TV again.
✎✎ Screws may not be supplied with the product. In this case, please
purchase the screws of the following specifications.
3. Connect the clamps fixed onto the TV and the clamps fixed onto the wall
with a strong cable and then tie the string tightly.
✎✎ NOTE
xx Install the TV near to the wall so that it does not fall backwards.
xx It is safe to connect the string so that the clamps fixed on the
wall are equal to or lower than the clamps fixed on the TV.
xx Untie the string before moving the TV.
Wall
4. Verify all connections are properly secured. Periodically check
connections for any sign of fatigue for failure. If you have any doubt about
the security of your connections, contact a professional installer.
36
English
[PC450]BN68-02795A-01L02.indb 36
2010-03-30 오후 3:37:29
If the TV seems to have a problem, first try this list of possible problems and solutions. If none of these troubleshooting tips
apply, visit “www.samsung.com,” then click on Support, or contact a Samsung customer service center.
Issues
Solutions and Explanations
Poor picture
First of all, please perform the Picture Test and confirm that your TV is properly displaying test image.
(go to MENU - Support - Self Diagnosis - Picture Test) (p. 23)
If the test image is properly displayed, the poor picture may caused by the source or signal.
The TV image does not look as good as it
did in the store.
• If you have an analog Cable/Satellite Box, upgrade to an HD digital set top box. Use HDMI or
Component cables to deliver HD (high definition) picture quality.
• Cable/Satellite subscribers: Try HD stations from the channel line up.
• Antenna connection: Try HD stations after performing Auto program.
✎✎ Many HD channels are upscaled from SD (Standard Definition) contents.
• Adjust the Cable/Sat box video output resolution to 1080i or 720p.
The picture is distorted: macroblock error,
small block, dots, pixelization.
• Compression of video contents may cause picture distortion, especially in fast moving pictures such
as sports and action movies.
• Low signal level can cause picture distortion. This is not a TV problem.
• Mobile phones used close to the TV (cca up to 1m) may cause noise in picture on analog and digital
TV.
Color is wrong or missing.
• If you’re using a component connection, make sure the component cables are connected to the
correct jacks. Incorrect or loose connections may cause color problems or a blank screen.
There is poor color or brightness.
• Adjust the Picture options in the TV menu. ( go to Picture mode / Color / Brightness / Sharpness)
(p. 15)
• Adjust Energy Saving option in the TV menu. (go to MENU – Picture – Eco Solution –
Energy Saving) (p. 15)
• Try resetting the picture to view the default picture settings. (go to MENU - Picture - Picture Reset)
(p. 17)
There is a dotted line on the edge of the
screen.
• If the picture size is set to Screen Fit, change it to 16:9 (p. 16).
• Change cable/satellite box resolution.
The picture is black and white.
• If you are using an AV composite input, connect the video cable (yellow) to the Green jack of
component input 1 on the TV.
When changing channels, the picture
freezes or is distorted or delayed.
• If connected with a cable box, please try to reset the cable box. Reconnect the AC cord and wait until
the cable box reboots. It may take up to 20 minutes.
• Set the output resolution of the cable box to 1080i or 720p.
Sound Problem
First of all, please perform the Sound Test to confirm that your TV audio is properly operating.
(go to MENU - Support - Self Diagnosis - Sound Test) (p. 23)
If the audio is OK, the sound problem may caused by the source or signal.
There is no sound or the sound is too low
at maximum volume.
• Please check the volume of the device (Cable/Sat Box, DVD, Blu-ray etc) connected to your TV.
The picture is good but there is no sound.
• Set the Speaker Select option to TV Speaker in the Sound menu (p. 19).
• If you are using an external device, make sure the audio cables are connected to the correct audio
input jacks on the TV.
• If you are using an external device, check the device’s audio output option (ex. you may need to
change your cable box’s audio option to HDMI when you have a HDMI connected to your TV).
• If you are using a DVI to HDMI cable, a separate audio cable is required.
• If your TV has a headphone jack, make sure there is nothing plugged into it.
• Reboot the connected device by reconnecting the device’s power cable.
English
[PC450]BN68-02795A-01L02.indb 37
05 Other Information
Troubleshooting
37
2010-03-30 오후 3:37:29
Other Information
Issues
Solutions and Explanations
The speakers are making an inappropriate
noise.
• Check cable connections. Make sure a video cable is not connected to an audio input.
• For antenna or Cable connections, check the signal strength. Low signal level may cause sound
distortion.
• Perform the Sound Test as explained above.
No Picture, No Video
The TV won’t turn on.
• Make sure the AC power cord is securely plugged in to the wall outlet and the TV.
• Make sure the wall outlet is working.
• Try pressing the POWER button on the TV to make sure the problem is not the remote. If the TV turns
on, refer to “Remote control does not work” below.
The TV turns off automatically.
•
•
•
•
There is no picture / Video.
• Check cable connections(remove and reconnect all cables connected to the TV and external devices).
• Set your external devices’ (Cable/Sat Box, DVD, Blu-ray etc) video outputs to match the connections
to the TV input. For example, if an external device’s output is HDMI, it should be connect to an HDMI
input on the TV.
• Make sure your connected devices are powered on.
• Be sure to select the TV’s correct source by pressing the SOURCE button on the remote control.
• Reboot the connected device by reconnecting the device’s power cable.
Ensure the Sleep Timer is set to Off in the Setup menu (p. 20).
If your PC is connected to the TV, check your PC power settings.
Make sure the AC power cord is plugged in securely to the wall outlet and the TV.
When watching TV from an antenna or cable connection, the TV will turn off after 10 - 15 minutes if
there is no signal.
RF(Cable/Antenna) Connection
The TV is not receiving all channels.
• Make sure the coaxial cable is connected securely.
• Please try Auto Program to add available channels to the channel list. Go to MENU - Channel Auto Program then select Auto and make sure the correct Cable TV signal type is set in the menu.
(p. 14)
• Verify the Antenna is positioned correctly.
The picture is distorted: macroblock error,
small block, dots, pixelization.
• Compression of video contents may cause picture distortion, especially with fast moving pictures
such as sports and action movies.
• A low signal can cause picture distortion. This is not a TV problem.
PC Connection
A “Mode Not Supported” message
appears.
• Set your PC’s output resolution so it match the resolutions supported by the TV (p. 10).
“PC” is always shown on the source list,
even if a PC is not connected.
• This is normal; “PC” is always shown on the source list, regardless of whether a PC is connected.
The video is OK but there is no audio.
• If you are using an HDMI connection, check the audio output setting on your PC.
Others
Purple/green rolling horizontal bars and
buzzing noise from the TV speakers with
Component cable connection.
• Remove the left and right audio connections from the set-top-box. If the buzzing stops, this indicates
that the set-top-box has a grounding issue. Replace the Component video cables with an HDMI
connection.
The picture won’t display in full screen.
• HD channels will have black bars on either side of the screen when displaying upscaled SD (4:3)
contents.
• Black bars on the top and bottom will appear during movies that have aspect ratios different from
your TV.
• Adjust the picture size options on your external device or TV to full screen.
The remote control does not work.
• Replace the remote control batteries with correct the poles (+/–) in the right direction.
• Clean the sensor’s transmission window on the remote.
• Try pointing the remote directly at the TV from 5~6 feet away.
The TV is making a humming noise.
• Plasma TVs typically make a soft humming sound. This is normal. It’s caused by the electrical charges
that are used to create the images on the screen.
• If the humming sound is loud, you may have set the brightness on the TV too high. Try setting the
brightness lower.
• You can also have loud humming if the back of your Plasma TV is too close to a wall or other hard
surface. Also try rerouting your connection cables.
• Improper installation of wall mount can create excessive noise.
38
English
[PC450]BN68-02795A-01L02.indb 38
2010-03-30 오후 3:37:29
Solutions and Explanations
Image Retention (Burn In) Issue.
• To minimize the possibility of screen burn, this unit is equipped with screen burn reduction technology.
Pixel Shift technology enables you to set picture movement up/down (Vertical Line) and side to side
(Horizontal Dot).
The cable/set top box remote control
doesn’t turn the TV on or off, or adjust the
volume.
• Program the Cable/Set remote control to operate the TV. Refer to the Cable/Set user manual for the
SAMSUNG TV code.
Caption on TV menu is greyed out.
• Caption can not be selected in the TV menu when connected via HDMI or Component (p. 21).
• Caption must be activated on the external device (p. 21).
A “Mode Not Supported” message
appears.
• Check the supported resolution of the TV, and adjust the external device’s output resolution
accordingly. Refer to the resolution settings on page 10 of this manual.
There is a plastic smell from the TV.
• This smell is normal and will dissipate over time.
The TV Signal Information is unavailable
in the Self Diagnostic Test menu.
• This function is only available with digital channels from an Antenna / RF / Coax connection (p. 23).
The TV is tilted to the side.
• Remove the base stand from the TV and reassemble it.
There are difficulties assembling the stand
base.
• Make sure the TV is placed on a flat surface. If you can not remove the screws from the TV, use a
magnetized screw driver.
The channel menu is greyed out
(unavailable).
• The Channel menu is only available when the TV source is selected.
Your settings are lost after 30 minutes or
every time the TV is turned off.
• If the TV is in the Store Demo mode, it will reset audio and picture settings every 30 minutes. Change
the settings from Store Demo mode to Home Use mode in the Plug & Play procedure. Press the
SOURCE button to select TV mode, and go to MENU → Setup → Plug & Play → ENTERE (p. 7).
You have intermittent loss of audio or
video.
• Check the cable connections and reconnect them.
• Loss of audio or video can be caused by using overly rigid or thick cables. Make sure the cables are
flexible enough for long term use. If mounting the TV to a wall, we recommend using cables with 90
degree connectors.
You see small particles when you look
closely at the edge of the frame of the TV.
• This is part of the product’s design and is not a defect.
The PIP menu is not available.
• PIP functionality is only available when you are using a HDMI, PC or Component source.
POP (TV’s internal banner ad) appears on
the screen.
• Select Home Use under Plug & Play mode. For details, refer to Plug & Play Feature (p. 7).
05 Other Information
Issues
✎✎ Some of above pictures and functions are available at specific models only.
English
[PC450]BN68-02795A-01L02.indb 39
39
2010-03-30 오후 3:37:30
Other Information
Specifications
Environmental Considerations
Operating Temperature
Operating Humidity
Storage Temperature
Storage Humidity
50°F to 104°F (10°C to 40°C)
10% to 80%, non-condensing
-4°F to 113°F (-20°C to 45°C)
5% to 95%, non-condensing
Stand Swivel (Left / Right)
-20˚ ~ 20˚
Model Name
PL42C450
PL50C450
Screen Size
42 inches
50 inches
200W
<1W
290W
<1W
Power Consumption
Normal operation
Standby
Sound
(Output)
10 W X 2
Dimensions (WxDxH)
Body
With stand
Weight
Without Stand
With Stand
Panel native
40.6 x 2.8 x 24.8 inches
(1031 x 70.9 x 631.0 mm)
40.6 x 11.2 x 27.4 inches
(1031 x 284.5 x 695.5 mm)
47.3 x 2.7 x 28.4 inches
(1202.6 x 69.5 x 720.5 mm)
47.3 x 11.2 x 31.0 inches
(1202.6 x 284.3 x 786.3 mm)
38.6 Ibs (17.5 kg)
43.0 Ibs (19.5 kg)
50.7 Ibs (23 kg)
55.1 Ibs (25 kg)
1024 X 768 @ 60Hz
1360 X 768 @ 60Hz
✎✎Design and specifications are subject to change without prior notice.
✎✎For information about power supply, and more about power consumption, refer to the label attached to the product.
¦¦ License
Manufactured under license from Dolby Laboratories. Dolby and the double-D symbol are
trademarks of Dolby Laboratories.
Manufactured under license under U.S. Patent #’s: 5,451,942; 5,956,674; 5,974,380; 5,978,762;
6,487,535 & other U.S. and worldwide patents issued & pending. DTS and the Symbol are
registered trademarks. & DTS 2.0+ Digital Out and the DTS logos are trademarks of DTS, Inc.
Product Includes software. © DTS, Inc. All Rights Reserved.
DivX Certified to play DivX video up to HD 1080p, including premium content.
ABOUT DIVX VIDEO: DivX® is a digital video format created by DivX,Inc. This is an official DivX Certified device that
plays DivX video. Visit www.divx.com for more information and software tools to convert your files into DivX video.
ABOUT DIVX VIDEO-ON-DEMAND: This DivX Certified® device must be registered in order to play DivX Video-onDemand (VOD) content. To generate the registration code, locate the DivX VOD section in the device setup menu. Go
to vod.divx.com with this code to complete the registration process and learn more about DivX VOD. Pat. 7,295,673;
7,460,688; 7,519,274
Open Source License Notice
In the case of using open source software, Open Source Licenses are available on the product menu.
Open Source License Notice is written only English.
40
English
[PC450]BN68-02795A-01L02.indb 40
2010-03-30 오후 3:37:30
A
Amplify
Antenna
Anynet+
AUDIO OUT Auto Adjustment
Auto Volume
F
18
13
30
9
18
19
B
Background Music
Balance L/R
Basic View
Batteries
Black Tone
Blanking Bracket Brightness
29
18
29
6
16
35
15
21
12
20
16
8
9
9
D
DIGITAL AUDIO OUT
DivX® VOD
D-sub
Dynamic
Dynamic Contrast
9, 30
29
9
15
16
HDMI
Home Theater
8, 30
9, 30
I
Installation Space
Language
License
Lock
2
21
40
14
24
22
22
19
27
15
11
14
15
18
19
Optimal resolution
11
14
23
15
23
20
28
23
11
19
40
5
3
Timer
Title
Tools
Troubleshooting
TV Speaker
20
29
3
37
19
USB Drive
23, 24
V
10
P
Photos
Picture Size
PIP (Picture in Picture) Plug & Play
Power Indicator
Select All
Self Diagnosis
Sharpness
Signal Information
Sleep Timer
Slide Show
Software Upgrade
Source List
Speaker Select
Specifications
Standby mode
Symbol
U
N
Navigate 32
31
6
29
16
29
T
M
Media Play
Melody
Menu Transparency
Mono
Music
Receiver
Recording
Remote Control
Repeat Mode
RGB Only Mode
Rotate
S
H
O
E
Eco Sensor
Edit Name
Editing Channels Energy Saving
Equalizer
External Speaker
6, 13
13
17
15
16
10
19
L
C
Change PIN
Channel Menu
Clock
Color Tone
Component
Connect to a PC
Connecting to an Audio Device
FAV.CH button
Favorite Channel
Film Mode
Fine Tune
Flesh Tone
Frequency
FM Transmitter
R
28
16, 29
22
7
5
Video Formats
Videos
Virtual Surround Volume
26
25
18
5
W
Wall Mount
Warm
White Balance 35
16
16
English
[PC450]BN68-02795A-01L02.indb 41
05 Other Information
Index
41
2010-03-30 오후 3:37:30
As figuras e ilustrações deste Manual de usuário são fornecidas apenas para fins de referência e podem ser diferentes da
aparência real dos produtos. O design e as especificações do produto podem ser alterados sem aviso prévio.
Para obter máxima qualidade de imagem sem distorção é necessário sinal digital de alta qualidade em formato widescreen
e uso de *conversor/decodificador de sinal.
*Este modelo já possui o conversor/decodificador de sinal integrado.
Instruções ao usuário
• Retenção da imagem na tela
Não exiba uma imagem estática (como em um videogame) no painel do monitor de plasma por mais de alguns minutos, pois isso pode causar
retenção da imagem na tela. Essa retenção de imagem também é conhecida como “queima de tela”. Para evitar esse tipo de retenção da imagem,
consulte a página 15 deste manual para reduzir o grau de brilho e contraste da tela ao exibir uma imagem estática.
• Aquecimento da parte superior da TV de Plasma
A parte de cima do produto pode esquentar após longos períodos de uso, uma vez que o calor é dissipado da tela através da saída de ventilação na
parte superior do produto.
Isso é normal e não indica qualquer defeito ou problema operacional do produto.
Entretanto, é recomendável não deixar que crianças toquem na parte de cima do produto.
• O produto está fazendo um ruído de “estalo”.
Um ruído de “estalo” pode ocorrer quando há contração ou expansão do produto devido a mudança do ambiente, como temperatura ou umidade.
Isso é normal e não um defeito da unidade.
• Defeitos na célula
O PDP utiliza um painel composto de 2.360.000 (nível HD) a 6.221.000 (nível FHD) pixels que requerem tecnologia sofisticada para produção.
Entretanto, pode haver alguns pixels luminosos ou escuros na tela. Esses pixels não causarão nenhum impacto no desempenho do produto.
• Evite operar a TV em temperaturas abaixo de 5°C
• Uma imagem estática exibida por muito tempo pode causar dano permanente no Painel PDP.
O fato de assistir a TV de Plasma no formato 4:3 por um longo período de tempo pode deixar traços de bordas exibidos nas partes
esquerda, direita e central da tela, causados pela diferença da emissão de luz na tela. A utilização de um DVD ou de um console de
jogo pode causar efeitos semelhantes na tela.
Danos provocados pelo efeito acima não são cobertos pela Garantia.
• Retenção de imagens na tela.
A exibição de imagens estáticas de Videogames e PC por mais tempo que um determinado período pode produzir pós-imagens parciais.
Para evitar esse efeito, reduza o “brilho” e o “contraste” ao exibir imagens estáticas por longos períodos de tempo.
• Garantia
A garantia não cobre defeitos causados por retenção de imagens.
A queima de tela não está coberta pela garantia.
Segurança do espaço de instalação
Mantenha as distâncias exigidas entre o produto e outros objetos (paredes, por exemplo) para garantir a ventilação apropriada.
A não observação de tais distâncias pode causar incêndios ou problemas com o produto devido a elevações de sua temperatura interna.
✎✎ Ao usar um suporte ou suporte de parede, utilize somente as peças fornecidas pela Samsung Electronics.
xx Se você usar peças fornecidas por outro fabricante, isto pode resultar em algum problema com o produto ou ferimento ocasionado pela queda
do produto.
✎✎ A aparência pode ser diferente dependendo do produto.
Instalação com um suporte
Instalação com um suporte de parede
10 cm
10 cm
10 cm
10 cm
10 cm
10 cm
10 cm
2
Português
[PC450]BN68-02795A-01L02.indb 2
2010-03-30 오후 3:37:31
ÍNDICE
INFORMAÇÕES GERAIS
yy Menu de Configuração............................................ 20
yy
yy
yy
yy
yy
yy
yy Menu de Suporte..................................................... 23
Lista de funções........................................................ 4
Acessórios................................................................. 4
Visualizando o Painel de controle............................... 5
Visualizando o controle remoto.................................. 6
Conexão com uma antena......................................... 7
Ajuste - Plug & Play (Configuração inicial)................... 7
Ajuste da hora
Uso do Sleep Timer
Temporizador para ligar / desligar
Bloqueio de programas
Outras funções
Picture-In-Picture (PIP)
20
20
20
21
21
22
CONEXÕES
FUNÇÕES AVANÇADAS
yy
yy
yy
yy
yy Media Play .............................................................. 24
Conexão com um dispositivo AV................................ 8
Conexão com um dispositivo de áudio...................... 9
Como se conectar a um PC....................................... 9
Alteração da fonte de entrada.................................. 11
Configuração do Anynet+ Alternando entre dispositivos Anynet+ Gravação Ouvindo através de um receptor Solução de problemas para Anynet+
Como navegar pelos menus.................................... 11
Usando o botão INFO (guia Agora & Próximo)......... 12
Como planejar sua exibição..................................... 12
Menu de Canais....................................................... 12
Exibição de Canais
Uso dos Canais favoritos
Memorização de Canais
Edição de Canais
Outras funções
12
13
13
14
14
yy Configuração do FM Transmitter ............................. 33
Configuração da Frequência
Guia de Instalação do FM Transmitter
Formatos de FM Transmitter suportados
15
15
15
16
18
yy Menu de Som.......................................................... 18
18
18
18
33
33
34
yy Como instalar o kit de montagem na parede............ 35
yy Afixação da TV à parede com segurança................. 36
Para evitar que a TV caia
36
yy Solução de problemas............................................. 37
yy Especificações......................................................... 40
Licença
PORTUGUÊS
Como alterar o modo de Imagem predefinido
Ajuste de configurações de Imagem
Soluções econômicas
Como alterar as opções de imagem
Ajuste da TV com o seu PC
31
31
31
32
32
APÊNDICE
yy Menu de Imagem..................................................... 15
Como alterar o modo de som predefinido
Ajuste das configurações de som
Configuração do Som
24
25
28
29
yy Anynet+................................................................... 30
FUNÇÕES BÁSICAS
yy
yy
yy
yy
Conectando a um dispositivo USB
Exibição na tela
Reprodução de arquivos múltiplos Media Play - Funções adicionais
40
yy Índice Remissivo...................................................... 41
Verifique o símbolo!
TO
O
LS
t
É possível utilizar essa função
pressionando o botão TOOLS no
controle remoto.
Nota
Guia passo a passo
Indica informações adicionais.
Confira aqui instruções sobre como abrir o
submenu relevante dentro do menu (on screen
display).
Português
[PC450]BN68-02795A-01L02.indb 3
3
2010-03-30 오후 3:37:31
INFORMAÇÕES GERAIS
Lista de funções
yy Excelente rede de comunicação e interface digital: Com um sintonizador digital de HD interno, as transmissões HD sem
assinatura podem ser visualizadas sem cabo/receptor de satélite (conversor Set-Top Box).
yy Media Play (USB): Possibilita a reprodução de arquivos de música, fotos e filmes salvos em um dispositivo USB (p. 24).
yy Auto Diagnóstico: É possível verificar se a imagem ou o áudio estão operando normalmente (p. 23).
Acessórios
✎✎Verifique se os itens a seguir foram incluídos com a TV PDP. Se algum item estiver faltando, entre em contato com o
representante.
✎✎As cores e os formatos dos itens podem variar dependendo do modelo.
yy Controle remoto e pilhas (AAA x 2) (nao disponivel em todos os locais)
yy Instruções ao proprietário
yy Certificado de garantia / Guia de segurança (nao disponivel em todos os locais)
yy Suporte sólido
yy Pano de limpeza
yy Cabo de força
yy Transmissor FM e braçadeira
(não disponíveis para algumas localidades)
Cabos de entrada (Vendidos separadamente)
HDMI
4
HDMI-DVI
Componente
Composto(AV)
Coaxial (RF)
VGA
Português
[PC450]BN68-02795A-01L02.indb 4
2010-03-30 오후 3:37:32
01 INFORMAÇÕES GERAIS
Visualizando o Painel de controle
A cor e o formato do produto podem variar, dependendo do modelo.
Indicador de energia
Sensor do controle remoto
Alto-falantes
SOURCEE
MENU
y
z
Indicador de energia
P (Power)
Sensor do controle remoto
Alterna entre todas as fontes de entrada disponíveis. No menu na tela, utilize esse
botão da mesma maneira que usaria o botão ENTERE no controle remoto.
Exibe o menu na tela com as funções da sua TV.
Ajusta o volume. No menu na tela, use os botões y da mesma maneira que
usaria os botões ◄ e ► no controle remoto.
Muda os canais. No menu na tela, use os botões z da mesma maneira que
usaria os botões ▼ e ▲ no controle remoto.
Pisca e apaga quando a energia está ligada e acende quando está no modo de
espera.
Liga e desliga a TV.
Aponte o controle remoto para este ponto na TV.
Modo standby
Não deixe a sua TV em standby por longos períodos (quando você viajar, por exemplo). Uma pequena quantidade de energia
é consumida mesmo com o botão Power desligado. É melhor desconectar o cabo da tomada.
Português
[PC450]BN68-02795A-01L02.indb 5
5
2010-03-30 오후 3:37:32
INFORMAÇÕES GERAIS
Visualizando o controle remoto
SOURCE
Exibe e seleciona as fontes de vídeo
disponíveis (p. 11).
Liga e desliga a TV.
Pressione para acessar canais
diretamente.
Pressione para selecionar mais canais
(digitais) transmitidos pela mesma estação.
Por exemplo, para selecionar o canal “54.3”,
pressione “54”, depois “-” e “3”.
Volta ao canal anterior.
Elimina o som temporariamente.
Ajusta o volume.
Muda os canais.
CH LIST
Exibe o menu na tela.
Exibe o EPG (Electronic Program Guide)
(p. 12).
Pressione para exibir informações na tela
da TV.
IT
LS
TO
O
GUIDE
FO
Seleciona rapidamente funções utilizadas
com frequência.
Exibe a Lista de canais na tela (p. 12).
MEDIA.P
IN
Exibe o Media Play (USB) (p. 24).
Sai do menu.
Seleciona os itens do menu de tela e
troca os valores vistos no menu.
RE
Botões utilizados nos menus
Lista de Canais, Media Play (USB), etc.
A
RN
EX
TU
Volta ao menu anterior.
Utilize esses botões nos modos|
Media Play (USB) e Anynet+ (HDMI-CEC)
(p. 24, 30).
(�: Controla a gravação em gravadores
Samsung que têm o recurso Anynet+)
B
C
D
P.MODE
S.MODE
MTS
FAV.CH
P.SIZE
CC
P.MODE: Selecione o modo de imagem
(p. 15).
S.MODE: pressione para selecionar o
modo de som (p. 18).
MTS: pressione para selecionar estéreo,
mono ou programa de áudio separado
(transmissão SAP) (p. 19).
FAV.CH: exibe listas de canais favoritos
na tela (p. 13).
P.SIZE: seleciona o tamanho da imagem
(p. 16).
CC: controla o decodificador de legendas
(p. 21).
Instalação das pilhas (Tamanho das pilhas: AAA)
✎✎NOTA
xx Utilize o controle remoto a uma distância máxima de 7
metros da TV.
xx Luzes brilhantes podem afetar o desempenho do controle
remoto. Evite utilizá-lo quando estiver perto de luzes
fluorescentes ou de letreiros de neon.
xx A cor e o formato podem variar, dependendo do modelo.
6
Português
[PC450]BN68-02795A-01L02.indb 6
2010-03-30 오후 3:37:33
01 INFORMAÇÕES GERAIS
Conexão com uma antena
Quando a TV for ligada, os ajustes básicos serão realizados automaticamente.
✎✎Conexão do cabo de força e da antena.
Antena VHF/UHF
ou
Cabo
ANT OUT
Entrada de energia
Ajuste - Plug & Play (Configuração inicial)
Quando a TV for ligada, uma sequência de avisos na tela irá auxiliá-lo a realizar as configurações básicas. Pressione o botão
POWERP. Plug & Play fica disponível apenas quando a fonte Entrada está definida como TV.
✎✎Para retornar à etapa anterior, pressione o botão vermelho.
1
2
Seleção de idioma
3
Seleção de antena
4
Seleção de canal
5
Configuração do
Modo Relógio.
6
7
Visualização do
Guia de Conexão HD.
Aproveite a sua TV!
Seleção Loja ou Casa
Pressione o botão ▲ ou ▼, e então pressione o botão
POWER
ENTERE. Selecione o idioma desejado para o menu da tela.
Pressione o botão ◄ ou ►, e então pressione o botão
ENTERE.
yy Selecione o modo Casa. O modo Loja é o modo utilizado
pelas lojas.
yy Para retornar as configurações da unidade de Loja para
Casa (padrão): Pressione o botão de volume da TV. Ao
ver o menu de volume na tela, aperte e mantenha o botão
pressionado MENU por 5 segundos.
Pressione o botão ▲ ou ▼, e então pressione o botão ENTERE.
yy Caso a antena esteja conectada a ANT 1 IN (AIR), selecione Ar e, caso esteja
conectada a ANT 2 IN (CABLE), selecione Cabo.
yy Caso estejam conectados ANT 1 IN (AIR) e ANT 2 IN (CABLE), selecione Ar+Cabo.
Após selecionar a fonte de antena a ser memorizada, selecione Busca. A TV começará a
memorizar todos os canais disponíveis. Para obter mais informações, consulte
Canal → Prog. Automática (p. 13).
yy Pressione o botão ENTERE quando desejar, para interromper o processo de
memorização.
Configure a opção Modo Relógio automática ou manualmente.
yy Config. Automática: Permite-lhe selecionar o fuso horário.
yy Config. Manual: permite definir data e hora atuais manualmente (p. 20).
É exibido o método de conexão para que você tenha a melhor qualidade de imagem HD.
P
INFO
Pressione o botão ENTERE.
Se você quiser restaurar essa função...
OO MENUm → Configuração → Plug & Play → ENTERE
Português
[PC450]BN68-02795A-01L02.indb 7
7
2010-03-30 오후 3:37:33
CONEXÕES
Conexão com um dispositivo AV
Usando um cabo HDMI ou HDMI/DVI: conexão HD (até 720p/1080i)
Dispositivos disponíveis: DVD, leitor de discos Blu-ray, cabo HD, receptor de satélite HD (conversor Set-Top Box).
R
Dispositivo
W
Dispositivo
Vermelho Branco
HDMI OUT
DVI OUT
AUDIO OUT
R
W
R-AUDIO-L
✎✎HDMI IN 1(DVI), 2, 3, PC/DVI AUDIO IN
xx Ao utilizar a conexão de cabo HDMI/DVI, é necessário usar a entrada HDMI IN 1(DVI) para vídeo. Um DVD,
leitor de discos Blu-ray, cabo HD ou receptor de satélite HD pode requerer um adaptador DVI-HDMI (DVI para
HDMI) ou DVI-HDMI (DVI para HDMI). A entrada PC/DVI AUDIO IN é necessária para áudio.
xx Caso um dispositivo externo como um DVD / leitor de discos Blu-ray / cabo HD / receptor de satélite HD que
suporte versões de HDMI anteriores à 1.3 seja conectado, a TV pode não operar normalmente (por exemplo,
sem imagem / sem som / imagem tremendo / cor anormal).
xx Caso não ouça som após conectar um cabo HDMI, verifique a versão de HDMI do dispositivo externo. Caso
suspeite que a versão seja anterior à 1.3, entre em contato com o fornecedor do dispositivo para confirmar a
versão de HDMI e solicitar uma atualização.
xx Recomenda-se a compra de um cabo HDMI certificado. Caso contrário, a tela pode ficar em branco ou haver
erro de conexão.
Uso de um Cabo de áudio/vídeo (720p/1080i apenas) ou Componente (até 1080p)
Dispositivos disponíveis: DVD, leitor de discos Blu-ray, cabo, receptor de satélite, videocassete
W
Vermelho Branco
R
B
Vermelho Azul
R
G
Verde
Dispositivo
W
Y
Vermelho Branco Amarelo
R
W
R
B
G
R
W
R
B
G
AUDIO OUT
R-AUDIO-L
COMPONENT OUT
PR
PB
Y
Dispositivo
R
W
R
W
AUDIO OUT
Y
Y
R
VIDEO OUT
R-AUDIO-L
✎✎Ao conectar no AV IN 1, a cor da entrada AV IN 1 [Y/VIDEO] (verde) não irá corresponder ao cabo de vídeo
(amarelo).
✎✎Para obter a melhor qualidade de imagem, recomenda-se a conexão Componente, em vez de A/V.
8
Português
[PC450]BN68-02795A-01L02.indb 8
2010-03-30 오후 3:37:34
02 CONEXÕES
Conexão com um dispositivo de áudio
Uso de uma conexão de Cabo óptico (digital) ou Cabo áudio (analógico)
Dispositivos disponíveis: Sistema digital de áudio, Amplificador, DVD home theater
AUDIO IN
Amplificador /
DVD home theater
R-AUDIO-L
Sistema áudio digital
R
OPTICAL
W
Vermelho Branco
✎✎DIGITAL AUDIO OUT (OPTICAL)
xx Quando um Sistema de áudio digital é conectado à saída DIGITAL AUDIO OUT (OPTICAL), reduza o volume
da TV e do sistema.
xx Áudio 5.1 CH é possível quando a TV está conectada a um dispositivo externo que ofereça suporte a tal
tecnologia.
xx Quando o receptor (amplificador ou DVD home theater) estiver ligado, você poderá ouvir a reprodução de
som pela entrada óptico da TV. Quando a TV estiver recebendo um sinal de DTV, ela irá enviar som 5.1 CH ao
amplificador ou DVD home theater. Se a fonte for um componente digital, como um DVD / leitor de discos Bluray / decodificador / receptor de satélite (Set-Top Box), e estiver conectado à TV por meio de HDMI, somente
o som de 2 canais do amplificador ou DVD home theater será ouvido.
xx
Caso deseje ouvir áudio 5.1 CH, conecte o conector digital audio out do receptor do DVD player/Blu-ray
player/Cabo/Satélite diretamente a um Amplificador ou Home theater, e não à TV.
✎✎AUDIO OUT: Conecta as saídas de áudio ao amplificador/home theater.
xx Ao fazer a conexão, use o conector apropriado.
xx Quando um amplificador de áudio estiver conectado aos conectores AUDIO OUT: Diminua o volume da TV e
ajuste o nível do volume com o controle de volume do amplificador.
Como se conectar a um PC
Uso de um Cabo HDMI/DVI ou D-sub
AUDIO OUT
DVI OUT
AUDIO OUT
PC OUT
Português
[PC450]BN68-02795A-01L02.indb 9
9
2010-03-30 오후 3:37:34
CONEXÕES
Modos de exibição (D-Sub e HDMI/DVI Entrada)
A resolução ótima
yy 42" : 1024 x 768 @ 60Hz
yy 50" : 1360 x 768 @ 60Hz
Modo
Resolução
Frequência
horizontal (kHz)
Frequência
vertical (Hz)
Frequência de
Pixels (MHz)
Polaridade de
sincr. (H/V)
42"
50"
IBM
640 x 350
720 x 400
31.469
31.469
70.086
70.087
25.175
28.322
+/-/+
>
>
>
>
MAC
640 x 480
832 x 624
35.000
49.726
66.667
74.551
30.240
57.284
-/-/-
>
>
>
>
VESA CVT
720 x 576
1280 x 720
35.910
56.456
59.950
74.777
32.750
95.750
-/+
-/+
>
>
VESA DMT
640 x 480
640 x 480
640 x 480
800 x 600
800 x 600
800 x 600
1024 x 768
1024 x 768
1024 x 768
1280 x 720
1360 x 768
31.469
37.500
37.861
37.879
46.875
48.077
48.363
56.476
60.023
45.000
47.712
59.940
75.000
72.809
60.317
75.000
72.188
60.004
70.069
75.029
60.000
60.015
25.175
31.500
31.500
40.000
49.500
50.000
65.000
75.000
78.750
74.250
85.500
-/-/-/+/+
+/+
+/+
-/-/+/+
+/+
+/+
>
>
>
>
>
>
>
>
>
>
>
>
>
>
>
>
>
>
VESA GTF
1280 x 720
52.500
70.000
89.040
-/+
✎✎NOTA
xx Para conexão de cabo HDMI/DVI, é necessário usar a entrada HDMI IN 1(DVI).
xx O modo entrelaçado não é compatível.
xx O aparelho pode operar de forma anormal se um formato de vídeo fora do padrão for selecionado.
xx Modos Separate (Separado) e Composite (Composto) são suportados. SOG (Sincr. no verde) não é compatível.
10
Português
[PC450]BN68-02795A-01L02.indb 10
2010-03-30 오후 3:37:35
Editar Nome
OO MENUm → Entrada → Editar Nome → ENTERE
Lista de Entradas
Utilize para selecionar TV ou uma fonte de
entrada externa, como DVD / leitor de discos
Blu-ray / cabo / receptor de satélite.
SOURCE
OO MENUm → Entrada →
■■ VCR / DVD / Sinal Cabo / Sinal Satélite / PVR STB
/ Receptor AV / Jogos / Filmadora / PC / DVI PC /
Dispositivos DVI / TV / IPTV / Blu-ray / HD DVD /
DMA: Nomeie o dispositivo conectado às entradas para
facilitar a seleção de sua fonte de entrada.
02 CONEXÕES
Alteração da fonte de entrada
✎✎Ao conectar um cabo HDMI/DVI à porta HDMI
Lista de Entradas → ENTERE
IN 1(DVI) ajuste a porta para o modo DVI PC ou
Dispositivos DVI em Editar Nome.
■■ TV / PC / AV1 / AV2 / Componente1 / Componente2 /
HDMI1/DVI / HDMI2 / HDMI3 / USB
✎✎ Só é possível escolher entre os dispositivos
externos que estão conectados à TV. Na
Lista de Entradas, as entradas
SOURCE conectadas serão
ativadas.
✎✎ Na Lista de Entradas, o PC permanece sempre
ativo.
FUNÇÕES BÁSICAS
Como navegar pelos menus
Operação do menu (On Screen Display)
GUIDE
FO
TO
O
MEDIA.P
IN
1
LS
Antes de usar a TV, siga as etapas abaixo para aprender
como utilizar o menu para selecionar
e ajustar as diferentes
CH LIST
funções.
2
RN
EX
TU
IT
RE
3
A
B
C
4
D
As etapas de acesso podem ser diferentes dependendo do
menu selecionado.
1
MENU m
2
3
4
5
▲/▼
6
7
ENTER E
ENTER E
▲/▼
◄/►
1 Botão MENU: exibe o menu de tela principal.
P.MODE
S.MODE
MTS
2 ENTERE / botão de direção: move o cursor e
FAV.CH Confirma
P.SIZE a configuração.
CC
seleciona um item.
3 Botão RETURN: volta ao menu anterior.
4 Botão EXIT: sai do menu na tela.
EXIT e
As opções do menu principal são
exibidas na tela:
Imagem, Som, Canal,
Configuração, Entrada,
Aplicativos, Suporte.
Selecione um ícone com o botão
▲ ou ▼.
Pressione ENTERE para acessar
o submenu.
Selecione o submenu desejado
utilizando os botões ▲ ou ▼.
Ajuste o valor de um item utilizando
os botões ◄ ou ►. As etapas
para ajuste de Menu podem ser
diferentes dependendo do menu
selecionado.
Pressione ENTERE para acessar
a seleção.
Pressione EXIT.
Português
[PC450]BN68-02795A-01L02.indb 11
11
2010-03-30 오후 3:37:35
FUNÇÕES BÁSICAS
Usando o botão INFO (guia Agora & Próximo)
FO
IN
O display identifica o canal atual e o
status de determinadas definições de
áudio-vídeo.
O guia Agora & Próximo mostra
informações sobre os programas diários
de cada canal da TV de acordo com o
horário de transmissão.
yy Use os botões ◄, ► para visualizar
informações do programa desejado enquanto assiste
ao canal.
*ORER+'
TELA QUENTE (HD)
HE-AAC
DTV Air
1080i HD | 10 | Muiti
05.1
Visualização Programada
Guia
Sex, 1 de jan 2:10 am
DTV Air 05.1 Globo HD
TELA QUENTE (HD)
10:05 pm - 12:10 pm
10
DESVENTURAS EM SERIE (HD)
05.1 TV GloboHD
Visualização Programada
6:30 pm
7:15 pm
Hoje
Hoje
10:06 pm - 12:10 am
E Assistir
Informação
Como planejar sua exibição
Guia
As informações do EPG (Guia de programação
GUIDE
eletrônica) são fornecidas pelas redes
responsáveis pela Transmissão digital. Ao
utilizar a programação fornecida pelas redes,
é possível especificar com antecedência
programas que deseja assistir para que a TV
mude automaticamente para o canal desejado
no horário especificado. Dependendo do status de um
canal, o campo de programas pode estar em branco ou
desatualizado.
Uso da Vis. Canal
Guia
TELA QUENTE (HD)
10:05 pm - 12:10 pm
DESVENTURAS EM SERIE (HD)
1
B
10:00 pm - 11:00 pm
American Chopper
No Information
Home and...
)Family Affairs
No Information
QVC Selection
No Information
-2 horas
+2 horas
2
3
Sair
4
4
5
7
B Verde (-2 Horas): exibição da lista de programas que
serão exibidos antes de 2 horas.
3
Amarelo (+2 Horas): exibição da lista de programas
que serão exibidos em 2 horas.
4
Azul (Sair): sai do guia.
5 Informação: exibe detalhes do programa
selecionado.
6 k (Página): vai para a página anterior ou para a página
seguinte.
7 Botão ENTERE
–– Ao selecionar o programa atual, é possível assistir o
programa selecionado.
–– Ao selecionar o programa futuro, é possível fazer a
reserva para assisti-lo. Para cancelar o agendamento,
pressione o botão ENTERE novamente e selecione
Cancelar Agendamento.
Menu de Canais
¦¦ Exibição de Canais
10
Modo Vis
1
Informação E Cancelar
2
Sex, 1 de jan 2:10 am
Globo HD
DiscoveryH&L
TV GloboSD
price-drop.tv
QVC
R4DTT
Sair
five
five
1 Vermelho (Modo Vis.) exibe a lista de programas
sendo exibidos ou que serão exibidos a seguir.
DTV Air 05.1 Globo HD
Vis. Canal
Hoje
04.1
05.1
05.2
05.3
05.4
05.5
Modo Vis.
Seg.-feira, 29 Set. 22:15
DESVENTURAS EM SERIE (HD)
05.1 TV GloboHD
05.1
05.2
)Family Affairs
)Dark Angel
11:00 pm - 12:00 pm
Tine Team
Fiv...
)Dark Angel
Informação kPágina EAssistir
5
6
7
Lista de Canais
Adicione, exclua ou defina canais favoritos
e use o guia de programas de transmissões
digitais.
CH LIST
OO MENUm → Canal → Lista de Canais
→ ENTERE
Selecione um canal em uma das telas:
Todos os Canais, Canais Adicionados,
Favorito ou Programado, pressionando os botões ▲ /
▼ e após ENTERE. Então, será possível assistir o canal
selecionado.
12
Português
[PC450]BN68-02795A-01L02.indb 12
2010-03-30 오후 3:37:37
SBT HD
05.1
Globo HD
7
Air
09.1
Read TV! HD
11.1
Gazeta HD
13
Air
14
Air
16.1
MIXTV HD
Antena
B
Zoom
Selecionar k Página T Ferramentas
■■
Todos os Canais: exibe todos os canais disponíveis
no momento.
■■
Canais Adicionados: exibe todos os canais
adicionados.
* Favorito: exibe todos os canais favoritos.
■■
Programado: exibe toda a programação reservada
no momento.
OO MENUm → Canal → Lista de Canais → ENTERE
Adicionar a Favoritos / Excluir de Favoritos
t
Define os canais que você assiste frequentemente como
Favoritos.
1. Selecione um canal e pressione o botão TOOLS.
2. Adicione ou exclua um canal usando o menu
Adicionar a Favoritos ou Excluir de Favoritos
respectivamente.
Canais Adicionados
■■
¦¦ Uso dos Canais favoritos
✎✎Uso dos botões coloridos com o Lista de Canais.
xx Vermelho (Antena): troca para Ar ou Cabo.
xx B Verde (Zoom): amplia ou diminui o número de um
Amarelo (Selecionar): seleciona várias listas de
canais. Selecione os canais desejados e pressione
o botão amarelo para definir todos os canais
selecionados ao mesmo tempo. A marca c é
exibida à esquerda dos canais selecionados.
04.1
SBT HD
05.1
Globo HD
7
Air
Ar
Excluir
09.1
Read TV!Adicionar
HD a Favoritos
11.1
Visual. Temp.
Gazeta HD
13
Air
14
Air
Bloquear
16.1
canal.
xx
03 FUNÇÕES BÁSICAS
Canais Adicionados
Ar
04.1
Antena
Edição do nome do canal
Selecionar Tudo
MIXTV HD
B
Zoom
Selecionar k Página T Ferramentas
Para exibir todos os canais favoritos, clique
no botão exibido à direita.
FAV.CH
xx k (Página): vai para a página anterior ou para a
página seguinte.
xx T (Ferramentas): exibe o menu de opções do
Lista de Canais. (Os menus de opções podem ser
diferentes, de acordo com a situação).
Ícones de exibição de status de canal
c
*
)
Operações
Um canal selecionado.
Um canal definido como Favorito.
Um programa reservado.
\
Um canal bloqueado.
Ícones
¦¦ Memorização de Canais
OO MENUm → Canal → ENTERE
Antena (Ar / Cabo) t
ntes de a TV iniciar a memorização dos canais disponíveis,
A
você deverá especificar o tipo de fonte de sinal conectada à
TV (isto é, Ar ou sistema de Cabo).
✎✎Caso a antena esteja conectada a ANT 1 IN (AIR),
selecione Ar e, caso esteja conectada a ANT 2 IN
(CABLE), selecione Cabo.
Português
[PC450]BN68-02795A-01L02.indb 13
13
2010-03-30 오후 3:37:38
FUNÇÕES BÁSICAS
Prog. Automática
■■ Ar: sinal de antena Ar.
■■ Cabo: sinal de Cabo.
■■ Ar+Cabo: sinais de antena Ar e a Cabo.
✎✎NOTA
xx Se ambos ANT 1 IN (AIR) e ANT 2 IN (CABLE)
estiverem conectados, marque a Ar + Cabo.
¦¦ Edição de Canais
OO MENUm → Canal → Lista de Canais → ENTERE
Edição do nome do canal
1. Selecione um canal e pressione o botão TOOLS.
2. Edite o nome do canal usando o menu
Edição do nome do canal.
■■ Edição do nome do canal (apenas para canais
analógicos): dê ao canal o nome que você desejar.
¦¦ Outras funções
OO MENUm → Canal → ENTERE
Lista de Canais
Menu de opções do Lista de Canais
Defina cada canal usando as opções do menu do Lista
de Canais (Adicionar / Excluir, Bloquear / Desbloqueio,
Visual. Temp., Selecionar Tudo / Desmarcar Tudo). Os
itens do menu de opções podem ser diferentes dependendo
do status do canal.
1. Selecione um canal e pressione o botão TOOLS.
2. Selecione uma função e altere suas configurações.
■■ Adicionar / Excluir: adiciona ou exclui um canal para
exibir somente os canais desejados.
✎✎ NOTA
xx Todos os canais excluídos serão exibidos no
menu Todos os Canais.
xx Um canal acinzentado indica que o canal foi
excluído.
xx O menu Adicionar é exibido apenas para os
canais excluídos.
xx Exclua um canal no menu Canais Adicionados
ou Favorito da mesma maneira.
■■ Bloquear / Desbloqueio: bloqueie um canal para que
não seja possível selecioná-lo e visualizá-lo.
✎✎ Essa função está disponível apenas quando
Bloqueio de Canais está definido para Ligado.
✎✎ A tela de entrada da Senha aparecerá. Digite a
sua senha de 4 dígitos. O padrão é “0-0-0-0”.
Altere a Senha utilizando a opção Mudar Senha.
■■ Visual. Temp.: é possível definir que um canal desejado
seja exibido automaticamente no horário reservado.
Primeiro ajuste o horário atual para utilizar essa função.
1. Pressione os botões ◄ / ► / ▲ / ▼ para selecionar
o canal desejado no Lista de Canais.
2. Pressione o botão TOOLS, e então selecione
Visual. Temp..
3. Role para cima ou para baixo para ajustar as
configurações na caixa ou use os botões numéricos
do seu controle remoto para digitar a data e hora.
✎✎ Caso tenha selecionado Uma vez,
Toda semana, ou Diário em Repetir será
possível digitar a data desejada.
4. Selecione OK, e então pressione o botão
ENTERE quando terminar.
✎✎ NOTA
xx Apenas canais memorizados podem ser
reservados.
xx Programas reservados serão exibidos no menu
Programado.
xx Quando um canal digital for selecionado,
pressione o botão ► para ver a programação
digital.
■■ Selecionar Tudo: você pode selecionar todos os canais
no Lista de Canais.
■■ Desmarcar Tudo: é possível retirar a seleção de todos
os canais selecionados.
✎✎ É possível selecionar Desmarcar Tudo
apenas quando um ou mais canais estiverem
selecionados.
Programado
(no Lista de Canais)
É possível ver, modificar ou excluir um programa que você
reservou para assistir. A visualização do tempo Programado
é exibida aqui. Selecione um programa e pressione o botão
TOOLS para exibir as Opções.
■■ Alterar Info: alterar um programa que você reservou
para assistir. Comece pela etapa 3 da "Visualização do
timer" acima.
■■ Cancelar Agendamentos: cancelar um programa que
você reservou para assistir.
✎✎ Isso exclui os programas destacados ou
selecionados.
14
Português
[PC450]BN68-02795A-01L02.indb 14
2010-03-30 오후 3:37:39
¦¦ Ajuste de configurações de Imagem
■■ Selecionar Tudo / Desmarcar Tudo: Selecionar todos
os programas reservados.
OO MENUm → Imagem → ENTERE
✎✎
Sintonia Fina
(apenas para canais analógicos)
Se a recepção for clara, você não precisa fazer a sintonia
fina do canal, já que isso é feito automaticamente durante
a operação de busca e armazenamento. Se o sinal
estiver fraco ou distorcido, faça a sintonia fina do canal
manualmente. Mova para a esquerda ou para a direta até
que a imagem esteja clara.
✎✎As configurações são aplicadas ao canal a que você
está assistindo.
✎✎Os canais com a sintonização fina ajustada e que
foram salvos estão marcados com um asterisco “*”
do lado direito de seus respectivos números, no
mostrador de canais.
✎✎Para desfazer a sintonia fina, selecione Restaurar.
LNA (Ligado / Deslig.)
(Amplificador de baixo ruído)
Caso a TV esteja operando em uma área com sinal fraco, a
função LNA pode aprimorar a recepção (um pré-amplificador
de baixo ruído amplifica o sinal recebido).
Sistema de Cor (Auto / PAL-M / PAL-N /
NTSC)
Normalmente, a TV pode receber imagem e som de
boa qualidade quando está no modo Auto. Esse modo
detecta automaticamente as fontes de sinal de cor. Se a
implementação de cor não for satisfatória, selecione PAL-M,
PAL-N ou NTSC.
Luz da Célula / Contraste / Brilho /
Nitidez / Cor / Matiz (Vd/Vm)
Sua TV possui várias opções para o controle de qualidade
da imagem.
✎✎NOTA
xx Ao realizar alterações em Luz da Célula, Contraste,
Brilho, Nitidez, Cor ou Matiz (Vd/Vm), o menu de
tela será ajustado de acordo.
xx No modo PC, é possível alterar apenas
Luz da Célula, Contraste e Brilho.
xx É possível ajustar e alterar as configurações para
cada dispositivo externo conectado à TV.
¦¦ Soluções econômicas
OO MENUm → Imagem → Solução Ecológica →
ENTERE
A função Eco pode ser usada para aumentar a sua
economia de energia.
Solução Ecológica
■■ Economia Energia (Deslig. / Baixo / Médio / Alto /
Imagem Desl. ): ajusta o brilho da TV para reduzir o
consumo de energia. Caso selecione Imagem Desl.,
a tela será desligada, mas o som continuará ligado.
Pressione qualquer botão para ligar a tela novamente.
Antes da tela ser ligada, uma imagem distorcida será
exibida por cerca de 4 segundos.
■■ Sensor Eco (Deslig. / Ligado): para aumentar a sua
economia de energia, as configurações de imagem irão
se adaptar à luz da sala automaticamente.
✎✎ Se a função Luz da Célula for ajustada, o
Sensor Ecológico será configurado como
Deslig..
Menu de Imagem
¦¦ Como alterar o modo de Imagem predefinido
OO MENUm → Imagem → Modo → ENTERE
Modo
Selecione o seu tipo de imagem preferido.
■■ Dinâmico: adequado para uma sala bem
iluminada.
■■ Padrão: adequado para um ambiente
normal.
■■ Filme: adequado para assistir filmes em
uma sala escura.
P.MODE
Luz célula mín.: Quando Sensor Ecológico
está Ligado, será possível ajustar o brilho da tela
manualmente.
Se o Sensor Ecológico estiver Ligado, o brilho
da tela pode mudar (fica ligeiramente mais escuro
ou brilhante) dependendo da intensidade da luz
ambiente.
✎✎
■■ Sem Sinal Espera (Deslig. / 15 min. / 30 min. /
60 min.)
Para evitar o consumo desnecessário de energia, defina
quanto tempo sua TV deverá permanecer ligada quando
não houver recepção de sinal.
Desative quando o PC estiver no modo de
economia de energia.
✎✎
Português
[PC450]BN68-02795A-01L02.indb 15
03 FUNÇÕES BÁSICAS
■■ Informação: exibir um programa que você reservou
para assistir. (Também é possível alterar as informações
de reserva.)
Também é possível visualizar as informações ao
selecionar um programa e pressionar o botão
ENTERE.
15
2010-03-30 오후 3:37:39
FUNÇÕES BÁSICAS
¦¦ Como alterar as opções de imagem
Opções de Imagem
OO MENUm → Imagem → Configurações Avançadas
OO MENUm → Imagem → Opções de Imagem →
→ ENTERE
Configurações Avançadas
(Configurações Avançadas estão disponíveis no modo
Padrão / Filme)
Em comparação com os modelos anteriores, as novas TVs
Samsung possuem imagens mais precisas.
✎✎No modo PC, é possível alterar apenasContraste Dinâmico,
Gamma e Estabilidade de Branco.
Configurações Avançadas
Tom de Preto : Deslig. ►
Contraste Dinâmico
: Médio
Gamma
:0
Apenas modo RGB
: Deslig.
Espaço de Cores
: Nativo
Estabilidade de Branco
Tom de Pele
:0
▼
U Mover E Entrar R Retornar
■■ Tom de Preto (Deslig. / Escuro / Escurecido / Mais
escuro): Selecione o nível de preto para ajustar a
profundidade da imagem.
■■ Contraste Dinâmico (Deslig. / Baixo / Médio / Alto):
ajusta o contraste da tela.
■■ Gamma: ajusta a intensidade da cor primária.
■■ Apenas modo RGB (Deslig. / Vermelho / Verde /
Azul): Exibe a cor Vermelho, Verde e Azul para fazer
ajustes finos no matiz e na saturação.
■■ Espaço de Cores (Auto / Nativo): ajusta a gama de
cores disponíveis para criar a imagem.
■■ Estabilidade de Branco: ajusta a temperatura da cor
para obter uma imagem mais natural.
Verm.-Offset / Verde-Offset / Azul-Offset: ajusta a
escuridão de cada cor (vermelho, verde, azul).
Verm.-Gain / Verde-Gain / Azul-Gain: ajusta o brilho
de cada cor (vermelho, verde, azul).
Restaurar: restaura o Equilíbrio de Branco de volta às
suas configurações padrão.
■■ Tom de Pele: realça o “Tom de pele” rosa.
■■ Aprim. da Margem (Deslig. / Ligado): realça as
margens de objetos.
16
ENTERE
✎✎No modo PC, é possível alterar apenas
Tonalidade de Cor, Tamanho e Proteção de Tela.
Opções de Imagem
Tonalidade de Cor
: Normal ►
Tamanho
: 16:9
Filtro Ruído Digital
: Auto
Filtro Ruído MPEG
: Auto
Nível de Preto HDMI
: Normal
Modo Filme
: Deslig.
Proteção de Tela
U Mover E Entrar R Retornar
■■ Tonalidade de Cor (Frio / Normal / Quente1 /
Quente2)
✎✎Quente1 ou Quente2 será desativado quando o modo
de imagem for Dinâmico.
✎✎É possível ajustar e alterar as configurações para cada
dispositivo externo conectado a uma entrada da TV.
■■ Tamanho: seu receptor de cabo/satélite
P.SIZE
também pode ter a própria configuração
de tamanhos de tela. Contudo, é
altamente recomendado utilizar o modo
16:9 na maior parte do tempo.
16:9 :ajusta a imagem para o modo amplo
16:9.
Zoom1: utilize para ampliar a imagem
moderadamente.
Zoom2: utilize para uma maior ampliação da imagem.
Ajuste Amplo: amplia a proporção da imagem para que
ocupe toda a tela.
Disponível com sinais HD 1080i / 720p no modo
16:9.
4:3 :ajusta a imagem para o modo básico (4:3).
Não assista no formato 4:3 por longos períodos
de tempo, já que traços das margens exibidas
à esquerda, direita e no centro da tela podem
causar retenção de imagem (queima de tela), que
não está incluído na garantia.
Ajuste à Tela: exibe a imagem inteira sem cortes,
quando houver a entrada dos sinais HDMI (720p / 1080i
/ 1080p) ou Componente (1080i / 1080p).
✎✎
✎✎
✎✎NOTA
xx Após selecionar Zoom1, Zoom2 ou Ajuste Amplo:
1. Pressione o botão ►, e então selecione Posição.
2. Pressione o botão ENTERE.
3. Pressione o botão ▲ ou ▼ para mover a imagem
para cima ou para baixo.
4. Pressione o botão ENTERE.
5. Pressione o botão ►, e então selecione Rest.
6. Pressione o botão ENTERE para retornar a
imagem à sua posição padrão.
Português
[PC450]BN68-02795A-01L02.indb 16
2010-03-30 오후 3:37:40
(1080i/1080p) ou Componente (1080i/1080p), talvez
seja necessário centralizar a imagem:
1. Pressione o botão ◄ ou ► para selecionar
Posição.
2. Pressione o botão ENTERE.
3. Pressione o botão ▲, ▼, ◄ ou ► para mover a
imagem.
4. Pressione o botão ENTERE.
5. Pressione o botão ◄ ou ► para selecionar Rest.
■■ Proteção de Tela: Para reduzir a possibilidade de
queima de tela, esta unidade é equipada com tecnologia
de prevenção contra queima de tela. A definição Tempo
permite programar o tempo entre o movimento da
imagem em minutos.
Deslocamento de Pixel (Deslig. / Ligado): ao utilizar
esta função, você pode de minuto em minuto mover
pixels no monitor PDP na direção horizontal ou vertical
para evitar retenção de imagens na tela.
Condição ideal para deslocamento de pixels
✎✎
Item
TV/AV/Componente/
HDMI/PC
Horizontal
0~4
4
Vertical
0~4
4
Hora (minuto)
1~4 min.
4 min.
6. Pressione o botão ENTERE.
xx HD (Alta definição): 16:9 - 1080i/1080p (1920x1080),
720p (1280x720)
xx As definições podem ser ajustadas separadamente
para cada entrada da TV.
Fonte de entrada
Tamanho da
imagem
TV, AV, Componente (480i,
16:9, Zoom1,
480p)
Zoom2, 4:3
16:9, 4:3, Ajuste Amplo,
DTV(1080i), Componente
(1080i, 1080p), HDMI (720p, Ajuste à Tela
1080i, 1080P)
PC
16:9, 4:3
■■ Filtro Ruído Digital (Deslig. / Baixo / Médio / Alto /
Auto / Visualiz. Automática): Se o sinal de transmissão
recebido por sua TV estiver fraco, é possível ativar
a função Filtro Ruído Digital para ajudar a reduzir
qualquer imagem estática e duplicada que possa surgir
na tela.
✎✎ Quando o sinal está fraco, tente outras opções até
que seja exibida a melhor qualidade de imagem.
Visualiz. Automática: Ao mudar de canais analógicos,
mostra a intensidade do sinal.
Disponível apenas para canais analógicos.
✎✎
✎✎ Quando a barra está verde, significa que esta é a
melhor transmissão de sinal possível.
■■ Filtro Ruído MPEG (Deslig. / Baixo / Médio /
Alto / Auto): reduz o ruído de MPEG para obter
qualidade melhorada de imagem.
■■ Nível de Preto HDMI (Normal / Baixo): seleciona o
nível de preto para ajustar a profundidade da tela.
✎✎ Disponível somente no modo HDMI.
■■ Modo Filme (Deslig. / Auto1 / Auto2): configura a TV
para detectar e processar automaticamente sinais de
vídeo de todas as fontes e ajustar a imagem para obter
a melhor qualidade.
03 FUNÇÕES BÁSICAS
xx Depois de selecionar Ajuste à Tela no modo HDMI
✎✎ O valor de Deslocamento de Pixel pode ser
diferente dependendo do tamanho (polegadas) e
modo da TV.
✎✎ Essa função não está disponível no modo
Ajuste à Tela
Tempo de Prot. Autom. (10 min. / 20 min. / 40 min
/ 1 horas / Deslig.): ajusta o tempo em que a tela
permanece com uma imagem estática antes que o
protetor de tela seja ativado. O Protetor de tela impede a
formação de imagens duplicadas na tela.
Rolagem: essa função remove pós-imagens na tela,
movendo todos os pixels no monitor PDP segundo um
padrão. Utilize essa função quando houver retenção
de imagens ou símbolos remanescentes na tela,
especialmente quando uma imagem estática tiver
permanecido na tela por um longo período.
A função de remoção de pós-imagem deve ser
executada por um longo período (cerca de 1 hora)
para remover com eficácia as pós-imagens da
tela. Se uma pós-imagem não for removida após
executar a função, execute-a novamente.
✎✎
✎✎ Pressione qualquer tecla do controle remoto para
cancelar esse recurso.
Cinza lateral (Claro / Escuro): Ao assistir à TV no
modo de tela 4:3, a tela é protegida contra qualquer
dano ajustando o equilíbrio do branco nos extremos
esquerdo e direito.
Restaurar Padrões (OK / Cancelar)
Restaura o seu modo de imagem atual às configurações
padrão.
✎✎ Disponível em TV, AV, COMPONENTE (480i /
1080i) e HDMI (480i / 1080i).
Português
[PC450]BN68-02795A-01L02.indb 17
17
2010-03-30 오후 3:37:40
FUNÇÕES BÁSICAS
Menu de Som
¦¦ Ajuste da TV com o seu PC
Ajuste a fonte de entrada para PC.
OO MENUm → Imagem → ENTERE
Auto Ajuste t
Ajusta os valores / posições de frequência e realiza a sintonia
fina das configurações automaticamente.
✎✎Não disponível quando conectado com um cabo HDMI
/DVI.
¦¦ Como alterar o modo de som predefinido
OO MENUm → Som → Modo → ENTERE
Modo
■■ Padrão: seleciona o modo de som normal.
■■ Música: destaca a música sobre as vozes.
S.MODE
■■ Filme: fornece o melhor som para filmes.
Tela
■■ Grosso / Ajuste Fino: retira ou reduz o ruído da
imagem. Se a interferência não for removida somente
com a sintonia fina, então ajuste a frequência o melhor
possível (Grosso) e realize a sintonia fina novamente.
Após ter reduzido a interferência, ajuste novamente a
imagem de modo que ela fique centralizada na tela.
■■ Posição: ajusta o posicionamento da tela do PC caso
ele não se encaixe na tela da TV. Pressione o botão
▲ ou ▼ para ajustar a posição vertical. Pressione o
botão ◄ ou ► para ajustar a posição horizontal.
■■ Restaurar Imagem: restaura a imagem de volta às
configurações padrão.
Utilização de sua TV como tela de computador (PC)
Dependendo da versão do Windows e da placa de vídeo,
as telas exibidas no seu PC provavelmente serão diferentes,
mas as mesmas informações de configuração básica se
aplicarão na maior parte dos casos. (Caso contrário, entre
em contato com o fabricante do computador ou com o
representante da Samsung.)
1. Clique em “Painel de controle", no menu Start (Iniciar) do
Windows.
2. Clique em “Aparência e temas", na janela do “Painel de
controle", e uma caixa de diálogo será exibida.
3. Clique em “Exibição". Uma caixa de diálogo será
exibida.
4. Navegue até a guia “Configurações", na caixa de
diálogo.
yy A configuração de tamanho correta (resolução) [Melhor:
1920 X 1080 pixels]
yy Se existir uma opção de frequência vertical na caixa de
diálogo de ajustes da tela, o valor correto é “60” ou “60
Hz”. Caso contrário, basta clicar em “OK” e sair da caixa
de diálogo.
■■ Voz Destacada: destaca as vozes em
relação a outros sons.
■■ Amplificar: aumenta a intensidade de sons de alta
frequência para permitir melhor audição para deficientes
auditivos.
¦¦ Ajuste das configurações de som
OO MENUm → Som → Equalizador → ENTERE
Equalizador
Ajusta o modo de som (apenas para o modo de som
padrão).
■■ Balanço Esq/Dir: ajusta o equilíbrio entre o alto-falante
direito e o esquerdo.
■■ 100Hz / 300Hz / 1kHz / 3kHz / 10kHz (Ajuste de
largura de banda): ajusta o nível de frequências de
largura de banda específicas.
■■ Restaurar: restaura o equalizador de volta às
configurações padrão.
¦¦ Configuração do Som
OO MENUm → Som → ENTERE
Virtual Surround (Deslig. / Ligado)
(apenas para modo de som padrão)
O sistema SRS TruSurround HD Digital proporciona uma
presença de som superior. Os alto-falantes adicionam um
som multi-direcional, criando assim um ambiente de áudio,
idealmente adequado para filmes, esportes e jogos.
Diálogo Destacado (Deslig. / Ligado)
(apenas para modo de som padrão)
Essa função enfatiza a voz enquanto mantém o nível de som
de fundo, permitindo que o diálogo seja ouvido com mais
clareza.
18
Português
[PC450]BN68-02795A-01L02.indb 18
2010-03-30 오후 3:37:40
Saída SPDIF
(apenas para canais digitais)
Altera o valor padrão de idiomas de áudio.
A SPDIF (Interface Digital Sony Philips) é utilizada para
permitir som digital, reduzindo a interferência que chega
aos alto-falantes e diversos dispositivos digitais, como DVD/
Home Theater.
✎✎Só é possível selecionar um dos idiomas que estão
sendo transmitidos.
■■ Formato de Áudio: durante a recepção de uma
transmissão de TV digital, é possível selecionar o
formato de saída de Áudio digital (SPDIF) nas opções
PCM ou Dolby Digital.
Som Várias Faixas (MTS) t
■■ Mono: selecione para canais transmitidos
em mono, ou se houver algum problema
na recepção do sinal estéreo.
MTS
■■ Estéreo: selecione para canais
transmitidos em estéreo.
■■ SAP: selecione para ouvir o Programa de
áudio separado; geralmente, trata-se da tradução de um
idioma estrangeiro.
✎✎Dependendo do programa específico que estiver
sendo transmitido, você pode ouvir em Mono,
Estéreo, SAP ou Áudio alternativo.
■■ Atraso de Áudio: corrigir problemas de sincronização
de áudio e vídeo ao assistir TV ou vídeo e ao ouvir a
saída de áudio digital utilizando um dispositivo externo,
como um receptor AV (0 ms ~ 250 ms).
03 FUNÇÕES BÁSICAS
Idioma de Áudio t
Transmissor FM
(não disponível em todos os locais)
Você pode ouvir o som da TV através das caixas de som
transmitindo sinais de áudio pelas freqüências moduladas.
✎✎Para informações mais detalhadas, consulte
"Configuração do FM Transmitter " (p. 33).
Volume Automático (Deslig. / Normal /
Noite)
Para equalizar o nível de volume de cada canal, ajuste como
Normal.
Conectando o Transmissor FM
Conecte o cabo do Transmissor FM na parte de trás da TV.
Painel lateral da TV
■■ Noite: esse modo permite uma experiência de áudio
melhorada com relação ao modo Normal fazendo com
que quase não haja ruído. Muito útil para uso no período
noturno.
Selecionar Alto-falante (Alto-falante Ext /
Alto-falante TV)
É possível que ocorra eco devido à diferença na velocidade
de decodificação entre o alto-falante principal e o receptor
de áudio. Nesse caso, ajuste a TV para Alto-falante Ext.
✎✎Quando Selecionar Alto-falante está definido para
Transmissor FM
■■ Transmissor FM (Deslig. / Ligado): Liga e desliga o
Transmissor FM.
■■ FM Frequency: Define a freqüência do Transmissor FM.
Alto-falante Ext, os botões volume e MUTE não irão
funcionar e as configurações de som serão limitadas.
Restaurar Padrões (OK / Cancelar)
Alto-falante Ext.
Restaura todas as configurações de som para os valores
padrão.
✎✎Quando Selecionar Alto-falante está definido para
xx Alto-falante TV: Deslig., Alto-falante Ext: Ligado
✎✎Quando Selecionar Alto-falante está definido para
Alto-falante TV.
xx Alto-falante TV: Ligado., Alto-falante Ext: Ligado
✎✎Caso não haja sinal de vídeo, ambos os alto-falantes
estarão mudos.
Português
[PC450]BN68-02795A-01L02.indb 19
19
2010-03-30 오후 3:37:41
FUNÇÕES BÁSICAS
Menu de Configuração
¦¦ Ajuste da hora
OO MENUm → Configuração → Hora → ENTERE
■■ Temporizador 1 / Temporizador 2 / Temporizador
3: é possível realizar três diferentes configurações de
temporizadores. É preciso ajustar o relógio primeiro.
Temporizador 1
Hora de Ligar
▲
00
Desativado
▼
Hora
Hora de Desligar
■■ Relógio: o ajuste do relógio afeta diversas funções da
TV que envolvem horário.
Volume
OO A hora atual será exibida sempre que você
pressionar o botão INFO.
necessário definir novamente o relógio.
Modo Relógio (Config. Automática / Config. Manual)
–– Config. Automática: Define a hora atual de
modo Automático usando o horário recebido da
transmissão digital.
A antena deve estar conectada para que seja
possível ajustar a hora automaticamente.
✎✎
–– Config. Manual: define a hora atual manualmente.
Dependendo da estação e do sinal da
transmissora, o horário automático pode não
ser ajustado corretamente. Se isso acontecer,
ajuste o horário manualmente.
✎✎
Config. Relógio: Defina o Dia, Mês, Ano, Hora, Minuto
e am/pm manualmente.
Disponível apenas quando o Modo Relógio está
definido para Config. Manual.
✎✎
✎✎ É possível ajustar diretamente Dia, Mes, Ano,
Hora e Minuto pressionando as teclas numéricas
do controle remoto.
Fuso Hora: seleciona o seu fuso horário.
Essa função está disponível apenas quando
Modo Relógio está definido para
Config. Automática.
✎✎
¦¦ Uso do Sleep Timer
OO MENUm → Configuração → Hora → Sleep Timer
→ ENTERE
■■ Sleep Timer t : desliga a TV automaticamente
após um período de tempo predefinido. (30, 60, 90,
120, 150 e 180 minutos).
✎✎ Para cancelar o Sleep Timer, selecione Deslig..
¦¦ Temporizador para ligar / desligar
OO MENUm → Configuração → Hora →
Temporizador 1 → ENTERE
É possível ajustar a TV para ligar automaticamente em um
horário predefinido.
Entrada
10
00
Antena
TV
Dom
Canal
Air
Seg
Ter
Qua
1
Qui
Sex
Sáb
Uma vez
✎✎ Se o cabo de força for desconectado, será
20
00
Desativado
Repetir
00
L Mover U Ajustar E Entrar R Retornar
Hora de Ligar / Hora de Desligar: define hora,
minuto, am/pm e ativado / desativado (Para ativar o
temporizador com a configuração correspondente,
ajuste para Ativado.)
Volume: selecione o nível de volume desejado.
Entrada: Selecione TV ou USB para reprodução
quando a TV for ligada automaticamente. (USB pode
ser selecionado apenas quando houver um dispositivo
de USB conectado à TV)
Antena (quando a Entrada está definida para TV):
Selecione Ar ou Cabo.
Canal (quando a Entrada está definida para TV):
selecione o canal desejado.
Conteúdo (quando a Entrada está definida para USB):
selecione uma pasta no dispositivo USB com arquivos
de música ou foto para que sejam reproduzidos quando
a TV ligar automaticamente.
NOTA
xx Caso não haja arquivos de música no
dispositivo USB ou a pasta que os contém não
seja selecionada, a função Temporizador não
funcionará corretamente.
xx Quando há somente um arquivo de foto no
dispositivo USB, a apresentação de slides não
é executada.
xx Se o nome de uma pasta for muito longo, não
será possível selecionar a pasta.
xx Cada USB utilizado recebe sua própria pasta.
Ao utilizar mais de um USB do mesmo tipo,
certifique-se de que as pastas atribuídas a
cada USB tenham nomes diferentes.
Repetir: Selecione Uma vez, Diário, Seg~Sex,
Seg~Sáb, Sáb~Dom ou Config. Manual para definir
a opção desejada. Se selecionar Config. Manual,
será possível ajustar o dia em que deseja ativar o
temporizador.
A marca c indica que o dia foi selecionado.
✎✎
✎✎
✎✎Desligamento automático (Desligamento automático)
(disponível apenas quando a TV é ligada pelo
Temporizador): a TV será desligada automaticamente
após 3 horas no estado ocioso para impedir o
superaquecimento.
Português
[PC450]BN68-02795A-01L02.indb 20
2010-03-30 오후 3:37:41
¦¦ Outras funções
OO MENUm → Configuração → Segurança →
OO MENUm → Configuração → ENTERE
ENTERE
Segurança
Menu Idioma
✎✎A tela de digitação da Senha é exibida antes da tela de
configuração.
Selecionar o idioma do menu.
1. Selecione o Menu Idioma e pressione o botão
ENTERE.
✎✎Digite a sua senha de 4 dígitos. O padrão é “0-0-0-0”.
Altere a Senha utilizando a opção Alterar Senha.
2. Escolha o idioma desejado e pressione o botão
ENTERE.
■■ Bloqueio de Canais (Deslig. / Ligado): bloqueia
canais na Lista de Canais para impedir que usuários
não autorizados, como crianças, assistam a programas
inadequados.
✎✎ Disponível apenas quando a fonte de entrada
estiver definida como TV.
■■ Restrição de Programas: impede que usuários não
autorizados, como crianças, assistam a programas
inadequados utilizando uma senha de 4 dígitos
definida pelo usuário. Caso o canal selecionado esteja
bloqueado, o símbolo “\” será exibido.
Permitir Tudo: desbloqueia todas as classificações.
✎✎ Os itens de Restrição de Programas são
diferentes dependendo do país.
■■ Mudar Senha: é exibida a tela Alterar Senha. Escolha
4 dígitos para a sua Senha e digite-os. Assim que os 4
dígitos forem inseridos, a tela Confirme Nova Senha é
exibida. Digite novamente os mesmos 4 dígitos. Quando
desaparecer a tela de confirmação, isso significa que a
sua Senha foi memorizada.
✎✎ Se você esquecer a Senha, pressione os botões
do controle remoto, na sequência a seguir, para
restaurar a Senha ao número inicial “0-0-0-0”:
POWER (Deslig.) → MUTE → 8 → 2 → 4 →
POWER (Ligado).
03 FUNÇÕES BÁSICAS
¦¦ Bloqueio de Programas
Closed Caption
(Mensagens de texto na tela)
■■ Closed Caption (Deslig. / Ligado): é
possível ligar ou desligar a função closed
caption. Caso as legendas não estejam
disponíveis, as mensagens não serão
exibidas na tela.
CC
✎✎ A função closed caption não
funciona nos modos Componente,
PC ou HDMI.
■■ Modo de Legenda: é possível selecionar o modo de
legenda desejado.
✎✎ A disponibilidade das legendas depende do
programa que está sendo transmitido.
CC1~CC4 / Text1~Text4: (apenas para canais
analógicos) A função de legendas funciona tanto
no modo de canal de TV analógico como quando
um sinal é fornecido de um dispositivo externo à TV.
(Dependendo do sinal da transmissão, a função closed
caption pode não funcionar em canais digitais.)
Português
[PC450]BN68-02795A-01L02.indb 21
21
2010-03-30 오후 3:37:41
FUNÇÕES BÁSICAS
Geral
¦¦ Picture-In-Picture (PIP)
■■ Modo Jogo (Deslig. / Ligado): ao se conectar a um
jogo como PlayStationTM ou XboxTM, você poderá ter
uma experiência mais real selecionando o modo jogo.
PIP t
✎✎NOTA
xx Restrições do modo jogo (cuidado)
−− Para desconectar o console e conectar outro
dispositivo externo, configure Modo Jogo para
Deslig. no menu de configuração.
−− Caso exiba o menu da TV no Modo Jogo, a tela
irá tremer levemente.
xx Modo Jogo não está disponível quando a fonte de
entrada está definida como TV ou PC.
xx Após conectar o console, configure Modo Jogo
para Ligado para evitar baixa qualidade de imagem.
xx Depois de conectar um console, defina Modo
Jogo como Deslig.. Infelizmente, poderá observar
redução de qualidade da imagem.
xx Se Modo Jogo estiver Ligado:
−− O modo Imagem está definido para Padrão e o
modo Som está definido para Filme.
−− Equalizador não está disponível.
■■ Men Transparência (Claro / Escuro): define a
transparência do menu.
■■ Melodia (Deslig. / Baixa / Média / Alta): Define se uma
melodia será reproduzida ao ligar ou desligar a TV.
■■ Sistema de Cor AV (Auto / PAL-M / PAL-N / NTSC):
Normalmente, a TV pode receber imagem e som de
boa qualidade quando está no modo Auto. Este modo
detecta automaticamente o sistema de cores do sinal.
Em caso de recepção de sinal com cores insatisfatórias,
selecione o modo Sistema de Cor como PAL-M, PAL-N
ou NTSC.
22
É possível assistir o sintonizador de TV e uma fonte de
vídeo externa simultaneamente. PIP (Picture-in-Picture) não
funciona no mesmo modo.
OO MENUm → Configuração → PIP → ENTERE
✎✎NOTA
xx Para mais informações sobre o som do modo PIP,
consulte as instruções de Seleção do Som
xx Se você desligar a TV enquanto assiste no modo
PIP, a janela PIP desaparecerá.
xx Você pode observar que a imagem na janela PIP se
torna um pouco artificial ao usar a tela principal para
visualizar um jogo ou karaokê.
xx Configurações do PIP
Imagem principal
Subtela
Componente1, Componente2,
HDMI1/DVI, HDMI2, HDMI3,
TV
HDMI4, PC
■■ PIP (Deslig. / Ligado): ativa ou desativa a função PIP.
■■ Ar/Cabo: seleciona Ar ou Cabo como a fonte de
entrada da subtela.
■■ Canal: seleciona o canal da subtela.
■■ Tamanho (Õ / Ã): seleciona um tamanho para a
subtela.
■■ Posição (à / – / — / œ): seleciona uma posição
para a subtela.
■■ Seleção do Som (Principal / Subtela): é possível
escolher o som desejado (Principal / Subtela) no modo
PIP.
Português
[PC450]BN68-02795A-01L02.indb 22
2010-03-30 오후 3:37:42
OO MENUm → Suporte → ENTERE
Auto Diagnóstico
✎✎O Auto Diagnóstico pode demorar alguns segundos, e
faz parte da operação normal da TV.
Atualização de SW
Atualização de SW pode ser realizada através de download
do firmware mais recente em "www.samsung.com" em um
dispositivo de memória USB.
Versão Atual - o software já instalado na TV.
✎✎O software é representado como “Ano/Mês/Dia_
Versão”.
Atualização de SW
■■ Teste de Imagem: utilize para verificar problemas de
imagem.
Sim: caso o padrão de teste não apareça ou haja ruído
no padrão de teste, selecione Sim. Pode haver um
problema com a TV. Entre em contato com a Central de
Atendimento da Samsung para obter assistência.
Não: caso o padrão de teste seja exibido
adequadamente, selecione Não. O problema pode estar
no seu equipamento externo. Verifique suas conexões.
Se o problema persistir, consulte o manual do usuário
do equipamento externo.
■■ Teste de Som (Sim / Não): utilize a melodia integrada
para verificar problemas de som.
✎✎ Caso não ouça som nos alto-falantes da TV, antes
de realizar o teste de som, certifique-se de que
Selecionar Alto-falante está definido
Alto-falante TV no menu Som.
✎✎ A melodia será ouvida durante o teste mesmo se
Selecionar Alto-falante está definido para
Alto-falante Ext ou o som esteja mudo pelo
botão MUTE.
Sim: caso seja possível ouvir o som vindo apenas de um
alto-falante ou de nenhum alto-falante, selecione Sim.
Pode haver um problema com a TV. Entre em contato
com a Central de Atendimento da Samsung para obter
assistência.
Não: caso seja possível ouvir o som pelos altofalantes, selecione Não. O problema pode estar no seu
equipamento externo. Verifique suas conexões. Se o
problema persistir, consulte o manual do usuário do
equipamento externo.
■■ Informação Sinal: (apenas para canais digitais) a
qualidade de recepção de canais HDTV será perfeita ou
os canais não estarão disponíveis. Ajuste sua antena
para aumentar a força do sinal.
■■ Solução de problemas: caso a TV pareça ter um
problema, consulte as descrições deste manual.
✎✎ Caso nenhuma destas dicas de solução de
problemas se aplique, entre em contato com o
centro de atendimento ao consumidor Samsung.
Versão Atual
2010/01/18_000001
POR USB
►
Software Alternativo
E Entrar R Voltar
Instalação da versão mais recente
■■ POR USB: Insira uma
Painel lateral da TV
unidade USB que
contenha o arquivo de
atualização de firmware,
cujo download foi feito
em “www.samsung.com,”
Dispositivo USB
na TV. Tome cuidado
para não desconectar
a energia ou remover a
unidade USB enquanto as atualizações são aplicadas.
A TV desligará e ligará automaticamente após concluir
a atualização do firmware. Quando o software é
atualizado, as configurações de vídeo e áudio definidas
retornam aos valores padrão. Recomendamos que
você anote as suas configurações para que possa
reconfigurá-las facilmente depois de atualizar o software.
■■ Software Alternativo (Não disponível)
Guia de Conexão HD
Consulte essas informações ao conectar dispositivos
externos à TV.
Entre em contato com a Samsung
Veja essas informações quando sua TV não funcionar
corretamente ou caso deseje atualizar o software. É possível
encontrar informações relacionadas aos nossos centros de
atendimento e sobre como fazer o download de produtos e
software.
Português
[PC450]BN68-02795A-01L02.indb 23
03 FUNÇÕES BÁSICAS
Menu de Suporte
23
2010-03-30 오후 3:37:42
FUNÇÕES AVANÇADAS
Media Play
MEDIA.P
Utilize arquivos de foto, música e/ou filme salvos
em um dispositivo de armazenamento USB
(pendrive).
O
MediaPlay
Vídeos
MENUm → Aplicativos → Media Play
(USB) → ENTERE
SUM
Alt. dispos.
dispositivo Vis. E Visualizar disp. R Retornar
¦ Conectando a um dispositivo USB
1. Ligue a TV.
Painel lateral da TV
2. Conecte um dispositivo USB contendo arquivos de fotos, músicas e/ou filmes à
entrada USB na lateral da TV.
3. Quando o USB está conectado à TV, é exibida a janela popup. Então será
possível selecionar Media Play.
Dispositivo USB
✎ O processo pode não funcionar adequadamente com arquivos multimídia não licenciados.
✎ Lista de informações essenciais antes de utilizar o Media Play (USB)
x
x
x
x
x
x
x
x
x
x
x
x
x
x
x
x
x
x
x
x
24
O MTP (Media Transfer Protocol) não é compatível.
O sistema de arquivos suporta FAT16, FAT32 e NTFS.
Determinados tipos de câmera digital USB e dispositivos de áudio podem não ser compatíveis com esta TV.
O Media Play suporta apenas os dispositivos de classe de armazenamento em massa USB (MSC). MSC é um dispositivo de
armazenamento em massa (Mass Storage Class Bulk-Only Transport). Exemplos de MSC são microunidades (thumb drives),
leitores de cartões Flash e USB HDD (HUB e USB não são compatíveis). Os dispositivos devem ser conectados diretamente à
porta USB da TV.
Antes de conectar o dispositivo à TV, faça back-up de seus arquivos para evitar danos ou perda de dados. A SAMSUNG não é
responsável por qualquer dano a arquivos de dados ou perda de dados.
Conecte um USB HDD à porta dedicada: USB 1 (HDD).
Não desconecte o dispositivo USB enquanto ele estiver carregando.
Quanto maior a resolução, maior o tempo para a exibição na tela.
A resolução máxima de JPEG suportada é de 15360 x 8640 pixels.
Para arquivos não suportados ou corrompidos, a mensagem "Formato de arquivo não suportado" é exibida.
Caso os arquivos sejam classificados pela Visual. Bás., será possível exibir até 1000 arquivos em cada pasta.
Não é possível reproduzir arquivos MP3 com DRMs que tenham sido transferidos de um site pago. A Gestão de Direitos Digitais
(DRM - Digital Rights Management) é uma tecnologia que suporta a criação, distribuição e gestão de conteúdos, de forma
integrada e abrangente, incluindo a proteção de direitos e interesses dos fornecedores do conteúdo, a prevenção de cópias ilegais
do conteúdo e também a gestão de cobranças e de contratos.
Se mais de 2 dispositivos PTP estiverem conectados, você só poderá usar um de cada vez.
Se mais de dois dispositivos MSC estiverem conectados, alguns deles podem não ser reconhecidos. Um dispositivo USB que
requeira muita energia (mais que 500 mA ou 5 V) pode não ser suportado.
Se uma mensagem de advertência de sobrecarga for exibida enquanto você conecta ou usa um dispositivo USB, o dispositivo
poderá não ser reconhecido ou apresentar mau funcionamento.
Caso a TV não receba nenhum sinal durante o tempo definido em Tempo de Prot. Autom., a proteção de tela será executada.
O modo de economia de energia de algumas unidades externas de disco rígido pode ser iniciado automaticamente quando
conectadas à TV.
Caso um cabo de extensão USB seja utilizado, o dispositivo USB pode não ser reconhecido ou os arquivos do dispositivo podem
não ser lidos.
Caso um dispositivo USB conectado à TV não seja reconhecido, a lista de arquivos no dispositivo esteja corrompida ou um
arquivo da lista não seja reproduzido, conecte o dispositivo USB ao PC, formate o dispositivo e verifique a conexão.
Caso um arquivo excluído do PC ainda seja encontrado ao executar o Media Play, use a função “Esvaziar Lixeira” do PC para
excluir o arquivo permanentemente.
Português
[PC450]BN68-02795A-01L02.indb 24
2010-03-30 오후 3:37:43
Vá para o arquivo desejado usando os botões direcionais e então pressione os botões ENTERE ou � (Reproduzir). O
arquivo será reproduzido.
✎✎Compatível com Visualizar Disp. e Início na página de Media Play.
Informações:
é possível verificar o nome do
arquivo selecionado e o número
de arquivos e páginas.
Vídeos
Movie 01.avi
Movie 03.avi
Movie 05.avi
Seção de lista de classificação:
exibe o padrão de classificação.
Movie 07.avi
✎✎ O padrão de classificação
Movie 09.avi
é diferente dependendo do
conteúdo.
1/1 Página
/Movie 01.avi
Movie 02.avi
Jan.10.2010
Movie 04.avi
Jan.10.2010
Movie 06.avi
Jan.10.2010
Seção de lista de arquivos:
É possível confirmar
os arquivos e grupos
classificados por categoria.
Jan.10.2010
Jan.10.2010
Movie 08.avi
Jan.10.2010
SUM
Jan.10.2010
Jan.10.2010
Movie 10.avi
Jan.10.2010
Selecionar
Alt. dispos.
04 FUNÇÕES AVANÇADAS
¦¦ Exibição na tela
Jan.10.2010
Classif. T Ferramentas
Botões de operação
Vermelho (Alt. dispos.): seleciona o dispositivo conectado.
B Verde (Preferência): define a preferência de arquivos. (não compatível na Basic view (Visual. Bás.))
Amarelo (Selecionar): seleciona diversos arquivos na lista de arquivos. Arquivos selecionados são
marcados com um símbolo.
Azul (Classif.): seleciona a lista de classificação.
T Ferramentas: exibe o menu de opções.
✎✎ Usando os botões � (REW) ou µ (FF), a lista de arquivos pode ir para a página anterior ou
para a página seguinte.
Vídeos
Reprodução de vídeos
1. Pressione os botões ◄ ou ► para selecionar Vídeos e então pressione o botão ENTERE no menu Media Play.
2. Pressione os botões ◄/►/▲/▼ para selecionar o vídeo desejado na lista de arquivos.
3. Pressione o botão ENTERE ou o botão � (Reproduzir).
–– O arquivo selecionado é exibido na parte superior da tela com o tempo de reprodução.
–– Caso as informações sobre a duração do vídeo sejam desconhecidas, o tempo de reprodução e a barra de progresso
não serão exibidos.
–– Durante a reprodução do vídeo, é possível pesquisar usando os botões ◄ e ►.
✎✎Em tal modo, é possível assistir os trechos de vídeo contidos em
um jogo de videogame, mas não será possível jogar o jogo em si.
yy Formatos de legenda suportados
Nome
Extensão do arquivo
Formato
Texto baseado em tempo
MPEG-4
.ttxt
XML
SAMI
.smi
HTML
SubRip
.srt
baseado em string
SubViewer
.sub
baseado em string
Micro DVD
.sub ou .txt
baseado em string
00:04:03 / 00:07:38
1/1
Movie 01.avi
SUM
E Pausa L Saltar T Ferramentas R Retornar
Português
[PC450]BN68-02795A-01L02.indb 25
25
2010-03-30 오후 3:37:44
FUNÇÕES AVANÇADAS
yy Formatos de vídeo suportados
Extensão do
arquivo
*.avi
*.mkv
*.asf
Container
AVI
MKV
ASF
*.wmv
ASF
*.mp4
MP4
*.3gp
3GPP
*.vro
VRO
VOB
*.mpg
*.mpeg
PS
*.ts
*.tp
*.trp
TS
Codec de vídeo
Resolução
Taxa de quadros
(fps - quadros
por segundo)
Taxa de
bits (Mbps)
Divx 3.11 / 4.x / 5.1 / 6.0
1920x1080
6 ~ 30
8
XviD
1920x1080
6 ~ 30
8
H.264 BP / MP / HP
1920x1080
6 ~ 30
25
MPEG4 SP / ASP
1920x1080
6 ~ 30
8
Motion JPEG
800x600
6 ~ 30
8
Divx 3.11 / 4.x / 5.1 / 6.0
1920x1080
6 ~ 30
8
XviD
1920x1080
6 ~ 30
8
H.264 BP / MP / HP
1920x1080
6 ~ 30
25
MPEG4 SP / ASP
1920x1080
6 ~ 30
8
Motion JPEG
800x600
6 ~ 30
8
Window Media Video v9
1920x1080
6 ~ 30
25
H.264 BP / MP / HP
1920x1080
6 ~ 30
25
MPEG4 SP / ASP
1920x1080
6 ~ 30
8
XVID
1920x1080
6 ~ 30
8
H.264 BP / MP / HP
1920x1080
6 ~ 30
25
MPEG4 SP / ASP
1920x1080
6 ~ 30
8
MPEG1
1920x1080
24 / 25 / 30
30
MPEG2
1920x1080
24 / 25 / 30
30
MPEG1
1920x1080
24 / 25 / 30
30
MPEG2
1920x1080
24 / 25 / 30
30
H.264
1920x1080
6 ~ 30
25
MPEG2
1920x1080
24 / 25 / 30
30
H.264
1920x1080
6 ~ 30
25
VC1
1920x1080
6 ~ 30
25
Codec de áudio
MP3 / AC3 / LPCM /
ADPCM / DTS Core
MP3 / AC3 / LPCM /
ADPCM / WMA
WMA
MP3 / ADPCM / AAC
ADPCM / AAC / HE-AAC
AC3 / MPEG / LPCM
AC3 / MPEG / LPCM / AAC
AC3 / AAC / MP3 / DD+ /
HE-AAC
Outras restrições
✎✎ NOTA
xx Caso haja problemas com o conteúdo de um codec, ele não será suportado.
xx Se as informações para um Recipiente estão incorretas e o arquivo estiver com erro, o Recipiente não
conseguirá reproduzir corretamente.
xx O som ou o vídeo podem não funcionar caso o conteúdo possua uma taxa de quadros / taxa de bits padrão
acima da taxa de quadros/segundo compatível relacionada na tabela acima.
xx Caso a Tabela de Índice apresente erros, a função Saltar não será suportada.
Decodificador de vídeo
• Suporta até H.264, Nível 4.1
• H.264 FMO / ASO / RS, VC1 SP / MP / AP L4 e AVCHD não são
compatíveis.
• GMC não é suportado.
• H.263 não é suportado.
26
Decodificador de áudio
• Suporta até WMA 7, 8, 9, STD
• O WMA 9 PRO não é compatível com 2 ou multicanais ou sem
perda de áudio.
• WMA com taxa de amostragem 22050 mono não é compatível.
Português
[PC450]BN68-02795A-01L02.indb 26
2010-03-30 오후 3:37:45
Se você sair da função de reproduzir filme, o filme poderá ser reproduzido mais tarde do ponto onde parou.
✎✎Caso você pressione o botão ENTERE (Capitulan.) durante a reprodução do arquivo, será possível explorar a cena
dividida nos 5 capítulos que deseja.
✎✎Capitulan. está disponível apenas para os vídeos que suportem essa função.
1. Selecione o arquivo de filme que deseja reproduzir
continuamente pressionando o botão ◄ ou ► para selecioná-lo
na seção de lista de arquivos.
00:04:03 / 00:07:38
1/1
Movie 01.avi
2. Pressione o botão � (Reproduzir) / ENTERE.
3. Selecione Reproduzir cont. (Voltar a reproduzir) pressionando o
botão azul. A reprodução do filme iniciará de onde havia parado.
✎✎ O botão azul ficará disponível ao reiniciar a reprodução.
✎✎ Se a função Lemb. Reprod. Cont. Filme estiver definida
como Ligado no menu Config., uma mensagem
aparecerá quando você retomar a reprodução de um
arquivo de filme.
04 FUNÇÕES AVANÇADAS
Reprodução contínua de filme (Voltar a reproduzir)
Reproduzir cont.
Resume a exibição da última cena vista.
SUM
Reproduzir cont. E Pausa L Saltar T Ferramentas R Retornar
Música
Reprodução de música
1. Pressione os botões ◄ ou ► para selecionar Música e então
pressione o botão ENTERE no menu Media Play.
Lista
2. Pressione os botões ◄/►/▲/▼ para selecionar a música
desejada na lista de arquivos.
3. Pressione o botão ENTERE ou o botão � (Reproduzir).
–– Durante a reprodução da música, é possível avançar ou
recuar a intervalos de 10 segundos usando os botões ◄ e ►.
–– Os botões � (REW) ou µ (FF) não funcionam durante a
reprodução.
✎✎Exibe apenas os arquivos com extensão MP3 e PCM. Outras
I Love You
Jhon
I Love you
Jhon
1st Album
Pop
2010
4.2MB
No Singer
3/15
Music 1
Music 2
No Singer
Music 3
No Singer
01:10 / 04:02
Music 4
No Singer
Music 5
No Singer
SUM
E Pausa L Saltar T Ferramentas R Retornar
extensões de arquivo não são exibidas, mesmo que sejam
salvos no mesmo dispositivo USB.
✎✎Caso o som esteja anormal ao reproduzir arquivos MP3, ajuste o Equalizador no menu Som. (Um arquivo mp3 com
excesso de modulação pode causar problemas de som.)
Português
[PC450]BN68-02795A-01L02.indb 27
27
2010-03-30 오후 3:37:46
FUNÇÕES AVANÇADAS
Fotos
Visualização de uma foto (ou apresentação de slides)
1. Pressione os botões ◄ ou ► para selecionar Fotos e então
pressione o botão ENTERE no menu Media Play.
Normal
Image1024.jpg
1024x768
2010/2/1
3/15
2. Pressione os botões ◄/►/▲/▼ para selecionar a foto desejada
na lista de arquivos.
3. Pressione o botão ENTERE ou o botão � (Reproduzir).
–– Enquanto uma lista de fotos está sendo exibida, pressione o
botão � (Reproduzir) / ENTERE no controle remoto para
iniciar a apresentação de slides.
–– Todos os arquivos da seção de lista de arquivos serão
utilizados na apresentação de slides.
–– Durante a apresentação de slides, os arquivos são
reproduzidos na ordem.
E Pausa L Ant./Próx. T Ferramentas R Retornar
SUM
✎✎Arquivos de música podem ser reproduzidos automaticamente
durante a apresentação de slides se Música de Fundo estiver
definida como Ligado.
✎✎Não é possível alterar o Modo BGM até que o carregamento do
BGM tenha sido concluído.
✎✎ NOTA
xx Algumas fotos não suportam a exibição de miniaturas.
¦¦ Reprodução de arquivos múltiplos
Reprodução de arquivos selecionados de vídeo / música / foto
1. Pressione o botão amarelo na lista de arquivos para selecionar o
arquivo desejado.
Vídeos
2. Repita a operação acima para selecionar diversos arquivos.
Movie 01.avi
✎✎ NOTA
xx Para cancelar todas as seleções, pressione o botão
Jan.10.2010
Movie 07.avi
Jan.10.2010
Movie 06.avi
Movie 09.avi
Jan.10.2010
Movie 10.avi
Jan.10.2010
SUM
Alt. dispos.
Jan.10.2010
Movie 08.avi
Jan.10.2010
Amarelo novamente.
selecionados, pressione o botão TOOLS e selecione
Desmarcar Tudo.
Jan.10.2010
Movie 04.avi
Jan.10.2010
Movie 05.avi
selecionados.
1/1 Página
Movie 02.avi
Jan.10.2010
Movie 03.avi
xx A marca c será exibida à esquerda dos arquivos
xx Para cancelar a seleção de todos os arquivos
2 arq. Selec.
/Movie 01.avi
Jan.10.2010
Selecionar
Classif. T Ferramentas
3. Pressione o botão TOOLS e selecione Repr. conteúdo selec..
Reprodução do grupo de arquivos de vídeo / música / foto
1. Ao exibir uma lista de arquivos, vá para qualquer arquivo no
grupo desejado.
2. Pressione o botão TOOLS e selecione Repr. Grupo Atual.
28
Português
[PC450]BN68-02795A-01L02.indb 28
2010-03-30 오후 3:37:47
Classificando a lista de arquivos
Pressione o botão azul na lista de arquivos para classificar os arquivos.
Categoria
Vídeos
Música
Fotos
Visual. Bás.
Exibe a pasta inteira. Você pode visualizar a foto selecionando a pasta.
Operação
>
>
>
Título
Classifica e exibe os títulos de arquivos na ordem símbolo / número / alfabeto /
especial.
>
>
>
Preferência
Classifica e exibe o arquivo por preferência. É possível alterar a preferência de arquivo
na seção de lista de arquivos usando o botão verde.
>
>
>
Mais Novo
Classifica e exibe arquivos começando pelos mais recentes.
>
Mais Antiga
Classifica e exibe arquivos começando pelos mais antigos.
>
Artista
Classifica o arquivo de música por artista em ordem alfabética.
>
Álbum
Classifica o arquivo de música por álbum em ordem alfabética.
>
Gênero
Classifica os arquivos de música por gênero.
>
Humor
Classifica os arquivos de música por humor. É possível modificar as informações de
humor da música.
>
Mensal
Classifica e exibe os arquivos de foto por mês.
>
04 FUNÇÕES AVANÇADAS
¦¦ Media Play - Funções adicionais
>
>
Menu de opções de reprodução de vídeos / músicas / fotos
Durante a reprodução de um arquivo, pressione o botão TOOLS.
Categoria
Operação
Vídeos
Música
Fotos
Título
É possível mover o outro arquivo diretamente.
>
Modo de Repetição
É possível reproduzir arquivos de filme e música repetidamente.
>
Tam. Imagem
(Modo1 / Modo2 / Original)
É possível ajustar o tamanho da imagem de acordo com sua preferência.
Configuração da Imagem
É possível ajustar a configuração da imagem. (p. 15, 16, 17, 18)
>
Configuração do Som
É possível ajustar a configuração do som. (p. 18, 19)
>
Definir Legenda
É possível reproduzir os filmes com legenda. Esta função só funciona se as legendas
estiverem com o mesmo nome do arquivo de vídeo.
>
Parar Apresentação
de Slides / Iniciar
Apresentação de Slides
É possível iniciar ou encerrar uma apresentação de slides.
Vel. Apr. Slides
É possível selecionar a velocidade da apresentação de slides durante a apresentação.
>
Música de Fundo
É possível configurar e selecionar música de fundo ao assistir a uma apresentação de
slides.
>
Zoom
É possível ampliar as imagens no modo de tela cheia.
>
Girar
Você pode girar as imagens no modo de tela cheia.
Informação
É possível ver informações detalhadas sobre o arquivo reproduzido.
>
>
>
>
>
>
>
>
>
>
Config.
Uso do menu de configuração
■■ Lemb. Reprod. Cont. Filme (Voltar a reproduzir) Ligado / Deslig.: selecione para exibir a mensagem pop-up de ajuda
para a reprodução contínua do filme.
■■ Obtenha o código registro do VOD DivX®: exibe o código de registro autorizado para a TV. Caso você se conecte ao
site do DivX e se registre, será possível fazer o download do arquivo de registro do VOD. Se você reproduzir o registro de
VOD usando o Media Play, o registro estará concluído.
✎✎ Para mais informações sobre VOD DivX®, acesse www.DivX.com.
■■ Obtenha o cód. desativação do VOD DivX®: Quando o VOD DivX® não está registrado, o código de desativação de
registro é exibido. Se você executar esta função quando DivX® VOD estiver registrado, o registro atual do DivX® VOD
será desativado.
■■ Informação: Selecione para exibir informações sobre o dispositivo conectado.
Português
[PC450]BN68-02795A-01L02.indb 29
29
2010-03-30 오후 3:37:48
FUNÇÕES AVANÇADAS
Anynet+
O que é Anynet+? t
Anynet+ é uma função que permite o controle de todos os dispositivos Samsung conectados que suportam Anynet+ com o
controle remoto da TV Samsung. O sistema Anynet+ pode ser usado apenas com os dispositivos Samsung que disponham
do recurso Anynet+. Para certificar-se de que o dispositivo Samsung tenha esse recurso, verifique se ele possui o logotipo
Anynet+.
Para conectar a um Home Theater Samsung
Painel traseiro da TV
Dispositivo
Anynet+ 3
Home Theater
Dispositivo Anynet+
1, 2
Cabo HDMI
Cabo HDMI
Cabo HDMI
Cabo Óptico
1. Conecte HDMI IN (1(DVI), 2 ou 3) na TV na saída HDMI do dispositivo Anynet+ correspondente utilizando um cabo
HDMI.
2. Com o cabo HDMI, conecte a entrada HDMI do home theater na saída HDMI do dispositivo Anynet+ correspondente.
✎✎NOTA
xx Conecte o cabo óptico entre a saída DIGITAL AUDIO OUT (OPTICAL) da sua TV e a entrada Digital Audio Input do
home theater.
xx Seguindo a conexão acima, a entrada óptica reproduz o áudio de apenas 2 canais. Você ouvirá som apenas dos
alto-falantes direito e esquerdo dianteiros do home theater e do subwoofer. Caso deseje ouvir áudio de 5.1 canais,
ligue a entrada DIGITAL AUDIO OUT (OPTICAL) do aparelho de DVD / receptor de satélite (ou seja, dispositivo
Anynet 1 ou 2) diretamente ao amplificador ou home theater, e não à TV.
xx É possível conectar apenas um Home Theater.
xx É possível conectar um dispositivo Anynet+ usando o cabo HDMI. Existem alguns cabos HDMI que não suportam
funções Anynet+.
xx O Anynet+ funciona quando o dispositivo de AV que suporta Anynet+ está no estado de espera ou ligado.
xx O sistema Anynet+ suporta até 12 dispositivos de AV. Note que pode conectar até 3 dispositivos iguais.
30
Português
[PC450]BN68-02795A-01L02.indb 30
30
2010-03-30 오후 3:37:48
O menu Anynet+ muda de acordo com o tipo e o estado dos dispositivos Anynet+ conectados à TV.
Menu Anynet+
Ver TV
Lista de Dispositivos
(nome_dispositivo) MENU
(nome_dispositivo) INFO
Gravação: (*gravador)
Parar gravação: (*gravador)
Receiver
Descrição
Altera o modo Anynet+ para o modo de transmissão de TV.
Exibe a lista de dispositivos Anynet+.
Exibe os menus de dispositivos conectados. Por exemplo, se um gravador de DVD estiver conectado, o
menu de disco do gravador de DVD será exibido.
Exibe o menu de reprodução do dispositivo conectado. Por exemplo, se um gravador de DVD estiver
conectado, o menu de reprodução do gravador de DVD será exibido.
Inicia a gravação imediatamente utilizando o gravador. (Isto está disponível apenas em dispositivos que
possuem suporte à função de gravação.)
04 FUNÇÕES AVANÇADAS
Menu Anynet+
Interrompe a gravação.
O áudio é reproduzido pelo receptor.
Caso exista mais de um dispositivo conectado, eles serão exibidos como (*gravador) e no caso de somente um dispositivo,
ele será representado como (*nome_dispositivo).
¦¦ Configuração do Anynet+
OO MENUm → Aplicativo → Anynet+ (HDMI-CEC) → ENTERE
■■ Configuração
Anynet+(HDMI-CEC) (Deslig. / Ligado): Para usar a função Anynet+, a opção Anynet+ (HDMI-CEC) deve ser ajustada como Ligado.
Quando a função Anynet+ (HDMI-CEC) é desativada, todas as operações relacionadas à função Anynet+ são desativadas.
Desligamento Automático (Não / Sim): configura um dispositivo Anynet+ para desligar automaticamente ao desligar a TV.
A fonte ativa na TV deve ser ajustada à TV para que a função Anynet+ seja usada.
✎✎
✎✎
✎✎ Mesmo que um dispositivo externo ainda esteja gravando, ele pode ser desligado.
¦¦ Alternando entre dispositivos Anynet+
1. Será exibida uma lista com os dispositivos Anynet+ conectados à TV.
Caso você não encontre o dispositivo desejado, pressione o botão vermelho para atualizar a lista.
2. Selecione um dispositivo e pressione o botão ENTERE. É possível mudar para o dispositivo selecionado.
Apenas quando você definir Anynet+ (HDMI-CEC) como Ligado no menu Aplicativo, o menu
Lista de Dispositivos aparecerá.
✎✎
✎✎
xx A mudança para o dispositivo selecionado pode demorar até 2 minutos. Não é possível cancelar a operação
enquanto a TV está mudando o dispositivo.
xx Se foi selecionado um modo de entrada externo pressionando o botão SOURCE, não é possível usar a função
Anynet+. Certifique-se de mudar para um dispositivo Anynet+ utilizando Lista de Dispositivos.
¦¦ Gravação
Você pode gravar um programa da TV usando um gravador Samsung.
1. Selecione Gravação.
Quando houver mais de dois dispositivos de gravação
xx Quando há vários dispositivos de gravação conectados, eles são listados. Selecione um dispositivo de
gravação na Lista de Dispositivos.
Quando o dispositivo de gravação não for exibido, selecione Lista de Dispositivos e pressione o botão vermelho
para procurar dispositivos.
2. Pressione o botão EXIT para sair.
Você pode gravar as transmissões de origem selecionando Gravação: (nome_dispositivo).
Pressione o botão � (REC) para gravar o que você estiver assistindo no momento. Ao assistir um vídeo a partir de
um outro dispositivo, o vídeo do dispositivo é gravado.
Antes de gravar, verifique se a entrada da antena está corretamente conectada ao dispositivo de gravação. Para conectar
uma antena corretamente a um dispositivo de gravação, consulte o manual do usuário do dispositivo de gravação.
✎✎
✎✎
✎✎
✎✎
✎✎
Português
[PC450]BN68-02795A-01L02.indb 31
31
2010-03-30 오후 3:37:49
FUNÇÕES AVANÇADAS
¦¦ Ouvindo através de um receptor
É possível ouvir o som por meio de um receptor (por exemplo, home theater), em vez dos Alto-falante TV.
1. Selecione Receiver e defina-o como Ligado.
2. Pressione o botão EXIT para sair.
✎✎ Se o seu receptor suporta apenas áudio, ele pode não aparecer na lista de dispositivos.
✎✎ O receptor irá funcionar quando você tiver conectado corretamente o conector óptico do receptor à entrada
DIGITAL AUDIO OUT (OPTICAL) da TV.
✎✎ Quanto o receptor (home theater) estiver definido como Ligado, você poderá ouvir a reprodução de som pela
entrada óptica da TV. Quando a TV estiver exibindo um sinal DTV (aéreo), a TV emitirá um som de 5.1 canais ao
receptor do home theater. Quando a fonte é um componente digital como um DVD e estiver conectada à TV via
HDMI, só será ouvido o som de 2 canais do receptor.
✎✎NOTA
xx É possível controlar os dispositivos Anynet+ apenas usando o controle remoto da TV, e não os botões na TV em si.
xx O controle remoto da TV pode não funcionar sob certas condições. Caso isso ocorra, selecione o dispositivo
Anynet+ novamente.
xx As funções Anynet+ não funcionam com os produtos de outros fabricantes.
¦¦ Solução de problemas para Anynet+
Problema
Possível solução
O Anynet+ não está funcionando.
•
•
•
•
•
•
•
•
Quero iniciar o Anynet+.
• Verifique se o dispositivo Anynet+ está conectado corretamente à TV e se Anynet+ (HDMI-CEC) está
configurado como Ligado no menu de configuração do Anynet+.
• Pressione o botão TOOLS para exibir o menu Anynet+ e selecione um menu desejado.
Quero sair do Anynet+.
• Selecione Ver TV no menu Anynet+.
• Pressione o botão SOURCE no controle remoto da TV e selecione um dispositivo que não seja um dos
dispositivos Anynet+.
• Pressione z, PRE-CH e FAV.CH para alterar o modo TV. (Observe que o botão de canais somente
funciona quando um dispositivo Anynet+ com sintonizador interno não estiver conectado.)
A mensagem “Conectando ao
dispositivo Anynet+...” será exibida
na tela.
• Não é possível usar o controle remoto durante a configuração do Anynet+ ou mudança para um modo de
visualização.
• Use o controle remoto quando a configuração do Anynet+ ou a mudança para modo de visualização tiver
sido concluída.
O dispositivo Anynet+ não toca.
• Não é possível usar a função reproduzir quando o Plug & Play (configuração inicial) estiver em progresso.
O dispositivo conectado não é
exibido.
•
•
•
•
•
Não é possível gravar o programa de TV.
• Verifique se a tomada da antena no dispositivo de gravação está devidamente conectada.
O som da TV não sai pelo
receptor.
• Conecte o cabo óptico entre a TV e o receptor.
32
Verifique se o dispositivo é um dispositivo Anynet+. O sistema Anynet+ só é compatível com dispositivos Anynet+.
É possível conectar apenas um receptor (home theater).
Verifique se o cabo de força do dispositivo Anynet+ está conectado corretamente.
Verifique as conexões dos cabos do dispositivo Anynet+ de vídeo/áudio/HDMI.
Verifique se Anynet+ (HDMI-CEC) está configurado como Ligado no menu de configuração do Anynet+.
Verifique se o controle remoto da TV está no modo TV.
Verifique se é um controle remoto compatível com Anynet+.
O Anynet+ não funciona em determinadas situações. (Busca de canais, operação de Media Play (USB) ou
Plug & Play (configuração inicial), etc.)
• Ao conectar ou remover o cabo HDMI, procure novamente dispositivos ou desligue a TV e ligue-a novamente.
• Verifique se a função Anynet+ do dispositivo Anynet+ está ligada.
Verifique se o dispositivo suporta as funções Anynet+.
Verifique se o cabo HDMI está conectado corretamente.
Verifique se Anynet+ (HDMI-CEC) está configurado como Ligado no menu de configuração do Anynet+.
Procurar novamente por dispositivos Anynet+.
É possível conectar um dispositivo Anynet+ apenas usando o cabo HDMI. Existem alguns cabos HDMI que
não suportam funções Anynet+.
• Caso a conexão seja encerrada porque houve uma queda de energia ou porque o cabo HDMI foi
desconectado, repita a busca por dispositivos.
Português
[PC450]BN68-02795A-01L02.indb 32
2010-03-30 오후 3:37:49
APÊNDICE
(não disponível em todos os locais)
¦¦ Configuração da Frequência
yy A frequência do Transmissor FM deve ser definida com valor diferente de qualquer freqüência de rádio FM próximo a TV a
fim de alcançar um bom sinal de recepção de rádio livre de interferências.
yy Se a frequência de um canal de TV cair dentro da faixa de freqüência de FM, o Transmissor FM irá atualizar
automaticamente para sua faixa de freqüência autorizada.
yy Canais de TV com a mesma freqüência do Transmissor FM irá resultar em interferências no sinal. Para evitar isso, o
intervalo de transmissor de FM de freqüência é automaticamente mostrada.
yy Se não houver nenhuma frequência de canal de TV dentro da faixa de freqüência de FM (83MHz a 108MHz), toda a gama
de 88.0MHz a 107.9MHz estará disponível para uso.
05 APÊNDICE
Configuração do Transmissor FM
¦¦ Guia de Instalação do Transmissor FM
O módulo Transmissor FM apresenta uma antena integrada. A amplitude do sinal da antena pode variar dependendo de
onde a antena está instalada e do desempenho do receptor. Se tiver sinal fraco, tente instalar a antena em um dos métodos
apresentados abaixo:
Método 1
Método 2
Ligue o transmissor FM (fig. 1), prenda o grampo (fig. 2) e engate o terminal Desenrole e posicione a antena onde o
da antena ao grampo.
receptor conseguir a melhor recepção.
Se a recepção está inadequada após usar o "Método 1", recomendamos a
instalação do transmissor usando o "Método 2".
2
1
✎✎NOTA
(não disponível em todos os locais)
xx Instalar a antena diretamente na parte de trás da TV pode resultar em mau sinal. Deixe algum espaço entre a TV e a
antena.
xx A antena do Transmissor FM em contacto direto com a antena da TV pode resultar em interferência no sinal.
xx Se o menu do Transmissor FM não está ativado, verifique se o Transmissor FM está corretamente inserido no
compartimento Transmissor FM 1.
xx Para ouvir o áudio, transmitido pela TV na freqüência FM, em um receptor de FM (rádio, home theater, etc), mova a
antena do receptor até o áudio estar limpo.
xx Se você usar um receptor de FM (rádio, home theater, etc), pode desfrutar de qualidade de áudio transmitida pela TV
através de frequência FM, se a pessoa estiver a 10 m do receptor.
xx Certifique-se de usar o Transmissor FM fornecido. Caso contrário, o produto pode ser danificado.
xx Evite utilizar o Transmissor FM fornecido com outros produtos.
Português
[PC450]BN68-02795A-01L02.indb 33
33
2010-03-30 오후 3:37:49
APÊNDICE
xx Ajuste a frequência do receptor FM (rádio, home theater, etc) para a frequência do Transmissor FM na TV. Se a
freqüência do receptor não for igual a do transmissor, o som não será ouvido.
xx Ajustar o volume do receptor FM para um nível adequado.
xx Quando a TV estiver desligada, o receptor FM (rádio, home theater, etc) emitirá ruído estático.
xx Devido à interferência de outros produtos eletrônicos, que é um ponto fraco de comunicações sem fio, você pode
ouvir ruídos ou sons estáticos.
¦¦ Formatos de Transmissor FM suportados
Nome
Especificação
Normal
Faixa de Freqüência
Distância de transferência
34
88.0MHz ~ 107.9MHz
Intervalo de ajuste automático
Corresponde à freqüência da TV
(Na 88.0MHz ~107.9MHz)
Máximo 5m: Depende da posição da antena e da qualidade do receptor
Português
[PC450]BN68-02795A-01L02.indb 34
2010-03-30 오후 3:37:50
05 APÊNDICE
Como instalar o kit de montagem na parede
Afixação da Tampa inferior
Ao instalar a TV na parede, afixe a Tampa inferior como mostra a figura.
Tampa inferior
Instalação do kit de montagem na parede
kit de montagem na parede (vendido separadamente) permite instalar a TV na parede.
O
Para obter informações detalhadas sobre como fazer a montagem na parede, consulte as instruções fornecidas juntamente
com o kit. consulte as instruções fornecidas juntamente com o kit. Entre em contato com um técnico para instalar o suporte
de montagem na parede. A Samsung Electronics não se responsabiliza por qualquer dano ao produto ou ferimento a si
próprio ou a outras pessoas caso você decida instalar a TV por sua conta.
Especificações do kit de montagem na parede (VESA)
✎✎
O kit de montagem na parede é vendido separadamente.
Instale o seu suporte de parede em uma parede sólida e perpendicular ao chão. Se a fixação for feita em algum outro material
de construção, entre em contato com o revendedor mais próximo. Se instalado em um teto ou uma parede com inclinação,
ele poderá cair e ocasionar algum dano pessoal grave.
✎✎NOTA
xx As medidas padrão para kits de montagem na parede são mostradas na tabela abaixo.
xx Ao comprar o seu kit de instalação na parede, são fornecidos um manual detalhado de instalação e todas as peças
necessárias para a montagem.
xx Não utilize parafusos que não estejam em conformidade com as especificações de parafusos padrão VESA.
xx Não utilize parafusos mais longos que a dimensão padrão ou que não estejam em conformidade com as
especificações de parafusos padrão VESA. Parafusos muito longos podem danificar o interior da TV.
xx Para kits de montagens em paredes que não estejam em conformidade com essas especificações VESA de
parafuso padrão, o comprimento dos parafusos pode ser diferente, dependendo das especificações dos kits.
xx Não aperte os parafusos com muita força, pois isso pode danificar o produto ou ocasionar sua queda, o que pode
resultar em ferimentos pessoais. A Samsung não se responsabiliza por esses tipos de acidentes.
xx A Samsung não se responsabiliza por danos ao produto nem ferimentos pessoais quando for usado um suporte
para parede que não seja VESA ou não seja o especificado, ou caso o cliente não siga as instruções de instalação
do produto.
xx Não instale a TV em um ângulo maior que 15 graus.
xx Sempre conte com a ajuda de duas pessoas para instalar a TV na parede.
Família de
produto
polegadas
Especif. VESA
Parafuso padrão
(A * B)
42~50
400 x 400
58~63
600 x 400
70~79
800 x 400
80~
1400 x 800
PDP TV
M8
Quantidade
4
✎✎ Desaparafuse o orifício circundante antes de instalar o kit de montagem na parede.
Não instale o kit de montagem na parede enquanto a TV estiver ligada. Isso pode causar ferimentos
ocasionados por choque elétrico.
Português
[PC450]BN68-02795A-01L02.indb 35
35
2010-03-30 오후 3:37:50
APÊNDICE
Afixação da TV à parede com segurança
Cuidado: puxar, empurrar ou subir na TV pode fazer com que ela caia. Fique atento para que as crianças
não subam ou mexam na TV, pois a TV poderá cair e causar ferimentos graves, podendo até levar à morte.
Siga todas as precauções de segurança fornecidas no folheto de segurança incluso. Para maior estabilidade,
instale um dispositivo antiqueda para fins de segurança.
¦¦ Para evitar que a TV caia
1. Coloque os parafusos em grampos e prenda-os na parede firmemente.
Verifique se os parafusos estão bem presos à parede.
✎✎ Você pode precisar de material extra, como um chumbador,
dependendo do tipo de parede.
✎✎ Como os grampos, parafusos e corda necessários não são
fornecidos, você deve comprá-los separadamente.
2. Remova os parafusos da parte central traseira da TV, coloque-os em
grampos e, em seguida, aperte-os novamente na TV.
✎✎ Os parafusos podem não ser fornecidos com o produto. Neste
caso, adquira parafusos com as especificações a seguir.
3. Conecte os grampos fixados na TV e os que estão fixados na parede
com um cabo forte e prenda-os bem.
✎✎ NOTA
xx Instale a TV próxima à parede para que ela não caia para trás.
xx É seguro conectar a corda para que os grampos fixados na
parede fiquem no mesmo nível ou abaixo dos grampos fixados
na TV.
Parede
xx Desamarre a corda antes de mover a TV.
4. Verifique se todas as conexões estão seguras. Verifique periodicamente
as conexões para evitar qualquer sinal de insuficiência ou falha. Caso
haja alguma dúvida sobre a segurança das conexões, entre em contato
com um profissional de instalação.
36
Português
[PC450]BN68-02795A-01L02.indb 36
2010-03-30 오후 3:37:51
Se a TV aparentar ter algum problema, primeiro verifique esta lista de possíveis problemas e soluções. Se nenhuma dessas
dicas de solução de problemas se aplicar ao seu caso, visite o site “www.samsung.com" e clique em Suporte, ou entre em
contato com o centro de atendimento ao cliente Samsung.
Problemas
Soluções e explicações
Imagem de baixa qualidade
Primeiro, realize o Teste de Imagem para confirmar que a sua TV está exibindo a imagem de teste
devidamente. (vá para MENU - Suporte - Auto Diagnóstico - Teste de Imagem) (p. 23)
Se a imagem de teste for exibida adequadamente, a imagem ruim pode ter como causa a fonte ou o sinal.
A imagem da TV não parece tão boa
quanto parecia na loja.
• Se você possui um decodificador / receptor de satélite, faça um upgrade para um receptor digital HD
e utilize cabos HDMI ou Componente para obter qualidade de imagem de alta definição.
• Assinantes de TV a cabo/por satélite: experimente canais HD na relação de canais.
• Conexão por antena: experimente os canais de alta definição (HD) depois de realizar a programação
automática.
✎✎ Muitos canais de alta definição (HD) são selecionados a partir de conteúdos de definição
padrão (SD).
• Ajuste a resolução de saída de vídeo do decodificador / receptor de satélite para 1080i ou 720p.
A imagem está distorcida: erro de
macrobloco, blocos pequenos, pontos,
pixelização.
• A compressão de conteúdos de vídeo pode causar distorção de imagem, principalmente naquelas
que se movem rapidamente, como as de filmes de esportes e ação.
• Um nível baixo de sinal pode causar distorção de imagem. Esse não é um problema com a TV.
• Celulares usados próximos à TV (cca até 1 m) podem causar ruído na imagem em TVs analógicas e
digitais.
Cores erradas ou sem cores.
• Caso esteja usando uma conexão componente, certifique-se de que os cabos componentes estejam
conectados às entradas corretas. Conexões incorretas ou soltas podem causar problemas de cores
ou uma tela em branco.
Cor ou brilho de baixa qualidade.
• Ajuste as opções de Imagem no menu da TV. ( vá para o modo Imagem / Cor / Brilho / Nitidez)
(p. 15)
• Ajuste as opções de Economia Energia no menu da TV. (vá para MENU – Imagem –
Solução Ecológica – Economia Energia) (p. 15)
• Tente restaurar as configurações de imagem para as configurações de imagem padrão. (vá para
MENU - Imagem - Restaurar Padrões) (p. 17)
Há uma linha pontilhada na borda da tela.
• Caso o tamanho da imagem esteja definido como Ajuste à Tela, altere-o para 16:9 (p. 16).
• Mude a resolução do decodificador/receptor de satélite.
A imagem está em preto e branco.
• Caso esteja usando uma entrada composta AV, conecte o cabo de vídeo (amarelo) na entrada verde
da entrada componente 1 da TV.
Ao mudar de canal, a imagem congela ou
é distorcida ou atrasada.
• Se a TV estiver conectada a um decodificador de TV a cabo, tente reiniciar o decodificador.
Reconecte o cabo de alimentação AC e espere até que o decodificador reinicie. Isso pode levar até
20 minutos.
• Defina a resolução de saída do decodificador como 1080i ou 720p.
Problema de áudio
Antes de mais nada, realize o Teste de Som para confirmar se o áudio da sua TV está funcionando
corretamente. (vá para MENU - Suporte - Auto Diagnóstico - Teste de Som) (p. 23)
Se o áudio estiver OK, o problema de som pode ser causado pela fonte ou sinal.
Sem som ou som muito baixo no volume
máximo.
• Verifique o volume do dispositivo (Decodificador / Receptor de satélite, DVD, Blu-ray, etc.) conectado
à sua TV.
A imagem está boa, mas não há som.
• Defina a opção Selecionar Alto-falante para Alto-falante TV no menu de Som (p. 19).
• Caso esteja usando um dispositivo externo, certifique-se de que os cabos de áudio estejam
conectados às entradas de áudio corretas na TV.
• Caso esteja usando um dispositivo externo, verifique a opção de saída de áudio do dispositivo (por
exemplo, pode ser necessário alterar a opção de áudio do decodificador de TV a cabo para HDMI
caso haja um cabo HDMI conectado à sua TV).
• Se você está usando um cabo DVI para HDMI, é necessário um cabo de áudio separado.
• Caso sua TV possua uma entrada de fone de ouvido, certifique-se de que nada esteja conectado a
ela.
• Reinicie o dispositivo conectado reconectando o cabo do dispositivo.
Os alto-falantes estão fazendo sons
estranhos.
• Verifique as conexões dos cabos. Certifique-se de que o cabo de vídeo não esteja conectado a uma
entrada de áudio.
• Para conexões por antena ou cabo, verifique a força do sinal. Um nível baixo de sinal pode causar
distorção de som.
• Realize o Teste de Som como explicado acima.
Português
[PC450]BN68-02795A-01L02.indb 37
05 APÊNDICE
Solução de problemas
37
2010-03-30 오후 3:37:51
APÊNDICE
Problemas
Soluções e explicações
Sem imagem, sem vídeo
A TV não liga.
• Certifique-se de que o cabo de alimentação AC esteja conectado corretamente à tomada da parede
e na TV.
• Certifique-se de que a tomada de parede esteja funcionando.
• Experimente apertar o botão POWER na TV para se certificar de que o problema não seja o controle
remoto. Caso a TV ligue, consulte a seção “O controle remoto não funciona”, localizada mais abaixo.
A TV desliga automaticamente.
•
•
•
•
Não há imagem / vídeo.
• Verifique as conexões de cabos (retire e reconecte todos os cabos conectados à TV e aos
dispositivos externos).
• Defina as saídas de vídeo de seus dispositivos externos (Decodificador / Receptor de satélite, DVD,
Blu-ray, etc.) de modo compatível com as conexões de entrada da TV. Por exemplo, caso a saída de
um dispositivo externo seja HDMI, ela deve ser conectada a uma entrada HDMI da TV.
• Certifique-se de que seus dispositivos conectados estejam ligados.
• Certifique-se de selecionar a fonte correta da TV, pressionando o botão SOURCE no controle
remoto.
• Reinicie o dispositivo conectado reconectando o cabo do dispositivo.
Certifique-se de que Sleep Timer está definido para Deslig. no menu Configuração (p. 20).
Se o PC estiver conectado à TV, verifique as configurações de energia do computador.
Certifique-se de que o cabo de alimentação AC esteja conectado corretamente à tomada e à TV.
Ao assistir TV utilizando uma antena ou cabo, a TV será desligada após 10 - 15 minutos caso não
haja sinal.
Conexão de RF (Cabo/Antena)
A TV não está recebendo todos os canais.
• Certifique-se de que o cabo coaxial esteja conectado de forma segura.
• Tente usar Prog. Automática para adicionar os canais disponíveis à lista de canais. Vá para MENU Canal - Prog. Automática, em seguida selecione Auto e certifique-se de que o tipo correto do sinal
da TV a cabo esteja definido no menu (p. 14).
• Verifique se a antena está posicionada corretamente.
A imagem está distorcida: erro de
macrobloco, blocos pequenos, pontos,
pixelização.
• A compressão de conteúdos de vídeo pode causar distorção de imagem, principalmente naquelas
que se movem rapidamente, como as de filmes de esportes e ação.
• Um nível baixo de sinal pode causar distorção de imagem.
Conexão com o computador
A mensagem "Modo não suportado" irá
aparecer.
• Defina a resolução de saída do computador de modo compatível com as resoluções suportadas pela
TV (p. 10).
“PC” sempre é exibido na lista de fontes,
mesmo que um PC não esteja conectado.
• Isso é normal, já que “PC” sempre é exibido na lista de fontes, mesmo quando não há um
computador conectado.
A imagem está boa, mas não há som.
• Caso esteja utilizando uma conexão HDMI, verifique a configuração de saída de áudio de seu PC.
Outros
Barras rolantes horizontais roxas/verdes e
ruído nos alto-falantes da TV com conexão
de cabo componente.
• Remova as conexões de áudio do lado direito e esquerdo do receptor. Se o ruído parar, isso indica
que o receptor tem um problema de aterramento. Substitua os cabos de vídeo componente por uma
conexão HDMI.
A imagem não é exibida no modo de tela
cheia.
• Canais HD irão apresentar barras pretas nos dois lados da tela ao exibir conteúdo SD (4:3).
• As barras pretas nas partes superior e inferior serão mostradas em filmes que possuem relação de
altura e largura diferentes da sua TV.
• Ajuste as opções de tamanho de imagem no seu dispositivo externo ou ajuste a TV como tela cheia.
O controle remoto não funciona.
• Troque as pilhas do controle remoto com os pólos (+/-) nas direções corretas.
• Limpe a janela de transmissão do sensor do controle remoto.
• Tente apontar o controle remoto diretamente para a TV, cerca de 1,5 m.
O controle remoto não funciona.
• As TVs de plasma normalmente produzem um zumbido suave. Isso é normal e é causado pelas
cargas elétricas que são usadas para criar as imagens na tela.
• Se o som do zumbido for alto, você pode ter definido o brilho da TV como alto demais. Tente definir
o brilho com menos intensidade.
• Um zumbido alto também pode ser produzido se a parte de trás da TV de plasma estiver muito
próxima à parede ou outra superfície dura. Tente também refazer o roteamento dos seus cabos de
conexão.
• A instalação inadequada de uma montagem na parede pode criar ruído excessivo.
38
Português
[PC450]BN68-02795A-01L02.indb 38
2010-03-30 오후 3:37:51
Soluções e explicações
Questão de retenção de imagem (burn-in).
• Para reduzir a possibilidade de queima de tela, esta unidade é equipada com tecnologia de redução
de queima de tela. A tecnologia Pixel Shift permite ajustar o movimento da imagem para cima/para
baixo (Linha vertical) e de um lado a outro (Ponto horizontal).
O controle remoto do decodificador de TV
a cabo / receptor não liga ou desliga a TV
e nem ajusta seu volume.
• Programe o controle remoto do decodificador / receptor para operar a TV. Consulte o manual do
usuário do decodificador / receptor de satélite para obter o código da TV SAMSUNG.
Closed Caption Está acinzentada no
menu da TV.
• Closed Caption não pode ser selecionada no menu da TV, quando ela estiver conectada através de
HDMI ou Componente (p. 21).
• Closed Caption deve ser ativada no dispositivo externo (p. 21).
A mensagem "Modo não suportado" irá
aparecer.
• Verifique a resolução suportada pela TV e ajuste a resolução de saída do dispositivo externo de
acordo. Consulte as configurações de resolução na página 10 deste manual.
A TV está exalando um odor de plástico.
• Esse cheiro é normal e irá se dissipar com o tempo.
A Informação Sinal da TV não está
disponível no menu Teste de Auto
Diagnóstico.
• Essa função fica disponível apenas com canais digitais de uma conexão por Antena / RF / Coaxial
(p. 23).
A TV está inclinada para um dos lados.
• Remova a base do suporte da TV e monte-o novamente.
Dificuldades na montagem da base de
suporte.
• Certifique-se que a TV foi colocado sobre uma superfície plana. Se você não pode remover os
parafusos da TV, use uma chave de fenda magnetizada.
O menu de canal está acinzentado (não
disponível).
• O Canal fica disponível apenas quando a fonte TV é selecionada.
Suas configurações são perdidas depois
de 30 minutos ou toda vez que a TV é
desligada.
• Caso a TV esteja no modo Loja, ela irá restaurar os padrões de áudio e vídeo a cada 30 minutos.
Altere as configurações do modo Loja para Casa no procedimento Plug & Play. Pressione o
botão SOURCE para selecionar o modo TV, e vá para MENU → Configuração → Plug & Play →
ENTERE (p. 7).
Perda esporádica de áudio ou vídeo.
• Verifique as conexões de cabo e as reconecte.
• Perda de áudio ou vídeo pode ser causada pelo uso de cabos muito rígidos ou grossos. Para
suporte de parede, recomendamos o uso de cabos com conectores de 90 graus.
É possível ver pequenas partículas ao olhar
mais de perto na borda da estrutura da TV.
• Trata-se de design do produto e não constitui defeito em si.
O menu PIP não está disponível.
• A função PIP só estará disponível quando você estiver usando uma fonte HDMI, PC ou Vídeo
Componente.
POP (anúncio interno da TV) é exibido
na tela.
• Selecione Casa no modo Plug & Play. Para obter mais detalhes, consulte a função Plug & Play (p. 7).
05 APÊNDICE
Problemas
✎✎ Algumas das imagens e funções acima estão disponíveis apenas para modelos específicos.
Português
[PC450]BN68-02795A-01L02.indb 39
39
2010-03-30 오후 3:37:52
APÊNDICE
Especificações
Considerações ambientais
Temperatura operacional
Umidade operacional
Temperatura de armazenamento
Umidade em armazenamento
10°C para 40°C (50°F to 104°F)
10% a 80%, sem condensação
-20°C para 45°C (-4°F to 113°F)
5% a 95%, sem condensação
Rotação da base (esquerda / direita)
-20˚ ~ 20˚
Nome do modelo
PL42C450
PL50C450
Tamanho da tela
42 polegadas
50 polegadas
200W
<1W
280W
<1W
Consumo de energia
Operação normal
Standby
Som
(Saída)
10 W X 2
Dimensões (CxLxA)
Corpo
40.6 x 2.8 x 24.8 polegadas
(1031 x 70.9 x 631.0 mm)
40.6 x 11.2 x 27.4 polegadas
(1031 x 284.5 x 695.5 mm)
47.3 x 2.7 x 28.4 polegadas
(1202.6 x 69.5 x 720.5 mm)
47.3 x 11.2 x 31.0 polegadas
(1202.6 x 284.3 x 786.3 mm)
Peso
Sem suporte
Com suporte
17.5 kg (38.6 Ibs)
19.5 kg (43.0 Ibs)
23 kg (50.7 Ibs)
25 kg (55.1 Ibs)
Painel nativo
1024 x 768 @ 60Hz
1360 x 768 @ 60Hz
Com suporte
✎✎Design e especificações estão sujeitos a alterações sem aviso prévio.
✎✎Para obter informações sobre a fonte de alimentação e o consumo de energia, consulte a etiqueta que está no produto.
¦¦ Licença
Fabricado sob licença de Dolby Laboratories. Dolby e o símbolo D duplo são marcas comerciais da
Dolby Laboratories.
Licença de fábrica sob a patente norte americana número: 5,451,942; 5,956,674; 5,974,380; 5,
978,762; 6,487,535 & outras patentes estrangeiras & pendentes. DTS e o Símbolo são marcas
registradas, & os logos DTS 2.0+ Digital Out e DTS são marcas da DTS, Inc. Produto inclui o
software. © DTS, Inc. Todos os direitos reservados.
DivX Certificado para reproduzir vídeo DivX até 1080p (HD), incluindo conteúdo premium
SOBRE DIVX VIDEO: DivX é um formato de vídeo digital criado pelo DivX, Inc. Esse é um certificado oficial para
aparelho DivX que reproduz DivX vídeo. Visite www.divx.com para mais informações e ferramentas de software
para converter seus arquivos em DivX vídeo. SOBRE DIVX VIDEO-ON-DEMAND: Esse certificado para dispositivo
DivX precisa ser registrado para reproduzir conteúdo DivX Vídeo-On-Demand (VOD). Para gerar o código de
registro, localize a seção DivX VOD no menu configuração do aparelho. Vá para vod.divx.com com este código para
completar o processo do registro e aprender mais sobre DivX VOD. Pat. 7,295,673;7 ,460,688; 7,519,274
Aviso de Licença de Software Livre
No caso de utilização de software livre, licenças de software livre estão disponíveis no menu do produto.
O aviso de Open Source Licence está escrito apenas em inglês.
40
Português
[PC450]BN68-02795A-01L02.indb 40
2010-03-30 오후 3:37:52
A
Alto-falante Ext
Alto-falante TV
Amplificar
Antena
Anynet+
Apenas modo RGB
Apresentação de slides
Atualização de SW
Audio Out Auto Ajuste
Auto Diagnóstico
F
19
19
18
13
30
16
29
23
9
18
23
18
14
6, 13
15
C
Canais favoritos
13
Como se conectar a um PC
9
Componente
8
Conexão com um dispositivo de áudio 9
Contraste Dinâmico
16
Controle remoto
6
D
Digital Audio Out
Dinâmico
Dispositivo USB
DivX® VOD
D-sub
9, 30
15
23, 24
29
9
E
Economia Energia
Edição de canais Editar Nome
Equalizador
Espaços de Segurança para
Instalação
Especificações
Estabilidade de Branco 15
14
11
18
2
41
16
3
26
28
10
G
Girar
Gravação
8, 30
9, 30
I
Idioma
Indicador de energia
Informação Sinal
21
5
23
L
Licença
Lista de Entradas
40
11
M
Media Play
Melodia
Men Transparência
Menu de canais
Modo de Repetição
Modo Filme
Modo standby
Mono
Montagem na parede
Mudar Senha
Música
Música de Fundo
Pilhas
PIP (Picture in Picture) Plug & Play
6
22
7
Q
Quente
29
31
H
HDMI
Home Theater
B
Balanço Esq/Dir
Bloquear
Botão FAV. CH
Brilho
Ferramentas
Formatos de Vídeo
Foto
Frequência
P
24
22
22
12
29
17
5
19
35
21
27
29
16
R
Receptor
Relógio
Resolução ótima
32
20
10
S
Selecionar Alto-falante
Selecionar Tudo
Sensor Ecológico
Símbolo
Sintonia Fina
Sleep Timer
Solução de problemas
19
14
15
3
15
20
37
T
Tam. Imagem
Tampa inferior Temporizador
Título
Tom de Pele
Tom de Preto
Tonalidade de Cor
Transmissor FM
16, 29
35
20
29
16
16
16
19
V
Vídeos
Virtual Surround Visual. Bás.
Volume
Volume Automático
25
18
29
5
19
N
Navegar Nitidez
11
15
Português
[PC450]BN68-02795A-01L02.indb 41
05 APÊNDICE
Índice Remissivo
41
2010-03-30 오후 3:37:53