1
Zelig Multimedia
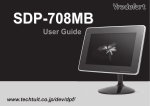
PhotoPlayer 800x480
MANUALE
XLCD700MH User Manual
Informiamo che il prodotto è stato realizzato con materiali e componenti in conformità a
quanto previsto dalle direttive ROHS: 2002/95/CE, 2002/96/CE 2003/108/CE; dalle Direttive
RAEE: 2003/96/CE, D.Lgs. 151/2005 e dalle seguenti Direttive CE:
93/68EEC; 2004/108/EC, 92/31/EEC, EN 55022: 1998+A1+A2:2003 Class B;
EN55024:1998+A1+A2:2003, EN 61000:3-2-:2005, EN 61000:3-3-:1995+A1:2001
Gentile Cliente,
La ringraziamo per la fiducia riposta nei nostri prodotti. La preghiamo di seguire
le norme d'uso e manutenzione: al termine del funzionamento di questo prodotto,
La preghiamo di non smaltirlo tra i rifiuti urbani misti, ma di effettuare per detti rifiuti,
una raccolta separata negli appositi raccoglitori di materiale elettrico/elettronico o di
riportare il prodotto dal rivenditore che lo ritirerà gratuitamente.
www.hamletcom.com
XLCD700MH User Manual
INDICE
ISTRUZIONI DI SICUREZZA ·····································
4
UTILIZZO DELLE VARIE VOCI DEL MENU ··················· 22
CARATTERISTICHE DEL PRODOTTO ························· 6
IMPOSTAZIONI ······················································ 24
PRODOTTO E COMPONENTI ···································· 7
SLIDE SHOW ························································ 25
NOME DEI COMPONENTI ········································· 8
ORARIO ······························································· 26
COME UTILIZZARE I TASTI DEL TELECOMANDO ········· 10
SVEGLIA ······························································ 26
INSTALLAZIONE ED ALIMENTAZIONE ························ 11
ACCENSIONE/SPEGNIMENTO AUTOMATICO ·············· 27
SELEZIONE DELLA MEMORIA ··································· 13
AUDIO ·································································· 27
FOTO ··································································· 15
CONFIGURAZIONE DEL SISTEMA ····························· 28
VIDEO ·································································· 16
INFORMAZIONI MEMORIA ······································· 28
MUSICA ································································ 18
VERIFICA IMPOSTAZIONI DEL SISTEMA ····················· 29
CARTELLA ····························································· 21
FINE ···································································· 29
OROLOGIO ···························································· 21
RISOLUZIONE DEI PROBLEMI ·································· 30
XLCD700MH User Manual
Istruzioni di sicurezza
● Non toccare l’alimentatore né il prodotto con le mani bagnate
- Si potrebbe prendere la scossa.
- Non utilizzare il prodotto vicino a delle fonti d’acqua.
● Tenere lontano dalla portata dei bambini
● Non appendere al muro.
- Questo prodotto non è stato progettato per essere appeso al muro.
● Non inserire parti metalliche o carta nel terminale di lato onde evitare di prendere la scossa o di causare un incendio
● È vietato smontare il prodotto e cercare di ripararlo.
- In caso di malfunzionamento del prodotto, leggere la sezione “Risoluzione dei problemi” presente in questa guida e seguire i consigli
indicati. Nel caso in cui il problema persistesse, contattare il rivenditore.
● Se si dovessero percepire strani odori o rumori, scollegare immediatamente l’alimentatore e contattare il rivenditore.
● Si raccomanda di utilizzare solo l'alimentatore e il cavo USB in dotazione.
- Utilizzare l'alimentatore fornito solo ed esclusivamente con questo prodotto.
● Non coprire, ostacolare la linea elettrica
- Potrebbe scaturire un incendio o si potrebbe prendere la scossa.
● Collegare bene la spina nella presa e non utilizzare una presa di corrente danneggiata.
4
XLCD700MH User Manual
Istruzioni di sicurezza
● Quando non si utilizza il prodotto, si consiglia di spegnerlo e scollegarlo.
● Tenere la linea elettrica lontano dagli impianti di riscaldamento.
- Questo per evitare corto circuiti.
● Non installare il prodotto vicino a luoghi poco sicuri
- Inserendo qualsiasi tipo di materiale non idoneo nel prodotto, si rischia di causare corto circuiti ed incendi.
● Non installare il prodotto in ambienti in cui la temperatura è troppo bassa (sotto 0°) o al sole.
- Se il prodotto viene esposto in luoghi con alte temperature o direttamente ai raggi del sole, potrebbe perdere la funzionalità e la qualità
delle prestazioni.
● Si consiglia di staccare la spina durante i temporali
● Quando si stacca la spina si consiglia di toglierla delicatamente e tenendola in modo corretto.
● Per pulire la cornice si consiglia di staccare la spina di pulirla con un panno soffice umido.
- Non utilizzare prodotti chimici come benzene, alchool, repellenti, lubrificanti e detergenti.
● Non far cadere il prodotto né schiacciarlo con bagagli pesanti durante il trasporto.
- Il monitor LCD potrebbe danneggiarsi.
● Se il prodotto dovesse danneggiarsi durante l’utilizzo, spegnerlo e contattare il rivenditore
● Scollegare l’alimentazione se non si utilizza il prodotto per un lungo periodo.
5
XLCD700MH User Manual
Caratteristiche del Prodotto
Memoria Flash
Input/output dei dati
attraverso l’utilizzo
della memoria
Pannello LCD
Alta risoluzione
MP3 Player
Permette di ascoltare
musica con un suono
di alta qualità
Video Player
Permette di visualizzare
filmati in formato
MJPEG
6
Telecomando
Offre diverse funzioni
Funzioni utili Nel quotidiano
Orologio, calendario e sveglia
Comunicazione
Permette di comunicare
con voce e foto
Capacità elevata della
memoria interna
Immagazzina foto e file musicali
nella memoria interna senza
bisogno di avere una memoria
supplementare
XLCD700MH User Manual
Prodotto e componenti
Telecomando
Cavo USB
Cornice LCD
Alimentatore
Manuale
7
XLCD700MH User Manual
Nome dei componenti
② Altoparlante
① Interruttore per accendere
la cornice
③ Piedistallo
⑤ Connettore in cui inserire
l’alimentatore
④ Connettore in cui inserire
il cavo USB
N.
8
⑥ Slot per memoria
Nome
Descrizione
1
Interruttore di accensione
Accende o spegne il monitor LCD.
2
Microfono
Permette di sentire i suoni in modalità stereo quando si ascoltano i file musicali (MP3).
3
Piedistallo
Ha una struttura tale per cui il corpo della cornice può essere ruotato.
4
Connettore per cavo USB
Collegare la cornice al computer tramite il cavo USB.
5
Connettore per l’alimentatore
Collegare l’alimentatore alla cornice e alla corrente elettrica.
6
Slot per memorie
Inserire in questo slot le memorie di tipo SD/MMC/xD/SONY-MS/MS Pro/MS ProDuo o CF.
XLCD700MH User Manual
Nome dei componenti
Ci sono 5 pulsanti nella parte alta della cornice digitale
⑥ ESC
① +
④ ▶▶l
③ l◀◀
⑤ OK
N.
Nome
② -
Descrizione
1
+
Aumenta il volume o riporta al menu superiore.
2
-
Diminuisce il volume o riporta al menu inferiore.
3
l◀◀
Permette di muoversi nel menu verso sinistra o di tornare al menu precedente.
4
▶▶l
Permette di muoversi nel menu verso destra o di selezionare un oggetto
5
OK
Seleziona e permette di entrare in una parte di menu
6
ESC
Annulla una scelta effettuata nel menu o ritorna al menu principale
9
XLCD700MH User Manual
Come utilizzare i tasti del telecomando
Nome
Descrizione
power
Accende e spegne la cornice digitale Exagerate.
menu
Da utilizzare per diverse funzioni..
home
Ferma l’esecuzione in corso (compreso lo scorrere delle immagini) e torna al menu principale.
slide
Avvia o ferma le diapositive/foto con musica di sottofondo.
info
Mostra a video le informazioni relative ai file.
card
Mostra che tipo di memoria è collegata.
clock
Mostra orologio e calendario.
mute
Consente di disattivare l'audio.
Permettono di muoversi nel menu su giù, sinistra destra.
Seleziona una parte di menu o un file.
10
10
volume
Regola il livello del volume
play/stop
Riproduce e arresta il file selezionato.
rotate
Ruota le foto a display di 90° a sinistra o a destra.
XLCD700MH User Manual
Installazione ed Alimentazione
1. Collegare l’alimentatore alla presa di corrente ed alla cornice come indicato in figura.
Nota Bene
L’alimentatore va usato con voltaggio AC 100~240V
2. Premere questo tasto per accendere la cornice; apparirà la schermata di benvenuto.
11
XLCD700MH User Manual
Installazione ed Alimentazione
1. Prelevare i dati dal computer tramite il cavo USB in dotazione
(foto, file musicali e filmati).
Nota Bene
Quando si collega la cornice digitale al PC per la prima volta è necessario attendere qualche minuto,
affinché il computer possa rilevare la nuova periferica.
2. Prelevare i dati dalla memoria.
12
XLCD700MH User Manual
Selezionare la memoria collegata alla cornice Exagerate
■ Selezione della memoria:
Select Card
Memory Stick
Internal Flash
Quando si inserisce una memoria nello slot, essa viene
rilevata dalla cornice Exagerate e le informazioni
appaiono a video.
Nota Bene
Se nella cornice sono inserite due diverse memorie è necessario
specificare quale si desidera usare.
■ Controllo dello schermo:
A video in alto a destra apparirà l’elenco delle memorie
“SD, MMC, MS, CF, xD o Memory”
● Memory:Indica la memoria interna della cornice
● SD/MMC/MS/CF/xD
13
XLCD700MH User Manual
Selezionare la memoria collegata alla cornice Exagerate
Collegare la cornice digitale EXAGERATE al PC tramite il cavo
USB in dotazione : A questo punto si potrà spostare immagini,
file musicali file vari dal PC alla cornice e viceversa
Schermata che appare quando si
effettua il collegamento
14
XLCD700MH User Manual
Foto
Il menu appare con queste immagini. Selezionare una di queste opzioni.
■ Menu foto
Muoversi nel menu premendo i tasti
( );
Premere i tasti
(
) per scorrere le foto ;
il formato supportato per le foto è JPG.
DSC_6880.JPG
■ Selezione delle immagini
Selezionare le foto desiderate utilizzando i tasti
(+ )
■ Ruotare le foto selezionate
Cliccando questo tasto si potrà ruotare la foto
selezionata in senso orario o antiorario
15
XLCD700MH User Manual
Video
Utilizzando questo menu, si potranno visualizzare dei file video, musicali etc.
■ Menu Video
Per muoversi in questo menu utilizzare i tasti
( )
Premere i tasti
(
) per scorrere i file video; il formato supportato per
i file video è AVI (mjpg).
DSC_6911.AVI
■ Selezione del filmato
Selezionare il filmato desiderato utilizzando i tasti
(+ -
■ Vedere il file video selezionato
Una volta scelto il file da vedere, premere i tasti
16
o
(
)
)
XLCD700MH User Manual
Video
■ Filmato precedente/successivo
Mentre si sta guardando un file, si può passare a quello
precedente/successivo premendo i tasti
o (
)
DSC_6911.AVI
■ Interrompere la riproduzione
Premere questi tasti per interrompere la riproduzione
( )
■ Togliere il suono
음량
Premere il tasto
la riproduzione.
음량
3
per interrompere il suono durante
3
17
XLCD700MH User Manual
Musica
Menu che permette di ascoltare i file MP3
■ Menu Musica
Per muoversi in questo menu utilizzare i tasti
( )
Premere i tasti
(|◀◀ ▶▶|) per scorrere i file audio.
Another Day - Ciel
Time
Title
Artist
Album
Info
□
□
□
□
□
■ Selezionare i file musicali desiderati
03:50
Selezionare i file musicali utilizzando i tasti Direzione.
Another Day - Ciel
사랑이야기
안녕내사랑
Good bye - Jessica
Never ending story
03:50
04:50
03:40
04:08
04:10
Good bye - Jessica
Time
Title
Artist
Album
Info
□
□
□
□
□
18
Another Day - Ciel
사랑이야기
안녕내사랑
Good bye - Jessica
Never ending story
■ Ascoltare i file musicali
04:08
Good bye
Jessica
NOW 5
Premere i seguenti tasti
03:50
04:50
03:40
04:08
04:10
(
) dopo aver selezionato il file desiderato.
XLCD700MH User Manual
Musica
Good bye - Jessica
Time
Title
Artist
Album
Info
□
□
□
□
■ Fermare l’esecuzione dei file musicali
04:08
Good bye
Jessica
NOW 5
Another Day - Ciel
사랑이야기
안녕내사랑
Good bye - Jessica
Never ending story
Premere i seguenti tasti
■ Togliere il suono
Time
04:08
Title
Good bye
Artist
Jessica
Album
NOW 5
Info 음량
□
Another Day - Ciel
사랑이야기
안녕내사랑
Good bye - Jessica
Never ending story
3
Se durante l’esecuzione si volesse eliminare il suono, premere questo tasto
03:50
04:50
03:40
04:08
04:10
Good bye - Jessica
Time
Title
Artist
Album
Info
□
□
□
□
Another Day - Ciel
사랑이야기
안녕내사랑
Good bye - Jessica
Never ending story
) per interrompere l’esecuzione dei file musicali.
03:50
04:50
03:40
04:08
04:10
Good bye - Jessica
□
□
□
(
■ Selezionare i file musicali multipli
04:08
Good bye
Jessica
NOW 5
03:50
04:50
03:40
04:08
04:10
Premere i tasti
(
Premendo il tasto
(
) sui file desiderati. I file appariranno selezionati col simbolo V.
) tutti i file selezionati verranno eseguiti.
19
XLCD700MH User Manual
Musica
Good bye - Jessica
Time
Title
Artist
Album
Info
□
□
□
□
□
20
Another Day - Ciel
사랑이야기
안녕내사랑
Good bye - Jessica
Never ending story
Never ending story
Time
Title
Artist
Album
Info
04:08
Good bye
Jessica
NOW 5
03:50
04:50
03:40
04:08
04:10
□
□
□
□
□
Another Day - Ciel
사랑이야기
안녕내사랑
Good bye - Jessica
Never ending story
■ Ascoltare i file musicali precedenti/successivi
04:08
Good bye
Jessica
NOW 5
03:50
04:50
03:40
04:08
04:10
Durante l’ascolto di file musicali, si potrà scegliere di
passare al file precedente/successivo, premendo il tasto
o
(
)
XLCD700MH User Manual
Cartella
Si può visualizzare il contenuto delle cartelle.
■ Menu Cartella
Muoversi nel MENU premendo i tasti
( )
Selezionare l’icona Cartella utilizzando i tasti
₩
시
곡
가
앨
정
□
□
□
□
□
간
명
수
범
보
Ciel - Another Day.mp3
딱따구리
17차-au.High.20f.avi
06. Good bye_Jessica.mp3
08. If.mp3
)
■ Controllo delle informazioni dei file :
04:08
Good bye
Jessica
NOW 5
3605K
<DIR>
8680K
5831K
3656K
(
07-05-10
07-05-10
07-05-11
07-05-11
07-05-11
Da qui è possibile vedere le informazioni dei file selezionati (titolo, dimensione
file, tipo file, durata…).
17:40
17:43
04:50
04:50
04.50
Orologio
AM 11:10
2007.08.29
2007 8
SUN MON TUE WED THU FRI SAT
1
2
3 4
5
12
6
7
8
9
10
13
14
15
16
17 18
19
20
21
22
23
24 25
26
27
28
29
30
31
11
■ Menu Orologio
Muoversi nel Orologio premendo i tasti
( )
Selezionare l’icona CLOCK/Orologio utilizzando i
tasti
(
)
21
XLCD700MH User Manual
Utilizzo delle varie voci del MENU
Si potrà accedere alle funzioni disponibili usando le voci del MENU
■ Slide Show
Slide Show
Seleziona memoria
Selezionando Slide Show si ha la possibilità di eseguire le stesse funzioni del tasto
che c’è sul telecomando.
Modifica
▶
Ordina per… ▶
▶
Vai a
Impostazioni ▶
■ Seleziona memoria
Slide Show
Seleziona memoria
Selezionando Seleziona memoria, si ha la possibilità di eseguire le stesse funzioni del
tasto
che c’è sul telecomando
Modifica
▶
Ordina per… ▶
▶
Vai a
Impostazioni ▶
Slide Show
Seleziona memoria
Modifica
▶
Ordina per… ▶
Vai a
▶
Impostazioni ▶
22
■ Modifica
Salva nella memoria interna
Elimina
Selezionando Modifica si potrà scegliere tra :
Store to Internal Storage/Salva nella memoria interna : da utilizzare per prendere/
copiare dati da una memoria esterna e copiarli/muoverli nella memoria
interna della cornice digitale.
Delete/Elimina : Funzione che permette di eliminare i file selezionati.
XLCD700MH User Manual
Utilizzo delle varie voci del MENU
■ Ordina per...
Slide Show
Seleziona memoria
Modifica
▶
Ordina per… ▶
▶
Vai a
Impostazioni ▶
per nome
per data
per dimensione
per cartellar
Casuale
■ Vai a
Slide Show
Seleziona memoria
Modifica
▶
Ordina per… ▶
Vai a
▶
Impostazioni ▶
Home
Foto
Video
MP3
Cartelle
Orologio
Slide Show
Seleziona memoria
Modifica
▶
Ordina per… ▶
Vai a
▶
Impostazioni ▶
Selezionando Ordina per, si potrà scegliere di ordinare i file per Nome/Data/Dimensione/
Cartella/Ordine casuale
Impostazioni
Inizializza impostazioni
Formattazione veloce
Formattare memoria interna
Selezionando Vai a si può andare direttamente al menu Home, foto, video, MP3, cartelle,
orologio.
■ Impostazioni
Selezionando Impostazioni si potrà scegliere tra :
Impostazioni : Per maggiore dettagli, si veda la sezione successiva Impostazioni
Inizializza Impostazioni : Si ripristinano tutti i valori iniziali.
Formattazione veloce : Esegue una formattazione veloce della memoria interna.
Formattare memoria interna : Esegue una formattazione normale della memoria interna
(Raccomandata).
23
XLCD700MH User Manual
Impostazioni
■ Impostazioni :
Per muoversi in questa schermata di menu utilizzare I tasti
( ).
Selezionare l’icona Impostazione premendo i tasti
(|◀◀ ▶▶|)
Impostazioni
▲
Slide Show
Orario
Sveglia
Accensione/Spegnimento automatico
Audio
Configurazione del Sistema
▼
Impostazioni
▲
Informazioni memoria
Informazioni di sistema
Fine
▼
24
XLCD700MH User Manual
Impostazioni
Slide Show
◀
Slide Show
Intervallo di visualizzazioneal
Slide Show Automatico
Selezione effetti
Slide Show con Mp3
Slide Show with Clock
▶
5 minuti
10 minuti
Intreccio
Acceso
Acceso
■ Intervallo di visualizzazione :
Si può impostare l’intervallo di scorrimento immagini. (da 1 secondo a 10 minuti).
■ Slide Show Automatico :
Se non viene premuto alcun tasto, e la cornice è accesa, parte in automatico la
riproduzione delle immagini. È possibile impostare l’intervallo di cambio immagine
automatica(da 5 secondi ad 1 ora).
■ Selezione effetti :
Si può scegliere diversi tipi di effetto delle immagini (All/Tutto, Fade Topdown/
Dissolvenza dall'alto in basso, Circle Rectangle/ Rettangoli in circolo, Interlace/
Intreccio, Spiral In/ Spirale in ingresso, Spiral Out/ Spirale in uscita)
■ Riproduzione con sottofondo musicale Mp3 :
è possibile scegliere di far eseguire un file MP3 mentre le immagini scorrono.
(On/Acceso: il file MP3 è attivo; Off/Spento: Il file MP3 non è attivo).
■ Calendario con immagini :
Calendario con immagini: L’orario corrente ed il calendario, appaiono mentre le
immagini scorrono.
19
25
XLCD700MH User Manual
Impostazioni
Orario
◀
Orario
Auto Power
Management
▶
Impostare
l’orario
Set Auto Power
On 2007-05-22
Off
Impostare
02:33:12
Auto
Powerl’ora
On Time PMPM
02:33:12
Set Auto Power Off
Off
Auto Power Off Time
PM 02:33:12
■ Impostare la data
E' possibile impostare la data nel formato: Giorno-Mese-Anno
■ Impostare l’ora
È possible impostare da qua l’orario.
Sveglia
◀
Audio
Sveglia
▶
BeepSpento
Sound off
Set
Beep Sound
Imposta
sveglia
Power
on volume
AM 09:00 1
Orario
sveglia
Turn volta
Off
Internal
Speaker
Sound
Una
Imposta
cadenza
Volume del suono della sveglia
14
■ Imposta sveglia
È possibile attivare la sveglia.
■ Orario sveglia
Imposta l’orario preciso in cui la
sveglia suona.
■ Imposta cadenza
Ogni quanto tempo la sveglia deve
attivarsi.(Una sola volta, ogni giorno,
settimanalmente)
■ Volume del suono della sveglia
Imposta il livello della suoneria della sveglia.
Ci sono 14 diversi livelli di suoneria.
Nota Bene
L’allarme non suona se non c’è almeno un file MP3 memorizzato nella memoria interna della cornice
digitale o su di una memoria esterna inserita però nello slot della cornice. (Infatti l’allarme suona un file
MP3 come suono.)
26
SDP-708MB User-Guide
Impostazioni
Accensione/Spegnimento automatico
◀ Accensione/Spegnimento automatico ▶
Imposta accensione automatica Spento
Orario di accensione automatica PM 02:33:12
Imposta spegnimento automatico Spento
Orario di spegnimento automatic PM 02:33:12
■ Imposta accensione automatica
La cornice si accende automaticamente.
■ Orario di accensione automatica
Funzione che permette di impostare
l’orario in cui accendersi.
■ Imposta spegnimento automatico
La cornice si spegne automaticamente.
■ Orario di spegnimento automatico
Funzione che permette di impostare
l’orario in cui spegnersi.
Audio
◀
Audio
Impostazione segnale Beep
Accendere l’audio
Suono altoparlante interno
▶
spento
1
Spegni
■ Impostazione segnale Beep
Regola il suono del segnale beep per i tasti del telecomando.
(basso, alto, spento)
■ Accendere l’audio
Questa funzione regola il livello del volume dell'allarme. (Si può scegliere tra 13 livelli.)
■ Suono altoparlante interno
Funzione che determina se utilizzare o meno il suono dell’altoparlante.
27
XLCD700MH User Manual
Impostazioni
Configurazione del Sistema
◀
Time
Configurazione
del Sistema
Auto Power
Management
▶
Date
Setting
English
Lingua
Set
Auto
Power On 2007-05-22
Off
Time
Setting
02:33:12
Nascondi
Mostra
barra
Auto
Power
Oninfo
Time PMPM
02:33:12
Uscita
Set
Autovideo
Power Off LCD interno
Off
Auto Power Off Time
PM 02:33:12
■ Lingua
Imposta la lingua da mostrare a video.
(tra Italiano, Coreano, Inglese, Cinese, Spagnolo, Tedesco e Giapponese).
■ Mostra barra info
Determina se mostrare o meno la barra delle informazioni.
(Display/Mostra/nascondi).
■ Uscita video
Il filmato è visibile solo ed unicamente sulla cornice digitale Exagerate
(non trasferibile ad unità esterna).
Informazioni memoria
◀
Informazioni memoria
Internal Flash
28
127,871KB Total
30,705 KB Used
97,166KB Free
▶
■ Informazioni memoria
Vengono visualizzate la capacità totale di memoria, la parte in uso e la parte ancora
disponibile.
XLCD700MH User Manual
Impostazioni
Informazioni di sistema
◀
Informazioni di sistema
▶
(c) 2007, SR I-Tech, All rights Reserved
Versione Hardware SDP-708MB
Versione Software SDP-708MB-V1.1
Orario di produzione 16:29:48, Aug 21 2007
■ Verifica Impostazioni di sistema
Mostra la versione del firmware e dell’hardware in uso.
Fine
Impostazioni
▲
Informazioni memoria
Informazioni di sistema
Fine
▼
Esce dal menu Impostazioni per tornare al menu Home.
Se non si usa la funzione Fine, le impostazioni saranno salvate automaticamente.
29
XLCD700MH User Manual
Risoluzione dei problemi
Problema
30
Soluzione
Alimentatore spento
- Verificare che l’alimentatore sia collegato correttamente e alla cornice digitale e alla presa di corrente a muro.
La cornice è accesa, ma la schermata
iniziale rimane fissa
- Verificare il tipo di memoria
- Questa cornice supporta 5 tipi di memoria: SD/MMC/xD/MS/CF
- Verificare il tipo di estensione del file: Questa cornice supporta JPG(tipo RGB), MP3 e file video.
Improvvisamente tutte le funzioni si
bloccano
- Non premere alcun tasto per almeno 30 secondi (massimo un minuto): il blocco del funzionamento può essere dovuto
all’elaborazione di un file molto pesante
- Se il problema non viene risolto scollegarsi dal PC o scollegare la memoria e riavviare la cornice.
Il collegamento al PC non funziona
(o il PC non riconosce la cornice)
- Verificare che il cavo USB sia ben collegato e che non sia danneggiato.
Impiega molto tempo a passare
all’immagine successiva durante
la riproduzione di immagini
- Premere il tasto menu
- Impostare un tempo di scorrimento immagini più rapido.
Non si sentono gli MP3
- Premere il tasto “Mute”.
- Controllare che il volume sia abbastanza alto.
Il telecomando non funziona
- Controllare la batteria del telecomando, che sia carica.
La cornice non riesce a leggere i file
video
- Controllare la tipologia del file video, poiché questo prodotto supporta i formati AVI.
Zelig Multimedia
PhotoPlayer 800x480
MANUAL
XLCD700MH User Manual
We inform You this product is manufactured with materials and components in compliance
with ROHS directives: 2002/95/CE, 2002/96/CE 2003/108/CE; with RAEE Directives:
2003/96/CE, Italian Legislative Decree 2005/151 and below EEC Directives:
93/68EEC; 2004/108/EC, 92/31/EEC, EN 55022: 1998+A1+A2:2003 Class B;
EN55024:1998+A1+A2:2003, EN 61000:3-2-:2005, EN 61000:3-3-:1995+A1:2001
Dear Customer, thanks for choosing Exagerate. Please carefully follow the
instructions for its use and maintenance and, once this item has run its life span,
we kindly ask You to: dispose of it in an environmentally friendly way, by putting
it in the separate bins for electrical/electronic waste, or to bring it back to your
retailer who will collect it for free.
www.hamletcom.com
XLCD700MH User Manual
CONTENTS
Safety Instructions ..…………………….. 4
Warning ..............……………………….. 4
Cautions ............………………………... 5
Product Features .………………………... 6
Product and Components ..……………... 7
Name of each part .………………………. 8
The back of the product ..…………………... 8
How to use the button ...……………………. 9
..…….. 10
How to use the button of remote control
Installation and Power connection .………. 11
Transmitting data ...……………………….. 12
Selecting the memory card and
connecting the USB
…….. 13
Connecting PC through USB .……………….. 14
PHOT ..................……………………….. 15
MOVIE ................………………………... 16
MUSIC .................………………………. 18
FOLDER .............……………………….. 21
CLOCK ...............……………………….. 21
Using the MENU key …………………….. 22
SETUP ................……………………….. 24
..........……………………….. 25
.................………………………..
Time
26
................………………………..
Alarm
26
…………………..
Auto Power Management
27
Audio ................……………………….. 27
System Configuration .…………………….. 28
Memory Information ……………………….. 28
System Information ……………………….. 29
Finish ...............………………………... 29
Troubleshooting ...………………………... 30
Slide Show
XLCD700MH User Manual
Safety Instructions
Please use the product properly after reading the instructions carefully to ensure the user’s safety and prevent the damage
of wealth.
Warning
● Do not touch the power plug, the body, the adapter with wet hands
- It could be the cause of electric shock.
- Do not use it outside or near the water’s edge under the snow or rain.
- Be careful not to get wet the adapter in cleaning the floor by water.
● Keep out of the reach of children in installing
- Children could get hurt falling off if it touched while playing.
● Do not hang on the wall.
- This product is not designed to hang on the wall so if you hang it on the wall, which could provide the damage or make the people hurt.
● Do not insert metals such as chopsticks, a wire, a drill, a propelling pencil, blade or highly combustible substances such as the paper and
match in the terminal located in the side of the product.
- There is a risk of electric shock and the fire.
- If you check that some kinds of foreign part are inserted, you must switch off the power and then call the C/S center and the store you
bought in.
● You must not arbitrarily separate, disassemble, repair and remodel.
- In case of malfunction and off the power, read the “troubleshooting” in the user guide and then take actions in accordance with
corresponding items. Even after that, the problem still has not solved, please contact the C/S center and the store you bought in.
● If there is some kind of strange noise or smell of burning or smoke, immediately unplug the power and contact the C/S center and the
store you bought in.
● Be sure to use the AC power adapter and the USB cable provided by our company.
- The AC power adapter to be provided is only for our product, so please do not use in charging of another product.
4
XLCD700MH User Manual
Safety Instructions
Cautions
● Do not vent or pull, and suppress with heavy things the power line by constraint.
- It could be the cause of electric shock and the fire.
● Put the power plug deeply to the end of inner side and do not use the damaged power plug or a loosed outlet.
● In case of movement, be sure to switch off the power and unplug the power plug from the outlet. Also move it after check whether the power
cord for outside such as the connection line with other units is unplugged or not.
- In case of movement without unplugging the power cord, the cord could be damaged and it leads the fire and the electric shock.
● Keep the power line far away from the heating units such as the heater, the furnace, etc.
- It could be cause of electric shock due to melting the PVC sheath of the power line.
● Do not install the product around the oil, the smoke, the moisture or a place where the water(rainwater) splashing out
- If some kind of foreign materials is inserted into the inside, which is the cause of defect, an electric shock and the fire.
● Do not install in the place where the temperature is too low (below 0℃) or inside of the car to avoid the direct sunlight.
- If the product is exposed to high temperature or direct sunlight for a long time, it could be cause of distortion or decline of the performance.
● Unplug the power plug when thundering and lightning.
- It could be cause of electric shock and the fire.
● When you unplug the power plug, please remove slowly with holding the handle of plug.
- If you pull the power line, the internal wire could be cut or the cause of the fire.
● When cleaning be sure to unplug the power and rub with a soft and dry cloth.
- Do not use chemicals such as the wax, benzene, an alcohol, a thinner, mosquito repellent, air freshener, lubricant and detergent.
● Do not threw or drop the product and the box housing the product or suppress with other heavy luggage on the box.
- LCD and body case could be damaged.
● Clean the dust or the water certainly on the power plug.
● If the product is damaged in use, switch off and unplug, and then contact the C/S center and the store you bought in.
● Unplug the power plug when it is not used for a long time and keep it in the packing box.
- If the dust is collected, it could be cause of electric shock, a leak and the fire due to heating, the ignition and the insulation.
5
XLCD700MH User Manual
Product Features
Flash memory device
Input/output of the data via
flash memory card
High quality LCD panel
Use LCD panel of which is a
video device for next generation (Slim, High resolution)
MP3 Player
Perform the high quality
stereo sounds data
Video Player
Plays back video for MJPEG
6
Remote control
Conveniently operates available functions
Convenient function for life
Clock, calendar view, alarm
setting function
Role as a messenger
Deliver the contents that you
want to extend as usual with
the photo and the voice
simultaneously.
High capacity of the
internal memory
Store the photo and the music
file in the internal memory and
have an appreciation of them
without additional memory
card.
XLCD700MH User Manual
Product and Components
This product is organized with following items. Please check the contents clearly.
Remote control
USB Cable
Body
The adapter
Manual
7
XLCD700MH User Manual
Name of each part
The back of the product
It describes the appearance and the name of each part. It maybe has some difference in appearance and function depending on the option.
② Speaker
① Power switch
③ Stay bar
⑤ Connection part
for the power
④ Connection part for
the USB cable
No.
8
⑥ Memory card slot
Name
Description
1
Power switch
Switch the power on or off.
2
Speaker
Output the stereo sound when playing the music file(MP3).
3
Stay bar
Made with ballhead method so the body can be rotated freely.
4
Connection part for the USB cabl
Use connecting to PC using the USB cable.
5
Connection part for the power
Use connecting the adapter provided with the body.
6
Memory card slot
Use inserting SD/MMC/xD/SONY-MS/MS Pro/MS ProDuo or CF memory card.
XLCD700MH User Manual
Name of each part
How to use the button
There are 5 buttons in the upper part of the product. This describes the name and function of each button as follows.
It maybe has some difference in appearance and function depending on the option.
⑥ ESC button
① + button
④ ▶▶l button
③ l◀◀ button
⑤ OK button
No.
② - button
Name
Description
1
+ button
Increases the volume level or moves to the upper menu.
2
- button
Decreases the volume level or moves to the lower menu.
3
l◀◀ button
Moves to the menu on the left or moves to the previous menu.
4
▶▶l button
Moves to the menu on the right or selects an item.
5
OK button
Selects or applies a menu.
6
ESC button
Cancels a selected menu, or moves to the main menu.
9
XLCD700MH User Manual
Name of each part
How to use the button of remote control
Name
Description
power
Turns the product on or off.
menu
Used to run various functions and change the previous settings.
home
Stops the previous function (including Slideshow) and moves to the home menu.
slide
Starts or stops the slideshow with background music.
info
Displays the active file’s information.
card
Displays the types of the connected memory cards for you to select any of the connected memory cards
and embedded memory devices
clock
Displays the clock and calendar.
mute
Switches the sound off.
Moves up, down, left, or right on the menu or file list.
Selects a menu or file to run it.
10
10
volume
Adjusts the volume level.
play/stop
Plays back the selected file or pauses the playback.
rotate
Rotates the displayed photo 90 degrees to the left or to the right.
XLCD700MH User Manual
Installation and Power connection
1. Connect the adapter with connection part of the back for the power. Connect the power
plug of the adapter with the outlet.
Note
The adapter can be used in AC 100~240V
2. Push the power switch.
And then LCD screen is on and the DION logo is displayed.
11
XLCD700MH User Manual
Transmitting data
1. Fetching the data stored on PC such as photos, musics, and movies
Note
In case of connection between PC and the product at first, some time is required (about 1 or 2 minutes)
2. Fetching the data from the external memory device
12
XLCD700MH User Manual
Selecting the memory card and connecting the USB
■ Selecting the memory card
Select Card
Memory Stick
Internal Flash
When you insert a memory card, the information of it
is displayed.
Note that you have to use the memory card selection
menu to choose one when both two slots have memory
cards.
■ Checking the screen
The screen displays“SD, MMC, MS, CF, xD or Memory”
at the upper right.
● Memory card screen: SD/MMC/MS/CF/xD Card
● Internal memory screen: Memory
13
XLCD700MH User Manual
Selecting the memory card and connecting the USB
Connecting PC through USB
You can store pictures, moving images, and music files on your
PC after connecting through the USB cable. Of course you can
store them in the built-in memory.
When connecting your PC through USB
When sending data from PC to DION
14
XLCD700MH User Manual
PHOTO
The preview displays available pictures. Select any of them to see in the digital photo frame.
※Parenthesis( ) is the button of the main body.
■ Moving to the PHOTO menu
Move to the MENU screen by pressing the
Press the PHOTO button after using the
buttons.
Photo format supportable → JPEG (jpg)
DSC_6880.JPG
( ) button
(
)
■ Selecting the desired photo
Select the desired photo using the
(+ ) buttons.
■ Rotating the selected photo
After selecting the photo you want, press the
button to rotate it clockwise or counterclockwise.
15
XLCD700MH User Manual
MOVIE
Using this menu, you can play back movies such as digital camera images, music albums, etc.
■ Moving to the MOVIE menu
Move to the MENU screen by pressing the
Select the MOVIE button after using the
Movie format supportable → AVI (mjpg).
DSC_6911.AVI
(
) button
(
) buttons.
■ Selecting the desired movie
Select the desired movie using the
(+ -
■ Playing back the selected movie
After selecting a movie file, press the
16
or
(
) button.
) buttons.
XLCD700MH User Manual
MOVIE
■ Playing back the previous/next movie
During playback, you can move to the previous or
next movie by pressing the or
(
) buttons.
DSC_6911.AVI
■ Stopping the playback
Press the
(
) button to stop the playback.
■ Turning off the sound
음량
Press the
playback.
음량
3
button to turn off the sound during
3
17
XLCD700MH User Manual
MUSIC
It plays back the MP3 files.
■ Moving to the MUSIC menu
Move to the MENU screen by pressing the
Select the MUSIC button after using the
Another Day - Ciel
Time
Title
Artist
Album
Info
□
□
□
□
□
Select the desired music file using the Direction buttons.
03:50
04:50
03:40
04:08
04:10
Good bye - Jessica
□
□
□
□
□
18
Another Day - Ciel
사랑이야기
안녕내사랑
Good bye - Jessica
Never ending story
) button
(|◀◀ ▶▶|) buttons.
■ Selecting the desired music file
03:50
Another Day - Ciel
사랑이야기
안녕내사랑
Good bye - Jessica
Never ending story
Time
Title
Artist
Album
Info
(
■ Playing back the selected music file
04:08
Good bye
Jessica
NOW 5
Press the
03:50
04:50
03:40
04:08
04:10
(
) button after selecting the desired music file.
XLCD700MH User Manual
MUSIC
Good bye - Jessica
Time
Title
Artist
Album
Info
□
□
□
□
■ Stopping the music
04:08
Good bye
Jessica
NOW 5
Another Day - Ciel
사랑이야기
안녕내사랑
Good bye - Jessica
Never ending story
Press the
■ Turning off the sound
Time
04:08
Title
Good bye
Artist
Jessica
Album
NOW 5
Info 음량
□
Another Day - Ciel
사랑이야기
안녕내사랑
Good bye - Jessica
Never ending story
3
Press the
□
□
□
□
Another Day - Ciel
사랑이야기
안녕내사랑
Good bye - Jessica
Never ending story
button to turn off the sound during playback.
03:50
04:50
03:40
04:08
04:10
Good bye - Jessica
Time
Title
Artist
Album
Info
) button during playback.
03:50
04:50
03:40
04:08
04:10
Good bye - Jessica
□
□
□
(
■ Selecting multiple music files
04:08
Good bye
Jessica
NOW 5
03:50
04:50
03:40
04:08
04:10
Press the
( ) button on the desired files. The files are displayed with V marks.
When you press the
( ) button, all the marked files are played back.
19
XLCD700MH User Manual
MUSIC
Good bye - Jessica
Time
Title
Artist
Album
Info
□
□
□
□
□
20
Another Day - Ciel
사랑이야기
안녕내사랑
Good bye - Jessica
Never ending story
Never ending story
Time
Title
Artist
Album
Info
04:08
Good bye
Jessica
NOW 5
03:50
04:50
03:40
04:08
04:10
□
□
□
□
□
Another Day - Ciel
사랑이야기
안녕내사랑
Good bye - Jessica
Never ending story
■ Playing back the previous/next music
04:08
Good bye
Jessica
NOW 5
03:50
04:50
03:40
04:08
04:10
During playback, you can move to the previous or next
music by pressing the
or
(
) buttons.
XLCD700MH User Manual
FOLDER
You can play back the files in the desired folder.
■ Moving to the FOLDER menu
Move to the MENU screen by pressing the
Select the FOLDER button after using the
₩
시
곡
가
앨
정
□
□
□
□
□
간
명
수
범
보
Ciel - Another Day.mp3
딱따구리
17차-au.High.20f.avi
06. Good bye_Jessica.mp3
08. If.mp3
(
) button during playback
) button.
■ Checking the file information
04:08
Good bye
Jessica
NOW 5
3605K
<DIR>
8680K
5831K
3656K
(
You can see the information of the selected file
07-05-10
07-05-10
07-05-11
07-05-11
07-05-11
17:40
17:43
04:50
04:50
04.50
CLOCK
AM 11:10
2007.08.29
2007 8
SUN MON TUE WED THU FRI SAT
1
2
3 4
5
12
6
7
8
9
10
13
14
15
16
17 18
19
20
21
22
23
24 25
26
27
28
29
30
31
11
■ Moving to the CLOCK menu
Move to the MENU screen by pressing the
(
button.
Select the CLOCK button after pressing the
(
) button.
)
21
XLCD700MH User Manual
Using the MENU key
You can access available functions using the MENU key.
■ Slide Show
Slide Show
Select Card
Edit
Sort Order
▶
▶
Goto
Setup
▶
▶
After pressing the MENU key, select Slide Show.
buttons.
It works the same as the
■ Selecting the memory card
Slide Show
Select Card
Edit
Sort Order
▶
▶
Goto
Setup
▶
▶
After pressing the MENU key, select Select Card.
buttons.
It works the same as the
Slide Show
Select Card
22
■ Editing
Edit
Sort Order
▶
▶
Goto
Setup
▶
▶
Store to Internal Storage
Delete
After pressing the MENU key, select Edit.
Store to Internal Storage : Used to moving or copying data from an external memory card
to the internal memory.
Delete : Used to delete the selected file.
XLCD700MH User Manual
Using the MENU key
■ Sort Order
Slide Show
Select Card
Edit
Sort Order
▶
▶
Goto
Setup
▶
▶
by Name
by Date
by Size
by Folder
Shuffle
After pressing the MENU key, select Sort Order.
You can sort the files by Name/Date/Size/Folder/Shuffling
■ Changing the screen
Slide Show
Select Card
Edit
Sort Order
▶
▶
Goto
Setup
▶
▶
Home
Photo
Video
MP3
Folder View
Clock
After pressing the MENU key, select Goto.
You can move to any screen of Home, Photo, Video, MP3, Folder View, Clock.
■ Setup
Slide Show
Select Card
Edit
Sort Order
▶
▶
Goto
Setup
▶
▶
Setup
Setup Initialize
Quick Format Internal Flash
Format Internal Storage
After pressing the MENU key, select Setup.
Setup : For more details, see page 24 to 29.
Setup Initialize : It returns the initial values.
Quick Format Internal Flash : It performs a quick format.
Format Internal Storage : It performs a normal format. (Recommended)
23
XLCD700MH User Manual
SETUP
It can configure multiple environmental settings.
■ Moving to the SETUP menu
Move to the MENU screen by pressing the
Select the SETUP button after pressing the
SETUP
▲
Slide Show
Time
Alarm
Auto Power Management
Audio
System Configuration
▼
SETUP
▲
Memory Information
System Information
Finish
▼
24
(
) button.
(|◀◀ ▶▶|) buttons.
XLCD700MH User Manual
SETUP
Slide Show
◀
Slide Show
Slide Show Interval
Auto Slide Show
Select transition effect
Slide Show with MP3
Slide Show with Clock
▶
5 minutes
10 minutes
Interlace
On
On
■ Slide Show Interval
You can set the interval for slide show. (1 sec to 10 minute)
■ Auto Slide Show
When no button is pressed after the power is on, the auto slide show starts. It sets
the interval for auto slide show. (5 sec to 1 hour, Off)
■ Select transition effect
You can select any of various slide effects.
(All, Fade Topdown, Circle Rectangle, Interlace, Spiral In, Spiral Out )
■ Slide Show with MP3
An MP3 file is played back while the slide show is running.
(On : MP3 playback is active; Off : MP3 playback is not active)
■ Slide Show with Clock
The current time and calendar appears while the slide show is running.
19
25
SDP-708MB User-Guide
SETUP
Time
◀
Time
Auto Power
Management
▶
Date
Setting
Set
Auto
Power On 2007-05-22
Off
Time
Setting
02:33:12
Auto
Power
On Time PMPM
02:33:12
Set Auto Power Off
Off
Auto Power Off Time
PM 02:33:12
■ Date Setting
It sets the date: Year-Month-Day.
■ Time Setting
It sets the current time.
Alarm
◀
Audio
Alarm
▶
Beep Sound
off
Set Set
Beep
Sound
Off
Alarm
Power
on Time
volume
AM 09:00 1
Alarm
Turn
Off
InternalSet
Speaker
Once
PeriodSound
Alarm Volume
14
■ Set Alarm
It determines whether or not to use the
alarm function.
■ Alarm Time
It sets the alarm time.
■ Set Period
It sets the alarm interval.
(Once, Daily, Weekly)
■ Alarm Volume
It sets the volume level of alarm.
You can set any of 14 volume levels.
Note
The alarm does not sound when no MP3 file exists in the built-in memory or the inserted memory card.
(The alarm clock plays an MP3 file as alarm sound.)
26
XLCD700MH User Manual
SETUP
Auto Power Management
◀
Auto Power Management
Set Auto Power On
Auto Power On Time
Set Auto Power Off
Auto Power Off Time
▶
Off
PM 02:33:12
Off
PM 02:33:12
■ Set Auto Power On
It automatically turns the power on.
■ Auto Power On Time
It sets the time for the Auto Power On
function.
■ Set Auto Power Off
It automatically turns the power off.
■ Auto Power Off Time
It sets the time for the Auto Power Off
function.
Audio
◀
Audio
▶
Beep Sound off
Set Beep Sound
1
Power on volume
Turn Off
Internal Speaker Sound
■ Set Beep Sound
It sets the beep sound for the remote control buttons.
(Beep Sound Low, Beep Sound High, Beep Sound Off)
■ Power on volume
It sets the volume level of alarm. (You can set any of 13 volume levels.)
■ Internal Speaker Sound
It determines whether or not to use the internal speaker sound.
27
XLCD700MH User Manual
SETUP
System Configuration
◀
Time
System
Configuration
Auto
Power
Management
▶
Date
Setting
English
Language
Set
Auto
Power On 2007-05-22
Off
Time
Setting
02:33:12
Hide
Info.
Bar
Show
Auto
Power
On Time PMPM
02:33:12
LCD
Select
Video
OutOff Internal
Set Auto
Power
Off
Auto Power Off Time
PM 02:33:12
■ Language
It sets the language to be displayed on the screen.
(It supports Italian, Korean, English, Chinese, Spanish, German and Japanese basically.
The other language is option fact.)
■ Info. Bar Show
It determines whether or not to display the information bar at the bottom.
(Display/Auto/Hide)
■ Select Video
Video Out is adjusted internal LCD for current model.
Memory Information
◀
Memory Information
Internal Flash
28
127,871KB Total
30,705 KB Used
97,166KB Free
▶
■ Memory Information
The memory capacity and free memory space are also displayed.
XLCD700MH User Manual
SETUP
System Information
◀
System Information
▶
(c) 2007, SR I-Tech, All rights Reserved
HW Version
SW Version
Build Time
SDP-708MB
SDP-708MB-V1.1
16:29:48, Aug 21 2007
■ Checking the system information
You can see the versions for firmware and hardware.
Note
The Firmware Upgrade uses the headquarters of a party home page.
www.s-dion.com
Finish
Setup
▲
Memory Information
System Information
Finish
▼
It exits from the Setup to return to the Home menu.
Note
f it does not use the Finish function, the settings is stored with automatic.
29
XLCD700MH User Manual
Troubleshooting
Problem
30
Solution
Power remains turned off.
- Check the plug-insertion hole of the adapter, adapter itself, and connection status between adapter and outlet.
Power is on but the initial display still
remains.
- Check the type of memory card.
- This product supports 5 kinds of memory cards such as SD/MMC/xD/MS/CF.
- Check the filename extension when the connection between memory card and power is normal. (This product supports
JPG(RGB type), MP3, Video files only.)
Suddenly all operations are stopped.
- First stop the button operations and wait for over 30 seconds (up to 1 minute). Delay can occur when the processing
speed is lowered by a high capacity file.
- When this phenomenon continues, disconnect PC or memory card and then startup and reboot the product.
It takes a long time to move to the next
photo in the slide show.
- Press the menu button.
- About under moving it presses the Select button in the slide show.
- It sets a slide show interval shortly.
You cannot hear MP3 sound.
- Press ‘Mute’ Button.
- It raises the UP button a volume.
Menu is not shown even after pressing
the Menu button.
- In order to implement photos on the screen, it also requires optimization process, so its speed can be lowered.
The remote control doesn’t operate.
- Check the battery status.
- Any foreign materials (particularly liquid) in the remote control may cause a problem. Exchange it from the purchasing
site if necessary.
The product cannot read video files or
abnormally plays back them.
- The file encoded with other codecs than the supported one may not normally operate. This product will upgrade with
additional codecs in near future. (Most digital cameras support the MJPEG codec.)