1
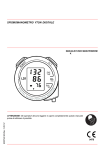
Gima S.p.A. Via Marconi, 1 20060 Gessate (MI) Italy Italia: tel. 199 400 401 - fax 199 400 403 Export: tel. +39 02 953854209/221/225 fax +39 02 95380056 [email protected] - [email protected] www.gimaitaly.com EU Representative SFIGMOMANOMETRO YTON DIGITALE YTON DIGITAL SPHYGMOMANOMETER M32722MRev.1.05.12 MANUALE D’USO E MANUTENZIONE USE AND MAINTENANCE BOOK ATTENZIONE: Gli operatori devono leggere e capire completamente questo manuale prima di utilizzare il prodotto. ATTENTION: The operators must carefully read and completely understand the present manual before using the product. 0476 2 1. Corpo principale 2. Pulsante Memory 3. Tubo aria 4. Pompetta gonfiaggio 5. Valvola sgonfiaggio rapido 6. Connettore aria 7. Pulsante O/I 8. Display 9. Bracciale 10. Anello 11. 1x Batteria AAA 1. Main body 2. Memory button 3. Air Hose 4. Inflation bulb 5. Rapid deflation valve 6. Air connector 7. O/I Button 8. Display 9. Cuff 10. D-Ring 11. 1xAAA Battery 3 ITALIANO SPECIFICHE Questo dispositivo è progettato per la misurazione non invasiva della pressione sanguigna arteriosa sistolica e diastolica e della frequenza cardiaca negli adulti (età superiore ai 15 anni). Il dispositivo adotta la tecnologia oscillometrica misurando con l’algoritmo Fuzzy la pressione arteriosa e la frequenza cardiaca. L’algoritmo Fuzzy è un algoritmo che tiene in considerazione le varie caratteristiche del battito cardiaco individuale e che fornisce una più precisa misurazione. Consultare il medico qualora la misurazione fosse effettuata su bambini o persone affette da aritmia poiché questi fattori possono causare errori. Dimensioni: Ø 65(D) x 26(H)mm Peso: Circa 50g pompetta e bracciale non inclusi Metodo di misurazione: Oscillometria Intervallo di misurazione: da 40 a 260 mmHg (pressione) da 40 a 160 battiti/minuto (frequenza) Precisione della misurazione: +/-3 mmHg per la pressione sistolica e diastolica +/-5% della lettura per la frequenza Gonfiaggio: Manuale Sgonfiaggio rapido: Manuale Batterie: 1 “AAA” x 1,5V Memoria: 90 serie in memoria Temperatura e umidità di lavoro: da +10°C a +40°C, 85% o inferiore Temperatura e umidità di conservazione: da -20°C a + 50°C, 85% o inferiore Dimensione bracciale: Applicabile a braccia da 22-32 cm INFORMAZIONI SULLA PRESSIONE SANGUIGNA Cos’è la pressione sanguigna? Il sangue viene inviato alle arterie tramite azione di una pompa chiamata cuore (contrazione e dilatazione). La pressione del sangue in uscita dal cuore viene chiamata “pressione sanguigna” e pulsa ad ogni battito del cuore. La maggiore pressione sanguigna quando il cuore si contrae viene chiamata “pressione sistolica” e la minore quando il cuore si dilata viene chiamata “diastolica”. La soglia di ipertensione per gli adulti viene definita dall’Organizzazione Mondiale della Sanità (OMS) in 140/90 mmHg. La salute e la pressione sanguigna! Quando si raggiunge la mezz’età, il rischio di ipertensione aumenta sensibilmente. Con l’età i vasi sanguigni invecchiano rapidamente. Inoltre, a causa dell’obesità e della mancanza di esercizio, il colesterolo si attacca ai vasi sanguigni causando una perdita di elasticità degli stessi. Di conseguenza tenere sotto controllo quotidianamente la pressione sanguigna aiuta a valutare le condizioni di salute. Perché misurare la pressione a casa? Annotando i valori della pressione sanguigna e le condizioni delle misurazioni quali l’ora e il proprio stato giornalmente, si può verificare la tendenza e le variazioni della pressione sanguigna, controllando la propria salute. Inoltre annotare i valori quotidiani della pressione sanguigna può aiutare il nostro medico nella diagnosi. Come affrontare un cattivo funzionamento del misuratore? Se anche dopo aver verificato i passaggi già menzionati, risulta impossibile procedere con una misurazione corretta, consultate il punto vendita dove avete acquistato l’apparecchio oppure il più vicino rivenditore senza toccare il meccanismo interno. In alcuni casi molto rari, possono verificarsi errori dovuti alle condizioni fisiche dell’utilizzatore. In questi casi, consultate un medico. INSTALLAZIONE BATTERIA 1. Aprire il coperchio della batteria e inserire una batteria di tipo ‘AAA’ nell’apposito comparto (come indicato in figura) prestando attenzione alla polarità. 2. Chiudere il coperchio del comparto. - Sostituire le batterie quando sul display appare il relativo simbolo “ “ o se all’accensione il display resta spento; - La batteria in dotazione ha il solo scopo di controllare il funzionamento ITALIANO del dispositivo, pertanto la sua durata può essere molto più breve del consigliato; - Non utilizzare batterie ricaricabili; - Se il dispositivo non dovesse essere utilizzato per un lungo lasso di tempo, rimuovere la batteria; - Non lasciare la batteria esaurita all’interno del dispositivo. POSTURA CORRETTA PER LA MISURAZIONE 1. Sedersi a un tavolo e appoggiare il braccio su di esso durante la misurazione. Assicurarsi che il bracciale sul braccio sia approssimativamente alla stessa altezza del cuore e che l’avambraccio sia steso in posizione naturale sul tavolo; 2. E’ anche possibile effettuare la misurazione sdraiati sulla schiena. Guardare il soffitto, stare calmi e non muovere il collo o il corpo durante la misurazione. Assicurarsi che il bracciale sul braccio sia approssimativamente alla stessa altezza del cuore. POSIZIONAMENTO DEL BRACCIALE 1. Inserire il lembo del bracciale circa 5 centimetri dentro l’anello a D come mostrato in figura. 2. Posizionare il bracciale sul braccio sinistro con i tubi in direzione del palmo della mano. Se la misurazione sul braccio sinistro dovesse risultare difficoltosa, può essere utilizzato il braccio destro. In questo caso è necessario sapere che le letture possono differire di 5-10 mmHg tra il braccio sinistro e il destro. 3. Avvolgere il bracciale attorno al braccio con il bordo inferiore dello stesso 2-3 centimetri circa al di sopra del gomito. La scritta <ARTERY> deve venirsi a trovare sopra l’arteria del braccio. 4. Premere il bracciale per assicurarsi che sia collegato correttamente. Il bracciale non deve essere nè troppo stretto nè troppo largo. Due dita devono poter essere infilate facilmente tra il bracciale e il braccio. 5. La scritta <INDEX> sul bracciale deve venirsi a trovare nell’area denominata <NORMAL> (22-32 cm). Questo significa che il bracciale è della misura corretta. Se la scritta <INDEX> si viene a trovare al di fuori dell’area <NORMAL>, consultare il rivenditore poiché questo significa che avete bisogno di un bracciale di misura differente. 6. Talvolta può risultare difficile far aderire il bracciale al braccio dell’utente, per questo è accettabile anche il posizionamento del bracciale a cono. 7. Se i vestiti restringono la circolazione del sangue nel braccio, o se si arrotola la manica in maniera che essa comprima il braccio, la misurazione può risultare errata. Se necessario, togliere quindi i vestiti per ottenere un’accurata misurazione. 4 5 ITALIANO Fig.1 Fig.3 Fig.2 Fig.4 EFFETTUAZIONE DELLA MISURAZIONE 1. Tenere il dispositivo con la mano sul cui braccio è stato posizionato il bracciale e tenere la pompetta con l’altra mano. Prima della misurazione effettuare 3~5 respiri profondi e rilassarsi. Non parlare ne muovere il braccio; 2. Premere il pulsante ‘O/I’, e appariranno tutti i simboli sul display per 2 secondi come in Fig.1. Il dispositivo emetterà quindi due corti segnali acustici e apparirà sul display la scritta ‘0 mmHg’ con la freccia verso l’alto lampeggiante per ricordare all’utente di gonfiare (Fig.2). Se dovesse esserci troppa aria nel bracciale, sul display apparirà la freccia verso il basso a indicare all’utente che deve sgonfiare del tutto il bracciale (Fig.3). Premere la valvola di sgonfiaggio rapido per far defluire l’aria fino a che appare a schermo la scritta ‘0 mmHg’ e la freccia verso l’alto. 3. Utilizzare la pompetta per gonfiare il bracciale fino a circa 40 mmHg al di sopra della vostra abituale pressione sistolica. Se non si conosce l’abituale pressione sistolica, gonfiare fino a circa 180 mmHg (se la pressione non dovesse essere sufficiente per effettuare una misurazione accurata, apparirà a display la freccia verso l’alto a indicare all’utente che dovrà gonfiare ulteriormente il bracciale). Smettere quindi di gonfiare e la pressione inizia a diminuire gradualmente. Nel mentre viene calcolata la pressione e la frequenza dell’utente; 4. Al termine della misurazione il dispositivo emette un lungo segnale acustico. La pressione sanguigna e la frequenza vengono mostrate sul display come in Fig.4. 5. Premere la valvola di sgonfiamento rapido per far defluire l’aria rimanente dal bracciale e premere il pulsante ‘O/I’ per spegnere il dispositivo. Se si desidera effettuare un’altra misurazione, attendere almeno 3 minuti. Se non si spegne il dispositivo, dopo 3 minuti di non utilizzo esso si spegne automaticamente. SGONFIAGGIO RAPIDO DURANTE LA MISURAZIONE Se non ci si dovesse sentire bene durante la misurazione o se si desidera fermare la misurazione per qualsiasi motivo, si può premere la valvola di sgonfiaggio rapido per far defluire l’aria dal bracciale e terminare la misurazione. FUNZIONE DI MEMORIA Fig.5 Fig.6 Fig.7 RICHIAMO DA MEMORIA 1. Il dispositivo può memorizzare 90 serie di letture e calcola automaticamente la media delle ultime 3 letture. Quando la memoria è piena (90 serie di letture memorizzate), la lettura più vecchia viene sostituita da quella nuova. La memoria non viene cancellata anche se si rimuove l’alimentazione elettrica; 2. Al termine della misurazione o quando il dispositivo è in stand-by, è possibile premere il tasto Memory per richiamare i dati in memoria. Premendo il tasto sul display appare la media delle ultime 3 misurazioni (vedi Fig. 5); ITALIANO 6 3. Premendo ancora sul display appare ‘01’, che sta a indicare l’ultima misurazione, e quindi appare la schermata che mostra la stessa come in Fig. 6; 4. Premendo nuovamente sul display appare ‘02’, che sta a indicare la penultima misurazione e così continuando a premere fino all’ultima misurazione in memoria. CANCELLAZIONE DELLA MEMORIA Al termine della misurazione o quando il dispositivo è in stand-by, tenere premuto il tasto Memory per almeno 5 secondi e sul display appare la scritta ‘CLR‘ che sta a indicare che tutte le letture in memoria sono state cancellate, come mostrato in Fig.7. MESSAGGI DI ERRORE E DI BATTERIA SCARICA POSSIBILE CAUSA RIMEDIO Il bracciale è applicato scorrettamente o il tubo è inserito male. Assicurarsi che il bracciale sia applicato correttamente e il tubo inserito adeguatamente e ripetere la misurazione. Movimento del braccio o della mano o aver parlato durante la misurazione. Ripetere la misurazione seguendo con scrupolo le indicazioni del manuale. Il bracciale non è sufficientemente gonfiato. Ripetere la misurazione portando il bracciale a una pressione più alta. Aritmia. Consultare il medico. La batteria si sta scaricando. Sostituire la batteria con una nuova. MESSAGGIO MANUTENZIONE, CONSERVAZIONE, RIPARAZIONE E RECICLO 1. E’ necessario proteggere il dispositivo da umidità, luce diretta del sole, colpi, solventi, alcool e benzina. 2. Rimuovere la batteria se non si utilizza il dispositivo per un lungo periodo di tempo e mantenere le batterie lontano dalla portata dei bambini. 3. Proteggere il bracciale e la pompetta da oggetti taglienti e non stirare o torcere il bracciale. 4. Utilizzare solo un panno morbido e asciutto per pulire il dispositivo. 5. Il bracciale è delicato e deve essere maneggiato con cura. E’ possibile pulirlo con un panno umido. ATTENZIONE: In nessun caso si deve lavare la camera d’aria interna! 6. E’ necessario consultare annualmente uno specialista per controllare le condizioni tecniche del dispositivo. Consultare il rivenditore per maggiori informazioni. 7. Dal momento che nè il dispositivo nè le batterie sono normali rifiuti casalinghi, seguire per lo smaltimento le disposizioni locali. Smaltimento: Il prodotto non deve essere smaltito assieme agli altri rifiuti domestici. Gli utenti devono provvedere allo smaltimento delle apparecchiature da rottamare portandole al luogo di raccolta indicato per il riciclaggio delle apparecchiature elettriche ed elettroniche. Per ulteriori informazioni sui luoghi di raccolta, contattare il proprio comune di residenza, il servizio di smaltimento dei rifiuti locale o il negozio presso il quale è stato acquistato il prodotto. In caso di smaltimento errato potrebbero venire applicate delle penali, in base alle leggi nazionali. 7 ITALIANO DIAGNOSI SINTOMO CAUSA I l display non si La batteria è scarica accende premendo il La polarità della batteria è invertita pulsante O/I. I contatti del comparto batteria sono sporchi La lettura è Il bracciale si trova al livello del cuore? estremamente alta o Il bracciale è applicato correttamente? bassa. RIMEDIO Sostituire la batteria. Inserire correttamente la batteria. Pulire i contatti con un panno asciutto. Assumere la corretta posizione. Applicare correttamente il bracciale. Avete teso il braccio durante la misurazione? Rilassarsi durante la misurazione Avete perlato o mosso il braccio (o la mano) durante la misurazione? Rimanere fermi e in silenzio durante la misurazione. L frequenza cardiaca è Avete perlato o mosso il braccio (o la eccessivamente alta o mano) durante la misurazione? bassa Avete effettuato la misurazione appena dopo attività fisica? Rimanere fermi e in silenzio durante la misurazione. La batteria si è Utilizzo di batterie difettose scaricata rapidamente Si suggeriscono batterie alcaline di marche note Il dispositivo si spegne E’ dovuto al sistema di spegnimento automatico automaticamente Questo serve a limitare il consumo delle batterie e non è un difetto. Effettuare la misurazione dopo aver riposato per più di 5 minuti CONDIZIONI DI GARANZIA GIMA Ci congratuliamo con Voi per aver acquistato un nostro prodotto. Questo prodotto risponde a standard qualitativi elevati sia nel materiale che nella fabbricazione. La garanzia è valida per il tempo di 12 mesi dalla data di fornitura GIMA. Durante il periodo di validità della garanzia si provvederà alla riparazione e/o sostituzione gratuita di tutte le parti difettose per cause di fabbricazione ben accertate, con esclusione delle spese di mano d’opera o eventuali trasferte, trasporti e imballaggi. Sono esclusi dalla garanzia tutti i componenti soggetti ad usura. La sostituzione o riparazione effettuata durante il periodo di garanzia non hanno l’effetto di prolungare la durata della garanzia. La garanzia non è valida in caso di: riparazione effettuata da personale non autorizzato o con pezzi di ricambio non originali, avarie o vizi causati da negligenza, urti o uso improprio. GIMA non risponde di malfunzionamenti su apparecchiature elettroniche o software derivati da agenti esterni quali: sbalzi di tensione, campi elettromagnetici, interferenze radio, ecc. La garanzia decade se non viene rispettato quanto sopra e se il numero di matricola (se presente) risulti asportato, cancellato o alterato. I prodotti ritenuti difettosi devono essere resi solo e soltanto al rivenditore presso il quale è avvenuto l’acquisto. Spedizioni inviate direttamente a GIMA verranno respinte. ENGLISH 8 SPECIFICATIONS This device is intended for the non-invasive measurement of systolic and diastolic arterial blood pressure and pulse rate in adults (age 15 and above). This device adopts the oscillometric technology with Fuzzy Algorithm measuring the arterial blood pressure and pulse rate. Fuzzy Algorithm is the processing algorithm taking into account of the speciality of individual heartbeats, which provides higher accuracy of measurement. Consult the physician if measurement is taken in children or persons with arrhythmia as errors may occur. Size: Ø 65(D) x 26(H)mm Weight: Approximately 50g not including bulb and cuff Measuring method: Oscillometry Measuring range: 40 to 260 mmHg (pressure) 40 to 160 beats/minute (pulse rate) Measuring accuracy: +/-3 mmHg for systolic and diastolic pressure +/-5% of the reading for the pulse rate Inflation: Manually Rapid deflation: Manually Batteries: 1 “AAA” x 1,5V Memory: 90 sets of memories Operation temperature and humidity: +10°C to +40°C, 85% and below Storage temperature and humidity: -20°C to + 50°C, 85% and below Cuff size: Applicable for arm size 22-32 cm INFORMATION OF BLOOD PRESSURE What is blood pressure? Blood is sent to the arteries with the action of a pump called heart (contraction and dilation). The pressure of blood leaving the heart is called "blood pressure", Blood Pressure pulsate with each beat of the heart. The high blood pressure when the heart contracts are called "Systolic pressure" and the low blood pressure when the heart dilates is called "diastolic pressure", The threshold value for hypertension in adults is defined by the World Health Organization (WHO) as 140/90 mmHg. Health and blood pressure! When people reach middle age, the risk of hypertension markedly increase. With aging, the blood vessels age rapidly, Furthermore, because of the obesity and lack of exercise, cholesterols stick to blood vessels, causing them to lose elasticity, Therefore, watching daily blood pressure help to evaluate our health condition. Why do we need to monitor blood pressure at home? By recording the blood pressure values and the measuring conditions such as the measuring time or living state every day, you can know the fluctuation tendency of your blood pressure, which helps control your health. Furthermore, recording of daily blood pressure values is very helpful for your doctor to diagnose. How to manage your Blood Pressure if it works unsuitable? If correct measurement is impossible even after checking the above-mentioned points, consult at the store where you have purchased the unit or the nearest dealer without touching the internal mechanism. In some very rare cases, there may be error due to the physical condition of the person. In such cases, please consult your doctor. BATTERY INSTALLATION 1. Open the battery cover and install one ‘AAA’ type battery into the battery compartment as indicated. Make sure that the polarity is correct. 2. CIose the battery compartment cover. “ appears - Replace the batteries when the replacement indication “ in the display or nothing after O/I button is pressed; - Battery in this kit is intended to check work capacity of the device and the life-span of the battery can be shorter than what is recommended; - Don’t use rechargeable battery; - lf the device is to be unused for long time, please take out the battery; - Don’t leave the worn battery in the device. 9 ENGLISH CORRECT POSTURE FOR MEASUREMENT 1.Sit at the table and let the table support your arm as you take the measurement. Make sure that the cuff on the upper arm is at approximately the same level as the heart, and that the forearm is extended naturally on the table; 2.You may lie on your back and take measurement. Look at the ceiling, keep calm, and don’t move your neck or body during the measurement. Make sure that the cuff on the upper arm is at approximately the same level as the heart. ASSEMBLY THE CUFF 1.Insert the edge of the cuff approximately 5 centimeters into the D-ring as shown. 2.Put the cuff on the left upper arm with the tube pointing to the direction of palm. If measurement on your left arm is difficult, you can use right arm for measurement. In this case, it is necessary to know that the readings may differ about 5-10 mmHg between left arm and right arm. 3.Wrap cuff around your upper arm with the lower edge of the cuff approximately 2-3 centimeters above the elbow. The mark <ARTERY> must be over the artery of the arm. 4.Press the cuff to make sure that it is attached securely. The cuff should not be too tight or too loose. Two fingers should be easily put in between cuff and upper arm. 5.The mark <INDEX> on the cuff must point to area <NORMAL> (22-32 cm). This means the cuff size is correct. If mark <INDEX> points to the area beyond area <NORMAL>, please consult your dealer whether you need another size cuff. 6.Sometimes it is difficult to make the cuff regular owning to the shape of the user’s upper arm, the cone-shape assembly of cuff is also acceptable. 7.If your clothes restrict blood circulation of your upper arm, or you roll your sleeve up so as to result in such restriction. Please take off your clothes to get accurate measurement if necessary. CARRY OUT A MEASUREMENT 1.HoId the main body with your hand whose arm is assembled with cuff, and hold the inflation bulb with another hand. Before the measurement, take 3~5 times deep breath and relax yourself. Don’t talk or move your arm; ENGLISH Fig.1 10 Fig.3 Fig.2 Fig.4 2.Press button ‘O/I’, and all symbols will appear on display in 2 seconds as Fig.1. Then two short beep will sound, then ‘0 mmHg’ will appear on the display with upward arrow flashing to remind the user to inflate as Fig.2. If there is too much air in the cuff, the display will show downward arrow to remind the user to deflate the air in the cuff as Fig.3. Please push the rapid deflation valve to deflate the air until ‘0 mmHg’ and upward arrow appears. 3.Pump the inflation bulb to inflate the pressure to about 40 mmHg above your regular systolic pressure. If you don’t know your regular systolic pressure, just pump to about 180 mmHg (If the pressure is not enough to get accurate measurement, the display will show upward arrow to remind the user to pump to higher pressure). Then stop inflation and the pressure begins to decrease gradually, during which the user’s blood pressure and pulse will be calculated; 4.There will be a long beep following the accomplishment of measurement. The blood pressure reading and pulse reading will show in the display as Fig.4 5.Press rapid deflation valve to exhaust the remaining air in the cuff and press the button ‘O/I’ to turn off the device. If you‘d like to carry out another measurement, please rest for at least 3 minutes. If the power supply is not switched off and the device keeps unused for 3 minutes, the device will be switched off automatically. RAPID DEFLATION DURING MEASUREMENT If you do not feel well during measurement or want to stop the measurement for some reason, you can press the rapid deflation valve to deflate the air in the cuff at any time to end the measurement. FUNCTION OF MEMORY MEMORY RECALL 1.LD1 can store 90 sets of readings and will automatically calculate the average value of the latest 3 readings. When the memory is full (90 sets of readings are stored), the oldest reading will be replaced by new one. Memory will not clear away even if power supply is removed; 2.After a measurement is finished or when the device stands by, the user can press button Memory to recall memory. Press button Memory, the display will show the average value of the latest 3 readings as Fig. 5; 3.Press again, the display will show ‘01’, which means the latest reading, then turns to another screen to show readings as Fig. 6; 4.Press again, the display will show ‘02’, which means the second to the latest reading. MEMORY CLEARANCE After a measurement is finished or when the device stands by, hold down button Memory for at least 5 seconds, the display will show ‘CLR‘ which means all the stored reading is removed as Fig.7. Fig.5 Fig.6 Fig.7 11 ENGLISH ERROR AND LOW BATTERY INFORMATION INDICATION POSSIBLE REASON CORRECTION METHODS The cuff is put on wrongly or the tube plug is inserted too loosely. Make sure that cuff is put on correctly and the tube plug is inserted tightly and repeat the measurement Movement of arm/hand or talking during measurement. Repeat the measurement with following completely recommendations of manual. The cuff is not inflated to necessary pressure. Repeat the measurement with pumping cuff to higher pressure. Arrhythmia. Consult your personal Physician The battery is weak. Replace the battery with new one CARE, STORING, REPAIR AND RECYCLING 1.lt’s necessary to protect this device against high moisture, direct sunlight, shock, solvent, alcohol and gasoline. 2.Remove the batteries if the device is to be stored for a long time, and keep the batteries far from the children. 3.Keep the cuff and inflation bulb from sharp subject and don’t extend or twist the cuff. 4.Use only soft and dry cloth to clean the device. 5.The cuffs are sensitive and must be handled with care. You can clean the cuff cover with damp cloth. WARNING: Under no circumstances may you wash the inner bladder! 6.It is necessary to consult specialists yearly for checking technical condition of the device. Please consult your dealer for more information. 7.Since neither the device nor batteries are household waste, follow your local recycling rules and dispose them at appropriate collection sites. Disposal: The product must not be disposed of along with other domestic waste. The users must dispose of this equipment by bringing it to a specific recycling point for electric and electronic equipment. For further information on recycling points contact the local authorities, the local recycling center or the shop where the product was purchased. If the equipment is not disposed of correctly, fines or penalties may be applied in accordance with the national legislation and regulations. ENGLISH 12 TROUBLESHOOTING SYMPTOM CHECK POINT REMEDY The battery has run down Replace the battery with new one. The polarity of battery is wrong Install the batteries correctly. The contact of battery compartment is polluted Clean the battery terminals with dry cloth. Is the cuff at the same level as the heart Make sure that your posture is right Is the cuff wrapped right? Wrap the cuff correctly Did you strain your ami during measurement? Relax during measurement Did you talk or move your arm (or hand) during measurement? Keep quiet and silent during the measurement Did you talk or move your arm (or hand) during measurement? Keep quiet and silent during the measurement Did you make measurement right after exercise? Take measurement again after resting for more than 5 minutes The batteries are run down soon Faulty batteries are used Suggest to alkaline batteries of known manufacturers The device is automatically turned off It is the result of automatically turn off system This is to save the power consumption of the device, and it is not a fault. No display when the O/I button is pressed. The reading is extremely low or high. Pulse rate is too low or too high GIMA WARRANTY CONDITIONS Congratulations for purchasing a GIMA product. This product meets high qualitative standards both as regards the material and the production. The warranty is valid for 12 months from the date of supply of GIMA. During the period of validity of the warranty, GIMA will repair and/or replace free of charge all the defected parts due to production reasons. Labor costs and personnel traveling expenses and packaging not included. All components subject to wear are not included in the warranty. The repair or replacement performed during the warranty period shall not extend the warranty. The warranty is void in the following cases: repairs performed by unauthorized personnel or with non-original spare parts, defects caused by negligence or incorrect use. GIMA cannot be held responsible for malfunctioning on electronic devices or software due to outside agents such as: voltage changes, electro-magnetic fields, radio interferences, etc. The warranty is void if the above regulations are not observed and if the serial code (if available) has been removed, cancelled or changed. The defected products must be returned only to the dealer the product was purchased from. Products sent to GIMA will be rejected.