1
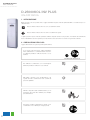
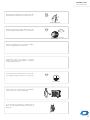
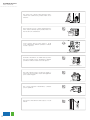
ON-OFF R410A
Sistemi per la climatizzazione
M A NUA LE D’ US O
KOLCLIMA
D.25000KOL INV PLUS
D.25000KOL INV PLUS
Linea commerciale
After energization,the up and down swin
is not set after the unit is started,the guide
D.25000KOL INV PLUS
ON-OFF R410A
1 - INTRODUZIONE
Grazie per aver scelto uno prodotto Diloc. Leggere attentamente questo manuale prima dell’utilizzo conservandolo per consultazioni future.
After energization,the up and down swing motor will rotate the guide
Questo simbolo indica le azioni che sono assolutamente
vietate
is not set after
the unit is started,the guide louver will be turned to lev
After energization,the up and down swin
Cautions
is not
set after thefor
unitOperation
is started,the guide
Questo simbolo indica le azioni che vanno assolutamente seguite
Please read the following carefully
Le figure presenti in questo manuale potrebbero differire da quelle reali del vostro prodotto; vi chiediamo di far riferimento
visivo al climatizzatore da Voi acquistato ponendo attenzione alle sole funzioni che restano ad ogni modo inalterate.
WARNI
2 - PRECAUZIONI PER L’USO
Once abnormality like burning
Don't operate th
smell occurs,please cut off the power
with wet hand.
After energization,the up and down swing motor will rotate the guide louv
Leggere attentamente le seguenti operazioni prima dell’uso
supply immediately and then contact
is not set after the unit is started,the guide louver will be turned to level po
with service center .
Cautions for Operation
Se si avverte odore di bruciato, togliere immediataPlease
mente l’alimentazione e contattare il Centro Assistenza, altrimenti potrebbero verificarsi incendi o scosse
elettriche
read the following carefully before operating.
Cautions for Operation
WARNING
Please
read
the
following
carefully
Once abnormality like burningIf the
Don't
operate
air conditioner
Never cut of
abnormality
stillthe
exists,
the unit
smell occurs,please cut off the power may
with
hand. and electric shock
be wet
damaged
supply immediately and then contact
or fire may result.
Otherwise, it may cau
cord and signa
damaged,replac
cordWARNIN
by profess
Special circuit must be adopted
Be sure to pul
Once abnormality
like burning
Don't
operate
for power
supply to prevent
fire.
plug
when
the airth
co
smell occurs,please cut off the power
with wet hand.
in use for a long tim
supply immediately and then contact
with service center .
Non utilizzare il condizionatore con le mani bagnate
altrimenti potrebbero verificarsi scosse elettriche
Cautions for Operation
with service center .
Please read the following carefully before operating.
If the abnormality still exists, the unit Otherwise, it may cause electric shock.
WARNING
may be damaged and electric shock
or
fire
may
result.
Once abnormality like burning
Don't operate the air conditioner
Never cut off or da
Mai tagliare o riparare il cavo di alimentazione o di
smell occurs,please
cut off the power
with wet hand.
cord and signal wire
segnale del vostro condizionatore. Farlo sostituire
da
Special circuit must be adopted
Be sure
to pull
out the power ★ Never dama
Do not use
octopus
multipurpose
damaged,replace them
supply immediately and then contact
personale qualificato
If
the
abnormality
still
exists,
the
unit
it may
for power supply to prevent fire. plugplug
when the
air conditioner
is notOtherwise,
or use the
onecau
w
or mobile
terminal
board for
the acc
cordOtherwise,
by professionals
may
damaged
electric shock
wire
connection.
inbe
use
for a longand
time.
may cause overhe
or fire may result.
with service center .
Utilizzare dispositivi adatti sull’alimentazione per la
prevenzione di incendi. Non utilizzare prese multiple
If the abnormality still exists, the unit
per l’alimentazione
★Special
Duringcircuit
cleaning,
cut off
★Be
The
power
su
mustplease
be adopted
sure
to pull
special
circuit
with
the
for power
power supply.
supply to prevent fire.
plug
when
the air
co
switch and enough
in use for a long time
turn on or off the u
protect the air cond
Otherwise, it may cause electric
shock.
Cut off power
supply
may be
and electric
shock
Dodamaged
not use octopus
multipurpose
or fireplug
mayorresult.
mobile terminal board for
Otherwise, the accumulated dust Otherwise, it may
Bemay
sure
to pull
out the power
damage the
cause
overheating
or fire.★ Never
or fire.
for power supply to prevent fire.
plug when the air conditioner is not or use the one which is
★ During cleaning, please cut
off
The
power multipurpose
supply must adopt
The power su
Do not
octopus
in use
for★
ause
long
time.
special
circuit
with
protection
the power supply.
Otherwise,
it terminal
may
cause
electric
plug
or mobile
board
for of airOtherwise,
should keep
the stab
acc
switch
enough capacity.Do not ents are easy to b
shock
or and
damage.
wire
connection.
Assicurarsi di togliere l’alimentazione quando non il
cause overhea
turn on or off the unit frequently tomay
voltage. Refrigera
condizionatore non si utilizza per un lungo periodo
protect the air conditioner.
damaged and com
★ During cleaning, please cut off ★
The powerwon
su
components
special circuit with p
Cut off power supplythe power supply.
is too low.
switch and enough
turn on or off the un
protect the air condit
Do not use octopus multipurpose
plug or mobile terminal board for
Cut off power supply
Otherwise, the accumulated
dust Otherwise, it may cause
wire connection.
Special
circuit must be adopted
1
2
wire connection.
may cause overheating or fire.
Otherwise, it may cause electric
or fire.
If the abnormality still exists, the unit Otherwise, it may cause electric shock.
may be damaged and electric shock
or fire may result.
Special circuit must be adopted
for power supply to prevent fire.
Be sure to pull out the power
plug when the air conditioner is not
If the abnormality still exists, the unit Otherwise, it may cause electric shock.
may be damaged and electric shock
MANUALE
or fire may result.
D’USO
Linea commerciale
★ Never damage
electric
Special the
circuit
must bewire
adopted
for power
supply
prevent fire.
or use the one
which
is nottospecified.
Be sure to pull out the power
★ Never damage the elect
plug when the air conditioner is not
or use the one which is not sp
in use for a long time.
in use for a long time.
Non utilizzare cavi danneggiati o non appropriati, altrimenti potrebbero verificarci sovraccarichi e incendi.
Do not use octopus multipurpose
plug or mobile terminal board for
wire connection.
Do not use octopus multipurpose
plug or mobile terminal board for
wire connection.
Otherwise, the accumulated dust
Otherwise, it may cause overheating
may cause overheating or fire.
or fire.
★ During cleaning, please cut off ★ The power supply must adopt
special circuit with protection of air
the power supply.
Durante la manutenzione togliere l’alimentazione,
altriswitch
and enough capacity.Do not
menti potrebbero verificarsi danni o scosse elettriche
turn on or off the unit frequently to
protect the air conditioner.
Cut off power supply
Otherwise, the accumulated dust
Otherwise, it may cause over
may cause overheating or fire.
or fire.
★ During cleaning, please cut off ★ The power supply must adopt
special circuit with protection of air
the power supply.
switch and enough capacity.Do not
turn on or off the unit frequently to
The power supply and voltage
protect the air conditioner.
should keep stable. Electric components are easy to be damaged
forpower
high
Cut off
supply
voltage. Refrigeration system will be
damaged and compressor and electric
components won't operate if voltage
is too low.
The power supply and vo
should keep stable. Electric c
ents are easy to be damaged
voltage. Refrigeration system
damaged and compressor and
components won't operate if
is too low.
Otherwise, it may cause electric
shock or damage.
1
Otherwise, it may cause
electric
Prevedere sull’alimentazione
un interruttore
differenshock or damage.
ziale per salvaguardare
il vostro impianto.
1
L’alimentazione deve essere stabile. I componenti
elettrici sono facilmente danneggiabili se soggetti a
frequenti sbalzi di tensione .
Cautions for Operation
★ Never insert any foreign matter into
★ Earthing:the unit must be
earthed reliably!The earthing
wire should connect with special device
of buildings.
Cautions for Operation
Assicurarsi di avere un impianto di messa a terra idoneo altrimenti potrebbero verificarsi scosse elettriche.
★ Earthing:the unit must be
earthed reliably!The earthing
wire should connect with special device
of buildings.
★ Never insert any foreign matter into
the air conditioner to avoid damage of
the air conditioner. And never insert
your hands into the air outlets of indoor
★ The operation of c
the air conditioner to avoid damage of
the air conditioner. And never insert
your hands into the air outlets of indoor
outdoor unit must be
professional personn
and outdoor units.
leakage of the system
avoid damage to com
★ The operation of cut-off valve of
outdoor unit must be performed by
professional personnel in order to
avoid damage to compressor for
leakage of the system.
and outdoor units.
If not, please ask the qualified personnel
to install. Furthermore, don't connect each
wire to gas pipe, water pipe, drainage
pipe or any other improper places which
professional does not recognize.
Cautions for Operation
Non inserire le mani o oggetti all’interno del
climatizzaIf not,
please ask the qualified personnel
tore per evitare che lo stesso di danneggi.
to install. Furthermore, don't connect each
★ Don'tofmake
★
Never insert any foreign matter into
★ Earthing:the unit must be
★ The operation
windows
and doors open
cut-off
valve of
wire to gas pipe, water pipe, drainage
earthed reliably!The earthing
wire should connect with special device
of buildings.
outdoor for
unitamust
be performed
by
the
airorconditioner
to avoid damage
of
long time
during operation
ofthe air
pipe
any other improper
places which
professional personnel in order to
the
air conditioner.
Andrecognize.
never insert
professional
does not
conditioner.
your hands into the air outlets of indoor
avoid damage to compressor for
and outdoor units.
★
Don't make windows and doors open
for a long time during operation ofthe air
★ Never block the air inlet and outlet
of the indoor and outdoor units.
★ Keep pressurized
and so on away from
above1m .
leakage of the system.
★ Never block the air inlet and outlet
of the indoor and outdoor units.
★ Keep pressurized spray ,gas holder
and so on away from the indoor unit
above1m .
conditioner.
Si raccomanda di far installare il condizionatore da
If not,
please ask
the qualified
personnel verificarsi perpersone
esperte
altrimenti
potrebbero
install. Furthermore, don't connect each
dite ditogas
wire to gas pipe, water pipe, drainage
pipe or any other improper places which
professional does not recognize.
It may reduce efficiency of the unit.
It may reduce efficiency or cause stop of
It may cause fire or e
the unit and even fire.
★
Don't make windows and doors open
for a long time during operation ofthe air
conditioner.
★ Never block the air inlet and outlet
of the indoor and outdoor units.
Please note
whether
the installation
pressurized
spray
,gas holder
★ Keep ★
firm the
enough
or unit
not.
and so onstand
awayisfrom
indoor
above1m .
★ Don't step on the top of the outdoor
unit or place anything on it.
Don't attempt to re
tioner by yourself.
3
of buildings.
D.25000KOL INV PLUS
Linea commerciale
pipe
oroutdoor
any other
improper places which
and
units.
professional does not recognize.
Cautions for Operation
★
leakage of the sys
★ Never block the
Don't make windows and doors open
of the indoor and o
for a long time during operation ofthe air
If★
not,
please
ask any
the qualified
personnel
Never
insert
foreign matter
into conditioner.
★ The operation of cut-off valve of
to install. Furthermore, don't connect each
outdoor unit must be performed by
the air conditioner to avoid damage of
earthed reliably!The earthing
wire to gas pipe, water pipe, drainage
professional personnel in order to
the air conditioner. And never insert
wire should connect with special device pipe
or any other improper places which
your hands into the air outlets of indoor
for Operation
avoid damage toCautions
compressor for
professional does not recognize.
of buildings.
leakage of the system.
and outdoor units.
porte e finestre aperte durante il funzioEarthing:the
unit
must
be
★ Never insert any fore
★
★ Earthing:the unit must be
Non tenere
namento del condizionatore, potrebbe ridurre la sua
efficienza
★
the air conditioner to avo
the air conditioner. And n
your hands into the air o
earthed reliably!The earthing
wire should connect with special device
Don't make windows and doors open
for a long time during operation ofthe air
of buildings.
★ Never block the air inlet and outlet
and
Keep units.
pressuriz
★outdoor
and so on away fr
of the indoor and outdoor units.
above1m .
conditioner.
If not, please ask the qualified personnel
to install. Furthermore, don't connect each
wire to gas pipe, water pipe, drainage
pipe or any other improper places which
professional does not recognize.
If not,
please askof
thethe
qualified
It may reduce
efficiency
unit.personnelIt may reduce efficien
to install. Furthermore, don't connect each
wire to gas pipe, water pipe, drainage the
pipe or any other improper places which
Cautions for Operation
professional does not recognize.
Non posizionare nessun o oggetto davanti alla mandata o la ripresa dell’aria; questo potrebbe ridurre l’efficienza del vostro climatizzatore
★
Don't make windows and doors open
for a long time during operation ofthe air
unit and even fir
★ Please note whether the installation ★ Don't step on the
★ Never insert any foreign matter into ★ The operation of cut-off
★ Earthing:the unit must be
stand is firm
ortonot.
unit or
place
anythi
outdoor
unit
must be
perfo
the airenough
conditioner
avoid damage of
earthed reliably!The earthing
professional personnel in o
the air conditioner. And never insert
wire should connect with special device
★
Don'tinto
make
windows
and
open ★ Never block the air in
air inlet and outlet
★ Never block the
pressurized
,gas
holder
★ Keepyour
hands
thespray
air outlets
ofdoors
indoor
avoid damage to compress
of buildings.
and so
of the indoor and outdoor units.
of the indoor and outdoo
a longfrom
time during
operationunit
ofthe air leakage
on
away
the indoor
of the system.
andfor
outdoor
units.
conditioner.
above1m .
conditioner.
It may reduce efficiency of the unit.
It may cause fire o
It may reduce efficiency or cause stop of
the unit and even fire.
If not, please ask the qualified personnel
Cautions for Operation
to install. Furthermore, don't connect each
Please note whether
the
installation
★ Don't step on the top of the outdoor
wire to gas
pipe,
water pipe, drainage
Tenere sostanze gassose lontane almeno★ Earthing:the
1 m★dal
unit must be
Neverother
insert any foreign matter
into
★ The operation of cut-off valve of
pipe★
or
which
stand is firm enough
orany
not. improper places unit
or place
anything
vostro climatizzatore altrimenti potrebbero earthed
verificarsi
outdoor
unit muston
beit.
performed by
the air conditioner
avoid damage of
reliably!The earthing professional
does not to
recognize.
professional personnel in order to
the
air
conditioner.
And
never
insert
wire
should
connect
with
special
device
incendi o esplosioni
of buildings.
your hands into the air outlets of indoor
avoid damage to compressor for
and outdoor units.
leakage of the system.
It may reduce efficiency of the unit.
★
damaged,
mayblock
cause
fallinlet
of and
theoutlet
unit
Don't make windows and If
doors
open ★itNever
the air
and
of
people.
of the
indoor and outdoor units.
for a long time during operation
oftheinjury
air
It may reduce efficiency o
There
is and
theeven
danger
o
Keep
spray
unitpressurized
fire.
★the
people
. away from the in
and so on
. step on the top
★ Please note whether the installationabove1m
★ Don't
conditioner.
It may reduce efficiency of the unit.
Don't attempt t
tioner by yourself.
It may reduce efficiency or cause stop of
the
andpersonnel
even fire.
If not, please ask
theunit
qualified
to install. Furthermore, don't connect each
wire to gas pipe, water pipe, drainage
pipe or any other improper places which
installation
Don't step on the top
professional does not recognize.
★ Please note whether the
★
of the outdoor
Controllare attentamente la stabilità della posizione
stand is firm enough or not.
unit or place anything on it.
dove viene installato il vostro climatizzatore, altrimenti
potrebbero verificarsi cadute e lesioni alle persone
stand is firm enough or not.
unit or place anything o
It may cause fire or explosion.
2
Don't attempt to repair the air conditioner by yourself.
Improper repair ma
If damaged, it may cause fall of the unit There is the danger of fall of things or
★ Never block the air inlet and outlet
★ Keep pressurized spray ,gas holder or fire, so you shou
people .
and
injury
of
people.
center to repair.
and
so
on
away
from
the
indoor
unit
of
the
indoor
and
outdoor
units.
for a long time during operation ofthe air
★
Don't make windows and doors open
It may reduce efficiency of the unit.
conditioner.
It may
reduce. efficiency or cause stop of
above1m
the unit and even fire.
If damaged, it may cause fall of the unit
and injury of people.
★ Don't step on the top of the outdoor
2
★ Please note whether the installation
stand is firm enough or not.
unit or place anything on it.
It may cause fire or explosi
There is the danger of fall
people .
Don't attempt to repair th
tioner by yourself.
2
Non salire sull’unità esterna o posizionare oggetti sopra di essa; questo potrebbe causare danneggiamenti
per la caduta di oggetti
Improper repair may cause electric shock
If damaged, it may cause fall of the unit There is the danger of fall of things or
or fire, so you should contact the service
It may reduce people
efficiency .of the unit.
It may reduce efficiency or cause stop of It may cause fire or explosion.
and injury of people.
center to repair.
the unit and even fire.
★ Please note whether the installation
stand is firm enough or not.
★ Don't step on the top of the outdoor
2
If damaged,
it may
cause fall
unit or place
anything
on of
it. the unit
and injury of people.
Don't attempt to repair the air condiImproper repair may cause e
tioner
by danger
yourself.of fall of things or
There
is the
or fire, so you should contac
people .
center to repair.
2
Non cercare di riparare il climatizzatore, contattare
persone qualificate.
If damaged, it may cause fall of the unit
and injury of people.
Cautions
for Operation
Improper repair may cause electric shock
There is the danger of fall of things or
people .
or fire, so you should contact the service
to repair.
Don't insertcenter
your hands
or stick into the air inlet or outlet.
★
Select th
2
Non inserire le mani all’interno dello ingresso o l’uscita
dell’aria
Splashing water on the air conditioner may cause electric
shock and malfunction.
4
★ Don't blo
It may ca
Cautions for Operation
Cautions for Operation
Don't insert your hands or stick into the air inlet or outlet.
MANUALE D’USO
Linea commerciale
Don't insert your hands or stick into the air inlet or outlet.
★
★
Select the most appropriate temperature.
Select the most appropriate temperature.
Keep proper temp
difference between
room and outdoors
Keep proper temp
Selezionare una temperatura appropriata, mantenendo una differenza appropriata dalla temperatura esterna
difference between
room and outdoors
Cautions for Operation
Cautions for Operation
Don't insert your hands or stick into the air inlet or outlet.
★
★
Don't insert your hands or stick into the air inlet or outlet.
Select the most appropriate temperature.
Select the most appropriate temperature.
Splashing water on the air conditioner may cause electric
Splashing water on the air conditioner may cause electric
★
shock and malfunction.
Non spruzzare acqua sul vostro climatizzatore, altrimenti potrebbero verificarsi incendi
★ Don't blow the wind to animals and plants direc
ItKeep
may cause
bad influence to them.
properatemp
difference between
room and outdoors
shock and malfunction.
Keep proper temp
Don't blow the wind to animals
and plants directly.
It may cause a bad influencedifference
to them.between
room and outdoors
Cautions for Operation
★
Don't insert your hands or stick into the air inlet or outlet.
Select the most appropriate temperature.
Cautions for Operation
Keep
temp
Splashing
waterproper
on the air
conditioner may cause electric
Splashing water on the air conditioner may cause electric
difference
the
wind tobetween
animals and plants directly.
★ Don't
shockblow
and
malfunction.
ItDon't
may cause
a bad
influence
tointo
them.
insert
your
hands
or stick
the air inlet or outlet.
room
and
outdoors
shock and malfunction.
★ Don't blow the wind to animals and plants directly.
It may cause a bad influence to them.
★
Select the most appropriate temperature.
Don't apply the cold wind to the body for a long time or
set too low temperature.
Non dirigere l’aria in uscitaDon't
verso
animali,
poapplypiante
the cold o
wind
to the body
for a long time or
treste causare malanni. set too low temperature.
★
It may cause a bad influence to them.
Cautions
Operation
Don't apply thefor
cold wind
to the body for a long time or
Non indirizzare l’aria fredda sul proprio corpo per troppo tempo.
★
Don't use the air conditioner for other purposes, such as
drying clothes, preserving foods, etc.
Keep proper temp
★ Don't blow the wind to animals and plants directly.
Splashing water on the air conditioner may cause electric
shock and malfunction.
set too low temperature.
Don't place a space heater near the air conditio
difference between
room and outdoors
Don't place a space heater near the air conditioner.
★
Don't insert your hands or stick into the air inlet or outlet.
★
★
Don't apply the cold wind to the body for a long time or
Don't place a space heater near the air conditioner.
set too water
low temperature.
Splashing
on the air conditioner may cause electric
shock
and malfunction.
Select the most
appropriate
temperature.
★
★
Don't place a space heater near the air conditioner.
to animals and plants directly.
★ Don't blow theOrwind
CO toxicosis may occur for imcomplete burning
It may cause a bad influence to them.
Don't use the air conditioner for other purposes, such as
drying clothes, preserving foods, etc.
★ Don't strike the glass door with heavy things to
Keep proper temp
Or CO toxicosis may occur for imcomplete burning.
difference between
room and outdoors
★ Don't strike the glass door with heavy things to avoid damage.
Or CO toxicosis may occur for imcomplete burning.
★
Don't apply the cold wind to the body for a long time or
set too low temperature.
Or CO
toxicosis
may heater
occur fornear
imcomplete
burning.
Don't
place
a space
the air conditioner.
★
Don'tuse
apply
the
wind to the
a long time
or as
Don't
the
aircold
conditioner
forbody
otherforpurposes,
such
Don't
placestrike
a space
nearwith
the air
conditioner.
★★
Don't
the heater
glass door
heavy
things to avoid damage
use
for other
as blow
drying
clothes,
preserving
foods,
etc.things to avoid damage.
★ Don't
★theDon't
strike
glass
door directly.
with
heavy
wind
to animals
and
plants
set too
lowthe
temperature.
Splashing
water
onthe
theair
air conditioner
conditioner may
causepurposes,
electric such
★ Don't
It may cause a bad influence to them.
drying
clothes, preserving foods, etc.
shock and
malfunction.
Non posizionare fonti di calore vicino al climatizzatore.
3
3
Or CO toxicosis may occur for imcomplete burning.
★
Don't apply the cold wind to the body for a long time or
★
set too
Don't use
thelow
airtemperature.
conditioner for other purposes, such as
drying clothes, preserving foods, etc.
Or CO toxicosis may occur for imcomplete burning.
Don't use
thenear
air conditioner
for other purposes, such as
★a space
Don't place
heater
the air conditioner.
drying clothes, preserving foods, etc.
★ Don't strike the glass door with heavy things to avoid damage.
3
★ Don't
3 strike the glass door with heavy things to avoid damage.
Non usare il climatizzatore per altri fini come asciugare
vestiti, conservare cibi, etc.
Or CO toxicosis may occur for imcomplete burning.
★
Don't use the air conditioner for other purposes, such as
drying clothes, preserving foods, etc.
★ Don't strike the glass door with heavy things to avoid damage.
Non colpire il climatizzatore con oggetti altrimenti potrebbe danneggiarsi
3
3
3
5
D.25000KOL INV PLUS
Linea commerciale
3 - NOMI DELLE PARTI
UNITA’ INTERNA
⑴
DISPLAY
USCITA ARIA
风速
⑵
功能
模式
开关
⑶
1 - USCITA ARIA
TELECOMANDO
2 - DISPLAY
3 - PANNELLO FRONTALE
4 - CONNESSIONE TUBI
5 - SCARICO CONDENSA
⑹
INGRESSO ARIA
FAN FUNTION
MODE ON/OFF
UNITA’ ESTERNA
INGRESSO ARIA
⑷
⑸
USCITA ARIA
6
6 - NASTRO
MANUALE D’USO
Linea commerciale
Names and Functions of Each Part
Function
Buttons
of Functions
Air Conditioner
Names
and
of
Each Part
4 - FUNZIONI
Notes:The buttons of displayer are touch type,so
they justButtons
need be touched
slightly.
Function
of Air Conditioner
Notes:The buttons of displayer are touch type,so they just need be touched slightly.
Air conditioner
FUNC button
Air conditioner
FUNC button
MODE ON/OFF
FUNC
FAN
FAN
ON/OFF
ON/OFF Button
ON/OFF
●
MODE ON/OFF
FUNC
and
and
Button
ON/OFF
Press this button
to start or stop the
and
is displayed
ON/OFF
Premere questo pulsante per accendere o spegnere
l’unità.Button
Se l’unità vienepressed;meanwhile,LC
spenta le funzioni “SLEEP”
eand
“TIMER”
verranno
Button
unit.In this case,the former timer and
at dual 8 till it blinks 3 times to prompt
cancellate
● Press this button to start orthe
stop
the and then dual 8 pressed;meanwhile,LC
sleeping setting will be cleared.
users,
resumes.
is displayed
unit.In this case,the formerRepressing
timer and
and simultaneously,
at dual 8 till it blinks 3 times to prompt
will show white after startup of
sleeping setting will be cleared.
the shielding will be solvedthe
for users,
normaland then dual 8 resumes.
unit and
show red after
energizQuesto simbolo sarà biancothe
quando
si accende
il climatizzatore
e rosso quando
l’unità
non
è
funzione
display of the unit.
Repressing
and simultaneously,
ation without running. ●
will show white after startup of
Mode
the shielding will be solved for normal
Mode Button
the unit and show red after energizdisplay of the unit.
MODE
ation without running.
Press FAN and simultaneously to set
●
Mode
Press
this
button
to
switch
the
modes:
Premere questo pulsante per cambiare la modalità di funzionamento:
Mode Button
dynamic or static display of fan speed.
●
●
Press FAN and simultaneously to set
dynamic or static display of fan speed.
During dynamic display,press FAN and
Press this button to switch the modes:
●
indicates auto
simultaneously for static display.
indicates cooling
●
dynamic display,press FAN and
During static display,pressDuring
FAN and
AUTO
(automatico)
indicates
auto
simultaneously for static display.
simultaneously for dynamic display.
COOL
(raffreddamento)
indicates
cooling
● During static display,press FAN and
indicates fan
DRY
(deumidificazione)
indicates dry
simultaneously for dynamic display.
indicates heating (no heating mode
FAN
(ventilazione)
indicates
fan
for cooling only unit)
HEAT
(riscaldamento)
indicates
heating (no heating mode
●
indicates dry
Names
and Functions of Each Part
and
and
●
Button
for cooling only unit)
Each press of
or
and ,the setting
temp will increase or decreaseand
1℃ .
Button
℃.Under
The seeting range is 16-30
● Each
press of
or
,the setting
Ad ogni pressione la temperatura
verràthese
incrementata
oinvalid.
decrementata
di 1 °C. Il range di funzionamento è 16 – 30 °C. Sotto
auto mode,
buttons are
temp
will increase or decrease 1 ℃ .
la modalità AUTO questi pulsanti non sono validi
Displayer
The seeting range is 16-30 ℃.Under
Pressing or simultaneously,all
auto mode, these buttons are invalid.
Premere contemporaneamente FAN e
per selezionare il display statico o dinamico per la visualizzazione della ventilazione
functions of buttons on the displayer
(vedi FAN SPEED)
board will be shielded.Then
buzzer
● Pressing
or simultaneously,all
will beep no matter any buuton
is of buttons on the displayer
functions
●
FAN
FAN
board will be shielded.Then buzzer
Fanper
Speed
Button la velocità di will
beep no matter
any buuton
is – LOW – MID – HI (automatica – bassa –
Premere questo pulsante
scegliere
ventilazione
desiderata:
AUTO
media – alta). Questo pulsante non è funzionante per la modalità8deumidificazione
●
Pressing this button to switch the fan speed among AUTO-LOW-MID-HI-AUTO in cycle.
Le velocità possono essere
mostrate
in maniera
dinamica o statica.
This button
is invalid
under dehumidifying
mode.
● Auto,low,mid,high
VISUALIZZAZIONE DINAMICA
8
or super-high fan speed may be displayed in dynamic or static.
● Low fan speed is displayed in dynamic:
LOW
1 tacca
grid
3 tacche
grids
tacche
5 grids
MID
● Mid fan speed is displayed in dynamic:
1tacca
grid
3 tacche
grids
9 tacche
grids
5 tacche
grids
HIGH
● High or super-high fan speed is displayed in dynamic:
1 tacca
grids
3 tacche
grids
tacche
5 grids
9 tacche
grids
●
Low fan speed is displayed in static:
●
Mid fan speed is displayed in static:
●
High or super-high fan speed is displayed in static:
13 tacche
grids
5 grids
9 grids
13 grids
7
● Auto,low,mid,high
●
or super-high
fan speed may be displayed in dynamic or static.
Low fan
speed
is displayed
in dynamic:
This button is invalid
under
dehumidifying
mode.
●
Low
1 grid
fan speed
dynamic:
3 grids is displayed in
5 grids
Auto,low,mid,high or super-high fan speed may be displayed in dynamic or static.
D.25000KOL
INV PLUS
grid fan speed
3 grids displayed in dynamic:
●1Mid
5 grids
Linea commerciale
● Low fan speed
is displayed inisdynamic:
●
1 grid
● Mid
1 grid
●
Mid fan 3speed
displayed5 grids
in dynamic:
1●grid
grids 5isgrids
3 grids
1 grid
9 grids
9 grids
5 grids
grids
or3super-high
fan speed is displayed in dynamic:
● isHigh
fan speed
displayed
in dynamic:
●
High or super-high
fan speed is displayed
9 gridsin dynamic:
VISUALIZZAZIONE
STATICA
1 grids
3 grids
5 grids
3 grids
5 grids
LOW
grids is displayed
5 gridsin dynamic:
High or super-high fan3speed
● Low fan speed is displayed in static:
1 grids
1 grids
3 grids● Low fan5 speed
9 grids
grids
displayedininstatic:
static:
● Mid fan speed isisdisplayed
MID
9 grids
13 grids
9 grids
13 grids
5 tacche
grids
5 grids
9 grids
●
● Mid fan speed is displayed in static:
● High
Low fan speed
is displayed
in static:
or super-high
fan speed is displayed in static:
●
High
or super-high
fan speed is displayed
Mid fan speed is
displayed
in static:
HIGHin static:
9 tacche
grids
5 grids
13 grids
●
9 grids
●
13 grids
High or super-high fan speed is displayed in static:
13 grids
13 tacche
grids
FUNCTION
Quando il climatizzatore è in funzione, premere FUNCTION per selezionare tra le funzioni TURBO, BLOW. HEATER, HEALT,
SLEEP, AIR, UP AND DOWN SWING, LEFT AND RIGHT SWING, DYNAMIC DISPLAY, LIGHT, TIMER, PURIFY, SET, INDOOR,
OUTDOOR and HUMIDITY (non tutte le funzioni sono selezionabili per il modello da Voi acquistato).
Se la funzione desiderata sta lampeggiando, può essere settata tramite e . Se la funzione non viene cambiata entro 5 sec.
(20 sec per lo SWING) è confermata in automatico. Per passare alla successiva premere nuovamente FUNC.
SIGNIFICATO DELLE FUNZIONI
9
SWING VERTICALE
9
Selezionare questa funzione per attivare il flusso di ventilazione verso la zona della stanza desiderata
9
SWING ORIZZONTALE
Selezionare questa funzione per attivare il flusso di ventilazione verso la zona della stanza desiderata
TIMER
Quando l’unità è accesa premere questo tasto per attivare la funzione TIMER in spegnimento (TIMER OFF); quando l’unità è
spenta premere questo tasto per attivare la funzione TIMER in accensione (TIMER ON).
SLEEP
La funzione SLEEP, ossia funzione notturna, permette all’unità di diminuire al minimo la sua capacità di ventilazione, ottimizzando le temperature impostate a seconda della sua modalità di funzionamento.
TURBO
La funzione TURBO permette all’unità di aumentare al massimo la sua capacità di ventilazione, permettendo il raggiungimento
delle temperature molto più rapidamente
BLOW
La funzione BLOW, una volta spenta l’unità interna, permette l’evaporazione della condensa sulla batteria evitando l’eventuale
formazione di muffa. Sotto la funzione BLOW, l’unità si fermerà se FUNC viene premuto.
GLIT
La funzione GLIT permette la visualizzazione della velocità di ventilazione in dinamica
PURITY
La funzione PURITY permette la visualizzazione sul display dell’attuale valore di purezza dell’aria
SET
La funzione SET permette la scelta della temperatura da visualizzare
INDOOR
La funzione INDOOR permette la visualizzazione sul display dell’attuale temperatura nell’ambiente interno
OUTDOOR
La funzione OUTDOOR permette la visualizzazione sul display dell’attuale temperatura nell’ambiente esterno
HUMIDITY
La funzione HUMIDITY permette la visualizzazione sul display dell’attuale valore di umidità presente
LIGHT
La funzione permette l’accensione o lo spegnimento della luce del display
Tutte le funzioni, una volta attivate, verranno mostrate sul display.
8
MANUALE D’USO
Linea commerciale
Operation of Remote Controller
Names and functions of remote control buttons
5 - FUNZIONAMENTO DEL
TELECOMANDO
Note: Be sure that there are no obstructions between receiver and remote controller; Don't drop
or throw the remote control; Don't let any liquid in the remote control and put the remote control
5.1 - Pulsanti del telecomando
directly under the sunlight or any place where is very hot.
Signal
SEGNALE
DItransmitter
TRASMISSIONE
(+/-)
●
FAN
AUTO
(+/-) button
increased by 1℃.Pressing -button,the
setting temp. will be decreased by 1 ℃
The temp. will be changed quickly by pressing
OPER
AIR HEALTH X-FAN
HUMIDITY
FILTER
TURBO
TEMP.
Pressing +button , the setting temp will be
the button continuously .Setting temp. range
is 16~30 ℃。
HOUR
ON/OFF
Names and Functions of
Each Part
FAN
ON/OFF
Remote controller
FAN speed button
Function Buttons
of Air
● Press
thisConditioner
button once,then fan speed will
MODE
change as below:
Notes:The buttons of displayer are touch type,so theyAuto
just need be touched slightly.
FAN
Air conditioner
FUNC button
Low speed
X-FAN
TEMP
TIMER
TURBO
SLEEP
LIGHT
FUNC
FAN
ON/OFF button
ON/OFF
Middle speed
High speed
Note:Under the Dry mode, the fan speed isn't
adjustable, low fan speed is imperative,
but when operating this button, the wireless
remote control
will send
this signal.
MODE
ON/OFF
Swing up and down button
NOTE:
ON/OFF
● Press
this button to start or stop the unit.It will
● Simpleness
and
swing
mode, non
is defaulted for wireless
assicurarsi che non ci siano ostruzioni tra il telecomando
il ricevitore . Non far cadere il telecomando
ON/OFFed
Button
and bagnarlo
Button con
remote control, in this mode, press this button,
timer or sleeping
last time.
alcun liquido e non lasciarlo esposto clear
direttamente
alla lucefunction
solare oofvicino
a fonti di calore.
● Press this button to start or stop the could turn on or turn off the Up and down
pressed;meanwhile,LC is displayed
swing function.
unit.In this case,the former timer and
at dual
till it blinks 3 times
to prompt
●
MODE
ON/OFF
When unit is turned
off,8synchronously
press
sleeping
setting
will be
cleared.
Mode
the users,
andbuttons,
then
dual
resumes.
premere questo pulsante per accendere o spegnere
l’unità.button
Se l’unità
viene
spenta "+"
le funzioni
e swing
“TIMER”
verranno
and Up“SLEEP”
and down
it 8could
cancellate
Repressing
and simultaneously,
the simpleness
swing
● Press this button,
● the running
mode
willafter
change
will show
white
startup of be switched between
mode
and
stationary
swing
mode,
at
this
time,
the
shielding
will
be
solved
for
normal
as below:
the unit and show red after energizdisplay of the unit.
blinks 2 seconds.
MODE
ation without running.
●
premere questo pulsante per cambiare la Mode
modalità di funzionamento:
In Stationary swing mode, press this button,the
Mode Button
angle for Up and down swing as show in below:
AUTO
Press FAN and simultaneously to set
●
Press this button to switch the modes:
dynamic or static display of fan speed.
COOL
DRY
FAN
●
AUTO
(automatico)
indicates
auto
COOL
(raffreddamento)
HEAT (Note:no
for coolling
indicates
cooling
When up and●down swing louver is working,
During dynamic display,press FAN and
when turn off the unit, the siwng louver will
simultaneously for static display.
immediately stop at current position.
During
static
display,press
FAN and
shows up and ●down
swing
louver
swings back
and forth as show
in the above for
figure.
simultaneously
dynamic display.
only(deumidificazione)
unit)
DRY
indicates dry
FAN
(ventilazione)
indicates
fan
HEAT
(riscaldamento)
indicates
heating (no heating mode
for cooling only unit)
and
“+” e “-”
and
12
Button
Each press of
or
,the setting
ad ogni pressione la temperatura verrà incrementatatemp
o decrementata
1 °C. Il 1range
will increase ordidecrease
℃ . di funzionamento è 16 – 30 °C. Sotto
●
la modalità AUTO questi pulsanti non sono validi
FAN SPEED
The seeting range is 16-30 ℃.Under
auto mode, these buttons are invalid.
premere questo pulsante per scegliere la velocità ●di Pressing
ventilazioneordesiderata:
AUTO – LOW – MID – HI (automatica – bassa –
simultaneously,all
media – alta). Questo pulsante non è funzionante per la modalità deumidificazione
functions of buttons on the displayer
board will be shielded.Then buzzer
will beep no matter any buuton is
SWING UP AND DOWN
Utilizzare questa funzione per regolare il flusso di aria verticale secondo la posizione desiderata come mostrato nella figura
seguente.
8
9
D.25000KOL INV PLUS
Linea commerciale
NOTE
il telecomando mostrato è universale; potrebbe quindi essere che alcune funzioni non siano presenti sul modello da Voi acquistato.
HEALTH
la funzione HEALTH non è disponibile per il presente prodotto; una volta premuto il climatizzatore continuerà a funzionare
nella modalità attuale
SAVE
la funzione SAVE non è disponibile per il presente prodotto; una volta premuto il climatizzatore continuerà a funzionare nella
modalità attuale
TURBO
Utilizzare questa funzione per azionare la velocità massima sul vostro climatizzatore; questo vi permetterà di raggiungere le
temperatura in maniera più tempestiva. Questa funzione non è attivabile nelle funzioni auto, deumidificazione e ventilazione.
TIMER
Quando il climatizzatore è acceso, premere questo pulsante per impostare il TIMER in spegnimento, premerlo invece a climatizzatore spento per impostare il TIMER in accensione.
Una volta premuto lampeggerà sul display la scritta HOUR ON/OFF; aiutarsi con i tasti +/- per impostare l’orario di accensione
o spegnimento desiderato (i valori selezionabili sono da 0,5h a 24h).
Definita l’orario desiderato, premere nuovamente il tasto TIMER inviare al climatizzatore l’impulso; la scritta HOUR ON/OFF
smetterà di lampeggiare.
Se il pulsante non viene premuto entro 5 sec o se viene ripigiato il tasto TIMER, la funzione verrà annullata.
TEMP
Quando il climatizzatore è acceso, premere questo pulsante per scegliere la temperatura visualizzata sul display tra: temperatura impostata (
) , temperatura ambiente interna (
), temperatura ambiente esterna (
). Non tutte le temperature
sono visualizzabili dal prodotto da Voi acquistato
NOTE
il telecomando mostrato è universale; potrebbe quindi essere che alcune funzioni non siano presenti sul modello da Voi acquistato.
SLEEP
Premere questo pulsante per attivare il funzionamento notturno. Quando è attiva comparirà l’icona “
”
In modalità COOL/ DRY: dopo un’ora che la funzione SLEEP è stata attivata, la temperatura impostata salirà di 1°C; di 2°C
dopo due ore. Quest’ultima temperatura verrà mantenuta fino alla disattivazione della funzione.
In modalità HEAT: dopo un’ora la funzione SLEEP è stata attivata, la temperatura impostata scenderà di 1°C; di 2°C dopo
due ore. Quest’ultima temperatura verrà mantenuta fino alla disattivazione della funzione
Nelle modalità FAN ed AUTO la funzione SLEEP non può essere attivata
X-FAN
Premere questo pulsante per attivare la funzione, (apparirà la scritta sul display) nelle sole modalità COOL e DRY; l’unità continuerà a ventilare una volta spento il climatizzatore. La funzione non è attiva nelle modalità HEAT , AUTO e FAN.
Note: X- FAN ha la medesima funzionalità della modalità BLOW
10
MANUALE D’USO
Linea commerciale
LIGHT
Premere questo pulsante per attivare o disattivare la luce sul display. Quando è attiva comparirà l’icona “
”
SWING LEFT AND RIGHT
Utilizzare questa funzione per regolare il flusso di aria orizzontale secondo la posizione desiderata come mostrato nella figura
seguente
5.2 - Guida alle operazioni generali
1.
2.
3.
Operation
4.
5.
Premere ON/OFF per accendere il climatizzatore
Premere MODE per selezionare la modalità desiderata
+/- per selezionare la temperatura (in modalità AUTO la temperatura non è impostabile)
ofPremere
Remote
Controller
Premere
FAN per
selezionare la velocità desiderata
Premere
e
per scegliere la direzione dell’aria ottimale
Guide
for for
operation-general
Guide
operation-generaloperation
operation
ss ON/OFF button to start the unit after powering
main unit on.(Note: Power the unit on every time,
Operation of Remote Controller
big -guide louver and small-guide louver will be
sed firstly.)
Guide
for for
operation-general
Guide
operation-generaloperation
operation
ss MODE button to select desired running mode.
ss
button
start
the unit
after powering
ss ON/OFF
+/ - button
to settothe
desired
temperature
.
main unit on.(Note: Power the unit on every time,
unnecessary to set the temperature at AUTO mode)
big -guide louver and small-guide louver will be
ess FAN button to set fan speed, the AUTO FAN,
sed
firstly.
W, MID
or) HIGH could be selected.
ss MODE
button
desired
mode.
ess
button
andto select
button
to setrunning
swing mode.
ss +/ - button to set the desired temperature.
unnecessary to set the temperature at AUTO mode)
ON/OFF
MODE
FAN
X-FAN
ON/OFF TEMP
TURBO
MODE
TIMER
SLEEP
LIGHT
TEMP
TIMER
FAN
X-FAN
ess FAN button to set fan speed, the AUTO FAN,
TURBO
SLEEP
LIGHT
5.3
- Guida
alle
operazioni opzionali
W, MID or
HIGH
could be
selected.
Guide for operation-optional operation
ess
button and
button to set swing mode.
1.
Premere SLEEP per attivare la funzionalità
ess SLEEP
button,
set
the
mode.
2.
Premeresleep
TIMER
per selezionare l’orario di spegnimento (o accensione)
MODE
ON/OFF
3.
Premere LIGHT per attivare o disattivare la lice del display
ss TIMER
press
+/- per
button,
to setlathe
4.button, then
Premer
X-FAN
attivarne
funzionalità
5. on or timer
Premere
eduled timer
off. TURBO per accelerare il raggiungimento della temperatura
FAN
Guide for operation-optional operation
ess light button to control displayer light on or off.
ss SLEEP button, set the sleep mode.
ess X-FAN button to set X-FAN function on or off.
X-FAN
TIMER
ON/OFF TEMP MODE
ss TIMER button, then press +/- button, to set the
ess turbo button to set this function on or off.
duled timer on or timer off.
TURBO
SLEEP
LIGHT
X-FAN
TEMP
TIMER
TURBO
SLEEP
LIGHT
FAN
ss light button to control displayer light on or off.
ess X-FAN button to set X-FAN function on or off.
ess turbo button to set this function on or off.
Introduction for special function
About X-FAN function
function indicates that moisture on evaporator of indoor unit will be blowed after the unit
opped to avoid mould.
aving set X-FAN function
on: After turning
off the function
unit by pressing ON/OFF button
Introduction
for special
ndoor fan will continue running for about 10 min. at low speed. In this period,
About
X-FAN
function
ress
X-FAN
button
to stop indoor fan directly.
unction
indicates
that moisture
on evaporator
of indoor
will beON/OFF
blowed after
the unit
aving set
X-FAN function
off: After
turning off the
unit byunit
pressing
button,
opped to avoid mould.
he complete unit will be off directly.
aving set X-FAN function on: After turning off the unit by pressing ON/OFF button
ndoor fan will continue running for about 10 min. at low speed. In this period,
15
ress X-FAN button to stop indoor fan directly.
11
D.25000KOL INV PLUS
Linea commerciale
5.4 - Istruzione sulle funzioni speciali
X-FAN
La funzione X-FAN permette l’evaporazione della condensa sulla batteria evitando l’eventuale formazione di muffa dovuta
all’umidità. Una volta spenta l’unità la ventilazione continuerà a funzionare alla minima velocità per circa 10 min o affinché non
si prema nuovamente il pulsante X-FAN.
AUTO RUN
Quando viene selezionata la modalità AUTO, la temperatura non sarà selezionabile e quindi mostrata sul display, l’unità selezionerà la modalità di utilizzo in base alla temperatura ambiente per rendere l’ambiente più confortevole.
TURBO
Quando la funzione viene selezionata, l’unità girerà ad una velocità di ventilazione elevata per far raggiungere rapidamente le
temperature impostate sia in freddo che in caldo.
LOCK
Operation of Remote Controller
Premere simultaneamente i pulsanti + e – per bloccare o sbloccare la tastiera. Se la tastiera verrà bloccata verrà visualizzata
Changing batteries and notices
l’icona
, e nessun tasto darà la propria funzionalità.
1.Slightly to press the place with
along the arrowhead
direction to push the back cover of remote controller.
DEFROSTING
(H1)
(As show in Fig
1. )
Dopo aver acceso il climatizzatore in modalità HEAT , l’unità potrebbe andare sotto la modalità DEFROST (sbrinamento),
2.Take
out
the
old
batteries,
insert twosulla
AAAunità
alkaline
funzione utile per eliminare
il gelo presente
esterna migliorando l’efficienza del vostro climatizzatore. Se spegnete
cells.
(As
show
in
Fig
2.)
l’unità dal telecomando o provate a cambiare modalità di funzionamento l’unità porterà prima a termine la funzione di DE3.Attach the back cover of remote control.
FROST.
Operation of Remote Controller
NOTE:
5.5 -● Cambio
batterie
When changing the batteries, do not use the old or
Changing batteries and notices
different batteries, otherwise, it can cause the malf1.Slightly to press the place with
along the arrowhead
unction of the wireless remote control.
direction to push the back cover of remote controller.
(As show in Fig 1. )
● If the wireless remote control will not be used for a
2.Take out the old batteries, insert two AAAlong
alkaline
time, please take them out, and don't let the
cells. (As show in Fig 2.)
leakage liquid damage the wireless remote control.
3.Attach the back cover of remote control.
● The operation should be in its receiving range.
●
NOTE:
●
It should be placed where is 1m away from the TV
sound sets.
When changing the batteries, do not use set
the or
oldstereo
or
Fig.1
Fig.2
different batteries, otherwise, it can cause
Fig.1
● If the
the malfremote control cannot
operate normally, please
unction of the wireless remote control.
●
●
●
●
take the batteries out, and then reinsert it 30s later; if
it is also
If the wireless remote control will not be used
for aabnormal ,please replace the batteries.
1. don't letPremere
leggermente la posizione con
e far slittare la cover posteriore (vedi Fig. 1)
long time, please take them out, and
● If thethe
main unit
needsvecchie
to be remote
controlled,
please
2.
Togliere
le batterie
ed inserire
2 batterie
alcaline tipo AAA (vedi Fig. 2)
leakage liquid damage the wireless remote
control.
aimRiposizionare
remote controller
at the
receiver of main unit in order
3.
la cover
posteriore
to improve the receiving sensitivity of the main unit.
The operation should be in its receiving range.
NOTE
● When
It should be placed where is 1m away
from
the TV
the remote controller sends out signal, a mark
Fig.2
set or stereo sound sets.
will flicker for about 1s. The
bell will ring if the main unit
•
Quando si cambiano le batterie, non utilizzare delle batterie vecchie o di diverso tipo, altrimenti potrebbero
receives
effective
signal.
normally,
verificarsi
If the remote control cannot operate
please dei malfunzionamenti
take the batteries out, and then reinsert it 30s later; if
•
Se il telecomando non viene utilizzato per parecchio tempo si consiglia di togliere le batterie; questo per evitare
it is also abnormal ,please replace the batteries.
che la fuoriuscita di liquidi provochi danni al vostro telecomando
●
If the main unit needs to be remote•controlled,
please
Tutte
le operazioni sono selezionabili all’interno del range di funzionamento del telecomando
aim remote controller at the receiver of main unit in order
Il telecomando
deve essere posizionato ad almeno 1 m da TV o stereo
to improve the receiving sensitivity•of the main
unit.
●
il telecomando non opera in maniera corretta, provare a togliere le batterie per almeno 30 sec. Se il
When the remote controller sends •
out signal,Se
a mark
problema non è risolto, si prega di provare a rimpiazzare le batterie
will flicker for about 1s. The bell will ring if the main unit
receives effective signal.
12
•
Per migliorare la trasmissione dei dati dal telecomando all’unità, puntare il telecomando verso il ricevitore.
•
Quando il telecomando invia segnali, l’icona lampeggerà per circa 1 sec.
17
MANUALE D’USO
Linea commerciale
6 - INIZIO E FINE OPERAZIONI
6.1 - Ad inizio operazioni
1.
Quando l’unità interna è accesa, il pannello scorrevole traslerà automaticamente verso il basso
2.
Se il pannello scorrevole è completamente aperto, l’oscillazione orizzontale potrà iniziare il suo flusso e la
ventilazione interna comincerà a girare
6.2 - A fine operazioni
1.
Quando l’unità è spenta, l’oscillazione scorrevole si posizionerà automaticamente in una specifica posizione.
2.
Se le alette per l’oscillazione verticale si fermano, il pannello scorrevole si chiuderà automaticamente
Avviso:
1.
Non cercare mai di muovere manualmente il pannello scorrevole
2.
Se manca l’alimentazione il pannello scorrevole manterrà la posizione attuale.
3.
Se viene visualizzato l’errore FC, significa che c’è un malfunzionamento sul pannello scorrevole. Provare a
effettuare un operazione di restart sul prodotto. Se dovesse persistere contattare l’Assistenza Tecnica
4.
Se l’unità funzionerà per un lungo periodo in modalità freddo, si formerà della condensa sulla porta scorrevole,
è normale.
13
D.25000KOL INV PLUS
Linea commerciale
7 - MANUTENZIONE
Attenzione
1.
Clean and Care
Togliere l’alimentazione prima di iniziare ad effettuare pulizia sul prodotto, altrimenti potrebbero verificarsi
scariche
elettriche
Clean
and
Care
Caution
2.
Mai spruzzare acqua sull’unità interna per effettuare la pulizia, altrimenti potrebbero verificarsi scariche elettriche
1.Turn power off and pull out the power
plug before cleaning air conditioner,or it may
Caution
electric shock.
3. 1.Turn power
Noncause
utilizzare
benzina,
utilizzare
panno inumidito
con acqua e detersivo neutro
off andprodotti
pull out aggressivi
the powercome
plug before
cleaning
airun
conditioner,or
it may
2.Never sprinkle water on the indoor unit and the outdoor unit for cleaning because it
cause electric
shock.
can cause electric shock.
Clean and Care2.Never sprinkle
the thinner
indoor unit
and the outdoor
unit for
because itwipe the units
3.Volatilewater
liquidon(e.g.
or gasoline)
will damage
thecleaning
air conditioner,so
cause
electric
shock.
7.1 can
- Pulizia
dell’unità
with
a dry soft
cloth, or a cloth slightly moistened with water or cleanser.
3.Volatile liquid (e.g.
thinner or gasoline) will damage the air conditioner,so wipe the units
Caution
with a dry soft cloth, or a cloth slightly moistened with water or cleanser.
1.Turn
power
off and
pull out the power plug before cleaning air conditioner,or it may
Clean
and
Care
the unit
1.
Spegnere il prodotto attendere che Clean
la ventilazione
finisca di girare e togliere l’alimentazione
cause electric shock.
Clean
the unit
2.Never sprinkle water on the indoor unit and the outdoor unit
for cleaning
because it
2.
Utilizzare
un panno
asciutto per la pulizia. Se la vostra unità è molto sporca immergere un panno
①
Cut power
offmorbido
beforeecleaning
Caution
can cause electric shock.
in acqua
e damage
detersivothe
neutro
(non utilizzare acqua
conunits
temperature superiori ai 40°C) e pulire bene il prodotto
3.Volatile
liquid
(e.g.
thinner
or
gasoline)
will
air
conditioner,so
wipe
the
①
Turn
off
the
air
switch
after
unit stops running.
1.Turn power off and pull out the
plug
cleaning
air conditioner,or
it may
Cutpower
power
offbefore
before
cleaning
with
a
dry
soft
cloth,
or
a
cloth
slightly
moistened
with
water
or
cleanser.
cause electric shock. 3.
Non
sull’unità
questo potrebbe danneggiare i circuiti elettronici all’interno del prodotto.
Turn off
thespruzzare
air switchacqua
after unit
stopsinterna,
running.
Use
cloth when
cabinetit
2.Never sprinkle water on the indoor
andsoft
the outdoor
unit forcleaning
cleaning because
②unit
Dry the cloth
can cause electric shock.
before cleaning
If thethe
unitunit
is very dirty, dip cloth into warm water
Clean
Use
soft
cloth
when
cleaning
cabinet
②or gasoline) will damage the air conditioner,so wipe the units
Dry the cloth
3.Volatile liquid (e.g. thinner
and
the
before
cleaning it.
before cleaning
If the
unitbelow
ismoistened
very40℃
dirty,with
dip dry
cloth
into
warm
water
with a dry soft cloth, or a cloth
slightly
water
orcloth
cleanser.
① Cut power off before cleaning
(As shown
Fig.7)
below 40℃
and dryinthe
cloth before cleaning it.
Turn off the air switch after(As
unitshown
stops in
running.
Fig.7)
风速
功能
模式
Clean
the unit
③ Don't
spray water on indoor unit
风速
开关
功能
模式
开关
Spraying
water
damage
microcomputer
and
Use soft cloth when cleaning
cabinet
Don't spray
water
onwillindoor
unit
Dry the
cloth
①②
Cut power off before③
cleaning
before cleaning
board
in the unit
(As shown in
Fig.7)
If the unit is very dirty, dip cloth
into circuit
warm
Spraying
waterwater
will damage
microcomputer
and
Turn
off 40℃
the airand
switch
unit stops
running.
below
dry after
the cloth
before
cleaning
it.
circuit board in the unit (As shown in Fig.7)
(As shown in Fig.7)
② Use soft cloth when cleaning cabinet
unitspray
is very water
dirty, dipon
cloth into warm
water
③If the
Don't
unitdei
7.2indoor
- Pulizia
filtri
Dry the cloth
before cleaning
风速
功能
模式
开关
Fig.7
Fig.7
Clean the air filter(once every 2 weeks)
below
and dry
cloth before
cleaning and
it.
40℃water
Spraying
will the
damage
microcomputer
the8)air
filter(once every 2 weeks)
(Ascircuit
shown
in Fig.7)
Togliere
il filtroClean
(vedi
Fig.
board
in the unit1.
(As shown
inDisassembly
Fig.7)
of air
filter.
①
Togliere il fermo (punto 1) svitando la vite. Dopodiché aprire il pannello frontale, svitare le viti che fermano il filtro
③ Don't spray water on ①
indoor
As shown
in Fig.8,take
the decorative
at 1) position ,
Disassembly
of
filter
eunit
sfilare
lo air
stesso
seguendoout
le frecce
mostrate strip
in figura.
Fig.7
and
unscrew
the
screw.After
opening
the
glass
panel, unscrew
Spraying water will damage microcomputer
and
As shown in Fig.8,take out the decorative strip at 1) position
2. shown in
Pulizia
circuit board in the unit (As
Fig.7)
the screws
fixing theopening
air filter.At
pull out the
air filter from
and unscrew
therimosso
screw.After
thelast
glass
the
volta
dalla2propria
sede,
pulirepanel
il filtrounscrew
con l’ausilio di un aspirapolvere o in caso di sporco
Clean
airUna
filter(once
every
weeks)
persistente
acqua elast
un detersivo
neutro.
Dopodiché
thefixing
arrowtramite
direction.
the screws
the
air filter.At
pull out the
air filter
from reinserire il filtro nella propria sede come da Fig. 8
Fig.7
arrow
direction.
① Disassembly of air filterNote:the
non
esporre
il
filtro
a
luce
solare
diretta
o
vicino
a
fonti
di calore, potrebbe deformarsi
Cleaning
the
filter
②
As shown in Fig.8,take out the decorative strip at 1) position ,
Clean ②
theCleaning
air filter(once
every
2 weeks)
Slightly
the filter
or clean the filter with electric
the filterflat
Fig.8
and unscrew the screw.After opening the glass panel unscrew
cleaner.If
too
much
dust
on
the
filter,clean
it
with
Slightly flat the filter or clean the filter with electric
Fig.8
the screws fixing
the air filter.At last apull
outneutral
the airdetergent
filter fromor warm water.After that,
of air filter
① Disassembly
little
cleaner.If too
much dust
on the filter,clean it with
arrowindirection.
dry the
filter
and
it,as shownthat,
in Fig.8.
Asthe
shown
Fig.8,take out the
decorative
strip
at 1)
position
a little
neutral
detergent
orreinstall
warm, water.After
风速
功能
模式
开关
and unscrew the screw.After opening
the glass
panel unscrew
dry the filter
andDo
reinstall
it,as
shown
NOTE:
not dry
the
filter in
byFig.8.
exposing it under direct
the screws fixing the air filter.At last pull out the air filter from
sunshine
or
near
a heating
oven, it
orunder
it maydirect
get deformed.
NOTE:
Do
not dry
the
filter
by exposing
Slightly flat the filter or clean
the filter
with
electric
Fig.8
the arrow direction.
cleaner.If too much dust onsunshine
the filter,clean
it
with
or near a heating oven, or it may get deformed.
a little neutral
detergent or warm water.After that,
the filter
② Cleaning
dry the filter and reinstall it,as shown in Fig.8.
Slightly flat the filter or clean the filter with electric
21
Fig.8
NOTE: Do
drydust
theon
filter
exposing
it under direct
cleaner.If
toonot
much
theby
filter,clean
it with
21
a little
neutral
or warm
water.After
sunshine
ordetergent
near a heating
oven,
or it maythat,
get deformed.
dry the filter and reinstall it,as shown in Fig.8.
② Cleaning the filter
NOTE: Do not dry the filter by exposing it under direct
sunshine or near a heating oven, or it may get
21deformed.
21
14
MANUALE D’USO
Linea commerciale
7.3 - Controlli prima dell’uso
1.
Controllare che non ci siano ostruzioni davanti alla mandata o la ripresa di aria del prodotto
2.
Controllare che l’impianto di messa a terra sia appropriatamente collegato
3.
Controllare che le batterie del climatizzatore siano in buone condizioni
4.
Controllare che la posizione dove è installata l’unità esterna sia ancora in buone condizioni altrimenti
contattare immediatamente il vostro installatore.
7.4 - Manutenzione dopo l’uso
1.
Togliere l’alimentazione
2.
Pulire l’unità interna ed esterna
3.
Eliminare qualsiasi ingombro davanti all’unità esterna
4.
Riverniciare le parti arrugginite sull’unità esterna per prevenirne la diffusione
15
D.25000KOL INV PLUS
Linea commerciale
8 - RISOLUZIONE DEI PROBLEMI
Attenzione
Non cercare di riparare il condizionatore da soli, potrebbe verificarsi scariche elettriche o incendi.
Si prega di fare riferimento alle seguenti situazioni prima di contattare il Servizio Assistenza Tecnica.
PROBLEMI
CAUSE
Il prodotto non parte immediatamente
Una volta spento il condizionatore, non riprenderà il suo funzionamento
per almeno 3 min.
C’e’ un insolito odore in uscita dal condizionatore
L’unità non rilascia particolari odori, con tutta probabilità sono odori accumulati dall’ambiente stesso e protratti tramite la ventilazione. Provare
a sanificare i filtri o altrimenti a pulire il climatizzatore
Si sente il rumore di un flusso d’acqua
Il rumore sentito potrebbe far riferimento al passaggio del gas sulla
batteria refrigerante interna
In modalità freddo qualche volta si vede del
vapore
Questo è un fenomeno che può accadere soprattutto se la temperatura e l’umidità nell’ambiente sono elevate ed il raffreddamento avviene
rapidamente
Si sente un cigolio quando si accende o si
spegne il prodotto
Questo è causato dalla deformazione della plastica dovuta al cambio di
temperatura
L’unità non parte
La corrente è stata staccata?
È scattato il circuito di protezione?
La tensione è troppo alta o bassa? (contattare uno specialista)
Il raffreddamento (riscaldamento)non e’
efficiente
La temperatura impostata è adatta?
L’uscita o l’ingresso dell’aria è ostruito?
I filtri sono sporchi?
Le porte e finestre sono chiuse?
La ventola è alla minima velocità?
E’ presente qualche fonte di calore nell’ambiente?
Il telecomando non funziona
È al di fuori della sua portata?
La trasmissione è stata disturbata da altri segnali, togliere alimentazione
e ridarla dopo 3 min.
Controllare le batterie del telecomando
Controllare se il telecomando è danneggiato
C’è una perdita d’acqua dall’unità interna
L’umidità nell’ambiente è troppo elevata
La connessione del tubo di drenaggio ha una perdita
C’è una perdita d’acqua dall’unità esterna
In modalità COOL, i rubinetti dove scorre il gas sono molto freddi ed è
possibile che a contatto con l’ambiente estivo essi gocciolino.
Durante lo sbrinamento, la brina scongelata porterà ad una fuoriuscita
di acqua.
L’unità interna non ventila
In modalità HEAT, se la temperatura dello scambiatore è bassa, la ventilazione non protrarrà aria per non inserire nell’ambiente aria fredda.
In modalità HEAT se la temperatura esterna è troppo bassa, entrerà in
funzione la procedura di sbrinamento che durerà all’incirca per 10 min;
durante questa operazione la ventilazione interna sarà bloccata
Si forma dell’umidità sulla griglia interna
Se l’unità lavora in un ambiente dove l’umidità è troppo levata potrebbe verificarsi la formazione di gocce di umidità sulla griglia
In caso si verifichino le seguenti problematiche contattare immediatamente personale qualificato.
•
•
•
•
•
16
C’è un rumore molto forte durante il funzionamento
Viene emesso un terribile odore durante il funzionamento
C’è una continua perdita d’acqua nella stanza
Il circuito di protezione scatta continuamente
Viene spruzzata dell’acqua sull’unità o inserito qualcosa all’interno del condizionatore
MANUALE D’USO
Linea commerciale
9 - CARATTERISTICHE TECNICHE
Codice
D.25000KOL INV PLUS
Caratteristiche Tecniche
Refrigerante
Classe di efficienza energetica estiva
Classe di efficienza energetica invernale
Tensione di alimentazione 50 Hz
Range temperatura ambiente per il funzionamento
Capacità di raffreddamento max
Capacità di raffreddamento standard
Capacità di raffreddamento min
Potenza assorbita max/standard/min
Capacità di riscaldamento max
Capacità di riscaldamento standard
Capacità di riscaldamento min
Potenza assorbita max/standard/min
Rumorosità Unità Interna
Rumorosità Unità Esterna
Sbrinamento automatico
Diametro tubi lato liquido
Diametro tubi lato gas
U.E. precaricata fino a lunghezza tubi
Lunghezza tubi massima
Dislivello max tubi
Ricarica aggiuntiva
Dimensioni Unità Interna HxLxP
Peso Unità Interna
Dimensioni Unità Esterna HxLxP
Peso Unità Esterna
Conformità alle norme
gas
EER > 3,25
COP > 3,60
V
°C
W
W
W
W
W
W
W
W
dB (A)
dB (A)
”
”
m
m
m
g/m
mm
kg
mm
kg
R410A
A
A
220-240 V
- 7 + 43
8300
7030
2500
3600/2190/800
9400
7800
1600
3600/2180/550
47/44/40
56
SI
1/4
5/8
5
20
10
30
540x1790x320
52
980x790x440
65
CE
17
D.25000KOL INV PLUS
Linea commerciale
10 - GARANZIA
Gentile Cliente,
La ringraziamo per aver acquistato un prodotto Diloc certi che ne rimarrà soddisfatto. Qualora il prodotto necessiti di interventi
in garanzia, La invitiamo a rivolgersi al rivenditore presso il quale ha effettuato l’acquisto oppure ad uno dei nostri centri di
assistenza autorizzati dislocati nella CEE e riportati sugli elenchi telefonici e sui cataloghi dei nostri prodotti. Prima di rivolgersi
al rivenditore o alla rete di assistenza autorizzata, Le consigliamo di leggere attentamente il manuale d’uso e manutenzione.
Garanzia.
Con la presente, Diloc garantisce il prodotto da eventuali difetti di materiali o di fabbricazione per la durata di 24 mesi e copre
le sole parti di ricambio e la manodopera compreso il diritto di chiamata del tecnico dei primi 12 mesi.
Qualora durante il periodo di garanzia si riscontrassero difetti di materiali o di fabbricazione, le consociate Diloc, i Centri di
assistenza Autorizzati o i Rivenditori autorizzati situati nella CEE, provvederanno a riparare o (a discrezione della Diloc) a sostituire il prodotto o i suoi componenti difettosi, nei termini ed alle condizioni sotto indicate, senza alcun addebito per i costi di
manodopera o delle parti di ricambio. Diloc si riserva il diritto (a sua unica discrezione) di sostituire i componenti dei prodotti
difettosi o prodotti a basso costo con parti assemblate o prodotti nuovi o revisionati.
ATTENZIONE
L’intervento sarà effettuato solo in luoghi di facile e sicuro accesso, in caso contrario verranno addebitati i costi relativi. Leggere attentamente i casi di decadenza garanzia sotto riportati.
ondizioni.
C
1.
Questa garanzia avrà valore solo se il prodotto difettoso verrà presentato unitamente alla fattura di vendita o di un’attestazione del rivenditore (riportante la data di acquisto, il tipo di prodotto e il nominativo del rivenditore) accompagnata dallo scontrino fiscale.
Diloc si riserva il diritto di rifiutare gli interventi in garanzia in assenza dei suddetti documenti o nel caso in cui le informazioni ivi contenute siano incomplete o illeggibili.
2.
La presente garanzia non copre i costi e/o gli eventuali danni e/o difetti conseguenti a modifiche o adattamenti apportati al prodotto, senza previa autorizzazione scritta rilasciata da Diloc, al fine di conformarlo a norme tecniche o di
sicurezza nazionali o locali in vigore in Paesi diversi da quelli per i quali il prodotto era stato originariamente progettato
e fabbricato.
3.
La presente garanzia decadrà qualora l’indicazione del modello o del numero di matricola riportata sul prodotto siano
stati modificati, cancellati, asportati o comunque resi illeggibili.
.
4
Sono esclusi dalla garanzia:
a. Gli interventi di manutenzione periodica e la riparazione o sostituzione di parti soggette a normale usura e logorio;
b. Qualsiasi adattamento o modifica apportati al prodotto, senza previa autorizzazione scritta da parte di Diloc per potenziare le prestazioni rispetto a quelle descritte nel manuale d’uso e manutenzione;
c. Tutti i costi dell’uscita del personale tecnico e dell’eventuale trasporto dal domicilio del Cliente al laboratorio del Centro di Assistenza e viceversa, nonché tutti i relativi rischi;
d. Danni conseguenti a:
- Uso improprio, compreso ma non limitato a: (a) l’impiego del prodotto per fini diversi da quelli previsti oppure l’inosservanza delle istruzioni Diloc sull’uso e manutenzione corretti del prodotto, (b) installazione o utilizzo del prodotto non conformi alle norme tecniche o di sicurezza vigenti nel Paese nel quale viene utilizzato;
- Interventi di riparazione da parte di personale non autorizzato o da parte del Cliente stesso;
- Eventi fortuiti, fulmini, allagamenti, incendi, errata ventilazione o altre cause non imputabili alla Diloc;
- Difetti degli impianti o delle apparecchiature ai quali il prodotto fosse stato collegato.
5.
Questa garanzia non pregiudica i diritti dell’acquirente stabiliti dalle vigenti leggi nazionali applicabili, né i diritti del
Cliente nei confronti del rivenditore derivanti dal contratto di compravendita.
Servizio Assistenza Tecnica
In caso di guasto sul prodotto, fare richiesta d’intervento solo ed esclusivamente alla Naicon srl, compilando l’apposito modulo in allegato al presente manuale oppure scaricandolo direttamente dal nostro sito internet www.naicon.com all’interno
della pagina riguardante i prodotti del Brand Diloc nella sezione Service. I riferimenti per l’invio della richiesta d’intervento si
trovano all’interno del modulo stesso.
Si richiede gentilmente la compilazione del modulo in ogni suo campo per riuscire così a garantire tempistiche di intervento
sicure e veloci. In caso di errori di compilazione l’azienda Naicon non si farà carico dei costi del Servizio Tecnico non preventivati quali uscite superflue dovute a modelli, numeri di serie, errori o quanto d’altro trascritto in maniera non corretta sullo
stesso modulo.
18
MANUALE D’USO
Linea commerciale
INDICE
1 - INTRODUZIONE
2
2 - PRECAUZIONI PER L’USO
2
3 - NOMI DELLE PARTI
6
4 - FUNZIONI
7
5 - FUNZIONAMENTO DEL TELECOMANDO
9
5.1 - Pulsanti del telecomando
5.2 - Guida alle operazioni generali
5.3 - Guida alle operazioni opzionali
5.4 - Istruzione sulle funzioni speciali
5.5 - Cambio batterie
9
11
11
12
12
6 - INIZIO E FINE OPERAZIONI
13
6.1 - Ad inizio operazioni
6.2 - A fine operazioni
13
13
7 - MANUTENZIONE
14
7.1 - Pulizia dell’unità
7.2 - Pulizia dei filtri
7.3 - Controlli prima dell’uso
7.4 - Manutenzione dopo l’uso
14
14
15
15
8 - RISOLUZIONE DEI PROBLEMI
16
9 - CARATTERISTICHE TECNICHE
17
10 - GARANZIA
18
19
Naicon srl Via il Caravaggio, 25 Trecella
I-20060 Pozzuolo Martesana - Milano (Italy)
Tel. +39 02 95.003.1 Fax +39 02 95.003.313
www.naicon.com e-mail: [email protected]