1
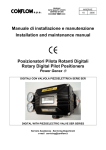
M/PPR/EPR/I/E 03 2004 Manuale di installazione e manutenzione Installation and maintenance manual Posizionatori Pilota Rotanti Rotary Pilot Positioners Power Genex PNEUMATICI SERIE PPR ELETTROPNEUMATICI SERIE EPR PNEUMATIC SERIES PPR ELECTROPNEUMATIC SERIES EPR Servizio Assistenza - Servicing Department e-mail [email protected] INDICE INDEX Pag. Page 1 DESCRIZIONE 1 1 DESCRIPTION 1 2 DATI TECNICI TIPO PPR 1 2 TECHNICAL DATA type PPR 1 3 DATI TECNICI TIPO EPR 1 3 TECHNICAL DATA type EPR 1 4 INFORMAZIONI SICUREZZA GENERAL AND SAFETY INFORMATION 1 5 POSITIONER–ACTUATOR COUPLING 2 5.1 ACCOPPIAMENTO POSIZIONATORE ATTUATORE Funzionamento ad azione rovescia 2 5.1 Reverse acting operation 2 5.2 Funzionamento ad azione diretta 2 5.2 Direct acting operation 2 6 INSTALLAZIONE SU PISTONE 3 6 INSTALLATION ON PISTON 3 6.1 Settaggio della indicatore camma 3 6.1 Cam and indicator adjustment 3 7 CONNESSIONI ELETTRICHE PNEUMATICHE 7 PNEUMATIC CONNECTIONS 8 AVVIAMENTO 5 8 START-UP 5 9 OPERAZIONE AUTO - MANUALE 5 9 AUTO – MANUAL OPERATION 5 10 REGOLAZIONE VELOCITA’ VALVOLA PILOTA 6 10 OPTIONAL RESTRICTED PILOT VALVE ORIFICES 6 10.1 Manutenzione valvola pilota 6 10.1 Pilot valve maintenance 6 11 ANOMALIE DI FUNZIONAMENTO 7 11 TROUBLES SHOOTING 7 12 RICAMBI 8 12 SPARE PARTS 8 GENERALI e del DI disco ED 1 2 4 4 5 AND ELECTRIC 4 1 – DESCRIZIONE 1 – DESCRIPTION PPR e EPR sono posizionatori a semplice e doppio effetto con segnale in entrata 3-15 psi e 4 –20 mA per il controllo proporzionale di attuatori rotanti. Gli apparecchi confrontano il segnale proveniente dall’unità regolante con l’angolo di rotazione dello stelo inviando un segnale amplificato che agisce sulle camere dell’attuatore. PPR and EPR are simple or double acting positioners with input signal 3-15 psi and 4 – 20 mA for proportional control of pneumatic rotary actuators. The positioners operate by comparision of the signal, coming from the control unit, with the angular rotation of the stem, and conveys a positioning amplified pressure to the valve actuator. 2- DATI TECNICI tipo PPR : 2- TECHINICAL DATA type PPR : Produzione Segnale di Ingresso Split range Alimentazione Aria Corsa Nominale Connessioni Pneumatiche Temperatura Ambiente Linearità Sensibilità Isteresi Ripetibilità Consumo d’aria Capacità Peso Waterproof IP 66 3 - 15 psi … 0.2 – 1.0 bar Disponibile 1.4 … 7 bar (20 … 100 psi) 0 … 100 ° Unica molla 1/4” NPT -20 ° … +80 °C Entro +/- 1.5 % fondo scala Entro 0.5 % fondo scala Entro 1.0 % fondo scala Entro +/- 0.5 % fondo scala 5 LPM (supply 1.4 bar) 80 LPM (supply 1.4 bar) 2.1 Kg Protection Input Signal Split range Supply Air Pressure Standard stroke Connessioni pneumatiche Ambient Temperature Linearity Sensitivity Hysteresis Repeatibility Air consumption Flow capacity Weight 3 - DATI TECNICI tipo EPR : TIPO EPR Tipo EPR-EX Segnale di Ingresso Impedenza entrata Split range Alimentazione Aria Corsa Nominale Connessioni Pneumatiche Connessioni Elettriche Temperatura Ambiente Linearità Sensibilità Isteresi Ripetibilità Consumo d’aria Capacità Peso senza terminal box Peso con terminal box – EX o con trasmettitore di posizione Waterproof IP 66 3 - 15 psi … 0.2 – 1.0 bar Available 1.4 … 7 bar (20 … 100 psi) 0 … 100 ° Unic spring 1/4” NPT -20 ° … +80 °C Within +/- 1.5 % F.S. Within 0.5 % F.S. Within 1.0 % F.S. Within +/- 0.5 % F.S. 5 LPM (supply 1.4 bar) 80 LPM (supply 1.4 bar) 2.1 Kg 3- TECHINICAL DATA type EPR : Waterproof IP 66 Flameproof – Exmd IIB T6 Sicurezza Intrinseca – Exia IIB T6 4 – 20 mA Ui ≤ 30 V li ≤ 100 mA Pi ≤ 0,75 W 235 +/- 15 Ω Disponibile 1.4 … 7 bar (20 … 100 psi) 0 … 100 % Unica molla ¼” NPT PG16 su attacco ½” NPT -20 ° … +70 °C Entro +/- 1.5 % fondo scala Entro 0.5 % fondo scala Entro 1.0 % fondo scala Entro +/- 0.5 % fondo scala 5 LPM (supply 1.4 bar) 80 LPM (supply 1.4 bar) 2.1 Kg Type EPR Type EPR-EX Input Signal Input resistance - impedance Split range Supply Air Pressure Standard stroke Connessioni pneumatiche Electric Connections Ambient Temperature Linearity Sensitivity Hysteresis Repeatibility Air consumption Flow capacity Weight without terminal box Weight with terminal - EX box or with position transmitter 2.9 Kg Waterproof IP 66 Flameproof – Exmd IIB T6 Intrinsic Safety – Exia IIB T6 4–20 mA Ui ≤ 30 V li ≤100mA Pi ≤ 0,75 W 235 +/- 15 Ω Available 1.4 … 7 bar (20 … 100 psi) 0 … 100 % Unic spring ¼” NPT PG16 on connection ½” NPT -20 ° … +70 °C Within +/- 1.5 % F.S. Within 0.5 % F.S. Within 1.0 % F.S. Within +/- 0.5 % F.S. 5 LPM (supply 1.4 bar) 80 LPM (supply 1.4 bar) 2.1 Kg 2.9 Kg 4 – INFORMAZIONI GENERALI DI SICUREZZA 4 – GENERAL AND SAFETY INFORMATIONS Prima di installare gli apparecchi rimuovere le protezioni di plastica poste a copertura degli attacchi di connessione. ATTENZIONE Durante il funzionamento gli apparecchi contengono pressione d’aria. ATTENZIONE Durante l’esercizio non toccare lo stelo perché é in movimento, potrebbe intrappolare le dita o i vestiti. ATTENZIONE Prima di iniziare eventuali operazioni di manutenzione assicurarsi che il posizionatore non sia in pressione . ATTENZIONE I posizionatori EPR-EX (sicurezza intrinseca – flameproof) devono essere alimentati da costruzioni elettriche associate, certificate in conformità alle norme EN 50.014 ed EN 50.020 che rispettino i limiti delle caratteristiche elettriche vedi punto 3. Before installing positioner, remove plastic covers placed on connection ends. WARNING Be careful during functioning the positioners are under air pressure. WARNING Be careful not to touch the stem, whilst it’s in operation, as this is moving, it’s possible trapping of fingers and clothes. WARNING Before starting maintenance be sure that the positioner is not pressurized . La mancata osservanza delle informazioni generali di sicurezza, delle norme vigenti e delle istruzioni di montaggio possono: In the event of non-observance of the general rules, safety informations and of the installation instructions, this may: ! • • ! WARNING The positioners type EPR-EX (intrinsic safety – flameproof) must be feed by electric devices certified in conformity with EN 50.014 and EN 50.020 standards. The devices must comply the electric features mentioned on technical specification, see point 3. • • Causare pericolo per l’incolumità di chi sta eseguendo le manovre o di terzi Compromettere l’efficiente funzionamento del posizionatore 1 Cause danger to life and limb of the user or third party Endanger the efficient functioning of the positioner 5 - ACCOPPIAMENTO POSIZIONATORE ATTUATORE 5- POSITIONER – ACTUATOR COUPLING 5.1 FUNZIONAMENTO AD AZIONE ROVESCIA Tutti i posizionatori vengono forniti per il funzionamento in azione rovescia a semplice effetto (OUT 2 chiuso). 5.1 REVERSE ACTING OPERATION All positioners are normally supplied for single acting operation with reverse action action (OUT 2 closed). 3 psi / 4 mA All’aumentare del segnale in ingresso lo stelo valvola ruota in senso antiorario Attuatore semplice effetto Connessione : Out 1 As the input signal increases valve stem rotates counter clockwise Single action actuator Connection : Out 1 3-15 psi 15 psi / 20 mA 3 psi / 4 mA All’aumentare del segnale in ingresso lo stelo valvola ruota in senso antiorario Attuatore doppio effetto Connessione : Out 1 e Out 2 As the input signal increases valve stem rotates counter clockwise Double effect actuator Connections : Out1 and Out2 3-15 psi 15 psi / 20 mA 5.2 FUNZIONAMENTO AD AZIONE DIRETTA 5.2 DIRECT ACTING OPERATION 15 psi / 20 mA All’aumentare del segnale in ingresso lo stelo valvola ruota in senso orario Attuatore semplice effetto Connessione : Out 2 As the input signal increases valve stem rotates clockwise Simple effect actuator Connection : Out 2 3-15 psi 3 psi / 4 mA 15 psi / 20 mA All’aumentare del segnale in ingresso lo stelo valvola ruota in senso orario Attuatore doppio effetto Connessione : Out 1 e Out 2 As the input signal increases valve stem rotates clockwise Double effect actuator Connection : Out1 and Out2 3-15 psi 3 psi / 4 mA 2 6 - INSTALLAZIONE SU PISTONE 6- INSTALLATION ON PISTON Montare il posizionatore come indicato nella fig. 1 Il posizionatore può essere anche montato ruotato di 180°. Mount the positioner as showed on fig.1. The positioner can be rotated by 180° angle. Fig.1 Rif.2 STAFFE / MOUNTING BRACKETS Rif.1 80 X 30 X 30 80 X 30 X 20 Rif.4 Rif.4 STAFFE / MOUNTING BRACKETS 30 130 X 30 X 30 130 X 30 X 50 Rif.3 Rif.3 30 30/20 80 30/50 130 Fissare la staffa Rif.1 al posizionatore Rif.2 per mezzo delle viti in dotazione Rif.3. Fissare il complesso staffa-posizionatore al pistone per mezzo delle viti in dotazione Rif.4 Place the mounting bracket Ref.1 to the positioner Ref.2 with the included locknuts Ref.3. Place the bracket and the positioner to the piston with the included locknuts Ref.4. AZIONE ROVESCIA / REVERSE ACTION AZIONE DIRETTA / DIRECT ACTION Fig.2 Fig.3 Rif.5 RA Rif.6 0 0 DA Rif.7 6.1 SETTAGGIO DELLA CAMMA E DEL DISCO INDICATORE 6.1 CAM AND INDICATOR ADJUSTMENT Tutti i posizionatori vengono forniti per il funzionamento ad azione rovescia “RA” con rotazione della camma Rif.7 in senso antiorario (vedi Fig.2). Per il funzionamento ad azione diretta (Fig.3) svitare la vite Rif.5, togliere il disco indicatore Rif.6 e la camma Rif.7. Rovesciare la camma Rif.7 e rimontarla come indicato in Fig.3. Nell’azione diretta “DA” il senso di rotazione è orario. All the positioners are supplied as “RA” reverse action setting, with the cam rotation (Ref.7) counter clockwise (see Fig.2). For a direct action (Fig.3) loosen the locknut Ref.5, remove the indicator disc Ref.6 and the cam Ref.7. Reverse the cam Ref.7 and place it as shown on Fig.3. With “DA” direct action the disc rotates clockwise. 3 7 - CONNESSIONI PNEUMATICHE ED ELETTRICHE 7- PNEUMATIC AND ELECTRIC CONNECTIONS Tutti i collegamenti pneumatici sono facilmente accessibili vedi Fig.4. Per le connessioni elettriche serie EPR inserire i due fili nel passacavo e collegarli alla morsettiera interna contrassegnata con “+” e “-“ vedi Fig. 5. All pneumatic connections are easily accessible, see Fig.4. For the electric connections EPR type, put the two cables into the cable gland and plug them to the internal terminal board marked by “+” and “-“, see fig. 5. ATTENZIONE I posizionatori EPR-EX (sicurezza intrinseca – flameproof) devono essere alimentati da costruzioni elettriche associate, certificate in conformità alle norme EN 50.014 ed EN 50.020 che rispettino i limiti delle caratteristiche elettriche indicate nel punto 3. WARNING The positioners type EPR-EX (intrinsic safety – flameproof) must be feed by electric devices certified in conformity with EN 50.014 and EN 50.020 standards. The devices must comply the electric features mentioned on technical specification, see point 3. ! Fig.4 TIPO/TYPE PPR Fig.5 TIPO/TYPE EPR ! SCHEMA ELETTRICO WIRE DIAGRAM SCHEMA ELETTRICO WIRE DIAGRAM 4 8- AVVIAMENTO 8 - START-UP ¾ Controllare che tutti i collegamenti siano corretti e che il posizionatore sia montato secondo la funzione richiesta ( vedi sez. 5 ) ¾ Check that all pneumatic and electrical connections are correct and the positioner is mounted according to the function required ( refer to section 5) ¾ Fornire l’alimentazione al posizionatore : 1,4….7 bar in accordo al pistone da comandare ¾ Supply air to the positioner : 1,4….7 bar according to the piston to control ¾ Fornire il segnale di comando 3 psi o 4 mA. Girare la rotella dello zero in senso orario o antiorario fino ad ottenere la partenza vedi Fig.6. ¾ Supply the input signal 3 psi or 4 mA. Turn the zero adjusting screw clockwise or counter clockwise to set the zero position see Fig.6. ¾ Controllare la rotazione fornendo il segnale max di 15 psi o 20 mA. Se la corsa non raggiunge il 100 % svitare o avvitare la vite del trimmer SPAN fino a raggiungere il 100% vedi Fig.6. ¾ Check the stroke of the control valve by setting input signal 15 psi or 20 mA. If the stroke does not meet 100%, turn the span adjusting screw clockwise or counter clockwise until 100% is reached., the same operation is necessary if the positioner reached the 100% before with max signal see fig.6. ¾ Check again the zero position ¾ Controllare nuovamente lo zero Fig. 6 Dettaglio “A” AUTO-MANUALE Vedi punto 10 Rotella dello Zero “A” detail AUTO-MANUAL See point 10 Zero adjusting screw Vite dello SPAN SPAN adjusting screw 9 - OPERAZIONE AUTO - MANUALE 9 – AUTO – MANUAL OPERATION Per operare manualmente usare un filtro riduttore e posizionare la vite Auto – Manuale presente nel pilota in posizione M. (vedi dettaglio “A” sotto). Questa operazione permette di bypassare il segnale di ingresso 3-15 psi. For manual operation using an external air regulator, set the Auto / Manual switch located on the pilot valve to M (see detail “A” below). This will bypass the 3-15 psi input signal. Vite di bloccaggio Stopper screw Vite Auto – Manuale Auto – Manual Screw Alloggiamento sede Seat Adjuster Dettaglio “A” ! “A” detail 5 Da non muovere Don’t touch 10 - REGOLAZIONE VELOCITA’ VALVOLA PILOTA ! ATTENZIONE assicurarsi di alimentazione 10 – OPTIONAL RESTRICTED PILOT VALVE ORIFICES Prima di rimuovere il pilota, avere scollegato segnale ed ! WARNING Before removing pilot valve, be sure to disconnect positioner from the signal and supply air. Nel caso il posizionatore risulti troppo veloce, viene fornito, insieme al posizionatore, un kit di orifizi a passaggio ridotto. Per installarlo, occorre rimuovere dal posizionatore il pilota: In case the positioner is too fast, is included with the positioner a restricted pilot valve orifice kit. To install it, the pilot valve must be removed from the positioner: • • • • • • Svitare le quattro viti “A” (Vedi Fig. 7) di fissaggio Togliere la molla di compensazione “B” (vedi Fig.7) Una volta rimosso il pilota, ruotarlo sottosopra (vedi Fig.8) Rimuovere gli O-rings dalle porte Out1 e Out2 (vedi Fig 8) Posizionare i piattelli degli orifizi nelle rispettive sedi e porre sopra di essi i nuovi O-rings, quindi rimontare la valvola pilota • • • • Remove the four screws “ A” (see Fig.7) holding the pilot to the positioner body. Remove the compensation spring “B” (see Fig.7) When the pilot is removed, reverse it as showed on Fig.8 Remove the o-rings from Out 1 and Out 2 ports as showed on Fig.8 Place the orifices plates in their places with the new o-rings above them and re-install the pilot valve 10.1 MANUTENZIONE VALVOLA PILOTA 10.1 PILOT VALVE MAINTENANCE Nel caso sia necessario sostituire la valvola pilota a seguito di usura, operare come sopra. In case of a replacement of the pilot valve due to wear, follow the istructions above. Fig.7 A A B Fig. 8 OUT 2 OUT 1 6 11 - ANOMALIE DI FUNZIONAMENTO Riportiamo qui di seguito alcuni inconvenienti che si possono verificare durante il funzionamento : INCONVENIENTI RISCONTRATI CAUSA PROVVEDIMENTO L’attuatore pendola e non si stabilizza Velocità troppo elevata Diminuire la velocità vedi punto 10 Vedi punto 7 fig. 4 Il posizionatore non regola correttamente apertura e chiusura dell’attuatore Connessioni pneumatiche non corrette Accoppiamento tra posizionatore e attuatore errato Collegamenti elettrici errati Mancanza del segnale di alimentazione Mancanza del segnale di comando Vedi punto 5 Vedi punto 7 fig.5 Controllare e sistemare Controllare e sistemare L’attuatore non compie il campo desiderato Regolazione del campo errata Vedi punto 8 L’attuatore non parte dalla posizione desiderata Regolazione dello zero errata Vedi punto 8 11 - TROUBLES SHOOTING Herebelow some of the possible causes giving troubles during normal working conditions : SYMPTOMS POSSIBLE CAUSE REMEDY Actuator hunting Opening/Closing speed too high Reduce the speed see chapter 10 See chapter 7 fig. 4 Positioner with wrong control action Wrong pneumatic connections Actuator and positioner coupling is not correct Wrong electric connections Supply air missing Control signal missing Actuator span inadeguate Span adjustment is wrong See chapter 8 Actuator start point shifted Zero adjustment is wrong See chapter 8 7 See chapter 5 See chapter 7 fig.5 Check and adjust Check and adjust 12 - RICAMBI PPR SERIES 12 – SPARE PARTS VALVOLA PILOTA PILOT VALVE MANOMETRO OUT 1 MANOMETER OUT 1 CAMMA E DISCO INDICATORE CAM AND INDICATOR DISC MANOM. ALIMENT. MAN. SUPPLY AIR MAN. SEGNALE MAN. INPUT LEVA DELLO SPAN SPAN LEVER EPR SERIES VALVOLA PILOTA PILOT VALVE CAMMA E DISCO INDICATORE CAM AND INDICATOR DISC MANOMETRO OUT 1 MANOMETER OUT 1 MANOM. ALIMENT. MAN. SUPPLY AIR LEVA DELLO SPAN SPAN LEVER STAFFA E VITI DI SERRAGGIO BRACKET WITH SCREWS STAFFA 0 TIPO 80 X 30 X 20 STAFFA 1 TIPO 80 X 30 X 30 STAFFA 2 TIPO 130 X 30 X 30 STAFFA 21 TIPO 130 X 30 X 50 8 Servizio Assistenza - Servicing Department e-mail [email protected] Via Lecco, 69/71 20041 AGRATE BRIANZA (Milano) - ITALY telefono - phone : ++39 - (0)39 - 651705 / 650397 fax : ++39 - (0)39 - 654018