1
BOBBY-AM/E
BOBBY/E
ART. / ITEM:
1875BOBBY-AM/E
1871BOBBY/E
IT
RILEVATORI VOLUMETRICI DA ESTERNO DUAL
PIR
Manuale di installazione, uso e manutenzione
EN
REG.N.4796
UNI EN ISO 9001:2008
MADE IN ITALY
DUAL PIR VOLUMETRIC DETECTORS FOR
OUTDOOR USE
Installation, operation and maintenance manual
LINCE ITALIA S.p.A.
- Istruzioni originali -
- Translation of the original instructions (original instructions in Italian) -
INDICE
CONTENTS
1.DESCRIZIONE................................................................................................... 2
1.1 CARATTERISTICHE GENERALI............................................................ 2
1.2 CARATTERISTICHE TECNICHE............................................................ 3
1.3 AVVERTENZE......................................................................................... 3
1.5 IDENTIFICAZIONE DELLE PARTI.......................................................... 4
2.INSTALLAZIONE............................................................................................... 5
2.1 AVVERTENZE GENERALI...................................................................... 5
2.2 MONTAGGIO DEL RILEVATORE........................................................... 5
2.3 COLLEGAMENTI ELETTRICI................................................................. 9
2.3.1 LED di visualizzazione................................................................. 9
2.3.2 Antimascheramento (solo per 1875BOBBY-AM/E)...................... 9
2.3.3 Regolazione PIR 2 .................................................................... 10
2.3.4 Impostazione DIP SWITCH ....................................................... 12
2.3.5 Funzionamento in AND.............................................................. 13
3. RICERCA DEI GUASTI E/O MALFUNZIONAMENTI ..................................... 14
4. MANUTENZIONE E VERIFICHE PERIODICHE.............................................. 15
4.1 PULIZIA ESTERNA DEL RILEVATORE................................................ 15
5. SMALTIMENTO E ROTTAMAZIONE............................................................... 15
5.1 DISINSTALLAZIONE............................................................................. 15
1.DESCRIPTION................................................................................................... 2
1.1 GENERAL FEATURES........................................................................... 2
1.2 TECHNICAL FEATURES........................................................................ 3
1.3 NOTICES ............................................................................................... 3
1.5 PARTS IDENTIFICATION....................................................................... 4
2.INSTALLATION.................................................................................................. 5
2.1 GENERAL PRECAUTIONS.................................................................... 5
2.2 MOUNTING THE DETECTOR................................................................ 5
2.3 ELECTRICAL WIRING............................................................................ 9
2.3.1 Visualization LED......................................................................... 9
2.3.2 Anti-masking (only for 1875BOBBY-AM/E)................................. 9
2.3.3 PIR 2 adjustment........................................................................ 10
2.3.4 DIP SWITCHES setting chart..................................................... 12
2.3.5 AND mode operation.................................................................. 13
3. TROUBLE SHOOTING.................................................................................... 14
4. MAINTENANCE AND PERIODIC CHECKS.................................................... 15
4.1 CLEANING THE EXTERNAL PART OF THE DETECTOR................... 15
5. DISPOSAL AND SCRAPPING......................................................................... 15
5.1 DISMANTLING...................................................................................... 15
Le informazioni riportate in questo manuale sono state compilate
con cura, tuttavia LINCE ITALIA S.p.A. non può essere ritenuta
responsabile per eventuali errori e/o omissioni. LINCE ITALIA
S.p.A. si riserva il diritto di apportare in ogni momento e senza
preavviso, miglioramenti e/o modifiche ai prodotti descritti
nel presente manuale. Consultare il sito www.lince.net per le
condizioni di assistenza e garanzia. LINCE ITALIA S.p.A. pone
particolare attenzione al rispetto dell’ambiente. Tutti i prodotti ed i
processi produttivi sono progettati con criteri di eco-compatibilità.
Il presente articolo è stato prodotto in Italia.
The information in this manual has been issued with care, but
LINCE ITALIA S.p.A. will not be responsible for any errors or
omissions. LINCE ITALIA S.p.A. reserves the right to improve
or modify the products described in this manual at any time
and without advance notice. Terms and conditions regarding
assistance and the product warranty can be found at LINCE
ITALIA’s website www.lince.net. LINCE ITALIA S.p.A. makes it a
priority to respect the environment. All products and production
processes are designed to be eco-friendly and sustainable.
This product has been Made in Italy
1.DESCRIZIONE
1.DESCRIPTION
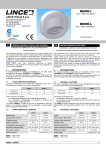
I rilevatorI da esterno 1875BOBBY-AM/E e 1871BOBBY/E
sono composti da due sensori passivi dual PIR. L’elettronica
particolarmente evoluta è stata progettata per garantire le
massime prestazioni in ambiente esterno e a temperature
rigide. I tre fasci sono orientabili e permettono di ottenere una
copertura orizzontale distribuita su 170°. Il range di copertura
dell’ infrarosso inferiore è orientabile anche verticalmente e
questo permette di ottenere un range compreso tra 3 m e 18 m.
Il rilevatore 1875BOBBY-AM/E, a differenza del modello
1871BOBBY/E, è dotato della funzione di ANTIMASKING ad
infrarossi attivi (EN 50131-1).Tale funzione è stata implementata
per rendere il rilevatore inattaccabile da quanti potrebbero
avere accesso al sito dove è installato durante il periodo in cui
il sistema risulta disinserito; segnala ogni tentativo di impedire il
suo funzionamento bloccando (mascherando) il suo campo di
rilevazione.
The 1875BOBBY-AM/E and 1871BOBBY/E outdoor detector
s consists of two dual PIR passive sensors. The particularly
evolved electronics have been designed to guarantee the
maximum performance in outdoor environments and at extreme
temperatures. The three beams are adjustable and allow to get
a horizontal coverage of 170°. The coverage range of the lower
IR can also be adjusted vertically in order to obtain a range
within 3 m and 18 m. The detector 1875BOBBY-AM/E, unlike the
1871BOBBY/E, is equipped with the active IR ANTI-MASKING
function (EN 50131-1). This function has been implemented to
make the detector unassailable by those who may have access
to the installation site during the period in which the system is
disconnected.
It indicates any attempt to prevent its operation by blocking
(masking) its detection field.
1.1
1.1
•
•
•
•
•
•
•
•
•
•
•
•
•
2
CARATTERISTICHE GENERALI
Doppia tecnologia da esterno.
Due sensori PIR.
Sensori infrarosso a doppio elemento basso consumo con filtro UV.
Regolazione di precisione dei fasci del PIR inferiore (sistema
brevettato).
Lente di Fresnel resistente ai raggi UV.
Ampiezza orizzontale del fascio: 85°.
Escursione orizzontale della copertura di ±45°.
Contenitore in policarbonato anti UV.
Staffa di fissaggio a parete in acciaio inox.
Staffe di fissaggio a palo in acciaio inox (disponibile su richiesta).
Funzione Antimasking (solo 1875BOBBY-AM/E).
Sensibilità infrarossi regolabile.
Funzione AND o OR selezionabile.
•
•
•
•
•
•
•
•
•
•
•
•
•
GENERAL FEATURES
Double technology for outdoor use.
Two PIR sensors.
Infrared sensors low consumption double element and UV
filter.
Low PIR beam precision adjustment (patented system).
UV rays resistant Fresnel Lens.
Horizontal beam detection: 85°.
Horizontal detection excursion ±45°.
UV resistant polycarbonate case.
Stainless steel wall fixing bracket.
Stainless steel pole fixing brackets (available on request).
Antimasking function (only 1875BOBBY-AM/E).
Adjustable IR sensibility.
AND/OR selectable function.
LINCE ITALIA S.p.A.
1.2
CARATTERISTICHE TECNICHE
1875BOBBY-AM/E
Alimentazione
1.2
TECHNICAL FEATURES
1871BOBBY/E
1875BOBBY-AM/E
da 9 a 15 Vcc.
Power supply
Consumo a 12 Vcc
20 mA (max.)
Current consumption
@ 12 Vdc
Contatti di allarme
mascheramento
MOS FET relay 100 mA 35 V, 2 Ω max.
Copertura rilevazione
V. par. 1.4
Tempo di allarme
Antimascheramento
IR-attivi
NO
LED di segnalazione
3
Grado di protezione
contenitore
IP 44
from 9 to 15 Vcc.
20 mA (max.)
Alarm, masking
contacts
MOS FET relay 100 mA 35 V, 2 Ω max.
Coverage area
See par. 1.4
Alarm time
1s
Classe ambientale
Classe IV (EN 50131-I)
Grado di sicurezza
Grado 3 (EN 50131-I)
1871BOBBY/E
Antimasking
Signal LEDs
Enclosure degree of
protection
1s
Active-IR
NO
3
IP 44
Environmental
classification
Class IV (EN 50131-1)
Security grading
Grade 3 (EN 50131-1)
Temperatura di
funzionamento
-25 °C / +55 °C
Operating
temperature
-25 °C / +55 °C
Dimensioni esterne
(LxPxA mm)
81x56x189 mm
External dimensions
(WxDxH mm)
81x56x189 mm
Peso (g)
470 (compreso staffe)
Contenitore
Distanza di
funzionamento
Policarbonato resistente UV
3 ÷ 18 m.
1.3AVVERTENZE
Dopo aver alimentato il rilevatore, attendere almeno 3÷4 minuti
prima di effettuare le prove di copertura (i sensori infrarossi
hanno bisogno di stabilizzarsi).
Al fine di ottenere una simulazione reale, liberare la zona
protetta, evitando che più persone si muovano all’interno della
zona stessa.
Dopo 30÷40 secondi di quiete, provare ad entrare nell’area di
rilevazione spostandosi perpendicolarmente ai fasci, evitando
quindi l’avvicinamento frontale.
Verificare il funzionamento dei due PIR con l’ausilio dei due
LED verdi di segnalazione. Effettuare la prova di funzionamento
facendo attenzione ad interrompere i fasci dell’infrarosso (vedere
fig. 1) spostandosi perpendicolarmente ai fasci stessi.
Una volta ottenuta la rilevazione, occorre attendere non meno di
7÷8 secondi prima di provare ad essere rilevati di nuovo.
Il grafico di copertura viene riportato nella fig. 1.
1.4
SELEZIONE DELL’AREA DI COPERTURA
La massima copertura è di 18 metri (a 120 cm dal suolo) con un
apertura di circa 85°, in condizioni standard (25°C, 75% umidità
relativa). Particolari condizioni ambientali possono aumentare o
diminuire tale portata.
Il rilevatore può lavorare sia in modalità AND che in modalità OR
degli infrarossi
Le possibili configurazioni sono descritte nel paragrafo di
impostazione dei DIP switch e relativi esempi di installazione.
(vedere fig. 22, 23, 24).
Weight (g)
Casing
470 (including brackets)
UV resistant polycarbonate
Operating range
3 ÷ 18 m.
1.3NOTICES
Once the detector has been powered, wait 3-4 minutes before
running the coverage test (the IR sensors need to be stabilised).
In order to obtain a real simulation, free the protected area,
preventing more people from moving inside the same area.
After 30-40 seconds of quiet, try to access the detection area
by moving perpendicularly to the beams, thus avoiding a frontal
approach.
Check the operation of the two PIRs with the two green LEDs.
Run the operation test, making sure to break the IR beams (see
fig.1) by moving perpendicularly to them.
Once detection has been achieved, wait for at least 7-8 seconds
before trying to be detected again.
The covered area pattern is shown in fig. 1.
1.4
SELECTING THE COVERAGE AREA
The maximum detection range is 18 m (at 120 cm from the
ground) with covered area of about 85°, (25 ° C, 75% relative
humidity). Particular conditions may increase or decrease the
detection range.
The detector can work both in AND or in OR configuration for
PIRs.
The possible configurations are described in the paragraph of
setting out the DIP switch and relative examples of installation
(see fig. 22, 23, 24).
3
LINCE ITALIA S.p.A.
Grafico di copertura (vista in pianta)
Covered area pattern (plan view)
Fig. 1
Le zone in grigio non possono essere coperte; le
zone tratteggiate potranno essere coperte ruotando il
meccanismo interno.
Grey zones can not be protected; the coverage of dashed
zones can be obtained with rotation of internal mechanism.
1.5
1.5
IDENTIFICAZIONE DELLE PARTI
PARTS IDENTIFICATION
Tabella 1
Table 1
Part.
Identificazione
Ref.
A
Viti di fissaggio del supporto rilevatore sulla staffa
fissaggio a parete.
Identification
A
Detector on wall fixing screws.
B
Vite di fissaggio del coperchio.
B
Cover fixing screw.
C
Coperchio con lente di Fresnel.
C
Cover with Fresnel lens.
D
Pomello di regolazione PIR2 basso.
D
Adjusting knob for low PIR2.
E
Elettronica e supporto con possibilità di rotazione
di 150°.
E
F
Microinterruttore con funzione antistrappo (solo se
fissato con la vite A).
F
G
Staffa fissaggio a parete in acciaio Inox.
G
Stainless steel wall fixing bracket.
H
Staffe a “U” (q.tà 2) – (non fornite) contenute nel kit
accessorio art. 001805/00102AA.
H
“U” Shaped bracket (2pcs) – (not supplied)
available in kit 001805/00102AA.
I
Vite metrica M4 x 6 inox per fissaggio staffe
ad “U” (q.tà 4) contenute nel kit accessorio art.
001805/00102AA.
I
Stainless Steel metric screw M4 x 6 for “U”
brackets fixing (4pcs ) enclosed into kit item
001805/00102AA.
L
Viti metriche M4 x 10 inox (q.tà 4) contenute nel kit
accessorio art. 001805/00102AA.
L
Stainless Steel metric screw M4 x 10 enclosed into
kit item 001805/00102AA.
150° horizontally rotating device.
Antitamper micro switch (only if fixed with screw A).
Il fissaggio tra rilevatore e staffa (G) viene assicurato dalle
due viti (A). In particolare la vite di fissaggio in prossimità del
microinterruttore assicura anche la protezione antistrappo.
Fix the detector to the support (G) using the two screws (A).
In particular, the mounting screw, close to the micro switch,
ensures, also the anti tamper protection.
Nel maneggiare il rilevatore evitare di toccare le lenti di filtro
sopra i sensori PIR.
Do not touch the filter lenses on the PIR’s when handling
the detector.
4
LINCE ITALIA S.p.A.
I
H
E
L
F
G
A
I
A
C
D
B
Fig. 2
2.INSTALLAZIONE
2.INSTALLATION
2.1
2.1
AVVERTENZE GENERALI
Prima dell'installazione verificare le seguenti condizioni:
• la parete non deve presentare avvallamenti o sporgenze
eccessive;
• installare il rilevatore su superfici rigide prive di vibrazioni;
• evitare il posizionamento del rilevatore vicino a fonti di
calore o alla luce diretta del sole;
• evitare la riflessione dell’energia elettromagnetica su ampie
superfici quali, ad esempio, specchi, pareti metalliche, etc.;
• evitare di puntare il rilevatore su lampade fluorescenti o
comunque di porlo nelle immediate vicinanze delle stesse.
• Per i collegamenti è consigliabile utilizzare un cavo
schermato e, preferibilmente, un cavo per ogni rilevatore.
• Separare i cavi dell’impianto di allarme da quelli della rete
elettrica.
Il rilevatore può essere installato in ambiente esterno (secondo
quanto prescritto dalla normativa EN 50131-1 nella classe
ambientale IV).
•
•
2.2
Evitare di puntare il rilevatore verso oggetti in movimento o,
se ciò risultasse inevitabile, prestare la massima cura nelle
regolazioni al fine di evitare falsi allarmi.
Apporre sempre il coperchio con lente di Fresnel prima di
effettuare le prove di copertura, senza lente il rilevatore non
funziona.
MONTAGGIO DEL RILEVATORE
L’altezza di installazione deve essere compresa tra i 100 cm min.
ed 130 cm max (terreno non in pendenza).
Se nell’area di copertura c’è la possibilità che vi sia presenza di
animali di medie dimensioni si consiglia di installare il rilevatore
ad una altezza tale da evitare che il fascio superiore rilevi la
presenza dell’animale stesso (v. fig. 22, 23, 24).
GENERAL PRECAUTIONS
Before starting the installation, make sure that:
• the wall does not have any pronounced depressions or
protrusions;
• install the detector on rigid surfaces, free of vibrations;
• avoid to fix the detectors near to heat sources or at direct
sunlight;
• avoid electromagnetic energy reflection on wide surfaces
such as mirrors, metal walls, etc.;
• avoid to fix the detector in front of fluorescent lamps or in
proximity of them.
• Connections shielded cable is suggested and one cable per
detector is preferred.
• Separate the alarm system cables from the mains cables.
The detector can be installed outdoors (according to the standard
EN 50131-1 in environment IV).
•
•
Avoid to direct the detector towards moving objects or, if
impossible, please take care in adjusting the detector in
order to avoid false alarms.
Be sure to install the cover with Fresnel lens before the
detector testing. Without cover, the detector doesn’t work.
2.2
MOUNTING THE DETECTOR
Installation height must be between 1 m and 1.30 m (not tilted
ground).
If medium-sized animals might enter the coverage area, we
recommend installing the detector at a height that allows you to
prevent the upper beam from detecting their presence (see fig.
22, 23, 24).
5
LINCE ITALIA S.p.A.
Fix the support on a wall or on a stable
pole
• Unscrew the B (fig. 2) screw an
remove the front cover with lens.
• Screw up the detector (see fig. 6)
on the support using the 2 provided
screws A (fig. 2) passing through the
connection cable as shown in the
figures 4 and 5.
• Lift up or take down the PIR 2 (lower)
using the adjusting knob to choose
the protected area as shown in para.
2.3.3.
• Mount the front cover fixing it with
screw B (see fig. 2).
Fissare la staffa di ancoraggio a muro, o
su palo, stabile ed immune da oscillazioni
• Svitare la vite B (fig. 2) e levare il
coperchio con lente
• Fissare l’unità rilevatore ad innesto
(vedi fig. 6) sulla staffa ed avvitare
le due viti A (fig. 2), avendo cura
di passare il cavo dei collegamenti
come riportato nelle fig. 4 e 5.
• Effettuare le regolazioni del rilevatore
agendo sul pomello di regolazione
del PIR 2 (inferiore), basandosi sul
grafico al par. 2.3.3
• Applicare il coperchio con lente
fissandolo con la vite B (fig. 2).
Fig. 3
Attenzione: la massima distanza di copertura (18 m) si
ottiene solamente installando il rilevatore a 120 cm da terra
Important: the maximum detection range (18 meters) is
obtained only if the installation height is 120 cm.
Sequenza di montaggio
Assembly sequence
•
•
•
•
Effettuare 4 fori nel muro ed inserire
i tasselli
Passare i cavi attraverso il foro della
staffa
Fissare ora la staffa al muro o, se su
palo, seguire le indicazioni di fig. 5.
•
•
Nel fissare la staffa al muro fare attenzione
alla perpendicolarità rispetto al terreno.
Make four holes on the wall and
insert the plugs.
Pass the wires through the support
slot and fix the metallic support on
the wall.
To fix the metallic support on the
pole, please see fig. 5.
Fix the metallic support on the wall
perpendicularly to the ground
Fig. 4
Nel caso di fissaggio su palo procedere
come illustrato in figura fissando la staffa
metallica principale alle due staffe da palo
(opzionali)
Fix the support onto the mounting support
with supplied screws.
Place the brackets (not included) around
the pole and fasten using the pole locking
screws.
Fig. 5
6
LINCE ITALIA S.p.A.
•
Poggiare il corpo del rilevatore sulla staffa e farlo scendere
fino in fondo per far coincidere i fori di fissaggio del corpo
con quelli della staffa
Per ottenere il passaggio
cavo, forare l’apposito
pretaglio utilizzando un
oggetto appuntito di adeguato
diametro, giravite o simile.
•
Locate the detector body on the metallic support and slide it
down, then fix it using the supplied screws.
In order to obtain a passage
for the cables, break the plastic
pre-cut using a pointed object of
appropriate diameter, screwdriver
or similar.
Fig. 6
Adjust PIR2, close the detector inserting
downwards the coverage as shown in
figure.
Fix the cover using the metric screw.
Dopo aver effettuato le regolazioni del
PIR 2, chiudere il rilevatore inserendo il
coperchio dall’alto verso il basso come
illustrato, quindi avvitarlo tramite la vite
metrica in acciaio inox in dotazione.
Fig. 7
MONTAGGIO CORRETTO
Montare il rilevatore in posizione verticale e perpendicolarmente
al terreno.
CORRECT INSTALLATION
Position the detector vertically and perpendicularly to the ground
Fig. 8
7
LINCE ITALIA S.p.A.
MONTAGGIO NON CORRETTO (rilevatore inclinato
verticalmente)
Se il rilevatore viene montato inclinato verso il basso la portata
può risultare ridotta.
WRONG INSTALLATION (detector tilted downwards)
If the detector is not installed perpendicularly to the ground, as
shown, operational reliability may result decreased.
Fig. 9
MONTAGGIO NON CORRETTO (rilevatore inclinato
verticalmente)
Se il rilevatore viene montato inclinato verso l’alto il PIR basso
non garantisce la copertura in prossimità del suolo mentre il
PIR superiore copre una zona troppo alta.
WRONG INSTALLATION (detector tilted upwards)
If the detector is not installed perpendicularly to the ground, as
shown, operational reliability may result decreased
Fig. 10
WRONG INSTALLATION
Take care to install the detector
perpendicularly to the groung.
MONTAGGIO NON CORRETTO
Accertarsi che il rilevatore sia
montato perpendicolarmente
rispetto al terreno.
Fig. 11
Il rilevatori 1871BOBBY/E e
1875BOBBY-AM/E sono equipaggiati con speciali filtri per i
disturbi dei raggi solari; nei limiti del possibile è comunque
consigliata l’installazione evitando il sole diretto
The detectors 1871BOBBY/E
and 1875BOBBY-AM/E are
designed to avoid any light
disturbance. However too
strong light as direct sunlight
may cause unstable condition
of detector, for example direct
sunlight. It’s recommended to
avoid such type of installation.
Fig. 12
8
LINCE ITALIA S.p.A.
2.3
COLLEGAMENTI ELETTRICI
2.3
ELECTRICAL WIRING
POWER: Alimentazione 12 Vcc (10 ~ 15 Vcc)
POWER: Power 12 Vdc
(10 ~ 15 Vdc)
MASK:
Uscita
antimask:
contatto normalmente chiuso a
riposo (solo per 1875BOBBYAM/E).
MASK:
Anti-mask
output:
normally closed contact in
standby (only for 1875BOBBYAM/E).
TAMPER: Uscita per la linea
Antisabotaggio 24h.
TAMPER:
output.
ALARM:
Uscita
allarme:
contatto normalmente chiuso a
riposo.
ALARM: Alarm output: normally
closed relay in stand by.
2.3.1
Fig. 13
LED di visualizzazione
2.3.1
Tabella 2
24
h
Antitamper
Visualization LED
Table 2
Colore/Color
Colore/Color
LED 1 ROSSO
LED allarme generale
LED 1 (Red)
General alarm LED
LED 2 VERDE
LED PIR 1 (PIR superiore)
LED 2 VERDE
Upper PIR LED
LED 2 VERDE
LED PIR 2 (PIR inferiore)
LED 2 VERDE
Lower PIR LED
Fig. 14
2.3.2 Antimascheramento (solo per 1875BOBBYAM/E)
Il rilevatore 1875BOBBYAM/E è dotato di antimascheramento a
infrarossi attivi per la protezione dei sensori piroelettrici, che genera un segnale di manomissione entro 3 minuti.
L’uscita dedicata a questa funzione è il morsetto denominato
MASK (v. fig. 13).
In una installazione tipica questo morsetto può essere collegato
ad una linea attiva 24h o ad un ingresso di centrale opportunamente programmato per l’invio di messaggi di anomalia. Quando
il rilevatore rileva un tentativo di mascheramento i quattro LED
lampeggiano simultaneamente fino a quando permane la condizione di mascheramento. Per abilitare il funzionamento corretto
della rilevazione di mascheramento (Anti-masking), è necessario consentire al rilevatore di studiare ed analizzare automaticamente le condizioni ambientali dell’area che deve proteggere.
Questa procedura è obbligatoria per assicurare il corretto funzionamento del canale antimascheramento.
La procedura da seguire è la seguente:
1)Effettuare i collegamenti alla morsettiera del rilevatore lasciando il dip switch in OFF.
2)Dopo aver dato alimentazione, chiudere il coperchio ed effettuare tutte le prove di portata necessarie per il funzionamento
desiderato.
3)Riaprire il coperchio e impostare in ON il dip switch 5.
4)Chiudere immediatamente il coperchio (entro 10 secondi al
massimo).
5)Tenersi fuori dall’area di copertura del rilevatore per circa 4
minuti affinché, durante questo periodo, non venga rilevata
nessuna presenza e verificare che non vi siano oggetti nel
raggio di 1 m.
2.3.2
Anti-masking (only for 1875BOBB-AM/E)
The detector 1875BOBBYAM/E is equipped with an active IR
anti-masking function to protect the pyroelectric sensors. It emits
a tampering signal within 3 minutes.
The output of this function is the MASK terminal block (see fig.
13).
In a standard configuration, this terminal block can be connected
to a 24h active line or to a control unit input appropriately programmed to send fault messages. When the detector identifies
a masking attempt, the four LEDs flash simultaneously until the
masking condition is resolved. To enable the correct operation of
the masking detection system (Anti-masking), allow the detector
to study and analyse the environmental conditions of the area
to be protected. This procedure is mandatory to guarantee the
correct operation of the anti-masking channel.
Follow the procedure below:
1)Make the connections to the detector terminal box, leaving
the dip switch set to OFF.
2)Once powered, close the lid and run all the flow tests required.
3)Open the lid and set dip switch 5 to ON.
4)Close the lid immediately (maximum within 10 seconds).
5)Keep out of reach of detector for about 4 minutes in order that
not detected any presence and pay attention that there are no
objects within 1 m.
9
LINCE ITALIA S.p.A.
2.3.3
Regolazione PIR 2
2.3.3
PIR 2 adjustment
Effettuare la regolazione del PIR2 (inferiore) tramite la vite di
regolazione dopo aver installato il rilevatore a 120 cm dal suolo.
Once the detector has been installed at 120 cm from the ground,
adjust the PIR2 (lower) using the adjustment screw.
Tacche di riferimento per le diverse portate del PIR 2.
Position adjustment related to different lower PIR 2 range.
Fig. 15
Fig. 16
Fig. 17
10
LINCE ITALIA S.p.A.
Fig. 18
Fig. 19
Fig. 20
Se l’oggetto in movimento risulta essere particolarmente grande
(per esempio un’automobile) c’è la possibilità che il rilevatore
possa rilevarne la presenza anche a distanze maggiori di 18 m.
If the object in motion is very large (for example a car) there is
possibility that the detector can detect its presence even if it’s
farther than 18 m.
Quando si imposta la funzionalità del rilevatore in triplo AND (Dip
3 e 4 in OFF) la distanza che si ottiene tramite la regolazione del
PIR 2 (basso) è in realtà la distanza massima di rilevazione del
rilevatore.
If the detector is set in triple AND (Dip 3 and 4 in OFF position)
configuration, the maximum distance of detection is the one
setted through the Adjustment of the PIR2.
11
LINCE ITALIA S.p.A.
2.3.4
2.3.4
Impostazione DIP SWITCH
DIP 1
DIP 2
OFF
OFF
OFF
DIP 1
DIP 2
Operation description
PIR 1 / PIR 2: sensibilità ALTA.
OFF
OFF
PIR 1 / PIR 2: HIGH sensitivity.
ON
PIR 1 / PIR 2: sensibilità MEDIOALTA.
OFF
ON
PIR 1 / PIR 2: MEDIUM-HIGH sensitivity.
ON
OFF
PIR 1 / PIR 2: sensibilità MEDIOBASSA.
ON
OFF
PIR 1 / PIR 2: MEDIUM-LOW sensitivity.
ON
ON
PIR 1 / PIR 2: sensibilità BASSA.
ON
ON
PIR 1 / PIR 2: LOW sensitivity
DIP 3
DIP 4
OFF
OFF
Descrizione del funzionamento
DIP SWITCHES setting chart
Logica di
funzionamento
Descrizione del funzionamento
PIR 1 AND Uscita allarme attiva solo quanPIR 2
do tutte e due i sensori rilevano
la presenza.
DIP 3
DIP 4
OFF
OFF
Operation
Operation description
logic
PIR 1 AND Alarm output active only when
PIR 2
all two sensors detect the presence.
Note: it can be used in most
outdoor installations.
Nota: utilizzabile nella maggior
parte delle installazioni esterne.
OFF
ON
PIR
1 Uscita allarme attiva quando il
ESCLUSO PIR 2 rileva la presenza.
OFF
ON
PIR
1 Output alarm active when the
E X C L U - PIR2 detect a presence.
DED
Note: not recommended in particularly hostile environments.
ON
OFF
PIR
2 Output alarm active when the
E X C L U - PIR1 detect a presence.
DED
Note: not recommended in particularly hostile environments.
ON
ON
PIR 1 OR Alarm output active when a sinPIR 2
gle technology (one of the two
PIRs) detects a presence.
Nota: non consigliata in ambienti particolarmente ostili.
ON
OFF
PIR
2 Uscita allarme attiva quando il
ESCLUSO PIR 1 rileva la presenza.
Nota: non consigliata in ambienti particolarmente ostili.
ON
ON
PIR 1 OR Uscita allarme attiva quando
PIR 2
una sola tecnologia (uno dei
due PIR) rileva la presenza
Note: not suitable for outdoor
applications.
Nota: non utilizzabile in applicazioni esterne.
NOTA:
I DIP 5 è utilizzabile solo per il modello 1875BOBBY-AM/E
ON
12
DIP 5
Funzione
attivata
DIP 6
LED spenti
NOTE:
DIP 5 is available only for 1875BOBBY-AM/E
ON
OFF
Antimask Funzione
disattivata
Antimask
LED sempre accesi
DIP 5
Anti-mask
activated
DIP 6
LEDs off
OFF
function Anti-mask
deactivated
function
LEDs always ON
LINCE ITALIA S.p.A.
2.3.5
Funzionamento in AND
2.3.5
AND mode operation
Esempio di rilevamento in modalità triplo AND (dip 3 e 4 in
OFF)
Example of detection in triple AND configuration (dip 3 and
4 in OFF position
( 1 )
NO ALARM
L’animale viene rilevato da uno dei due sensori (PIR basso) per
cui l’allarme NON si attiva.
( 1 )
NO ALARM
The pet is detected only by one of the two sensors (PIR low). The
alarm is not enabled.
Fig. 21
( 2 )
NO ALARM
La persona viene rilevata da uno dei due sensori (PIR alto) per
cui l’allarme NON si attiva.
( 2 )
NO ALARM
The body is detected only by by one of the two sensors (PIR
high). The alarm is not enabled.
Fig. 22
( 3 )
ALARM
La persona viene rilevata da tutti e due i sensori (PIR basso +
PIR alto) per cui si attiva lo stato di allarme.
( 3 )
ALARM
The body is detected by the two sensors (PIR low + PIR high).
The alarm is enabled
Fig. 23
Attenzione: le illustrazioni fanno riferimento alla modalità di
funzionamento in AND, se si decide di utilizzare impostazioni
diverse (vedere par. 2.3.5, DIP Switch 3 e 4 in ON) si hanno
allarmi anche negli esempi in fig. 22 e 23.
Warning: the examples are referred to the AND set up. In case
of different set up (see para. 2.3.5, DIP Switches 3 and 4 in ON
position) alarms are enabled also in the previous examples (see
fig. 22 and 23).
13
LINCE ITALIA S.p.A.
3. RICERCA DEI GUASTI E/O MALFUNZIONAMENTI
Trouble
Soluzione
I LED non si accendo- Verificare la correttezza dei collegano
menti
3. TROUBLE SHOOTING
Trouble
Solution
LEDs fail to switch on
Check the presence of current
and if the voltage is between 9.5
and 16 Vdc
Verificare la presenza ed il valore
dell’alimentazione
Verificare che il Dip Switch 6 sia in
posizione OFF
Falsi allarmi
Il rilevatore non è perpendicolare al
terreno
Make sure that Dip Switch 6 is
set to OFF
False alarms
The detector is not perpendicular
to the ground
Il PIR basso è mal regolato, raggiunge distanze superiori a quelle
desiderate
Oggetti in movimento nell’area protetta (biancheria stesa, rami di alberi)
A volte non rileva
Errata regolazione in particolare del
PIR basso
Allarmi continui
dell’uscita MASK
Ostacoli di medie dimensioni a ridosso del rilevatore
Aprire il coperchio, disalimentare il
rilevatore (attendere circa 5 secondi), rialimentare e chiudere il coperchio immediatamente (entro 10
secondi)
Il LED rosso lampeg- Verificare la tensione di alimentagia
zione del rilevatore.
14
Check wiring connection
Check if the lower detection area
is wider than your planning
Check if there are objects in movement in the detection area.
No detection,
mes.
someti- The Lower PIR is not properly
adjusted
Continuous alarms
MASK output
of Medium-sized obstacles close to
the detector
Open the lid, disconnect the detector (wait about 5 seconds), repower and close the lid immediately (within 10 seconds)
Red LED blinking
Verify the detector’s power supply
LINCE ITALIA S.p.A.
4. MANUTENZIONE E VERIFICHE PERIODICHE
4.
MAINTENANCE
CHECKS
4.1
4.1
PULIZIA ESTERNA DEL RILEVATORE
AND
PERIODIC
CLEANING THE EXTERNAL PART OF THE DETECTOR
Per assicurare il corretto funzionamento del rilevatore è necessario che la lente venga mantenuta pulita. Una lente non
perfettamente pulita può causare problemi di rivelazioni e/o
problemi alla funzione antimask.
Keep the lens clean to guarantee proper operation of the
detector.
A lens which is not perfectly clean may cause detection problems and/or problems to the anti-mask function.
Periodicità: quando necessario o in condizione di sporcizia evidente.
Materiale da utilizzare: panno - acqua senza additivi.
Procedura di pulizia:
Frequency: when necessary or when clearly dirty.
Material to be used: cloth - water with no additives.
Cleaning procedure:
IMPORTANT!
Do NOT use chlorine-based or abrasive products or
alcohol to remove particularly noticeable dirt.
ATTENZIONE! Per rimuovere sporcizie particolarmente evidenti NON utilizzare prodotti a base di cloro, prodotti abrasivi oppure alcool.
1.Pulire il coperchio e la lente con un panno inumidito con acqua.
2. Ripassare con un panno asciutto.
1. Clean the lid and the lens with a cloth dampened with water.
2. 2. Wipe with a dry cloth.
5. SMALTIMENTO E ROTTAMAZIONE
5. DISPOSAL AND SCRAPPING
5.1DISINSTALLAZIONE
5.1DISMANTLING
ATTENZIONE!
Non disperdere nell’ambiente i componenti ed ogni
altro materiale del prodotto.
Rivolgersi a consorzi abilitati allo smaltimento ed al riciclaggio dei materiali.
IMPORTANT!
Do not dispose of the components or any other product material in the environment.
Seek the assistance of companies authorised to dispose of
and recycle waste materials.
1. Svitare le viti che tengono fisso il coperchio frontale e rimuoverlo.
2. Scollegare il rilevatore: sulla morsettiera scollegare tutti i morsetti (v. Fig. 14).
3. Dividere le parti in base alla loro tipologia e smaltirle in accordo con le leggi vigenti.
1. Unscrew the screws that fasten the front lid and remove it.
2. Disconnect the detector: disconnect all the terminals on the
terminal block (see Fig. 14).
3. Divide the parts by type and dispose of them in accordance
with applicable laws.
15
LINCE ITALIA S.p.A
001530/00840AA
Via Variante di Cancelliera, snc
00040 ARICCIA (Roma)
Tel. +39 06 9301801
Fax +39 06 930180232
[email protected]


![[ITA] DIRVE-K Manuale v1-4](http://vs1.manualzilla.com/store/data/006119981_1-b949b95cef07768fbceed4c06fff95ac-150x150.png)