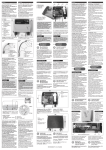
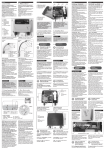
Download Manuale d` installazione e d` uso Use and installation
Transcript
English
Italiano
DIMENSIONI - DIMENSIONS
Inserimento
DIMENSIONI
serbatoio
OCIO richiede di digitare 2 oppure 3
dimensioni in funzione del tipo di
serbatoio:
Tali dimensioni vanno digitate nelle
unità di misura selezionate
(MILLIMETRI oppure POLLICI )
la modalità di INPUT delle dimensioni
del serbatoio è la stessa
indipendentemente dal TIPO.
TANK
DIAM.
TANK
DIAM.
TANK
DIAM.
SHAPE A
0000
SHAPE A
X000
Modifica
2° cifra
Entering tank
DIMENSIONS
OCIO requires 2 or 3 tank dimensions
to be entered, depending on the shape
of the tank.
These dimensions must be entered using
the units of measurement
(MILLIMETERS or INCHES) of the
system that has been previously selected.
The procedure for entering TANK
DIMENSIONS does not depend on the
chosen TANK SHAPE.
TANK
SHAPE A
DIAM.
0
TANK 1? 0 0 SHAPE
A
DIAM.
0
TANK 2? 0 0 SHAPE
A
DIAM. 3 0 0 0
Modification
2° digit
CALIBRATION
LEVEL 2 3 0 0
Modification
3° digit
TANK
HEIGH
TANK
HEIGH
CALIBRATION
DENSITY
1.040
CALIBRATION?
DENSITY
1.050
CALIBRATION?
DENSITY 1 . 0 6 0
Modification
4° digit
TANK
SHAPE A
DIAM.
0
TANK ?X 1 0SHAPE
A
DIAM.
0
TANK X? 2 0SHAPE
A
DIAM. X 3 0 0
B
CALIBRAZIONE
tramite nota
MISURA DI LIVELLO
SHAPE A
X000
SHAPE A
XX00
Al termine della lettura di
CALIBRAZIONE, OCIO calcola
automaticamente il valore del PESO
SPECIFICO del liquido, che da quel
momento viene utilizzato per le
successive letture di livello.
La CALIBRAZIONE è l’attività
tramite cui viene assegnato a OCIO il
valore del PESO SPECIFICO
(DENSITY)del liquido .
TANK
SHAPE A
HEIGH
0
TANK ?1 0 0SHAPE
A
HEIGH
0
TANK ?2 0 0SHAPE
A
HEIGH 3 0 0 0
CALIBRATION?
After the CALIBRATION READING,
OCIO will automatically calculate the
liquid's DENSITY and use that value for
all further level readings.
Important note!
• Make sure that the liquid used for
calibrating the instrument is the same
kind of liquid that will be used in the tank
where OCIO will be installed.
• Use a reliable instrument to measure
the calibration level, e.g. a graduated
staff.
• digitare in OCIO il livello misurato
nelle UNITA’ di MISURA selezionate
(UNITA’ METRICHE = millimetri ;
UNITA’ ANGLOSASSONI = pollici)
CALIBRATION
CALIBRATION
by
MEASURING LEVEL
To do this, proceed as follows:
• Place the probe inside a tank whose
level can be accurately measured and
that contains the same liquid that will
be used in the tank where OCIO will be
installed.
• Enter the known level on the keypad.
• Confirm the CALIBRATION
READING that OCIO will initiate.
• effettuare la misura del livello con un
metodo AFFIDABILE, quale ad esempio
un’asta graduata di precisione
• Enter the measured level using the same
UNITS OF MEASUREMENT of the
system that has been selected (METRIC
UNITS: millimetres; UK UNITS: inches).
OCIO determines the level of the liquid
in a tank by detecting the pressure applied
by the liquid, which depends on the
liquid's level and also on its DENSITY .
• installare la sonda di OCIO in modo
tale che che appoggi correttamente sul
fondo del recipiente che si utilizza per la
calibrazione
CALIBRATION is the operation by
which OCIO is assigned a value for the
liquid's DENSITY.
• quando possibile utilizzare per la
calibrazione lo stesso serbatoio in cui
OCIO deve essere installato
• When calibrating the instrument, if
possible use the same tank where OCIO
will be definitely installed.
• se non si utilizza il serbatoio stesso,
utilizzare un recipiente di dimensioni tali
da garantire che il livello non sia
influenzato dal pompaggio di aria
effettuato da OCIO durante la lettura di
calibrazione
• If you cannot use the same tank, choose
a tank that is large enough to ensure that
the level will not by affected by the
pumping of air that OCIO will perform
during the calibration reading.
Attenzione!
Warning!
OCIO is factory-calibrated for use
with tanks containing DIESEL OIL,
which has a DENSITY of 0.84 kg/dm
at a temperature of 20 °C .
3
Il valore di “ DENSITY “ è pertanto
fissato per default pari a 0,840
The "DENSITY" value is therefore
preset at 0.840
Utilizzando OCIO in serbatoi
contenenti gasolio, NON E’
NECESSARIO EFFETTUARE
LA CALIBRAZIONE.
If the instrument is intended for use
with tanks containing diesel oil, NO
FURTHER CALIBRATION IS
NECESSARY.
• Install the probe so that it is properly
lying on the bottom of the tank used for
calibration.
• Always perform the calibration with a
• effettuare sempre la calibrazione tramite tank level that is 70% or more of the
un livello che sia almeno pari o superiore maximum level that OCIO will measure
al 70 % del livello massimo che OCIO
in its definitive installation.
dovrà misurare.
ESEMPIO: se OCIO và installato
in serbatoio CILINDRICO
ORIZZONTALE del DIAMETRO
DI 1 METRO, è bene effettuare la
CALIBRAZIONE (nello stesso
serbatoio o in altro recipiente) tramite
lettura di un livello pari o superiore
a 70 centimetri.
EXAMPLE: If OCIO is to be
installed in a tank shaped as a
HORIZONTAL CYLINDER having a
DIAMETER of 1 METER, the
calibration should be performed by
reading a tank level of 70 or more
centimetres (in the same tank or in
another one).
ALARM ?
SETTAGGIO ALLARMI
OCIO consente la gestione didue allarmi
tramite i quali è possibile:
- attivare indicazioni remote ( acustiche
o visive )
- interbloccare il funzionamento di
eventuali pompe collegate al serbatoio.
Per ognuno dei due allarmi, sono
disponibili sia il contatto normalmente
aperto sia il contatto normalmente chiuso.
Sono disponibili cioè nr. 3 morsetti per
ognuno dei due allarmi.
A
CALIBRATION
by known
DENSITY
CALIBRATION?
Quando è noto il PESO SPECIFICO del
liquido, è possibile CALIBRARE OCIO
semplicemente inputando tale valore.
When the liquid's DENSITY is KNOWN,
OCIO can be calibrated by simply
entering the known value.
Il valore va imputato in:
The density must be entered using:
• Kg / dm 3 se sono state selezionate le
UNITA’ METRICHE
• kg / dm 3 if the METRIC SYSTEM
has been selected
• oz / inch 3 se sono state selezionate le • oz / inch 3 if the UK SYSTEM
UNITA’ ANGLOSASSONI
selected
CALIBRATION
DENSITY
Attenzione!
Warning!
OCIO is not a SAFETY
DEVICE.
E’ pertanto VIETATO collegare alle
uscite di allarme di OCIO
apparecchiature il cui mancato o
ritardato intervento possa avere
conseguenze sulla SICUREZZA di
cose o persone o sull’AMBIENTE.
Therefore, DO NOT CONNECT to
OCIO's alarm terminals any device
whose non-functioning or delayed
functioning might affect the SAFETY
of PERSONS or of the
ENVIRONMENT.
Settare gli allarmi di OCIO significa:
To set the alarms it is necessary to:
• definire il TIPO di allarme:
- allarme di BASSO LIVELLO = LOW
l’ allarme si attiva quando il livello scende
sotto il valore impostato
- allarme di ALTO LIVELLO =
HIGH l’ allarme si attiva quando il livello
sale sopra il valore impostato
• choose the TYPE of alarm:
- LOW LEVEL alarm = LOW
The alarm is activated when the tank
level falls below the pre-set value.
- HIGH LEVEL alarm = HIGH
The alarm is activated when the tank
level rises above the pre-set value.
La selezione del tipo di allarme è libera;
sarà quindi possibile avere:
- due allarmi di tipo diverso (un tipo H
e un tipo L)
- due allarmi dello stesso tipo (entrambi
tipo H o entrambi tipo L).
The alarms can be set independently from
one another; this means that you can have:
- two alarms of different kinds (one Hlevel alarm and one L-level alarm)
- two alarms of the same kind (two Hlevel alarms or two L-level alarms).
• definire il VALORE a cui sui attiva
l’allarme.
Il valore a cui si attiva l’allarme è
SEMPRE espresso in VALORE
PERCENTUALE della capacità
massima del serbatoio.
• enter the VALUE that activates the
alarm.
The values that activate the alarms are
ALWAYS expressed as PERCENTAGE
VALUES of the tank's full capacity.
The values that activate the alarms can
be any number that falls within the
Agli allarmi può essere assegnato un
valore qualsiasi compreso entro i seguenti following range:
- H -level alarm: values with a
limiti:
MAXIMUM value of 90 %
- allarme tipo H : valori NON
- L -level alarm: values with a
SUPERIORI al 90 %
MINIMUM value of 3 %
- allarme tipo L : valori NON
INFERIORI al 3 %
If the alarm values are set at 0 %
(whether the H-level or L-level alarm)
Assegnando il valore 0 % all’allarme
(sia di tipo H che di tipo L ), questo non they will not be activated under any
circumstances.
si attiverà in nessuna condizione.
CALIBRAZIONE
tramite noto Peso Specifico
CALIBRATION?
CALIBRATION
by known DENSITY
CALIBRATION
DENSITY
Modifica
1° cifra
Modification
1° digit
CALIBRATION
DENSITY
0.840
CALIBRATION?
DENSITY 1 . 8 4 0
CALIBRATION
LEVEL
CALIBRAZIONE
tramite misura del livello
CALIBRATION
LEVEL
0 0 0 0 MM
CALIBRATION?
LEVEL
1 0 0 0 MM
CALIBRATION?
LEVEL
2000
MM
CALIBRATION
LEVEL
2 0 0 0 MM
CALIBRATION?
LEVEL
2 1 0 0 MM
CALIBRATION?
LEVEL
2 2 0 0 MM
CALIBRATION?
LEVEL 2 3 0 0
CALIBRATION
by measuring level
segue - to continue
Segue / To continue
Italiano
7. Uso quotidiano
7. Daily use
L’uso quotidiano di OCIO è
estremamente semplice ed intuitivo
Using OCIO is easy and
uncomplicated.
C
A
Indicazione del
LIVELLO o del volume
In order to avoid the alarms being
activated/deactivated by small variations
of level, OCIO will:
• attiva l’allarme quando il valore
settato viene raggiunto in modo “
stabile “ (cioè per almeno x letture
consecutive)
• activate the alarm when the pre-set
value is reached in a "stable" manner
(i.e. after at least x consecutive readings)
allarme tipo L settato al 15 % :
- si attiva quando il livello, scendendo,
raggiunge il valore del 15 %
e lo mantiene per almeno x letture
- si disattiva quando il livello,
risalendo , raggiunge il valore
del 17 %
Conferma del valore settato e ritorno al
menù di Configurazione.
MM
Displaying tank
LEVEL or tank volume
Italiano
English
Visualizzazione del
SERIAL NUMBER
dello strumento
VOLUME XXXXX L
C
*
Displaying the
instrument's
SERIAL NUMBER
OCIO entra automaticamente in tale
attività dopo l’accensione
At start-up, OCIO automatically starts
measuring.
Con la semplice battitura di un tasto
è sempre possibile visualizzare
brevemente il SERIAL NUMBER
dello strumento
OCIO può visualizzare una delle tre
seguenti INDICAZIONI:
OCIO can display any of the following
QUANTITIES:
The instrument's SERIAL NUMBER
can be shown briefly on the display
by simply pressing a key.
• LIVELLO
( in mm o pollici )
• VOLUME ( in litri o galloni )
• VOLUME PERCENTUALE
( in %
del volume totale )
• LEVEL ( in mm or inches )
• VOLUME ( in litres or gallons )
• VOLUME PERCENTAGE
(in % of
total volume)
NORMAL CONDITIONS
( nessun allarme attivo )
(no alarms are on)
L’ utente può liberamente passare da una
INDICAZIONE all’altra con la semplice
battitura di un tasto.
OCIO rimane nel tipo di INDICAZIONE
selezionata sino ad una diversa selezione
o sino a che non intervenga una
condizione di allarme.
The user can easily switch from
displaying one quantity to another at the
touch of a key.
The instrument will display the selected
QUANTITY until the user selects another
one or until an alarm is activated.
La BARRA DI LIVELLO
è una indicazione
analogica della percentuale
di riempimento del
serbatoio, presente solo se
è stato CONFIGURATO il
serbatoio
LEVEL
L’ asterisco (in alto a
destra) lampeggia ogni
volta che OCIO legge ed
eventualmente aggiorna il
valore di LIVELLO o di
VOLUME indicato
Le indicazioni di
VOLUME sono
possibili solo se è stato
configurato il serbatoio
XX
VOLUME
XX
CONDIZIONI di ALLARME
LEVEL
XXXX MM
%
*
VOLUMES can be
displayed only if the
tank has been
configurated.
Whenever a CONDITION OF ALARM
is reached, OCIO sends a signal and
changes the current DISPLAY .
, OCIO
Depending on which quantity is being
displayed under normal conditions, OCIO
will display one of the followingALARM
MESSAGES , and the display will
FLASH ON AND OFF in order to alert
the user that a condition of alarm has
been reached.
*
*
*
(one or both the alarms are activated)
In funzione del tipo di indicazione
selezionata in condizioni normali, quando
entra in allarme OCIO visualizza una
delle due seguentiINDICAZIONI DI
ALLARME, caratterizzate da un
LAMPEGGIO che allerta l’utente
della condizione di allarme
VOLUME XXXXX L
L
The asterisk (on the
upper right)flashes
whenever OCIO is
reading or updating the
displayed LEVEL or
VOLUME .
ALARM CONDITIONS
(uno o entrambi gli allarmi attivi)
Non appena si entra in una
CONDIZIONE DI ALLARME
attiva le uscite e modifica l’
INDICAZIONE visualizzata.
The LEVEL BAR is an
analog indicator that shows
(in percentage) what
portion of the tank is filled.
The level bar appears only
if the tank has been
CONFIGURED.
XX MM
VOLUME
ALARM
XXXXX L
Condizione
di allarme
Alarm
conditions
ALARM
VOLUME
XX%
Quando OCIO rileva l’uscita dalla
condizione di allarme, ritorna
automaticamente all’indicazione
selezionata in precedenza.
B
Visualizzazione del
SETTAGGIO DEI
SISTEMI DI ALLARME
Sia in condizioni NORMALI ( nessun
allarme attivo ), che in condizioni di
ALLARME, OCIO consente di
visualizzare i valori di set degli allarmi
VOLUME XXXXX L
XX%
VOL
*
*
Important note!
Per evitare che piccole variazioni di
livello causino il continuo attivarsi /
disattivarsi dell’allarme, OCIO:
ESEMPIO:
allarme tipo H settato al 75 % :
- si attiva quando il livello, salendo,
raggiunge il valore del 75 % e lo
mantiene per almeno x letture
- si disattiva quando il livello,
scendendo, raggiunge il valore del
73 %
has been
The OCIO system includes two alarms
which can be used:
- for activating remote devices (such as
acoustic or visual alarms);
- for stopping any pumps that may be
connected to the tank.
For each of the two alarms, both the
normally open contact and the normally
closed contact are available.
i.e.: No. 3 connectors are available for
both alarms.
OCIO non è una apparecchiatura
di SICUREZZA .
• disattiva l’allarme solo quando si è
raggiunto un valore che si discosta dal
valore di allarme per almeno il 2%.
CALIBRATION
LEVEL
SETTING THE ALARMS
Il settaggio degli allarmi è consentito
The alarms can be set only after
solo dopo aver configurato un serbatoio configuring a tank.
Nota importante!
CALIBRAZIONE
tramite noto
PESO SPECIFICO
CALIBRATION
PLEASE WAIT
CALIBR. RESULT
DENSITY 0 . 9 9 7
If the DENSITY is not known, OCIO can
be CALIBRATED by having it read a
known LEVEL.
• accertarsi che il liquido che si utilizza
per la calibrazione sia lo stesso che sarà
contenuto nel serbatoio
CALIBRATION?
OCIO è calibrato in fabbrica per
l’utilizzo in serbatoi contenenti
GASOLIO, caratterizzato da un
PESO SPECIFICO ( DENSITY )
pari a 0,84 Kg/dmc
alla temperatura di riferimento di
20 °C .
A
CALIBRATION
START READING? Y
Confirmation
of displayed
value
Conferma del valore indicato
Confirmation of displayed value
La procedura consiste nel:
• inserire la sonda di OCIO in un
recipiente di cui sia possibile misurare
con precisione il livello, contenente lo
stesso liquido del serbatoio in cui sarà
installato OCIO
• digitare tramite la tastiera di OCIO
il valore del livello noto
• confermare l’inizio della LETTURA
di CALIBRAZIONE da parte di OCIO
OCIO misura il livello di un liquido
tramite il rilievo della pressione generata
dal liquido stesso, che come è noto
dipende oltre che dal livello anche dal
PESO SPECIFICO
del liquido.
CALIBRATION
START READING? N
CALIBRATION
DENSITY
1.060
CALIBRATION?
DENSITY
1.061
CALIBRATION?
DENSITY 1 . 0 6 2
Quando il PESO SPECIFICO non è noto,
è possibile effettuare una
CALIBRAZIONE facendo effettuare
a OCIO una lettura di un LIVELLO
NOTO.
CALIBRAZIONE
MM
Conferma del
valore indicato
ALARM?
SHAPE A
XXX0
English
CONDIZIONI NORMALI
Note importanti!
TANK
HEIGH
MM
Italiano
A
CALIBRATION
LEVEL 2 3 0 0
Modifica
4° cifra
SHAPE A
XXX0
SHAPE A
0000
English
CALIBRATION
DENSITY
1.840
CALIBRATION?
DENSITY
1.940
CALIBRATION?
DENSITY 1 . 0 4 0
SHAPE A
XX00
TANK
HEIGH
Italiano
Segue / To continue
Modifica
3° cifra
B
TANK
DIAM.
English
Segue / To continue
S/N
D
OCIO attiva automaticamente il
compressore per mantenere sempre
all’interno della SONDA le corrette
condizioni di lettura;
una attivazione MANUALE è comunque
sempre possibile quando desiderato.
VOLUME XXXXX L
Displaying the
SELECTED
ALARM LEVELS
L / H : tipo dell’allarme
L / H : type of alarm
XX% : valore percentuale settato
XX% : pre-set percentage value
OCIO automatically turns on the
compressor whenever necessary for
maintaining ideal operating conditions
inside the PROBE. The compressor,
however, can be turned on MANUALLY
by the user at any time.
The compressor's running time depends on current
operating conditions. The compressor will stop
running automatically (USUALLY AFTER A FEW
SECONDS) as soon as the instrument detects that
proper operating conditions have been restored.
VOLUME XXXXX L
8. Dati tecnici
8. Specifications
Alimentazione
Power Supply
Dimensioni:
Dimensions:
230 V +/- 5 50-60 Hz oppure
110 V +/- 5 % 50-60 Hz
custodia dell’unità di controllo :
165x180x60 mm
sonda di rilievo :
- terminale Ø 29,5 x L = 60
protezione: IP55
Probe:
Sonda di rilievo:
- materials : tube: Rilsan
- materiale : tubazione: Rilsan
weighted end: brass
terminale di zavorra: ottone
- dimensions:
- dimensioni:
- for liquids having viscosity < 30 Cst ):
- per liquidi con viscosità < 30 Cst :
- tube: I/E diameter = 4 mm / 6 mm
- tubazione: diametro I/E = 4 mm / 6
( L = 10 m )
mm ( L = 10 m )
- end: diameter 29,5 mm / length 60 mm
- terminale : diametro 29,5 mm
- for liquids having viscosity
lunghezza 60 mm
< 2000 Cst (optional):
- per liquidi con viscosità
- tube for end piece I/E diameter = 9
< 2000 Cst (optional):
mm / 12 mm (L = 3 m)
- tubazione: per tratto terminale diametro
Compatible Fluids
I/E = 9 mm / 12 mm ( L = 3 m )
Any NON-flammable fluids, NON-explosive
Fluidi compatibili
fluids, NON-corrosive fluids that are
qualunque fluido NON infiammabile, NON
compatible with the probe materials.
esplosivo, NON corrosivo, compatibile con Operating Range
i materiali della sonda.
- Temperature : from –20 °C to +50 °C
Condizioni ambientali limite
- Humidity : up to 90 %
- temperatura : – 20 C ° + 50 C °
Tank Shapes
- umidità : fino al 90 %
Can be chosen between the following:
Geometria serbatoio
- parallelepipedal
selezionabile tra i seguenti tipi:
- vertical cylinder (with flat ends)
- parallelepipedo
- horizontal cylinder (with flat ends)
- cilindrico verticale ( fondi piani )
Tank Dimensions
- cilindrico orizzontale ( fondi piani ).
Can be entered during installation
Dimensioni serbatoio
MAXIMUM HEIGHT: 4 metres
liberamente digitabili in fase di installazione Tank capacity
ALTEZZA MASSIMA: 4 metri
From a few dozen litres to 999,000 litres
Volumetria serbatoio
selezionabile tra:
- LIVELLO ( FONDO SCALA =
400 cm di colonna d’acqua )
- contenuto in PERCENTUALE del
volume totale serbatoio
- contenuto in VOLUME ( Litri oppure
Galloni )
Ripetibilità
+/- 0.5 % del fondo scala
Allarmi
due ( entrambi di tipo liberamente
selezionabile )
Tipo allarmi :
- H = ALTO LIVELLO ( HIGH )
(si CHIUDE il contatto se il livello
rilevato risulta PIU’ ALTO del livello
di allarme impostato )
- L = BASSO LIVELLO ( LOW )
(si CHIUDE il contatto se se il livello
rilevato risulta PIU’ BASSO del livello
di allarme impostato )
Portata dei contatti (carico resistivo) :
2 Amp - 277 Volt AC
5 Amp - 125 Volt AC
5 Amp - 30 Volt DC
Readings
Can be chosen between:
- LEVEL ( MAX RANGE =
a column of water 400 cm tall )
- contents expressed as PERCENTAGE of
total tank capacity
- contents expressed as VOLUME (litres
or gallons)
Accuracy
+/- 1 % of max range (after proper
calibration)
Repeatability
+/- 0.5 % of max range
Alarms
Two (both can be set independently)
Types of Alarms :
- H = HIGH LEVEL (HIGH)
( contact CLOSES when the detected
level is HIGHER than the selected alarm
level)
- L = LOW LEVEL (LOW)
( contact CLOSES when the detected
level is LOWER than the selected alarm
level)
Contact capacity (resistive load) :
2 Amp - 277 Volt AC
5 Amp - 125 Volt AC
5 Amp - 30 Volt DC
If the L-level alarm is set at 15% :
- The alarm will be activated when
the tank level, while going down,
reaches the value of 15% and
maintains it for at least x readings.
- The alarm will be deactivated when
the tank level, while going up,
reaches the value of 17%.
Confirm the value and return to the
configuration menu.
ALARM
XXXXX L
*
9. Dimensioni
ripetere parzialmente
l’input del PIN CODE
I tratti verticali visualizzati nella
BARRA DI LIVELLO danno una
indicazione analogica del valore
impostato per gli allarmi.
The number of vertical lines shown by
the LEVEL BAR gives an analogic
indication of the pre-set alarm values.
A partire dalla visualizzazione del
settaggio degli allarmi OCIO consente
di entrare DIRETTAMENTE nella
attività di SETTAGGIO ALLARMI.
Anche in questo caso è tuttavia
necessario digitare il PIN CODE
richiesto per l’ entrata in
CONFIGURAZIONE.
1
From the display showing the pre-set
alarm values it is possible to pass
DIRECTLY into ALARM SETTING
mode.
You will be requested, however, to enter
the PIN CODE that is required for
entering CONFIGURATION mode.
Index:
Cos’è Ocio
Come funziona Ocio
Come installare Ocio
installazione meccanica
collegamenti elettrici
Per iniziare
All’accensione
Configurazione
Come entrare in configurazione
Le attività di configurazione
Uso quotidiano
Dati tecnici
Dimensioni
Ricambi
Certificato di conformità CE
What is Ocio?
How Ocio works
Installing Ocio
Installation
Electric connections
Before starting
Start-up
Configuration
How to enter configuration mode
Configuration operations
Daily use
Specifications
Dimensions
Spare parts
Ce certificate of conformity
Bulletin M0073B rev. 2
10. Ricambi
10. Spare parts
1. Coperchio custodia
2. Gruppo schede
3. Base custodia
4. Ghiera
5. Raccordo tubo Ø 6
6. Corpo valvola
7. Compressore
8. Kit sonda gasolio
9. Kit sonda olio (opzionale)
10. Staffa condensatore
11. Cavo collegamento schede
12. Tubo poliuretano
1. Case cover
2. Board unit
3. Case base
4. Ring nut
5. Hose connection d. 6
6. Valve body
7. Compressor
8. Diesel oil probe kit
9. Oil probe kit (optional)
10. Capacitor bracket
11. Board connecting cable
12. Polyurethane tube
11. Certificato di
conformità CE
11. Ce certificate
of conformity
60
La sottoscritta:PIUSI S.p.A
Via Pacinotti c.m. z.i. Rangavino
46029 Suzzara - Mantova - Italia
DICHIARA
sotto la propria responsabilità, che l’apparecchiatura descritta in appresso:
Descrizione : Misuratore di livello
Modello : Ocio
Matricola: riferirsi al Lot Number riportato sulla targa CE apposta sul prodottoAnno di
costruzione: riferirsi all’anno di produzione riportato sulla targa CE apposta sul prodotto.è
conforme alle disposizioni legislative che traspongono le direttive :
- Direttiva Bassa Tensione 2006/95/CE
- Direttiva Compatibilità Elettromagnetica 2004/108/CE
La documentazione è a disposizione dell’autorità competente su motivata richiesta presso
Piusi S.p.A. o richiedendola all’indirizzo e-mail: [email protected]. La persona autorizzata a
costituire il fascicolo tecnico e a redigere la dichiarazione è Otto Varini in qualità di legale
rappresentante.
DECLARATION OF CONFORMITY
Partially repeat the
entry of PIN CODE
ALARM
NUMBER:
9. Dimensions
180
1
2
3
3.1
3.2
4
5
6
6.1
6.2
7
8
9
10
11
Indice:
DICHIARAZIONE DI CONFORMITA’
1 = L = 30% 2 = H = 80%
ALARM CONFIGUR.
PIN CODE: X X
*
Control Unit Housing : 165x180x60 mm
probe:
- End Ø 29,5 x L 60 mm
protection: IP55
• deactivate the alarm when the tank
level diverges from the pre-set value by
at least 2%.
EXAMPLE:
If the H-level alarm is set at 75%:
- The alarm will be activated when
the tank level, while going up,
reaches the value of 75% and
maintains it for at least x readings.
- The alarm will be deactivated when
the tank level, while going down,
reaches the value of 73%.
Sistema di gestione del livello del serbatoio
Tank level monitoring system
230 V +/- 5
50-60 Hz or
110 V +/- 5 % 50-60 Hz
+/- 1 % del fondo scala ( dopo corretta
calibrazione )
1 / 2: numero dell’allarme
1 / 2: alarm number
Turning the compressor on
MANUALLY
La durata dell’ attivazione del compressore dipende
dalle specifiche condizioni di utilizzo.
OCIO provvede in ogni modo ad arrestarlo
(SOLITAMENTE DOPO POCHI SECONDI) non
appena rileva che le corrette condizioni di lettura
sono state rispristinate.
Precisione
Either in NORMAL CONDITIONS (no
alarm on) or in ALARM CONDITIONS,
OCIO can display the selected alarm
levels.
Manuale d' installazione e d' uso
Use and installation manual
READING
PLEASE WAIT...
Indicazione
B
D
*
da poche decine di litri sino a 999.000 litri
When OCIO detects conditions that are
no longer of alarm, the display reverts
to showing the quantity previously
selected.
English
XXXX
Attivazione MANUALE
del compressore
165
140
Italiano
The undersigned:
PIUSI S.p.AVia Pacinotti c.m. z.i.Rangavino
46029 Suzzara - Mantova - Italy
HEREBY STATES
under its own responsibility, that the equipment described below:
Description : Level measuring
Model : OCIO
Serial number: refer to Lot Number shown on CE plate affixed to productYear of manufacture:
refer to the year of production shown on the CE plate affixed to the productis in conformity with
the legal provisions indicated in the directives :
- Low-Voltage Directive 2006/95/EC
- Electromagnetic Compatibility Directive 2004/108/EC
The documentation is at the disposal of the competent authority following motivated request
at Piusi S.p.A. or following request sent to the email address: [email protected]. The person
authorised to compile the technical file and draw up the declaration is Otto Varini as legal
representative.
Suzzara, 01/01/2010
legale rappresentante.
legal representative.
Italiano
English
Italiano
1. Cos’è Ocio
1. What is Ocio?
OCIO è una apparecchiatura
elettronica di misura e controllo del
livello di serbatoi.
OCIO rileva il livello del serbatoio grazie
all’elaborazione di una lettura di
pressione, effettuata tramite una sonda
calata all’interno del serbatoio.
I componenti di OCIO sono:
• L’ UNITA’ DI CONTROLLO
alloggiata in una custodia di materiale
plastico, adatta per installazione
all’esterno, provvista di display (LCD)
e tastiera
OCIO is an electronic instrument for
monitoring the level of liquids contained
in tanks.
OCIO indicates tank levels by processing
pressure readings made by a probe
placed inside the tank.
OCIO is made up of the following parts:
• CONTROL UNIT
Contained in a plastic housing and
suitable for outdoor use, it includes a
liquid-crystal display (LCD) and a
keypad.
A. Display
B. Tastiera
C. Passacavo per
alimentazione
D. Collegamento
sonda
E. Passacavo allarmi
A. Lcd
B. Keypad
C. Core hitch for
power line
D. Probe tube
connection
E. Core hitch for
alarms
A
B
English
A. Resistenza scaldante
B. Scheda elettronica
C. Valvola di controllo
D. Compressore
A
• la SONDA da inserire nel serbatoio e
collegare all’ unità di controllo
tipo/typeLV
D
E
• PROBE to be placed inside the tank
and connected to the control unit.
tipo/typeHV (optional)
a) Weighted end-piece
b) Connection Oil version
c) Tube 12x9
d) Ring nut M16X1
e) Connection M16X1
f) Ring nut M8X0,5
G) Tube 6x4
h) Connection
Standard vers.
OCIO consente :
• la visualizzazione continuamente
aggiornata del livello del serbatoio
• il settaggio di due distinti livelli di
allarme capaci di comandare segnalazioni
remote
OCIO è adatto per essere utilizzato su
serbatoi:
• di tipo atmosferico, non pressurizzati,
nei quali cioè la pressione interna è
sempre pari alla pressione atmosferica
• di dimensioni e volumetria diverse; è
possibile selezionare una delle diverse
geometrie disponibili e digitare le
dimensioni del serbatoio
• contenenti fluidi chenon siano
infiammabili, esplosivi o corrosivi ( quali
gasolio, olii lubrificanti, acqua, prodotti
alimentari )
OCIO è una apparecchiatura
totalmente autonoma che necessita
della sola alimentazione elettrica .
Attenzione!
Warning!
Per assicurare un uso corretto
dell’apparecchiatura è necessario
leggere e rispettare le indicazioni e le
avvertenze contenute nel presente
manuale.
Un uso improprio può causare danni
alle persone o alle cose.
For safe and proper use, carefully
follow the instructions and
indications contained in this manual.
Improper use may cause harm to
persons and damage to property.
L’ installazione di OCIO è semplice e
rapida e può essere effettuata anche su
serbatoi già pieni.
OCIO can be installed easily and quickly,
even on tanks that have already been
filled.
Attenzione!
Warning!
L’UNITA’ DI CONTROLLO è una
apparecchiatura elettrica NON
adatta per installazione in ambienti
con pericolo d’esplosione
The CONTROL UNIT is an electric
device that is NOT suited for use in
areas where there may be risks of
explosion.
2. How Ocio works
Un fluido all’nterno di un serbatoio
genera sul fondo del serbatoio stesso una
pressione che dipende:
• dal livello del liquido ( L )
• dal peso specifico del liquido ( D )
A fluid contained in a tank applies a
pressure at the bottom of the tank, that
depends on:
• the level of the liquid ( L )
• the density of the liquid ( D )
3.1 Installation
A
POSIZIONAMENTO
unità di controllo
Utilizzando la sonda fornita con OCIO
(di lunghezza totale pari a 10 metri)
l’UNITA’ DI CONTROLLO può essere
installata all’aperto, in posizione
comodamente accessibile, sul serbatoio
stesso o nelle sue immediate vicinanze.
La tubazione della sonda dovrà essere
posata con cura, evitandone il
danneggiamento che ne
comprometterebbe la perfetta tenuta.
Nota importante!
POSITIONING
the control unit
The CONTROL UNIT, connected to the
probe supplied with OCIO (total length
10 metres), can be installed outdoors in
any location offering easy access, directly
on the tank or in its immediate vicinity.
The probe tube should be laid out with
care, avoiding any damage that might
impair its sealing tightness.
Important note!
Qualora ritenuto opportuno, prolungando
la tubazione della sonda,l’UNITA’ DI
CONTROLLO può essere installata
sino a 50 metri dal serbatoio senza
alcuna conseguenza sulle prestazioni
dello strumento.
La massima cura deve essere prestata per
assicurare la perfetta tenuta dell’eventuale
giunzione.
If necessary, the CONTROL UNIT can
be installed at a distance of up to 50
metres from the tank , by applying an
extension the probe tube, with no
consequences on the instrument's
performance.
Great care must be given to ensuring
perfect sealing tightness to all coupling
joints.
L’UNITA’ DI CONTROLLO può essere
utilizzata sia in posizione orizzontale
che verticale .
The CONTROL UNIT functions regularly
either in a vertical or a horizontal
position.
Nel caso di installazione all’aperto è
preferibile l’installazione in verticale e
se ne raccomanda una protezione
dall’esposizione diretta ai raggi solari
When installed outdoors, the vertical
position is preferable, and the unit should
also be sheltered from direct sunlight.
B
FISSAGGIO meccanico
unità di controllo
Per il fissaggio della custodia esistono
due alternative:
• fissaggio DIRETTO A PARETE
Per il fissaggio è necessaria l’apertura
della custodia
B
FASTENING
the control unit
There are two ways to fasten the housing:
• DIRECT WALL fastening
It is necessary to open the housing before
fastening.
156
n° 2
Fori passanti
Ø 4,5
no. 2
through holes
Ø 4,5
80
2. Come funziona Ocio
OCIO provides accurate and
constantly updated readings even
when the fluid level changes or under
variable ambient conditions
(atmospheric pressure and
temperature).
3. Installing Ocio
A
With OCIO you can:
• have constantly updated readings of
actual tank levels;
• set two different alarm levels that can
be used to activate remote devices.
OCIO can be used in the following
situations:
• non-pressurized tanks, where tank
pressure is always equal to the
atmospheric pressure;
• tanks having various shapes and
capacities; you can select one of the
available shapes and enter the tank
dimensions;
• tanks containing fluids that arenot
flammable, explosive or corrosive
(examples of admissible fluids are: diesel
oil, lubricating oil, water, food products).
OCIO is a completely independent
instrument and needs only be connected
to a power source.
D
3. Come installare Ocio
3.1 Installazione
meccanica
A. Zavorra
B. Raccordo vers. olio
C. Tubo 12x9
D. Ghiera M16x1
E. Raccordo M16x1
F. Ghiera M8x0,5
G. Tubo 6x4
H. Raccordo vers. std.
C
A. Heating resistance
B. Circuit board
C. Control valve
D. Compressor
Anche al variare del livello del
fluido, o a fronte di cambiamenti
delle condizioni ambientali
(pressione atmosferica e
temperatura) OCIO garantisce così
una lettura sempre precisa e
costantemente aggiornata.
C
B
Italiano
English
Italiano
English
SONDA tipo “ STANDARD “
:
• Accertarsi che il serbatoio sia provvisto
superiormente di un bocchello, provvisto
di tappo o flangia, di dimensioni tali da
permettere l’inserimento del terminale di
zavorra tipo STANDARD (vedi dimensioni
nei dati tecnici)
• Realizzare un foro filettato DN 1/2” sul
tappo bocchello
• Montare sul tappo del bocchello il
passacavo fornito con la sonda, dotato di
filetto maschio DN 1/2”
• Infilare la sonda nel passacavo
• Collegare la sonda al raccordo del
terminale di zavorra e serrare accuratamente
• Infilare il terminale nel bocchello ed
accertarsi che questo raggiunga il fondo
del serbatoio
• Montare il tappo ( o flangia ) del bocchello
sul bocchello stesso
• Serrare il passacavo dopo aver riverificato
che il terminale sia adagiato sul fondo del
serbatoio
• Collegare il tubo sonda al raccordo
previsto esternamente alla custodia dell’
UNITA’ DI CONTROLLO e serrare
accuratamente
• Oltre i 1000 Cst, attendere alcuni minuti
per la stabilizzazione della sonda.
"STANDARD"- type PROBE
:
• Make sure there is an opening (with a
cap or a flange) on the tank top, wide
enough for the STANDARD-type end
weight to go through (check size on
specifications sheet).
• Drill a 1/2” DN threaded hole on the
cap of the opening.
• Take the core hitch that is supplied with
the probe, which has a 1/2" DN male
thread, and mount it on the cap of the
opening.
• Introduce the probe through the core
hitch.
• Connect the probe to the weighted end
and fasten it tightly.
• Pass the end piece through the opening
and make sure it reaches the bottom of
the tank.
• Place the cap (or flange) back on the
opening.
• Tighten the core hitch after checking
once again that the weighted end is lying
on the bottom of the tank.
• Connect the probe tube to the joint on
the outside of the CONTROL UNIT
housing and fasten it tightly.
• Over 1000 Cst wait a few minutes for
the probe to stabilise.
La custodia dell’UNITA’ DI
CONTROLLO è provvista di un secondo
passacavo per il collegamento degli
allarmi.
Tale passacavo è fornito di un tappo di
chiusura, che è necessario rimuovere per
il suo utilizzo.
L’uscita allarmi è costituita da due
CONTATTI PULITI
NORMALMENTE APERTI
, i quali si
commutano in CHIUSURA
all’attivazione dell’allarme
corrispondente.
I due contatti puliti sono disponibili per
il collegamento sui morsetti:
J2 : allarme n. 1
J3 : allarme n. 2
The CONTROL UNIT housing is provided
with a second core hitch to be used for
connecting the alarms.
It is closed by a cap, which must be
removed before use.
The alarm line consists of two CLEAN
CONTACTS that are NORMALLY
OPEN and that switch to the CLOSED
POSITION when the corresponding
alarm is activated.
The two clean contacts are located on
the terminal:
J2 : Alarm no. 1
J3 : Alarm no. 2
SONDA tipo “ OIL “ (opzionale) :
• Accertarsi che il serbatoio sia provvisto
superiormente di un bocchello, provvisto
di tappo o flangia, di dimensioni tali da
permettere l’inserimento del terminale di
zavorra.
• Realizzare un foro filettato DN 1/2” gas
sul tappo bocchello
• Montare sul tappo del bocchello il
passacavo fornito con la sonda, dotato di
filetto maschio DN 1/2” gas
• Infilare il tubo DN 4x6 nel passacavo
• Collegare le due tubazioni ( DN 4x6 e
DN 9x12 ) tramite il raccordo fornito con
il kit “ OIL “, serrando accuratamente.
Tagliare la tubazione DN 9x12 in modo
che la sua lunghezza sia di poco inferiore
all’altezza del serbatoio; l’intera tubazione
DN 9x12 rimarrà così all’interno del
serbatoio
• Collegare la tubazione DN 9x12 al
raccordo del terminale di zavorra già
montati, quindi serrare accuratamente.
• Infilare il terminale nel bocchello ed
accertarsi che questo raggiunga il fondo
del serbatoio
• Montare il tappo ( o flangia ) del bocchello
sul bocchello stesso
• Serrare il passacavo dopo aver riverificato
che il terminale sia adagiato sul fondo del
serbatoio
• Collegare il tubo sonda al raccordo
previsto esternamente alla custodia dell’
UNITA’ DI CONTROLLO e serrare
accuratamente
"OIL"- type PROBE
(option):
• Make sure there is an opening (with a
cap or a flange) on the tank top, wide
enough for the end weight to go through
• Drill a 1/2" gas DN threaded hole on
the cap of the opening.
• Take the core hitch that is supplied with
the probe, which has a 1/2" gas DN male
thread, and mount it on the cap of the
opening.
• Introduce the 4x6 DN tube through the
core hitch.
• Connect the two tubes (4x6 DN and
9x12 DN) using the joint supplied with
the OIL-type probe and fasten them
tightly. Cut the 9x12 DN tube so that its
length is slightly less than the tank's
height; the entire 9x12 DN tube should
now fit completely inside the tank.
Connect the 9x12 DN tube to the weighted
end - previously installed - and fasten it
tightly.
• Pass the end piece through the opening
and make sure it reaches the bottom of
the tank.
• Place the cap (or flange) back on the
opening.
• Tighten the core hitch after checking
once again that the weighted end is lying
on the bottom of the tank.
• Connect the probe tube to the joint on
the outside of the CONTROL UNIT
housing and fasten it tightly.
3.2
Peso specifico = D (Kg / dm 3)
Density
= D (Kg / dm 3)
1
1 (dm 3)
OCIO measures the pressure applied by
the fluid through a probe which is held
at the bottom of the tank by a weight.
Given the value of theDENSITY ( D )
of the fluid contained inside the tank ,
OCIO will automatically calculate the
surface level of the liquid within the tank
and show it on the display.
The DENSITY ( D ) of any fluid can be
easily entered in the instrument through
CALIBRATION.
A microchip placed on the electronic
CIRCUIT BOARD automatically
activates a small electric COMPRESSOR
located inside the CONTROL UNIT,
whenever it is necessary.
That, and a special CONTROL VALVE,
maintains ideal operating conditions
inside the PROBE.
The microchip also controls a HEATING
RESISTANCE that prevents the
temperature inside the housing to fall
below a pre-determined value, in order
to allow accurate readings and avoid the
forming of condensate on the circuitry.
• BRACKET fastening
(bracket not supplied)
In this case it is NOT necessary to open
the housing.
132
D (Kg)
Esempi / Examples:
D = 1 Kg / dm 3
- ACQUA - WATER :
- GASOLIO - DIESEL OIL : D = 0,84 Kg / dm 3
D = 0,85 - 0,92 Kg / dm 3
- OLIO - OIL (optional):
OCIO legge la pressione generata dal
fluido tramite la sonda, matenuta sul
fondo del serbatoio grazie alla zavorra.
Tenendo conto del valore delPESO
SPECIFICO ( D ), caratteristico del
fluido contenuto nel serbatoio, OCIO
calcola automaticamente l’altezza ( L )
del liquido contenuto nel serbatoio, e la
visualizza sul display.
Tramite una semplice attività di
CALIBRAZIONE è possibile inserire
il valore del PESO SPECIFICO ( D )
di un qualunque fluido.
Nell’UNITA’ DI CONTROLLO un
piccolo COMPRESSORE elettrico viene
automaticamente attivato quando
necessario dal microprocessore della
SCHEDA ELETTRONICA.
Ciò, unitamente alla presenza di una
speciale VALVOLA di CONTROLLO,
mantiene sempre all’interno della
SONDA le corrette condizioni di lettura.
Una RESISTENZA SCALDANTE,
controllata dal microprocessore, evita
che la temperatura all’interno della
custodia scenda sotto un valore prefissato,
migliorando la precisione della lettura
ed evitando problemi di condensa
sull’elettronica.
• fissaggio TRAMITE STAFFA
(NON fornita con OCIO).
Per il fissaggio NON è necessaria
l’apertura della custodia
n° 4
fori ciechi Ø 2,8
profondità 6 mm
118
L
1
no. 4
blind holes Ø 2,8
depth 6 mm
3.2
Note importanti!
Per l’alimentazione dell’unità di controllo
è necessaria l’apertura della custodia in
quanto questa viene fornita senza cavo
di alimentazione e spina.
La scheda è protetta da eventuali
sovraccarichi per mezzo del fusibile F1
Nel caso di mancato funzionamento dello
strumento controllare lo stato del fusibile.
POWER SUPPLY
control unit
Important note!
I dati di alimentazione
da rispettare,
dipendenti dal modello
di OCIO, sono riportati
nella targhetta sul
coperchio della
custodia dell’ UNITA’
DI CONTROLLO
The required
characteristics of the
power source depend
on the model of OCIO
and are inscribed on
the nameplate placed
on the cover of the
CONTROL UNIT
housing.
RELE 2
(allarme 2
(alarm 2)
MONTAGGIO
e collegamento sonda
La sonda in dotazione è adeguata
all’utilizzo di OCIO per fluidi con
viscosità inferiore a 30 Cst. (gasolio,
acqua, ecc.)
Qualora si volesse utilizzare OCIO per
fluidi con viscosità compresa tra 30 e
2000 Cst, si dovrà acquistare il kit sonda
tipo “OIL” che non viene fornita con
OCIO.
C
OCIO is not a SAFETY
DEVICE .
In particolare gli ALLARMI di
OCIO sono stati previsti per essere
utilizzati come INDICAZIONE
locale o remota, e NON come
ATTUAZIONE DIRETTA DI
APPARECCHIATURE DI
SICUREZZA.
E’ pertanto VIETATO collegare
alle uscite di allarme di OCIO
apparecchiature il cui mancato o
ritardato intervento possa avere
conseguenze sulla SICUREZZA di
cose o persone o sull’AMBIENTE.
Specifically, the ALARMS are
designed to provide SIGNALS for
local or remote use, they DO NOT
DIRECTLY ACTIVATE ANY
SAFETY DEVICE.
Therefore, DO NOT CONNECT to
OCIO's alarm terminals any device
whose non-functioning or delayed
functioning might affect the SAFETY
of PERSONS or of the
ENVIRONMENT.
4. Per iniziare
4. Before starting
Grazie alla tastiera e al display che guida
l’operatore, l’ uso di OCIO è semplice
e intuitivo.
Using OCIO is easy and uncomplicated,
thanks to the keypad and to the display
that guides the user through the various
steps.
I paragrafi successivi descrivono le
funzioni di OCIO facendo ricorso a
rappresentazioni grafiche delle azioni sui
tasti e delle indicazioni che appaiono
sull’ LCD.
The following paragraphs show how to
use OCIO, with a graphic representation
of what keys to press and the
corresponding indications that appears
on the LCD.
• Rappresentazione dei 4 TASTI della
tastiera di OCIO
• The 4 KEYS on OCIO's keypad.
Enter
Enter
Canc
Cancel
Se la sonda non è
ancora collegata,
o se la sonda è
collegata, ma il
livello del
serbatoio è
inferiore a 50 mm,
OCIO visualizza:
If the probe is not
connected, or if
the probe is
connected but the
tank level is lower
than 50 mm, the
display shows:
Attenzione!
Warning!
Questo
messaggio
riamane acceso
fino a quando lo
strumento non
legge un livello di
liquido superiore
a 50 mm .
This message
remains on the
display until the
instrument
detects a tank
level higher than
50 mm.
F1
Alimentazione/Power supply J2
Qualora la presa di alimentazione sia a
distanza superiore sarà cura
dell’installatore utilizzare una prolunga
dell’alimentazione in accordo alle vigenti
normative di sicurezza.
COLLEGAMENTO
elettrico allarmi
(attività Opzionale)
Per il collegamento degli allarmi è
necessaria l’apertura della custodia.
J3
If the power source cannot be reached,
the installer shall have to use an extension
cable, respecting existing safety
regulations.
B
If the probe is
connected and
the tank level
( XXX mm) is
higher than 50
mm, the display
shows:
LEVEL
6. Configuration
La CONFIGURAZIONE è l’attività
tramite cui OCIO viene adattato alle
specifiche condizioni di utilizzo.
Tale attività deve essere eseguita in
occasione dell’installazione dello
strumento da personale che abbia
attentamente letto le presenti istruzioni.
CONFIGURATION is the procedure by
which OCIO is adjusted to meet the
specific operating conditions.
CONFIGURATION should be performed
at the time of installation, after carefully
reading and understanding the
instructions contained in this manual.
6.1
6.1
How to ENTER
CONFIGURATION MODE
In order to access CONFIGURATION
mode you must enter a 2-DIGIT PIN
CODE (the PIN code CANNOT be
changed).
Per accedere alla Modalità di
CONFIGURAZIONE è necessario
digitare unPIN CODE A 2 CIFRE
(NON MODIFICABILE).
Tale PIN CODE coincide con le ultime
due cifre del SERIAL NUMBER ed è
pertanto diversa da strumento a strumento
(vedi par. Visualizzazione SERIAL
NUMBER)
Per la visualizzazione delle grandezze
misurate OCIO consente di selezionare
tra:
OCIO can display measurements in
either of two measuring systems:
UNITA’ METRICHE
(millimetri e litri)
METRIC SYSTEM
(millimetres and litres)
UNITA’ ANGLOSASSONI
(pollici e galloni)
UK SYSTEM
(inches and gallons)
Gli eventuali dati (dimensioni serbatoio
e peso specifico liquido) saranno da
imputare in unità di misura congruenti.
Once you have selected what system to
use, all data (i.e. tank dimensions and
liquid density) must be entered using the
appropriate system.
TANK ?
UNIT ?
LEV / VOL
MM / L
UNIT ?
LEV / VOL
IN / GAL
XX MM
6. Configurazione
Come ENTRARE in
CONFIGURAZIONE
CHOOSING THE UNITS
OF MEASUREMENT
UNIT ?
Se la sonda è
collegata e nel
serbatoio il
livello
( XXX mm ) è
superiore a 50
mm, OCIO
visualizza:
OUT OF RANGE
SELEZIONE
UNITA’ DI MISURA
CONFIGURAZIONE
SERBATOI
CONFIGURING
THE TANK
OCIO consente di visualizzare due tipi
di grandezze
Il LIVELLO del liquido all’interno del
serbatoio
Il VOLUME di liquido presente
OCIO can display two different
quantities:
the LEVEL of the liquid inside the
tank
the VOLUME of the liquid.
Nota importante!
Important note!
OCIO rileva sempre un LIVELLO e da
questo è in grado di calcolare il VOLUME
di liquido presente nel serbatoioSOLO
SE il serbatoio in cui OCIO è installato
è stato configurato.
OCIO always detects the LEVEL of the
liquid, and uses this information to
determine the VOLUME of the liquid
only if the tank has been regularly
configured.
Conf igurar e il serbatoio signif ica:
Configuring the tank means:
TIPO -TYPE
selezionare il tipo di serbatoio
The PIN code corresponds to the last two
digits of the SERIAL NUMBER and is
therefore different for each instrument
(see section: Displaying the SERIAL
NUMBER).
selecting theshape of the tank
DIMENSIONI - DIMENSIONS
digitare le dimensioni del serbatoio
LEVEL
BATTITURA BREVE
(premere e rilasciare subito dopo)
Down
TIPO -TYPE
SHORT TAP
(press and release immediately)
BATTITURA LUNGA
(premere e mantenere
brevemente premuto)
SYSTEM CONFIGUR.
PIN SYSTEM
CODE: CONFIGUR.
00
PINSYSTEM
CODE: CONFIGUR.
10
PIN CODE: 2 0
LONG TAP
(press and hold
briefly)
BATTITURA CONTINUATA
(premere e mantenere premuto)
HOLDING
(press and hold down)
BATTITURA
CONTEMPORANEA
(premere il primo tasto e,
mentre lo si tiene premuto,
premere brevemente il
secondo, poi rilasciare)
CONNECTING
the electric alarms
(this operation is optional)
To connect the alarms it is necessary to
open the housing.
SelectingTANK SHAPE
OCIO consente di di selezionare tra
3 tipi di serbatoi ( A, B, C ),
oppure diNON CONFIGURARE
il
serbatoio
( selezione NONE )
OCIO allows you to choose between
3 kinds of tanks (A, B, C),
or NOT TO CONFIGURE
the tank
(by selecting NONE)
SYSTEM CONFIGUR.
PIN SYSTEM
CODE: CONFIGUR.
20
PINSYSTEM
CODE: CONFIGUR.
21
PIN CODE: 2 2
TANK ?
SHAPE A
• A non-specific
LCD SCREEN
PIN CODE
ESATTO
XX MM
Il passaggio da una INDICAZIONE
DELL’LCD all’altra può esser
generata:
RIGHT
PIN CODE
UNIT ?
The LCD can pass from
ONE SCREEN
to another
• da una delleAZIONI SUI TASTI
illustrate sopra
• when theKEYS ARE PRESSED
as
indicated above, or
• dal TRASCORRERE DI UN
CERTO TEMPO
senza alcuna azione
sui tasti
• when a CERTAIN AMOUNT OF
TIME goes by without any key being
pressed.
indicazione display
DOPO che il tempo
è trascorso
Selezione TIPO
TANK ?
DOUBLE KEYING
(press one key and, while
holding it down, press
and release another key)
LEVEL
indicazione display
PRIMA dell’azione
sui tasti
XX MM
• How to use the
KEYS :
CALIBRATION ?
6.2
Le ATTIVITA’ di
CONFIGURAZIONE
Una volta entrati in
CONFIGURAZIONE, le seguenti attività
sono accessibili tramite la battitura dei
tasti indicati:
CALIBRATION
DENSITY
XX MM
5. Start-up
All’accensione OCIO effettua un
autotest provvedendo in sequenza a:
• accendere tutti i segmenti del display
• spegnere tutti i segmenti del display
• attivare brevemente il compressore
• visualizzare il SERIAL NUMBER per
alcuni secondi
• entrare AUTOMATICAMENTE nella
modalità di visualizzazione del livello.
When OCIO is switched on, it carries
out a self-test by performing the following
activities in sequence:
• turning on all segments of the LCD
• turning off all segments of the LCD
• briefly activating the compressor
• displaying the SERIAL NUMBER
• AUTOMATICALLY entering into level
display mode.
UNIT ?
UNIT
TANK ?
TANK
SHAPE A
CALIBRATION
DENSITY
ALARM ?
ALARM
NUMBER 1
Attenzione!
LEVEL
XX MM
LEV / VOL
MM / L
CALIBRATION ?
L’attività di IMPOSTAZIONE
ALLARMI è presente solo dopo
che si è effettuata la
CONFIGURAZIONE
SERBATOIO
WRONG
PIN CODE
Once you have entered the
CONFIGURATION mode, you can
perform the following activities by
pressing the keys as shown:
LCD
AFTER
a certain time
5. All’accensione
PIN CODE
ERRATO
CONFIGURATION
OPERATIONS
LCD
AFTER
pressing keys
no pressure on keys
for a certain time
LEVEL
6.2
LCD
BEFORE
pressing keys
pressure on keys
nessuna azione sui tasti
per un certo tempo
B
LEVEL INDICATOR
S / N AMMXXXX
N.A. N.C.
INSTALLING
and connecting the probe
If Ocio is to be used with fluids having
a viscosity between 30 and 2000 Cst, it
is necessary to purchase the “Oil”-type
probe kit which is not supplied with Ocio.
Giù
Up
• Rappresentazione delle possibili
AZIONI SUI TASTI :
indicazione display
DOPO dell’azione
sui tasti
The supplied probe is suitable for Ocio
with fluids having a viscosity lower than
30 Cst. (diesel oil, water, etc).
Su
azione sui tasti
152
C
OCIO non è una apparecchiatura
di SICUREZZA .
• Rappresentazione di una generica
INDICAZIONE DELL
’ LCD
It is necessary to open the housing when
connecting the control unit to a power
source, because it is supplied without
cord and plug.
The circuit board is protected from
overloads by a fuse (F1).
Check the fuse if the instrument should
fail to function.
Nota importante!
N.A. N.C.
Warning!
Warning!
When supplied,
OCIO is calibrated
for tanks containing
DIESEL OIL.
If the instrument is
intended for use
with other liquids,
it has to be
CALIBRATED.
English
entering thedimensions of the tank
• All electric connections should be made
by qualified personnel. The installer is
responsible for respecting all relevant
regulations.
• During installation and maintenance
operations, make sure that OCIO is
disconnected from the power supply.
• Before connecting OCIO to a power
supply, check the nameplate for
information on the required
characteristics of the power source.
• Use wires with an adequate section for
connecting to the power source.
• Make sure that the earth wire is properly
connected to the earthing system.
• Before connecting any device to the
clean contacts of the minimum-level and
maximum-level alarms, make sure that
the maximum voltage and current do not
exceed the values supported by the
contacts. Use wires with adequate
sections for the expected workload.
• Always close the cover of the control
unit before connecting the power supply.
A
ALIMENTAZIONE
unità di controllo
RELE 1
(allarme 1
(alarm 1)
Electric
connections
Accensione / Start-up
Attenzione!
OCIO viene fornito
calibrato per
serbatoi conteneti
GASOLIO
Qualora il
serbatoio contenga
un fluido diverso è
necessario
procedere ad una
CALIBRAZIONE.
The electric characteristics of these
La portata di detti contatti è precisata nel contacts are shown in theSpecifications
paragrafoDati Tecnici
sheet.
Attenzione!
Italiano
English
Important note!
• Il collegamento elettrico deve essere
eseguito da personale esperto. E’
responsabilità dell’installatore verificare
che le norme vigenti siano rispettate
• Durante l’installazione e la
manutenzione provvedere sempre a
scollegare la linea d’alimentazione
• Prima di effettuare il collegamento
verificare sempre i dati elettrici riportati
sulla targhetta di OCIO
• Per il collegamento alla linea
d’alimentazione utilizzare cavi con
sezioni minime adeguate
• Verificare che il terminale di terra
dell’unità di controllo sia correttamente
collegato all’impianto di messa a terra
• Prima di collegare qualsiasi apparecchio
ai contatti puliti degli allarmi di minimo
e massimo livello , verificare che il
voltaggio e le correnti massime non siano
maggiori di quelle ammissibili dai contatti
. Utilizzare cavi con sezioni minime
adeguate alle correnti in gioco
• Chiudere sempre il coperchio dell’unità
di controllo prima di fornire
l’alimentazione
A
1
Collegamenti
elettrici
Italiano
Warning!
SETTING THE ALARMS can be
done only after CONFIGURING
THE TANK
Ø
A
Vertical Cylinder
H
H max = 4.000 mm / 157,4 inc
Ø max = 30.000 mm / 999,9 inc
TANK ?
SHAPE B
TANK SHAPE B
HEIGHT 1 2 3 4 MM
serbatoioCilindrico
ad asse Orizzontale
Horizontal Cylinder
L
B
Ø
Ø max = 4.000 mm / 157,4 inc
L max = 30.000 mm / 999,9 inc
TANK ?
SHAPE C
TANK
SHAPE C
HEIGHT 1 2 3 4 MM
serbatoio
Parallelepipedo
Parallepipedal
tank
Calibrazione
Calibration
Impostazione
allarmi
Setting the
alarms
TANK SHAPE A
HEIGHT 1 2 3 4 MM
serbatoioCilindrico
ad asse Verticale
Selezione
unità di misura
Choosing
the units of
measurement
Configurazione
serbatoio
Configuring
the tank
VOLUMETRIE
VOLUMES
655.350 lt
65.535 gallon
W
H
C
W max = 30.000 mm / 999,9 inc
H max = 4.000 mm / 157,4 inc
D max = 30.000 mm / 999,9 inc
TANK ?
SHAPE NONE
TANK NONE
RESET?
N
serbatoio
NON configurato
NON configured
tank
D


