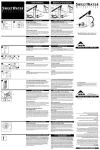
1
Owner’s Manual
Bedienungsanleitung
Manuel D’Utilisation
Manuale Di Istruzioni
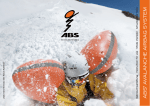
Float 22
Basic Components
airbag
trigger handle
leg strap
2
10
waist belt
12
13
Float 22
Basic Components
probe and shovel
compartment
airbag compartment
diagonal ski mount loop
main storage compartment
helmet carry
loops
diagonal ski mount loop
11
waist belt pocket
3
Float Throttle
Basic Components
airbag
13
trigger handle
leg strap
waist belt
4
12
10
Float Throttle
Basic Components
probe and shovel
compartment
airbag compartment
helmet carry
loops
main storage compartment
THROTTL
E
11
waist belt pocket
5
Float 32
Basic Components
airbag
load lifters
13
trigger handle: can be
set on either shoulder,
hydration on the opposite
trigger handle: can be
set on either shoulder,
hydration on the opposite
waist belt
leg strap
6
10
13
12
Float 32
Basic Components
airbag compartment
lined goggle pocket
diagonal ski mount loop
shovel and probe
compartment
helmet sling storage
helmet carry
loops
ice axe cords
compression strap
main storage
compartment
ice axe loops
diagonal ski mount loop
12
waist belt pocket
7
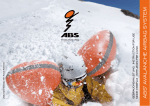
Theory of Operation / Disclaimer / Warranty
Why do I need an avalanche airbag?
Preventing or minimizing burial depth is the key to reducing avalanche fatalities. That’s because the
majority of time in an avalanche rescue is spent on excavating the victim. An airbag is designed to
keep you at or near the surface, minimizing excavation time.
Disclaimer
The Float system is designed to help improve your chances of surviving an avalanche. It must be used
correctly, following the guidelines in this manual. Perform a practice deployment at least once a year.
Do not modify any aspect of this product or perform any operations not described in this manual.
Your Float cannot prevent the release of an avalanche or guarantee survival under any conditions.
While it will provide some protection from impact, no airbag system can completely prevent injury
from trauma. Any airbag must be used in conjunction with a beacon, shovel, probe, and helmet to
provide the best chance of survival. As with other avalanche rescue tools, your airbag should not
promote taking more risks.
You have invested in lifesaving technology. Be sure you have also invested your time in acquiring
the necessary skills to avoid avalanche situations before heading into the backcountry. Take an
avalanche safety course, practice with your equipment, and plan your route according to the regional
avalanche forecast.
Warranty
The manufacturer, Backcountry Access, Inc. (BCA), expressly warrants the workmanship and
components of this product for three years after the date of retail purchase. All parts will be either
repaired or replaced free of charge, including labor, by the manufacturer. This warranty does not cover
damage to the product caused by improper use or excessive wear and tear. Direct all warranty claims
to BCA or your retailer. All claims must include proof of purchase and a return authorization number.
To ensure warranty protection and periodic technical updates please register online at:
www.backcountryaccess.com/warranty .
8
Equipment Check
Compressed Air System
trigger cover
7
trigger cable
pressure gauge
8
4
14
release valve cover
coupler gauge
air hose
ejector assembly
9
air cylinder
1
3
quick
connect fitting
2
9
Installing Compressed Air Cylinder
1. Remove packaging caps from pressurized air cylinder. To reach the compressed air system, unzip
the main storage compartment and fold back the fabric compressed air system cover.
2. Once cylinder is placed in the sleeve, secure the Velcro closure on the cylinder compartment.
3. Connect the quick connect fitting on the air hose u by pulling the large ring toward the air cylinder
v. It should click back into place when air hose w is properly connected. Coupler gauge x should
fit in place to ensure air hose is connected properly.
4
1
1
4
WRONG
SECURE
1
1
4. IMPORTANT! Screw the trigger cable nut y onto the trigger pin z. To expose the trigger
cable nut before threading it on the trigger pin, it might be necessary to push the trigger handle back
into the shoulder strap.
5. Screw the trigger cover { over the trigger cable nut y.
5
6
7
TRIGGER CABLE NUT ATTACHED
5
7
TRIGGER COVER ATTACHED
7
10
Using the Avalanche Airbag
6. Empty, discharged cylinders should only be refilled or exchanged at authorized Float refill or exchange
centers. For a list of these locations, please see www.backcountryaccess.com/refillcenters .
If shipping is required, see “Shipping a Compressed Air Cylinder” below.
7. To disconnect an empty cylinder, follow the above steps in reverse.
Equipment Check
System Fittings
Follow the previous “Installing Compressed Air Cylinder” steps to verify connections are correct.
Every time you use your Float system, verify the trigger cable nut connection by unscrewing the
trigger cover { and making sure the trigger cable nut y is attached securely to the trigger pin z.
Replace trigger cover.
Air Cylinder
Check the pressure gauge | on the compressed air cylinder and make sure it is between 2500 and
2700 psi (172 to 186 bar) at room temperature (approximately 70°F or 21°C). Pressure must
be checked at room temperature for the reading to be accurate. Check pressure before every use.
PRESSURE MUST BE IN THIS RANGE OR THE SYSTEM MAY NOT FUNCTION PROPERLY.
Once the system is exposed to cold, the pressure will drop. If the pressure is ever observed below
2000 psi (138 bar), at any temperature, the airbag may not fill completely. See “Installing Compressed
Air Cylinder” on page 10 for replacement details.
Inspect the cylinder. Do not use a cylinder that is dented or damaged.
Pack
Make sure the Velcro flap on the top
of the airbag compartment is securely
fastened. This will ensure that the airbag is
completely stored and secure.
WRONG
SECURE
Only the airbag and ejector are meant to be
stored in the airbag compartment. Do not store any additional items in this compartment.
Check that nothing is loose inside the compressed air system or blocking the ejector assembly
Make sure the compartment is zipped completely shut.
9
.
Check to make sure that nothing is obstructing the airbag compartment on the outside of the pack,
especially any items with sharp points such as crampons or ice tools. Only carry skis using the
diagonal ski carry. Do not use the side compression straps for A-frame carry, as they may obstruct the
airbag’s deployment.
Pack Adjustments
Your pack should be properly fitted before you head into avalanche terrain. The forces of an
avalanche can rip the pack from your back if it is not secured to your body.
11
Using the Avalanche Airbag
Attaching Leg Strap
The leg strap ~ can be found in the waist belt pocket 11 .It should be used to prevent the pack from
being pulled off in an avalanche. Pull leg strap out and thread the waist belt 12 through the adjustable
end of the leg strap. With the fixed loop in your hand, bring the strap around the outside of your leg
then through your legs.
Insert the waist belt through the leg strap loop, then fasten the waist buckle. Tighten
the adjustment until it is snug but comfortable.
10
11
Waist Buckle
There are two parts to the buckle: male and female. Insert the male part into the widest opening of the
female part. Tighten the waist strap until snug. When attached correctly, the webbing and the buckle
should lay flat against your body.
Shovel and Probe Storage
Store shovel blade, shovel handle and probe in designated pockets, located in the external tool
compartment.
Ski/Snowboard Attachment
Float 22: Skis can be carried using the diagonal ski mounts. To carry a snowboard, order our BCA
Snowboard Carry Attachment, which integrates with the snowboard attachment loops on the back panel.
Float Throttle: Does not offer the diagonal ski carry. However, it is possible to attach BCA’s Snowboard
Carry Attachment, which integrates with the snowboard attachment loops on the back panel.
Float 32: Skis can be carried using the diagonal ski mounts. To carry a snowboard, order our BCA
Snowboard Carry Attachment, which integrates with the snowboard attachment loops on the back panel.
Hydration (reservoir not included)
Float 22 and Float Throttle: Not compatible with hydration system.
12
Using the Avalanche Airbag
Float 32: Place reservoir in main compartment and hang from Velcro loop (a) located inside. Feed
hydration tube through the corner opening (b) on the opposite side of where the trigger cable enters the
main compartment. Open airbag compartment and unfold airbag. Route the hydration tube through the
airbag compartment and into the shoulder strap opening (c) that does not contain the airbag trigger. Before
repacking airbag, make sure the hydration tube is threaded under the airbag and ejector assembly to
eliminate any obstruction during deployment.
c
a
c
b
b
Helmet Carrying
Float 22: The mesh helmet sling attaches to the four loops on the front of the pack.
Float Throttle: Helmet sling is not included, but pack contains helmet carry loops compatible with the
helmet sling included with other models.
Float 32: Helmet sling is permanently fixed on the front of the pack and is integrated into the sling storage
compartment under the BCA logo. Pull out the sling and attach clips to lower two loops, or upper two loops
if using the diagonal ski carry option.
Deployment
When traveling in avalanche terrain, unzip the pocket where the trigger handle 13 is
stored (see image on right). In case of an avalanche, pull the trigger handle quickly
in a downward motion, reaching across your body with the hand opposite the trigger.
Try skiing or riding to the flanks of the avalanche to escape the debris. When the
avalanche slows down, preserve your airway by covering your mouth with your hand
or elbow.
What to Expect
13
The airbag should exit the backpack and fill completely in approximately three
seconds. The airbag will continue to build pressure for a few seconds longer until
the system pressure equalizes. The airbag will hold air for several minutes until the
threat of an avalanche has passed.
After Deployment
Release the air from the airbag by pressing the release valve with your finger.
The valve is located underneath the orange release valve cover 14 . Do not use hard or sharp objects
to hold the release valve open, as they could damage the valve-sealing surface. Re-pack the airbag
into the airbag compartment. See “Packing the Airbag” below for details.
13
Maintenance
The Float airbag will not deploy again until the cylinder is refilled or replaced. This can be done at a
Float Refill Center (see www.backcountryaccess.com/refillcenters). To install the charged cylinder,
see “Installing Compressed Air Cylinder” on page 10. If you have deployed your airbag in an
avalanche, please contact BCA for a free airbag inspection and cylinder refill.
Packing the Airbag
The airbag must be folded into the airbag compartment. DO NOT ROLL OR STUFF THE AIRBAG
OR THE SYSTEM MAY NOT DEPLOY PROPERLY. If the airbag is wet, dry it completely before
packing. Empty any residual air from the airbag using the release valve (you may need to do this
periodically as you pack the bag). It is very important that all residual air has been released. After
this air has been released, disconnect the air hose from the cylinder before folding the airbag.
1. Completely separate the zipper so the slider is only attached to one set of teeth.
2. Bring zipper slider back to the opposite side of pack where the zipper begins (a).
3. Begin by laying out the deflated airbag flat on the ground. Make one vertical accordion fold on
each side of the airbag (b).
4. Next make two horizontal accordion folds on the airbag (c). After this step your airbag is ready to
be zipped inside the airbag compartment.
5. With airbag folded inside the compartment, re-engage the zipper (d) and zip the compartment
past the Velcro flap at the top of the compartment (e). Fasten Velcro and finish zipping the
compartment closed (f).
6. Refill or exchange your empty cylinder before using your Float pack again
b)
a)
e)
c)
f)
14
d)
Maintenance
Removing and Installing the Airbag System
The 12/13 Float packs feature a removable and interchangeable airbag system. The airbag
components can be swapped between the Float 32 and Float 22/Float Throttle or removed entirely.
Removing
1. To remove the airbag, open the airbag compartment by pulling the breakaway zipper apart under
the Velcro flap. Never try to “unzip” the airbag compartment zipper. Doing so could result in damage
to the breakaway zipper.
2. Disconnect the trigger cable and air hose from the cylinder (a).
3. Unfasten the black Velcro holding the loose end of the orange rope in place. Un-thread the rope
from the webbing loops (b).
4. Once the rope is no longer threaded through the webbing loops, the airbag, ejector, trigger cable and
air hose are free to remove (c). The trigger cable stays with pack, but can be removed as noted later in
the section “Moving the Trigger.”
a
b
c
15
Installing
1. With the airbag unfolded, lay the ejector in the airbag compartment with the orange release valve
cover facing up (a). The air hose should be fed through the designated opening (b) into the main
storage compartment where the cylinder is kept.
2. Starting on the side with the fixed end of the orange rope, thread the rope downward through the
first slit in the airbag. Thread the rope through the first webbing loop then upward back through the
first slit. Repeat this step with each slit (c) until you reach the ejector tube.
3. Once the threading is complete up to the ejector tube, pull the rope tight. This action will pull the
webbing loops up through the attachment slits in the airbag.
4. Bring rope over ejector tube.
5. Repeat threading technique through remaining slits and webbing loops.
6. Secure the loose end of the orange rope by running it up through the black Velcro loop, then loop
it back down and fold the Velcro flap over it.
7. Repack airbag and close compartment (see above instructions for repacking).
8. Reconnect trigger cable and air hose to cylinder (d).
a
b
c
d
16
Installing / Maintenance and Storage
Moving the Trigger
The Float 32 allows you to install the trigger in the left or right shoulder strap, depending on your
preference. This feature is not available in the Float 22 or Float Throttle.
Removing
1. Open the zipper on the shoulder strap containing the trigger.
2. Untighten the small screw that attaches the trigger to the webbing loop inside the shoulder strap.
3. Pull the trigger and cable out (a) through the shoulder strap zipper.
a
Installing
1. Starting at the shoulder strap zipper (a), thread the trigger cable, leading with the trigger cover,
back into the pack (b). Be sure the trigger cable is fed underneath the airbag components.
2. Feed trigger cable through the opening in bottom right corner of the airbag compartment (c) into
the main storage pocket that stores the cylinder.
3. Inside the shoulder strap zipper, secure the trigger cable by fastening the screw on the trigger
assembly to the webbing loop.
b
b
c
a
17
Maintenance / Storage / Transportation
No scheduled maintenance is required as long as the system is stored in a cool, dry place. Do not expose
a charged Float cylinder to temperatures exceeding 130°F (55°C) or below -22°F (-30°C). If subjected to
adverse conditions, check that all connections are free of contaminants. Pack can be cleaned with warm
soapy water and connections can be cleaned with a damp cloth. Do not use lubricants.
Periodic Deployment
BCA recommends deploying your Float airbag at least once per year, both to make sure the system is
operating correctly and to be sure the user knows how to operate the equipment efficiently. Put it on, pull
the trigger, repack the airbag and refill the cylinder before the season starts. Your Float airbag is designed
to undergo a minimum of 20 deployments and is warranted for three years. With proper care, it should last
five years or more.
Discharging Compressed Air Cylinder
If the compressed air cylinder v is pressurized but the pressure is below 2500 psi (172 bar) at 70°F
(21°C), it should not be used in the backcountry, but it may be used for a practice deployment. Simply
deploy the airbag by pulling on the trigger handle.
DO NOT POINT CYLINDER OUTLET PORT (COUPLER) AT ANYONE OR ANYTHING, AS IT
COULD CAUSE DAMAGE OR INJURY. DISCHARGING A COMPRESSED AIR CYLINDER IS
LOUD – PERSONAL EAR PROTECTION IS RECOMMENDED.
Shipping a Compressed Air Cylinder
DISCHARGE CYLINDER BEFORE SHIPPING.
Compressed air cylinders may not be shipped pressurized without proper (Hazmat) certification.
Empty or full compressed air cylinders must be shipped in original packaging to prevent damage.
Please return protective covers. When shipping unpressurized cylinders in their original packaging, please make sure you remove any Hazmat labels or markings that were used when they were
shipped pressurized.
Transportation Guidelines
While the International Air Transport Association (IATA) has specifically approved avalanche airbags
with pressurized cylinders for airline travel, the Transportation Security Administration (TSA) does
not allow them on flights to and from North America. If you are traveling in countries outside of North
America, contact your airline in advance for permission to check through your pressurized Float cylinder.
If permission is granted, then pack the pressurized cylinder in your checked baggage. Make sure it is
packed with the following document: www.backcountryaccess.com/IATAdoc .
If you are traveling to or from North America, then TSA will not allow your pressurized cylinder on board.
Discharge the compressed air cylinder before entering the airport. Once empty, unscrew the cylinder
head from the cylinder and put both in clean, re-sealable plastic bags. Carry them through the TSA
security checkpoint so they are visible to TSA personnel. Afterward, the cylinder head can be screwed
back on the cylinder by hand. When you reach your destination, locate a Float Refill Center and
exchange or refill your empty cylinder. For a list of Float refill/exchange locations, visit our site at
www.backcountryaccess.com/refillcenters .
18
Certifications and Markings
The following marks can be found on Backcountry Access Float avalanche airbags.
The CE mark of conformity indicates that Backcountry Access and this product meet the
requirements of the Personal Protective Equipment Directive (89/686/EEC).
The Pi mark of conformity indicates that Backcountry Access and this product meet the
requirements of ADR/RID and TPED (Directive 2010/35/EU).
Tested by TÜV SÜD: a globally recognized testing, inspection, and certification
organization.
TÜV Süd Product Service GmbH
Ridlerstr. 21
D-80339 Munich
Germany
EU representative:
BCA Europe
Davisstraße 11 b
A-5400 Hallein
Austria
Ph: 0043 (0) 6245 / 77385
Fax: 0043 (0) 6245 / 77385 - 99
Backcountry Access Float avalanche airbags are covered under U.S. patent: #7,878,141.
Float 22:
Pack volume: 22 l (1343 cu in)
Weight: 5.5 pounds (2495 g), entire system including cylinder
Float Throttle:
Pack volume: 22 l (1343 cu in)
Weight: 5.5 pounds (2495 g), entire system including cylinder
Float 32: Pack volume: 32 l (1953 cu in)
Weight: 6.4 pounds (2903 g), entire system including cylinder
Airbag volume: 150 liters
Cylinder/cylinder head: Weight: 385 g/206 g Volume: 290 ml
System: Tensile strength >3000 N Operating temperature range –30ºC to 55ºC (-22ºF to 130ºF)
19
Avalanche Rescue
This is a basic introduction to avalanche rescue techniques. On our website, you will also find a list of
avalanche instructors. We strongly suggest taking an avalanche course in your area before venturing
into the backcountry. Each person needs a working beacon, probe and shovel—and must know how
to use them. Before leaving, call your local avalanche forecast center and determine the danger level
in the area you intend to visit:
US: www.avalanche.org
Canada: www.avalanche.ca
Europe: www.lawinen.org
Searching for victims
If a member of your group is buried, you must perform a beacon
search. The objective is to find the strongest signal (lowest
distance reading) and immediately begin probing the area. In the
event of a burial, switch all avalanche beacons to search mode.
The guidelines below assume the use of a digital beacon.
20m
40m
path
40m
avalanche
Signal search: If there is a “last seen point,” start your signal
search there. Otherwise, start your signal search at the top,
bottom or side of the slide path. See diagram on right to establish
a search pattern.
20m
Coarse search: Once a signal is engaged, align your beacon so
that any of the center three lights are flashing and move quickly in
the direction it is pointing. Make sure the number in the distance
display is decreasing. If it is increasing, turn 180 degrees. Inside
ten meters, move slowly and try to keep the center search light engaged.
single searcher
search path
multiple searchers
search paths
Fine search: Within three meters, use your beacon as close as possible to the snow surface and look
for the smallest distance reading. Confirm by “bracketing” in the perpendicular direction.
Probing/Pinpointing: At the point where the distance has reached a
minimum, probe the area in concentric circles, with each probe hole about
10 inches (25cm) apart. Your probe should enter the snow perpendicular to
the slope. Once you have confirmed the victim’s location, leave the probe
in the snow.
90˚
Shoveling: While shoveling might seem elementary, it usually consumes
the majority of time during an avalanche beacon rescue. For best results,
start shoveling just downhill of the probe. Make your hole one “wingspan”
wide. In burials deeper than one meter, excavate downhill about 1.5
times the burial depth. For more advanced shoveling techniques,
see our website: www.backcountryaccess.com/shoveling .
1.5 x
burial depth
20
10˝ 10˝
25CM 25CM
Bedienungsanleitung
21
Float 22
Basis-Komponenten
Airbag
Auslösegriff
Beingurt
22
10
Hüftgurt
12
13
Float 22
Basis-Komponenten
Schaufel- und
Sondenfach
Airbagfach
Diagonaler
Skihalteriemen
Schlaufen für
Helmnetz
Hauptfach
Diagonaler Skihalteriemen
11
Hüftgurttasche
23
Float Throttle
Basis-Komponenten
Airbag
13
Auslösegriff
Beingurt
Hüftgurt
24
12
10
Float Throttle
Basis-Komponenten
Schaufel- und
Sondenfach
Airbagfach
Schlaufen für
Helmnetz
Hauptfach
THROTTL
E
11
Hüftgurttasche
25
Float 32
Basis-Komponenten
Airbag
Lastaufnahmen
13
Auslösegriff: wahlweise in
einem der Schultergurte,
Trinkschlauch im anderen
Schultergurt
Auslösegriff: wahlweise in
einem der Schultergurte,
Trinkschlauch im anderen
Schultergurt
Hüftgurt
Beingurt
26
10
13
12
Float 32
Basis-Komponenten
Airbagfach
Ausgekleidetes Skibrillenfach
Diagonaler
Skihalteriemen
Schaufel- und
Sondenfach
Fach mit Helmnetz
Schlaufen für
Helmnetz
Riemen für
Eispickel
Kompressionsgurt
Hauptfach
Riemen für Eispickel
Diagonaler Skihalteriemen
12
Hüftgurttasche
27
Funktionsprinzip / Haftungsbeschränkung / Garantie
Warum brauche ich einen Lawinenairbag?
Ein Verschütten im Fall eines Lawinenabgangs zu verhindern bzw. das Minimieren der
Verschüttungstiefe ist der Schlüssel zur Reduktion der Zahl von Lawinentoten. Und zwar deshalb,
weil bei einer Lawinenrettung die meiste Zeit auf das Ausgraben des Opfers verwendet wird. Ein
Lawinenairbag ist darauf ausgelegt, Sie an – oder nahe – der Oberfläche zu halten und damit die
Ausgrabezeit zu minimieren.
Haftungsbeschränkung
Das Float-Airbag-System wurde entwickelt, um Ihre Überlebenschancen bei einem Lawinenabgang zu
erhöhen. Es muss sachgemäß – wie in diesem Handbuch beschrieben – verwendet werden. Führen
Sie mindestens einmal jährlich eine Probeauslösung durch. Verändern Sie keine Teile des Produkts
und verwenden Sie das Produkt nur bestimmungsgemäß entsprechend der Anleitungen in diesem
Handbuch.
Ihr Float-Airbag kann weder Lawinen verhindern noch ein Überleben in allen Situationen garantieren.
Obwohl der Airbag in gewisser Weise vor Verletzungen schützt, kann kein Airbag-System alle
potenziellen Verletzungen vollständig verhindern. Jeder Airbag muss in Verbindung mit einem
Verschüttetensuchgerät, einer Schaufel, einer Sonde und einem Helm verwendet werden, um
maximale Überlebenschancen zu bieten. Der Airbag darf, ebenso wie andere Lawinenausrüstung,
nicht zu einer höheren Risikobereitschaft verleiten.
Sie haben in eine Notfallausrüstung investiert. Sie sollten auch Zeit darin investieren, sich die
erforderlichen Kenntnisse zur Lawinensicherheit anzueignen, bevor Sie im freien Skiraum auf Tour
gehen. Nehmen Sie an einem Lawinenkurs teil, üben Sie die Rettung im Notfall und planen Sie Ihre
Route mithilfe des regionalen Lawinenlageberichts.
Garantie
Der Hersteller, Backcountry Access Inc. (BCA), gewährt ab dem Kaufdatum im Einzelhandel drei Jahre
Garantie auf die Verarbeitung und die Komponenten des Produkts. Alle defekten Teile werden vom
Hersteller entweder repariert oder kostenlos ersetzt. Dies umfasst auch Arbeitskosten des Herstellers.
Diese Garantie gilt nicht für Schäden an der Ware, die durch unsachgemäße Handhabung oder
übermäßigen Verschleiß verursacht wurden. Richten Sie bitte alle Garantieansprüche an BCA oder an
Ihre Verkaufsstelle. Im Garantiefall muss der Kaufbeleg vorgewiesen werden.
Um eine Leistung im Garantiefall sicherzustellen und regelmäßig Updates zu erhalten, registrieren
Sie Ihr Produkt bitte online unter: www.backcountryaccess.com/warranty .
28
Ausrüstungscheck
Druckluftsystem
Abdeckmuffe
7
Auslösekabel
Manometer
8
4
14
Abdeckung des
Ablassventils
Auslöseeinheit
Kupplungsprüfer
Luftschlauch
9
Druckluftflasche
1
3
Schnellkupplung
2
29
Installieren der Druckluftflasche
1. Die Abdeckkappen von der Druckluftflasche entfernen. Zum Zugriff auf das Druckluftsystem
den Reißverschluss des Hauptfachs öffnen und die Abdeckung des Fachs für das Druckluftsystem
zurückschlagen.
2. Die Flasche im Druckluftfach verstauen und das Fach mit dem Klettverschluss sichern.
3. Die Schnellkupplung des Luftschlauchs u anschließen v. Hierzu den Ring zur Druckluftflasche
w ziehen und den Nippel in das Ventil drücken. Ein Klicken zeigt an, dass der Luftschlauch
ordnungsgemäß befestigt ist. Mit dem Kunststoff-Kupplungsprüfer x prüfen, ob die Schnellkupplung
richtig angeschlossen ist.
4
1
1
4
FALSCH
RICHTIG
1
1
4. WICHTIG! Die Auslösenuss y auf den Auslösestift z schrauben. Sie müssen den
Auslösegriff unter Umständen zurück in den Schultergurt drücken, um die Nuss auf den Auslösestift
schrauben zu können.
5. Die Abdeckmuffe { über die Auslösenuss y schrauben.
5
6
7
BEFESTIGTE AUSLÖSENUSS
5
7
BEFESTIGTE ABDECKMUFFE
7
30
Verwendung des Lawinenairbags
6. Leere Druckluftbehälter dürfen nur an autorisierten Float-Füll- oder –Austauschstationen aufgefüllt
oder ausgetauscht werden. Eine Liste dieser Stationen finden Sie unter www.backcountryaccess.
com/refillcenters .
Informationen zum Versand finden Sie unten unter „Versand von Druckluftflaschen“.
7. Zum Entfernen einer leeren Druckluftflasche die obigen Schritte in umgekehrter Reihenfolge
ausführen.
Ausrüstungscheck
Systemverbindungen
Überprüfen Sie anhand der unter „Installieren der Druckluftflasche“ beschriebenen Schritte, ob die
Komponenten richtig angeschlossen sind. Prüfen Sie vor jedem Einsatz Ihres Float-Systems die
Auslöseverbindung. Lösen Sie die Abdeckmuffe { und vergewissern Sie sich, dass die Auslösenuss
y sicher mit dem Auslösestift z verschraubt ist. Befestigen Sie wieder die Abdeckmuffe.
Druckluftflasche
Prüfen Sie das Manometer | der Druckluftflasche. Vergewissern Sie sich, dass der Flaschendruck
bei Raumtemperatur (ca. 21 °C) zwischen 172 und 186 bar beträgt. Die Überprüfung des
Flaschendrucks bei Raumtemperatur muss vor jedem Gebrauch erfolgen. DER DRUCK MUSS IM
OBIGEN BEREICH LIEGEN, DA SONST DIE ORDNUNGSGEMÄSSE FUNKTION DES AIRBAGS
NICHT GEWÄHRLEISTET IST. Sobald das System der Kälte ausgesetzt wird, fällt der Druck ab.
Sollte der Flaschendruck generell – auch bei Raumtemperatur – weniger als 138 bar betragen, kann
es sein, dass sich der Airbag beim Auslösen nicht vollständig füllt. In diesem Fall muss die Flasche
ausgetauscht werden. Einzelheiten zum Austausch der Flasche finden Sie unter „Installieren der
Druckluftflasche“ auf Seite 30.
FALSCH
RICHTIG
Überprüfen Sie die Druckluftflasche.
Verwenden Sie keine beschädigten oder
verbeulten Flaschen.
Rucksack
Vergewissern Sie sich, dass die Klettlasche auf der Oberseite des Airbagfachs sicher verschlossen
ist. Nur dann ist der Airbag vollständig verstaut und geschützt. Nur der Airbag und die Auslöseeinheit
dürfen sich im Airbagfach befinden. Verstauen Sie keine weiteren Gegenstände in diesem Fach.
Vergewissern Sie sich, dass die Teile des Druckluftsystems nicht locker sind und die Auslösevorrichtung
nicht blockieren 9 . Der Reißverschluss des Fachs muss vollständig geschlossen sein.
Stellen Sie sicher, dass keine Gegenstände den Austritt des Airbags aus dessen Fach an der
Außenseite verhindern, insbesondere keine Ausrüstungsgegenstände mit scharfen Kanten wie
Steigeisen oder Ausrüstung zum Eisklettern. Verwenden Sie nur den diagonalen Skihalteriemen für
den Skitransport. Verwenden Sie nicht die Kompressionsgurte an der Seite zum Tragen der Ski, da
dadurch das Auslösen des Airbags behindert werden kann.
31
Verwendung des Lawinenairbags
Anpassen des Rucksacks
Ihr Rucksack sollte optimal an Ihren Körper angepasst sein, bevor Sie sich ins freie Skigelände
begeben. Die Kräfte, die in einer Lawine wirken, können Ihnen den Rucksack vom Körper reißen,
falls er nicht optimal gesichert ist.
Anbringen des Beingurts
Der Beingurt ~ befindet sich in der Hüftgurttasche 11 . Er muss verwendet werden,
um zu verhindern, dass der Rucksack in einer Lawine vom Körper gerissen wird.
Ziehen Sie den Beingurt aus der Hüftgurttasche 12 . Ziehen Sie den Hüftgurt durch
das verstellbare Ende des Beingurts. Führen Sie die Schlaufe des Beingurts von
hinten durch Ihren Schritt.
Führen Sie den Hüftgurt durch die Schlaufe des Beingurts und schließen Sie den
Hüftgurt. Verkürzen Sie den Beingurt, so dass er straff, aber noch komfortabel sitzt.
10
11
Hüftgurtschnalle
Die Hüftgurtschnalle besteht aus zwei Teilen. Führen Sie den einen Teil der Schnalle komplett durch
den Schlitz des zweiten Schnallenteils. Ziehen Sie den Hüftgurt stramm. Ist die Hüftgurtschnalle
korrekt geschlossen, liegen beide Teile flach am Körper an.
Schaufel- und Sondenfach
Verstauen Sie das Schaufelblatt, den Schaufelstiel und die Sonde in den dafür vorgesehenen
Fächern auf der Außenseite.
Befestigung von Ski/Snowboard
Float 22: Ski können in den diagonalen Skihalteriemen transportiert werden. Bestellen Sie für
den Transport eines Snowboards unsere BCA-Snowboard-Halterung, die an den SnowboardHalterungsschlaufen auf der Rückseite des Rucksacks befestigt wird.
Float Throttle: Ist nicht mit einem diagonalen Skitragesystem ausgestattet. Sie können aber die BCASnowboard-Halterung, die an den Snowboard-Befestigungsschlaufen auf der Rückseite des Rucksacks
befestigt wird, verwenden.
32
Using the Avalanche Airbag
Float 32: Ski können in den diagonalen Skihalteriemen transportiert werden. Bestellen Sie für
den Transport eines Snowboards unsere BCA-Snowboard-Halterung, die an den SnowboardHalterungsschlaufen auf der Rückseite des Rucksacks befestigt wird.
Trinksystem (Behälter separat erhältlich)
Float 22 und Float Throttle: Nicht kompatibel mit dem Trinksystem.
Float 32: Den Trinkbehälter in das Hauptfach legen und mit dem Klettriemen (a) auf der Innenseite
sichern. Den Trinkschlauch durch eine der Ecköffnungen (b) auf der gegenüberliegenden Seite der
Öffnung für das Auslösekabel führen. Das Airbagfach öffnen und den Airbag entfalten. Den Trinkschlauch
durch das Airbagfach in die Öffnung des Schultergurts (c) einführen (nicht in den Schultergurt mit dem
Airbagauslöser). Vor dem Packen des Airbags sicherstellen, dass der Trinkschlauch unterhalb des Airbags
und der Auslöseeinheit verläuft, damit der Schlauch das Auslösen des Airbags nicht behindert.
c
a
c
b
b
Transport eines Helms
Float 22: Das Helmnetz wird an den vier Schlaufen auf der Vorderseite des Rucksacks befestigt.
Float Throttle: Hat kein Helmnetz, aber der Rucksack verfügt über Schlaufen, die mit dem Helmnetz
anderer Modelle kompatibel sind.
Float 32: Das Helmnetz befindet sich auf der Vorderseite des Rucksacks und ist in das zugehörige Fach
unterhalb des BCA-Logos integriert. Das Netz herausziehen. Die Klemmen an den
beiden unteren bzw. bei Verwendung des diagonalen Skitragesystems an den beiden
oberen Schlaufen befestigen.
Auslösen des Airbags
Öffnen Sie beim Betreten des freien Skigeländes das Fach mit dem Auslösegriff
(siehe Bild rechts) 13 . Ziehen Sie den Auslösegriff bei einem Lawinenabgang mit
der gegenüberliegenden Hand schnell und kräftig nach unten. Ziehen Sie den Griff
nicht quer zur Brust. Versuchen Sie, zum Rand der Lawine zu gelangen, um den
Schneemassen zu entkommen. Schützen Sie Ihre Atemwege durch Vorhalten der Hand
13
oder der Arme, wenn die Lawine langsamer wird.
Was geschieht beim Auslösen des Airbags?
Der Airbag wird aus seiner Tasche gedrückt und innerhalb von drei Sekundengefüllt. Der Druck im
Airbag steigt für einige Sekunden an, bis ein Druckausgleich zwischen Airbag und Druckluftflasche
erreicht ist. Der Airbag hält die Luft für mehrere Minuten, bis die Lawinengefahr vorüber ist.
33
Wartung
Nach dem Auslösen des Airbags
Mit dem Finger auf das Ablassventil drücken, um die Luft aus dem Airbag zu lassen.
Das Ventil befindet sich unter der orangenen Abdeckung 14 . Keine harten oder spitzen Gegenstände
zum Betätigen des Ablassventils verwenden, da es hierdurch beschädigt werden könnte. Den Airbag
wieder in das Airbagfach packen, siehe hierzu „Packen des Airbags“ unten.
Der Float-Airbag kann erst wieder ausgelöst werden, wenn die Druckluftflasche aufgefüllt oder ersetzt
wird. Dies kann an einer Float-Füllstation erfolgen (siehe www.backcountryaccess.com/refillcenters).
Einzelheiten zum Installieren einer gefüllten Flasche finden Sie unter „Installieren der Druckluftflasche“
auf Seite 30. Wenn Sie Ihren Airbag in einer Lawine ausgelöst haben, wenden Sie sich bezüglich des
kostenlosen Auffüllens der Flasche und einer kostenlosen Airbag-Inspektion bitte an BCA.
Packen des Airbags
Der Airbag muss in das Airbagfach gefaltet werden. DEN AIRBAG NICHT ROLLEN ODER IN DAS
FACH STOPFEN, DA DIES DAS AUSLÖSEN DES SYSTEMS BEHINDERT. Einen nassen Airbag
vor dem Packen vollständig trocknen. Die verbleibende Luft über das Ablassventil aus dem Airbag
drücken (dies ist beim Packen des Airbags unter Umständen mehrmals erforderlich). Es darf keine
Restluft im Airbag bleiben. Nach dem Herausdrücken der Luft und vor dem Falten des Airbags den
Luftschlauch von der Flasche entfernen.
1. Den Reißverschluss komplett auseinanderziehen, sodass der Schieber nur noch an einem Satz
Zähne befestigt ist.
2. Den Schieber wieder auf die gegenüberliegende Seite zum Anfang des Reißverschlusses (a) bewegen.
3. Den leeren Airbag flach auf den Boden legen. Den Airbag einmal vertikal auf jeder Seite falten
(Z-Faltung) (b).
4. Den Airbag dann zweimal horizontal falten (Z-Faltung) (c). Danach kann das Airbagfach
geschlossen werden.
5. Nach dem Falten des Airbags den Reißverschluss (d) wieder einhaken. Den Reißverschluss bis
hinter die Klettlasche (d) auf der Oberseite des Fachs zuziehen. Die Klettlasche befestigen und den
Reißverschluss ganz zuziehen (f).
6. Vor dem nächsten Einsatz des Float-Rucksacks die Druckluftflasche auffüllen oder austauschen.
b)
a)
e)
c)
f)
34
d)
Maintenance
Entfernen und Installieren des Airbag-Systems
Die Float-Rucksäcke 12/13 haben ein herausnehmbares, austauschbares Airbag-System. Die
Komponenten des Airbags können zwischen dem Float 32 und dem Float 22/Float Throttle
ausgetauscht oder komplett entfernt werden.
Entfernen
1. Zum Entfernen des Airbags den geteilten Reißverschluss unter der Klettlasche
auseinanderziehen und das Airbagfach öffnen. Den Reißverschluss des Airbagfachs nie wie einen
normalen Reißverschluss öffnen. Dadurch kann der Reißverschluss beschädigt werden.
2. Das Auslösekabel und den Luftschlauch von der Flasche (a) entfernen.
3. Den Klettverschluss öffnen, mit dem das freie Ende der orangenen Schnur gesichert ist. Die
Schnur aus den Gurtschlaufen fädeln (b).
4. Nachdem die Schnur aus den Schlaufen entfernt wurde, können der Airbag, die Auslöseeinheit,
das Auslösekabel und der Luftschlauch herausgenommen werden (c). Das Auslösekabel bleibt im
Rucksack, kann aber, wie im Abschnitt „Versetzen des Auslösers“ beschrieben, entfernt werden.
a
b
c
35
Installieren
1. Die Auslöseeinheit bei entfaltetem Airbag so in das Airbagfach legen, dass die orangene
Abdeckung des Ablassventils nach oben zeigt (a). Den Luftschlauch durch die dafür vorgesehene
Öffnung (b) in das Hauptfach mit der Druckluftflasche einführen.
2. Die orangene Schnur vom befestigten Ende aus nach unten durch den ersten Schlitz des
Airbags fädeln. Die Schnur durch die erste Gurtschlaufe und dann wieder nach oben durch
den ersten Schlitz fädeln. Diesen Schritt für alle Schlitze wiederholen, bis die Schnur bis zum
Auslöseschlauch eingefädelt ist (c).
3. Die Schnur strammziehen, nachdem sie vollständig bis zum Auslöseschlauch eingefädelt ist.
Dadurch werden die Gurtschlaufen durch die Befestigungsschlitze im Airbag nach oben gezogen.
4. Die Schnur über den Auslöseschlauch führen.
5. Die Einfädelungsschritte für die verbleibenden Schlitze und Schlaufen wiederholen.
6. Das freie Ende der orangenen Schnur zuerst durch den schwarzen Klettriemen ziehen, dann
nach unten führen und mit der Klettlasche sichern.
7. Den Airbag packen und das Fach verschließen (siehe vorstehende Anleitung zum Packen des Airbags).
8. Das Auslösekabel und den Luftschlauch wieder an die Flasche (d) anschließen.
a
b
c
d
36
Installation / Wartung und Lagerung
Versetzen des Auslösers
Beim Float 32 können Sie den Auslöser wahlweise im linken oder rechten Schultergurt installieren.
Der Float 22 und der Float Throttle verfügen nicht über diese Option.
Entfernen
1. Den Reißverschluss des Schultergurts öffnen, in dem sich der Auslöser befindet.
2. Die kleine Schraube lösen, mit der der Auslöser an der Gurtschlaufe im Schultergurt befestigt ist.
3. Den Auslöser und das Kabel (a) durch den Reißverschluss des Schultergurts herausziehen.
a
Installieren
1. Zuerst das Ende des Auslösekabels mit der Abdeckmuffe wieder durch den Reißverschluss des
Schultergurts (a) in den Rucksack einführen (b). Sicherstellen, dass das Auslösekabel unterhalb
der Airbag-Komponenten verläuft.
2. Das Auslösekabel durch die Öffnung in der rechten unteren Ecke des Airbagfachs (c) in das
Hauptfach mit der Druckluftflasche einführen.
3. Das Auslösekabel sicher in der Reißverschlusstasche des Schultergurts befestigen. Hierzu die
Schraube der Auslöseeinheit wieder an der Gurtschlaufe festdrehen.
b
b
c
a
37
Wartung / Lagerung / Transport
Eine regelmäßige Wartung ist nicht erforderlich, solange das System an einem kühlen und trockenen Ort
gelagert wird. Eine gefüllte Float-Druckluftflasche nicht Temperaturen von über 55°C oder unter -30°C
aussetzen. Nach dem Einsatz unter ungünstigen Bedingungen sicherstellen, dass alle Verbindungen frei
von Verschmutzungen sind. Der Rucksack kann mit warmem Seifenwasser und die Verbindungen mit
einem feuchten Tuch gereinigt werden Keine Schmiermittel verwenden.
Periodisches Auslösen des Airbags
BCA empfiehlt, den Float-Airbag mindestens einmal pro Jahr auszulösen. Dadurch wird sichergestellt,
dass das System ordnungsgemäß funktioniert und der Nutzer mit dem effizienten Betrieb des Systems
vertraut ist. Vor Beginn einer neuen Saison den Airbag anziehen, den Auslöser betätigen und die
Druckluftflasche auffüllen. Ihr Float-Airbag ist auf mindestens 20 Auslösungen ausgelegt und hat eine
dreijährige Garantie. Bei ordnungsgemäßer Behandlung sollte der Airbag mindestens fünf Jahre halten.
Entleeren der Druckluftflasche
Wenn die Flasche v unter Druck steht, der Druck aber bei Raumtemperatur (21°C) weniger als
172 bar beträgt, dürfen Sie die Flasche nicht im freien Skigelände verwenden, können sie aber für
Übungszwecke nutzen. Lösen Sie den Airbag einfach durch Ziehen am Auslösegriff aus.
DIE AUSTRITTSÖFFNUNG DER DRUCKLUFTFLASCHE KEINESFALLS AUF GEGENSTÄNDE
ODER PERSONEN RICHTEN, DA DIES ZU SCHÄDEN ODER VERLETZUNGEN FÜHREN
KÖNNTE. DAS ENTLEEREN VON DRUCKLUFTFLASCHEN IST LAUT – EIN GEHÖRSCHUTZ
WIRD EMPFOHLEN.
Versand von Druckluftflaschen
DIE FLASCHEN VOR DEM VERSAND ENTLEEREN
Gefüllte Druckluftflaschen dürfen nicht ohne entsprechendes Zertifikat (Gefahrgut) versendet werden.
Leere oder volle Druckluftflaschen müssen in der Originalverpackung verschickt werden, um Schäden
zu vermeiden. Vor dem Versand die Abdeckkappen wieder befestigen. Beim Versand leerer Druckluftflaschen in der Originalverpackung bitte alle Gefahrgut-Etiketten oder Kennzeichnungen, die für den
Versand der gefüllten Flaschen verwendet wurden, entfernen.
Richtlinien für Flugreisen
Während die International Air Transport Association (IATA) den Transport speziell genehmigter
Lawinenairbags inklusive gefüllter Druckluftflaschen auf Flugreisen erlaubt, verbietet die Transportation
Safety Administration(TSA) den Transport auf Flugreisen bei der Ein- oder Ausreise nach Nordamerika.
Falls Sie in Länder außerhalb Nordamerikas reisen, kontaktieren Sie ihre Fluggesellschaft im Voraus
bezüglich einer Erlaubnis für den Transport gefüllter Float-Druckluftflaschen. Falls Sie eine Erlaubnis
erhalten, verstauen Sie die Druckluftflasche im Gepäck, das Sie am Flughafen aufgeben. Die Flasche
muss zusammen mit folgendem Dokument verpackt werden: www.backcountryaccess.com/IATAdoc .
Falls Sie nach Nordamerika einreisen oder aus Nordamerika ausreisen, erlaubt die TSA den
Flugtransport gefüllter Druckluftflaschen nicht. Entleeren Sie die Druckluftflasche, bevor Sie den
Flughafen betreten. Schrauben Sie den Flaschenkopf von der leeren Flasche und legen Sie beide Teile
in saubere, wiederverschließbare Plastikbeutel. Transportieren Sie beide Teile für die TSA-Mitarbeiter
38
Zertifizierungen und Kennzeichnungen
deutlich sichtbar durch die TSA-Sicherheitskontrolle. Nach der Reise können Sie den Flaschenkopf
wieder von Hand auf die Flasche schrauben. Wenn Sie Ihr Reiseziel erreichen, füllen bzw. tauschen Sie
die Druckluftflasche an einer Float-Füllstation aus. Eine Liste mit Float-Füll-/Austauschstationen finden
Sie unter: www.backcountryaccess.com/refillcenters .
Backcountry Access Float-Lawinenairbags verfügen über folgende Zertifizierungen und
Kennzeichnungen.
Die CE-Konformitätskennzeichnung bestätigt, dass Backcountry Access und dieses
Produkt die Anforderungen der Richtlinie für persönliche Schutzausrüstung (89/686/
EWG) erfüllen.
Die Pi-Konformitätskennzeichnung bestätigt, dass Backcountry Access und dieses
Produkt die Anforderungen für ADR/RID und TPED (Richtlinie 2010/35/EU) erfüllen.
Getestet von TÜV SÜD: eine weltweit
anerkannte Organisation für Tests,
Prüfung und Zertifizierung.
TÜV Süd Product Service GmbH
Ridlerstr. 21
D-80339 München
Deutschland
EU-Vertretung:
BCA Europe
Davisstraße 11 b
A-5400 Hallein
Österreich
Tel.: 0043 (0) 6245 / 77385
Fax: 0043 (0) 6245 / 77385 - 99
Backcountry Access Float-Lawinenairbags werden von folgenden US-Patenten #7,878,141
Float 22:
Packvolumen: 22 l
Gewicht: 2495 g. Gesamtgewicht inklusive Druckluftflasche
Gewicht: 2495 g. Gesamtgewicht inklusive Druckluftflasche
Gewicht: 2903 g. Gesamtgewicht inklusive Druckluftflasche
Float Throttle:
Packvolumen: 22 l
Float 32: Packvolumen: 32 l
Airbagvolumen: 150 Liter Druckluftflasche/Flaschenkopf: Gewicht: 385 g/206 g Volumen: 290 ml
System Zugfestigkeit > 3000 N
Betriebstemperaturbereich –30ºC bis 55ºC
39
Lawinenrettung
Der folgende Abschnitt enthält grundlegende Informationen zur Lawinenrettung. Auf unserer Webseite
finden Sie zudem eine Liste von Bergführern und weiteren Spezialisten für Lawinensicherheit. Wir
empfehlen Ihnen, einen Lawinenkurs zu belegen, bevor Sie sich ins freie Skigelände begeben.
Zudem muss jede Person ein Verschüttetensuchgerät, eine Sonde und eine Schaufel mit sich führen
– und damit umgehen können. Rufen Sie den Lawinenlagebericht ab und informieren Sie sich über
die regionale Lawinengefahrenstufe, bevor Sie aufbrechen.
USA: www.avalanche.org
Kanada: www.avalanche.ca
Europa: www.lawinen.org
Suche nach Opfern
Falls ein Mitglied Ihrer Gruppe verschüttet wird, suchen Sie mit einem Verschüttetensuchgerät (VS-Gerät) nach einem Signal. Ziel ist
das Auffinden des stärksten Signals (kleinster Entfernungswert im
Display) und das sofortige Sondieren an dieser Stelle. Schalten Sie
bei Verschüttungen alle VS-Geräte auf Suchmodus. Die nachstehenden Richtlinien gelten für die Verwendung digitaler VS-Geräte.
Grobsuche: Nachdem ein Signal erfasst wurde, drehen Sie Ihr
VS-Gerät, bis eine der drei mittleren Richtungs-LEDs blinkt. Gehen
Sie zügig in Richtung der blinkenden LED. Vergewissern Sie sich,
dass die im Display angezeigte Entfernung abnimmt. Drehen
Sie sich um 180 Grad, falls die Entfernung zunimmt. Gehen Sie
langsamer, sobald Sie sich dem Signal bis auf zehn Meter nähern,
und achten Sie darauf, dass die Such-LED weiterhin blinkt.
20m
40m
path
40m
avalanche
Signalsuche: Falls es einen Verschwindepunkt gibt, an dem
das Opfer zuletzt gesehen wurde, beginnen Sie Ihre Suche dort.
Beginnen Sie andernfalls am Anfang, am Ende oder seitlich des
Abgangsbereichs mit der Suche. Das Diagramm rechts veranschaulicht die Suchmuster.
20m
single searcher
search path
multiple searchers
search paths
Feinsuche: Wenn Sie sich in drei Metern Entfernung vom Signal befinden, führen Sie das Gerät so
dicht wie möglich an die Schneeoberfläche und achten Sie auf den kleinsten Entfernungswert im
Display. Bestätigen Sie den Entfernungswert, indem Sie sich senkrecht zu dem Punkt bewegen.
Sondieren/Punktsuche: Beginnen Sie mit dem Sondieren an der Stelle mit
dem kleinsten Entfernungswert. Sondieren Sie den Bereich in konzentrischen
Kreisen. Die Sondierstiche sollten zirka 25 Zentimeter auseinanderliegen und
senkrecht zur Schneeoberfläche sein. Haben Sie die Lage des Opfers ermittelt, lassen Sie die Sonde im Schnee stecken.
Schaufeln: Das Schaufeln scheint einfach zu sein, nimmt aber bei einer
Verschüttetensuche die meiste Zeit in Anspruch. Um schnellstmöglich
ans Ziel zu kommen, schaufeln Sie hangabwärts, knapp unterhalb der
Sonde. Schaufeln Sie ein Loch von der Breite Ihrer ausgestreckten Arme.
Schaufeln Sie bei Verschüttungen von über einem Meter Tiefe ein Loch
von ungefähr zwei Metern mal der 1,5-fachen Verschüttungstiefe. Weiterführende Informationen zu Ausgrabemethoden. Finden Sie auf unserer
Webseite www.backcountryaccess.com/shoveling.
40
90˚
1.5 x
burial depth
10˝ 10˝
25CM 25CM
Manuel D’Utilisation
41
Float 22
Éléments de Base
airbag
poignée de déclenchement
sangle cuissarde
ceinture
42
10
ceinture
12
13
Float 22
Éléments de Base
compartiment de la
sonde et de la pelle
compartiment du airbag
boucle de montage des
skis en diagonale
compartiment de
rangement principal
boucles du
transport de
casque
boucle de montage des
skis en diagonale
11
poche de ceinture
43
Float Throttle
Éléments de Base
airbag
13
poignée de déclenchement
sangle cuissarde
ceinture
ceinture
44
12
10
Float Throttle
Éléments de Base
compartiment de la
sonde et de la pelle
compartiment du airbag
boucles du
transport de
casque
compartiment de
rangement principal
THROTTL
E
11
poche de ceinture
45
Float 32
Éléments de Base
airbag
load lifters
13
poignée de déclenchement :
peut être placée sur l’une ou
l’autre épaule, le manchon
d’hydratation étant sur l’autre
poignée de déclenchement :
peut être placée sur l’une ou
l’autre épaule, le manchon
d’hydratation étant sur l’autre
ceinture
sangle cuissarde ceinture
46
10
13
12
Float 32
Éléments de Base
compartiment du airbag
poche doublée pour lunettes
boucle de montage des
skis en diagonale
compartiment de la
pelle et de la sonde
rangement de la bride
de casque
boucles du
transport de
casque
attache piolet
sangle de compression
compartiment de
rangement principal
attache piolet
boucle de montage des
skis en diagonale
11
poche de ceinture
47
Fonctionnement / Déni de responsabilité / Garantie
Pourquoi un sac airbag ?
Prévenir l’ensevelissement ou réduire au minimum sa profondeur est un élément clef de réduction du
nombre des décès causés par les avalanches. En effet les opérations de dégagement représentent
l’essentiel du temps passé pour porter secours aux victimes d’avalanches. De par sa conception,
un sac airbag vous maintiendra à la surface ou à proximité de la surface, réduisant au minimum le
temps nécessaire au dégagement.
Déni de responsabilité
Le système Float a été conçu pour améliorer vos chances de survie à une avalanche. Il doit être utilisé
correctement, en respectant les directives de ce manuel. Exercez-vous à déployer le sac airbag au
moins une fois par an. Ne modifiez ce produit d’aucune manière ou ne faites rien qui ne soit pas décrit
dans ce manuel.
Votre Float ne peut pas empêcher la survenue d’une avalanche ni garantir la survie en toutes
circonstances. Quoiqu’il assure une certaine protection contre l’impact, aucun système de sac
airbag ne peut complètement éliminer le risque de blessures causées par l’accident. Les sacs
airbags doivent être utilisés en conjonction avec un DVA, une pelle, une sonde et un casque afin
de se donner les meilleures chances de survie. Comme c’est le cas pour d’autres outils de secours
d’avalanche, votre sac airbag ne devrait pas vous conduire à prendre plus de risques.
Vous avez investi dans une technologie qui peut vous sauver la vie. En même temps veillez
également à consacrer un minimum de temps à apprendre comment éviter les avalanches, avant de
vous lancer dans une randonnée. Prenez un cours de sécurité avalanche, exercez-vous avec votre
équipement et tracez votre itinéraire en fonction des prévisions d’avalanche locales.
Garantie
Le fabricant, Backcountry Access, Inc. (BCA), garantit expressément la fabrication et les composants
de ce produit pendant trois ans à compter de la date d’achat chez un détaillant. Toutes les pièces
seront réparées ou remplacées gratuitement par le fabricant, y compris la main d’œuvre. Cette garantie
ne couvre pas les dommages au produit provoqués par une utilisation inappropriée ou une usure
excessive. Adressez toutes vos demandes de prise en charge au titre de la garantie à BCA ou à votre
détaillant. Toutes les réclamations doivent être accompagnées d’un justificatif de l’achat et d’un numéro
d’autorisation de retour.
Pour être couvert par la garantie et être tenu au courant des mises à jour techniques périodiques,
veuillez vous enregistrer en ligne à l’adresse : www.backcountryaccess.com/warranty .
48
Garantie / Inventaire de l’équipement
SYSTÈME
D’AIR COMPRIMÉ
protection du
déclencheur
7
câble de déclenchement
manomètre
8
4
14
indicateur du coupleur
capot de la vanne
de déclenchement
éjecteur
conduite 3
d’air comprimé
9
piston à air
comprimé
1
rapide raccord
2
49
Installation du piston à air comprimé
1. Enlevez les capsules de protection du piston d’air comprimé. Pour accéder au système d’air
comprimé, ouvrez la fermeture éclair du compartiment principal puis repliez le chapeau de toile du
système d’air comprimé.
2. Une fois le piston en place dans le manchon, fixez les attaches en Velcro sur le compartiment du
piston.
3. Connectez le raccord rapide sur la conduite d’air comprimé u en tirant sur le gros anneau vers le
piston à air comprimé v. Il devrait émettre un clic lors de sa mise en place lorsque la conduite d’air
comprimé w est correctement raccordée. L’indicateur du coupleur x doit être bien en place pour
que le système soit correctement raccordé.
4
1
1
4
INCORRECT
CORRECT
1
1
4. IMPORTANT ! Vissez l’écrou du câble de déclenchement y sur la goupille z.
Pour dégager l’écrou du câble de déclenchement afin de l’enfiler sur la goupille de déclenchement,
il peut être nécessaire de repousser la poignée de déclenchement dans la bretelle d’épaule.
5. Vissez le cache du déclencheur { sur l’écrou du câble de déclenchement y.
5
6
7
ÉCROU DU CÂBLE DE DÉCLENCHEMENT EN PLACE
5
7
CACHE DU DÉCLENCHEUR EN PLACE
7
50
Utilisation des sacs airbags
6. Les cylindre vides, déchargés ne doivent être rechargés ou remplacés qu’à des centres de
rechargement ou de remplacement agréés par Float. Pour consulter la liste de ces centres, rendezvous à l’adresse www.backcountryaccess.com/refillcenters.
S’il est nécessaire de procéder à l’expédition, référez-vous aux instructions « Expédition d’un piston à
air comprimé » ci-dessous.
7. Pour déconnecter un piston vide, procédez comme ci-dessus, dans l’ordre inverse.
Description de l’équipement
Raccords
Reprenez les étapes précédentes « Installation du piston à air comprimé » pour vérifier que les
raccords sont corrects. Lors de chaque utilisation de votre système Float, vérifiez le raccord du câble
de déclenchement en dévissant le cache du déclencheur { et en vous assurant que l’écrou du câble
de déclenchement y est bien attaché à la goupille de déclenchement z. Remettez le cache du
déclencheur en place.
Piston à air comprimé
Vérifiez le manomètre | du piston à air comprimé et vérifiez qu’il indique 172 à 186 bars (2 500 à2
700 psi) à la température ambiante (approximativement 21°C ou 70°F). La pression doit être relevée
à la température ambiante pour que l’indication soit correcte. Vérifiez la pression avant chaque
utilisation. LA PRESSION DOIT SE SITUER DANS CETTE FOURCHETTE FAUTE DE QUOI LE
SYSTÈME PEUT NE PAS FONCTIONNER CORRECTEMENT. Lorsque le système sera exposé au
froid, la pression chutera. Si la pression relevée tombe à moins de 138 bars (2 000 psi), quelle que
soit la température, l’airbag risque de ne pas se gonfler complètement. Référez-vous à « Installation
du piston à air comprimé » à la page
INCORRECT
CORRECT
50 pour plus de détails sur la façon de
procéder à son remplacement.
Inspectez le piston. N’utilisez pas de
piston qui présente des bosses ou qui est
endommagé.
Sac
Veillez à ce que le rabat en Velcro au sommet du compartiment de l’airbag soit bien attaché. Ceci
garantira que l’airbag a été correctement rangé et est en sécurité.
Seuls l’airbag et l’éjecteur sont prévus pour être rangés dans le compartiment de l’airbag. Ne mettez
rien d’autre dans ce compartiment.
Vérifiez que rien n’est lâche à l’intérieur du système d’air comprimé et que rien ne bloque l’éjecteur
Assurez-vous que la fermeture éclair du compartiment est bien fermée.
9
.
Vérifiez que rien n’obstrue le compartiment de l’airbag sur l’extérieur du sac, notamment des objets
pointus comme des crampons ou des pics à glace. Les skis doivent exclusivement être transportés en
51
Utilisation des sacs airbags
utilisant les porte-skis disposés en diagonale. N’utilisez pas les lanières de compression latérales pour
le transport du cadre en A, dans la mesure où elles pourraient entraver le déploiement de l’airbag.
Ajustements du sac
Il est impératif de bien ajuster votre sac avant de vous aventurer en zone d’avalanche.
La puissance d’une avalanche peut arracher le sac de votre dos s’il n’est pas ajusté au
plus près à votre corps.
Fixation de la sangle cuissarde
La sangle cuissarde ~ se trouve dans la poche de ceinture 11 . Elle permet d’éviter que
le sac ne soit arraché lors d’une avalanche. Tirez sur la sangle et enfilez la ceinture
12 à travers l’extrémité ajustable de la sangle cuissarde. Avec la boucle fixe en main,
enroulez la sangle sur l’extérieur de votre jambe puis faites-la passer entre vos jambes.
Introduisez la ceinture dans la boucle de la sangle cuissarde, puis fermez la boucle de
ceinture. Ajustez au plus près du corps mais en évitant toute gène.
10
11
Boucle de ceinture
La boucle est en deux parties : mâle et femelle. Insérez la partie mâle dans l’ouverture la plus large
de la partie femelle. Serrez bien la ceinture sans provoquer de gêne. Lorsqu’elles sont correctement
attachées, la sangle et la boucle devraient s’appuyer à plat contre votre corps.
Rangement de la pelle et de la sonde
Rangez la lame de la pelle, le manche de la pelle et la sonde dans la poche prévue à cet effet, située
dans le compartiment à outil externe.
Fixation des skis / du snowboard
Float 22 : Les skis peuvent être transportés en utilisant les porte-skis disposés en diagonale. Pour
transporter un snowboard, commandez un Snowboard Carry Attachment BCA, qui viendra se monter
sur les boucles de fixation de snowboard situées sur le panneau arrière.
Float Throttle : Ne comprend pas l’accessoire de transport de skis en diagonale. Il est néanmoins
possible d’y adjoindre un Snowboard Carry Attachment BCA, qui viendra se monter sur les boucles
de fixation de snowboard situées sur le panneau arrière.
52
Utilisation des sacs airbags
Float 32: Les skis peuvent être transportés en utilisant les porte-skis disposés en diagonale. Pour
transporter un snowboard, commandez un Snowboard Carry Attachment BCA, qui viendra se monter
sur les boucles de fixation de snowboard situées sur le panneau arrière.
Hydratation (réservoir non fourni)
Float 22 et Float Throttle : Non compatible avec le système d’hydratation.
Float 32 : Placez le réservoir dans le compartiment principal et suspendez-le à la boucle de Velcro (a)
qui se trouve à l’intérieur. Faites pénétrer le conduit d’hydratation par l’ouverture (b) située sur le coin du
côté opposé à celui où le câble de déclenchement pénètre dans le compartiment principal. Ouvrez le
compartiment de l’airbag et dépliez l’airbag. Acheminez le tube d’ de la sangle hydratation à travers le
compartiment de l’airbag en le faisant passer dans l’orifice de la bretelle d’épaule (c) qui ne contient pas le
déclencheur d’airbag. Avant de replier l’airbag dans le sac, veillez à ce que le tube d’hydratation soit enfilé
sous l’airbag et l’éjecteur afin d’éviter tout risque d’obstruction pendant le déploiement.
c
a
c
b
b
Transport du casque
Float 22 : Le filet de port du casque vient s’attacher sur les quatre boucles à l’avant du sac.
Float Throttle : Pas de filet de port du casque mais le sac contient des boucles de
transport de casque compatibles avec les filets de port du casque fournis avec les
autres modèles.
Float 32 : Le filet de port du casque est attaché de façon permanente à l’avant du sac et
est intégré dans le compartiment de rangement de la bride sous le logo BCA. Sortez la
bride et attachez les agrafes aux deux boucles du dessous ou aux boucles du dessus si
vous utilisez l’accessoire de transport de skis proposé en option.
Déploiement
13
Lorsque vous vous trouvez dans une zone d’avalanche, ouvrez la poche où est
logée la poignée de déclenchement 13 (référez-vous à l’image sur la droite). En cas
d’avalanche, tirez vivement la poignée de déclenchement de haut en bas, en passant
la main à l’opposé du déclencheur en travers du corps. Essayez de vous dégager sur les bords de
l’avalanche pour ne pas être pris dans les débris. Dès que l’avalanche ralentit sa course, préservez
vos voies respiratoires en vous couvrant la bouche avec votre main ou votre coude.
Ce qui doit se passer
L’airbag devrait se déplier du sac à dos et se gonfler complètement en trois secondes environ. Il
poursuivra son expansion pendant quelques secondes, jusqu’à ce que la pression du système soit
stabilisée. Il peut demeurer gonflé plusieurs minutes, le temps que le risque d’avalanche se dissipe.
53
Entretien
Après le déploiement
Purgez l’air de l’airbag en appuyant sur le bouton d’évacuation. Le bouton de purge se trouve en-dessous
du cache orange 14 . N’utilisez pas d’objets durs ou pointus pour maintenir le bouton de purge ouvert car ils
pourraient endommager la surface du joint d’étanchéité. Repliez l’airbag dans son compartiment. Référezvous à la rubrique « Pliage de l’airbag » ci-dessous pour savoir comment procéder.
L’airbag Float ne pourra plus se déployer avant que le piston soit rechargé ou remplacé. Ceci peut
s’effectuer dans un centre de rechargement Float (voir www.backcountryaccess.com/refillcenters). Pour
mettre en place le piston chargé, référez-vous à la rubrique « Installation du piston à air comprimé »
à la page 50. Si vous avez déployé votre airbag lors d’une avalanche, prenez contact avec BCA pour
bénéficier d’une inspection et d’un rechargement gratuits de votre airbag.
Pliage de l’airbag
L’airbag doit être replié dans son compartiment. NE ROULEZ PAS OU NE FOURREZ PAS L’AIRBAG,
SINON LE SYSTÈME POURRAIT NE PAS SE DÉPLOYER CORRECTEMENT. Si l’airbag est mouillé,
faites-le soigneusement sécher avant de le ranger. Purgez l’airbag de tout l’air restant en appuyant
continûment sur le bouton d’évacuation (il peut être nécessaire de le faire plusieurs fois pendant le pliage). Il
est impératif que tout l’air restant soit évacué. Une fois l’air évacué, débranchez les conduites d’air du piston
avant de replier l’airbag dans son compartiment.
1. Séparez complètement les deux bandes de la fermeture éclair de façon à ce que la tirette ne soit plus
accrochée qu’à l’une des rangées de dents.
2. Remontez la tirette de la fermeture éclair jusqu’à l’autre bout du sac, là où débute la fermeture éclair (a).
3. Commencez par étendre l’airbag dégonflé bien à plat par terre. Faites un premier pli vertical en accordéon
sur chaque côté de l’airbag (b).
4. Ensuite faites deux plis horizontaux en accordéon sur l’airbag (c). À la fin de cette étape, votre airbag est
prêt à être rangé sous fermeture éclair dans son compartiment.
5. L’airbag étant replié dans le compartiment, réengagez la fermeture éclair (d) et fermez le compartiment
au-delà du rabat en Velcro sur le haut du compartiment (e). Attachez le Velcro et fermez à fond la fermeture
éclair du compartiment (f).
6. Procédez au rechargement ou au remplacement du piston vide avant d’utiliser votre sac Float à nouveau.
b)
a)
e)
c)
f)
54
d)
Maintenance
Enlèvement et installation du système d’airbag
Les sacs Float 12/13 sont équipés d’un système d’airbag amovible et interchangeable. Les
éléments de l’airbag sont interchangeables entre les Float 32 et 22/Float Throttle ou peuvent être
entièrement retirés.
Enlèvement
1. Pour enlever l’airbag, ouvrez le compartiment de l’airbag en détachant la fermeture éclair située
sous le rabat de Velcro. Ne tentez jamais d’ouvrir la fermeture éclair du compartiment de l’airbag.
Vous risqueriez d’endommager la fermeture.
2. Débranchez le câble de déclenchement et les conduites d’air du piston (a).
3. Détachez le Velcro noir maintenant en place l’extrémité libre de la cordelette orange. Déroulez la
cordelette des boucles (b).
4. Une fois que la cordelette n’est plus enroulée sur les boucles de sangle, l’airbag, l’éjecteur, le
câble de déclenchement et la conduite d’air peuvent être enlevés (c). Le câble de déclenchement
reste solidaire du sac mais il peut être retiré comme indiqué ci-dessous à la rubrique «
Déplacement du déclencheur ».
a
b
c
55
Installation
1. Airbag déplié, placez l’éjecteur dans le compartiment de l’airbag avec le capot orange de la
vanne de déclenchement vers le haut (a). La conduite d’air doit être insérée par l’orifice prévu à cet
effet (b) dans le compartiment principal de rangement dans lequel se trouve le piston.
2. En commençant par le côté de l’extrémité fixe de la cordelette orange, enfilez la cordelette dans
la première fente de l’airbag. Faites passer la cordelette par la première boucle de sangle en bas
puis repassez dans la première fente en haut. Répétez l’opération pour chaque fente (c) jusqu’à ce
que vous atteigniez le tube de l’éjecteur.
3. Une fois arrivé au tube de l’éjecteur, tirez sur la cordelette pour la tendre. Ceci fera passer les
boucles de sangle à travers les fentes d’accessoire de l’airbag.
4. Acheminez la cordelette par dessus le tube de l’éjecteur.
5. Répétez les opérations d’enfilage pour les fentes et boucles restantes.
6. Attachez l’extrémité libre de la cordelette orange en la faisant passer au travers de la boucle noire
en Velcro, puis réacheminez-la vers le bas en faisant une boucle et repliez le rabat en Velcro dessus.
7. Repliez l’airbag et fermez le compartiment (référez-vous aux instructions ci-dessus pour le pliage).
8. Rebranchez le câble de déclenchement et les conduites d’air au piston (d).
a
b
c
d
56
Installation / Entretien et entreposage
Déplacement du déclencheur
Le Float 32 vous permet de placer le déclencheur sur bretelle d’épaule gauche ou droite, selon vos
préférences. Cette possibilité n’est pas proposée sur le Float 22 ou le Float Throttle.
Enlèvement
1. Ouvrez la fermeture éclair sur la bretelle d’épaule où se trouve le déclencheur.
2. Desserrez la petite vis qui fixe le déclencheur sur la boucle de sangle à l’intérieur de la bretelle d’épaule.
3. Faites passer le déclencheur et le câble (a) à travers la fermeture éclair de la bretelle d’épaule
pour les extraire.
a
Installation
1. En commençant au niveau de la fermeture éclair de la bretelle d’épaule, renfilez le câble de
déclenchement dans le sac (b) en passant d’abord par le cache du déclencheur. Veillez à ce que le
câble de déclenchement passe bien au-dessous des éléments de l’airbag.
2. Faites pénétrer le câble de déclenchement dans la poche principale de rangement où est logé le piston
en le faisant passer à travers l’orifice situé dans le coin en bas à droite du compartiment de l’airbag (c).
3. À l’intérieur de la fermeture éclair de la bretelle d’épaule, bloquez le câble de déclenchement en
attachant la vis du déclencheur à la boucle de sangle.
b
b
c
a
57
Entretien / Stockage / Transport
Le système ne nécessite aucun entretien particulier pourvu qu’il soit entreposé dans un endroit frais et
sec. N’exposez pas le piston Float chargé à des températures supérieures à 55°C (130°F) ou inférieures
à -30°C (-22°F). Si le sac a été placé dans des conditions difficiles, vérifiez qu’aucune connexion n’est
obstruée par des éléments contaminants. Le sac peut être nettoyé à l’eau chaude savonneuse et les
connexions avec un chiffon humide. Ne pas utiliser de lubrifiant.
Déploiement périodique
BCA recommande de déployer le airbag Float au moins une fois par an, à la fois pour vous assurer que
le système fonctionne correctement et que l’utilisateur sait bien se servir de l’équipement. Endossez-le,
déclenchez-le, repliez l’airbag et rechargez le cylindre avant le début de la saison. Votre airbag Float a été
conçu pour pouvoir se déployer un minimum de 20 fois et est couvert par une garantie de 3 ans. S’il est
correctement entretenu, il devrait avoir une durée de vie de cinq ans ou plus.
Purge du piston à air comprimé
Si le piston d’air comprimé v est sous pression mais que la pression tombe à moins de 172 bars
(2 500 psi) à 21°C (70°F), il ne devrait plus être utilisé en randonnée mais peut servir pour un exercice
d’entraînement. Déployez simplement le coussin d’air en tirant sur la poignée de déclenchement.
NE POINTEZ PAS l’ORIFICE DE SORTIE DU PISTON (COUPLEUR) EN DIRECTION DE QUI OU
DE QUOI QUE CE SOIT, CAR IL POURRAIT CAUSER DES BLESSURES OU DES DOMMAGES.
PURGER UN CYLINDRE D’AIR COMPRIMÉ EST UNE OPÉRATION BRUYANTE – LE PORT
D’UNE PROTECTION AUDITIVE PERSONNELLE EST RECOMMANDÉ.
Expédition d’un piston à air comprimé
DÉCHARGEZ LE PISTON À AIR COMPRIMÉ AVANT DE L’EXPÉDIER.
Les cylindre à air comprimé ne peuvent pas être expédiés pressurisés sans certification appropriée
(Hazmat). Les cylindre à air comprimé vides ou pleins doivent être expédiés dans leur conditionnement
d’origine pour éviter tout dommage. Veuillez renvoyer les caches de protection. Lorsque des cylindre
non-pressurisés sont expédiés dans leur conditionnement d’origine, prenez bien soin d’enlever toutes
les étiquettes ou mentions Hazmat qui ont été apposées quand ils ont été expédiés pressurisés.
Directives de transport
Quoique l’Association internationale des transports aériens (IATA) ait spécifiquement homologué les
coussins gonflables d’avalanche munis de cylindre pressurisés pour le voyage aérien, l’Administration de
la sécurité des transports (TSA) ne les autorise pas sur les vols à destination ou au départ de l’Amérique
du Nord. Si vous vous rendez dans des pays en dehors de l’Amérique du Nord, prenez contact avec
votre compagnie aérienne à l’avance pour obtenir la permission d’enregistrer votre piston pressurisé
Float. Si la permission vous est accordée, mettez le piston pressurisé dans vos bagages enregistrés.
Veillez à ce qu’il soit accompagné des documents suivants : www.backcountryaccess.com/IATAdoc .
Si vous vous rendez en Amérique du Nord ou en partez, la TSA ne vous permettra pas d’embarquer
votre piston pressurisé à bord. Déchargez le piston d’air comprimé avant de pénétrer dans l’aéroport.
Lorsqu’il est vide, dévissez la tête du piston et mettez les deux éléments dans des sachets en plastique
propres et réutilisables. Faites-les franchir les points de contrôle de la TSA en les mettant bien en vue
58
Certifications et indications
du personnel de la TSA. Ceci fait, la tête du piston peut être revissée sur le piston à la main. Dès que
vous êtes arrivé à destination, mettez-vous en quête d’un centre de rechargement Float et échangez ou
rechargez votre piston vide. Pour obtenir une liste de centres agréés Float où procéder à la recharge ou
à l’échange, rendez-vous sur notre site à l’adresse www.backcountryaccess.com/refillcenters .
Les indications suivantes figurent sur les sacs airbags Backcountry Access Float.
La marque de conformité CE indique que Backcountry Access et ce produit répondent
aux exigences de la Directive sur les équipements de protection personnelle (89/686/EEC).
La marque de conformité Pi indique que Backcountry Access et ce produit répondent
aux exigences ADR/RID et TPED (Directive 2010/35/EU).
Testé par TÜV SÜD : organisme
mondialement reconnu d’administration
de tests, d’inspection et de certification.
TÜV Süd Product Service GmbH
Ridlerstr. 21
D-80339 Munich
Allemagne
Représentant pour l’UE:
BCA Europe
Davisstraße 11 b
A-5400 Hallein
Autriche
Tél : 0043 (0) 6245 / 77385
Télécopie : 0043 (0) 6245 / 77385 - 99
Les sacs airbags Backcountry Access Float sont protégés par le brevet américain : n° 7 878 141.
Float 22:
Capacité du sac : 22 l (1 343 pouces cubes)
Poids : 2 495 g (5,5 lb) pour le système complet, cylindre compris
Float Throttle:
Capacité du sac : 22 l (1 343 pouces cubes)
Poids : 2 495 g (5,5 lb) pour le système complet, cylindre compris
Float 32: Capacité du sac : 32 l (1 953 pouces cubes)
Capacité de l’airbag : 150 litres
Poids : 2 903 g (6,4 lb) pour le système complet, cylindre compris
Cylindre/tête de piston : Poids : 385 g / 206 g
Volume : 290 ml
Système : Résistance à la traction >3000 N Plage de températures de fonctionnement -30°C à 55°C (de -22°F à 130°F)
59
Sauvetage en cas d’avalanche
Voici une brève introduction aux techniques de sauvetage en cas d’avalanche. Notre site Web
contient également une liste de formateurs aux avalanches. Nous vous recommandons vivement
de suivre un cours de préparation aux avalanches dans votre région avant de partir en randonnée.
Chaque personne doit disposer d’un DVA en état de fonctionnement, d’une sonde et d’une pelle
– et doit savoir comment s’en servir. Avant de partir, appelez votre centre local de prévision des
avalanches et déterminez le niveau de danger dans la zone où vous avez l’intention de vous rendre.
États-Unis : www.avalanche.org
Canada: www.avalanche.ca
Europe: www.lawinen.org
Recherche des victimes
Si un membre de votre groupe est enseveli, vous devez
entreprendre une détection à l’aide de DVA. Le but est de
détecter le signal le plus fort (la plus faible distance relevée) et de
commencer à sonder la zone. En cas d’ensevelissement, mettez
tous les DVA en mode recherche. Les directives ci-dessous
concernent l’utilisation d’un DVA numérique.
20m
40m
path
40m
avalanche
Recherche de signal : Si vous disposez d’un point où la victime
a été aperçue pour la dernière fois, commencez votre recherche
de signal à cet endroit. Sinon commencez votre recherché audessus, au bas ou sur le côté du chemin suivi par l’avalanche.
Référez-vous au schéma de droite pour décider d’un mode de
recherche.
20m
Recherche approximative : Dès que vous captez un signal,
orientez votre DVA de façon à ce que l’un quelconque des trois
voyants lumineux centraux se mette à clignoter et dirigez-vous
immédiatement dans la direction indiquée. Vérifiez que le chiffre
de l’indicateur de distance diminue. S’il augmente, faites une
rotation de 180 degrés. Lorsque vous êtes dans les dix mètres,
avancez lentement et efforcez-vous de maintenir le clignotement du voyant central.
single searcher
search path
multiple searchers
search paths
Recherche fine : Lorsque vous êtes à moins de trois mètres, positionnez votre DVA le plus près
possible de la surface de la neige et recherchez la plus faible distance indiquée par l’instrument.
Confirmez en faisant une recherche en fourchette dans la direction perpendiculaire.
Sondage / pointage : À l’endroit où l’indication de distance atteint un
minimum, sondez la zone en faisant des cercles concentriques espacés
d’environ 25 cm (10 po) entre deux sondages. Faites pénétrer la sonde
dans la neige perpendiculairement à la pente. Une fois que vous avez
confirmé la position de la victime, laissez la sonde plantée dans la neige.
Dégagement : Bien que pelleter puisse paraître d’une simplicité
enfantine, c’est généralement ce qui prend le plus de temps lors d’un
sauvetage effectué à l’aide de DVA. Pour des résultats optimaux,
commencez le dégagement juste en contrebas de la sonde. Pratiquez
une excavation sur une largeur équivalente à un intervalle. Dans le
cas d’ensevelissement dépassant un mètre de profondeur, faites
une excavation en contrebas équivalant à 1,5 fois la profondeur
d’ensevelissement environ. Pour connaître des techniques plus
pointues de dégagement, rendez-vous sur notre site Web : www.
backcountryaccess.com/shoveling .
60
90˚
1.5 x
burial depth
10˝ 10˝
25CM 25CM
Manuale Di Istruzioni
61
Componenti principali
Float 22
airbag
impugnatura di attivazione
cosciale
62
10
fascia vita
12
13
Componenti principali
Float 22
compartimento
sonda e pala
compartimento airbag
asola trasversale per sci
asole per
trasporto
casco
compartimento principale
asola trasversale per sci
11
tasca nella
fascia vita
63
Componenti principali
Float Throttle
airbag
13
impugnatura di attivazione
cosciale
fascia vita
64
12
10
Componenti principali
Float Throttle
compartimento
sonda e pala
compartimento airbag
asole per
trasporto
casco
compartimento principale
THROTTL
E
11
tasca nella
fascia vita
65
Componenti principali
Float 32
airbag
carico sollevatori
13
impugnatura di attivazione:
può essere applicata
su uno degli spallacci,
l’idratazione sull’altro
impugnatura di attivazione:
può essere applicata
su uno degli spallacci,
l’idratazione sull’altro
fascia vita
cosciale
66
10
13
12
Componenti principali
Float 32
compartimento airbag
tasca porta maschera foderata
asola trasversale per sci
compartimento
porta-pala e sonda
tasca per fascia
porta-casco
asole per
trasporto
casco
cordini per piccozza
cinghia di compressione
compartimento
principale
cordini per piccozza
asola trasversale per sci
12
tasca nella
fascia vita
67
Principio di funzionamento - Esonero di responsabilità - Garanzia
A cosa serve un airbag antivalanga?
In caso di incidente dovuto a valanga, è basilare evitare di essere seppelliti dalla neve o ridurre il
più possibile la profondità di seppellimento. Questo perché nelle operazioni di salvataggio, buona
parte del tempo è dedicata alle operazioni di scavo per disseppellire la vittima. L’airbag è studiato per
tenere il corpo in superficie o appena al di sotto, riducendo il tempo di scavo.
Esonero di responsabilità
Il sistema Float è studiato per migliorare le possibilità di sopravvivenza in caso di valanga. Il dispositivo
deve essere utilizzato correttamente, attenendosi alle istruzioni contenute nel presente manuale.
È consigliabile eseguire un dispiegamento di prova almeno una volta l’anno. Si consiglia di non
modificare il dispositivo in alcun modo e di non azionarlo in modo diverso da quanto prescritto.
Il sistema Float non può impedire il formarsi di una valanga, né garantire la sopravvivenza in
nessuna condizione. Benché questo dispositivo offra una protezione parziale dagli urti, nessun
airbag antivalanga previene completamente dal rischio di lesioni da trauma; inoltre qualsiasi airbag
deve essere sempre utilizzato unitamente ad apparecchio di ricerca in valanga (ARVA), pala,
sonda e casco, per offrire le massime possibilità di sopravvivenza. Come per gli altri strumenti di
salvataggio da valanga, l’airbag non deve indurre gli escursionisti a correre maggiori rischi.
Dopo aver investito in una tecnologia salvavita è necessario, prima di intraprendere un’escursione,
dedicare del tempo ad acquisire le competenze necessarie, per evitare di incorrere in valanghe. Si
consiglia di seguire un corso sulla sicurezza in caso di valanghe, esercitarsi nell’uso dell’attrezzatura
e pianificare il tragitto in funzione dei bollettini meteo del centro antivalanghe di zona.
Garanzia
Il fabbricante, Backcountry Access, Inc. (BCA), offre una garanzia esplicita sulla manodopera e i
componenti del prodotto per tre anni dalla data di acquisto presso il rivenditore al dettaglio. Ogni
componente sarà riparato o sostituito dal fabbricante senza alcun costo aggiuntivo, inclusa la
manodopera. La garanzia non copre i danni al prodotto causati da uso improprio o usura eccessiva.
Ogni richiesta coperta da garanzia deve essere inoltrata a BCA o al rivenditore, includendo lo scontrino
e un numero di autorizzazione al reso.
Per attivare la garanzia e ricevere gli aggiornamenti tecnici periodici sui nostri dispositivi,
è necessario registrarsi online sul sito: www.backcountryaccess.com/warranty.
68
Equipment Check
Sistema ad aria compressa
copertura meccanismo
di attivazione
7
cavo attivazione
manometro
8
4
14
coperchio valvola
di sfiato
gruppo eiettore
anello di sicurezza
tubo flessibile
aria
9
3
1
raccordo a innesto
rapido
bombola aria
2
69
Installazione della bombola di aria compressa
1. Rimuovere i coperchi della confezione dalla bombola. Accedere al sistema di aria compressa
aprendo il compartimento principale dello zaino e ripiegando indietro la copertura in tessuto del sistema.
2. Inserire la bombola nell’apposito alloggiamento, quindi chiudere l’apertura a strappo del
compartimento bombola.
3. Collegare il raccordo a innesto rapido al tubo flessibile dell’aria u tirando l’anello grande verso la
bombola v. Quando il raccordo del tubo flessibile w è collegato correttamente, si blocca con uno
scatto. L’anello di sicurezza x deve essere installato per garantire che il tubo flessibile sia raccordato
correttamente.
4
1
1
4
SBAGLIATO
SICURO
1
1
4. IMPORTANTE. Avvitare il dado del cavo di attivazione y sul perno z. Per esporre il
dado prima di avvitarlo sul perno, potrebbe essere necessario spingere in dentro l’impugnatura di
attivazione nello spallaccio.
5. Avvitare la copertura del meccanismo di attivazione { sul dado y.
5
6
7
DADO DEL CAVO DI ATTIVAZIONE AVVITATO
5
7
COPERTURA MECCANISMO DI ATTIVAZIONE COLLEGATA
7
70
Uso dell’airbag antivalanga
Le bombole vuote o scariche devono essere ricaricate o sostituite solo presso un centro di assistenza
Float. L’elenco dei centri di assistenza Float è consultabile alla pagina www.backcountryaccess.com/
refillcenters.
If shipping is required, see “Shipping a Compressed Air Cylinder” below.
7. Per smontare la bombola vuota, eseguire le istruzioni precedenti in ordine inverso.
Verifica dell’attrezzatura
Raccordi del sistema
Verificare che le connessioni siano state eseguite correttamente seguendo le istruzioni della
sezione precedente “Installazione della bombola di aria compressa”. Ogni volta che si usa il sistema
Float, verificare il corretto avvitamento del dado del cavo di attivazione svitando la copertura { e
controllando che il dado y sia avvitato saldamente sul perno z. Riposizionare la copertura del
meccanismo di attivazione.
Bombola dell’aria
Verificare sul manometro | Verificare sul manometro (8) che la pressione della bombola di
aria compressa sia compresa tra 2500 e 2700 psi (172-186 bar) a temperatura ambiente (circa
21 °C). Per una lettura accurata, verificare la pressione a temperatura ambiente prima di ogni
uso. IL SISTEMA FUNZIONA CORRETTAMENTE SOLO SE LA PRESSIONE È COMPRESA
NELL’INTERVALLO INDICATO. Quando il dispositivo è esposto a temperature inferiori, la
pressione diminuisce. Se la pressione diminuisce sotto 2000 psi (138 bar), in qualsiasi condizione
di temperatura, l’airbag potrebbe non riempirsi correttamente. Per istruzioni sulla sostituzione della
bombola, vedere la sezione “Installazione della bombola di aria compressa” a pagina 70.
Ispezionare le condizioni della bombola e
non utilizzarla qualora sia danneggiata o
ammaccata.
WRONG
SECURE
Zaino
Verificare che l’apertura a strappo nella parte
superiore del compartimento airbag sia ben chiusa. In questo modo l’airbag è completamente richiuso
nell’apposito compartimento e al sicuro.
Il compartimento airbag deve ospitare solo l’airbag e l’eiettore. Non riporre altri oggetti in questo
compartimento.
Verificare che non vi siano componenti non fissati nel sistema ad aria compressa e che nulla blocchi il
gruppo eiettore 9 . Controllare che la zip del compartimento sia perfettamente chiusa.
Verificare che nulla ostruisca il compartimento dell’airbag dall’esterno dello zaino, specialmente oggetti
con estremità acuminate, come i rampanti o l’attrezzatura da ghiaccio. Trasportare gli sci solo tramite il
portasci diagonale. Non usare le cinghie di compressione laterali per il trasporto degli sci lateralmente
allo zaino (a formare una A), poiché potrebbero ostruire il dispiegamento dell’airbag.
71
Uso dell’airbag antivalanga
Regolazioni dello zaino
Lo zaino deve essere indossato correttamente prima di ogni escursione su terreni a rischio di valanga,
poiché, se non è fissato saldamente al corpo, potrebbe essere strappato via dalla forza della valanga.
Fissaggio del cosciale
Il cosciale ~ si trova nella tasca in vita 11 . e va adoperato per evitare che lo zaino
sia strappato via in caso di valanga. Estrarre il cosciale e far passare la fascia della vita
attraverso l’estremità regolabile del cosciale. Tenendo l’asola fissa del cosciale con una
mano, portare la cinghia esternamente alla gamba, quindi farla passare tra le gambe.
Inserire la fascia della vita attraverso l’asola del cosciale, quindi chiudere la fibbia in
vita. Serrare il cosciale, che deve essere aderente, ma confortevole.
10
11
Fibbia della fascia in vita
La fibbia si compone di due parti: maschio e femmina. Inserire la parte maschio nell’apertura più
grande della parte femmina, quindi serrare la fascia in modo che sia ben aderente: la fascia è
indossata correttamente quando la cinghia e la fibbia poggiano piatte contro il corpo.
Collocazione di pala e sonda
Riporre lama e manico della pala e la sonda nelle apposite tasche, nel compartimento esterno per gli
attrezzi.
Fissaggio di sci e snowboard
Float 22: è possibile trasportare gli sci usando le asole portasci trasversali. Per lo snowboard, si
consiglia di ordinare il sistema di fissaggio specifico per snowboard di BCA, che si integra con le
asole apposite sul pannello posteriore.
Float Throttle: non è previsto un sistema di trasporto diagonale degli sci. È possibile tuttavia applicare
il sistema di fissaggio snowboard di BCA, che si integra con le asole per lo snowboard sul pannello
72
Using the Avalanche Airbag
posteriore.
Float 32: è possibile trasportare gli sci usando le asole portasci trasversali. Per lo snowboard, si
consiglia di ordinare il sistema di fissaggio specifico per snowboard di BCA, che si integra con le
asole apposite sul pannello posteriore.
Idratazione (sacca non inclusa)
Float 22 e Float Throttle: non compatibili con sistemi di idratazione.
Float 32: inserire la sacca nel compartimento principale e appenderla all’asola a strappo (a) all’interno.
Inserire il tubo del sistema di idratazione attraverso l’apertura sull’angolo (b), al lato opposto dello zaino
rispetto a quello in cui il cavo di attivazione dell’airbag entra nel compartimento principale. Aprire il
compartimento airbag e dispiegare l’airbag. Far passare il tubo dell’idratazione attraverso il compartimento
airbag e dentro l’apertura dello spallaccio (c) che non contiene il meccanismo di attivazione dell’airbag.
Prima di richiudere l’airbag, accertarsi che il tubo dell’idratazione passi sotto l’airbag e il gruppo eiettore, per
evitare che ostruisca l’airbag durante il dispiegamento.
c
a
c
b
b
Trasporto del casco
Float 22: Tla fascia in rete portacasco è fissata alle quattro asole situate sulla parte
anteriore dello zaino.
Float Throttle: la fascia portacasco non è inclusa; lo zaino è dotato di asole per il
trasporto del casco compatibili con la fascia inclusa in altri modelli.
Float 32: la fascia portacasco è fissata in modo permanente alla parte anteriore dello
zaino ed è inserita nella tasca apposita sotto il logo BCA. Estrarre la fascia e fissarne
i ganci alle due asole inferiori, o a quelle superiori se si stanno trasportando gli sci
trasversalmente.
13
Dispiegamento
Quando si procede su un terreno a rischio di valanga, aprire la tasca in cui è riposta l’impugnatura di
attivazione 13 (vedere immagine a destra). In caso di valanga, tirare rapidamente l’impugnatura verso
il basso afferrandola attraverso il torace con la mano opposta all’impugnatura. Cercare di sciare o
correre lungo i fianchi della valanga per sfuggire ai detriti. Quando la valanga rallenta, proteggere le
vie respiratorie coprendo la bocca con una mano o un gomito.
Cosa succede durante il dispiegamento
L’airbag esce dallo zaino e si gonfia completamente in tre secondi circa. La pressione nell’airbag
continuerà ad aumentare per alcuni secondi ancora, fino al riequilibrio della pressione nel sistema.
L’airbag rimane gonfio per diversi minuti, un periodo di tempo normalmente sufficiente affinché la
minaccia di una valanga si allontani.
73
Manutenzione
Dopo il dispiegamento
Sgonfiare l’airbag premendo con le dita la valvola di sfiato dell’aria. La valvola si trova sotto il
coperchio arancio della valvola di sfiato 14 . Non utilizzare oggetti duri o affilati per tenere aperta
la valvola di sfiato, per non danneggiare la superficie di chiusura ermetica della valvola. Quindi
richiudere l’airbag nel compartimento. Per maggiori informazioni, consultare la sezione “Chiusura
dell’airbag” qui di seguito.
Non sarà più possibile dispiegare l’airbag Float finché non si ricarica o si sostituisce la bombola,
operazione da effettuarsi presso un centro di assistenza Float (vedere www.backcountryaccess.com/
refillcenters). Per istruzioni sull’installazione della bombola carica, vedere la sezione “Installazione
della bombola di aria compressa” a pagina 70. Se l’airbag è stato dispiegato in una valanga,
contattare BCA per richiedere un’ispezione del dispositivo e il riempimento della bombola gratuiti.
Chiusura dell’airbag
Ripiegare l’airbag nel compartimento, SENZA ARROTOLARLO O SPINGERLO ALLA RINFUSA,
PER EVITARE CHE IL SISTEMA NON SI DISPIEGHI CORRETTAMENTE. Qualora l’airbag
fosse bagnato, lasciarlo asciugare completamente prima di riporlo. Sgonfiare completamente
l’airbag tramite la valvola apposita (potrebbe essere necessario compiere periodicamente questa
operazione mentre si richiude l’airbag). È molto importante svuotare l’airbag di tutta l’aria residua.
Quando tutta l’aria residua è fuoriuscita, staccare il tubo flessibile dalla bombola, quindi ripiegare
l’airbag nel compartimento.
1. Aprire completamente la chiusura lampo in modo che il cursore impegni solo una coppia di denti.
2. Riportare il cursore sul lato opposto dello zaino, dove inizia la chiusura lampo (a).
3. Iniziare distendendo l’airbag sgonfio sul terreno. Eseguire una piega a fisarmonica verticalmente
sui due lati dell’airbag (b).
4. Quindi eseguire due pieghe a fisarmonica orizzontali sull’airbag (c). A questo punto l’airbag è
pronto per essere richiuso nel compartimento.
5. Quando l’airbag è ripiegato nel compartimento, agganciare nuovamente il cursore (d) e chiudere
passando oltre l’aletta a strappo sopra il compartimento (e). Chiudere l’apertura a strappo e la
chiusura lampo fino in fondo (f).
6. Ricaricare o sostituire la bombola vuota prima di usare di nuovo lo zaino Float.
b)
a)
e)
c)
f)
74
d)
Manutenzione
Rimozione e installazione del sistema airbag
Gli zaini Float 2012/2013 sono dotati di sistema airbag rimovibile e intercambiabile. I componenti
dell’airbag possono essere scambiati tra il Float 32 e il Float 22/Float Throttle, oppure rimossi
completamente.
Rimozione
1. Per rimuovere l’airbag, aprirne il compartimento facendo scorrere completamente il cursore
dell’apertura a strappo sotto l’aletta a strappo. Non cercare mai di sganciare completamente la
chiusura lampo del compartimento airbag, poiché si danneggerebbe il cursore.
2. Scollegare il cavo di attivazione e il tubo flessibile dell’aria dalla bombola (a).
3. Aprire l’aletta a strappo nera che tiene in posizione l’estremità libera della corda arancio. Sfilare
la corda dalle asole in tessuto (b).
4. Una volta sfilata la corda dalle asole in tessuto, l’airbag, l’eiettore, il cavo di attivazione e il tubo
flessibile dell’aria possono essere rimossi liberamente (c). Il cavo di attivazione è fissato allo zaino,
ma può anch’esso essere rimosso come descritto successivamente nella sezione “Spostamento
del sistema di attivazione”.
a
b
c
75
Installazione del sistema
1. Con l’airbag aperto, porre l’eiettore nel compartimento airbag con il coperchio arancio della
valvola di sfiato rivolto verso l’alto (a). Il tubo flessibile dell’aria deve essere inserito attraverso
l’apposita apertura (b) nel compartimento principale, dove è riposta la bombola.
2. Infilare la corda arancio verso il basso iniziando dal lato con l’estremità fissa e farla passare
attraverso la prima fessura nell’airbag. Infilare la corda attraverso la prima asola in tessuto, quindi
verso l’alto nuovamente attraverso la prima fessura. Ripetere l’operazione con ogni fessura (c) fino
a raggiungere il tubo dell’eiettore.
3. Una volta terminato di infilare la corda fino al tubo di eiezione, tirare la corda ben stretta. Così
facendo si tirano le asole in tessuto attraverso le fessure di fissaggio nell’airbag.
4. Far passare la corda sopra il tubo dell’eiettore.
5. Continuare a infilare la corda attraverso le fessure e le asole restanti.
6. Fissare l’estremità libera della corda arancio facendola passare attraverso l’asola a strappo nera,
quindi farla passare indietro nuovamente e piegare l’aletta a strappo sopra di essa.
7. Ripiegare l’airbag e chiudere il compartimento (vedere le istruzioni precedenti per la chiusura dell’airbag).
8. Ricollegare il cavo di attivazione e il tubo flessibile dell’aria dalla bombola (d).
a
b
c
d
76
Installazione, manutenzione e conservazione
Spostamento del meccanismo di attivazione
Nel modello Float 32 è possibile installare il meccanismo di attivazione sullo spallaccio di sinistra o
di destra, secondo le proprie preferenze. Questa caratteristica non è disponibile nei modelli Float
22 o Float Throttle.
Rimozione
1. Aprire la chiusura lampo sullo spallaccio contenente il meccanismo di attivazione.
2. Allentare la vitina che fissa il meccanismo all’asola in tessuto all’interno dello spallaccio.
3. Tirare il meccanismo di attivazione e il cavo (a) per estrarli dallo spallaccio.
a
Installazione del sistema
1. Iniziando dalla chiusura lampo dello spallaccio (a), infilare il cavo di attivazione, collegato al
coperchio del meccanismo di attivazione, fino all’interno dello zaino (b). Accertarsi che il cavo del
meccanismo di attivazione sia inserito sotto i componenti dell’airbag.
2. Far passare il cavo del meccanismo di attivazione attraverso l’apertura in basso a destra del
compartimento airbag (c) fino alla tasca del compartimento principale, dove è riposta la bombola.
3. All’interno della chiusura lampo dello spallaccio, fissare il cavo del meccanismo di attivazione
serrando la vite sull’asola in tessuto.
b
b
c
a
77
Manutenzione, conservazione e trasporto
Se il dispositivo è conservato in luogo fresco e asciutto, non sono necessari interventi di manutenzione
programmata. Non esporre la bombola del dispositivo Float pressurizzata a temperature superiori a 55 °C
o inferiori a -30 °C. Se il dispositivo è stato sottoposto a condizioni avverse, controllare che tutti gli attacchi
siano privi di impurità. Lo zaino può essere pulito con sapone e acqua tiepida, mentre gli attacchi possono
essere puliti con un panno umido. Non utilizzare lubrificanti.
Dispiegamento periodico
Il produttore raccomanda di dispiegare l’airbag Float almeno una volta l’anno, per verificarne il corretto
funzionamento e accertarsi di sapere come azionarlo. Indossare lo zaino, tirare il meccanismo di
attivazione, quindi ripiegare l’airbag e riempire la bombola prima dell’inizio della stagione escursionistica.
L’airbag Float può essere dispiegato almeno 20 volte ed è garantito per 3 anni. Una manutenzione
accurata dovrebbe consentirne l’uso per almeno 5 anni.
Scarico della bombola di aria compressa
Quando la bombola di aria compressa è pressurizzata, v ma la pressione è inferiore a 172 bar a
21 °C, non può essere utilizzata durante un’escursione, ma può servire a eseguire un dispiegamento
di esercitazione. Dispiegare semplicemente l’airbag tirando l’apposita impugnatura.
NON PUNTARE L’APERTURA DI SCARICO DELLA BOMBOLA (ACCOPPIATORE) CONTRO
OGGETTI O PERSONE, PER NON CAUSARE DANNI O LESIONI. LO SCARICO DELL’ARIA
COMPRESSA È PARTICOLARMENTE RUMOROSO: SI CONSIGLIA PERTANTO DI INDOSSARE
ADEGUATE PROTEZIONI AURICOLARI.
Spedizione di bombole di aria compressa
SVUOTARE LE BOMBOLE PRIMA DELLA SPEDIZIONE.
Le bombole di aria compressa non possono essere spedite pressurizzate senza la corretta certificazione
per la spedizione di merci pericolose. Per evitare ogni danneggiamento, le bombole vuote o in pressione
devono essere spedite nella confezione originale. Si prega di restituire anche i coperchi di protezione.
Prima di spedire le bombole depressurizzate nella confezione originale, rimuovere le etichette o i contrassegni relativi alla spedizione di merce pericolosa applicati per l’invio delle bombole pressurizzate.
Linee guida per il trasporto
La IATA, l’organizzazione internazionale delle compagnie aeree, consente specificamente il trasporto
aereo di airbag antivalanga con bombole pressurizzate; tuttavia, il trasporto non è consentito
dall’organismo per la sicurezza del trasporto aereo, la TSA (Transportation Security Administration), sui
voli da e verso l’America settentrionale. In caso di viaggi in Paesi fuori dall’America settentrionale, si
consiglia di contattare la compagnia aerea in anticipo, per avere il permesso di trasportare la bombola
pressurizzata. Una volta ottenuto il permesso, la bombola pressurizzata deve essere inclusa nel
bagaglio registrato. La bombola deve essere corredata del documento scaricabile all’indirizzo: www.
backcountryaccess.com/IATAdoc .
La TSA non consente di portare bombole pressurizzate a bordo di aerei in viaggio da e verso l’America
settentrionale. Quindi sarà necessario scaricare la bombola prima di entrare in aeroporto. Dopo
avere svuotato la bombola, svitarne la testa e chiuderle entrambe in sacchetti di plastica risigillabili.
78
Certificazioni e marchi
Presentarle in questo modo ai banchi di controllo di sicurezza della TSA per mostrarle al personale
incaricato. Successivamente, la testa potrà essere nuovamente avvitata manualmente sulla bombola.
Una volta a destinazione, sarà necessario rivolgersi a un centro di assistenza Float per scambiare o
riempire la bombola vuota. L’elenco dei centri di assistenza Float è consultabile nella pagina
www.backcountryaccess.com/refillcenters del nostro sito.
Gli airbag antivalanga Float di Backcountry Access recano i seguenti marchi.
Il marchio di conformità CE indica che Backcountry Access e questo prodotto soddisfano
i requisiti della Direttiva CEE 89/686 relativa ai Dispositivi di protezione individuale.
Il marchio di conformità Pi indica che Backcountry Access e questo prodotto soddisfano
i requisiti delle disposizioni ADR/RID (Trasporto di merci pericolose) e TPED
(Attrezzature a pressione trasportabili) della Direttiva UE 2010/35.
Testato TÜV SÜD è un ente di
certificazione, ispezione e prova
riconosciuto su scala mondiale.
TÜV Süd Product Service GmbH
Ridlerstr. 21
D-80339 Monaco
Germania
Rappresentante per l’UE:
BCA Europe
Davisstraße 11 b
A-5400 Hallein
Austria
Tel.: 0043 (0) 6245 / 77385
Fax: 0043 (0) 6245 / 77385 - 99
Gli airbag antivalanga Backcountry Access Float sono brevettati negli Stati Uniti (brevetto n.
7.878.141).
Float 22:
Capacità zaino: 22 l Peso: 2.495 g (sistema completo, bombola inclusa)
Float Throttle:
Capacità zaino: 22 l Peso: 2.495 g (sistema completo, bombola inclusa)
Float 32: Capacità zaino: 32 l Volume airbag: 150 litri
Peso: 2.903 g (sistema completo, bombola inclusa)
Bombola/testa della bombola: Peso: 385 g/206 g Volume: 290 ml
Sistema: Resistenza alla trazione >3000 N
Temperatura di esercizio: -30/+55 °C
79
Salvataggio da valanga
Quella che segue è una breve introduzione alle tecniche di salvataggio in caso di valanga. Nel nostro
sito è disponibile anche un elenco di istruttori specializzati sull’argomento del salvataggio da valanga.
Suggeriamo vivamente di seguire un corso nella propria zona prima di fare delle escursioni. Ogni
partecipante all’escursione deve avere un apparecchio ARVA, una sonda e una pala, e deve sapere
come usarli. Prima di partire, consultare i bollettini del centro antivalanghe di zona e determinare il
livello di pericolo dell’area che si intende visitare:
US: www.avalanche.org
Canada: www.avalanche.ca
Europa: www.lawinen.org
Ricerca delle vittime
Qualora un membro del vostro gruppo rimanga sepolto da una
valanga, dovrete eseguire una ricerca con l’ARVA. L’obiettivo è
individuare il segnale più forte (la lettura alla distanza minima)
e iniziare a sondare immediatamente in quella zona. In caso di
seppellimento, tutti i presenti devono commutare gli ARVA in
modalità ricerca. Le linee guida seguenti presuppongono che si
stiano usando apparecchi ARVA digitali.
20m
40m
path
40m
avalanche
Ricerca primaria (ricerca del segnale). Se la vittima è stata
vista l’ultima volta in un determinato punto, iniziare la ricerca da lì.
Diversamente, avviare la ricerca del segnale in cima, in fondo o
sul lato del percorso di scivolamento della valanga. Lo schema a
destra aiuta a stabilire un percorso di ricerca.
20m
single searcher
search path
multiple searchers
search paths
Ricerca secondaria. Una volta intercettato un segnale, allineare
l’ARVA in modo che una qualsiasi delle spie centrali lampeggi e spostarsi rapidamente nella direzione
in cui punta l’ARVA. Accertarsi che il numero sul display della distanza diminuisca. Se invece aumenta,
ruotare di 180 gradi. Nel raggio di 10 metri, procedere lentamente e cercare di tenere accesa la spia
centrale della ricerca.
Ricerca di precisione. Nel raggio di 3 metri dalla vittima, usare l’ARVA il più possibile vicino alla
superficie nevosa e cercare la lettura con la distanza minima. Confermare con una ricerca incrociata
in direzione perpendicolare.
Sondaggio e ricerca nel punto di localizzazione. Nel punto in cui la
distanza ha raggiunto il minimo, sondare l’area per cerchi concentrici,
inserendo la sonda nel manto nevoso ogni 25 cm circa. La sonda deve
penetrare perpendicolarmente alla neve. Una volta confermata la posizione
della vittima, lasciare la sonda nella neve.
90˚
10˝ 10˝
25CM 25CM
Spalatura. Benché possa apparire un’operazione semplice, la spalatura
richiede la maggior parte del tempo di recupero di una vittima da seppellimento
in valanga. Per ottenere i risultati migliori, iniziare a spalare la neve appena a
valle della sonda. Creare un foro largo all’incirca quanto l’apertura delle proprie
1.5 x
burial depth
braccia. In caso di seppellimento di profondità superiore a un metro, scavare a
valle della sonda a una distanza di 1,5 volte la profondità di seppellimento. Per maggiori informazioni sulle
tecniche di spalatura, consultare il nostro sito web: www.backcountryaccess.com/shoveling .
80
Float save in Montezuma, Colorado, USA.
Backcountry Access, Inc.
2820 Wilderness Place, Unit H
Boulder, Colorado USA
Phone: 303.417.1345
Fax: 303.417.1625
www.backcountryaccess.com
BCA Europe
[email protected]
Phone: 0043 (0) 6246 / 72150