1
30x Speed Dome - TVT77DER
-
-
-
-
-
-
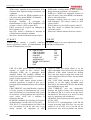
SET AREA SCAN: questa opzione consente di
programmare fino a 4 funzioni Area Scan
descritte nella sezione 3.5. Per la
memorizzazione operare come segue:
1. Premere il tasto OPEN sulla tastiera.
2. Muovere il joystick sino a definire il
limite sinistro dell’area da scansionare e
premere nuovamente OPEN.
3. Muovere il joystick sino a definire il
limite destro dell’area e premere ancora
OPEN.
RUN AREA SCAN: esegue la funzione Area
Scan selezionata (1 - 4). Utilizzare il joystick
per la selezione dell’area desiderata e premere
quindi OPEN per avviare l’esecuzione.
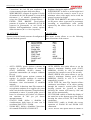
ENTER PRESET SCAN SET: questa voce
consente di accedere ad un’altra finestra per la
programmazione delle 4 funzioni di scansione
automatiche di un massimo di 30 posizioni Preset ciascuna precedentemente memorizzate
(come descritto nella sezione 3.3).
RUN PRESET SCAN: tramite questa voce è
possibile eseguire una delle 4 funzioni Pre-set
Scan selezionata (premere il tasto OPEN per
avviare la scansione).
SET PATTERN SCAN: questa voce consente
di programmare i 4 percorsi di ronda
(PATTERN). Per iniziare a programmare il
percorso spostare la telecamera al punto di
partenza tramite il joystick e premere il tasto
OPEN sulla tastiera. Muovere il joystick
seguendo il percorso desiderato. Nel caso in cui
si voglia fermare la memorizzazione del
percorso premere nuovamente il tasto OPEN.
Viceversa, premendo il tasto CLOSE, il
percorso non verrà memorizzato.
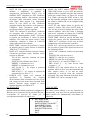
RUN PATTERN SCAN: per eseguire la
funzione PATTERN selezionare il percorso
desiderato tramite il joystick e premere il tasto
OPEN per avviare l’esecuzione. Altrimenti
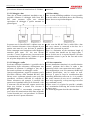
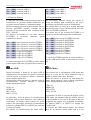
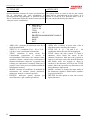
uscire dal menù e premere i tasti:
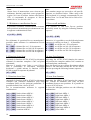
-
-
-
-
-
-
[1-4] + [PAT]
-
[1-4] + [PAT]
La telecamera ripeterà esattamente i
movimenti registrati durante la fase di
programmazione rispettando sia le velocità di
raggiungimento di ciascuna posizione che i
tempi di sosta in ciascuna posizione.
SET AREA SCAN: this option allows to
program up to 4 functions Area Scan as
described in section 3.5. For programming
operate as follows:
1. Press OPEN button on keyboard.
2. Move the joystick to reach the left area limit
and press OPEN button again.
3. Move the joystick up to the right area limit e
press OPEN button again.
RUN AREA SCAN: this option allows to run
the selected Area Scan (1 – 4) function. Use the
joystick to select the desired area and then press
OPEN button to start execution.
ENTER PRESET SCAN SET: entering this
option will show the window to program the 4
automatic Pre-set scan functions. Each scan
function can be composed of up to 30 Pre-set
positions previously recorded (as described in
section 3.3).
RUN PRESET SCAN: with this option it is
possible to run the selected Pre-set Scan
function (press OPEN button to start
execution).
SET PATTERN SCAN: this option allows to
program the 4 patrol patterns. To start
programming a Pattern use the joystick to move
the camera up to the starting point and press
OPEN button on the keyboard. Then move the
joystick to all required directions so that the
camera will follow to the desired path. Press
again the OPEN button to stop the pattern's
setting. While, to exit programming without
saving the pattern, press CLOSE button.
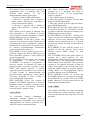
RUN PATTERN SCAN: to execute the
PATTERN function, it is possible to select the
desired Pattern by joystick and press OPEN
button. Otherwise, exit the menu and use the
following button combination:
The camera will follow the same movements
stored during the pattern learning, using the
same speeds and the same stop time on each
positions.
21