1
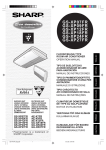
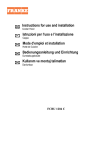
GB
Instructions for use and installation
IT
Istruzioni per l’uso e l’installazione
Cooker Hood
Cappa
FR
Mode d’emploi et installation
DE
Bedienungsanleitung und Einrichtung
TR
Kullanım ve montaj talimatları
Hotte de Cuisine
Dunstabzugshaube
Davlumbaz
FSI 612
FSI 912
FSI 6122
FSI 9122
INDEX
EN
RECOMMENDATIONS AND SUGGESTIONS ......................................................................................................................3
CHARACTERISTICS - INSTALLATION...............................................................................................................................4
USE.........................................................................................................................................................................................6
MAINTENANCE......................................................................................................................................................................7
INDICE
IT
CONSIGLI E SUGGERIMENTI ..............................................................................................................................................9
CARATTERISTICHE - INSTALLAZIONE...........................................................................................................................10
USO ......................................................................................................................................................................................12
MANUTENZIONE .................................................................................................................................................................13
SOMMAIRE
FR
CONSEILS ET SUGGESTIONS ..........................................................................................................................................15
CARACTERISTIQUES - INSTALLATION ..........................................................................................................................16
UTILISATION........................................................................................................................................................................18
ENTRETIEN..........................................................................................................................................................................19
INHALTSVERZEICHNIS
DE
EMPFEHLUNGEN UND HINWEISE....................................................................................................................................21
CHARAKTERISTIKEN - MONTAGE..................................................................................................................................22
BEDIENUNG.........................................................................................................................................................................24
WARTUNG............................................................................................................................................................................25
IÇERIKLER
TR
TAVSIYELER VE ÖNERILER ..............................................................................................................................................27
ÖZELLIKLER - MONTAJ....................................................................................................................................................28
KULLANIM ............................................................................................................................................................................30
BAKIM...................................................................................................................................................................................31
2
2
RECOMMENDATIONS AND SUGGESTIONS
The Instructions for Use apply to several versions of this appliance. Accordingly, you may find descriptions of individual features that do not apply to
your specific appliance.
INSTALLATION
• The manufacturer will not be held liable for any damages resulting from incorrect or improper installation.
• The minimum safety distance between the cooker top and the extractor
hood is 650 mm (some models can be installed at a lower height, please refer to the paragraphs on working dimensions and installation).
• Check that the mains voltage corresponds to that indicated on the rating
plate fixed to the inside of the hood.
• For Class I appliances, check that the domestic power supply guarantees
adequate earthing.
Connect the extractor to the exhaust flue through a pipe of minimum diameter 120 mm. The route of the flue must be as short as possible.
• Do not connect the extractor hood to exhaust ducts carrying combustion
fumes (boilers, fireplaces, etc.).
• If the extractor is used in conjunction with non-electrical appliances (e.g. gas
burning appliances), a sufficient degree of aeration must be guaranteed in
the room in order to prevent the backflow of exhaust gas. The kitchen must
have an opening communicating directly with the open air in order to
guarantee the entry of clean air.
USE
• The extractor hood has been designed exclusively for domestic use to eliminate kitchen smells.
• Never use the hood for purposes other than for which it has been designed.
• Never leave high naked flames under the hood when it is in operation.
• Adjust the flame intensity to direct it onto the bottom of the pan only, making
sure that it does not engulf the sides.
• Deep fat fryers must be continuously monitored during use: overheated oil
can burst into flames.
• Do not flambè under the range hood; risk of fire
• This appliance is not intended for use by persons (including children) with
reduced physical, sensory or mental capabilities, or lack of experience and
knowledge, unless they have been given supervision or instruction concerning use of the appliance by a person responsible for their safety.
• Children should be supervised to ensure that they do not play with the appliance.
MAINTENANCE
• Switch off or unplug the appliance from the mains supply before carrying out
any maintenance work.
• Clean and/or replace the Filters after the specified time period (Fire hazard).
• Clean the hood using a damp cloth and a neutral liquid detergent.
The symbol
on the product or on its packaging indicates that this product may not be treated
as household waste. Instead it shall be handed over to the applicable collection point for the
recycling of electrical and electronic equipment. By ensuring this product is disposed of correctly,
you will help prevent potential negative consequences for the environment and human health,
which could otherwise be caused by inappropriate waste handling of this product. For more
detailed information about recycling of this product, please contact your local city office, your
household waste disposal service or the shop where you purchased the product.
EN
3
3
CHARACTERISTICS - INSTALLATION
FIXING OF THE HOOD UNDER THE CABINET
• To drill the cabinet follow the indications given in the dimensional drawing in the chapter which regards hood dimensions.
• To fix the hood onto the cabinet use the 44,4 mm long screws
inserting and tightening them from the inside of the cabinet.
Connection to air outlet
AIR OUTLET IN THE DUCTING MODE
When installing the hood in ducting version, basing on the installer’s choice, a rigid or a flexible pipe is used in order to connect the hood to the air outlet piping.
• Insert the flange on the hood body outlet.
• Open the metal grid and make sure that the conversion knob is
in the ducting position.
• Connect the hood to the air outlet piping with a pipe.
• Fix the pipe with an adequate quantity of pipe clamps. This
material is not supplied together with the hood.
• Remove the charcoal filter if present.
EN
4
4
AIR OUTLET IN THE RECYCLING MODE
• Open the metal grid and make sure that the conversion knob is in the recycling position.
• Place the charcoal filter. The charcoal filter is not
supplied together with the hood. (Hoods with two
motors needs to be equipped with two charcoal filters).
INSTRUCTIONS FOR OPENING AND REMOVING THE
METAL GRILLE PANEL
• To open the grille, pull the facia panel out into the
operating position.
• Press inwardly on the two slide catch fastners, located at each side of the grille near the facia panel,
while pulling the grille panel onwards. The grille
may then pivot down.
• To remove the grille, release the right hand hinge pin
from the slot along the casing and the grille can be
removed.
ELECTRICAL CONNECTION
• Connect the hood to the mains through a two-pole switch having a contact gap of at least 3
mm..
EN
5
5
USE
Control board
1
2
3
Lighting
Motor
Speed
On/off lighting system.
On/off motor.
Speed control:
1. Minimum speed, particularly silent, continuous air exchange, suitable in presence of only few cooking vapours and odours.
2. Medium speed, due to an optimum relation between hood extraction capacity
and the noise level, it is suitable for most of the cooking conditions.
3. Maximum speed, suitable for the cooking conditions when vapours and smells
are of the utmost emission even for a longer time.
OPTIONAL
4
Microswitch Microswitch, which is activated by the movement of the visor. It switches on and
off the hood basing on the conditions which have been earlier established with
the sliders of the control panel.
5
Led
Led indicating when the motor is on.
EN
6
6
MAINTENANCE
GREASE FILTER
Regular maintenance and cleaning will ensure good performance
and reliability, while extending the working life of the hood. Special attention should be taken to keep the grease filter clean at all
times and the charcoal filter (recirculation model) should be replaced regularly. To remove filters for subsequent cleaning and
replacement first open the metal grille panel.
This retain the solid grease particles. It is fitted onto the reverse
side of the lower grille panel and can be either of a synthetic material or metallic. Maintenance of the grease filter varies according to the type used: synthetic grease filters should not be washed
and should be replaced every three months. The metal grease filters should be washed once a month in hot water using mild detergent or liquid soap. It should not be bent and should be left to
dry before being refitted. The filter is easily removed from grille
by pushing the spring wire clips to one side and removing.
CHARCOAL FILTER
In the recycling mode the charcoal filter absorbs smells and
odours. The charcoal filter cannot be cleaned and should be replaced at least every six months or more frequently if the hood is
used consistently.
To replace the charcoal filter, support the filter with one hand,
remove the round disk through the centre of the charcoal filter
and rotate it till the filter will come away .
Replace by reversing the operation.
WARNING! It is a possible fire hazard if the filters are not
cleaned and replaced as recommended.
EN
7
7
WORKTOP ILLUMINATION
If a lamp fails to function at any time, open the metal grille panel
and check that the lamp is fully screwed into the holder.
When changing the lamp, an identical replacement must be fitted
to ensure a safe working of the hood.
CLEANING
The metalwork should be cleaned regularly, at least once a month, using household cleaners
and polish. Never use abrasives.
EN
8
8
CONSIGLI E SUGGERIMENTI
Questo libretto di istruzioni per l'uso è previsto per più versioni dell' apparecchio.
É possibile che siano descritti singoli particolari della dotazione, che non riguardano il Vostro apparecchio.
INSTALLAZIONE
• Il produttore declina qualsiasi responsabilità per danni dovuti ad installazione non
corretta o non conforme alle regole dell’arte.
• La distanza minima di sicurezza tra il Piano di cottura e la Cappa deve essere di
650 mm, (alcuni modelli possono essere installati ad un’altezza inferiore, fare riferimento ai paragrafi ingombro e installazione).
• Verificare che la tensione di rete corrisponda a quella riportata nella targhetta
posta all’interno della Cappa.
• Per Apparecchi in Classe Ia accertarsi che l’impianto elettrico domestico garantisca un corretto scarico a terra.
• Collegare la Cappa all’uscita dell’aria aspirata con tubazione di diametro pari o
superiore a 120 mm. Il percorso della tubazione deve essere il più breve possibile.
• Non collegare la Cappa a condotti di scarico dei fumi prodotti da combustione
(caldaie, caminetti, ecc.).
• Nel caso in cui nella stanza vengano utilizzati sia la Cappa che apparecchi non
azionati da energia elettrica (ad esempio apparecchi utilizzatori di gas), si deve
provvedere ad una aerazione sufficiente dell’ambiente. Se la cucina ne fosse
sprovvista, praticare un’apertura che comunichi con l’esterno, per garantire il richiamo d’aria pulita.
USO
• La Cappa è stata progettata esclusivamente per uso domestico, per abbattere gli
odori della cucina.
• Non fare mai uso improprio della Cappa.
• Non lasciare fiamme libere a forte intensità sotto la Cappa in funzione.
• Regolare sempre le fiamme in modo da evitare una evidente fuoriuscita laterale
delle stesse rispetto al fondo delle pentole.
• Controllare le friggitrici durante l’uso: l’olio surriscaldato potrebbe infiammarsi.
• Non preparare alimenti flambè sotto la cappa da cucina; pericolo d'incendio.
• Questo apparecchio non deve essere utilizzato da persone (bambini inclusi) con
ridotte capacità psichiche, sensoriali o mentali, oppure da persone senza esperienza e conoscenza, a meno che non siano controllati o istruiti all’uso
dell’apparecchio da persone responsabili della loro sicurezza.
• I bambini devono essere supervisionati per assicurarsi che non giochino con
l’apparecchio.
MANUTENZIONE
• Prima di procedere a qualsiasi operazione di manutenzione, disinserire la Cappa
togliendo la spina elettrica o spegnendo l’interruttore generale.
• Effettuare una scrupolosa e tempestiva manutenzione dei Filtri secondo gli intervalli consigliati (Rischio di incendio).
• Per la pulizia delle superfici della Cappa è sufficiente utilizzare un panno umido e
detersivo liquido neutro.
Il simbolo
sul prodotto o sulla confezione indica che il prodotto non deve essere considerato
come un normale rifiuto domestico, ma deve essere portato nel punto di raccolta appropriato per
il riciclaggio di apparecchiature elettriche ed elettroniche. Provvedendo a smaltire questo prodotto in modo appropriato, si contribuisce a evitare potenziali conseguenze negative per l’ambiente
e per la salute, che potrebbero derivare da uno smaltimento inadeguato del prodotto. Per informazioni più dettagliate sul riciclaggio di questo prodotto, contattare l’ufficio comunale, il servizio
locale di smaltimento rifiuti o il negozio in cui è stato acquistato il prodotto.
IT
9
9
CARATTERISTICHE - INSTALLAZIONE
FISSAGGIO SOTTOPENSILE
• Forare il mobile pensile basandosi sul dimensionale del capitolo Ingombro.
• Fissare la cappa al mobile con le viti di lunghezza 44,4 mm
avvitandole dalla parte interna del mobile.
Connessioni
USCITA ARIA VERSIONE ASPIRANTE (EVACUAZIONE ESTERNA)
Per installazione in Versione Aspirante collegare la Cappa alla
tubazione di uscita per mezzo di un tubo rigido o flessibile la cui
scelta è lasciata all’installatore.
• Inserire la Flangia sull’Uscita del Corpo Cappa.
• Aprire la griglia di aspirazione e verificare che la manopola di
conversione sia in posizione aspirante.
• Collegare l’uscita aria della cappa con l’uscita di evacuazione
per mezzo di un tubo.
• Fissare il tubo con adeguate fascette stringitubo. Il materiale
occorrente non è in dotazione.
• Assicurarsi che non siano presenti i Filtri antiodore al Carbone
Attivo
IT
1
10
0
USCITA ARIA VERSIONE FILTRANTE (RICIRCOLO INTERNO)
• Aprire la griglia di aspirazione e verificare che la
manopola di conversione sia in posizione filtrante.
• Applicare il filtro al carbone attivo, non fornito su
cappe aspiranti. (Le cappe in versione 2 motori necessitano di due filtri)
ISTRUZIONI PER L’APERTURA DELLA GRIGLIA DI ASPIRAZIONE
• Far scorrere verso il centro della cappa gli appositi
fermi laterali e tirare contemporaneamente la griglia
in avanti.
• La griglia scenderà ruotando intorno ai due perni posteriori e rimarrà appesa agli stessi.
• Per ottenere il definitivo sganciamento tirare leggermente in avanti la parte destra della griglia e far uscire il perno dalla griglia attraverso l'asola ricavata sulla carcassa della cappa.
CONNESSIONE ELETTRICA
• Collegare la Cappa all’Alimentazione di Rete interponendo un Interruttore bipolare con apertura dei contatti di almeno 3 mm.
IT
1
11
1
USO
Quadro comandi
1
2
3
Luci
Motore
Velocità
OPZIONALI
4
Micro
5
IT
Led
Accende e spegne l’Impianto di Illuminazione.
Accende e spegne il motore Aspirazione.
Determina le velocità di esercizio:
1. Velocità minima, adatta ad un ricambio d’aria continuo particolarmente silenzioso, in presenza di pochi vapori di cottura.
2. Velocità media, adatta alla maggior parte delle condizioni d’uso, dato l’ottimo
rapporto tra portata d’aria trattata e livello sonoro.
3. Velocità massima, adatta a fronteggiare le massime emissioni di vapore di cottura, anche per tempi prolungati.
Microinterruttore azionato dal movimento della visiera, comanda l’accensione e
lo spegnimento alle condizioni predeterminate dai cursori del quadro comandi.
Segnala l’accensione del motore di Aspirazione.
1
12
2
MANUTENZIONE
FILTRO ANTIGRASSO
Una costante manutenzione garantisce un buon funzionamento ed
un buon rendimento nel tempo. Particolari attenzioni vanno rivolte al filtro antigrasso ed al filtro al carbone vegetale attivo (se la
cappa è in versione filtrante) che va cambiato regolarmente.
Ha la funzione di trattenere le particelle grasse in sospensione. È
posto nella parte interna della griglia di aspirazione e può essere
fornito o in materiale sintetico o in metallo. la manutenzione del
filtro antigrasso varia a seconda del tipo usato. Il filtro antigrasso
sintetico non può essere lavato e va sostituito ogni tre mesi.Il filtro antigrasso metallico deve essere lavato ogni mese in acqua
calda e detersivo evitando di piegarlo. Lasciar asciugare prima di
rimontarlo.
FILTRO AL CARBONE VEGETALE ATTIVO
Ha la funzione di trattenere gli odori presenti nel flusso d'aria che
lo attraversa.
L'aria viene reimmessa nell'ambiente cucina depuratasi per successivi passaggi attraverso il filtro. Il filtro al carbone non può
essere lavato e va sostituito mediamente ogni tre mesi. Per rimuovere il filtro al carbone, aprire la griglia metallica di aspirazione e ruotare leggermente il filtro in senso antiorario con una
mano facendo nello stesso tempo una leggera pressione. Per rimontarlo invertire le operazioni.
ATTENZIONE! C'è un possibile rischio di incendio se i filtri
non sono puliti e sostituiti secondo le istruzioni del produttore.Per rimuovere il fintro antigrasso è indispensabile aprire
la griglia di aspirazione e rimuovere gli appositi ferma filtro
in filo metallico.
IT
1
13
3
ILLUMINAZIONE
Se in qualunque momento una lampada non funziona, aprire la
griglia metallica e controllare che sia ben avvitata.
Se è necessario cambiarla, utilizzare una lampada dello stesso
tipo e potenza.
PULIZIA
La pulizia della cappa va eseguita regolarmente, almeno una volta al mese, usando,un panno
umido con detersivo liquido neutro o con alcool denaturato. Evitare l'uso di prodotti abrasivi.
IT
1
14
4
CONSEILS ET SUGGESTIONS
La présente notice d'emploi vaut pour plusieurs versions de l'appareil. Elle peut contenir des descriptions d'accessoires ne figurant pas dans votre appareil.
INSTALLATION
• Le fabricant décline toute responsabilité en cas de dommage dû à une installation non
correcte ou non conforme aux règles de l’art.
• La distance minimale de sécurité entre le plan de cuisson et la hotte doit être de 650
mm au moins (certains modèles peuvent être installés à une hauteur inférieure : se reporter aux paragraphes « Encombrement » et « Installation »).
• Vérifier que la tension du secteur correspond à la valeur qui figure sur la plaquette
apposée à l’intérieur de la hotte.
• Pour les Appareils appartenant à la Ière Classe, veiller à ce que la mise à la terre de
l’installation électrique domestique ait été effectuée conformément aux normes en vigueur.
• Connecter la hotte à la sortie d’air aspiré à l’aide d’une tuyauterie d’un diamètre égal ou
supérieur à 120 mm. Le parcours de la tuyauterie doit être le plus court possible.
• Ne pas connecter la hotte à des conduites d’évacuation de fumées issues d’une combustion tel que (Chaudière, cheminée, etc…).
• Si vous utilisez des appareils qui ne fonctionnent pas à l’électricité dans la pièce ou est
installée la hotte (par exemple: des appareils fonctionnant au gaz), vous devez prévoir
une aération suffisante du milieu. Si la cuisine en est dépourvue, pratiquez une ouverture qui communique avec l’extérieur pour garantir l’infiltration de l’air pur.
UTILISATION
• La hotte a été conçue exclusivement pour l’usage domestique, dans le but d’éliminer
les odeurs de la cuisine.
• Ne jamais utiliser abusivement la hotte.
• Ne pas laisser les flammes libres à forte intensité quand la hotte est en service.
• Toujours régler les flammes de manière à éviter toute sortie latérale de ces dernières
par rapport au fond des marmites.
• Contrôler les friteuses lors de l’utilisation car l’huile surchauffée pourrait s’enflammer.
• Ne pas préparer d’aliments flambés sous la hotte de cuisine : risque d’incendie
• Cet appareil ne doit pas être utilisé par des personnes (y compris les enfants) ayant
des capacités psychiques, sensorielles ou mentales réduites, ni par des personnes
n’ayant pas l’expérience et la connaissance de ce type d’appareils, à moins d'être sous
le contrôle et la formation de personnes responsables de leur sécurité.
• Les enfants doivent être surveillés pour s'assurer qu'ils ne jouent pas avec l'appareil.
ENTRETIEN
• Avant de procéder à toute opération d’entretien, retirer la hotte en retirant la fiche ou en
actionnant l’interrupteur général.
• Effectuer un entretien scrupuleux et en temps dû des Filtres, à la cadence conseillée
(Risque d’incendie).
• Pour le nettoyage des surfaces de la hotte, il suffit d’utiliser un chiffon humide et détersif liquide neutre.
Le symbole
sur le produit ou son emballage indique que ce produit ne peut être traité comme
déchet ménager. Il doit plutôt être remis au point de ramassage concerné, se chargeant du recyclage du matériel électrique et électronique. En vous assurant que ce produit est éliminé correctement, vous favorisez la prévention des conséquences négatives pour l’environnement et la santé
humaine qui, sinon, seraient le résultat d’un traitement inapproprié des déchets de ce produit. Pour
obtenir plus de détails sur le recyclage de ce produit, veuillez prendre contact avec le bureau municipal de votre région, votre service d’élimination des déchets ménagers ou le magasin où vous avez
acheté le produit.
FR
1
15
5
CARACTERISTIQUES - INSTALLATION
FIXATION SOUS L’ARMOIRE MURALE
• Percer l’armoire murale en se basant sur les indications relatives aux dimensions, indiquées dans le chapitre Encombrement.
• Fixer la hotte contre le meuble, au moyen des vis ayant une
longueur de 44,4 mm. ; visser lesdites vis du côté interne du
meuble.
Connexions
ÉVACUATION DE L’AIR VERSION ASPIRANTE (EVACUATION EXTERNE)
Pour l’installation en Version Aspirante, connecter la Hotte à la
conduite d’évacuation au moyen d’un tuyau rigide ou flexible,
dont le choix sera effectué par l’installateur.
• Insérer la Flasque sur l’Évacuation du Corps de la Hotte.
• Ouvrir la grille d’aspiration et vérifier que le bouton de conversion soit sur la position aspirante.
• Connecter l’évacuation de l’air de la hotte à la conduite
d’évacuation au moyen d’un tuyau.
• Fixer le tuyau au moyen de colliers serre-tube appropriés. Le
matériel nécessaire pour effectuer cette opération n’est pas
fourni avec l’appareil.
• S’assurer que les Filtres anti-odeur au Charbon Actif ne soient
pas présents.
FR
1
16
6
EVACUATION DE L’AIR VERSION FILTRANTE (RECYCLAGE DE
L’AIR INTERNE)
• Ouvrir la grille d’aspiration et vérifier que le bouton
de conversion soit sur la position filtrante.
• Appliquer le filtre au charbon actif, qui n’est pas
fourni pour les hottes aspirantes. (Les hottes dans la
version avec 2 moteurs nécessitent de deux filtres)
INSTRUCTIONS POUR L'OUVERTURE DE LA GRILLE
D'ASPIRATION
• Déplacer vers le centre de la hotte les arrêts latéraux
à ressort et en même temps tirer la grille en avant.
• Pour décrocher définitivement la grille il suffit de
tirer en avant la part droite et de faire sortier la grille
en la laissant passer par l'ouverture
.
BRANCHEMENT ELECTRIQUE
• Brancher la hotte sur le secteur en interposant un interrupteur bipolaire avec ouverture des
contacts d’au moins 3 mm.
FR
1
17
7
UTILISATION
Tableau des commandes
1
2
3
Éclairage
Moteur
Vitesse
OPTIONNELS
4
Micro
5
FR
Del
Allume et éteint l’Installation d’Éclairage.
Fait démarrer et arrête le moteur d’Aspiration.
Détermine la vitesse de service:
1. Vitesse minimum, pour un changement de l’air continu, particulièrement silencieux, en cas de faible concentration des vapeurs de cuisson.
2. Vitesse moyenne, pour la plupart des conditions d’emploi, étant donné le rapport optimal entre le débit de l’air traité et le niveau du bruit.
3. Vitesse maximum, pour faire face aux émissions importantes de vapeurs de
cuisson, même pendant des périodes prolongées.
Microinterrupteur actionné par le mouvement de la visière; il commande le démarrage et l’arrêt selon les conditions préétablies par les curseurs du tableau des
commandes.
Signale le démarrage du moteur d’Aspiration.
1
18
8
ENTRETIEN
FILTRE A GRAISSE
Un entretien continu garanti un bon fonctionnement et un bon
rendement dans le temps. Une attention toute particulière doit
être réservée au filtre à graisse et au filtre au charbon végétal actif
(seulement fournit pour hottes en version filtrante).
Sa fonction est de retenir les particules grasses en suspension. Il
se trouve dans la grille d'aspiration et peut être fourni soit en matériel synthétique, soit en métal.
L'entretien du filtre à graisse vari selon le type utilisé.
Le filtre à graisse métallique doit être lavé une fois par mois avec
de l'eau tiède et du détersif, tout en évitant de le plier.
Laisser sècher avant de le remonter.
FILTRE AU CHARBON ACTIF
Sa fonction est de retenir les odeurs de l'air qui le traversent. L'air
est réintroduite dans la cuisine par différents passages à travers le
filtre. Le filtre au charbon actif ne peut être ni lavé ni régéneré et
doit être remplacé tous les trois mois. Pour remplacer le filtre au
charbon actif, ouvrir la grille métallique d'aspiration, tourner le
filtre en sens antihoirair avec une main tout en exercant une pression sur le filtre. Pour remonter le filtre, invertier les opérations.
ATTENTION! Nous recommandons de suivre attentivement
toutes les instructions données pour le nettyage et le remplacement des filtres a fin d'éviter un possible danger d'incendie.
Pour remplacer le filtre à graisse il faut ouvrir la grille d'aspiration et déplacer les arrêts-filtre en fil métallique.
FR
1
19
9
ECLAIRAGE
Si une des ampoules d'éclairage faillit de fonctionner, ouvrir la
grille métallique et côntroller que l'ampoule soit bien vissée.
Si nécessaire, remplacer l'ampoule en utilisant une ampoule du
même type ayant la même puissance.
NETTOYAGE
Le nettoyage de la hotte doit être fait au moins une fois par mois en utilisant un torchon humide avec du détersif liquide neutre ou avec de l'alcool dénaturé. Eviter l'utilisation de produits
contenant des substances abrasives.
FR
2
20
0
EMPFEHLUNGEN UND HINWEISE
Diese Gebrauchsanleitung gilt für mehrere Geräte-Ausführungen. Es ist möglich, dass
einzelne Ausstattungsmerkmale beschrieben sind, die nicht auf Ihr Gerät zutreffen.
MONTAGE
• Der Hersteller haftet nicht für Schäden, die auf eine fehlerhafte und unsachgemäße Montage zurückzuführen sind.
• Der minimale Sicherheitsabstand zwischen Kochmulde und Haube muss 650 mm betragen (einige Modelle können an einer geringeren Höhe installiert werden, beziehen Sie sich
dazu auf den Absatz Raumbedarf und Installation).
• Prüfen, ob die Netzspannung mit dem Wert auf dem im Haubeninneren angebrachten Schild übereinstimmt.
• Bei Geräten der Klasse I ist sicherzustellen, dass die elektrische Anlage des Wohnhauses
über eine vorschriftsmäßige Erdung verfügt.
• Das Anschlussrohr der Haube zur Luftaustrittsöffnung muss einen Durchmesser von 120
mm oder darüber aufweisen. Der Rohrverlauf muss so kurz wie möglich sein.
• Die Haube darf an keine Entlüftungsschächte angeschlossen werden, in die Verbrennungsgase (Heizkessel, Kamine usw.) geleitet werden.
• Werden im Raum außer der Dunstabzugshaube andere, nicht elektrisch betriebene (z.B.
gasbetriebene) Geräte verwendet, muss für eine ausreichende Belüftung gesorgt werden.
Sollte die Küche diesbezüglich nicht entsprechen, ist an einer Aussenwand eine Öffnung
anzubringen, die Frischluftzufuhr gewährleistet.
BEDIENUNG
• Die Dunstabzugshaube ist ausschließlich zum Einsatz im privaten Haushalt und zur
Beseitigung von Küchengerüchen vorgesehen.
• Unsachgemäßer Einsatz der Haube ist zu unterlassen.
• Große Flammen bei eingeschalteter Haube niemals unbedeckt lassen.
Achtung! Große Flammen bei eingeschalteter Haube niemals unbedeckt lassen.
• Die Intensivität der Flamme ist so zu regulieren, dass sie den Topfboden nicht überragt.
Achtung! Frittiergeräte müssen während des Gebrauchs stets beaufsichtigt werden: Überhitztes Öl kann sich entzünden.
• Frittiergeräte müssen während des Gebrauchs stets beaufsichtigt werden: überhitztes Öl
kann sich entzünden.
• Keine flambierten Speisen unter der Abzugshaube zubereiten: Brandgefahr.
• Dieses Gerät darf nicht von Personen, auch Kindern, mit verminderten psychischen, sensorischen und geistigern Fähigkeiten, oder von Personen ohne Erfahrung und Kenntnisse
benutzt werden, sofern sie nicht von für ihre Sicherheit verantwortlichen Personen beaufsichtigt und beim Gebrauch des Geräts angeleitet werden.
• Kinder dürfen sich nicht unbeaufsichtigt in der Nähe des Geräts aufhalten und auf keinen
Fall mit dem Gerät spielen.
WARTUNG
• Bevor Wartungsarbeiten durchgeführt werden, muss die Stromzufuhr zur Haube unterbrochen werden, indem der Stecker gezogen oder der Hauptschalter abgeschaltet wird.
• Bei der Filterwartung müssen die vom Hersteller empfohlenen Zeiträume zum Austauschen
der Filter genauestens eingehalten werden (Brandgefahr).
• Zur Reinigung der Haubenflächen Wir empfehlen ein feuchtes Tuch und ein mildes Flüssigreinigungsmittel.
• Bitte keine Reinigungsmittel mit Scheuermittel verwenden. Die Oberfläche wird damit
verkratzt.
Das Symbol
auf dem Produkt oder seiner Verpackung weist darauf hin, dass dieses Produkt nicht als
normaler Haushaltsabfall zu behandeln ist, sondern an einem Sammelpunkt für das Recycling von elektrischen und elektronischen Geräten abgegeben werden muss. Durch Ihren Beitrag zum korrekten Entsorgen
dieses Produkts schützen Sie die Umwelt und die Gesundheit Ihrer Mitmenschen. Umwelt und Gesundheit
werden durch falsches Entsorgen gefährdet. Weitere Informationen über das Recycling dieses Produkts
erhalten Sie von Ihrem Rathaus, Ihrer Müllabfuhr oder dem Geschäft, in dem Sie das Produkt gekauft haben.
DE
2
21
1
CHARAKTERISTIKEN - MONTAGE
MONTAGE UNTER EINEM OBERSCHRANK
• Den Oberschrank unter Bezugnahme auf die Abmessungen im
Kapitel „Platzbedarf“ bohren.
• Die Haube am Möbel mit den 44,4 mm langen Schrauben fixieren, indem sie von der Möbelinnenseite her festgeschraubt
wird.
Anschlüsse
LUFTAUSTRITT ABLUFTVERSION (LUFTABLEITUNG)
Für die Installation in Abluftversion wird die Haube mittels Rohr
oder Schlauch an die Außenrohrleitung angeschlossen (die Wahl
bleibt dem Installateur überlassen).
• Den Flansch am Haubenaustritt einfügen.
• Das Sauggitter öffnen und kontrollieren, dass der
Umstellschalter auf Abluft positioniert ist.
• Den Luftaustritt der Haube mittels Rohr an die Abluftöffnung
anschließen.
• Das Rohr mit geeigneten Rohrschellen fixieren. Das hierzu
erforderliche Material wird nicht mitgeliefert.
• Kontrollieren, dass keine Aktivkohle-Geruchsfilter vorhanden
sind.
DE
2
22
2
LUFTAUSTRITT UMLUFTVERSION (LUFTRÜCKFÜHRUNG)
• Das Sauggitter öffnen und kontrollieren, dass der
Umstellschalter auf Umluft positioniert ist.
• Den Aktivkohlefilter anbringen, der bei Ablufthauben nicht mitgeliefert wird. (Bei 2-motorigen Haubenversionen sind zwei Filter erforderlich).
ANLEITUNG ZUM ÖFFNEN DES SAUGGITTERS
• Die seitlichen Haltevorrichtungen zur Haubenmitte
schieben und das Gitter gleichzeitig nach vorne ziehen.
• Das Gitter öffnet sich und bleibt an den beiden hinteren Stiften hängen.
• Um es definitiv entnehmen zu können, muss man die
rechte Gitterseite leicht nach vorne ziehen und den
Gitterstift aus dem Schlitz beim Haubengehäuse entnehmen.
ELEKTROANSCHLUSS
• Bei Anschluss der Haube an das Stromnetz muss ein zweipoliger Schalter mit einem Öffnungsweg von mindestens 3 mm zwischengeschaltet werden.
DE
2
23
3
BEDIENUNG
Bedienfeld
1
2
3
Beleuchtung
Schaltet die Beleuchtung ein und aus.
Motor
Schaltet den Gebläsemotor ein und aus.
Geschwindigkeit Bestimmt die Gebläsestufe:
1. Geringste Gebläsestufe, eignet sich für einen ständigen und besonders leisen
Luftaustausch bei geringer Kochdunstentwicklung.
2. Mittlere Gebläsestufe, eignet sich aufgrund des optimalen Verhältnisses zwischen Fördervolumen und Geräuschentwicklung für die meisten Anwendungssituationen.
3. Höchste Gebläsestufe, eignet sich für starke Kochdunstentwicklung, auch über
längere Zeit hin.
OPTIONEN
4
Mikro
5
DE
Led
Von der Bewegung des Leitschirms aktivierter Schalter, der das Ein- und Ausschalten unter den von den Schiebeschaltern des Bedienfelds vorbestimmten Bedingungen steuert.
Signalisiert das Einschalten des Gebläsemotors.
2
24
4
WARTUNG
FETTFILTER
Eine regelmäßige Wartung garantiert einwandfreien Betrieb und
gute Leistungen über lange Zeit hin. Besondere Aufmerksamkeit
muss in diesem Zusammenhang den Fettfiltern und den Aktivkohlefiltern (bei Hauben mit Umluftbetrieb) geschenkt werden,
die regelmäßig ausgetauscht werden müssen.
Die Funktion des Fettfilters besteht darin, die in der Luft vorhandenen Fettpartikel aufzufangen. Er befindet sich hinter dem
Sauggitter und kann aus synthetischem
Material oder Metall sein. Die Wartung hängt vom Fettfiltertyp
ab: synthetische Fettfilter können nicht gereinigt werden und sind
alle drei Monate auszutauschen.
Metallfettfilter müssen einmal pro Monat mit heißem Wasser und
Reinigungsmittel gewaschen werden, wobei darauf zu achten ist,
die Filter nicht zu biegen und vor Wiederanbringung zu trocknen.
AKTIVKOHLEFILTER
Der angesaugte Kochdunst wird von Geruchsstoffen befreit. Anschließend wird die saubere Luft wieder der Küche zugeführt, um
später wiederum gefiltert zu werden.
Aktivkohlefilter können nicht gereinigt werden und sind im
Durchschnitt alle drei Monate auszutauschen. Bei Entnahme des
Kohlefilters ist nach dem Öffnen des Metall-Sauggitters folgendermaßen vorzugehen:bei Bajonettverschluss wird der Filter locker gegen den Uhrzeigersinn gedreht, wobei man mit der Hand
leicht andrückt.Bei Wiedereinbau des Filters ist in umgekehrter
Reihenfolgen vorzugehen.
ACHTUNG! Werden die vom Hersteller angegebenen Reinigungs und Austauschzeiten nicht eingehalten, kann Brandgefahr bestehen. Zwecks Entnahme des Fettfilters, ist es unerlässlich, das Sauggitter zu öffnen und das FettfilterHaltegitter zu entfernen.
DE
2
25
5
BELEUCHTUNG
Sollte die Lampe nicht funktionieren, öffnet man das Metallgitter
und prüft, ob sie gut eingeschraubt ist.
Bei Austausch muss eine Lampe des gleichen Typs und mit der
gleichen Leistung verwendet werden.
REINIGUNG
Die Haube wird regelmäßig, mindestens einmal im Monat, mit einem feuchten Tuch und einem neutralen Flüssigreinigungsmittel oder denaturiertem Alkohol gereinigt. Die Verwendung
von Produkten mit Schleifpartikeln ist zu vermeiden.
DE
2
26
6
TAVSIYELER VE ÖNERILER
Bu kullanma talimatι birden fazla cihaz modeli için geçerlidir.
Cihazιnιza uymayan bazι donanιm özellikleri tarif edilmiş olabilir.
MONTAJ
• Yalnιş veya eksik montajdan doğan herhangi bir zararιn sorumluluğu
üreticiye ait değildir.
• Davlumbaz ile pişirici cihazιn ocak kιsmι arasιndaki minimum güvenlik
mesafesi 650 mm.dir (bazı modeller daha alçak seviyede bir yüksekliğe kurulabilir, hacim ve kurulum ile ilgili paragraflara bakınız).
• Besleme voltajιnιn, davlumbaz içerisine yerleştirilen bilgi etiketinde
belirtilenle aynι olup olmadιğιnι kontrol edin.
• Sιnιf I elektrikli aletleri için, güç kaynağιnιn yeterli topraklamayι
sağlayιp sağlamadιğιnι kontrol edin. Minimum 120 mm çapιnda bir
boru yoluyla davlumbazι çιkιş bacasιna bağlayιn. Baca bağlantιsι
mümkün oldu- ğunca kιsa olmalιdιr.
• Davlumbaz borusunu yanιcι duman taşιyan baca deliğine (buhar
kazanι, şömine, vb.) bağlamayιn.
• Davlumbazιn elektrikle çalιşmayan aletlerle (örneğin; gazlι cihazlar)
bağιntιlι olarak kullanιlmamasι halinde çιkιş gazιnιn geri tepmesini
önlemek amacιyla odada yeterli bir havalandιrma sağlanmalιdιr. Temiz hava girişini temin etmek için mutfakta doğrudan dιşarιya açιlan
bir açιklιk bulunmalιdιr.
KULLANIM
• Davlumbaz mutfaktaki kokularιn emilmesi amacιyla evlerde kullanιm
için tasarlanmιştιr.Ticari ve endüstriyel amaçlar için kullanmayιnιz.
• Davlumbazι tasarlandιğι amaçlarιn dιşιnda kesinlikle kullanmayιnιz.
• Davlumbaz çalιşιrken altιnda kesinlikle yüksek çιplak ateş
bιrakmayιn.
• Alev yoğunluğunu doğrudan tencerenin altιnda kalacak şekilde
ayarlayιn, kenarlarιnι sarmadιğιndan emin olun.
• Yağda kιzartma tavalarιnι kullanιrken sürekli olarak takip edin: fazla
ιsιnan yağ tutuşabilir.
• Kapağın altında kıvılcımdan kaçının, yangın riski
• Bu alet, güvenliklerinden sorumlu kişiler tarafından kontrol edilmedikleri veya eğitilmedikleri sürece; fiziksel, duyumsal ve zihinsel kapasitesinde kısıtlama olan (çocuklar dahil) veya aleti kullanma tecrübesi
ve bilgisi olmayan kişiler tarafından kullanılamaz.
• Bebeklerin, aletle oynamadıklarından emin olmak için kontrol edilmeli
gerekir.
BAKIM
• Herhangi bir bakιm işlemini gerçekleştirmeden önce davlumbazι
kapatιn veya fişini çιkarιn.
• Filtreleri belirtilen zamanlarda temizleyin ve / veya değiştirin(Yangın
riski).
• Cihazι nemli bir bez ve nötr bir sιvι deterjan kullanarak temizleyin.
Ürün veya paketi üzerindeki
sembolü, bu ürünün normal bir evsel atık olarak görülmemesi
ve bu tip elektrikli veya elektronik cihazların atıldığı dönüşümlü toplama noktalarına terkedilmesi
gerektiğine işaret eder. Bu ürünü gerektiği gibi elimine etme kurallarına uyarsanız çevre ve insan
sağlığı üzerindeki olumsuz etkilerini bertaraf etmeye katkı sağlamış olursunuz. Bu ürünün geri
dönüşüm koşulları hakkında daha ayrıntılı bilgi için hudutları içinde bulunduğunuz belediyenin
ilgili diaresine, atık yoketme servisine veya ürünün satıcısına danışınız.
TR
2
27
7
ÖZELLIKLER - MONTAJ
RAF-KONSOL ALTINA SABİTLEME
• Raf yada konsol mobilyasını ölçüler şemasında verilen ebatlara
uyarak deliniz.
• Davlumbazı mobilyaya 44,4 mm uzunluğunda vidalarla sabitleyiniz, vidaları mobilyanın iç tarafından sıkınız.
Bağlantılar
ASPİRATÖRLÜ MODELİN HAVA ÇIKIŞI ( DIŞARI TAHLİYE)
Aspiratörlü modeli monte ederken davlumbazı çıkış borusuna
bağlayınız. Bu bağlantı montörün seçeceği rijit (sert) ya da esnek
bir boru ile yapılmalıdır.
• Flanşı davlumbaz gövdesi çıkışına geçiriniz.
• Emme ızgarasını açınız ve dönüştürme kulpunun emme pozisyonunda olduğunu kontrol ediniz.
• Davlumbazın hava çıkışını bir boru vasıtasıyla tahliye çıkışına
bağlayınız.
• Boruyu uygun kelepçelerle sabitleyiniz. Bu malzeme cihaz donanımında verilmemiştir.
• Aktif karbonlu koku giderici filtreler bulunmadığından emin
olunuz.
TR
2
28
8
FİLTRELİ MODELİN HAVA ÇIKIŞI ( İÇ DOLAŞIM )
• Emme ızgarasını açınız ve dönüştürme kulpunun filtreleme pozisyonunda olduğunu kontrol ediniz.
• Aktif karbonlu filtreyi takınız. Bu filtre aspiratörlü
davlumbazlarda yoktur. (2 motorlu modellerde iki
adet filtreye gerek vardır)
EMME IZGARASINI AÇMA TALİMATLARI
• Yan kısımlardaki tutucuları davlumbazın merkezine
doğru kaydırınız ve aynı anda ızgarayı öne doğru çekiniz.
• Izgara iki arka pimin etrafında dönerek inecek ve
bunlara asılı durumda kalacaktır.
• Bunlardan nihai olarak kurtulmasını sağlamak için
ızgaranın sağ tarafını hafifçe öne doğru çekiniz ve
pimi davlumbaz iskeleti üzerindeki delikten
çıkarınız.
ELEKTRIK BAĞLANTISI
• Davlumbazι, temas noktalarι arasιnda 3 mm açιklιk olan çift kutuplu bir anahtar üzerinden
elektrik şebekesine bağlayιn.
TR
2
29
9
KULLANIM
Kumanda Tablosu
1
2
3
Lambalar
Motor
Hız
OPSİYONELLER
4
Micro
5
TR
Led
Aydınlatma sistemini açar ve kapatır.
Aspiratör motorunu açar ve kapatır.
Çalışma hızını belirler:
1. Minimum hız, sessizce ve sürekli bir hava değişimi sağlar, az miktarda pişirme
buharı olduğunda uygundur.
2. Orta hız, genel kullanım koşullarının çoğuna bu hız uygundur; işlenen hava
debisi ile ses düzeyi arasındaki oran optimum seviyededir.
3. Maksimum hız, uzun süreli ve çok buharlı pişirme işlemlerine uygundur.
Mikroanahtar görüntü siperliği hareketiyle çalışır ve kumanda tablosu kursörlerinin belirlediği koşullarda açma ve kapama eylemine kumanda eder.
Aspiratör motorunun açık olduğuna işaret eder.
3
30
1
BAKIM
YAĞ TUTUCU FİLTRE
Bu filtreye istikrarlı olarak yapılacak bakım işlemi, hem iyi çalışmasını, hem de uzun ömürlü olmasını sağlar. Yağ tutucu filtre
ile aktif bitkisel karbonlu filtre (davlumbazın filtreli modelindeki)
özel itina ve vaktinde değiştirme gerektirir.
Bu filtrenin fonksiyonu havada asılı yağ zerreciklerini tutmaktır.
Emme ızgarasının iç kısmına yerleştirilmiştir ve sentetik ya da
metal malzemeden mamüldür. Yağ tutucu filtrenin bakımı kullanılan tipte filtreye göre değişir. Sentetik malzemeden olanı
yıkanmaz ve üç ayda bir değiştirilir. Metalik olan yağ filtresi ise
ayda bir kez sıcak su ve deterjanla yıkanmalı, katlama kıvırma
gibi hareketlere maruz bırakılmamalıdır. Yerine takmadan önce
kuruması için bekletilmelidir.
AKTİF BİTKİSEL KARBONLU FİLTRE
Bu filtrenin görevi, içinden geçen hava akımındaki kokuları tutmaktır. Kokusu alınan ve arındırılan bu hava filtreden yeniden
geçmek üzere ortama salınır. Karbonlu filtre yıkanmaz ve ortalama üç ayda bir değiştirilir. Karbon filtreyi çıkarmak için metal
emme ızgarasını açınız ve filtreyi hafifçe bastırarak (ittirerek) bir
elinizle sola doğru döndürünüz. Tekrar takmak için de bu işlemi
tersine uygulayınız.
DİKKAT! Filtrelerin kirli olması ve üreticinin talimatları uyarınca değiştirilmemesi yangın riski oluşturur. Yağ tutucu
filtreyi sökmek için emme ızgarasının açılması ve metal filtre
tutucu parçaların çıkartılması şarttır.
TR
3
31
1
AYDINLATMA
Herhangi bir lambanın çalışmaması durumunda, metal ızgarayı
açınız ve ampulin iyi vidalanmış durumda olmasını kontrol ediniz.
Değiştirilmesi gerekiyorsa aynı tipte ve güçte bir ampul kullanınız.
TEMİZLİĞİ
Davlumbazın temizliği düzenli olarak ve en az ayda bir kez yapılmalıdır. Temizlik için nemli
bir bez, nötr sıvı deterjan ya da denatüre alkol kullanılmalıdır. Aşındırıcı-yıpratıcı ürünler kullanmaktan kaçınınız.
TR
3
32
2
Franke S.p.a.
Via Pignolini,2
37019 Peschiera del Garda (VR)
www.franke.it
436004867_ver1