1
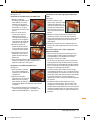
Adjusting the protractor
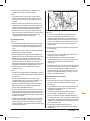
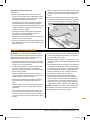
See Figs 12 & 15
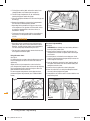
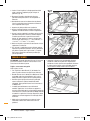
1. Fit the Protractor (3) to the preferred holes in the MDF
slider and tighten the small knobs on the locating
bosses until they are a snug fit. If the knobs are too
tight to turn by hand a small spanner can be used.
2.With the knobs fully tightened the protractor cannot be
removed (Fig 12)
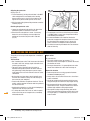
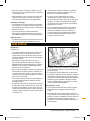
Checking the protractor scale
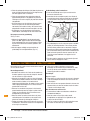
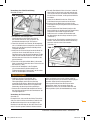
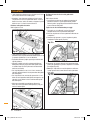
1. Loosen the adjustment knob and line the edge of the
protractor up with the aluminium inner track
2.Check that the scale pointer is at 90°. If necessary,
loosen the central clamping screw and adjust the
position of the metal scale plate until it reads 90°
(Fig 15)
Fig.15
In use:
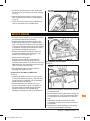
• The protractor can fit in any of the three pairs of holes
in the MDF slider. In most cases the protractor will be
used following the workpiece
• An extended wooden face should be fitted to the
protractor to support the workpiece close to the cutter.
By also trimming the wooden face as it passes the
cutter, tear-out in the workpiece will be prevented
• The holes for mounting the wooden face are slotted to
allow re-trimming
KEY FACTORS FOR QUALITY OF CUT
GB
The quality of cut using a router depends on a number of
key factors.
The Feed Rate
• Don’t overload your cutter. Take into account the size of
the motor, cutter size and type, depth and width of cut,
and the type of material
• Too rapid a rate of feed will cause the router to
overload. Cutting will be difficult to control, and tear
out (splintering) is likely. Damage may occur to your
router motor or chuck, and in extreme cases the cutter
could break
• On the other hand, too slow a rate of feed will cause
the bit to rub instead of cutting. This will show up as
burn marks on your workpiece
• Practice will determine the optimum feed rate. The cut
quality, and the sound of the router motor are guides to
the correct feed rate
• Avoid pausing during the cut; this will risk developing a
slight burn mark or step in your work
• It is always best to first do a ‘trial run’ with the power
off to ensure that you can complete the cut smoothly
without obstruction
12
Depth of Cut
As a general rule:
• For small, straight cutters (up to 10mm / 3⁄8" in
diameter) ensure that the depth of cut does not exceed
the diameter of the bit
• For larger diameter bits, it is generally better to make
two or three shallow cuts rather than one deep cut
Router bit selection
• Routers operate at free-running speeds of between
18,000 and 24,000 rpm (min-1)
• Sharp cutters are essential for clean cuts, free of burn
marks and tearout
• We do not recommend high speed steel bits because
they generally do not retain their sharp edges for long
• We recommend that you purchase tungsten carbide
tipped router cutters. Tungsten carbide is the hardest
commercially available cutting edge material
• When profile cutting or edge trimming, look for bits
which have a ball bearing pilot on top. Bits which have
an integral pilot (i.e. no ball bearing race) can burn or
mark the work
Assembly / Key Factors for Quality of Cut
FULL_MANUAL123.indd 12
06/07/2012 10:25