1
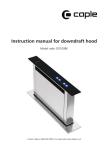
INFORMAZIONI COMMERCIALI PER I CONSUMATORI
COMMERCIAL INFORMATION FOR THE CONSUMER
I
GB
ISTRUZIONI PER L'USO DOWNDRAFT
INSTRUCTIONS FOR USE DOWNDRAFT
INFORMAZIONI TECNICHE
TECHNICAL INFORMATION
TYPE: S-DD1 / S-DD2
I
Il simbolo
sul prodotto o sulla confezione indica che il prodotto non deve essere considerato come
un normale rifiuto domestico, ma deve essere portato nel punto di raccolta appropriato per il riciclaggio di
apparecchiature elettriche ed elettroniche. Provvedendo a smaltire questo prodotto in modo appropriato, si
contribuisce a evitare potenziali conseguenze negative per l’ambiente e per la salute, che potrebbero derivare da
uno smaltimento inadeguato del prodotto. Per informazioni più dettagliate sul riciclaggio di questo prodotto,
contattare l’ufficio comunale, il servizio locale di smaltimento rifiuti o il negozio in cui è stato acquistato il prodotto.
Questo elettrodomestico è marcato conformemente alla Direttiva Europea 2002/96/CE sui rifiuti da apparecchiature
elettriche ed elettroniche (WEEE).
GB
The symbol
on the product or on its packaging indicates that this product may not be treated as
household waste. Instead it shall be handed over to the applicable collection point for the recycling of electrical
and electronic equipment. By ensuring this product is disposed of correctly, you will help prevent potential negative
consequences for the environment and human health, which could otherwise be caused by inappropriate waste
handling of this product. For more detailed information about recycling of this product, please contact your local
city office, your household waste disposal service or the shop where you purchased the product. This appliance
is marked according to the European directive 2002/96/EC on waste electrical and electronic equipment (WEEE).
D
Das Symbol
auf dem Produkt oder seiner Verpackung weist darauf hin, dass dieses Produkt nicht
als normaler Haushaltsabfall zu behandeln ist, sondern an einem Sammelpunkt für das Recycling von elektrischen
und elektronischen Geräten abgegeben werden muss. Durch Ihren Beitrag zum korrekten Entsorgen dieses Produkts
schützen Sie die Umwelt und die Gesundheit Ihrer Mitmenschen. Umwelt und Gesundheit werden durch falsches
Entsorgen gefährdet. Weitere Informationen über das Recycling dieses Produkts erhalten Sie von Ihrem Rathaus,
Ihrer Müllabfuhr oder dem Geschäft, in dem Sie das Produkt gekauft haben. Dieses Elektrohaushaltsgerät ist
entsprechend der EU-Richtlinie 2002/96/CE Über Elektro- und Elektronik – Altgeräte (WEEE).
2
I
INDICE
Presentazione
Avvertenze
Versioni d’uso
Installazione
Funzionamento
Manutenzione
3
PRESENTAZIONE
Elegante e funzionale, ecco come si presenta il nuovo
prodotto per aspirazione realizzato dalla Sirius spa. Un
sistema di aspirazione a scomparsa, abbinabile ad ogni
design di cucina, elegante e discreto sia per applicazioni
ad isola che a muro.
Una soluzione perfetta, per applicazione in spazi limitati
con una capacità di aspirazione superiore, grazie al
sistema perimetrale e ai filtri in alluminio posizionati
dietro l’elegante pannello frontale in acciaio con una
rumorosità impercettibile grazie al nuovo sistema di
scorrimento.
AVVERTENZE
ATTENZIONE: non posizionare pentole e non orientare
manici di pentole nella parte superiore del downdraft
per evitare eventuali capovolgimenti.
adulti.
I bambini, le persone inesperte o i disabili possono
utilizzare l’apparecchio solo sotto la supervisione di
L’aria raccolta non deve essere convogliata in un condotto
usato per lo scarico di fumi di apparecchi alimentati con
energia diversa da quella elettrica (impianti di riscaldamento
centralizzati, termosifoni, scaldabagni, ecc.).
Per lo scarico dell’aria da evacuare rispettare le prescrizioni
delle autorità competenti.
Prevedere una buona areazione del locale in cui viene
utilizzato il prodotto aspirante e altri apparecchi alimentati
con energia diversa da quella elettrica (stufe a gas, impianti
a legna, carbone, olio ecc).
Evitare l’uso di materiali che causano fiammate (flambè)
nelle immediate vicinanze dell’apparecchio. Nel caso di
fritture fare particolarmente attenzione al pericolo di incendio
che costituiscono olio e grassi. Particolarmente pericoloso
per la sua infiammabilità è l’olio già usato.
Non usare griglie elettriche scoperte. Per evitare un possibile
rischio di incendio attenersi alle istruzioni indicate per la
pulizia dei filtri antigrasso.
Non utilizzare il prodotto senza filtri antigrasso;
Non è autorizzato l’uso del prodotto per scopi diversi da
quelli per cui è stato progettato;
Per il normale funzionamento del downdraft è necessario
utilizzare un gruppo aspirante (motore esterno) della stessa
casa produttrice, nel caso di versione esternal motor.
Per conseguenze o danni derivati da un errata
installazione e utilizzo dell’apparecchio la ditta
fornitrice non risponderà di alcuna garanzia.
Prima di procedere a qualsiasi tipo di operazione di pulizia
o manutenzione assicurarsi che l’apparecchio sia scollegato
dalla rete elettrica.
CONSIGLI UTILI
- Prima di procedere con l’installazione verificare che
tutti i componenti non siano danneggiati, in caso
contrario contattare il rivenditore e non proseguire
con l’installazione.
- Prima di installare il prodotto leggere attentamente
tutte le istruzioni di seguito riportate;
- Utilizzare un tubo evacuazione aria che abbia la
lunghezza minima possibile;
- Limitato numero di curve;
- Materiale approvato normativamente;
- Evitare cambiamenti drastici di sezione (diametro
costante consigliato: Ø 150mm o pari superfice);
La pressione negativa (depressione) della stanza in cui è
attivo il prodotto aspirante non deve superare 4Pa
(0,04mbar), questo è garantito da ingressi d’aria come
porte, finestre, bocchette d’areazione ecc.
Per il mancato rispetto delle precedenti istruzioni
la ditta fornitrice non risponderà per problemi di
portata o di rumorosità e nessuna garanzia sarà prestata.
Quando l’etichetta dati tecnici attaccata al prodotto non
mostra il simbolo
l’apparecchio è in classe I quindi
necessità di collegamento a terra.
DESCRIZIONE
Prima di collegare il prodotto aspirante alla rete
elettrica verificare che i valori di tensione
corrispondano con i dati riportati dalla targhetta tecnica
attaccata al prodotto.
Se l’apparecchio non è provvisto di spina o se al termine
dell’installazione questa non è facilmente accessibile è
necessario prevedere un dispositivo di separazione del
prodotto aspirante dalla rete elettrica che abbia una distanza
di apertura dei contatti di tutti i poli di almeno 3mm.
Il Downdraft è stato realizzato per essere alloggiato all’interno
del mobile in posizione orizzontale nella zona posteriore al
piano cottura, sia con motore a bordo che in versione external
motor. Il modello SDD1 è disponibile solo in versione esternal
motor. Dopo aver estratto l’unità aspirante, l’aspirazione dei
vapori e dei fumi, avviene attraverso il canale posto nella
parte superiore del pannello mobile. Il mod. SDD2 prevede
anche la versione filtrante, mediante l’utilizzo dei filtri carbone
4 (Dis. 15C ), con riciclo all’interno della cucina.
2) Effettuare nella parte posteriore del piano della cucina,
un foro rettangolare delle dimensioni di 790x100
mm o 535x100 mm rispettivamente per le dimensioni
da 90Cm e da 60Cm. (Vedi dis. 13)
3) Nel caso si desideri posizionare il Downdraft attaccato
al piano cottura è possibile unire il foro del Downdraft
con quello del piano cottura.
4) Prima di effettuare il foro controllare che nella parte
interna del mobile, in corrispondenza della zona di
alloggio del downdraft, non sia presente la struttura
del mobile o altri particolari che potrebbero creare
problemi per la corretta installazione. Verificare che
gli ingombri del downdraft e del piano cottura siano
compatibili con il mobile e quindi sia fattibile
l’installazione.
5) Installare il downdraft nel foro praticato, inserendolo
da sopra, come indicato dal Dis. 3;
6) La cornice in acciaio del downdraft deve aderire
perfettamente al top della cucina;
7) Fissare il downdraft all’interno del mobile utilizzando
le apposite staffe (Dis. 11 A). In base alle dimensioni
del mobile e agli ingombri del condotto uscita aria
utilizzare le staffe di fissaggio in dotazione.
Attenzione: non praticare ulteriori fori sul prodotto,
per evitare di danneggiare i componenti interni di
scorrimento ed elettrici.
8) Nel caso della versione con motore a bordo procedere
al montaggio del gruppo motore orientando l’uscita
dell’aria nella posizione prescelta verso il basso o
verso l’alto. (Dis.11).
Ad avvenuta installazione del motore procedere al
montaggio della canalizzazione per l’uscita dell’aria.
9) Nel caso di versione con motore esterno posizionare
in una zona idonea l’eventuale gruppo aspirante
(motore esterno) e disporre il condotto di evacuazione
dell’aria di scarico come da Dis.10. Procedere al
montaggio della canalizzazione uscita aria tra il
motore esterno e il downdraft; Selezionare l’uscita
aria tra le cinque possibilità (Dis.12) ed installare
il raccordo in dotazione.
Il gruppo aspirante (motore esterno) deve essere
della stessa casa produttrice del Downdraft.
10)Posizionare la scatola metallica contenente i
componenti elettronici in una zona facilmente
accessibile per eventuali interventi di assistenza
(Dis.14), collegando i connettori elettrici della stessa
al downdraft (Dis.14).
11)Nel caso di motore esterno collegare il cavo del
gruppo motore all’apposito connettore sulla scatola
dei componenti elettronici.
12)Collegare il prodotto alla rete elettrica.
INSTALLAZIONE
ATTENZIONE: Il Downdraft S-DD1 non può essere
installato su piani cottura a GAS.
SDD1
ASSICURARSI CHE IL DOWNDRAFT NON SIA ACCESO E
SIA SCOLLEGATO IL CAVO ALIMENTAZIONE SDD1
1) Per il normale funzionamento occorre eseguire un
corretto montaggio del downdraft e posizionare in una
zona idonea il gruppo aspirante (motore esterno),
mediante il collegamento di condotto di evacuazione
dell’aria di scarico come da dis. 1;
2) Nella parte posteriore del piano di lavoro, partendo dal
foro precedentemente ricavato per il piano cottura,
effetture un ulteriore foro rettangolare delle dimensioni
pari a 785x70mm nel caso di downdraft con larghezza
880 mm e 530x70mm nel caso di downdraft con
larghezza 580mm (Vedi dis. 2). Prima di effettuare il
foro controllare che nella parte interna del mobile, in
corrispondenza della zona di alloggio del downdraft,
non sia presente la struttura del mobile o altri particolari
che potrebbero creare problemi per la corretta
installazione.
Verificare che gli ingombri del downdraft e del piano
cottura siano compatibili con il mobile e quindi sia
fattibile l’installazione.
3) Installare il downdraft nel foro praticato, inserendolo
da sopra, come indicato dal Dis. 3;
4) Il bordo superiore del downdraft deve arrivare a contatto
con il top della cucina (Dis.4);
5) Fissare il downdraft all’interno del mobile utilizzando
le staffe di fissaggio come dimostra il Dis. 5;
6) E’ possibile regolare la direzione d’uscita aria verso
destra, sinistra o verso il basso in base alle esigenze,
rimuovendo le 8 viti di fissaggio e ruotando il raccordo
metallico. Ripristinare le viti come dimostra il dis. 6.
7) Installare il gruppo aspirante (motore esterno) seguendo
le relative instruzioni.
8) Effettuare il collegamento dei tubi per convogliare l’aria,
la flangia uscita aria del downdraft corrisponde alle
dimensioni di 230x80mm;
9) Collegare il downdraft al gruppo aspirante (motore
esterno) mediante il cavo elettrico in dotazione, già
fissato al gruppo aspirante (motore esterno), effettuare
il collegamento del downdraft alla rete elettrica.
10)Estrarre il pannello aspirante pigiando il tasto ON/1 (B),
successivamente rimuovere il pannello frontale (Dis.
9A), premendo gli angoli in alto verso l’interno, quindi
reperire dall’imballo i filtri antigrasso (Dis.9B) e
posizionarli nell’apposita sede come dimostra il dis.9.
Ripristinare il pannello frontale.
11)Il gruppo aspirante (motore esterno) deve essere
della stessa casa produttrice del Downdraft.
Calibrazione del Downdraft SDD1 / SDD2
Dopo aver installato il Downdraft, occorre avviare la procedura
di autocalibrazione necessaria a regolare lo sforzo di estrazione
dell’unità filtrante. Collegare il prodotto alla rete elettrica facendo
attenzione che sia conforme alla tensione di alimentazione
richiesta dalla targhetta dati tecnici.
Premere il tasto ON/1 (dis. 7B SDD1-SDD2, dis. 8H SDD2
T.C.), inizia l’estrazione dell’unità filtrante, raggiunti i 18Cm di
altezza dell’unità filtrante, premere nuovamente il tasto ON/1
(SDD1/SDD2) - OFF (SDD2 touch control) per arrestare la
salita; successivamente premere il tasto TIMER (dis. 7F / dis.
16M) ed entro due secondi il tasto OFF.
SDD2
1) Per un buon funzionamento del downdraft occorre
eseguire una corretta installazione.
5
A questo punto il Downdraft esegue la calibrazione dell’unità
filtrante spostandola in alto e in basso per alcuni centimetri,
durante questa fase i tastini della pulsantiera comandi
lampeggiano. Terminata l’autocalibrazione l’unità filtrante torna
nella posizione precedente e i tastini smettono di lampeggiare.
Attendere l’arresto dell’unità filtrante e successivamente
riprendere in normale utilizzo del Downdraft.
FUNZIONAMENTO
Mod. Downdraft - vers. Standard (Dis.7) SDD1/SDD2
A: Interruttore discesa pannello aspirante / OFF
Ha la funzione di chiusura del pannello aspirante sia in forma
totale che su posizioni intermedie al di sopra di 180 mm dal
piano di cottura. Durante la chiusura il pannello aspirante
rimane in funzione alla velocità impostata fino all’altezza di
180mm dal piano di cottura. Al di sotto di tale dimensione
la funzione di aspirazione si interrompe automaticamente.
B: Interruttore salita pannello aspirante ON/ I° velocità
Ha la funzione di estrazione del pannello aspirante fino
all’altezza massima di 300mm e di impostazione automatica
della prima velocità di aspirazione al raggiungimento
dell’altezza di 180mm dal piano di cottura.
Premendo ulteriormente il tasto dopo il raggiungimento di
tale dimenzione è possibile posizionare il pannello aspirante
su posizioni intermedie desiderate fino all’altezza massima
di 300mm mantenendo invariata la velocità di aspirazione.
C: Interruttore II° velocità
D: Interruttore III° velocità
E: Interruttore IV° velocità
Hanno la funzione di impostare le rispettive velocità di
aspirazione dopo che il pannello aspirante ha raggiunto
l’altezza di 180mm dal piano di cottura e di posizionare in
posizioni differenti l’altezza del pannello aspirante ripremendo
lo stesso tasto fino al massimo di 300m.
F: Temporizzatore 10 min
Ha la funzione di arresto automatico del sistema di
aspirazione e di chiusura automatica del pannello
aspirante dopo dieci minuti dalla sua impostazione.
Mod. Downdraft SDD 2 - vers. Touch Control (Dis. 16)
Tasto OFF (dis. 16G) Ha la funzione di chiusura del
pannello aspirante sia in forma totale che su posizioni
intermedie al di sopra di 180 mm dal piano di cottura,
durante la chiusura il pannello aspirante rimane in
funzione alla velocità impostata fino all’altezza di 180mm
dal piano di cottura. Al di sotto di tale dimensione la
funzione di aspirazione si interrompe automaticamente.
Nel caso in cui il pannello aspirante sia posizionato ad un
altezza intermedia compresa tra 180 mm e 300mm è
possibile riavviare la salita del pannello aspirante agendo
prima sul tasto OFF e successivamente sul tasto On/+.
Leds (Dis. 16I) Le velocità di funzionamento vengono
indicate dai leds blue (1° velocità led in basso a sinistra).
TASTO MENO: (Dis. 16 L) è attivo solo se l’altezza del
pannello aspirante è superiore ai 18cm dal piano cottura
e consente di ridurre la velocità del motore di aspirazione.
TASTO TIMER (dis. 10M) : Ha la funzione di arresto
automatico del sistema di aspirazione e di chiusura
automatica del pannello aspirante dopo dieci minuti
dalla sua impostazione.
Altre funzioni:
- Dopo 30 ore di funzionamento dell’apparecchio la pulsantiera
evidenzia la saturazione dei filtri antigrasso mediante il
lampeggio dei led, per il reset premere il tasto timer.
- Dopo 4 ore di funzionamento continuo dall’ultima
impostazione l’apparecchio si spegne e si chiude
automaticamente.
- Durante la rimozione del pannello anteriore per
operazioni di pulizia e manutenzione tutte le funzioni
elettroniche di aspirazione e movimento sono bloccate.
MANUTENZIONE
Un’accurata manutenzione garantisce un buon
funzionamento ed un buon rendimento nel tempo.
Una cura particolare va rivolta al filtro antigrasso.
La rimozione del filtro antigrasso avviene in primo luogo
estraendo il carrello aspirante pigiando il tasto ON/1 (Dis. 7B / dis. 8H), successivamente rimuovere il pannello frontale
(Dis. 9A), premendo i spigoli in alto verso l’interno, quindi
estarre i filtri antigrasso (Dis.9B). La pulizia dei filtri antigrasso
può essere eseguita a mano o in lavastoviglie. I filtri antigrasso
devono essere puliti regolarmente poiché possono costituire
pericolo d’incendio. Ripristinare i filtri antigrasso e il pannello
frontale facendo attenzione che sia ben agganciato in entrambi
i lati altrimenti potrebbe causare l’inceppamento del carrello
filtrante.
Nel caso di SDD2 nella versione filtrante è necessario
sostituire i filtri carbone attivo (Dis. 15 C) periodicamente.
IL filtro carbone si rimuove togliendo prima il filtro antigrasso
e successivamente il filtro carbone (Dis. 15 C).
La sostituzione del filtro carbone avviene in rapporto
all’uso, almeno una volta ogni 6 mesi.
Tasto On/+ (Dis.16H) Ha la funzione di estrazione del
Per la pulizia dell’apparecchio viene consigliato l’uso di
pannello aspirante fino all’altezza massima di 300mm
panno morbido acqua tiepida e detersivo neutro, evitando
e di impostazione automatica della prima velocità di
l’uso di prodotti contenenti abrasivi o corrosivi.
aspirazione al raggiungimento dell’altezza di 180mm
dal piano di cottura.
La sostituzione del cavo alimentazione deve essere
Premendo ulteriormente il tasto dopo il raggiungimento
effettuata solo da personale specializzato.
di tale dimensione è possibile aumentare la velocità del
motore di aspirazione.
6
GB
CONTENTS
Presentation
Warnings
Uses
Installation
Working
Maintenance
7
For normal operation of Downdraft an extraction unit
(external motor) of the same manufacturer is required.
PRESENTATION
The manufacturer is not responsible for any
consequences or damage deriving from improper
installation and use of the appliance.
Elegant and functional, here is how the new ventilation
product designed by Sirius SpA looks.
A “hideaway” exhausting system that fits every kitchen
design, elegant and unobtrusive on both island and wall
applications.
It is the perfect solution for limited space application
with a superior exahusting efficiency, thanks to its
perimetral suction system and to the aluminium filters
positioned behind the elegant stainless steel front panel,
and with an extremely low noise level thanks to a new
sliding system.
Before proceeding with any type of cleaning or
maintenance operation, check that the appliance is
disconnected from the mains.
USEFUL TIPS
- Before proceeding with installation, check that none
of the components are damaged. If otherwise, contact
the dealer and do not continue with installation.
- Before installing the appliance, carefully read all the
instructions.
- Use an air duct of minimum indispensable length.
- Use a limited number of elbows.
- Use certified materials.
- Avoid drastic changes in cross-section (recommended
constant diameter: 150 mm Ø or equal cross-sectional area).
WARNINGS
ATTENTION: do not put pots and do not set handles of
saucepans on the upper side of the downdraft in order
to avoid that they turn upside down.
The appliance may be used by children, inexpert
or disabled persons only under supervision of
adults. The drawn air must not be conveyed into a duct
used for extraction of flue gas of equipment powered
with energy different from electrical energy (central
heating systems, thermosiphons, water heaters, etc.).
For air evacuation comply with the regulations laid down
by the competent authorities. Provide for good ventilation
in the room housing the extraction system and other
equipment powered with energy different from electrical
energy (gas stoves, wood-, carbon- and oil-powered
systems, etc). The negative pressure (vacuum) of the
room in which the extraction system is active must not
exceed 4Pa (0.04 mbar). This is assured by means of
air inlets such as doors, windows, vents, etc.
The manufacturer cannot be held responsible for air
flow or noise problems if failing to comply with the
above instructions and no guarantee is provided.
DESCRIPTION
The Downdraft has been designed to be housed in a
cabinet, horizontally on the back side of the cooktop,
both in the appliance equipped with motor and in the
external motor version appliance.
The model SDD1 is available only in external motor
version.
After extracting the exhausting unit, the aspiration of
vapours and fumes occurs by means of a opening placed
on the upper side of the vertically-sliding panel.
The model SDD2 is available in filtering version as well,
by using carbon filters (Fig. 15C ) so to recycle air inside
the kitchen.
When the label on the product bearing the technical
data does not show the symbol
the appliance is
classified in Class I and hence requires an earth
connection.
Before connecting the extraction system to the
mains, check that the voltage values correspond
to the data shown on the plate fixed on the product. If
the appliance is not fitted with a plug or if it is not easily
accessible after installation, fit a device to isolate the
extraction system from the mains with a contact opening
distance of at least 3 mm for all the poles. Do not use
ingredients that cause flames (flambè) in the immediate
vicinity of the appliance. In the case of frying, be
particularly careful since oils and grease constitute a
fire hazard. In particular, used oil has a high risk of
inflammability. Do not use uncovered electric grilles. To
prevent the risk of fire, follow the grease filter cleaning
instructions. Do not use the aspiration panel without
grease filters. The aspiration panel may not be used for
purposes different from those for which it was designed.
INSTALLATION
ATTENTION: The Downdraft S-DD1 cannot be
installed on gas hob.
SDD1
1. For normal operation Downdraft must be properly
installed and the extraction unit (external motor)
8
positioned in a suitable area by connecting the air duct
as shown in Fig. 1.
2. At the rear of the worktop, starting from the opening
previously made for the cooktop, extend the opening
by 785x70 mm for a 860 mm wide Downdraft and
530x70 mm in the case of a 580 mm wide Downdraft
(see Fig. 2). Before making the opening, check that
there are no structural or other parts inside the cabinet
that hinder proper installation of Downdraft. Check that
the dimensions of Downdraft and the cooktop are
compatible with the cabinet so that the installation can
be carried out properly.
3. Fit Downdraft in the opening, inserting it from the top
as shown in Fig. 3.
4. The upper edge of Downdraft must be in contact with
the worktop (Fig. 4).
5. Fix Downdraft inside the cabinet using the fixing brackets
as shown in Fig. 5.
6. The air evacuation direction can be adjusted to the right,
left or down as required, by removing the 8 retaining
screws and turning the metal union. Refit the screws
as shown in Fig 6.
7. Install the extraction unit (external motor) following the
relevant instructions.
8. Connect the air ducts; the dimension of the air outlet
flange of Downdraft is 230x80 mm.
9. Connect Downdraft to the extraction unit (external
motor) using the cable provided already fitted to the
extraction unit (external motor) and connect Downdraft
to the mains.
10. Extract the aspiration panel by pressing the button
ON/1 (B), then remove the front panel (Fig. 9A), pressing
the upper corners inside. Take the grease filters (Fig.
9B) out of the packaging and position them in their
housing as shown in Fig. 9. Refit the front panel.
11.The extraction unit (external motor) must be from the
same manufacturer as Downdraft.
Attention: do not make any additional openings on
the appliance in order to avoid to damage the internal
sliding and electrical components.
8. In the version of the Downdraft equipped with motor,
install the motor group adjusting the air evacuation
direction as required, either downwards or upwards
(Fig. 11). After installing the motor, connect the air
ducts.
9. In the external motor version, put the extraction unit
(external motor) in a proper place and connect the
air evacuation duct as shown in Fig. 10. Afterwards
connect the air outlet duct between the external
motor and the Downdraft. Select the air outlet among
the five possibilities shown (Fig. 12) and install the
joint provided.
The extraction unit (external motor) must be from
the same manufacturer as the Downdraft.
10.Put the metallic box containing the electronic
components in a place easy to be reached if a
technical assistance is needed Fig. 14). Connect the
electrical connectors of the box to the Downdraft .
11.If the motor is external, connect the motor unit cable
to the suitable connector placed on the electronic
components box.
12.Power the appliance.
Downdraft calibration (SDD1-SDD2)
After the downdraft has been installed, the aspiration
panel must be calibrated. This operation is necessary
to regulate the power exstraction of the aspiration panel.
Connect the product to the power line, making sure that
it is conformed to the supply voltage indicated on the
technical data tag. Pushing the ON/1 button (fig.7-B)
the aspiration panel rises. After it has reached a height
of 180mm from the cooketop, press the OFF botton (fig.
7/4), then the Timer (fig. 7-F) and after 2 sec. the OFF
button ( Fig. 7-A). The downdraft will carry out the
calibration of its aspiration panel rising and retracting
for some centimeters. During this phase, the buttons
on the pushbutton control panel blink. At the end of the
calibration, the aspiration panel get back to the previous
position and the button end to blink. Wait until the
aspiration panel stops moving before re-activating the
extraction.
SDD2
1. For a good performance the Downdraft must be
properly installed.
2. At the rear of the cooktop make a rectangular opening
of mm 90x100 or mm 535x100, respectively for a
mm 860 wide Downdraft or for a mm 580 wide
Downdraft (Fig. 13)
3. If you would like to place the Downdraft very close
to cooktop, connect the opening of the Downdraft
to the one of the cooktop.
4. Before making the opening, check that there are no
structural or other parts inside the cabinet, where
the appliance is to be placed, which could hinder a
proper installation. Check that the dimensions of the
Downdraft and the ones of the cooktop are compatible
with the cabinet so that the installation can be carried
out properly.
5. Put the Downdraft in the opening, inserting it from
above as shown in Fig. 3
6. The upper edge of the Downdraft must fit perfectly
the cooktop.
7. Fix the Downdraft inside the cabinet. According to
the dimensions of the cabinet and of the air outlet
duct, use the provided fixing brackets (Fig. 11 A).
OPERATION
Mod. Downdraft SDD 2 - Touch Control version (Fig. 16)
A: Aspiration panel down / OFF switch
It is used to close the aspiration panel completely or to
position it at intermediate heights at least 180 mm above
the cooktop.
During closure the aspiration panel remains active at
the speed set up to the height of 180 mm from the
cooktop. Below this height the aspiration function is
automatically cut out.
B: Aspiration panel up/1st speed switch
It is used to extract the aspiration panel up to a maximum
height of 300 mm and automatically set the first aspiration
9
speed when reaching the height of 180 mm from the
cooktop. When pressing the button again after reaching
this height, the aspiration panel can be positioned in
intermediate positions up to a maximum height of 300
mm while maintaining the aspiration speed unchanged.
MAINTENANCE
Careful maintenance guarantees good functioning and
goog efficiency over time.
C: 2nd speed switch
D: 3rd speed switch
E: 4th speed switch
Particular care should be taken with the grease filter.
The grease filter is removed by extracting the aspiration
by extracting the aspiration panel by pressing the button
ON/1 (Fig. 9-B / Fig.16H). Afterwards remove the front
panel (Fig. 9 A SDD1 – Fig. 15 A SDD2) by pushing the
upper corners inside, then remove the grease filters
(Fig. 9B SDD1 – Fig. 15B SDD2 The grease filters can
be hand washed or in the dishwasher.
The grease filters must be cleaned regularly as they may
constitute a risk of fire.
Reinsert the grease filters and the front panel. Make
sure that the front panel is properly fixed otherwise it
may jam the filtering panel.
In the SDD2, in filtering version, the active carbon filters
must be replaced regularly (Fig. 15 C).
To remove the carbon filter, first remove the grease filter
and then the carbon filter (Fig. 15 C).
The carbon filter needs replacing depending on the use,
but however every six months at least.
They are used to set the respective aspiration speeds
after the aspiration panel has reached a height of 180
mm from the cooktop and to position the aspiration
panel at different heights up to a maximum of 300 mm
by pressing the same button again.
F: 10-minute timer
Its function is to automatically stop the extraction system and
close the aspiration panel 10 minutes after it has been set.
OFF switch: (Fig. 16G) It is used to close the aspiration
panel completely or to position it at intermediate heights
at least mm 180 above the cooktop. While closing the
aspiration panel keeps on working at the speed set up
to the height of mm 180 from the cooktop. Below this
height the aspiration function is automatically cut out.
On switch/+: (Fig. 16H) It is used to extract the aspiration
panel up to the maximum height of mm. 300 and to set
automatically the first aspiration speed when reaching
the height of mm 180 from the cooktop.
When pressing the button again after reaching this
height, the aspiration motor speed can be encreased.
If the aspiration panel is positioned at an intermediate
height between mm 180 and mm 300, the aspiration
panel can start raising again by pressing first the OFF
switch and then the On/+. Switch.
To clean the appliance itself a soft cloth, tepid water and
neutral detergent are recommended, while abrasive or
corrosive products must be avoided.
The power cable must be replaced by specialised
personnel only.
Leds: (Fig. 16I) The different speed levels are indicated
by blue leds. (1. Speed level corresponds to the led
down on the left).
MINUS SWITCH: (Dis. 16 L) it is working only if the
position reached by the aspiration panel is higher than
mm 180 from the cooktop. It is used to decrease the
aspiration motor speed.
TIMER SWITCH: (Fig. 10M) : it is used to stop
automatically the aspiration system and to close
automatically the aspiration panel ten minutes it has
been set.
Other functions:
· After 30 hours of appliance operation, the pushbutton
panel indicates saturation of the grease filters by the
buttons flashing. To reset, press the timer button.
· After 4 hours of continuous operation from the last
setting, the appliance turns off and closes automatically.
· When the front panel is removed for cleaning and
maintenance operations, all the electronic aspiration
and movement functions are locked.
10
11
12