1
OPERATING INSTRUCTIONS
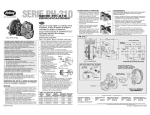
PH-410 SERIES
SPECIFICATIONS
Rigid type pintle hook with air operated
plunger, provides a minimum clearance
and some shock absorption at the coupling.
20,000 lbs. Maximum Vertical Load
100,000 lbs. Maximum Gross Trailer Weight
Weight: 40 lbs.
IMPORTANT SAFETY INFORMATION
Maintain adequate vertical (tongue) load to properly control
the trailer (generally 10%) but do not exceed the above rated
capacities.
DO NOT damage the latch. Be particularly careful with the
drawbar when coupling and uncoupling.
Other steps and inspections are also required. Consult OSHA
and D.O.T. regulations and American Trucking Association for
complete coupling and uncoupling procedures. These cover
items such as cargo securement, brakes, lights, safety chains,
and other important requirements.
This equipment must not be used or maintained in a careless
manner.
GENERAL INFORMATION
1. Do not modify or add to the product.
2. Wear safety goggles during installation, removal and servicing.
3. Never strike any part of the item with a steel hammer.
4. Do not weld on this product.
This product is covered by Holland’s Commercial Products
Warranty. Holland reserves the right, without giving prior
notice, to change specifications and dimensions as designs are
altered or improved.
TOWING APPLICATIONS
Trailers, full trailers, doubles, and triples operations within the
stated capacities. For off-road applications, reduce the above
capacities by 25% and use in conjunction with a swivel type
drawbar.
DRAWBAR EYE DIMENSIONS
2.38˝ to 3˝ I.D. with 1.25˝ to 1.63˝ diameter section.
MOUNTING
1. Use a mounting structure of sufficient strength to support the
rated capacity of the pintle hook. Refer to SAE J847 for structural
performance requirements.
2. Use the mounting bolt hole pattern detailed on the back of this
page.
3. Install the pintle hook using six (6) new 3/4˝ diameter Grade 8
bolts. Torque bolts to a minimum of 200 ft.-lbs. Do not exceed
manufacturer’s recommended torque limit. Note that installation
torque requirements can vary widely and are influenced by many
parameters. These include, but are not limited to, thread type,
thread engagement, coatings, lubrication, mounting structure
details and other parameters unique to each specific application.
A
1. Before operating, inspect for proper
operation, worn, damaged or missing
parts and a secure mounting. Correct as
required before use.
2. Make sure the pintle is in the proper
coupling position as shown at right
(with the latch on top).
3. Open the latch (XA-10545) by lifting the
lock handle (A).
4. Position the drawbar eye over the horn
of the pintle and lower into place.
5. Push the latch closed. When locked, the
lock handle (A) will rotate and move up
until it is flush with the top of the latch
(see illustrations at right).
Locked
CORRECT
A
Unlocked
MAINTENANCE
For proper performance, the following maintenance steps should
be performed every 30,000 miles or 3 months, whichever comes
first.
1. Clean and check for proper operation. Inspect for worn,
damaged or missing parts. Replace as required using only
Holland parts.
2. Inspect, in particular, the coupling contact area. Replace when
wear exceeds 3/16˝ (0.19˝) from the original surface profile.
3. Lubricate latch pivots with a light oil lubricant.
4. Check mounting fasteners for proper torque.
5. Check plunger adjustment. See Item 8 of “Mounting
Instructions”, described previously.
6. With the latch closed, measure the gap between the hook and
the latch while lifting up on the latch. Replace the latch (XA10545 sub-assembly) when gap exceeds 3/8˝ (0.375˝).
INCORRECT
PH-410
7.06˝
5.97˝
.5˝ - 12˝
SEE CHART BELOW FOR
MOUNTING STRUCTURE WIDTHS
AND CORRESPONDING
PART NUMBERS
SAE J847 Information:
Type I - not applicable. Type II - 100,000 lbs.
For reference, Holland conducts proof load tests using dry threads
torqued to 200 ft.-lbs. when mounted into solid steel plate at least
1-1/2˝ thick. This may or may not be adequate for your specific
applications. Perform recommended maintenance as stated below.
REQUIRED MOUNTING INTERFACE
MINIMUM CLEARANCE
6.63˝
BODY
PROFILE
REF
5.00˝
2.50˝
3.25˝ MIN.
11.79˝
7.63˝
4. A Holland air chamber is recommended for use with Holland
pintle hooks.
.95˝
5. Mount the air chamber and plunger assembly, making sure
that the air chamber and plunger assembly are in line with the
pintle body. Adjust as required and tighten the chamber bolts
securely.
Figure 1
6. Connect the air supply and
.38˝ MIN.
check for proper operation.
2.38˝
2.00˝
5.01˝
4.87˝
2.13˝
3/8˝ NPT PLUG
3/8˝ TO 1/4˝ NPT REDUCER
7. Check the plunger adjustment.
A
When properly adjusted, the
plunger should tightly grip a
1.25˝ round bar (or plunger
B
adjustment tool TF-03147-10)
PLUNGER
when energized (see Figure 1)
RETRACTED
and retract far enough when deenergized to allow easy removal Figure 2
of a 1.63˝ diameter drawbar.
.81˝ THRU
(6 REQ.)
3.31˝
RK-10545 LATCH KIT
XA-10545
(SUB-ASSY.)
XB-10537
See Mounting Structure Chart
on page 1 for Air Chamber and
Plunger Kit part numbers
8. Adjustment of Holland’s air
activated plunger:
Bracket only in
Kit #XA-02608
A. Loosen chamber rod jam nut
(A) as shown in Figure 1.
X
B. Holland plungers have an
adjustment range of approximately 1-1/2˝. The plunger is
pre-set at the factory to provide approximately 1 inch of
adjustment out or 1/2˝ adjustment in. At no time should the
chamber rod have less than 3/8˝ engagement with the
plunger.
To adjust, loosen jam nut (A) from plunger. Turn plunger
rod clockwise for less engagement or counterclockwise for
more engagement. After adjusting, retighten jam nut (A)
securely against plunger rod.
XB-03104
XA-04156
XA-10573
ALL DIMENSIONS SHOWN
ARE NOMINAL
MOUNTING STRUCTURE CHART
PINTLE
ASSEMBLY
NUMBER
MOUNTING
STRUCTURE
WIDTHS “X”
AIR
CHAMBER
ROD LENGTH
AIR CHAMBER
AIR
& PLUNGER
CHAMBER
KIT NUMBER PART NUMBER
PH-410RA11
0.5˝ to 2.0˝
1.8˝
XA-02608
XB-165945
PH-410RC11
6.0˝ to 8.0˝
6.1˝
XA-10196
XB-166314
PH-410RD11
8.0˝ to 9.0˝
7.7˝
XA-10248
XB-166326
PH-410RE11
9.0˝ to 11.0˝
9.1˝
XA-10197
XB-166315
PH-410RF11
12.0˝ (12.00˝)
12.0˝
XA-10198
XB-166321
E n g i n e e r i n g Yo u r R o a d t o S u c c e s s
SAF-HOLLAND USA, Inc.
888.396.6501 Fax 800.356.3929
SAF-HOLLAND Canada Limited
519.537.3494 Fax 800.565.7753
Western Canada
604.574.7491 Fax 604.574.0244
SAF-HOLLAND International, Inc.
616.396.6501 Fax 616.356.1511
Copyright © Jukly 2007-SAF-HOLLAND, Inc. All information contained in this document was correct at time of copyright, and is subject to change without notice. All rights reserved.
XL-PH342-ES Rev C
www.safholland.com
Turn over for spanish
Peso: 40 lb (18 kg).
INFORMACIÓN IMPORTANTE DE SEGURIDAD
Mantenga una carga vertical (en la lanza) adecuada para
controlar correctamente el remolque (generalmente 10%) pero
no supere las capacidades estipuladas anteriores.
NO dañe el seguro. Tenga especial cuidado con la barra de
tracción al acoplar y desacoplar.
También se requieren otros pasos e inspecciones. Consulte los
reglamentos de OSHA y D.O.T. y de la American Trucking
Association acerca de los procedimientos completos de acople y
desacople. Que cubren asuntos como aseguramiento de la carga,
frenos, luces, cadenas de seguridad y otras exigencias importantes.
La operación de este equipo y su mantenimiento no deben
realizarse en forma descuidada
INSTRUCCIONES DE OPERACIÓN
1.
SERIE PH-410
ESPECIFICACIONES
2.
3.
Gancho de clavija rígido con émbolo móvil
neumático, reduce al mínimo la holgura y
amortigua los golpes al enganchar.
4.
5.
Carga vertical máxima de 20.000 lb (9 ton)
Peso bruto máximo del remolque
100.000 lb (45 ton)
Información SAE J847:
Tipo I: No Aplica. Tipo II: 100.000 lb (45 ton).
4.
5.
6.
7.
INFORMACIÓN GENERAL
1. No modifique ni añada nada al producto.
2. Use gafas de seguridad durante la instalación, la revisión y
cuando quite el producto.
3. Nunca golpee ninguna parte del artículo con un martillo de acero.
4. No aplique soldadura a este producto.
Este producto está cubierto por la garantía de productos
comerciales de Holland. Holland se reserva el derecho, sin
notificación previa, de cambiar las especificaciones y
dimensiones cuando se alteren o mejoren los diseños.
8.
APLICACIONES DE ARRASTRE
Remolques, remolques completos, dobles y triples que operen
dentro de las capacidades establecidas. Para uso fuera de la
carretera, reduzca las capacidades anteriores en 25% y use con
una barra de tracción de tipo giratorio.
DIMENSIONES DEL OJO DE LA BARRA DE TRACCIÓN
2,38 (6 a 7,6 cm) pulgadas a 3 pulgadas de D.I. con un diámetro
de sección de 1.25 pulgadas a 1.63 pulgadas.
MONTAJE
1. Use una estructura de montaje suficientemente resistente para
soportar la capacidad estipulada del gancho de clavija. Consulte
SAE J847 acerca de las exigencias de rendimiento estructural.
2. Use el patrón de barrenado para los tornillos de montaje que se
detallan al reverso de esta página.
3. Instale el gancho de clavija mediante seis (6) tornillos nuevos
grado 8 con un diámetro de 3/4 de pulgada (1,9 cm). Apriete los
tornillos a un mínimo de 200 libras-pie. No exceda el límite de
torque recomendado por el fabricante. Considere que las
exigencias de torque de la instalación pueden variar
ampliamente y están influidas por muchos parámetros. Que
incluyen, entre otros, tipo de rosca, enganche de rosca,
recubrimiento, lubricación, detalles de la estructura de montaje y
otros parámetros exclusivos de cada aplicación específica. Como
Antes de poner a funcionar, inspeccione
su funcionamiento correcto, el desgaste,
si hay daños o faltan partes y que esté
montado correctamente. Antes de
usarlo, haga las correcciones necesarias.
Asegúrese que la clavija está en la posición
adecuada de acople como se muestra a la
derecha (con el seguro arriba).
Abra el seguro (XA-10545) levantando
la manija (A).
Coloque el ojo de la barra de tracción
sobre el cuerno del gancho y bájela
hasta alcanzar su lugar.
Empuje el seguro para cerrarlo. Cuando
está cerrado, la manija (A) rotará y se
moverá hacia arriba hasta estar al ras
con la parte superior del seguro (vea las
ilustraciones a la derecha).
PH-410
referencia, Holland realiza pruebas de carga usando roscas secas
apretadas a 200 libras-pie cuando se montan en una placa de
acero sólido de al menos 1 1/2 pulgadas (3,8 cm) de espesor. Esto
puede o no ser adecuado para su aplicación específica. Realice el
mantenimiento recomendado como se establece a continuación.
Se recomienda usar una cámara neumática de Holland con los
ganchos de clavija Holland.
Monte la cámara neumática y el montaje del émbolo,
asegurándose que la cámara neumática y el montaje del émbolo
se ajusten convenientemente al cuerpo del gancho. Haga el ajuste
necesario y apriete firmemente los tornillos de la cámara.
Conecte el suministro de aire y revise que esté funcionando
correctamente.
Figura 1
Revise el ajuste del émbolo.
0,38”
Cuando está bien calibrado, el
(9,7 MM) MIN.
émbolo debe apretar fuertemente
A
una barra de 1,25 (3,2 cm)
pulgadas de diámetro
(o el calibrador de émbolo
B
TF-03147-10) cuando está activado
ÉMBOLO
(vea la Figura 1) y recogerse lo
RETRAÍDO
suficiente cuando está desactivado
para poder quitar fácilmente la
Figura 2
barra de tracción de 1,63 pulgadas
(4,1 cm) de diámetro.
Ajustes del émbolo neumático
Holland:
A. Afloje la contratuerca de la
barra de la cámara (A) como
se muestra en la Figura 1.
X
B. Los émbolos Holland tienen
un intervalo de ajuste de aproximadamente 1-1/2 pulgadas
(3,8 cm). El émbolo está calibrado en la fábrica para dar
aproximadamente 1 pulgada (2,5 cm) de ajuste hacia afuera o
1/2 pulgada (1,3 cm) de ajuste hacia adentro. En ningún
momento la barra de la cámara deberá tener menos de 3/8
de pulgada (0,95 cm) de enganche con el émbolo.
Para ajustar, afloje la contratuerca (A) del émbolo. Gire la barra
del émbolo en sentido horario para disminuir el enganche o en
sentido antihorario para aumentarlo. Después de ajustar, vuelva
a apretar firmemente la contratuerca (A) a la barra del émbolo.
A
Cerrado
CORRECTO
A
Abierto
INCORRECTO
MANTENIMIENTO
Cada 30.000 millas (48.000 km) o cada 3 meses, lo que suceda
primero, hay que dar los siguientes pasos para lograr un
rendimiento adecuado.
1. Limpie y verifique que funcione correctamente. Inspeccione si
hay desgaste, daños o partes faltantes. Reemplace las piezas
necesarias sólo con piezas genuinas de Holland.
2. Inspeccione, en particular, el área de contacto de enganche.
Reemplace cuando el desgaste exceda 3/16 de pulgada
(0,19”; 0,48 cm) del perfil de la superficie original.
3. Lubrique los pivotes del seguro con un lubricante de aceite ligero.
4. Revise que los tornillos de la placa de montaje tengan el torque
correcto.
5. Revise la calibración del émbolo. Vea el punto 8 de las
“Instrucciones de Montaje” mencionadas anteriormente.
6. Con el seguro cerrado, mida la separación entre el gancho
y el seguro mientras levanta el seguro. Reemplace el seguro
(sub conjunto XA-10545) cuando la separación supere
3/8 de pulgada (0,375”; 0,95 cm).
7,06˝
5,97˝
,5˝ - 12˝
VEA EN EL DIAGRAMA SIGUIENTE
LOS ANCHOS DE LA ESTRUCTURA
DE MONTAJE Y LOS NÚMEROS
DE PARTE CORRESPONDIENTES
INTERFASE DE MONTAJE NECESARIA
ESPACIO LIBRE MÍNIMO
REFERENCIA
DEL PERFIL
6,63˝
5,00˝
2,50˝
3,25˝
MÍN.
11,79˝
7,63˝
2,38˝
2,00˝
,95˝
5,01˝
4,87˝
2,13˝
3/8˝ TAPÓN NPT
3/8˝ A 1/4˝ REDUCTOR NPT
,81˝ A TRAVÉS
(6 NEC.)
3,31˝
RK-10545 JUEGO DEL SEGURO
XA-10545
(SUB-CONJ.)
Vea la tabla de estructura de
montaje en la página 1 acerca de
los números de parte del juego de
émbolo y la cámara neumática
XB-10537
Soporte sólo en
Juego #XA-02608
XB-03104
XA-04156
XA-10573
TODAS LAS MEDIDAS
SON NOMINALES
TABLA DE ESTRUCTURA DE MONTAJE
LONGITUD DE NÚMERO DE JUEGO
NÚMERO
LA BARA
DE LA CÁMARA
DE PARTE
DE LA CÁMARA
Y EL ÉMBOLO
DE LA CÁMARA
NEUMÁTICA
NEUMÁTICOS
NEUMÁTICA
9,1˝ (23,1 cm)
PH-410RE11 9,0˝ a 11,0˝ (22,9 a 27,9 cm)
7,7˝ (19,6 cm)
PH-410RD11 8,0˝ a 9,0˝ (20,3 a 22,9 cm)
6,1˝ (15,5 cm)
PH-410RA11 6,0˝ a 8,0˝ (15,2 a 20,3 cm)
1,8˝ (4,6 cm)
0,5˝ a 2,0˝ (1,3 a 5,1 cm)
PH-410RA11
ESPESOR
“X” DE LA
ESTRUCTURA
DE MONTAJE
NÚMERO DE
CONJUNTO
DE
CLAVIJA
PH-410RF11
12,00˝ (30,5 cm)
12,0 (30,5 cm)
XA-02608
XA-10196
XA-10248
XA-10197
XA-10198
XB-165945
E n g i n e e r i n g Yo u r R o a d t o S u c c e s s
XB-166314
SAF-HOLLAND USA, Inc.
888.396.6501 Fax 800.356.3929
XB-166326
SAF-HOLLAND Canada Limited
519.537.3494 Fax 800.565.7753
Western Canada
604.574.7491 Fax 604.574.0244
XB-166315
XB-166321
SAF-HOLLAND International, Inc.
616.396.6501 Fax 616.356.1511
Copyright © Julio 2007-SAF-HOLLAND, Inc. All information contained in this document was correct at time of copyright, and is subject to change without notice. All rights reserved.
XL-PH342-ES Rev C
www.safholland.com
Vuelque para el inglés