1
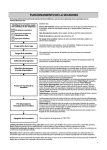
Operating Instructions Model Numbers LWS02A* and LWS02B* © Copyright 1999, Alliance Laundry Systems LLC Part No. 39090R3 September 1999 zF"amV m¤4apm WARNING To reduce the risk of fire, electric shock, serious injury or death to persons, read the IMPORTANT SAFETY INSTRUCTIONS in the Use and Care Guide before operating your washer. W018E FFhamF pzF ©4dF Regular Cycle Use for sturdy items, like play or work clothes, towels, T-shirts, etc. The wash time selection will depend on the type of fabric and the amount of soil. For the best results when cleaning heavily soiled items, use a longer wash time (15 minutes maximum). Lightly soiled items require less wash time. 2 There are three settings in the REGULAR cycle — Extra Clean, Normal and Light. The number shown next to these settings is the length of agitation in minutes. (For example: Setting the timer on Extra Clean will be a 15 minute agitation.) Permanent Press Cycle Use for permanent press items and synthetics. The wash time selection will depend upon the type of fabric and amount of soil. There are two settings in the PERMANENT PRESS cycle — Normal and Light. The number shown next to these settings is the length of agitation in minutes. (For example: Setting the timer on Normal will be a nine minute agitation.) Model Number LWS02A* and LWS02B* Delicate Cycle Wash delicate items usually washed by hand on this cycle. A full tub of water is recommended (even for small loads) to allow the delicate items to move freely through the water. More water helps reduce fabric wear, wrinkling, and provides for a clean wash. There are two settings in the DELICATE cycle — Normal and Light. The number shown next to these settings is the length of time in minutes. (For example: Setting the timer on Normal will be nine minutes, including short periods of agitation and long periods of soaking.) 39090 p "^ dp^F 5. Set WASH/RINSE temperatures. IMPORTANT: Before using your new washer, make sure the washer cord is plugged into a 120 Volt electrical outlet that has the proper grounding and polarity. Make sure the washer hoses are connected to the hot and cold water faucets, and that the faucets are turned on. Be sure the drain hose is not kinked and is inserted into a drain. See the INSTALLATION INSTRUCTIONS for details of proper washer installation. IMPORTANT: Prior to first wash, use an all purpose cleaner or a detergent and water solution and a damp cloth to remove shipping dust from inside of washtub. 1. Get the clothes ready for washing. Empty pockets and cuffs. Sort items into separate loads. Pretreat stains and heavily soiled areas. D305IE1A 2. Measure and add detergent to the washtub. W395IE0B 3. Add clothes loosely into the washtub. 4. Close the loading W383IE0A door. The washer will not agitate or spin with the loading door open. NOTE: The washer will provide a cold rinse in all TEMPERATURE settings. Cold rinses will save you money and energy and will help reduce wrinkling in permanent press and synthetics. The Energy Saver settings, marked with a dot (•), show which temperature settings will use the least energy. 6. Set LOAD SIZE (WATER LEVEL) control. Use RESET if agitation has started and more water is needed. IMPORTANT: Holding the LOAD SIZE (WATER LEVEL) control in the RESET position can cause flooding of the washer. 7. Select the cycle according to the type of fabric being washed. Push the timer knob in and turn clockwise to the desired cycle and wash time. 8. Pull the timer knob out to start the water fill. Agitation will begin when the water reaches the level you selected. The washer will stop (pause) shortly before the wash and rinse spins. Do not turn the timer through these pauses. They are part of the cycle. ahF Although the washer cycles are automatic, the timer may be reset to lengthen, shorten or repeat a portion of a cycle. To set or reset the timer, push timer knob in to stop the washer. Hold timer knob in firmly while turning it clockwise to the setting desired. Pull timer knob out to start the washer. p"camV Set the timer knob in the center of the word “RINSE” (this prevents the washer from spinning without first filling with water). Place the soaking product and clothes load in the washtub. Pull timer knob to start washer fill. After fill is completed and agitation has started, push the timer knob in. This will stop the washer. When the clothes have soaked the desired length of time, TURN THE TIMER KNOB TO THE END OF THE RINSE SETTING, then pull the timer knob out to start the spin. CAUTION: Failure to turn the timer knob to the spin cycle and completely draining the washtub after soaking will result in the washer overflowing and causing property damage. W318IE0C WARNING To reduce the risk of serious injury, do not by-pass the loading door switch by permitting the washer to agitate or spin W019E with the loading door open. 3 39090 pF 4 39090 Instrucciones de operación Modelos número LWS02A* y LWS02B* © Copyright 1999, Alliance Laundry Systems LLC Pieza No. 39090R3 Septiembre 1999 m¤44apmF =F pzF"4a¸m ADVERTENCIA Para reducir el riesgo de incendios, choques eléctricos y lesiones graves o letales, lea las INSTRUCCIONES IMPORTANTES DE SEGURIDAD de la Guía de uso y cuidado antes de utilizar la lavadora. W018S FFham"4a¸m Fd 4a4dp "=F4¤"=p Ciclo regular Este ciclo se emplea para prendas resistentes, por ejemplo, ropa de juego y de trabajo, toallas, camisetas, etc. La selección de la duración del lavado dependerá del tipo de tela y de cuán sucia esté la prenda. Para obtener los mejores resultados al lavar prendas muy sucias, elija una mayor duración de lavado (15 minutos máximo). Las prendas con poca suciedad requerirán un menor tiempo de lavado. 2 El ciclo REGULAR consta de tres opciones: lavado extra (Extra Clean), Normal y ligero (Light). El número que aparece al lado de estos ajustes representa la duración de la agitación en minutos. (Por ejemplo, al colocar el temporizador en Extra Clean, la agitación durará 15 minutos). Ciclo de planchado permanente Este ciclo se emplea para prendas de planchado permanente y prendas de tejidos sintéticos. La selección de la duración del lavado dependerá del tipo de tela y de cuán sucia esté la prenda. El ciclo de planchado permanente (PERMANENT PRESS) consta de dos opciones: lavado Normal y ligero (Light). El número que aparece al lado de los ajustes representa la duración de la agitación en minutos. (Por ejemplo, al colocar el temporizador en Normal, la agitación durará nueve minutos). Modelos número LWS02A* y LWS02B* Ciclo de ropa delicada Este ciclo se emplea para prendas delicadas que normalmente se lavan a mano. Se recomienda llenar completamente la tina de agua (incluso para las cargas pequeñas) para que las prendas delicadas puedan moverse libremente. Una mayor cantidad de agua reduce el desgaste de la tela, evita que las prendas se arruguen mucho y deja la ropa limpia. El ciclo delicado (Delicate) consta de dos opciones: Normal y ligero (Light). El número que aparece al lado de este ajuste representa el lapso de tiempo en minutos. (Por ejemplo, al colocar el temporizador en Normal, el ciclo durará nueve minutos, dividido en períodos cortos de agitación y períodos largos de remojo). 39090 (SP) "¦"=p =F d" pz" IMPORTANTE: antes de usar su nueva lavadora, asegúrese de que esté enchufada en un tomacorriente de 120 voltios que tenga la debida conexión a tierra y la polaridad correcta. Asimismo, asegúrese de que las mangueras de la lavadora estén conectadas a los grifos de agua caliente y fría, y que éstos estén abiertos. Cerciórese de que la manguera de drenaje no esté torcida y esté insertada en un desagüe. Remítase a las INSTRUCCIONES DE INSTALACIÓN para obtener más información sobre la instalación correcta de la lavadora. IMPORTANTE: Antes del primer lavado, use un limpiador de uso general o una solución de detergente y agua y un paño húmedo para remover el polvo de la tina de la lavadora acumulado durante su transporte. 1. Prepare la ropa a lavar. Vacíe los bolsillos y los dobleces. Divida las prendas en cargas separadas. Trate previamente las manchas y las partes muy sucias. D305IE1A 2. Mida y agregue el detergente en la tina de lavado. 4. Cierre la compuerta de carga. Si ésta permanece abierta no se iniciará la agitación ni el centrifugado. W318IE0C ADVERTENCIA Para reducir el riesgo de lesiones graves, no anule el interruptor de la compuerta de carga para permitir que la lavadora inicie su ciclo de agitación o centrifugado sin que la compuerta esté bien cerrada. W019S 5. Ajuste las temperaturas de lavado/enjuague (WASH/RINSE). 3. Introduzca la ropa separadamente en la tina de lavado. IMPORTANTE: Mantener el control de tamaño de la carga (nivel de agua) [LOAD SIZE (WATER LEVEL)] en la posición RESET podría ocasionar el desborde de la lavadora. 7. Seleccione el ciclo de acuerdo con el tipo de tela que vaya a lavar. Oprima la perilla del temporizador y hágala girar en el sentido de las agujas del reloj hasta llegar al ciclo y a la duración de lavado que desee. NOTA: La lavadora proporcionará un enjuague con agua fría en todos los ajustes de TEMPERATURA. Un enjuague frío permite ahorrar dinero y electricidad, y evita que las prendas de planchado permanente y prendas de tejidos sintéticos se arruguen en exceso. Las opciones de ahorro de electricidad, marcadas con un punto (•), muestran los ajustes de temperatura que consumen una menor cantidad de electricidad. W395IE0B 6. Ajuste el control de tamaño de la carga (nivel de agua) [LOAD SIZE (WATER LEVEL)]. Coloque dicho control en la posición RESET si la lavadora comienza la agitación pero necesita más agua. 8. Tire de la perilla del temporizador para que la lavadora comience a llenarse de agua. La agitación se iniciará cuando el agua alcance el nivel seleccionado. W383IE0A La lavadora se detendrá (hará una pausa) poco antes del centrifugado del lavado y del enjuague. No gire la perilla del temporizador durante estas pausas ya que forman parte del ciclo. 3 39090 (SP) Fhzpa«"=p Fhpbp Aun cuando los ciclos de la lavadora sean automáticos, se podrá reajustar el temporizador para alargar, acortar o repetir parte de un ciclo. Coloque la perilla del temporizador en el centro de la palabra RINSE (enjuague); esto evitará que comience el centrifugado antes de que la lavadora se llene de agua. Vierta el producto de remojo y coloque la carga en la tina. Tire de la perilla del temporizador para que la lavadora comience a llenarse de agua. Una vez que se haya llenado y comience la agitación, oprima la perilla del temporizador. De esta manera, la lavadora se detendrá. Una vez que la ropa haya quedado en remojo durante el período de tiempo deseado, GIRE LA PERILLA DEL TEMPORIZADOR HACIA EL FINAL DEL AJUSTE DE ENJUAGUE. Seguidamente, tire de la perilla para que comience el centrifugado. Para ajustar o reajustar el temporizador, oprima la perilla para detener la lavadora. Sujete la perilla firmemente mientras la hace girar en el sentido de las agujas del reloj hasta llegar al ajuste deseado. Tire de la perilla para que la lavadora comience a funcionar. ADVERTENCIA: Si no se gira la perilla del temporizador hacia el ciclo de centrifugado y la tina de lavado no se drena completamente después del remojo, la lavadora se desbordará, lo cual podría causar daños a la propiedad. 4 39090 (SP)