1
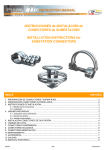
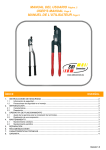
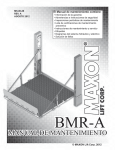
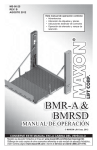
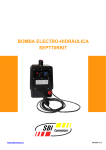
Battery-Crimping & cutting tools
Presses de sertissage électro-hydrauliques et
coupe câbles
Herramientas a compresión de batería y de corte
EDC620CM, EDW570CM, EU1370CM, EC1270CM
& EA50600CM
ENGLISH
Before operating the battery-powered crimping tool the user
must read the operating instructions carefully.
1 Safety
1.1 Designated application 3
1.2 Safefy instructions 3
1.3 Dangers 3
1.4 Sources of danger 3
1.5 In case of an emergency/Protective devices
2 Scope of delivery
3 Charging the accumulator
4 Software Installation and support
5 Important notes/Tool preparation
6 Interrupting the crimping cycle
7 Maintenance/Care/Disposal
8 Troubleshooting
9 Technical data
FRANÇAIS
Avant d’utiliser les presses électro-hydrauliques autonomes, l’utilisateur doit lire
attentivement la notice d’utilisation
1 Sécurité
1.1 Domaine d’application
1.2 Instructions de sécurité
1.3 Dangers
1.4 Précautions
1.5 Dispositifs de protection
2 Composition des kits
3 Charge des batteries4 Installation du logiciel
5 Utilisation de l'outil
6 Interruption d’un cycle de sertissage
7 Maintenance, élimination
8 Défaillances
9 Caractéristiques techniques
ESPAÑOL
El usuario debe leer y entender el manual de instrucciones antes de utilizar la
herramienta de compresión a batería
1 Información de seguridad
1.1 Aplicaciones
1.2 Precauciones de seguridad en el manejo
1.3 Peligros
1.4 Fuentes de peligro
1.5 En caso de emergencia / Dispositivos de protección
2 Entrega
3 Carga del acumulador
4 Instalación del software y soporte
5 Notas importantes / Preparación de la herramienta
6 Interrupción del ciclo de compresión
7 Mantenimiento
8 Problemas
9 Características técnicas
1-Safety
1.1 Designated application
The electro-hydraulic crimping tools «blue expert» are exclusively used for the production of
crimping connectors. The tool is only suitable for manual operation and after a series of approx.
40-50 press cycles, it must be allowed to cool down for about 10 minutes.
Please take the rules and regulations of those countries in which the crimping tool is to be
used, as well as the information in the operating instructions, into account, so that the tool may
be used correctly and safely.
For reason of safety, the battery-powered crimping tool may only be serviced by authorised
specialist workshops. Any unauthorised modifications or the opening of the tool by the user will
lead to a loss of the product liability.
1.2 Safety Instructions
Explanation of the Symbols
Risk of injury and
crushing
Service
Specialist disposal of the battery
Read operating instructions
Reset
1.3 Dangers
All persons that work with this tool or carry out servicing on it must be appropriately instructed
in their work and must read, observe, and understand the operating instructions. Nonobservance of these instructions or faults caused by unqualified staff may lead to damage to
health, incorrect tool usage and damage to the property of others or to the tool.
1.4 Sources of danger
The battery-powered crimping machine itself has a voltage of 14.4 Volts, and the charger is operated
on 230V, 50Hz. Since the battery-powered crimping machine operated with a high pressure, parts of
the body must not be allowed to come into the area of the crimping head or the pressing dies.
The tool: - must not be cleaned when wet
- may only operated using a battery P/N BL1426 or mains power lead P/N CA22005
- must not be used in surroundings where there is a risk of explosion
- must be protected against heat, water, damp and corrosive surroundings.
- must be treated carefully
- must not be thrown
The power cable of the charger must not be used for pulling out the plug and must be protected
against corrosive Liquids, oils and sharp objects.
1.5 In case of an Emergency/Protective devices
In an emergency case, the tool will automatically stop when the operating switch is released.
When the emergency push button at the slide is depressed, the pressure on the hydraulic
cylinder is released in order to retract the ram and to release the crimping dies. The front
protective frame at the handle will protect the hand at the front part of the tool. The typical Aweighted noise level averages not more than 70dB (A). The noise level can over travel 85 dB
(A) during the working process. The weighted effective value of the acceleration averages not
more than 2.5 m/s².
2- Scope of delivery
3-Charging the accumulator
4-Software installation and support
1. 230V/50Hz
Installation instructions of analysis software
1. Connect the tool to your computer by using the Mini-USB-cable. The Mini-USB socket
is located in front of the tool under the black protection cap
1.1 Remove protection cap
1.2 Connect mini-USB cable
2.
2.The new hardware will be installed automatically by Windows 2000, XP or Vista.
3.
3. Insert the CD-Rom in your computer.
4. Copy the file «analysis-software» on your hard disk.
5-Important notes/Tool preparation
Unhook the blockage hook (Pos. 2) and open the head (Pos. 1) of the compression tool.
Place the dies in the head of the tool one at a time, making sure they are correctly placed
in their seat. Next, insert the connector and close the head of the tool.
5. Double click on AS-V2.0.exe to start the software.
6. Analysis-software is ready to use.
Remove battery!
Unhook the blockage hook (Pos. 2) and open
the head (Pos. 1) of the compression tool.
Place the dies in the head of the tool one at a
time, making sure they are correctly placed in
their seat.
Next, insert the connector and close the head of
the tool
6-Interrupting the pressing cycle
7- Maintenance/Care/Disposal
1
The crimping operation is carried out automatically on pressing the black push button on
the handle.
The operation can be interrupted
1. During the compression by releasing the
black push button to stop the ram advance.
2. At any time by firmly pressing of the silver
push button
2.
Having interrupted the crimping operation, the
connection can be pressed once again if dies
have been in contact with the connector.
Check the function
When the device has not been used for a longer period carry out maintenance and care
acc. to pictures on the right page.
8-Trouble shooting
Compression tool
Led
SERVICE
Failure
Reasons/Trouble shooting
After the crimp operation
green
Operating data OK
green/red
Operating data OK and service interval exceeded/ Service
needed
red
Operating data BORDERLINE / Please contact service center
red
Operating data FALSE / Service needed
orange Memory card failure / Service demanded
orange Temperature failure / Tool has to be heated up or cooled down
after inserting the battery
green
No failure
red
Memory card failure / Service demanded
red
Temperature failure / Tool has to be heated up or cooled
down
The failure reports can be downloaded by using the
Analysis Software. Please send the data file with failure
status to your certified Service Center. The tool will be
shut off when Service LED is permanent shining red or
orange. After changing the battery, the working process
can be started again.
Led
BATTERY
Failure
Reasons/Trouble shooting
After pressing cycle
Off
No malfunction
red
Charge/change battery (approx. 10% capacity)
red
Battery flat
after inserting the battery green red
Green
No malfunction
Red
Charge/change battery
green
red
red
off
Battery is fully charged
Battery is defectlve
Battery is too hot or too cold
Battery polarity reversed or the battery circuit is open
9-Technical data
General
Operation temperature range
-20°C - +40°C
Hydraulic oil
abt. 75ml Shell Tellus T15
Conformity
CE
o Fast feed by double piston hydraulics
o Automatic pressure control and Quickstop
o Motor stop and automatic retraction when crimping is complete
o Electronic control and monitoring of the crimping operation
o Manual retraction
o Multifunction electronics with sleep mode for maintenance indicator and attery
control
o Connectable by mini USB interface to ail usual PC systems for service and
control purposes
o Service and control software optionally available
Characteristics
EDW570CM EDC620CM
Crimping Force kN
Crimping time s
Stroke mm
Weight Kg
Reasons/Trouble shooting
Charger connected, ready for operation
Battery is defective
Charging started
60
2a4
17
4.2
120
5 a 10
25
6.4
120
7 a 14
27
6
6 - 150 Hex
6 - 120 DI
10 - 300 Hex
10 - 240 DI
10 - 300
10 - 300
10 - 120
6 - 35
35 - 120
6 - 240
6 - 50
35 - 240
10 - 300
6 - 120
35 - 300
10 - 300
6 - 120
35 - 300
6 - 120
10 - 120
16 - 240
10 - 300
16 - 240
10 - 300
Crimping capacity
Terminals and Splices Cu, Series
YAV – YSV
Terminals and Splices Cu, DIN
46235/46267
C Type Connectors
CFR Bimetallic Connectors
Term. And splices Monometallic
and Bimetallic Deep Indent
Soldered Term. DIN 46234
Charger
Failure
LED left-hand.
red
red
LED right-hand
green
EC1270CM EU1370CM
50
2a4
13
3.8
Characteristics
Cutting force
Max. Cut Diam.
Cu
Al
EA50600CM
60 kN
50 mm
500 mm2
630 mm2
Accumulator
Capacity of Accumulator
Mains voltage of accumulator
Charging time of accumulator
Battery charger
Mains voltage
Connecting lead, length
2.6Ah
14.4V(DC)
abt. 45min
230V, 50Hz
2m
1 Sécurité
1.1 Domaine d’application
Les outils de sertissage électro-hydrauliques « Blue Expert » sont exclusivement destinés
au sertissage de connecteurs électriques. L’outil doit seulement être utilisé pour des
opérations manuelles et après une série d’approximativement 40-50 cycles de sertissage,
il faut le laisser refroidir pendant environ 10 minutes.Merci de respecter les règles et
règlements des pays dans lesquels l’outil de sertissage doit être utilisé, ainsi que les
informations indiquées dans les instructions de mise en œuvre, afin que l’outil puisse être
utilisé correctement et en toute sécurité.Pour des raisons de sécurité, la maintenance de
la presse électro-hydraulique autonome doit être effectuée dans des ateliers spécialisés
autorisés. Une modification non autorisée ou une ouverture de l’outil par l’utilisateur
libèrera le fabricant de sa responsabilité par rapport au produit.
2 Composition des kits
(Voir pag. 4)
3 Charge des batteries
1.2 Instructions de sécurité
Explication des symboles
Risque de blessure
et d’écrasement
Entretien
1.5 Dispositifs de protection
En cas d’urgence, l’outil s’arrêtera automatiquement quand le commutateur est
actionné.Quand le bouton poussoir de secours présent sur le côté est enfoncé, la
pression sur le cylindre hydraulique est libérée afin de rétracter le piston et libérer les
matrices de sertissage.L’armature de protection présente au niveau de la poignée
protègera la main.La moyenne du niveau sonore ne dépasse pas les 70dB (A) – Pendant
l’utilisation, le niveau sonore peut dépasser les 85 dB (A).La valeur mesurée de la
moyenne d’accélération ne dépasse pas les 2,5 m/s².
(Voir pag. 5)
La batterie usagée doit être remise à un
spécialiste du traitement de ce type de déchets
Lire les instructions de mise en œuvre
Réinitialisation
1.3 Dangers
Toutes les personnes qui travaillent avec cet outil ou en effectuent la maintenance
doivent être correctement formés et doivent lire, respecter et comprendre les instructions
de mise en œuvre.Une non-observation de ces instructions ou des défaillances causées
par un personnel non qualifié peut entrainer des dommages à la santé, une utilisation
incorrecte de l’outil et des dommages à l’outil ou à la propriété des autres.
1.4 Précautions
La presse électro-hydraulique autonome a un voltage de 14,4 Volts, et le chargeur
fonctionne sous 230V, 50Hz.Comme la presse électro-hydraulique autonome travaille à
haute pression, ne pas diriger la tête de l’outil en direction de l’opérateur ou d’une autre
personne.
L’outil :
o Ne doit pas être nettoyé lorsqu’il est humide,
o doit être utiliser exclusivement avec la batterie BL1426 ou l’adaptateur secteur
CA22005.
o Doit être utilisé dans des endroits ou il n’y a pas de risque d’explosion.
o Doit être protégé contre la chaleur, l’eau, l’humidité et les endroits corrosifs.
o Doit être manipulé avec précaution
o Ne doit pas être jeté.
Le câble du chargeur ne doit pas être utilisé pour extraire la prise et doit être protégé
contre les liquides corrosifs, les huiles et les objets tranchants.
4 Installation du logiciel
Instructions d’installation du matériel USB et du logiciel d’analyse.
1. Connecter l’outil à votre ordinateur en utilisant le mini-câble USB. L’entrée du port USB
est située à l’avant de l’outil sous le cache de protection noir.
1.1 Enlever le cache.1.2 Connecter le mini-câble USB.2 Le nouveau matériel sera installé
automatiquement par Windows 2000, XP ou Vista.3 Insérer le Cd-rom dans votre
ordinateur.
4 Copier le fichier « logiciel d’analyse » sur votre disque dur.5 Double-cliquer sur ASV2.0exe pour démarrer le logiciel.6 Le logiciel d’analyse est prêt pour utilisation
(Voir pag. 6)
5 Utilisation de l’outil
Enlever la batterie !Déverrouiller la clenche (Rep. 2) et ouvrir la crosse (Rep.1) de la
presse.Placer les matrices dans la tête de l’outil l’une après l’autre en vous assurant
qu’elles sont correctement positionnées et verrouillées.
Positionner ensuite le connecteur à sertir entre les matrices.
(Voir pag. 7)
6 Interruption d’un cycle de sertissage
L’opération de sertissage est réalisée automatiquement en pressant sur la gâchette noire
située sur la poignée.L’opération peut être interrompue :Pendant le sertissage en
relâchant la gâchette noire pour arrêter pour arrêter la course du piston.A n’importe quel
moment en appuyant fermement sur la gâchette grise.Malgré l’interruption de l’opération
de sertissage, le connecteur peut à nouveau être serti si les matrices n’ont pas été en
contact avec celui-ci.
(Voir pag. 8)
7 Maintenance, élimination
Vérifier régulièrement le fonctionnement de la presse.Lorsque le matériel n’a pas été
utilisé depuis longtemps, procéder aux opérations de maintenance et respecter les
instructions illustrées ci-après. (Voir pag. 9)
8 Défaillances
Outil de compression
Voyant d’entretien
Raisons / DéfaillancesDéfaillance
Après sertissage
Vert
Données de fonctionnement OK
Vert / rouge Données de fonctionnement OK et entretien interne dépassé /
besoin d’un entretien.
Rouge Limite du nombre de cycle avant maintenance / Veuillez contacter le
service après-vente
Données de fonctionnement non-conformes / presse défectueuse /
maintenance nécessaire
Orange Echec carte mémoire / Besoin d’un contrôle
Orange Problème de température / l’outil doit être réchauffé ou refroidi.
Après insertion de la batterie
Vert
Correct
Rouge Echec carte mémoire / Besoin d’un contrôle / vérification.
Rouge Problème de température / L’outil doit être réchauffé ou refroidi.
Les rapports d’erreurs peuvent être téléchargés avec le logiciel
d’analyse.
L’outil devra être éteint si la lumière du voyant reste en
permanence rouge ou orange. Après changement de la batterie,
le travail peut reprendre.
Voyant de la batterie
Défaillance
Raisons / Défaillances
Après un cycle de sertissage
Eteint Correct
Rouge Charger / Changer la batterie (environ 10% de capacité)
---------- Rouge Batterie déchargée
Après insertion de la batterie
Vert
Correct
Rouge Charger / Changer la batterie
Chargeur
Défaillance
Raisons / Défaillances
Voyant de gauche
Rouge Chargeur branché, prêt pour utilisation
Rouge
Voyant de droite
Vert
Vert
Rouge
Rouge
Eteint
Batterie défectueuse
Début du chargement
Batterie complètement chargée
Batterie défectueuse
Batterie trop chaude ou trop froide
Polarité de la batterie inversée ou circuit de la batterie ouvert.
9 Caractéristiques techniques
Caractéristiques générales :
Température d’utilisation :
-20° C à +40° C
Huile hydraulique :
abt. 75ml Shell Tellus T15
Outil conforme aux normes
CE
o Avance rapide par double-pistons hydrauliques.
o Contrôle automatique de la pression.
o Arrêt instantané.
o Arrêt du moteur et rétraction automatique quand le sertissage est terminé.
o Contrôle électronique et contrôle de l’opération de sertissage.
o Rétractation manuelle.
o Multifonctions électroniques avec mode veille pour les indicateurs de
maintenance et contrôle de la batterie.
o Raccordement par mini-port USB à tous les systèmes informatiques de
maintenance et de contrôle.
o Logiciel de maintenance et de contrôle.
Caractéristiques
Force de sertissage kN
Dureé de sertissage s
Course maximale mm
Peso Kg
EDW570CM EDC620CM
EC1270CM EU1370CM
50
2a4
13
3.8
60
2a4
17
4.2
120
5 a 10
25
6.4
120
7 a 14
27
6
6 - 150 Hex
6 - 120 PP
10 - 300 Hex
10 - 240 PP
10 - 300
10 - 300
10 - 120
6 - 35
35 - 120
6 - 240
6 - 50
35 - 240
10 - 300
6 - 120
35 - 300
10 - 300
6 - 120
35 - 300
6 - 120
10 - 120
16 - 240
10 - 300
16 - 240
10 - 300
Capacité de sertissage
Cosses et manchons de Cu,
Series YAV – YSV
Cosses et manchons de Cu
según DIN 46235/46267
Connecteurs type C
Cosses Al - Cu série CFR
Cosses et manchons Mono. et Al
- Cu PP
Cosses brasées série DIN 46234
Caractéristiques
Force
Diam. Max
Cu
Al
EA50600CM
60 kN
50 mm
500 mm2
630 mm2
Batterie :
Capacité :
Tension d‘alimentation :
Durée de chargement :
Chargeur de la batterie :
Tension d‘alimentation:
Longueur du fil de raccordement :
2.6Ah
14.4V(DC)
environ 45 mn
230V, 50HZ
2m
1 Seguridad
1.1 Aplicaciones
La familia de herramientas de compresión electro-hidráulicas “Blue Expert” están
exclusivamente diseñadas para realizar compresiones con conectores.
Es aconsejable utilizar la herramienta solamente para operaciones manuales,
transcurridas series de compresión de aproximadamente 40-50 ciclos debe dejarse
enfriar la herramienta 10 minutos.
Seguir las normas y reglas especificadas por aquellos países donde se utilice la
herramienta. Tener en cuenta la información de las instrucciones de operación para la
correcta y segura utilización de la herramienta. Utilizar solamente esta herramienta de
acuerdo con las especificaciones de este manual, cualquier otra aplicación diferente a la
especificada en este manual puede causar lesiones serias.
Por razones de seguridad, la herramienta de compresión a batería solamente se
suministrará por personal especializado y autorizado en talleres específicos. Cualquier
modificación no autorizada o manipulación de la herramienta por parte del usuario
comportará la pérdida de la garantía de la herramienta.
La herramienta trabaja con presiones elevadas. No se permite acercar las partes del
cuerpo en la zona próxima al área del cabezal de compresión o de las matrices de
compresión.
Se recomienda seguir los siguientes consejos:
No limpiar la herramienta si está húmeda
Solamente utilizar la herramienta utilizando la batería P/N BL1426 o carga de
alimentación P/N CA22005
La herramienta no debe estar en ambientes con riesgos de explosión.
La herramienta debe estar protegida contra ambientes calurosos, húmedos,
corrosivos y agua.
Debe manipularse con cuidado.
No debe tirarse.
El cable de alimentación del cargador no debe extraerse del enchufe y debe protegerse
contra líquidos corrosivos, aceites y objetos punzantes.
1.5 En caso de emergencia / Dispositivo de protección
En caso de emergencia, la herramienta se parará automáticamente cuando se libera el
botón de compresión del mango.
Cuando se suelta el botón de emergencia se libera la presión del cilíndrico hidráulico,
entonces se repliega el pistón y las matrices de compresión.
La empuñadura del mango protege la mano y la parte frontal de la herramienta.
La media de ruido en ponderación A (dBA) no supera los 70 dB(A). El nivel de ruido tiene
un recorrido de hasta 85 dB(A) durante el proceso de trabajo.
El valor de la ponderación efectiva media de aceleración no supera los 2.5 m/s2.
2 Material entregado
1.2 Precauciones de seguridad en el manejo
Explicación de los símbolos.
Riesgo de lesión y
aplastamiento
Servicio
Eliminación especial de residuos
eléctricos
Leer las instrucciones de
manipulación
(Ver Pág. 4)
3 Carga de las baterías
(Ver Pág. 5)
Reiniciación
1.3 Peligros
Todas las personas que trabajan con esta herramienta o realizan servicios de reparación
deben estar correctamente formados y deben leer, observar y entender las instrucciones
de manejo.
La no-observación de estas instrucciones o faltas causadas por personal no-cualificado
puede resultar en daños en la salud, utilización incorrecta de la herramienta y daños en
la propiedad de otros o de la propia herramienta.
1.4 Fuentes de peligro
La herramienta de compresión a batería trabaja a 14.4 VDC, y el cargador a 230 VAC, 50
Hz.
4 Instalación Software y Soporte
Instrucciones de instalación del software de análisis
1 Conectar la herramienta al ordenador mediante el cable mini-USB. El conector miniUSB está situado en la parte frontal de la herramienta debajo la tapa de color negro de
protección.
1.1 Quitar la tapa de protección
1.2 Conectar el cable mini-USB
2 El nuevo hardware se instalará automáticamente por Windows 2000, XP o VISTA
3 Insertar el CD ROM en el ordenador
4 Copiar el archivo “analysis-software” en el disco duro del ordenador.
5 Ejecutar el archivo AS-V2.0.exe (mediante doble click con el ratón) para iniciar el
software.
6 El software de análisis está listo para utilizarse.
(Ver pág. 6).
5 Notas Importantes / Preparación de la
herramienta
Quitar la batería!
Desbloquear el pasador de bloqueo (Pos. 2) y abrir el cabezal de la herramienta de
compresión (Pos. 1).
Instalar las matrices en el cabezal de la herramienta y asegurarse de que están
correctamente instaladas.
Seguidamente cerrar el cabezal de la herramienta.
(Ver Pág. 8)
6 Interrupción del ciclo de compresión
La operación de compresión se realiza automáticamente pulsando el botón de
compresión de color negro del mango. La operación se puede interrumpir.
1 El proceso de compresión se puede detener en cualquier instante; soltar el botón de
compresión de color negro del mango y se detendrá el avance del pistón.
2 En cualquier instante presionar firmemente el botón plateado
Una vez interrumpido el proceso de compresión, se podrá volver a reanudar otra vez si
las matrices han estado en contacto con el conector.
(Ver Pág. 9)
7 Mantenimiento
Comprobar la función
Cuando el dispositivo no se ha usado durante un largo período de tiempo realizar
entonces el mantenimiento y cuidado tal y como se muestra en las imágenes de la
página.
(Ver Pág. 10)
8 Problemas
Herramienta de compresión
Led de Servicio
Fallo
Motivo/ Solución
Después de la operación de compresión
Verde Datos de la operación OK
Verde/rojo
Datos de la operación OK y período de mantenimiento
superado/ Mantenimiento requerido
Rojo
Datos de la operación en la zona límite / Contactar con el servicio de
mantenimiento
Rojo
Datos de la operación falsos / Contactar con el servicio de reparación
Naranja Error en la tarjeta de memoria / Contactar con el servicio de reparación
Naranja Fallo de temperatura / La herramienta debe calentarse o enfriarse
Después de instalar la batería
Verde Sin fallos
Rojo
Error en la tarjeta de memoria / Contactar con el servicio de
mantenimiento
Rojo
Error de temperatura / La herramienta debe calentarse o enfriarse
Los informes de error se pueden descargar con el Software de
Análisis.
La herramienta se apagará cuando el led de servicio está
encendido permanentemente en rojo o naranja.
Después de cambiar la batería el proceso de trabajo puede
reanudarse de nuevo.
Led de batería
Fallo
Motivo/ Solución
Después de un ciclo de compresión
Apagado
Funcionamiento correcto
Rojo
Carga / Cargar batería (aproximadamente 10% de su capacidad)
Rojo
Batería apagada
Después de instalar la batería
Verde Funcionamiento correcto
Rojo
Rojo/Cargar batería
Cargador
Fallo
Motivo/ Solución
Led izquierdo
Rojo
Cargador conectado, preparado para la operación
Rojo
Batería defectuosa
Led derecho
Verde
Verde
Rojo
Carga iniciada
Batería completamente cargada
Batería defectuosa
Rojo
Apagado
Batería demasiado caliente o fría
Polaridad de la batería invertida o circuito de la batería abierto.
9 Características técnicas
General
Rango de temperatura de funcionamiento
-20ºC - +40ºC
Aceite hidráulico
abt. 75 ml. Shell Tellus T15
Conformidad
CE
o Movimiento de avance rápido mediante doble pistón hidráulico
o Control automático de presión
o Paro rápido
o Paro del motor y retracción automática del pistón cuando el ciclo de compresión
se ha completado
o Control y monitorización electrónica de la operación de compresión
o Retracción manual
o Multifunción electrónica con el modo “sleep” para el indicador de mantenimiento
y el control de batería
o Conexión mediante interfaz mini-USB a todos los ordenadores para servicios de
mantenimiento y control.
o Software de servicio y control disponibles opcionalmente
Características
EDW570CM EDC620CM
Fuerza Compresión kN
Tiempo de compresión s
Recorrido mm
Peso Kg
C. Albert Einstein 5 – 7, Polígono Industrial Sesrovires
08635 Sant Esteve Sesrovires.
(BARCELONA)
www.sbiconnect.es
[email protected]
EC1270CM EU1370CM
50
2a4
13
3.8
60
2a4
17
4.2
120
5 a 10
25
6.4
120
7 a 14
27
6
6 - 150 Hex
6 - 120 PP
10 - 300 Hex
10 - 240 PP
10 - 300
10 - 300
10 - 120
6 - 35
35 - 120
6 - 240
6 - 50
35 - 240
10 - 300
6 - 120
35 - 300
10 - 300
6 - 120
35 - 300
6 - 120
10 - 120
16 - 240
10 - 300
16 - 240
10 - 300
Capacidad de compresión
Terminales y Manguitos de Cu,
Series YAV - YSV
Terminales y Manguitos de Cu
según DIN 46235/46267
Conectores tipo C
Term. Bimetálicos serie CFR
Term. Y manguitos
Monometálicos y Bimetálicos PP
Term. Soldados serie DIN 46234
Características
Fuerza de corte
Max. Diam
Cu
Al
EA50600CM
60 kN
50 mm
2
500 mm
630 mm2
Cargador de Batería
Capacidad del acumulador
Tensión de alimentación del acumulador
Tiempo de carga del acumulador
Carga de la batería
Tensión de alimentación
Carga de conexión, longitud
2.6 Ah
14.4 V(DC)
Aprox. 45 min.
230 V, 50 Hz.
2m