1
THESE INSTRUCTIONS ARE TO BE USED ONLY FOR:
MODEL PL835
MANUALS FOR OTHER MODELS CAN BE FOUND AT WWW.SOURCEONEOPE.COM
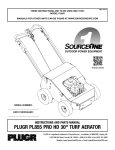
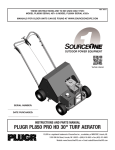
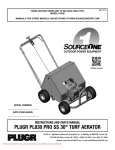
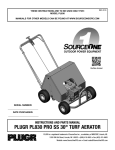
PLUGR PL835 PRO SS 30" TURF AERATOR MANUAL
To remove access cover: Remove cover release rubber latches.
ASSEMBLY INSTRUCTIONS
Reverse procedure to replace cover.
Handle: Remove cover from machine; remove two bolts from
bottom of handle. Slide the handle into square receptacles in frame
with retractor lever facing up and clutch engagement bail facing
down. Insert bolts through handle mount and holes in handle,
making sure bolts are inserted from the bottom up. The hex heads
on these two bolts needs to fit into the hex hole on the bottom of the
handle mounts. Tighten nylon nuts.
Retractor Cable: Solid wire cable with identical ends attaches to
black retractor plate with 1/4” x 1 1/2” bolt and lock nut. This is
installed at the factory. The other end is placed on the center
handle lever. Install cable and place the clevis pin and cotter pin key
back in position.
Clutch Cable: Insert clutch cable control knob into clutch bail lever
pivot then slide cable retainer into cable mount bracket and tighten
top jamb nut down on bracket sandwiching it between both nuts
and tighten. Preliminary adjustment should be within tolerance from
factory. If adjustments are needed for belt tension, loosen lock nut
on control knob and turn knob accordingly. One or two rotations
should be sufficient.
Engine: Engine and gear case are factory filled with high quality
detergent SAE 30 oil, (SE, SF, or SG). Check level prior to operation.
Please refer to the engine manual or call the engine manufacturer at
the phone number listed in the engine instructions if there are any
questions regarding the engine. NOTE: GASOLINE CAN BE
HAZARDOUS. HANDLE GASOLINE CAREFULLY AT ALL TIMES! USE
LEAD FREE GASOLINE WITHOUT OIL MIXED IN.
OPERATING INSTRUCTIONS
CAUTION! KEEP FINGERS FROM BEING PINCHED UNDER THE
MOVING HAND LEVERS DURING ENGAGEMENT.
Bottom lever: This lever engages the drive belt idler. Pull it up to
engage. This lever must be held up for machine operation. When
released, forward motion will stop. If the lever fails to spring down
when released, contact the manufacturer immediately for
adjustment instructions as this is a safety feature.
Center lever: This lever swings the plugr mechanism forward into
the operating position. Release handle and allow lever to move
forward. It will automatically pull itself into operating position.
To aerate: Release the center lever and allow tines to move
forward. Pull the bottom lever up and hold. Do not push machine
while operating. The holes will be deeper if you allow the PLUGR to
pull itself forward as the tines penetrate the soil.
To stop PLUGR: Release the bottom lever. It will automatically
spring down to disengage belt idler. Pull the center lever back to
lock. SHUT OFF ENGINE if not continuing.
To operate in cold temperatures: Engage tines in "up" position for
at least two minutes prior to actual aeration to warm cam grease.
MAINTENANCE INSTRUCTIONS
Journal bearings: Grease journal bearing on the zerks provided
every 10 hours of operation. We recommend Almagard® #3752
Grease from Lubrication Engineers®, Inc. Check for wear
periodically.
Shaft bearings: Grease both crank shaft ball bearings on the
zerks provided every 100 hours of operation.
Wheel bearings: Grease wheel ball bearings on the zerks
provided every 100 hours of operation..
Engine oil/filter: See engine manufacturer’s instructions. Change
oil and filter at least once a season per engine manual.
V-Belt: Adjust V-belt tightness with adjustment holes in pivoting
clutch bracket. It should only be necessary to move to the next
hole. Do not over tighten V-belt. This puts a load on the engine
gear box bearings. The belt is tight enough when it does not slip
during the operating cycle.
Tines (threaded type): These are adjustable by only the thickness
of the jam nut approximately 1/4" and the openings should face the
rear of the PLUGR. They are replaceable by loosening the jam lock
nut and unscrewing the tine. All threads are right hand. Install the
tine with the jam lock nut on the tine and use maximum threads
inserted into the tine casting. Tighten jam lock nut against the tine
casting.
Decals: All safety decals are available for replacement at no cost.
Do not operate without all warning labels clearly readable.
SPECIFICATIONS
Machine Width
30"
Aeration Width Per Pass
30"
Hole Centers
2.6" x 7.5"
Hole Depth (Up to)
2.75"
Plug Diameter
5/8"
Approx. Sq. Ft. Per Hour (Up to) 37,500
Shipping Weight
324 lbs.
Actual Machine Weight
274 lbs.
Tire
10"
Belt Drive Clutch
Double V-type
Nylatron Cam Bearings