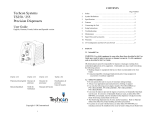
1
Items
1
Description
Power Button
Items
6
Description
Air pressure regulator knob
2
Mode Button
7
Footswitch
3
Set Button
8
Pneumatic Valve (not included)
4
LCD Display
9
Fluid Reservoir (not included)
5
Power Adapter
10
Air Filter
5.1.5 Teach Mode Setting
In the teach mode, the dispense time will be accumulated as long as the
foot switch is depressed. This is helpful in determining required dispense
time when dispense output is unknown.
1. Push the Mode button (2) to select “INTERRUPT”.
2. Press and hold the Set button (3) to enter the teach mode. The time will
show “0.000” in the LCD.
3. Press and hold down Foot switch. Dispense time will be accumulated.
4. Release Foot Switch when desired amount of fluid is dispensed.
5. Press and hold the Set button (3) for two seconds to save the data.
6. Press the Mode button (2) to switch the “TIMED MODE” mode.
7. The dispenser is now set to repeat this timed cycle.
5.1.1 Connecting The Unit: (Refer to Figure 2.0)
1. Connect the power cord, foot switch and air hose to the back of the unit.
Make sure the air inlet pressure is 70 psi (4.8 bar) or higher.
2. Press the Power button (1) to turn on the unit.
3. Connect Valve air hose to Port A.
NOTE: Pressure in Port A can be monitored by the low pressure setting
but is not regulated by the air regulator in the unit. It delivers the same
pressure as the inlet pressure. On the other hand, pressure in Port B is
regulated but it is not linked to the low pressure setting.
4. Press the Mode (2) and Set button (3) simultaneously until “VALVE”
appears on the top right hand corner of the Display as shown in Figure 3.0
Program # Cycle Mode
5.2 TO CONTROL SPRAY VALVE
CAUTION: A 5-micron filter (TSD800-6) must be installed with the unit to ensure proper
air filtration.
TO AIR SOURCE
10
Control Type
P1
Dispense
Time
TIMED MODE VALVE
1
0.100S
A: 70 PSI
B: 70 PSI
Counter
Valve Pressure Port
Pressure Port B
Regulated
8
5
Figure 3.0
5.1.2
1.
2.
3.
4
Program selection
Press the Set button (3) to highlight the program number selection.
Press the (+) or (-) buttons to select desired program.
Press the Set button (3) to exit.
7
6
5.1.3 Manual/Purge Dispense Cycle Setting:
1. Press the Mode button (2) until “PURGE” appears on the Display.
2. Press and hold the Foot Switch to activate dispense cycle.
5.1.4 Automatic Dispense Cycle Setting:
1. Push the Mode button (2) to select “TIMED MODE” or “INTERRUPT”.
2. Press and hold the Set button (3) for two seconds to enter set up screen.
The last digit of the dispense time will be highlighted.
3. Press the Set button (3) to move the cursor to the next position.
4. Press the (+) or (-) button to set the time
5. Press and hold the Set button (3) for two seconds to save the data.
6. If the unit is in “TIMED MODE” mode, press and release the Foot Switch
to activate the timed dispense cycle.
7. If the unit is in “INTERRUPT”, press and hold the Foot Switch until the
dispense cycle is completed. The dispense cycle can be disrupted if the
Foot Switch is released and resumed when the Foot Switch is depressed
again.
5
9
1
2
3
Figure 4.0
Items
1
Description
Power Button
Items
6
Description
Air pressure regulator knob
2
Mode Button
7
Foot Switch
3
Set Button
8
Pneumatic Valve (not included)
4
LCD Display
9
Fluid Reservoir (not included)
5
Power Adapter
10
Air Filter
6