1
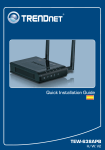
Guía de instalación rápida
TEW-638APB
3.01
Table of Contents
Español
1. Antes de iniciar
2. Instalación del Hardware
1
1
2
Troubleshooting
8
Version 04.20.2011
1. Antes de iniciar
Contenidos del paquete
ŸTEW-638APB
ŸGuía de instalación rápida multilingüe
ŸCD-ROM (herramienta y guía del usuario)
ŸAdaptador de alimentación (12V DC, 0.5A)
ŸCable de red (0.6mts / 2pies)
Requisitos del sistema
ŸUn navegador Web como Internet Explorer (6 o super), Firefox 2.0 (ó superior),
Opera, Chrome, Safari
ŸUn ordenador con adaptador de red o un adaptador inalámbrico instalado
correctamente
ŸEnrutador con un puerto para redes LAN
ŸUn servidor DHCP disponible, los enrutadores tienen por lo general un servidor
DHCP integrado
1
2. Instalación del Hardware
Nota:
1. Busque una localización óptima para el Punto de Acceso. El mejor lugar para el
Punto de Acceso se encuentra normalmente en el centro de su red inalámbrica.
2. Deshabilite cualquier programa antivirus o firewall (cortafuegos) antes de empezar la
instalación de hardware.
Para usuarios de Windows
1. Introduzca el CD-ROM del de la herramienta
en la unidad de CD-ROM de su PC.
2. Haga clic en Run Setup.exe.
(Windows 7/Vista).
3. Haga clic en Setup Wizard
(Asistente de configuración).
4. Haga clic en I accept the terms in the license
agreement (Acepto los términos de este
acuerdo de licencia), y haga clic en Next
(Siguiente).
2
5. Conecte el cable RJ45 suministrado desde el
puerto LAN de su enrutador a un puerto LAN
del TEW-638APB. Luego, haga clic en Next
(Siguiente).
6. Conecte un cable RJ-45 desde el puerto LAN
de su enrutador al puerto Ethernet de su PC.
7. Conecte el adaptador de alimentación al punto
de acceso y luego a una toma de corriente.
Luego haga clic en Next (Siguiente).
8. Seleccione el TEW-638APB de la lista y, a
continuación, haga clic en Configure
(configurar).
9. Escriba la contraseña y entonces haga clic en
Login (Conectarse). La contraseña
predeterminada es admin.
3
10. Seleccione un Punto de acceso y luego haga
clic en Next (Siguiente)
Nota: Para la configuración de Cliente AP,
consulte la Guía del usuario para
instrucciones paso a paso. Puede encontrar
la Guía del usuario en el CD-ROM de este
producto.
11. Seleccione Dynamic IP Address
Configuration (Configurar dirección IP
dinámica) y luego haga clic en Configure
(Configurar).
12. Seleccione Manual Setup (Configuración
manual) y después haga clic en Next
(siguiente).
13. Introduzca un SSID y haga en Next
(siguiente). El SSID predeterminado es
TRENDnet638. El SSID es el nombre de la
red inalámbrica de su red inalámbrica (por
ejemplo, enrutador inalámbrico o punto de
acceso). Introduzca un único SSID. Elija algo
que pueda identificar con facilidad cuando
busque una red inalámbrica disponible
4
14. Seleccione el Modo inalámbrico (Wireless
Mode) deseado y después pulse Next
(Siguiente).
15. Seleccione un modo de seguridad y, a
continuación, haga clic en Next.
Nota:
1. Para proteger su red de cualquier acceso no autorizado se le recomienda habilitar la
encriptación inalámbrica
2. Los ejemplos que se muestran a continuación son para la seguridad WPA2-PSK
(AES). Si selecciona WPA-PSK o WPA2-PSK, compruebe que sus adaptadores
inalámbricos son compatibles con WPA o WPA2. Si sus adaptadores inalámbricos no
son compatibles con WPA o WPA2, entonces seleccione WEP.
3. El cifrado WEP es compatible únicamente velocidades de hasta 54Mbps con
802.11b/g.
4. Tan pronto se active la encriptación en el enrutador, cada PC y dispositivo
inalámbrico deberá configurarse con la misma clave de encriptación.
16. Seleccione el modo WPA deseado, luego
introduzca los caracteres de la clave
precompartida y después haga clic en Next
(Siguiente). Para WPA-PSK o WPA2-PSK, la
clave precompartida debe tener entre 8 y 63
caracteres ASCII o 64 caracteres HEX.
Asegúrese de copiar la clave precompartida.
Usted necesitará la clave pre compartida
cuando configure su adaptador inalámbrico.
5
17. Haga clic en Save (opcional). Esto guarda los
parámetros de configuración en un archivo,
que puede volver a subir cuando sea
necesario.
18. Asígnele un nombre al fichero y, después,
haga clic en Save (guardar) (opcional)
19. Haga clic en Configure (configurar). para
aplicar las configuraciones.
20. Haga clic en Exit.
6
21. Haga clic en Yes (Sí) para salir.
22. Conecte la antena desmontable de 2dBi al
TEW-638APB.
Nota: Para conectar una computadora inalámbrica a la unidad TEW-638APB, por favor
refiérase a la primera pregunta en la sección de solución de problemas
La configuración inalámbrica ha finalizado
Para obtener información más detallada sobre la configuración y las opciones de
configuración avanzadas de la TEW-638APB, por favor consulte la sección de resolución de
problemas en el CD-ROM de la Guía del Usuario, o el sitio Web de TRENDnet en
http://www.trendnet.com.
Registre su producto
Para asegurar los más altos niveles de servicio y apoyo al cliente, registre su producto
en línea en: www.trendnet.com/register
Gracias por elegir TRENDnet
7
Troubleshooting
1. All the settings are correct, but I can not make a wireless connection to the
Access Point.
1. Double check that the wireless LED on the Access Point is lit.
2. Power cycle the Access Point. Unplug the power to the Access Point. Wait 15
seconds, then plug the power back in.
3. Contact the manufacturer of your wireless network adapter. Make sure the
wireless network adapter is configured with the proper SSID. The default SSID
of the Access Point is TRENDnet638. If you have enabled any encryption on
the Access Point, make sure to configure the wireless network adapter with the
same Pre-shared key.
2. I have a wireless adapter that supports WiFi Protected Setup (WPS) push
button setup. How do I setup WPS between the TEW-638APB and my wireless
adapter?
1. Press on the WPS button on the front of the TEW-638APB for 10 seconds.
2. Refer to your wireless adapters for instructions on setting up WPS.
3. I inserted the Utility CD-ROM into my computer's CD-ROM Drive but the
installation menu does not appear automatically. What should I do
1. For Windows 7, if the installation menu does not appear automatically, click on
the Windows Icon on the bottom left hand corner of the screen,, click the
“Search programs and files” box, and type D:\autorun.exe, where “D” in
“D:\autorun.exe” is the letter assigned to your CD-ROM Drive, and then press
the ENTER key on your keyboard
2. For Windows Vista, if the installation menu does not appear automatically, click
on the Windows Icon on the bottom left hand corner of the screen, click on the
“Start Searc”h box, and type D:\autorun.exe, where “D” in “D:\autorun.exe” is the
letter assigned to your CD-ROM Drive, and then press the ENTER key on your
keyboard.
3. For Windows XP/2000 if the window does not appear automatically, click Start,
click Run and type D:\autorun.exe where “D” in “D:\autorun.exe” is the letter
assigned to your CD-ROM Drive, and then press the ENTER key on your
keyboard.
4. I do not have a DHCP server or DHCP is disabled on my network and I am
unable to configure the TEW-638APB. What should I do?
1. Go to the TCP/IP settings on your computer and assign a static IP address on
your computer's network adapter in the subnet of 192.168.10.x. Since the
default IP address of the TEW-638APB is 192.168.10.100, do not assign a static
IP address of 192.168.10.100 on your computer's network adapter.
2. Open Internet Explorer and enter http://192.168.10.100 into the address bar.
8
5. I followed the Quick Installation Guide and setup a new password. When I log
in to the browser configuration an access error message appears. What should I
do?
If the password was changed and you don't remember it, you need to reset the
TEW-638APB. To reset the TEW-638APB, power up the unit and wait 30 seconds
for the unit to boot up. Then take a pin or paper clip and press the reset button for
15 seconds, then let go. The reset button is located on the bottom of the
TEW-638APB. Please note that performing a reset on the TEW-638APB will erase
all settings applied and will revert back to default settings. The default user name
is admin and the default password is admin. When you log in to the browser
configuration for the first time, make sure to enter admin for user name. Do not
leave the user name field blank.
6. How do I configure AP Client mode on the TEW-638APB?
Please refer to the User Guide. The User Guide is on the provided CD-ROM.
If you still encounter problems or have any questions regarding the TEW-638APB,
please contact TRENDnet's Technical Support Department.
LED/Button
Color
Sequence
Definition
PWR (Power) LED
Green
N/A
Solid
Off
Device is on
Device is off
LAN port connected at 10/20 Mbps or 100/200Mbps
(Half/Full Duplex)
Solid
Network Port
Link/Act LEDs
Wireless LED
WPS LED
Power Switch
(EU Version only)
Reset Button
WPS Button
Green
N/A
Off
LAN port data transmitting/receiving 10/20Mbps
or 100/200Mbps (Half/Full Duplex)
LAN port is disconnected/No Ethernet Link
Green
Blinking
Wireless LAN is on or enabled/Wireless data transmission
N/A
Off
Wireless LAN is off or disabled
Solid
WPS authentication process complete
Blinking
Blinking
Green
N/A
Off
WPS authentication in process
WPS is not activated or disabled
N/A
N/A
Turns on/off power to the TEW-638APB
N/A
N/A
N/A
N/A
Hold 10 seconds to reset device to factory defaults.
Hold 10 seconds to activate WPS
If you still encounter problems or have any questions regarding the TEW-638APB,
please contact TRENDnet's Technical Support Department.
9
Copyright ©2011. All Rights Reserved. TRENDnet.