1
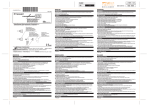
soficNoticeUltra-partB-03-2010_Mise en page 1 09/03/10 15:01 Page1 Poignée stérile à usage unique pour dispositif d’injection sécurisé Sterile single use handle for protective injection device Empuñadura estéril de un solo uso para dispositivo de inyección asegurada Steriles Handstück zum Einmalgebrauch für den gesicherten Injektions-Mechanismus Manico sterile monouso per dispositivi di iniezione sicuri SEPTODONT Louisville, CO, 80027 Steriele handgreep voor eenmalig gebruik voor beveiligd injectieapparaat SEPTODONT Cambridge, ON N1R 6X3, CANADA Sterylne, jednorazowe uchwyty do urzdzenia do sterylnej iniekcji z osłon zabezpieczajc PROPPAUSPSTERB/03/10-V1 Sterilt handtag för engångsbruk för skyddad injektionsspruta 05 98 158 15 00 soficNoticeUltra-partB-03-2010_Mise en page 1 09/03/10 15:01 Page3 soficNoticeUltra-partB-03-2010_Mise en page 1 09/03/10 15:01 Page5 SV ANVÄNDNINGSINSTRUKTIONER Delen B (handtag) skall monteras på del A (nål). Detta handtag har speciellt formgetts för användning med den sterila anordningen för engångsbruk Ultra Safety Plus (Part A), för att garantera en maximal säkerhetsnivå för den praktiserande läkaren och dennes medarbetare mot risken för ett oavsiktligt stick och korskontaminering. KÄNNETECKEN: - Ergonomisk form och lätt användning. - Låssystem på huvuddelen av injektionssprutan Ultra Safety Plus Part A. - Möjlig passiv och aktiv sugning. - Används med patronerna 1,7 ml, 1,8 ml eller 2,2 ml. BRUKSANVISNING Steg 1 : För in patronen i den cylindriska delen på anordningen Ultra Safety Plus Part A. Steg 2 : ta upp handtagets kolv genom att placera tummen bakom vingen på fingerhållaren. För in handtagets ända i den cylindriska delen på injektionssprutan del A, bakom patronen. Steg 3 : låt sedan nålens skyddsfodral glida mot handtaget tills det klickar på plats (detta ljud betyder att fodralet har nått handtaget och att systemet är låst). Steg 4 : utför injektionen. Passiv sugning: injektionssystemet har en lätt utbuktning av plast vid den nedre delen, på sidan av nålens bakre spets (del av nålen som tränger in i patronens membran vid införandet). I början av injektionen utövar denna utbuktning ett tryck på membranet, följt av ett lågtryck då den släpps. Sugningen görs nu. Aktiv sugning: görs genom att dra handtagets kolv. Tummen skall placeras i ringen bak på handtaget. En genomskinlig plastring på kolvens ända garanterar en täthet som medför en förflyttning av patronens kolv. För att garantera en optimal sugning, rekommenderas det att först dra ut minst en mängd på 0,25 ml till 0,35 ml vätska från patronen. Steg 5 : efter injektionen, håll i fingerhållarens vinge och låt skyddsfodralet glida på sprutans cylindriska del till den första positio- FR nen. Håll i sprutans huvuddel med en hand och låt fodralet glida med den andra handen tills det låses på plats. Nu kan injektionssprutan (del A + del B) kastas i all säkerhet. För att ta bort handtaget, håll i den cylindriska delen med en hand och placera ett finger med den andra handen i ringen på handtaget och dra tills kolven helt dragits in. Efter att kolven dragits in helt, ta bort handtaget i ett drag. Skaffa bort injektionssprutan i en uppsamlingsanordning för spetsiga eller vassa föremål. Kasta handtaget i en påse för medicinskt avfall eller i en annan uppsamlingsanordning i enlighet med gällande bestämmelser i landet där den används. VARNING: 1) Denna produkt är skapad för engångsanvåndning. All återanvändning innebär risker för användarens och patientens säkerhet. - får ej återsteriliseras. - används inte för fler än en patient. - använd ett nytt handtag med en steril injektionsspruta (del A). 2) Innan användningen, kontrollera noggrant att det finns en genomskinlig plastring på kolvens ända. 3) Vid monteringen av handtaget med del A, se till att systemet låsts riktigt (klickat på plats). INSTRUCTIONS D’UTILISATION La Part B (poignée) doit être assemblée sur la Part A (aiguille). Cette poignée est conçue spécialement pour être utilisée avec le dispositif stérile à usage unique Ultra Safety Plus (Part A), afin d’assurer au praticien et à son équipe un niveau de sécurité maximum contre le risque de piqûre accidentelle et de contamination croisée. CARACTÉRISTIQUES : - Forme ergonomique et utilisation facile. - Système de verrouillage sur le corps du dispositif d’injection Ultra Safety Plus Part A. - Possibilité d’aspiration passive et active. - S’utilise avec des cartouches 1,7 ml, 1,8 ml ou 2,2 ml. MODE D’EMPLOI : Etape 1 : insérer la cartouche dans le corps cylindrique du dispositif Ultra Safety Plus Part A. Etape 2 : prendre le piston de la poignée en plaçant le pouce à l’arrière de l’ailette du porte-doigt. Introduire l’extrémité de la poignée dans le corps cylindrique du dispositif d’injection Part A, à l’arrière de la cartouche. Etape 3 : faire glisser ensuite le fourreau protecteur de l’aiguille vers la poignée, jusqu’à l’obtention d’un CLIC (ce bruit signifie que le fourreau a atteint la poignée et que le système est verrouillé). Etape 4 : réaliser l’injection. Aspiration passive : le système d’injection présente une légère protubérance en plastique au niveau de l’embase, du côté de la pointe arrière de l’aiguille (partie de l’aiguille qui pénètre le diaphragme de la cartouche au moment de son insertion). Au début de l’injection, cette protubérance exerce une pression sur le diaphragme, suivie d’une dépression au moment du relâchement. L’aspiration se fait alors. Aspiration active : elle est obtenue en tirant sur le piston de la poignée, en positionnant le pouce dans l’anneau situé à l’arrière de la poignée. La présence de l’anneau en plastique translucide à l’extrémité du piston de la poignée assure une étanchéité qui entraîne le déplacement du piston de la cartouche. Pour garantir une aspiration optimale, il est conseillé, au préalable, d’extraire au moins une quantité de 0,25 ml à 0,35 ml de liquide de la cartouche. Etape 5 : après l’injection, tenir l’ailette du porte-doigt et faire glisser le fourreau protecteur sur le corps cylindrique de la seringue jusqu’à la première position d’attente. Ensuite, en tenant le corps de la seringue d’une main, faire glisser de l’autre main le fourreau protecteur jusqu’à la position finale de verrouillage. Désormais, le dispositif d’injection (Part A + Part B) peut être jeté en toute sécurité. Pour enlever la poignée, tenir le corps cylindrique d’une main, et de l’autre main, placer un doigt dans l’anneau de la poignée et tirer jusqu’à ce que le piston soit complètement rétracté. Après avoir complètement rétracté le piston, enlever la poignée d’un seul trait. Eliminer le dispositif d’injection dans un collecteur pour objets pointus et tranchants. Jeter la poignée dans un sac pour déchets médicaux ou dans tout autre collecteur conformément à la réglementation en vigueur dans le pays concerné. MISES EN GARDE : 1) Ce produit est conçu pour être à usage unique. Toute réutilisation génère des risques pour la sécurité de l’utilisateur et du patient. - ne pas re-stériliser, - ne pas utiliser pour plus d’un patient, - utiliser une nouvelle poignée avec tout nouveau dispositif stérile d’injection (Part A). 2) Avant utilisation, bien vérifier la présence de l’anneau en plastique translucide à l’extrémité du piston. 3) Lors de l’assemblage de la poignée avec la Part A, s’assurer que le système est bien verrouillé (obtention d’un CLIC). soficNoticeUltra-partB-03-2010_Mise en page 1 09/03/10 15:01 Page7 EN INSTRUCTIONS FOR USE Part B (handle) must be assembled with Part A (needle). This handle is designed to be used with the Sterile Single Use Ultra Safety Plus Device (Part A) for maximum safety to the practitioner and staff against the risk of needle stick injury and cross contamination. FEATURES: - Ergonomic design and ease of use. - Locking on the barrel of the Ultra Safety Plus Syringe device Part A. - Enables aspiration. - Can be used with 1.7, 1.8, 2.2 ml cartridges. HOW TO USE: Step 1 : Insert the cartridge into the Ultra Safety Plus Syringe barrel. Step 2 : Grip the handle plunger and put the thumb behind the finger holder. Indroduce the handle tip into the barrel of the Part A, behind the cartridge. Step 3: Now slide the sheath protecting the needle backwards, towards the handle until it CLICKS (the click is made as the sheath hits the handle and locks the unit together). Step 4 : Perform the injection. Self aspiration: At the base of the cartridge barrel of the injection device you will see there is a small protuberance. It appears as a plastic tip holding the centred back end of the needle that penetrates the diaphragm of the cartridge when inserted. At the beginning of the injection, the diaphragm presses against the protuberance, and aspiration occurs as the diaphragm moves back away from the protuberance when released. Aspiration : The pliable O-Ring situated at the end of the handle piston creates a vacuum when the practitioner pulls back the piston. The cartridge stopper follows the piston providing active aspiration. It is best observed when a minimum of 0.25 ml to 0.35 ml of solution has been previously expelled from the cartridge (providing space). PL Step 5 : After you have finished the injection, remove your fingers from the O-Ring Handle and grip the finger horder, slide the protective sheath down the barrel of the syringe until you reach the first holding position, then grip the barrel of the syringe and pull the protective sheath down further to the final locking position. Now the injection device (Part A + Part B) can be disposed of safely. To remove the handle, hold the barrel with one hand and using the other hand, place a finger in the ring of the handle and pull backwards until the plunger is fully retracted. After you have fully retracted the plunger, peel off the handle in one movement. Dispose of the Syringe into the sharps container. The handle can be disposed of in the clinical waste bag or in any other container according to the regulations in force in the country involved. WARNINGS : 1) This is designed to be a single use product. Any reuse constitutes a risk to the safety of the user and the patient. - Do not resterilise. - Do not use for more than one patient. - Use a new handle with any new sterile injection device (Part A). 2) Prior to use, please check the presence of the pliable o-ring at the end of the plunger. 3) When assembling the handle with Part A, be sure that it is perfectly locked (audible CLICK). soficNoticeUltra-partB-03-2010_Mise en page 1 09/03/10 15:01 Page9 NL GEBRUIKSINSTRUCTIES Deel B (handgreep) moeten gemonteerd worden op Deel A (naald). Deze handgreep werd speciaal ontworpen voor gebruik met het steriele apparaat voor eenmalig gebruik Ultra Safety Plus (Deel A), om de arts en zijn team een maximale beveiliging te bezorgen tegen het risico van accidentele injectie en kruisbesmetting. EIGENSCHAPPEN: - Ergonomische vorm en eenvoudig gebruik. - Vergrendelingsysteem op het hoofddeel van het injectieapparaat Ultra Safety Plus, Deel A. - Passieve en actieve opzuiging mogelijk. - Wordt gebruikt met vullingen van 1,7 ml, 1,8 ml of 2,2 ml. GEBRUIKSAANWIJZING: Stap 1: duw de vulling in het cilindrische lichaam van het Ultra Safety Plus-apparaat, Deel A. Stap 2: neem de duwstaaf van de handgreep door de duim achter het flapje van de vingerhouder te plaatsen. Duw het uiteinde van de handgreep in het cilindrische lichaam van het injectieapparaat Deel A, aan de achterkant van de vulling. Stap 3: verschuif vervolgens de beschermende koker van de naald naar de handgreep, tot u een KLIK hoort (dit geluid betekent dat de koker de handgreep heeft bereikt en het systeem vergrendeld is). Stap 4: voer de injectie uit. Passieve zuiging: het injectiesysteem is voorzien van een kleine uitstulping in plastic ter hoogte van de basis, aan de kant van de achterste punt van de naald (deel van de naald dat het diafragma van de vulling doorboort op het moment dat deze wordt ingedrukt). Bij het begin van de injectie oefent deze uitstulping een druk uit op het diafragma, gevolgd door een daling van de druk op het moment van de loslating. Op dat moment gebeurt de zuiging. Actieve zuiging: dit doet u door aan de duwstaaf van de handgreep te trekken, door de duim in de ring aan de achterkant van de handgreep te steken. De aanwezigheid van de doorzichtige ES plastic ring aan het uiteinde van de duwstaaf van de handgreep zorgt voor een waterdichtheid, die de verplaatsing van de duwstaaf van de vulling mogelijk maakt. Voor een optimale zuiging is het aangeraden vooraf minstens 0,25 tot 0,35 ml vloeistof uit de vulling op te trekken. Stap 5: na de injectie hat flapje van de vingerhouder vasthouden en de beschermende koker over het cilindrische lichaam van de spuit schuiven tot de eerste wachtpositie. Vervolgens het lichaam van de spuit met één hand vastnemen en met de andere hand de beschermende koker schuiven tot de uiteindelijke vergrendelingspositie. Nu kan het injectieapparaat (Deel A + Deel B) in alle veiligheid worden weggegooid. Om de handgreep te verwijderen, het cilindrische lichaam met één hand vasthouden met de andere hand een vinger in de ring van de handgreep stoppen totdat de duwstaaf helemaal teruggetrokken is. Zodra de duwstaaf helemaal teruggetrokken is, de handgreep in één trekbeweging verwijderen. Het injectieapparaat in een container voor scherpe en puntige voorwerpen gooien. De handgreep in een zak voor medisch afval gooien of in een andere container die beantwoordt aan de geldende reglementering van het betrokken land. WAARSCHUWINGEN: 1) Dit product is ontworpen als een product voor eenmalig gebruik, ieder hergebruick houdt risico’s in wat betreft de veiligheid van de gebruiker en de patiënt. - niet opnieuw steriliseren, - niet voor meer dan één patiënt gebruiken, - een nieuwe handgreep gebruiken voor elk nieuw steriel injectie apparaat (Deel A). 2) Vóór het gebruik goed de aanwezigheid van de doorzichtige plastic ring aan het uiteinde van de duwstaaf controleren. 3) Bij de montage van de handgreep met Deel A, controleren of het systeem goed vergrendeld is (u moet een KLIK horen). INSTRUCCIONES DE UTILIZACIÓN La Parte B (empuñadura) debe ensamblarse en la Parte A (aguja). Esta empuñadura se ha concebido especialmente para ser utilizada con el dispositivo de uso único Ultra Safety Plus (Parte A), con el fin de garantizar al práctico facultativo y a su equipo un nivel de seguridad máximo contra el riesgo de pinchazo accidental y contaminación cruzada. CARACTERÍSTICAS: - Forma ergonómica y de fácil utilización. - Sistema de bloqueo en el cuerpo del dispositivo de inyección Ultra Safety Plus Parte A. - Posibilidad de aspiración pasiva y activa. - Se utiliza con cartuchos 1,7 ml, 1,8 ml ó 2,2 ml. MODO DE EMPLEO: Etapa 1: insertar el cartucho en el cuerpo cilíndrico del dispositivo Ultra Safety Plus Parte A. Etapa 2: coger el pistón de la empuñadura colocando el pulgar en la parte trasera de la aleta reservado para colocar el dedo. Introducir el extremo de la empuñadura en el cuerpo cilindrico del dispositivo de inyección Parte A, en la parte trasera del cartucho. Etapa 3: seguidamente, deslizar la funda protectora de la aguja hacia la empuñadura, hasta que se oiga un CLIC (este ruido significa que la funda ha alcanzado la empuñadura y que el sistema está bloqueado. Etapa 4: realizar la inyección. Aspiración pasiva: el sistema de inyección presenta una ligera protuberancia de plástico a nivel de la base, del lado de la punta posterior de la aguja (parte de la aguja que penentra el diafragma del cartucho en el momento de su inserción). Al principio de la inyección, esta protuberancia ejerce una presión sobre el diafragma, seguida de une depresión en el momento que se suelta. Entonces, tiene lugar la aspiración. Aspiración activa: se obtiene tirando del pistón de la empuñadura, colocando el pulgar en la anilla situada en la parte trasera de la empuñadura. La presencia de la anilla de plástico translúcida en el extremo del pistón de la empuñadura garantiza una estanqueidad que provoca el desplazamiento del pistón del car- tucho. Para garantizar une aspiración óptima, se aconseja, previamente, extraer al menos una cantidad de 0.25 ml a 0.35 ml de liquido del cartucho. Etapa 5 : después de la inyección, sujetar la aleta reservada para colocar el dedo y deslizar la funda protectora sobre el cuerpo cilíndrico de la jeringuilla hasta la primera posición de espera. A continuación, manteniendo el cuerpo de la jeringuilla con una mano, deslizar con la otra mano la funda protectora hasta la posición final de bloqueo. En adelante, el dispositivo de inyección (Parte A + Parte B) puede desecharse en total seguridad. Para quitar la empuñadura, mantener el cuerpo cilíndrico con una mano, y con la otra mano, colocar un dedo en la anilla y tirar de ella hasta que el pistón se haya retraído completamente. Después de haber retraído completamente el pistón, retirar la empuñadura de una vez. Eliminar el dispositivo de inyección en un colector para objetos puntiagudos y que cortan. Desechar la empuñadura en una boisa para residuos médicos o en cualquier otro colector de acuerdo con la reglamentación en vigor en el país en cuestión. ADVERTENCIAS: 1) Este producto está concebido para ser de uso único. Toda reutilización genera riesgos para la seguridad del usuario y del paciente. - no reesterilizar. - no debe utilizarse para más de un paciente. - utilizar una nueva empuñadura con cualquier nuevo dispositivo eltéril de inyección (Parte A). 2) Antes de la utilización, comprobar debidamente la presencia de la anilla de plástico translúcida en el extremo del pistón. 3) Cuando se ensambla la empuñadura con la Parte A, cerciorarse de que el sistema esté bien bloqueado (se oirá un CLIC). soficNoticeUltra-partB-03-2010_Mise en page 1 09/03/10 15:01 Page11 DE BENUTZUNGSHINWEISE Das Teilstück B (Handstück) muss auf dem Teilstück B (Nadel) fest angebracht werden. Dieses Handstück wurde speziell konstruiert, um zusammen mit einem sterilen Mechanismus zum Einmalgebrauch, Ultra Safety Plus (Teilstück A,) eingesetzt zu werden, damit der praktizierende Arzt und sein Team über ein Produkt mit maximaler Sicherheit hinsichtlich der Risiken bei zufälligen Einstichproblemen und Kreuzkontamination verfügen. EIGENSCHAFTEN: - Ergonomische Form und problemloser Gebrauch. - Verriegelungssystem auf dem Körper des Injektionsmechanismus Ultra Safety Plus, Teilstück A. - Möglichkeit der passiven und aktiven Aspiration. - Gebrauch zusammen mit Ampullen mit 1,7 ml, 1,8 ml oder 2,2 ml. GEBRAUCHSANWEISUNG: Abschnitt 1: Einführen der Ampulle in den zylindrischen Körper des Sets Ultra Safety Plus Teilstück A. Abschnitt 2: Den kolben des Handstücks so mit der Hand fassen, dass der Daumen hinter dem Flügel des Daumenrings positioniert ist. Einführen des Handstück-Endes in den zylindrischen Körper des Injektions-Mechanismus Teil A, im hinteren Ampullenteil. Abschnitt 3: Anschließend die Nadel-Schutzhülse in HandstückRichtung gleiten lassen, bis ein Einrast-Klickgeräusch zu hören ist (dieses Geräusch zeigt an, dass die Schutzhülse das Handstück erreicht hat und das System gesichert ist). Abschnitt 4: Die Injektion vormehmen. Passive Aspiration: Es ist am Injektionssystem- Unterteil auf der hinteren Seite der Nadel (dem Teil der Nadel, der zum Zeitpunkt seines Einlegens in das Ampullen-Diaphragma eindringt) eine leichte Protuberanz aus Kunststoff vorhanden. Diese Protuberanz übt zu Injektionsbeginn einen Druck auf das Diaphragma aus, wobei sich dann im Augenblick des Nachgebens ein Unterdruck zeigt. Damit erfolgt die Aspiration. Aktive Aspiration: Diese wird dadurch bewirkt, dass am Hand- IT stück-Kolben gezogen wird, indem der Daumen hinter das Handstück in den Ring positioniert wird. Das Vorhandensein des Ringes aus Kunststoffmaterial wird an der Kolbenaussenseite des Handstücks durch Durchscheinen sichtbar und er gewährleistet eine Dichtigkeit, die das Verschieben des Kolbens der Ampulle bewirkt. Es wird zwecks Sicherstellung einer optimalen Aspiration empfohlen, zu Beginn mindestens eine Menge von 0,25 ml bis 0,35 ml Ampullenflüssigkeit herauszuziehen. ISTRUZIONI PER L’USO La Parte B (manico) deve essere assemblata sulla Parte A (ago). Il manico è espressamente studiato per l’impiego con il dispositivo sterile monouso Ultra Safety Plus (Parte A). Il sistema completo garantisce, al medico e alla sua équipe, un livello massimo di sicurezza contro il rischio di punture accidentali e contaminazione incrociata. La presenza dell’anello in plastica traslucida, posizionato all’estremità del pistone, garantisce la tenuta stagna necessaria a spostare il pistone della cartuccia. Per assicurare un livello di aspirazione ottimale si consiglia, innanzitutto, di estrarre una quantità di liquido dalla cartuccia pari a un intervallo minimo compreso tra 0,25 ml e 0,35 ml. Abschnitt 5 : Nach der Injektion ist der Daumenringflügel festzuhalten und die Schutzhülle muss auf den zylindrischen Spritzenkörper bis zur ersten Warteposition eingeschoben werden. Dann ist mit einer Hand die Schutzhülse bis zur Verriegelungs-Endposition schieben, wobei der Spritzenkörper mit der anderen Hand festgehalten wird. Der Injektions-Mechanismus (Teilstück A und Teilstück B) kann nunmehr in völliger Sicherheit entsorgt werden. Zwecks Handstückentfernung ist der zylindrische Körper mit einer Hand festzuhalten und mit der anderen Hand wird ein Finger in den Fingerring gelegt und es wird so lange eine Zugbewegung ausgeübt, bis der Kolben vollständig zurückgezogen ist. Nach dem Rückziehen des Kolbens wird das Handstück mit einer einzigen Bewegung abgenommen. Der Injektions-Mechanismus ist in einem Behälter für spitze und schneidende Gegenstände zu entsorgen. Das Handstück ist entsprechend den in dem jeweiligen Land gültigen gesetzlichen Bestimmungen in einem Sack für medizinische Abfälle oder in einem Container zu entsorgen. CARATTERISTICHE: - Forma ergonomica e facilità di impiego. - Sistema di bloccaggio sul corpo del dispositivo di iniezione Ultra Safety Parte A. - Possibilità di aspirazione passiva e attiva. - Utilizzo con cartucce da 1,7 ml, 1,8 ml o 2,2 ml. Fase 5 : eseguita l’iniezione, tenere l’aletta del foro portadito e far scorrere la guaina di protezione sul corpo cilindrico della siringa fino a raggiungere la prima posizione. Successivamente, tenendo il corpo della siringa con una mano, far scorrere, nell’altra, la guaina di protezione fino a raggiungere la posizione finale di blocco. Il dispositivo di iniezione (Parte A + Parte B) può essere ora smaltito in tutta sicurezza. Per rimuovere il manico, tenere il corpo cilindrico con una mano e, con l’altra, posizionare un dito nell’anello e tirare fino a ritrarre completamente il pistone. Eseguita tale operazione, rimuovere il manico in un solo colpo. Smaltire il dispositivo di iniezione in un raccoglitore per oggetti appuntiti e taglienti. Gettare il manico in un sacchetto per rifiuti medici o in altro raccoglitore conforme, secondo quanto previsto dalla normativa applicabile in vigore nel paese di utilizzo. WARNHINWEIS: 1) Dieses Produkt ist nur zum einmaligen Gebrauch bestimmt. Jede Wiederverwendung ist mit Risiken für die Sicherheit des Anwenders und des Patienten verbunden. - Nicht nochmals sterilisieren. - Nur bei einem einzigen Patienten anwenden. - Ein neues Handstück mit einem ganz neuen sterilen InjektionsMechanismus benutzen (Teilstück A). 2) Vor der Benutzung ist zu überprüfen, dass der durchsichtige Kunststoffring am Kolbenende tatsächlich vorhanden ist. 3) Während der Handstück-Montage auf das Teilstück A ist zu überprüfen, dass das System exakt verschlossen ist (das Klick-Geräusch muss hörbar sein). MODALITÀ DI IMPIEGO Fase 1: inserire la cartuccia nel corpo cilindrico del dispositivo Ultra Safety Plus Parte A. Fase 2: afferrare il pistone posizionando il pollice dietro l’aletta del porta-dito. Introdurre l’estremità del manico nel corpo cilindrico del dispositivo (Parte A), dietro la cartuccia. Fase 3: far scorrere la guaina di protezione dell’ago verso il manico fino a udire un CLIC. Ciò indica che la guaina ha raggiunto il manico e che il sistema è ora bloccato. Fase 4: eseguire l’iniezione. Aspirazione passiva: il sistema di iniezione presenta, alla base, una leggera protuberanza in plastica, dal lato della punta, dietro l’ago (parte dell’ago che penetra il diaframma della cartuccia al momento dell’inserimento). Nella fase iniziale dell’iniezione, la protuberanza esercita una pressione sul diaframma, seguita da una depressione al momento del rilascio. A questo punto avviene l’aspirazione. Aspirazione attiva: si ottiene inserendo il pollice nell’ anello situato dietro il manico e tirando il pistone. ATTENZIONE: 1) Questo prodotto è monouso (concepito per essere utilizzato una volta sola). Qualsiasi riutilizzazione com porta rischi per la sicurezza dell’utilizzatore e del paziente. - Non risterilizzare. - Non utilizzare per più di un paziente. - Utilizzare un nuovo manico unitamente a un nuovo dispositivo sterile di iniezione (Parte A). 2) Prima dell’utilizzo, verificare la presenza dell’anello in plastica traslucida posto all’estremità del pistone. 3) Durante l’assemblaggio del manico con la Parte A, assicurarsi che il sistema sia correttamente bloccato (è necessario udire un CLIC).