1
soficNoticeUltra-partB-03-2010_Mise en page 1 09/03/10 15:01 Page7
EN
INSTRUCTIONS FOR USE
Part B (handle) must be assembled with Part A (needle).
This handle is designed to be used with the Sterile Single Use
Ultra Safety Plus Device (Part A) for maximum safety to the practitioner and staff against the risk of needle stick injury and cross
contamination.
FEATURES:
- Ergonomic design and ease of use.
- Locking on the barrel of the Ultra Safety Plus Syringe device
Part A.
- Enables aspiration.
- Can be used with 1.7, 1.8, 2.2 ml cartridges.
HOW TO USE:
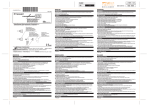
Step 1 : Insert the cartridge into the Ultra Safety Plus Syringe barrel.
Step 2 : Grip the handle plunger and put the thumb behind the
finger holder. Indroduce the handle tip into the barrel of the Part
A, behind the cartridge.
Step 3: Now slide the sheath protecting the needle backwards,
towards the handle until it CLICKS (the click is made as the sheath hits the handle and locks the unit together).
Step 4 : Perform the injection.
Self aspiration: At the base of the cartridge barrel of the injection
device you will see there is a small protuberance. It appears as a
plastic tip holding the centred back end of the needle that
penetrates the diaphragm of the cartridge when inserted. At the
beginning of the injection, the diaphragm presses against
the protuberance, and aspiration occurs as the diaphragm
moves back away from the protuberance when released.
Aspiration : The pliable O-Ring situated at the end of the handle
piston creates a vacuum when the practitioner pulls back the
piston.
The cartridge stopper follows the piston providing active
aspiration. It is best observed when a minimum of 0.25 ml to
0.35 ml of solution has been previously expelled from the
cartridge (providing space).
PL
Step 5 : After you have finished the injection, remove your fingers
from the O-Ring Handle and grip the finger horder, slide the
protective sheath down the barrel of the syringe until you reach
the first holding position, then grip the barrel of the syringe and
pull the protective sheath down further to the final locking
position. Now the injection device (Part A + Part B) can be disposed of safely.
To remove the handle, hold the barrel with one hand and using the
other hand, place a finger in the ring of the handle and pull
backwards until the plunger is fully retracted. After you have fully
retracted the plunger, peel off the handle in one movement.
Dispose of the Syringe into the sharps container. The handle can
be disposed of in the clinical waste bag or in any other container
according to the regulations in force in the country involved.
WARNINGS :
1) This is designed to be a single use product. Any reuse
constitutes a risk to the safety of the user and the
patient.
- Do not resterilise.
- Do not use for more than one patient.
- Use a new handle with any new sterile injection device
(Part A).
2) Prior to use, please check the presence of the pliable
o-ring at the end of the plunger.
3) When assembling the handle with Part A, be sure that
it is perfectly locked (audible CLICK).