1
EXJRPP
Operating Instructions
Installation Procedures
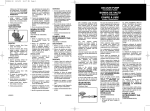
10. Adding additional fixtures requires drilling a 3 in.
diameter hole in the tank. See figure for area’s NOT
to drill (Figure 9).
(continued)
d. If the system cycles properly, continue the
installation.
7. Make permanent connections between the
discharge pipe and the house discharge pipe.
8. Install the ventilation pipe to the tank using a 2 or 3
in. vent pipe (not included) and vent seal (included)
as seen in Figure 8.
Do not drill
in shaded
area
Figure 8: Ventilated System
Figure 9: Ventilated System
a. The Rapid Restroom must be vented according
to local codes. The toilet will not flush properly
unless vented.
a. After drilling the hole insert a 2 in. rubber seal
(not included) in the 3 in. hole.
b. Insert a 2 in. discharge pipe through the rubber
seal making sure it protrudes at least 1 in. into the
tank. (use liquid soap for ease of assembly
b. Connect the vent pipe to an existing dry vent or
run at least 2 ft. above the roof line.
9. Install the toilet to the Rapid Restroom using the
wax seal provided and the closet bolts.
11. Finish making all the necessary connections
to fixtures and test each fixture by running
water through the system. Check for leaks at all
connections.
a. If no sub-flooring is used one wax ring will be
required to seal the flange. If a sub-floor is used
two wax rings may be required to get a proper
seal.
a. Fixtures rely on gravity feed to drain into the tank,
make sure discharge pipes are slopping down
toward the Rapid Restroom.
b. Follow all instructions that came with the toilet
for final installation.
c. Connect water to toilet and test.
www.waynewatersystems.com
3