1
Manual del programador del Trabajo Fin de Máster realizado por
David Silva Montemayor
para la obtención del título de
Máster en Ingeniería de Automatización e Informática Industrial
Estudio de viabilidad de un sistema basado en
Raspberry Pi para aplicaciones de Inspección Industrial
por Visión Artificial
Febrero 2015
Índice
Índice de ilustraciones .................................................................................................................... 3
1
Recursos necesarios ........................................................................................................... 5
1.1
Recursos hardware ............................................................................................................ 5
1.2
Recursos software .............................................................................................................. 5
1.3
Recursos humanos ............................................................................................................. 5
2
Operaciones para la modificación del software ................................................................. 6
3
Instalación del sistema operativo ...................................................................................... 7
4
Configuración básica de la Raspberry Pi............................................................................. 9
5
Configuración para acceso remoto .................................................................................. 15
5.1
5.2
5.3
Conexión de la Raspberry Pi directamente al Pc usando cable de red ............................. 16
5.1.1
Configuración de Windows 7 u 8 dirección estática............................................. 17
5.1.2
Configuración dirección estática Raspberry Pi ..................................................... 18
5.1.3
Comprobar el éxito de la conexión ...................................................................... 19
Conexión remota a la Raspberry Pi usando SSH............................................................... 20
5.2.1
Activación del servicio SSH en la Raspberry Pi ..................................................... 20
5.2.2
Instalación de Putty en Windows ......................................................................... 20
Conexión remota a la Raspberry Pi usando VNC .............................................................. 23
5.3.1
Instalación VNC en la Raspberry Pi ....................................................................... 23
5.3.2
VNC por medio de aplicaciones ........................................................................... 23
6
OpenCV en Raspberry Pi .................................................................................................. 24
7
RaspiCam en programas .................................................................................................. 27
7.1
Paso 1: Compilación ......................................................................................................... 27
7.2
Paso 2: Crear el primer proyecto ..................................................................................... 28
7.3
Paso 3: Mostrar una imagen ............................................................................................ 29
7.4
Paso 4: Proyectos visión ................................................................................................... 31
Configuración Raspberry Pi
1
8
Código .............................................................................................................................. 33
8.1
Código fuente .................................................................................................................. 33
8.1.1
Rutina principal .................................................................................................... 33
8.1.2
Clase PiCapture .................................................................................................... 35
8.2
Código a compilar ............................................................................................................ 47
8.3
OpenCV ............................................................................................................................ 48
8.3.1
Highgui.hpp .......................................................................................................... 48
8.3.2
Core.hpp .............................................................................................................. 52
8.3.3
Imgproc.hpp ......................................................................................................... 75
8.3.4
Cv.hpp ................................................................................................................ 102
Configuración Raspberry Pi
2
Índice de ilustraciones
Ilustración 1. NOOBS ......................................................................................................................... 7
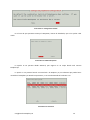
Ilustración 2. Primer paso ................................................................................................................. 8
Ilustración 3. Instalación terminada .................................................................................................. 8
Ilustración 4. Configuración Raspberry Pi.......................................................................................... 9
Ilustración 5. Partición y contraseña ................................................................................................. 9
Ilustración 6. Opción escritorio ....................................................................................................... 10
Ilustración 7. Opción internacionalización ...................................................................................... 10
Ilustración 8.Internacionalización 2 ................................................................................................ 11
Ilustración 9. Internacionalización 3................................................................................................ 11
Ilustración 10. Zona horaria ............................................................................................................ 11
Ilustración 11. Configuración teclado .............................................................................................. 13
Ilustración 12. Habilitar RaspiCam .................................................................................................. 13
Ilustración 13. Overclock ................................................................................................................. 13
Ilustración 14. Opciones avanzadas ................................................................................................ 14
Ilustración 15. LEDs conexión de red............................................................................................... 15
Ilustración 16.IP Raspberry Pi .......................................................................................................... 16
Ilustración 17. Conexión entre ordenador y Raspberry Pi ............................................................... 16
Ilustración 18. Conexiones .............................................................................................................. 17
Ilustración 19. Dirección estática Pc ................................................................................................ 18
Ilustración 20. Dirección estática Raspberry Pi ............................................................................... 19
Ilustración 21. Comprobación configuración .................................................................................. 19
Ilustración 22. Servicio SSH RasPi .................................................................................................... 20
Configuración Raspberry Pi
3
Ilustración 23. Putty ........................................................................................................................ 20
Ilustración 24.Parámetros Putty...................................................................................................... 21
Ilustración 25. Configuración Putty con IP RasPi ............................................................................. 21
Ilustración 26. Conexión con Raspberry Pi ...................................................................................... 22
Ilustración 27.VNC Viewer............................................................................................................... 23
Ilustración 28.Directorio por defecto .............................................................................................. 24
Ilustración 29. Configuración ccmake ../ ......................................................................................... 26
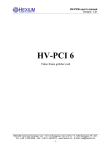
Ilustración 30.Directorio /opt/vc ..................................................................................................... 27
Ilustración 31. CMakeLists.txt ......................................................................................................... 28
Ilustración 32. Rutas include ........................................................................................................... 29
Ilustración 33. Tamaño archivo ....................................................................................................... 29
Ilustración 34. static void encoder_buffer_callback ........................................................................ 29
Ilustración 35. Eliminar vista previa ................................................................................................ 30
Ilustración 36. Captura de imagen .................................................................................................. 30
Ilustración 37. Ejemplo captura ...................................................................................................... 31
Ilustración 38. IplImage & Mat ejemplo .......................................................................................... 32
Configuración Raspberry Pi
4
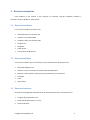
1 Recursos necesarios
Para modificar y dar soporte a este proyecto se necesitan recursos hardware, software y
humanos. Estos se detallan a continuación.
1.1 Recursos hardware
Los recursos hardware necesarios son:
Ordenador tipo con conexión wifi.
Pantalla con entrada HDMI.
Teclado y ratón con conexión USB.
Raspberry Pi.
RaspiCam.
Cable de red.
Tarjeta SD de 4 GB mínimo
1.2 Recursos software
Los recursos software que se necesitan para el mantenimiento del proyecto son:
Microsoft Windows 7/8.
Noobs 1.3.10, el cual incluye el sistema operativo Raspbian.
OpenCV 2.4.8 o superior, dado que las actualizaciones son constantes.
PiCapture.
Putty.
VNC Viewer.
1.3 Recursos humanos
El personal encargado del mantenimiento del software ha de tener conocimientos en:
Lenguaje de programación C++.
Desarrollo de aplicaciones en Linux.
Librerías OpenCV.
Configuración Raspberry Pi
5
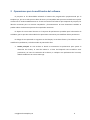
2 Operaciones para la modificación del software
El proyecto se ha desarrollado utilizando el entorno de programación proporcionado por la
Raspberry Pi, que no es más que un editor de texto y el compilador GCC que trae instalado. Esta opción
necesita de un archivo CMakeLists.txt en el cual se muestren los ficheros que componen al proyecto, las
librerías necesarias para su correcta compilación y funcionamiento. En este documento también se
pueden indicar las distintas opciones de compilación necesarias.
El objeto de este manual técnico es el conjunto de parámetros ajustables para la detección de
soldadura, por lo que solo se describirán las operaciones necesarias para modificar dichos parámetros.
El código de esta aplicación se organiza en dos bloques, los archivos fuente y las cabeceras. Para
modificar los parámetros, se ha de acceder al primero de ellos.
Rutina principal: en este archivo es donde se encuentran los parámetros para ajustar la
detección de círculos, el nivel de umbral o el área de búsqueda. Para modificar estos
parámetros, así como la resolución de la cámara, o cualquier otro parámetros de la misma,
deberá modificarse el archivo main.cpp.
Configuración Raspberry Pi
6
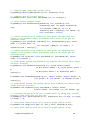
3 Instalación del sistema operativo
El primer paso para poner en funcionamiento la Raspberry Pi es instalar el sistema operativo, para
ello, en la página oficial de descargas de Raspberry Pi ( http://www.raspberrypi.org/downloads/ ), se
descargará NOOBS offline and network install.
Ilustración 1. NOOBS
Es un instalador que incluye los sistemas operativos más usados y entre los que se encuentra
Raspbian, que será el que usemos debido a su distribución Linux.
Una vez descargado el archivo, es necesario insertar una tarjeta SD de al menos 8GB formateada.
En ella se descomprime el archivo recién descargado y una vez finalizado este proceso, la insertaremos
en la Raspberry Pi. Para continuar con la instalación será necesario un cable HDMI y una pantalla con
esta entrada, o en su defecto un cable RCA de video; un teclado, un ratón (estos pueden ser
inalámbricos, funciona sin problemas) y un cable de red para establecer la conexión a internet. Una vez
que esté todo conectado, conectamos el cable de alimentación eléctrica.
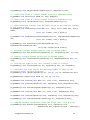
Elección del sistema operativo, Raspbian, además es el recomendado. También seleccionamos
idioma del instalador inglés, no hay español; y el idioma del teclado, ‘es’ de español.
Configuración Raspberry Pi
7
Ilustración 2. Primer paso
Una vez seleccionado todo correctamente, clicamos en el botón de arriba a la izquierda (Install),
nos informa de que borrará la tarjeta SD, aceptamos y comienza a instalar.
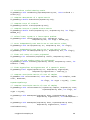
Ilustración 3. Instalación terminada
Configuración Raspberry Pi
8
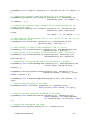
4 Configuración básica de la Raspberry Pi
Tras el primer arranque aparece por defecto este menú, si no es así, basta con ejecutar en la
ventana de comandos sudo raspi-config, siendo el usuario pi y la contraseña raspberry.
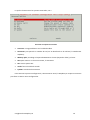
Ilustración 4. Configuración Raspberry Pi
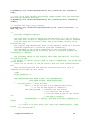
Para moverse por el menú se usarán los cursores, para elegir una opción se usa la barra
espaciadora y para cambiar entre partes del menú se usará el tabulador o la tecla Tab. Como se ha
usado NOOBS, nos indica que ya ha configurado para aprovechar todo el espacio libre, después nos da la
opción de cambiar de usuario y contraseña, para ello nos abre una ventana de comandos.
Ilustración 5. Partición y contraseña
Estas son las opciones 1 y 2 del menú, a las que se puede volver en cualquier momento.
Configuración Raspberry Pi
9
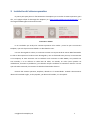
La tercera opción nos permite seleccionar el arranque de la Raspberry Pi, que sea en consola de
texto (Console Text), en escritorio (Desktop) o el entorno para aprender a programar para
niños(Scratch).
Ilustración 6. Opción escritorio
La opción numero 4 nos permite establecer el idioma, la zona horaria y configurar el teclado.
Ilustración 7. Opción internacionalización
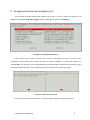
Para establecer el idioma español, ir pasando las opciones hasta alcanzar la que muestra la
ilustración:
Configuración Raspberry Pi
10
Ilustración 8.Internacionalización 2
Ilustración 9. Internacionalización 3
Tras aceptar esta opción, sale de nuevo la terminal y termina de configurarse. Para la
configuración de la zona horaria:
Ilustración 10. Zona horaria
Configuración Raspberry Pi
11
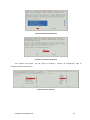
Para la configuración del teclado, basta con buscar uno genérico sino encontramos el modelo
exacto, e idioma establecemos español. Al acabar, vuelve a salir el Terminal mientras termina de
configurarse.
Configuración Raspberry Pi
12
Ilustración 11. Configuración teclado
En el caso de que queramos manejar la RaspiCam, hemos de habilitarla, que es la opción 5 del
menú.
Ilustración 12. Habilitar RaspiCam
La opción 6 nos permite añadir Rastrack, que registra en un mapa donde está nuestra
RaspberryPi.
La opción 7 nos permite hacerle un Overclock a la Raspberry Pi, nos advierte que puede hacer
inestable a la Raspberry Pi. Desde la experiencia, no se nota demasiado el hacérselo o no.
Ilustración 13. Overclock
Configuración Raspberry Pi
13
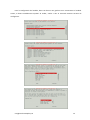
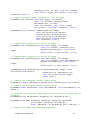
La opción número 8 son las opciones avanzadas, son 7.
Ilustración 14. Opciones avanzadas
Overscan: corrige problemas con la salida de vídeo.
Hostname: para ponerle un nombre de red, así se identificará en la red local, la nombramos
raspberry.
Memory Split: para elegir el reparto de RAM entre la GPU (tarjeta de vídeo) y el resto.
SSH: para activar o no el acceso remoto, lo activamos.
SPI: activa e puerto SPI.
Audio: fuerza la salida de sonido.
Update: actualiza la herramienta.
Para terminar la primera configuración, seleccionamos Finish, la Raspberry Pi requiere reiniciarse
para llevar a cabo la nueva configuración.
Configuración Raspberry Pi
14
5 Configuración para acceso remoto
Este paso ha de llevarse a cabo sino disponemos de una pantalla con HDMI o RCA, ya que una vez
configurado, se podrá acceder a la Raspberry Pi desde el ordenador, aunque nos deja sin la entrada de
cable de red, que será necesaria para conectarse a esta.
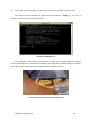
El primer paso es comprobar la IP de la Raspberry Pi y si esta tiene acceso a internet, ya que será
muy útil para actualizar programas o realizar una simple conexión a internet. Tras conectar el cable de
red, si todo va bien, han de estar encendidos los led 100, LNK y FDX.
Ilustración 15. LEDs conexión de red
Configuración Raspberry Pi
15
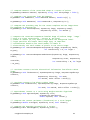
5.1 Conexión de la Raspberry Pi directamente al Pc usando cable de red
Para saber la IP de la Raspberry Pi, desde terminal ejecutamos: ifconfig –a
Es la que se
encuentra en la sección eth0 en la segunda línea.
Ilustración 16.IP Raspberry Pi
Para comprobar si tiene acceso a internet basta con hacer ping a cualquier página de internet.
Una vez comprobado esto, conectaremos la Raspberry Pi al ordenador para poder configurar el equipo y
tener acceso remoto, seguiremos necesitando la pantalla, el teclado y el ratón.
Ilustración 17. Conexión entre ordenador y Raspberry Pi
Configuración Raspberry Pi
16
5.1.1
Configuración de Windows 7 u 8 dirección estática
Paso 1: es necesario compartir la conexión Wi-Fi o la conexión Ethernet que se tenga para
acceder a la red, para ello es necesario activar el uso compartido de internet entre las dos interfaces.
Click derecho en el icono de red -> “Abrir centro de redes y recursos compartidos”.
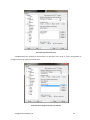
Paso 2: identificar la conexión principal y clicar sobre ella y después en “Propiedades”, esto nos
abre “Propiedades de Conexión de red inalámbrica”.
Ilustración 18. Conexiones
En “Uso compartido”, activar “Permitir que los usuarios de otras redes se conectes a través de
la conexión a Internet de este equipo”. Después buscar en “Conexión de red doméstica”, la
conexión de red que tiene la Raspberry Pi, debería ser la Ethernet que esté libre, en este caso es
“Conexión de área local”.
Paso 3: se repite el paso uno y se selecciona el puerto el puerto al que está conectado la
Raspberry Pi, en la ilustración 19, “Conexión de área local”. Clicar en “Propiedades”, después en
“Esta conexión usa los siguientes elementos” seleccionar “Protocolo de Internet versión 4 (TCP/IP)”.
En este caso se asigna la dirección 192.168.137.1
Configuración Raspberry Pi
17
Ilustración 19. Dirección estática Pc
5.1.2
Configuración dirección estática Raspberry Pi
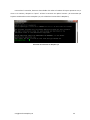
Paso 1: en la ventana de comandos de la Raspberry Pi, Terminal, introducir este comando:
sudo nano /etc/network/interfaces Esto abre un archivo que se ha de modificar hasta que quede de
como la ilustración 20; una vez modificado, para guardarlo basta con pulsar Ctrl+X y acto seguido Y ó S,
depende si el idioma es inglés o español.
Configuración Raspberry Pi
18
Ilustración 20. Dirección estática Raspberry Pi
Paso 2: sirve para comprobar que toda la configuración está correcta; para ello introducir en la
línea de comandos: sudo nano /etc/resolv.conf Al igual que antes, abre un fichero; se comprueba si
está como la ilustración 21; una vez modificado guardarlo como anteriormente.
Ilustración 21. Comprobación configuración
Paso 3: reiniciar la Raspberry Pi para que los cambios hagan efecto, sudo reboot
5.1.3
Comprobar el éxito de la conexión
Desde la ventana de comandos de Windows, realizar un ping a la dirección de la Raspberry Pi:
ping 192.168.137.2
Desde el terminal de la Raspberry Pi, realizar un ping a la dirección del ordenador:
ping 192.168.137.1, para detener la ejecución basta con pulsar Crtl+C.
Configuración Raspberry Pi
19
5.2 Conexión remota a la Raspberry Pi usando SSH
5.2.1
Activación del servicio SSH en la Raspberry Pi
Si durante la instalación se activó este servicio, no es necesario este paso, sino es así, basta con
ejecutar estos comandos:
Ilustración 22. Servicio SSH RasPi
5.2.2
Instalación de Putty en Windows
Ahora es necesario instalar el cliente SSH en Windows, para esto es recomendable instalar el
programa Putty, el cual lo puede descargar aquí:
http://www.chiark.greenend.org.uk/~sgtatham/putty/download.html
Es recomendable utilizar la versión installer, ya que este contiene todos los programas necesarios
para hacer una conexión remota con la Raspberry Pi y otros programas adicionales para incrementar el
nivel de seguridad.
Ilustración 23. Putty
Al ejecutar el programa, nos aparecen todos los campos posibles para configurar distintas
conexiones.
Configuración Raspberry Pi
20
Ilustración 24.Parámetros Putty
Completaremos los parámetros de acuerdo a la ilustración 19 y clicar el “Save” para guardar la
configuración con el nombre que queramos.
Ilustración 25. Configuración Putty con IP RasPi
Configuración Raspberry Pi
21
Para utilizar la conexión, basta con hacer doble click sobre el nombre de la que queramos usar, o
clicar en el nombre y después en “Open”. Al abrir la conexión nos pide el usuario y la contraseña que
hayamos establecido a nuestra Raspberry Pi; así se habilita el terminal de la Raspberry.
Ilustración 26. Conexión con Raspberry Pi
Configuración Raspberry Pi
22
5.3 Conexión remota a la Raspberry Pi usando VNC
La conexión SSH con el terminal tiene algunos inconvenientes a la hora de trabajar y programar,
por ello se configurará la conexión para poder ver el escritorio de la Raspberry Pi.
5.3.1
Instalación VNC en la Raspberry Pi
Lo primero es instalar el servidor VNC en la Raspberry, este carga el escritorio remoto.
Conectamos la Raspberry Pi al Pc mediante Putty y se ejecuta:
sudo apt-get install tightvncserver
Una vez instalado, para ejecutarlo basta con ejecutar el comando:
vncserver :1 –geometry 1280x800 –depth 16 –pixelformat rgb565
Donde “:1” indica el número de escritorio, “1280x800” la resolución que a la que se muestra, se
puede ajustar; si se necesita ayuda basta con ejecutar: vncserver –help
La primera vez que se
ejecuta, se pide una contraseña que será la que proteja el escritorio.
5.3.2
VNC por medio de aplicaciones
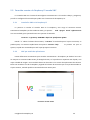
Existen diferentes herramientas para acceder remotamente a la Raspberry Pi desde el Pc. Entre
las mejores se encuentra VNC Viewer for Google Chrome, es la que da una respuesta más rápida y una
mejor calidad de imagen. Para instalarlo basta con buscarlo en la sección de aplicaciones de Chrome.
Basta con introducir la IP de la Raspberry seguido del número de escritorio que se haya seleccionado en
el paso anterior, también pedirá la contraseña de este mismo paso.
Ilustración 27.VNC Viewer
Configuración Raspberry Pi
23
6 OpenCV en Raspberry Pi
Para instalar las librerías de visión de OpenCV en una Raspberry Pi, se ha de tener paciencia, pues
es un proceso que puede llevar casi 12 horas. El primer paso es descargarlo, para ello, elegimos el
directorio en el que queremos instalarlo, en este caso el directorio por defecto.
Ilustración 28.Directorio por defecto
Para descargar la última versión de OpenCV, se ejecuta el siguiente comando:
git clone https://github.com/Itseez/opencv.git
Una vez descargado, se descomprime: unzip opencv-2.4.8.zip (el nombre dependerá de la
versión que se haya descargado).
Cambiamos el directorio a la carpeta descomprimida: cd opencv-2.4.8
Dentro de este directorio, creamos otro: mkdir release y nos cambiamos a ese directorio:
cd reléase
Una vez en este directorio ejecutamos la configuración previa para una correcta instalación:
ccmake ../ Para configurar se teclea “c” y se dejan las opciones como la ilustración 29. Una
vez estén todas correctas, se teclea de nuevo “c” para configurarlo y después “g” para
generar el archivo Makefile.
Configuración Raspberry Pi
24
Configuración Raspberry Pi
25
Ilustración 29. Configuración ccmake ../
Tras configurar, se compila con el comando: make
Si no da fallo, cosa que no suele ser habitual, se instala con: sudo make install
Esta es la parte del proceso que lleva 10 horas, suele tener un par de intervalos en los que parece
que se ha quedado colgada, en el 28% y en el 37%.
Con esto basta para realizar aplicaciones con imágenes almacenadas, pero si se quiere trabajar
con las imágenes de la RaspiCam, ha de hacerse el siguiente paso.
Configuración Raspberry Pi
26
7 RaspiCam en programas
Es el punto más costoso de toda la instalación, pues requiere vincular las librerías mmal con las
librerías de OpenCV. Para ello se han de seguir los siguientes pasos:
7.1 Paso 1: Compilación
1. Descargar el código fuente como .zip: https://github.com/raspberrypi/userland
2. Descomprimir el archivo y copiarlo en el directorio: /opt/vc
Ilustración 30.Directorio /opt/vc
3. Ejecutar el siguiente comando:
sed
-i
‘s/if
(DEFINED
CMAKE_TOOLCHAIN_FILE)/if
(NOT
DEFINED
CMAKE_TOOLCHAIN_FILE)/g’ makefiles/cmake/arm-linux.cmake
4. Crear un directorio y compilarlo, lleva un rato:
sudo mkdir build
cd build
sudo cmake –DCMAKE_BUILD_TYPE=Release ..
sudo male
sudo make install
No debería de dar ningún fallo, aunque es probable que en 3 sí, esto depende de la versión de
Raspbian instalada y de la versión subida a GitHub del documento en el que se está trabajando; en caso
de que de fallo, no pasa nada, se puede continuar sin problemas.
Configuración Raspberry Pi
27
7.2 Paso 2: Crear el primer proyecto
Este proyecto solo servirá para unir las librerías de OpenCV y las mmal.
1. Crear un nuevo archivo donde se copiará uno de los ejemplos que vienen con las librerías en
el directorio que queramos, en este caso será el directorio por defecto /home/pi . Se crea un
nuevo directorio donde se copiará el ejemplo.
cd /home/pi
mkdir camcv (se le puede poner cualquier nombre, pero ojo con los directorios)
cd camcv
cp /opt/vc/userland/host_applications/Linux/apps/raspicam/* .
mv RaspiStill.c camcv.c
(cambia el nombre al archivo, se puede poner otro pero ojo)
sudo chmod 777 camcv.c
(este comando puede no ser necesario)
2. Modificar el archivo CMakeLists.txt y dejarlo como la ilustración 31.
Ilustración 31. CMakeLists.txt
3. Borrar el directorio CMakeFiles si existe.
4. Compilar y probar si funciona
cmake .
make
./camcv –t 1000
No debería dar problema alguno.
Configuración Raspberry Pi
28
7.3 Paso 3: Mostrar una imagen
Es el último paso antes de comprobar que todas las librerías están bien conectadas. Para ello se
han se seguir estos pasos:
1. Descargar el código de este enlace: http://raufast.org/download/camcv.c
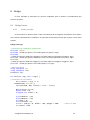
2. Añadir estos #include necesarios en la línea 61; es una fuente frecuente de errores.
Ilustración 32. Rutas include
3. Modificar el tamaño del archivo en la línea 156:
Ilustración 33. Tamaño archivo
4. En la función static void encoder_buffer_callback realizar los siguientes cambios:
Ilustración 34. static void encoder_buffer_callback
Configuración Raspberry Pi
29
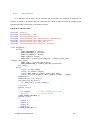
5. En las líneas 711, 715,726 y 823 eliminar la vista previa de la imagen:
Ilustración 35. Eliminar vista previa
6. Compilar y ejecutar:
cmake ..
make ./camcv –t 1000
Ilustración 36. Captura de imagen
En este paso no es habitual la presencia de errores. Aunque se podría trabajar de esta manera,
resulta muy complicado, por lo que se verá otra forma más fácil; este código es difícil de leer y de
integrar la captura de imagen en el código
Configuración Raspberry Pi
30
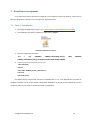
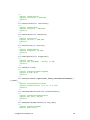
7.4 Paso 4: Proyectos visión
El código de los pasos anteriores es complicado de entender y de leer, por lo que como base para
los proyectos de visión se empleará la última versión de PiCapture disponible en este enlace:
https://github.com/orgicus/PiCapture Es un proyecto simple que une las librerías de OpenCV con el uso
de la RaspiCam. Para trabajar con él se puede descargar directamente o ejecutar los siguientes
comandos en el directorio que queramos trabajar:
git clone https://github.comraspberrypi/userland.git
reemplazar
en
CMakeLists.txt
USERLAND_DIR por el directorio en el que se esté trabajando.
cmake ..
make ./main
Por defecto, captura las imágenes en escala de grises, aunque se puede cambiar con un
parámetro en la llamada a cap.open.
Ilustración 37. Ejemplo captura
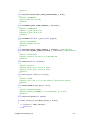
El mayor problema usando este ejemplo ( si se quiere usar lenguaje C) como base es el tipo de
variable en la que almacena la imagen que captura la cámara, esta es de tipo Mat y la mayoría de
funciones de OpenCV trabajan con IpLImage. Esto es un problema ya que no existe transformación
directa entre un tipo y otro para facilitar el trabajo. Para poder trabajar ha de hacerse de la siguiente
manera:
Configuración Raspberry Pi
31
Ilustración 38. IplImage & Mat ejemplo
La captura se almacena en una variable tipo Mat, se crea una variable tipo IplImage necesaria
para el ejemplo y para distinguir como funcionar con cada una. Para trabajar con una IlpImage se
trabajara siempre con los datos, mientras que para trabajar con una Mat convertida a IplImage se ha de
trabajar usando el operador de dirección &. En la ilustración 38 se muestra un ejemplo en el que se
captura una imagen, se binariza y se muestra la original y la binarizada.
En el caso de usar C++, que es el lenguaje que se ha usado en este proyecto, se facilita bastante la
tarea, pues se puede trabajar con objetos Mat en todas las funciones, basta con adecuar las librerías y
las funciones de OpenCV a este lenguaje pues la mayoría de las funciones de OpenCV en C++ soporta
objetos tipo Mat como parámetros de entrada.
Configuración Raspberry Pi
32
8 Código
En este apartado se mostrarán los archivos empleados para la facilitar el entendimiento del
presente proyecto.
8.1 Código fuente
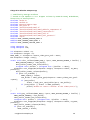
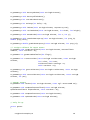
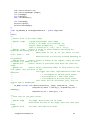
8.1.1
Rutina principal
En este archivo es donde se lleva a cabo el tratamiento de las imágenes procedentes de la cámara
para realizar la búsqueda de la soldadura. Se ejecutará continuamente hasta que se pulse la tecla q del
teclado.
Código: main.cpp
//Archivos de cabecera necesarios
#include "cap.h"
#include </home/pi/opencv/include/opencv2/opencv.hpp>
#include
</home/pi/opencv/modules/highgui/include/opencv2/highgui/highgui.hpp>
#include </home/pi/opencv/modules/core/include/opencv2/core/core.hpp>
#include
</home/pi/opencv/modules/imgproc/include/opencv2/imgproc/imgproc.hpp>
#include </home/pi/opencv/include/opencv/cv.hpp>
//Declaraciones
using namespace cv;
using namespace std;
PiCapture cap;
int main(int argc,char **argv) {
//Creación de variables
bool isColor = argc >= 2;
namedWindow("Circles");
cap.open(640, 480, isColor ? true : false);
Mat im,binar,im_roi;
double time = 0;
unsigned int frames = 0;
int
int
int
int
int
int
minRadius = 10;
maxRadius = 50;
GPIO = 0;
Threshold = 0;
Ox = 150,Oy = 0, Width = 340 ,Height = 480;
Umbral =130;
Configuración Raspberry Pi
//Para el ROI
33
Rect r_o_i = Rect(Ox,Oy,Width,Height);
vector<Vec3f> circles;
Point center;
int radius;
//Bucle continuo
while(char(waitKey(1)) != 'q') {
double t0 = getTickCount();
im = cap.grab();
frames++;
if(!im.empty()) {
//Binariza la imagen y creamos ROI
threshold(im,binar,Umbral,255,CV_THRESH_BINARY);
im_roi=binar(r_o_i);
//Busca círculos
HoughCircles(im_roi,circles,CV_HOUGH_GRADIENT,3,240/2,150,100,minRadius
,maxRadius);
if(circles.size()==0)
GPIO = 0;
else{
GPIO = 1;
center=Point(cvRound(circles[0][0]),cvRound(circles[0][1]));
radius=cvRound(circles[0][2]);
//Si el círculo es correcto
if(minRadius<=radius && radius<=maxRadius){
circle(im_roi,center,radius,CV_RGB(128,0,128),4,8,0);
}
}
if(GPIO==1)
cout<<"\tSoldadura detectada\n"<<endl;
imshow("Circles", im_roi);
}
else
cout << "Frame dropped" << endl;
time += (getTickCount() - t0) / getTickFrequency();
cout << frames / time << " fps" << endl;
}
return 0;
Configuración Raspberry Pi
34
}
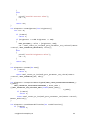
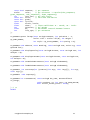
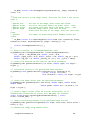
8.1.2
Clase PiCapture
Es la definición de la clase y de los métodos que se encargan de configurar la RaspiCam, de
capturar la imagen y de ajustar todos los parámetros para poder modificar la toma de imágenes; por
ejemplo ajustando la saturación, el contraste o el brillo.
Código de la cabecera: cap.h
#include
#include
#include
#include
#include
#include
#include
<stdio.h>
<opencv2/opencv.hpp>
"interface/mmal/mmal.h"
"interface/mmal/util/mmal_default_components.h"
"interface/mmal/util/mmal_connection.h"
"interface/mmal/util/mmal_util.h"
"interface/mmal/util/mmal_util_params.h"
class PiCapture {
private:
MMAL_COMPONENT_T *camera;
MMAL_COMPONENT_T *preview;
MMAL_ES_FORMAT_T *format;
MMAL_STATUS_T status;
MMAL_PORT_T *camera_preview_port, *camera_video_port,
*camera_still_port;
MMAL_PORT_T *preview_input_port;
MMAL_CONNECTION_T *camera_preview_connection;
bool color;
public:
static cv::Mat image;
static int width, height;
static MMAL_POOL_T *camera_video_port_pool;
static void set_image(cv::Mat _image) {image = _image;}
PiCapture();
PiCapture(int, int, bool);
void open(int,int,bool);
cv::Mat grab() {return image;}
//settings
typedef struct
{
int enable;
/// Turn colourFX on or off
int u,v;
/// U and V to use
} MMAL_PARAM_COLOURFX_T;
typedef struct
{
double x;
double y;
double w;
double h;
} PARAM_FLOAT_RECT_T;
Configuración Raspberry Pi
35
/**
* @brief setSaturation
* @param saturation (-100,100)
* @return
*/
int setSaturation(int saturation);
/**
* @brief setSharpness
* @param sharpness (-100,100)
* @return
*/
int setSharpness(int sharpness);
/**
* @brief setContrast
* @param contrast (-100,100)
* @return
*/
int setContrast(int contrast);
/**
* @brief setBrightness
* @param brightness (0,100)
* @return
*/
int setBrightness(int brightness);
/**
* @brief setISO
* @param ISO (100,800) - default is 300
* @return
*/
int setISO(int ISO);
/**
* @brief setExposureMeteringMode
* @param m_mode (0,4)
* @return
*/
int setExposureMeteringMode(MMAL_PARAM_EXPOSUREMETERINGMODE_T
m_mode);
/**
* @brief setVideoStabilisation
* @param vstabilisation (1 is on, 0 is off)
* @return
*/
int setVideoStabilisation(int vstabilisation);
/**
* @brief setExposureCompensation
* @param exp_comp (-10,10)
* @return
*/
int setExposureCompensation(int exp_comp);
/**
* @brief setExposureMode
* @param mode (0,13)
Configuración Raspberry Pi
36
* @return
*/
int setExposureMode(MMAL_PARAM_EXPOSUREMODE_T mode);
/**
* @brief setAWBMode
* @param awb_mode (0,10)
* @return
*/
int setAWBMode(MMAL_PARAM_AWBMODE_T awb_mode);
/**
* @brief setAWBGains
* @param r_gain (0.0,1.0)
* @param b_gain (0.0,1.0)
* @return
*/
int setAWBGains(float r_gain,float b_gain);
/**
* @brief setImageFX
* @param imageFX (0,23)
* @return
*/
int setImageFX(MMAL_PARAM_IMAGEFX_T imageFX);//TODO example
int setColourFX(MMAL_PARAM_COLOURFX_T *colourFX);//TODO example
/**
* @brief setRotation
* @param rotation (0,359) try 0,90,180,270
* @return
*/
int setRotation(int rotation);
/**
* @brief setFlips
* @param hflip (0,1) treat as bool
* @param vflip (0,1) treat as bool
* @return
*/
int setFlips(int hflip,int vflip);
/**
* @brief setROI
* @param rect (has x,y,w,h and expects normalized values)
* @return
*/
int setROI(PARAM_FLOAT_RECT_T rect);
/**
* @brief setShutterSpeed
* @param speed (0,330000) in microseconds, 0 is auto
* @return
*/
int setShutterSpeed(int speed);
int mmal_status_to_int(MMAL_STATUS_T status)
{
if (status == MMAL_SUCCESS)
return 0;
else
Configuración Raspberry Pi
37
{
switch (status)
{
case MMAL_ENOMEM :
printf("Out of memory"); break;
case MMAL_ENOSPC :
printf("Out of resources (other than
memory)"); break;
case MMAL_EINVAL:
printf("Argument is invalid"); break;
case MMAL_ENOSYS :
printf("Function not implemented"); break;
case MMAL_ENOENT :
printf("No such file or directory");
break;
case MMAL_ENXIO :
printf("No such device or address");
break;
case MMAL_EIO :
printf("I/O error"); break;
case MMAL_ESPIPE :
printf("Illegal seek"); break;
case MMAL_ECORRUPT : printf("Data is corrupt \attention FIXME:
not POSIX"); break;
case MMAL_ENOTREADY :printf("Component is not ready \attention
FIXME: not POSIX"); break;
case MMAL_ECONFIG : printf("Component is not configured
\attention FIXME: not POSIX"); break;
case MMAL_EISCONN : printf("Port is already connected ");
break;
case MMAL_ENOTCONN : printf("Port is disconnected"); break;
case MMAL_EAGAIN :
printf("Resource temporarily unavailable.
Try again later"); break;
case MMAL_EFAULT :
printf("Bad address"); break;
default :
printf("Unknown status error"); break;
}
return 1;
}
}
};
static void color_callback(MMAL_PORT_T *, MMAL_BUFFER_HEADER_T *);
static void gray_callback(MMAL_PORT_T *, MMAL_BUFFER_HEADER_T *);
Configuración Raspberry Pi
38
Código de la definición: PiCapture.cpp
// modified by George Profenza
// based on the OpenCV 2.x C++ wrapper written by Samarth Manoj Brahmbhatt,
University of Pennsylvania
#include <stdio.h>
#include <stdlib.h>
#include <opencv2/opencv.hpp>
#include "bcm_host.h"
#include "interface/mmal/mmal.h"
#include "interface/mmal/util/mmal_default_components.h"
#include "interface/mmal/util/mmal_connection.h"
#include "interface/mmal/util/mmal_util.h"
#include "interface/mmal/util/mmal_util_params.h"
#include "cap.h"
#define MMAL_CAMERA_PREVIEW_PORT 0
#define MMAL_CAMERA_VIDEO_PORT 1
#define MMAL_CAMERA_CAPTURE_PORT 2
using namespace cv;
using namespace std;
int PiCapture::width = 0;
int PiCapture::height = 0;
MMAL_POOL_T * PiCapture::camera_video_port_pool = NULL;
Mat PiCapture::image = Mat();
static void color_callback(MMAL_PORT_T *port, MMAL_BUFFER_HEADER_T *buffer) {
MMAL_BUFFER_HEADER_T *new_buffer;
mmal_buffer_header_mem_lock(buffer);
unsigned char* pointer = (unsigned char *)(buffer -> data);
PiCapture::set_image(Mat(PiCapture::height, PiCapture::width, CV_8UC3,
pointer));
mmal_buffer_header_release(buffer);
if (port->is_enabled) {
MMAL_STATUS_T status;
new_buffer = mmal_queue_get(PiCapture::camera_video_port_pool>queue);
if (new_buffer)
status = mmal_port_send_buffer(port, new_buffer);
if (!new_buffer || status != MMAL_SUCCESS)
printf("Unable to return a buffer to the video port\n");
}
}
static void gray_callback(MMAL_PORT_T *port, MMAL_BUFFER_HEADER_T *buffer) {
MMAL_BUFFER_HEADER_T *new_buffer;
mmal_buffer_header_mem_lock(buffer);
unsigned char* pointer = (unsigned char *)(buffer -> data);
PiCapture::set_image(Mat(PiCapture::height, PiCapture::width, CV_8UC1,
pointer));
mmal_buffer_header_release(buffer);
if (port->is_enabled) {
MMAL_STATUS_T status;
Configuración Raspberry Pi
39
new_buffer = mmal_queue_get(PiCapture::camera_video_port_pool>queue);
if (new_buffer)
status = mmal_port_send_buffer(port, new_buffer);
if (!new_buffer || status != MMAL_SUCCESS)
printf("Unable to return a buffer to the video port\n");
}
}
PiCapture::PiCapture(){}
PiCapture::PiCapture(int _w, int _h, bool _color) {
open(_w,_h,_color);
}
void PiCapture::open(int _w, int _h, bool _color) {
color = _color;
width = _w;
height = _h;
camera = 0;
preview = 0;
camera_preview_port = NULL;
camera_video_port = NULL;
camera_still_port = NULL;
preview_input_port = NULL;
camera_preview_connection = 0;
bcm_host_init();
status = mmal_component_create(MMAL_COMPONENT_DEFAULT_CAMERA, &camera);
if (status != MMAL_SUCCESS) {
printf("Error: create camera %x\n", status);
}
camera_preview_port = camera->output[MMAL_CAMERA_PREVIEW_PORT];
camera_video_port = camera->output[MMAL_CAMERA_VIDEO_PORT];
camera_still_port = camera->output[MMAL_CAMERA_CAPTURE_PORT];
{
MMAL_PARAMETER_CAMERA_CONFIG_T cam_config = {{
MMAL_PARAMETER_CAMERA_CONFIG, sizeof (cam_config)}, width, height, 0,
0,width, height, 3, 0, 1, MMAL_PARAM_TIMESTAMP_MODE_RESET_STC };
mmal_port_parameter_set(camera->control, &cam_config.hdr);
}
format = camera_video_port->format;
if(color){
format->encoding = MMAL_ENCODING_RGB24;
format->encoding_variant = MMAL_ENCODING_RGB24;
}else{
format->encoding = MMAL_ENCODING_I420;
format->encoding_variant = MMAL_ENCODING_I420;
}
format->es->video.width = width;
format->es->video.height = height;
format->es->video.crop.x = 0;
format->es->video.crop.y = 0;
format->es->video.crop.width = width;
format->es->video.crop.height = height;
format->es->video.frame_rate.num = 30;
Configuración Raspberry Pi
40
format->es->video.frame_rate.den = 1;
camera_video_port->buffer_size = width * height * 3 / 2;
camera_video_port->buffer_num = 1;
status = mmal_port_format_commit(camera_video_port);
if (status != MMAL_SUCCESS) {
printf("Error: unable to commit camera video port format (%u)\n",
status);
}
// create pool form camera video port
camera_video_port_pool = (MMAL_POOL_T *)
mmal_port_pool_create(camera_video_port,
camera_video_port->buffer_num, camera_video_port->buffer_size);
if(color) {
status = mmal_port_enable(camera_video_port, color_callback);
if (status != MMAL_SUCCESS)
printf("Error: unable to enable camera video port (%u)\n",
status);
else
cout << "Attached color callback" << endl;
}
else {
status = mmal_port_enable(camera_video_port, gray_callback);
if (status != MMAL_SUCCESS)
printf("Error: unable to enable camera video port (%u)\n",
status);
else
cout << "Attached gray callback" << endl;
}
status = mmal_component_enable(camera);
// Send all the buffers to the camera video port
int num = mmal_queue_length(camera_video_port_pool->queue);
int q;
for (q = 0; q < num; q++) {
MMAL_BUFFER_HEADER_T *buffer =
mmal_queue_get(camera_video_port_pool->queue);
if (!buffer) {
printf("Unable to get a required buffer %d from pool
queue\n", q);
}
if (mmal_port_send_buffer(camera_video_port, buffer) !=
MMAL_SUCCESS) {
printf("Unable to send a buffer to encoder output port
(%d)\n", q);
}
}
if (mmal_port_parameter_set_boolean(camera_video_port,
MMAL_PARAMETER_CAPTURE, 1) != MMAL_SUCCESS) {
printf("%s: Failed to start capture\n", __func__);
}
cout << "Capture started" << endl;
}
Configuración Raspberry Pi
41
//Settings
int PiCapture::setSaturation(int saturation){
int ret = 0;
if (!camera)
return 1;
if (saturation >= -100 && saturation <= 100)
{
MMAL_RATIONAL_T value = {saturation, 100};
ret = mmal_status_to_int(mmal_port_parameter_set_rational(camera>control, MMAL_PARAMETER_SATURATION, value));
}
else
{
printf("Invalid saturation value");
ret = 1;
}
return ret;
}
int PiCapture::setSharpness(int sharpness){
int ret = 0;
if (!camera)
return 1;
if (sharpness >= -100 && sharpness <= 100)
{
MMAL_RATIONAL_T value = {sharpness, 100};
ret = mmal_status_to_int(mmal_port_parameter_set_rational(camera>control, MMAL_PARAMETER_SHARPNESS, value));
}
else
{
printf("Invalid sharpness value");
ret = 1;
}
return ret;
}
int PiCapture::setContrast(int contrast){
int ret = 0;
if (!camera)
return 1;
if (contrast >= -100 && contrast <= 100)
{
MMAL_RATIONAL_T value = {contrast, 100};
ret = mmal_status_to_int(mmal_port_parameter_set_rational(camera>control, MMAL_PARAMETER_CONTRAST, value));
Configuración Raspberry Pi
42
}
else
{
printf("Invalid contrast value");
ret = 1;
}
return ret;
}
int PiCapture::setBrightness(int brightness){
int ret = 0;
if (!camera)
return 1;
if (brightness >= 0 && brightness <= 100)
{
MMAL_RATIONAL_T value = {brightness, 100};
ret = mmal_status_to_int(mmal_port_parameter_set_rational(camera>control, MMAL_PARAMETER_BRIGHTNESS, value));
}
else
{
printf("Invalid brightness value");
ret = 1;
}
return ret;
}
int PiCapture::setISO(int ISO){
if (!camera)
return 1;
return mmal_status_to_int(mmal_port_parameter_set_uint32(camera>control, MMAL_PARAMETER_ISO, ISO));
}
int PiCapture::setExposureMeteringMode(MMAL_PARAM_EXPOSUREMETERINGMODE_T
m_mode){
MMAL_PARAMETER_EXPOSUREMETERINGMODE_T meter_mode =
{{MMAL_PARAMETER_EXP_METERING_MODE,sizeof(meter_mode)},
m_mode};
if (!camera)
return 1;
return mmal_status_to_int(mmal_port_parameter_set(camera->control,
&meter_mode.hdr));
}
int PiCapture::setVideoStabilisation(int vstabilisation){
if (!camera)
return 1;
Configuración Raspberry Pi
43
return mmal_status_to_int(mmal_port_parameter_set_boolean(camera>control, MMAL_PARAMETER_VIDEO_STABILISATION, vstabilisation));
}
int PiCapture::setExposureCompensation(int exp_comp){
if (!camera)
return 1;
return mmal_status_to_int(mmal_port_parameter_set_int32(camera>control, MMAL_PARAMETER_EXPOSURE_COMP , exp_comp));
}
int PiCapture::setExposureMode(MMAL_PARAM_EXPOSUREMODE_T mode){
MMAL_PARAMETER_EXPOSUREMODE_T exp_mode =
{{MMAL_PARAMETER_EXPOSURE_MODE,sizeof(exp_mode)}, mode};
if (!camera)
return 1;
return mmal_status_to_int(mmal_port_parameter_set(camera->control,
&exp_mode.hdr));
}
int PiCapture::setAWBMode(MMAL_PARAM_AWBMODE_T awb_mode){
MMAL_PARAMETER_AWBMODE_T param =
{{MMAL_PARAMETER_AWB_MODE,sizeof(param)}, awb_mode};
if (!camera)
return 1;
return mmal_status_to_int(mmal_port_parameter_set(camera->control,
¶m.hdr));
}
int PiCapture::setAWBGains(float r_gain, float b_gain){
MMAL_PARAMETER_AWB_GAINS_T param =
{{MMAL_PARAMETER_CUSTOM_AWB_GAINS,sizeof(param)}, {0,0}, {0,0}};
if (!camera)
return 1;
if (!r_gain || !b_gain)
return 0;
param.r_gain.num = (unsigned int)(r_gain * 65536);
param.b_gain.num = (unsigned int)(b_gain * 65536);
param.r_gain.den = param.b_gain.den = 65536;
return mmal_status_to_int(mmal_port_parameter_set(camera->control,
¶m.hdr));
}
int PiCapture::setImageFX(MMAL_PARAM_IMAGEFX_T imageFX){
Configuración Raspberry Pi
44
MMAL_PARAMETER_IMAGEFX_T imgFX =
{{MMAL_PARAMETER_IMAGE_EFFECT,sizeof(imgFX)}, imageFX};
if (!camera)
return 1;
return mmal_status_to_int(mmal_port_parameter_set(camera->control,
&imgFX.hdr));
}
int PiCapture::setColourFX(MMAL_PARAM_COLOURFX_T *colourFX){
MMAL_PARAMETER_COLOURFX_T colfx =
{{MMAL_PARAMETER_COLOUR_EFFECT,sizeof(colfx)}, 0, 0, 0};
if (!camera)
return 1;
colfx.enable = colourFX->enable;
colfx.u = colourFX->u;
colfx.v = colourFX->v;
return mmal_status_to_int(mmal_port_parameter_set(camera->control,
&colfx.hdr));
}
int PiCapture::setRotation(int rotation){
int ret;
int my_rotation = ((rotation % 360 ) / 90) * 90;
ret = mmal_port_parameter_set_int32(camera->output[0],
MMAL_PARAMETER_ROTATION, my_rotation);
mmal_port_parameter_set_int32(camera->output[1],
MMAL_PARAMETER_ROTATION, my_rotation);
mmal_port_parameter_set_int32(camera->output[2],
MMAL_PARAMETER_ROTATION, my_rotation);
return ret;
}
int PiCapture::setFlips(int hflip, int vflip){
MMAL_PARAMETER_MIRROR_T mirror = {{MMAL_PARAMETER_MIRROR,
sizeof(MMAL_PARAMETER_MIRROR_T)}, MMAL_PARAM_MIRROR_NONE};
if (hflip && vflip)
mirror.value = MMAL_PARAM_MIRROR_BOTH;
else
if (hflip)
mirror.value = MMAL_PARAM_MIRROR_HORIZONTAL;
else
if (vflip)
mirror.value = MMAL_PARAM_MIRROR_VERTICAL;
mmal_port_parameter_set(camera->output[0], &mirror.hdr);
mmal_port_parameter_set(camera->output[1], &mirror.hdr);
Configuración Raspberry Pi
45
return mmal_port_parameter_set(camera->output[2], &mirror.hdr);
}
int PiCapture::setROI(PARAM_FLOAT_RECT_T rect){
MMAL_PARAMETER_INPUT_CROP_T crop = {{MMAL_PARAMETER_INPUT_CROP,
sizeof(MMAL_PARAMETER_INPUT_CROP_T)}};
if(rect.x < 0) rect.x = 0;if(rect.x > 1) rect.x = 1;
if(rect.y < 0) rect.y = 0;if(rect.y > 1) rect.y = 1;
if(rect.w < 0) rect.w = 0;if(rect.w > 1) rect.w = 1;
if(rect.h < 0) rect.h= 0;if(rect.h > 1) rect.h = 1;
crop.rect.x = (65536 * rect.x);
crop.rect.y = (65536 * rect.y);
crop.rect.width = (65536 * rect.w);
crop.rect.height = (65536 * rect.h);
return mmal_port_parameter_set(camera->control, &crop.hdr);
}
int PiCapture::setShutterSpeed(int speed){
if (!camera)
return 1;
return mmal_status_to_int(mmal_port_parameter_set_uint32(camera>control, MMAL_PARAMETER_SHUTTER_SPEED, speed));
}
Configuración Raspberry Pi
46
8.2 Código a compilar
En Raspbian, al igual que en Linux, y usando el compilador GCC que trae por defecto instalado,
tanto la comprobación de errores, como la compilación y la ejecución se hacen mediante ventana de
comandos. Para indicar los archivos que pertenecen a un proyecto, y por lo tanto ha de compilar,
existen este tipo de archivos, los CMakeLists, en los que se indican los archivos a compilar.
cmake_minimum_required(VERSION 2.8)
project(PiCapture)
SET(COMPILE_DEFINITIONS -Werror)
find_package( OpenCV REQUIRED )
include_directories(/opt/vc/include)
include_directories(/opt/vc/include/interface/vcos/pthreads)
include_directories(/opt/vc/include/interface/vmcs_host)
include_directories(/opt/vc/include/interface/vmcs_host/linux)
include_directories(USERLAND_DIR)
include_directories("${PROJECT_SOURCE_DIR}/include")
link_directories(/opt/vc/lib)
link_directories(/opt/vc/src/hello_pi/libs/vgfont)
add_executable(main src/main.cpp src/PiCapture.cpp)
target_link_libraries(main mmal_core mmal_util mmal_vc_client bcm_host ${OpenCV_LIBS})
Configuración Raspberry Pi
47
8.3 OpenCV
A continuación se mostrarán los archivos de OpenCV utilizados para el correcto funcionamiento
del proyecto.
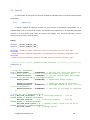
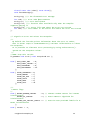
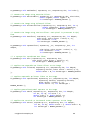
8.3.1
Highgui.hpp
La librería highgui de OpenCV resuelve un gran número de problemas relacionados con la
entrada/salida y con el interface de usuario. Una utilidad muy importante es la capacidad de asignar
acciones a los eventos del ratón sobre las ventanas de highgui, crear barras de posición u ofrecer
funciones para entrada y salida de vídeo.
Código
#ifndef __OPENCV_HIGHGUI_HPP__
#define __OPENCV_HIGHGUI_HPP__
#include "/home/pi/opencv/modules/core/include/opencv2/core/core.hpp"
#include
"/home/pi/opencv/modules/imgcodecs/include/opencv2/imgcodecs/imgcodecs.hpp"
#include
"/home/pi/opencv/modules/videoio/include/opencv2/videoio/videoio.hpp"
///////////////////////// graphical user interface //////////////////////////
namespace cv
{
// Flags for namedWindow
enum { WINDOW_NORMAL
= 0x00000000, // the user can resize the window (no
constraint) / also use to switch a fullscreen window to a normal size
WINDOW_AUTOSIZE
= 0x00000001, // the user cannot resize the window,
the size is constrainted by the image displayed
WINDOW_OPENGL
= 0x00001000, // window with opengl support
WINDOW_FULLSCREEN = 1,
// change the window to fullscreen
WINDOW_FREERATIO = 0x00000100, // the image expends as much as it can
(no ratio constraint)
WINDOW_KEEPRATIO = 0x00000000 // the ratio of the image is respected
};
// Flags for set / getWindowProperty
enum { WND_PROP_FULLSCREEN
= 0, // fullscreen property
(can be
WINDOW_NORMAL or WINDOW_FULLSCREEN)
WND_PROP_AUTOSIZE
= 1, // autosize property
(can be
WINDOW_NORMAL or WINDOW_AUTOSIZE)
WND_PROP_ASPECT_RATIO = 2, // window's aspect ration (can be set to
WINDOW_FREERATIO or WINDOW_KEEPRATIO);
WND_PROP_OPENGL
= 3 // opengl support
Configuración Raspberry Pi
48
};
enum { EVENT_MOUSEMOVE
EVENT_LBUTTONDOWN
EVENT_RBUTTONDOWN
EVENT_MBUTTONDOWN
EVENT_LBUTTONUP
EVENT_RBUTTONUP
EVENT_MBUTTONUP
EVENT_LBUTTONDBLCLK
EVENT_RBUTTONDBLCLK
EVENT_MBUTTONDBLCLK
EVENT_MOUSEWHEEL
EVENT_MOUSEHWHEEL
};
=
=
=
=
=
=
=
=
=
=
=
=
0,
1,
2,
3,
4,
5,
6,
7,
8,
9,
10,
11
enum { EVENT_FLAG_LBUTTON
EVENT_FLAG_RBUTTON
EVENT_FLAG_MBUTTON
EVENT_FLAG_CTRLKEY
EVENT_FLAG_SHIFTKEY
EVENT_FLAG_ALTKEY
};
=
=
=
=
=
=
1,
2,
4,
8,
16,
32
// Qt font
enum { QT_FONT_LIGHT
QT_FONT_NORMAL
QT_FONT_DEMIBOLD
QT_FONT_BOLD
QT_FONT_BLACK
};
=
=
=
=
=
// Qt font style
enum { QT_STYLE_NORMAL
QT_STYLE_ITALIC
QT_STYLE_OBLIQUE
};
= 0, //QFont::StyleNormal,
= 1, //QFont::StyleItalic,
= 2 //QFont::StyleOblique
25,
50,
63,
75,
87
//QFont::Light,
//QFont::Normal,
//QFont::DemiBold,
//QFont::Bold,
//QFont::Black
// Qt "button" type
enum { QT_PUSH_BUTTON = 0,
QT_CHECKBOX
= 1,
QT_RADIOBOX
= 2
};
typedef void
userdata);
typedef void
typedef void
typedef void
(*MouseCallback)(int event, int x, int y, int flags, void*
(*TrackbarCallback)(int pos, void* userdata);
(*OpenGlDrawCallback)(void* userdata);
(*ButtonCallback)(int state, void* userdata);
CV_EXPORTS_W void namedWindow(const String& winname, int flags =
WINDOW_AUTOSIZE);
Configuración Raspberry Pi
49
CV_EXPORTS_W void destroyWindow(const String& winname);
CV_EXPORTS_W void destroyAllWindows();
CV_EXPORTS_W int startWindowThread();
CV_EXPORTS_W int waitKey(int delay = 0);
CV_EXPORTS_W void imshow(const String& winname, InputArray mat);
CV_EXPORTS_W void resizeWindow(const String& winname, int width, int height);
CV_EXPORTS_W void moveWindow(const String& winname, int x, int y);
CV_EXPORTS_W void setWindowProperty(const String& winname, int prop_id,
double prop_value);
CV_EXPORTS_W double getWindowProperty(const String& winname, int prop_id);
//! assigns callback for mouse events
CV_EXPORTS void setMouseCallback(const String& winname, MouseCallback
onMouse, void* userdata = 0);
CV_EXPORTS int getMouseWheelDelta(int flags);
CV_EXPORTS int createTrackbar(const String& trackbarname, const String&
winname,
int* value, int count,
TrackbarCallback onChange = 0,
void* userdata = 0);
CV_EXPORTS_W int getTrackbarPos(const String& trackbarname, const String&
winname);
CV_EXPORTS_W void setTrackbarPos(const String& trackbarname, const String&
winname, int pos);
// OpenGL support
CV_EXPORTS void imshow(const String& winname, const ogl::Texture2D& tex);
CV_EXPORTS void setOpenGlDrawCallback(const String& winname,
OpenGlDrawCallback onOpenGlDraw, void* userdata = 0);
CV_EXPORTS void setOpenGlContext(const String& winname);
CV_EXPORTS void updateWindow(const String& winname);
// Only for Qt
struct QtFont
{
Configuración Raspberry Pi
50
const char* nameFont; // Qt: nameFont
Scalar
color;
// Qt: ColorFont -> cvScalar(blue_component,
green_component, red\_component[, alpha_component])
int
font_face; // Qt: bool italic
const int* ascii;
// font data and metrics
const int* greek;
const int* cyrillic;
float
hscale, vscale;
float
shear;
// slope coefficient: 0 - normal, >0 - italic
int
thickness; // Qt: weight
float
dx;
// horizontal interval between letters
int
line_type; // Qt: PointSize
};
CV_EXPORTS QtFont fontQt(const String& nameFont, int pointSize = -1,
Scalar color = Scalar::all(0), int weight =
QT_FONT_NORMAL,
int style = QT_STYLE_NORMAL, int spacing = 0);
CV_EXPORTS void addText( const Mat& img, const String& text, Point org, const
QtFont& font);
CV_EXPORTS void displayOverlay(const String& winname, const String& text, int
delayms = 0);
CV_EXPORTS void displayStatusBar(const String& winname, const String& text,
int delayms = 0);
CV_EXPORTS void saveWindowParameters(const String& windowName);
CV_EXPORTS void loadWindowParameters(const String& windowName);
CV_EXPORTS int startLoop(int (*pt2Func)(int argc, char *argv[]), int argc,
char* argv[]);
CV_EXPORTS
void stopLoop();
CV_EXPORTS int createButton( const String& bar_name, ButtonCallback
on_change,
void* userdata = 0, int type = QT_PUSH_BUTTON,
bool initial_button_state = false);
} // cv
#endif
Configuración Raspberry Pi
51
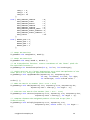
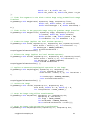
8.3.2
Core.hpp
Es un módulo compacto que define las estructuras de datos básicas, incluyendo las matrices tipo
Mat (densas y multidimensionales) y otras funciones básicas utilizadas por todos los demás módulos.
Código
#ifndef __OPENCV_CORE_HPP__
#define __OPENCV_CORE_HPP__
#ifndef __cplusplus
# error core.hpp header must be compiled as C++
#endif
#include
#include
#include
#include
#include
#include
#include
#include
#include
"opencv2/core/cvdef.h"
"opencv2/core/version.hpp"
"opencv2/core/base.hpp"
"opencv2/core/cvstd.hpp"
"opencv2/core/traits.hpp"
"opencv2/core/matx.hpp"
"opencv2/core/types.hpp"
"opencv2/core/mat.hpp"
"opencv2/core/persistence.hpp"
/*! \namespace cv
Namespace where all the C++ OpenCV functionality resides
*/
namespace cv {
/*!
The standard OpenCV exception class.
Instances of the class are thrown by various functions and methods in the
case of critical errors.
*/
class CV_EXPORTS Exception : public std::exception
{
public:
/*!
Default constructor
*/
Exception();
/*!
Full constructor. Normally the constuctor is not called explicitly.
Instead, the macros CV_Error(), CV_Error_() and CV_Assert() are used.
*/
Exception(int _code, const String& _err, const String& _func, const
String& _file, int _line);
virtual ~Exception() throw();
/*!
\return the error description and the context as a text string.
*/
Configuración Raspberry Pi
52
virtual const char *what() const throw();
void formatMessage();
String msg; ///< the formatted error message
int code; ///< error code @see CVStatus
String err; ///< error description
String func; ///< function name. Available only when the compiler
supports getting it
String file; ///< source file name where the error has occured
int line; ///< line number in the source file where the error has occured
};
//! Signals an error and raises the exception.
/*!
By default the function prints information about the error to stderr,
then it either stops if setBreakOnError() had been called before or raises
the exception.
It is possible to alternate error processing by using redirectError().
\param exc the exception raisen.
*/
//TODO: drop this version
CV_EXPORTS void error( const Exception& exc );
enum { SORT_EVERY_ROW
SORT_EVERY_COLUMN
SORT_ASCENDING
SORT_DESCENDING
};
=
=
=
=
enum { COVAR_SCRAMBLED
COVAR_NORMAL
COVAR_USE_AVG
COVAR_SCALE
COVAR_ROWS
COVAR_COLS
};
0,
1,
2,
4,
8,
16
=
=
=
=
=
=
0,
1,
0,
16
/*!
k-Means flags
*/
enum { KMEANS_RANDOM_CENTERS
= 0, // Chooses random centers for k-Means
initialization
KMEANS_PP_CENTERS
= 2, // Uses k-Means++ algorithm for
initialization
KMEANS_USE_INITIAL_LABELS = 1 // Uses the user-provided labels for KMeans initialization
};
enum { FILLED
= -1,
Configuración Raspberry Pi
53
LINE_4 = 4,
LINE_8 = 8,
LINE_AA = 16
};
enum { FONT_HERSHEY_SIMPLEX
FONT_HERSHEY_PLAIN
FONT_HERSHEY_DUPLEX
FONT_HERSHEY_COMPLEX
FONT_HERSHEY_TRIPLEX
FONT_HERSHEY_COMPLEX_SMALL
FONT_HERSHEY_SCRIPT_SIMPLEX
FONT_HERSHEY_SCRIPT_COMPLEX
FONT_ITALIC
};
enum { REDUCE_SUM
REDUCE_AVG
REDUCE_MAX
REDUCE_MIN
};
=
=
=
=
=
=
=
=
=
=
=
=
=
0,
1,
2,
3,
4,
5,
6,
7,
16
0,
1,
2,
3
//! swaps two matrices
CV_EXPORTS void swap(Mat& a, Mat& b);
//! swaps two umatrices
CV_EXPORTS void swap( UMat& a, UMat& b );
//! 1D interpolation function: returns coordinate of the "donor" pixel for
the specified location p.
CV_EXPORTS_W int borderInterpolate(int p, int len, int borderType);
//! copies 2D array to a larger destination array with extrapolation of the
outer part of src using the specified border mode
CV_EXPORTS_W void copyMakeBorder(InputArray src, OutputArray dst,
int top, int bottom, int left, int right,
int borderType, const Scalar& value =
Scalar() );
//! adds one matrix to another (dst = src1 + src2)
CV_EXPORTS_W void add(InputArray src1, InputArray src2, OutputArray dst,
InputArray mask = noArray(), int dtype = -1);
//! subtracts one matrix from another (dst = src1 - src2)
CV_EXPORTS_W void subtract(InputArray src1, InputArray src2, OutputArray dst,
InputArray mask = noArray(), int dtype = -1);
//! computes element-wise weighted product of the two arrays (dst =
scale*src1*src2)
CV_EXPORTS_W void multiply(InputArray src1, InputArray src2,
OutputArray dst, double scale = 1, int dtype = 1);
Configuración Raspberry Pi
54
//! computes element-wise weighted quotient of the two arrays (dst = scale *
src1 / src2)
CV_EXPORTS_W void divide(InputArray src1, InputArray src2, OutputArray dst,
double scale = 1, int dtype = -1);
//! computes element-wise weighted reciprocal of an array (dst = scale/src2)
CV_EXPORTS_W void divide(double scale, InputArray src2,
OutputArray dst, int dtype = -1);
//! adds scaled array to another one (dst = alpha*src1 + src2)
CV_EXPORTS_W void scaleAdd(InputArray src1, double alpha, InputArray src2,
OutputArray dst);
//! computes weighted sum of two arrays (dst = alpha*src1 + beta*src2 +
gamma)
CV_EXPORTS_W void addWeighted(InputArray src1, double alpha, InputArray src2,
double beta, double gamma, OutputArray dst, int
dtype = -1);
//! scales array elements, computes absolute values and converts the results
to 8-bit unsigned integers: dst(i)=saturate_cast<uchar>abs(src(i)*alpha+beta)
CV_EXPORTS_W void convertScaleAbs(InputArray src, OutputArray dst,
double alpha = 1, double beta = 0);
//! transforms array of numbers using a lookup table: dst(i)=lut(src(i))
CV_EXPORTS_W void LUT(InputArray src, InputArray lut, OutputArray dst);
//! computes sum of array elements
CV_EXPORTS_AS(sumElems) Scalar sum(InputArray src);
//! computes the number of nonzero array elements
CV_EXPORTS_W int countNonZero( InputArray src );
//! returns the list of locations of non-zero pixels
CV_EXPORTS_W void findNonZero( InputArray src, OutputArray idx );
//! computes mean value of selected array elements
CV_EXPORTS_W Scalar mean(InputArray src, InputArray mask = noArray());
//! computes mean value and standard deviation of all or selected array
elements
CV_EXPORTS_W void meanStdDev(InputArray src, OutputArray mean, OutputArray
stddev,
InputArray mask=noArray());
//! computes norm of the selected array part
CV_EXPORTS_W double norm(InputArray src1, int normType = NORM_L2, InputArray
mask = noArray());
//! computes norm of selected part of the difference between two arrays
CV_EXPORTS_W double norm(InputArray src1, InputArray src2,
int normType = NORM_L2, InputArray mask =
noArray());
Configuración Raspberry Pi
55
//! computes PSNR image/video quality metric
CV_EXPORTS_W double PSNR(InputArray src1, InputArray src2);
//! computes norm of a sparse matrix
CV_EXPORTS double norm( const SparseMat& src, int normType );
//! naive nearest neighbor finder
CV_EXPORTS_W void batchDistance(InputArray src1, InputArray src2,
OutputArray dist, int dtype, OutputArray
nidx,
int normType = NORM_L2, int K = 0,
InputArray mask = noArray(), int update = 0,
bool crosscheck = false);
//! scales and shifts array elements so that either the specified norm
(alpha) or the minimum (alpha) and maximum (beta) array values get the
specified values
CV_EXPORTS_W void normalize( InputArray src, InputOutputArray dst, double
alpha = 1, double beta = 0,
int norm_type = NORM_L2, int dtype = -1,
InputArray mask = noArray());
//! scales and shifts array elements so that either the specified norm
(alpha) or the minimum (alpha) and maximum (beta) array values get the
specified values
CV_EXPORTS void normalize( const SparseMat& src, SparseMat& dst, double
alpha, int normType );
//! finds global minimum and maximum array elements and returns their values
and their locations
CV_EXPORTS_W void minMaxLoc(InputArray src, CV_OUT double* minVal,
CV_OUT double* maxVal = 0, CV_OUT Point* minLoc =
0,
CV_OUT Point* maxLoc = 0, InputArray mask =
noArray());
CV_EXPORTS void minMaxIdx(InputArray src, double* minVal, double* maxVal = 0,
int* minIdx = 0, int* maxIdx = 0, InputArray mask =
noArray());
//! finds global minimum and maximum sparse array elements and returns their
values and their locations
CV_EXPORTS void minMaxLoc(const SparseMat& a, double* minVal,
double* maxVal, int* minIdx = 0, int* maxIdx = 0);
//! transforms 2D matrix to 1D row or column vector by taking sum, minimum,
maximum or mean value over all the rows
CV_EXPORTS_W void reduce(InputArray src, OutputArray dst, int dim, int rtype,
int dtype = -1);
//! makes multi-channel array out of several single-channel arrays
CV_EXPORTS void merge(const Mat* mv, size_t count, OutputArray dst);
//! makes multi-channel array out of several single-channel arrays
Configuración Raspberry Pi
56
CV_EXPORTS_W void merge(InputArrayOfArrays mv, OutputArray dst);
//! copies each plane of a multi-channel array to a dedicated array
CV_EXPORTS void split(const Mat& src, Mat* mvbegin);
//! copies each plane of a multi-channel array to a dedicated array
CV_EXPORTS_W void split(InputArray m, OutputArrayOfArrays mv);
//! copies selected channels from the input arrays to the selected channels
of the output arrays
CV_EXPORTS void mixChannels(const Mat* src, size_t nsrcs, Mat* dst, size_t
ndsts,
const int* fromTo, size_t npairs);
CV_EXPORTS void mixChannels(InputArrayOfArrays src, InputOutputArrayOfArrays
dst,
const int* fromTo, size_t npairs);
CV_EXPORTS_W void mixChannels(InputArrayOfArrays src,
InputOutputArrayOfArrays dst,
const std::vector<int>& fromTo);
//! extracts a single channel from src (coi is 0-based index)
CV_EXPORTS_W void extractChannel(InputArray src, OutputArray dst, int coi);
//! inserts a single channel to dst (coi is 0-based index)
CV_EXPORTS_W void insertChannel(InputArray src, InputOutputArray dst, int
coi);
//! reverses the order of the rows, columns or both in a matrix
CV_EXPORTS_W void flip(InputArray src, OutputArray dst, int flipCode);
//! replicates the input matrix the specified number of times in the
horizontal and/or vertical direction
CV_EXPORTS_W void repeat(InputArray src, int ny, int nx, OutputArray dst);
CV_EXPORTS Mat repeat(const Mat& src, int ny, int nx);
CV_EXPORTS void hconcat(const Mat* src, size_t nsrc, OutputArray dst);
CV_EXPORTS void hconcat(InputArray src1, InputArray src2, OutputArray dst);
CV_EXPORTS_W void hconcat(InputArrayOfArrays src, OutputArray dst);
CV_EXPORTS void vconcat(const Mat* src, size_t nsrc, OutputArray dst);
CV_EXPORTS void vconcat(InputArray src1, InputArray src2, OutputArray dst);
CV_EXPORTS_W void vconcat(InputArrayOfArrays src, OutputArray dst);
//! computes bitwise conjunction of the two arrays (dst = src1 & src2)
CV_EXPORTS_W void bitwise_and(InputArray src1, InputArray src2,
OutputArray dst, InputArray mask = noArray());
Configuración Raspberry Pi
57
//! computes bitwise disjunction of the two arrays (dst = src1 | src2)
CV_EXPORTS_W void bitwise_or(InputArray src1, InputArray src2,
OutputArray dst, InputArray mask = noArray());
//! computes bitwise exclusive-or of the two arrays (dst = src1 ^ src2)
CV_EXPORTS_W void bitwise_xor(InputArray src1, InputArray src2,
OutputArray dst, InputArray mask = noArray());
//! inverts each bit of array (dst = ~src)
CV_EXPORTS_W void bitwise_not(InputArray src, OutputArray dst,
InputArray mask = noArray());
//! computes element-wise absolute difference of two arrays (dst = abs(src1 src2))
CV_EXPORTS_W void absdiff(InputArray src1, InputArray src2, OutputArray dst);
//! set mask elements for those array elements which are within the elementspecific bounding box (dst = lowerb <= src && src < upperb)
CV_EXPORTS_W void inRange(InputArray src, InputArray lowerb,
InputArray upperb, OutputArray dst);
//! compares elements of two arrays (dst = src1 <cmpop> src2)
CV_EXPORTS_W void compare(InputArray src1, InputArray src2, OutputArray dst,
int cmpop);
//! computes per-element minimum of two arrays (dst = min(src1, src2))
CV_EXPORTS_W void min(InputArray src1, InputArray src2, OutputArray dst);
//! computes per-element maximum of two arrays (dst = max(src1, src2))
CV_EXPORTS_W void max(InputArray src1, InputArray src2, OutputArray dst);
// the following overloads are needed to avoid conflicts with
//
const _Tp& std::min(const _Tp&, const _Tp&, _Compare)
//! computes per-element minimum of two arrays (dst = min(src1, src2))
CV_EXPORTS void min(const Mat& src1, const Mat& src2, Mat& dst);
//! computes per-element maximum of two arrays (dst = max(src1, src2))
CV_EXPORTS void max(const Mat& src1, const Mat& src2, Mat& dst);
//! computes per-element minimum of two arrays (dst = min(src1, src2))
CV_EXPORTS void min(const UMat& src1, const UMat& src2, UMat& dst);
//! computes per-element maximum of two arrays (dst = max(src1, src2))
CV_EXPORTS void max(const UMat& src1, const UMat& src2, UMat& dst);
//! computes square root of each matrix element (dst = src**0.5)
CV_EXPORTS_W void sqrt(InputArray src, OutputArray dst);
//! raises the input matrix elements to the specified power (b = a**power)
CV_EXPORTS_W void pow(InputArray src, double power, OutputArray dst);
//! computes exponent of each matrix element (dst = e**src)
CV_EXPORTS_W void exp(InputArray src, OutputArray dst);
//! computes natural logarithm of absolute value of each matrix element: dst
= log(abs(src))
CV_EXPORTS_W void log(InputArray src, OutputArray dst);
Configuración Raspberry Pi
58
//! converts polar coordinates to Cartesian
CV_EXPORTS_W void polarToCart(InputArray magnitude, InputArray angle,
OutputArray x, OutputArray y, bool
angleInDegrees = false);
//! converts Cartesian coordinates to polar
CV_EXPORTS_W void cartToPolar(InputArray x, InputArray y,
OutputArray magnitude, OutputArray angle,
bool angleInDegrees = false);
//! computes angle (angle(i)) of each (x(i), y(i)) vector
CV_EXPORTS_W void phase(InputArray x, InputArray y, OutputArray angle,
bool angleInDegrees = false);
//! computes magnitude (magnitude(i)) of each (x(i), y(i)) vector
CV_EXPORTS_W void magnitude(InputArray x, InputArray y, OutputArray
magnitude);
//! checks that each matrix element is within the specified range.
CV_EXPORTS_W bool checkRange(InputArray a, bool quiet = true, CV_OUT Point*
pos = 0,
double minVal = -DBL_MAX, double maxVal =
DBL_MAX);
//! converts NaN's to the given number
CV_EXPORTS_W void patchNaNs(InputOutputArray a, double val = 0);
//! implements generalized matrix product algorithm GEMM from BLAS
CV_EXPORTS_W void gemm(InputArray src1, InputArray src2, double alpha,
InputArray src3, double beta, OutputArray dst, int
flags = 0);
//! multiplies matrix by its transposition from the left or from the right
CV_EXPORTS_W void mulTransposed( InputArray src, OutputArray dst, bool aTa,
InputArray delta = noArray(),
double scale = 1, int dtype = -1 );
//! transposes the matrix
CV_EXPORTS_W void transpose(InputArray src, OutputArray dst);
//! performs affine transformation of each element of multi-channel input
matrix
CV_EXPORTS_W void transform(InputArray src, OutputArray dst, InputArray m );
//! performs perspective transformation of each element of multi-channel
input matrix
CV_EXPORTS_W void perspectiveTransform(InputArray src, OutputArray dst,
InputArray m );
//! extends the symmetrical matrix from the lower half or from the upper half
CV_EXPORTS_W void completeSymm(InputOutputArray mtx, bool lowerToUpper =
false);
Configuración Raspberry Pi
59
//! initializes scaled identity matrix
CV_EXPORTS_W void setIdentity(InputOutputArray mtx, const Scalar& s =
Scalar(1));
//! computes determinant of a square matrix
CV_EXPORTS_W double determinant(InputArray mtx);
//! computes trace of a matrix
CV_EXPORTS_W Scalar trace(InputArray mtx);
//! computes inverse or pseudo-inverse matrix
CV_EXPORTS_W double invert(InputArray src, OutputArray dst, int flags =
DECOMP_LU);
//! solves linear system or a least-square problem
CV_EXPORTS_W bool solve(InputArray src1, InputArray src2,
OutputArray dst, int flags = DECOMP_LU);
//! sorts independently each matrix row or each matrix column
CV_EXPORTS_W void sort(InputArray src, OutputArray dst, int flags);
//! sorts independently each matrix row or each matrix column
CV_EXPORTS_W void sortIdx(InputArray src, OutputArray dst, int flags);
//! finds real roots of a cubic polynomial
CV_EXPORTS_W int solveCubic(InputArray coeffs, OutputArray roots);
//! finds real and complex roots of a polynomial
CV_EXPORTS_W double solvePoly(InputArray coeffs, OutputArray roots, int
maxIters = 300);
//! finds eigenvalues and eigenvectors of a symmetric matrix
CV_EXPORTS_W bool eigen(InputArray src, OutputArray eigenvalues,
OutputArray eigenvectors = noArray());
//! computes covariation matrix of a set of samples
CV_EXPORTS void calcCovarMatrix( const Mat* samples, int nsamples, Mat&
covar, Mat& mean,
int flags, int ctype = CV_64F); //TODO:
InputArrayOfArrays
//! computes covariation matrix of a set of samples
CV_EXPORTS_W void calcCovarMatrix( InputArray samples, OutputArray covar,
InputOutputArray mean, int flags, int
ctype = CV_64F);
CV_EXPORTS_W void PCACompute(InputArray data, InputOutputArray mean,
OutputArray eigenvectors, int maxComponents =
0);
CV_EXPORTS_W void PCACompute(InputArray data, InputOutputArray mean,
OutputArray eigenvectors, double
retainedVariance);
Configuración Raspberry Pi
60
CV_EXPORTS_W void PCAProject(InputArray data, InputArray mean,
InputArray eigenvectors, OutputArray result);
CV_EXPORTS_W void PCABackProject(InputArray data, InputArray mean,
InputArray eigenvectors, OutputArray
result);
//! computes SVD of src
CV_EXPORTS_W void SVDecomp( InputArray src, OutputArray w, OutputArray u,
OutputArray vt, int flags = 0 );
//! performs back substitution for the previously computed SVD
CV_EXPORTS_W void SVBackSubst( InputArray w, InputArray u, InputArray vt,
InputArray rhs, OutputArray dst );
//! computes Mahalanobis distance between two vectors: sqrt((v1v2)'*icovar*(v1-v2)), where icovar is the inverse covariation matrix
CV_EXPORTS_W double Mahalanobis(InputArray v1, InputArray v2, InputArray
icovar);
//! performs forward or inverse 1D or 2D Discrete Fourier Transformation
CV_EXPORTS_W void dft(InputArray src, OutputArray dst, int flags = 0, int
nonzeroRows = 0);
//! performs inverse 1D or 2D Discrete Fourier Transformation
CV_EXPORTS_W void idft(InputArray src, OutputArray dst, int flags = 0, int
nonzeroRows = 0);
//! performs forward or inverse 1D or 2D Discrete Cosine Transformation
CV_EXPORTS_W void dct(InputArray src, OutputArray dst, int flags = 0);
//! performs inverse 1D or 2D Discrete Cosine Transformation
CV_EXPORTS_W void idct(InputArray src, OutputArray dst, int flags = 0);
//! computes element-wise product of the two Fourier spectrums. The second
spectrum can optionally be conjugated before the multiplication
CV_EXPORTS_W void mulSpectrums(InputArray a, InputArray b, OutputArray c,
int flags, bool conjB = false);
//! computes the minimal vector size vecsize1 >= vecsize so that the dft() of
the vector of length vecsize1 can be computed efficiently
CV_EXPORTS_W int getOptimalDFTSize(int vecsize);
//! clusters the input data using k-Means algorithm
CV_EXPORTS_W double kmeans( InputArray data, int K, InputOutputArray
bestLabels,
TermCriteria criteria, int attempts,
int flags, OutputArray centers = noArray() );
//! returns the thread-local Random number generator
CV_EXPORTS RNG& theRNG();
//! fills array with uniformly-distributed random numbers from the range
[low, high)
Configuración Raspberry Pi
61
CV_EXPORTS_W void randu(InputOutputArray dst, InputArray low, InputArray
high);
//! fills array with normally-distributed random numbers with the specified
mean and the standard deviation
CV_EXPORTS_W void randn(InputOutputArray dst, InputArray mean, InputArray
stddev);
//! shuffles the input array elements
CV_EXPORTS_W void randShuffle(InputOutputArray dst, double iterFactor = 1.,
RNG* rng = 0);
/*!
Principal Component Analysis
The class PCA is used to compute the special basis for a set of vectors.
The basis will consist of eigenvectors of the covariance matrix computed
from the input set of vectors. After PCA is performed, vectors can be
transformed from
the original high-dimensional space to the subspace formed by a few most
prominent eigenvectors (called the principal components),
corresponding to the largest eigenvalues of the covariation matrix.
Thus the dimensionality of the vector and the correlation between the
coordinates is reduced.
The following sample is the function that takes two matrices. The first
one stores the set
of vectors (a row per vector) that is used to compute PCA, the second one
stores another
"test" set of vectors (a row per vector) that are first compressed with
PCA,
then reconstructed back and then the reconstruction error norm is
computed and printed for each vector.
\code
using namespace cv;
PCA compressPCA(const Mat& pcaset, int maxComponents,
const Mat& testset, Mat& compressed)
{
PCA pca(pcaset, // pass the data
Mat(), // we do not have a pre-computed mean vector,
// so let the PCA engine to compute it
PCA::DATA_AS_ROW, // indicate that the vectors
// are stored as matrix rows
// (use PCA::DATA_AS_COL if the vectors
are
// the matrix columns)
maxComponents // specify, how many principal components to
retain
);
// if there is no test data, just return the computed basis, readyto-use
if( !testset.data )
Configuración Raspberry Pi
62
return pca;
CV_Assert( testset.cols == pcaset.cols );
compressed.create(testset.rows, maxComponents, testset.type());
Mat reconstructed;
for( int i = 0; i < testset.rows; i++ )
{
Mat vec = testset.row(i), coeffs = compressed.row(i),
reconstructed;
// compress the vector, the result will be stored
// in the i-th row of the output matrix
pca.project(vec, coeffs);
// and then reconstruct it
pca.backProject(coeffs, reconstructed);
// and measure the error
printf("%d. diff = %g\n", i, norm(vec, reconstructed, NORM_L2));
}
return pca;
}
\endcode
*/
class CV_EXPORTS PCA
{
public:
enum { DATA_AS_ROW = 0,
DATA_AS_COL = 1,
USE_AVG
= 2
};
//! default constructor
PCA();
//! the constructor that performs PCA
PCA(InputArray data, InputArray mean, int flags, int maxComponents = 0);
PCA(InputArray data, InputArray mean, int flags, double
retainedVariance);
//! operator that performs PCA. The previously stored data, if any, is
released
PCA& operator()(InputArray data, InputArray mean, int flags, int
maxComponents = 0);
PCA& operator()(InputArray data, InputArray mean, int flags, double
retainedVariance);
//! projects vector from the original space to the principal components
subspace
Mat project(InputArray vec) const;
//! projects vector from the original space to the principal components
subspace
void project(InputArray vec, OutputArray result) const;
//! reconstructs the original vector from the projection
Configuración Raspberry Pi
63
Mat backProject(InputArray vec) const;
//! reconstructs the original vector from the projection
void backProject(InputArray vec, OutputArray result) const;
//! write and load PCA matrix
void write(FileStorage& fs ) const;
void read(const FileNode& fs);
Mat eigenvectors; //!< eigenvectors of the covariation matrix
Mat eigenvalues; //!< eigenvalues of the covariation matrix
Mat mean; //!< mean value subtracted before the projection and added
after the back projection
};
// Linear Discriminant Analysis
class CV_EXPORTS LDA
{
public:
// Initializes a LDA with num_components (default 0) and specifies how
// samples are aligned (default dataAsRow=true).
explicit LDA(int num_components = 0);
// Initializes and performs a Discriminant Analysis with Fisher's
// Optimization Criterion on given data in src and corresponding labels
// in labels. If 0 (or less) number of components are given, they are
// automatically determined for given data in computation.
LDA(InputArrayOfArrays src, InputArray labels, int num_components = 0);
// Serializes this object to a given filename.
void save(const String& filename) const;
// Deserializes this object from a given filename.
void load(const String& filename);
// Serializes this object to a given cv::FileStorage.
void save(FileStorage& fs) const;
// Deserializes this object from a given cv::FileStorage.
void load(const FileStorage& node);
// Destructor.
~LDA();
//! Compute the discriminants for data in src and labels.
void compute(InputArrayOfArrays src, InputArray labels);
// Projects samples into the LDA subspace.
Mat project(InputArray src);
// Reconstructs projections from the LDA subspace.
Mat reconstruct(InputArray src);
// Returns the eigenvectors of this LDA.
Configuración Raspberry Pi
64
Mat eigenvectors() const { return _eigenvectors; }
// Returns the eigenvalues of this LDA.
Mat eigenvalues() const { return _eigenvalues; }
static Mat subspaceProject(InputArray W, InputArray mean, InputArray
src);
static Mat subspaceReconstruct(InputArray W, InputArray mean, InputArray
src);
protected:
bool _dataAsRow;
int _num_components;
Mat _eigenvectors;
Mat _eigenvalues;
void lda(InputArrayOfArrays src, InputArray labels);
};
/*!
Singular Value Decomposition class
The class is used to compute Singular Value Decomposition of a floatingpoint matrix and then
use it to solve least-square problems, under-determined linear systems,
invert matrices,
compute condition numbers etc.
For a bit faster operation you can pass flags=SVD::MODIFY_A|... to modify
the decomposed matrix
when it is not necessarily to preserve it. If you want to compute
condition number of a matrix
or absolute value of its determinant - you do not need SVD::u or SVD::vt,
so you can pass flags=SVD::NO_UV|... . Another flag SVD::FULL_UV
indicates that the full-size SVD::u and SVD::vt
must be computed, which is not necessary most of the time.
*/
class CV_EXPORTS SVD
{
public:
enum { MODIFY_A = 1,
NO_UV
= 2,
FULL_UV = 4
};
//! the default constructor
SVD();
//! the constructor that performs SVD
SVD( InputArray src, int flags = 0 );
//! the operator that performs SVD. The previously allocated SVD::u,
SVD::w are SVD::vt are released.
SVD& operator ()( InputArray src, int flags = 0 );
Configuración Raspberry Pi
65
//! decomposes matrix and stores the results to user-provided matrices
static void compute( InputArray src, OutputArray w,
OutputArray u, OutputArray vt, int flags = 0 );
//! computes singular values of a matrix
static void compute( InputArray src, OutputArray w, int flags = 0 );
//! performs back substitution
static void backSubst( InputArray w, InputArray u,
InputArray vt, InputArray rhs,
OutputArray dst );
//! finds dst = arg min_{|dst|=1} |m*dst|
static void solveZ( InputArray src, OutputArray dst );
//! performs back substitution, so that dst is the solution or pseudosolution of m*dst = rhs, where m is the decomposed matrix
void backSubst( InputArray rhs, OutputArray dst ) const;
template<typename _Tp, int m, int n, int nm> static
void compute( const Matx<_Tp, m, n>& a, Matx<_Tp, nm, 1>& w, Matx<_Tp, m,
nm>& u, Matx<_Tp, n, nm>& vt );
template<typename _Tp, int m, int n, int nm> static
void compute( const Matx<_Tp, m, n>& a, Matx<_Tp, nm, 1>& w );
template<typename _Tp, int m, int n, int nm, int nb> static
void backSubst( const Matx<_Tp, nm, 1>& w, const Matx<_Tp, m, nm>& u,
const Matx<_Tp, n, nm>& vt, const Matx<_Tp, m, nb>& rhs, Matx<_Tp, n, nb>&
dst );
Mat u, w, vt;
};
/*!
Line iterator class
The class is used to iterate over all the pixels on the raster line
segment connecting two specified points.
*/
class CV_EXPORTS LineIterator
{
public:
//! intializes the iterator
LineIterator( const Mat& img, Point pt1, Point pt2,
int connectivity = 8, bool leftToRight = false );
//! returns pointer to the current pixel
uchar* operator *();
//! prefix increment operator (++it). shifts iterator to the next pixel
LineIterator& operator ++();
//! postfix increment operator (it++). shifts iterator to the next pixel
Configuración Raspberry Pi
66
LineIterator operator ++(int);
//! returns coordinates of the current pixel
Point pos() const;
uchar* ptr;
const uchar* ptr0;
int step, elemSize;
int err, count;
int minusDelta, plusDelta;
int minusStep, plusStep;
};
/*!
Random Number Generator
The class implements RNG using Multiply-with-Carry algorithm
*/
class CV_EXPORTS RNG
{
public:
enum { UNIFORM = 0,
NORMAL = 1
};
RNG();
RNG(uint64 state);
//! updates the state and returns the next 32-bit unsigned integer random
number
unsigned next();
operator uchar();
operator schar();
operator ushort();
operator short();
operator unsigned();
//! returns a random integer sampled uniformly from [0, N).
unsigned operator ()(unsigned N);
unsigned operator ()();
operator int();
operator float();
operator double();
//! returns uniformly distributed integer random number from [a,b) range
int uniform(int a, int b);
//! returns uniformly distributed floating-point random number from [a,b)
range
float uniform(float a, float b);
//! returns uniformly distributed double-precision floating-point random
number from [a,b) range
double uniform(double a, double b);
void fill( InputOutputArray mat, int distType, InputArray a, InputArray
b, bool saturateRange = false );
//! returns Gaussian random variate with mean zero.
double gaussian(double sigma);
Configuración Raspberry Pi
67
uint64 state;
};
class CV_EXPORTS RNG_MT19937
{
public:
RNG_MT19937();
RNG_MT19937(unsigned s);
void seed(unsigned s);
unsigned next();
operator
operator
operator
operator
int();
unsigned();
float();
double();
unsigned operator ()(unsigned N);
unsigned operator ()();
// returns uniformly distributed integer random number from [a,b) range
int uniform(int a, int b);
// returns uniformly distributed floating-point random number from [a,b)
range
float uniform(float a, float b);
// returns uniformly distributed double-precision floating-point random
number from [a,b) range
double uniform(double a, double b);
private:
enum PeriodParameters {N = 624, M = 397};
unsigned state[N];
int mti;
};
/////////////////////////////// Formatted output of cv::Mat
///////////////////////////
class CV_EXPORTS Formatted
{
public:
virtual const char* next() = 0;
virtual void reset() = 0;
virtual ~Formatted();
};
class CV_EXPORTS Formatter
{
public:
enum { FMT_DEFAULT = 0,
FMT_MATLAB = 1,
Configuración Raspberry Pi
68
FMT_CSV
FMT_PYTHON
FMT_NUMPY
FMT_C
};
=
=
=
=
2,
3,
4,
5
virtual ~Formatter();
virtual Ptr<Formatted> format(const Mat& mtx) const = 0;
virtual void set32fPrecision(int p = 8) = 0;
virtual void set64fPrecision(int p = 16) = 0;
virtual void setMultiline(bool ml = true) = 0;
static Ptr<Formatter> get(int fmt = FMT_DEFAULT);
};
//////////////////////////////////////// Algorithm
////////////////////////////////////
class CV_EXPORTS Algorithm;
class CV_EXPORTS AlgorithmInfo;
struct CV_EXPORTS AlgorithmInfoData;
template<typename _Tp> struct ParamType {};
/*!
Base class for high-level OpenCV algorithms
*/
class CV_EXPORTS_W Algorithm
{
public:
Algorithm();
virtual ~Algorithm();
String name() const;
template<typename _Tp> typename ParamType<_Tp>::member_type get(const
String& name) const;
template<typename _Tp> typename ParamType<_Tp>::member_type get(const
char* name) const;
CV_WRAP
CV_WRAP
CV_WRAP
CV_WRAP
CV_WRAP
CV_WRAP
CV_WRAP
int getInt(const String& name) const;
double getDouble(const String& name) const;
bool getBool(const String& name) const;
String getString(const String& name) const;
Mat getMat(const String& name) const;
std::vector<Mat> getMatVector(const String& name) const;
Ptr<Algorithm> getAlgorithm(const String& name) const;
void set(const String& name, int value);
void set(const String& name, double value);
Configuración Raspberry Pi
69
void set(const String&
void set(const String&
void set(const String&
void set(const String&
void set(const String&
template<typename _Tp>
value);
name, bool value);
name, const String& value);
name, const Mat& value);
name, const std::vector<Mat>& value);
name, const Ptr<Algorithm>& value);
void set(const String& name, const Ptr<_Tp>&
CV_WRAP void setInt(const String& name, int value);
CV_WRAP void setDouble(const String& name, double value);
CV_WRAP void setBool(const String& name, bool value);
CV_WRAP void setString(const String& name, const String& value);
CV_WRAP void setMat(const String& name, const Mat& value);
CV_WRAP void setMatVector(const String& name, const std::vector<Mat>&
value);
CV_WRAP void setAlgorithm(const String& name, const Ptr<Algorithm>&
value);
template<typename _Tp> void setAlgorithm(const String& name, const
Ptr<_Tp>& value);
void set(const char* name, int value);
void set(const char* name, double value);
void set(const char* name, bool value);
void set(const char* name, const String& value);
void set(const char* name, const Mat& value);
void set(const char* name, const std::vector<Mat>& value);
void set(const char* name, const Ptr<Algorithm>& value);
template<typename _Tp> void set(const char* name, const Ptr<_Tp>& value);
void setInt(const char* name, int value);
void setDouble(const char* name, double value);
void setBool(const char* name, bool value);
void setString(const char* name, const String& value);
void setMat(const char* name, const Mat& value);
void setMatVector(const char* name, const std::vector<Mat>& value);
void setAlgorithm(const char* name, const Ptr<Algorithm>& value);
template<typename _Tp> void setAlgorithm(const char* name, const
Ptr<_Tp>& value);
CV_WRAP String paramHelp(const String& name) const;
int paramType(const char* name) const;
CV_WRAP int paramType(const String& name) const;
CV_WRAP void getParams(CV_OUT std::vector<String>& names) const;
virtual void write(FileStorage& fs) const;
virtual void read(const FileNode& fn);
typedef Algorithm* (*Constructor)(void);
typedef int (Algorithm::*Getter)() const;
typedef void (Algorithm::*Setter)(int);
CV_WRAP static void getList(CV_OUT std::vector<String>& algorithms);
CV_WRAP static Ptr<Algorithm> _create(const String& name);
Configuración Raspberry Pi
70
template<typename _Tp> static Ptr<_Tp> create(const String& name);
virtual AlgorithmInfo* info() const /* TODO: make it = 0;*/ { return 0; }
};
class CV_EXPORTS AlgorithmInfo
{
public:
friend class Algorithm;
AlgorithmInfo(const String& name, Algorithm::Constructor create);
~AlgorithmInfo();
void get(const Algorithm* algo, const char* name, int argType, void*
value) const;
void addParam_(Algorithm& algo, const char* name, int argType,
void* value, bool readOnly,
Algorithm::Getter getter, Algorithm::Setter setter,
const String& help=String());
String paramHelp(const char* name) const;
int paramType(const char* name) const;
void getParams(std::vector<String>& names) const;
void write(const Algorithm* algo, FileStorage& fs) const;
void read(Algorithm* algo, const FileNode& fn) const;
String name() const;
void addParam(Algorithm& algo, const char* name,
int& value, bool readOnly=false,
int (Algorithm::*getter)()=0,
void (Algorithm::*setter)(int)=0,
const String& help=String());
void addParam(Algorithm& algo, const char* name,
bool& value, bool readOnly=false,
int (Algorithm::*getter)()=0,
void (Algorithm::*setter)(int)=0,
const String& help=String());
void addParam(Algorithm& algo, const char* name,
double& value, bool readOnly=false,
double (Algorithm::*getter)()=0,
void (Algorithm::*setter)(double)=0,
const String& help=String());
void addParam(Algorithm& algo, const char* name,
String& value, bool readOnly=false,
String (Algorithm::*getter)()=0,
void (Algorithm::*setter)(const String&)=0,
const String& help=String());
void addParam(Algorithm& algo, const char* name,
Mat& value, bool readOnly=false,
Mat (Algorithm::*getter)()=0,
void (Algorithm::*setter)(const Mat&)=0,
const String& help=String());
void addParam(Algorithm& algo, const char* name,
std::vector<Mat>& value, bool readOnly=false,
std::vector<Mat> (Algorithm::*getter)()=0,
Configuración Raspberry Pi
71
void (Algorithm::*setter)(const std::vector<Mat>&)=0,
const String& help=String());
void addParam(Algorithm& algo, const char* name,
Ptr<Algorithm>& value, bool readOnly=false,
Ptr<Algorithm> (Algorithm::*getter)()=0,
void (Algorithm::*setter)(const Ptr<Algorithm>&)=0,
const String& help=String());
void addParam(Algorithm& algo, const char* name,
float& value, bool readOnly=false,
float (Algorithm::*getter)()=0,
void (Algorithm::*setter)(float)=0,
const String& help=String());
void addParam(Algorithm& algo, const char* name,
unsigned int& value, bool readOnly=false,
unsigned int (Algorithm::*getter)()=0,
void (Algorithm::*setter)(unsigned int)=0,
const String& help=String());
void addParam(Algorithm& algo, const char* name,
uint64& value, bool readOnly=false,
uint64 (Algorithm::*getter)()=0,
void (Algorithm::*setter)(uint64)=0,
const String& help=String());
void addParam(Algorithm& algo, const char* name,
uchar& value, bool readOnly=false,
uchar (Algorithm::*getter)()=0,
void (Algorithm::*setter)(uchar)=0,
const String& help=String());
template<typename _Tp, typename _Base> void addParam(Algorithm& algo,
const char* name,
Ptr<_Tp>& value, bool readOnly=false,
Ptr<_Tp> (Algorithm::*getter)()=0,
void (Algorithm::*setter)(const Ptr<_Tp>&)=0,
const String& help=String());
template<typename _Tp> void addParam(Algorithm& algo, const char* name,
Ptr<_Tp>& value, bool readOnly=false,
Ptr<_Tp> (Algorithm::*getter)()=0,
void (Algorithm::*setter)(const Ptr<_Tp>&)=0,
const String& help=String());
protected:
AlgorithmInfoData* data;
void set(Algorithm* algo, const char* name, int argType,
const void* value, bool force=false) const;
};
struct CV_EXPORTS Param
{
enum { INT=0, BOOLEAN=1, REAL=2, STRING=3, MAT=4, MAT_VECTOR=5,
ALGORITHM=6, FLOAT=7, UNSIGNED_INT=8, UINT64=9, UCHAR=11 };
Param();
Param(int _type, bool _readonly, int _offset,
Algorithm::Getter _getter=0,
Algorithm::Setter _setter=0,
Configuración Raspberry Pi
72
const String& _help=String());
int type;
int offset;
bool readonly;
Algorithm::Getter getter;
Algorithm::Setter setter;
String help;
};
template<> struct ParamType<bool>
{
typedef bool const_param_type;
typedef bool member_type;
enum { type = Param::BOOLEAN };
};
template<> struct ParamType<int>
{
typedef int const_param_type;
typedef int member_type;
enum { type = Param::INT };
};
template<> struct ParamType<double>
{
typedef double const_param_type;
typedef double member_type;
enum { type = Param::REAL };
};
template<> struct ParamType<String>
{
typedef const String& const_param_type;
typedef String member_type;
enum { type = Param::STRING };
};
template<> struct ParamType<Mat>
{
typedef const Mat& const_param_type;
typedef Mat member_type;
enum { type = Param::MAT };
};
template<> struct ParamType<std::vector<Mat> >
{
typedef const std::vector<Mat>& const_param_type;
typedef std::vector<Mat> member_type;
Configuración Raspberry Pi
73
enum { type = Param::MAT_VECTOR };
};
template<> struct ParamType<Algorithm>
{
typedef const Ptr<Algorithm>& const_param_type;
typedef Ptr<Algorithm> member_type;
enum { type = Param::ALGORITHM };
};
template<> struct ParamType<float>
{
typedef float const_param_type;
typedef float member_type;
enum { type = Param::FLOAT };
};
template<> struct ParamType<unsigned>
{
typedef unsigned const_param_type;
typedef unsigned member_type;
enum { type = Param::UNSIGNED_INT };
};
template<> struct ParamType<uint64>
{
typedef uint64 const_param_type;
typedef uint64 member_type;
enum { type = Param::UINT64 };
};
template<> struct ParamType<uchar>
{
typedef uchar const_param_type;
typedef uchar member_type;
enum { type = Param::UCHAR };
};
} //namespace cv
#include
#include
#include
#include
"opencv2/core/operations.hpp"
"opencv2/core/cvstd.inl.hpp"
"opencv2/core/utility.hpp"
"opencv2/core/optim.hpp"
#endif /*__OPENCV_CORE_HPP__*/
Configuración Raspberry Pi
74
8.3.3
Imgproc.hpp
Es el módulo que incluye el procesamiento de imagen, el filtrado lineal y no lineal, las
transformaciones geométricas (re escalado, transformaciones afines, …) conversión de espacio de color,
histogramas y un largo etcétera.
Código
#ifndef __OPENCV_IMGPROC_HPP__
#define __OPENCV_IMGPROC_HPP__
#include "opencv2/core.hpp"
/*! \namespace cv
Namespace where all the C++ OpenCV functionality resides
*/
namespace cv
{
//! type of morphological operation
enum { MORPH_ERODE
= 0,
MORPH_DILATE
= 1,
MORPH_OPEN
= 2,
MORPH_CLOSE
= 3,
MORPH_GRADIENT = 4,
MORPH_TOPHAT
= 5,
MORPH_BLACKHAT = 6
};
//! shape of the structuring element
enum { MORPH_RECT
= 0,
MORPH_CROSS
= 1,
MORPH_ELLIPSE = 2
};
//! interpolation algorithm
enum { INTER_NEAREST
INTER_LINEAR
INTER_CUBIC
INTER_AREA
INTER_LANCZOS4
neighborhood
INTER_MAX
WARP_FILL_OUTLIERS
WARP_INVERSE_MAP
};
enum { INTER_BITS
INTER_BITS2
INTER_TAB_SIZE
INTER_TAB_SIZE2
=
=
=
=
Configuración Raspberry Pi
=
=
=
=
=
0,
1,
2,
3,
4,
//!<
//!<
//!<
//!<
//!<
nearest neighbor interpolation
bilinear interpolation
bicubic interpolation
area-based (or super) interpolation
Lanczos interpolation over 8x8
= 7, //!< mask for interpolation codes
= 8,
= 16
5,
INTER_BITS * 2,
1 << INTER_BITS,
INTER_TAB_SIZE * INTER_TAB_SIZE
75
};
//! Distance types for Distance Transform and M-estimators
enum { DIST_USER
= -1, // User defined distance
DIST_L1
= 1,
// distance = |x1-x2| + |y1-y2|
DIST_L2
= 2,
// the simple euclidean distance
DIST_C
= 3,
// distance = max(|x1-x2|,|y1-y2|)
DIST_L12
= 4,
// L1-L2 metric: distance = 2(sqrt(1+x*x/2) - 1))
DIST_FAIR
= 5,
// distance = c^2(|x|/c-log(1+|x|/c)), c = 1.3998
DIST_WELSCH = 6,
// distance = c^2/2(1-exp(-(x/c)^2)), c = 2.9846
DIST_HUBER
= 7
// distance = |x|<c ? x^2/2 : c(|x|-c/2), c=1.345
};
//! Mask size for distance
enum { DIST_MASK_3
=
DIST_MASK_5
=
DIST_MASK_PRECISE =
};
transform
3,
5,
0
//! type of the threshold operation
enum { THRESH_BINARY
= 0, // value = value > threshold ? max_value : 0
THRESH_BINARY_INV = 1, // value = value > threshold ? 0 : max_value
THRESH_TRUNC
= 2, // value = value > threshold ? threshold :
value
THRESH_TOZERO
= 3, // value = value > threshold ? value : 0
THRESH_TOZERO_INV = 4, // value = value > threshold ? 0 : value
THRESH_MASK
= 7,
THRESH_OTSU
= 8 // use Otsu algorithm to choose the optimal
threshold value
};
//! adaptive threshold algorithm
enum { ADAPTIVE_THRESH_MEAN_C
= 0,
ADAPTIVE_THRESH_GAUSSIAN_C = 1
};
enum { PROJ_SPHERICAL_ORTHO = 0,
PROJ_SPHERICAL_EQRECT = 1
};
//! class of the
enum { GC_BGD
GC_FGD
GC_PR_BGD
GC_PR_FGD
};
pixel
= 0,
= 1,
= 2,
= 3
in GrabCut algorithm
//!< background
//!< foreground
//!< most probably background
//!< most probably foreground
//! GrabCut algorithm flags
enum { GC_INIT_WITH_RECT = 0,
GC_INIT_WITH_MASK = 1,
GC_EVAL
= 2
};
//! distanceTransform algorithm flags
Configuración Raspberry Pi
76
enum { DIST_LABEL_CCOMP = 0,
DIST_LABEL_PIXEL = 1
};
//! floodfill algorithm flags
enum { FLOODFILL_FIXED_RANGE = 1 << 16,
FLOODFILL_MASK_ONLY
= 1 << 17
};
//! type of the template matching operation
enum { TM_SQDIFF
= 0,
TM_SQDIFF_NORMED = 1,
TM_CCORR
= 2,
TM_CCORR_NORMED = 3,
TM_CCOEFF
= 4,
TM_CCOEFF_NORMED = 5
};
//! connected components algorithm output formats
enum { CC_STAT_LEFT
= 0,
CC_STAT_TOP
= 1,
CC_STAT_WIDTH = 2,
CC_STAT_HEIGHT = 3,
CC_STAT_AREA
= 4,
CC_STAT_MAX
= 5
};
//! mode of the contour retrieval algorithm
enum { RETR_EXTERNAL = 0, //!< retrieve only the most external (top-level)
contours
RETR_LIST
= 1, //!< retrieve all the contours without any
hierarchical information
RETR_CCOMP
= 2, //!< retrieve the connected components (that can
possibly be nested)
RETR_TREE
= 3, //!< retrieve all the contours and the whole
hierarchy
RETR_FLOODFILL = 4
};
//! the contour approximation
enum { CHAIN_APPROX_NONE
CHAIN_APPROX_SIMPLE
CHAIN_APPROX_TC89_L1
CHAIN_APPROX_TC89_KCOS
};
algorithm
= 1,
= 2,
= 3,
= 4
//! Variants of a Hough transform
enum { HOUGH_STANDARD
= 0,
HOUGH_PROBABILISTIC = 1,
HOUGH_MULTI_SCALE
= 2,
HOUGH_GRADIENT
= 3
};
//! Variants of Line Segment Detector
Configuración Raspberry Pi
77
enum { LSD_REFINE_NONE = 0,
LSD_REFINE_STD = 1,
LSD_REFINE_ADV = 2
};
//! Histogram comparison methods
enum { HISTCMP_CORREL
= 0,
HISTCMP_CHISQR
= 1,
HISTCMP_INTERSECT
= 2,
HISTCMP_BHATTACHARYYA = 3,
HISTCMP_HELLINGER
= HISTCMP_BHATTACHARYYA,
HISTCMP_CHISQR_ALT
= 4,
HISTCMP_KL_DIV
= 5
};
//! the color conversion code
enum { COLOR_BGR2BGRA
= 0,
COLOR_RGB2RGBA
= COLOR_BGR2BGRA,
COLOR_BGRA2BGR
COLOR_RGBA2RGB
= 1,
= COLOR_BGRA2BGR,
COLOR_BGR2RGBA
COLOR_RGB2BGRA
= 2,
= COLOR_BGR2RGBA,
COLOR_RGBA2BGR
COLOR_BGRA2RGB
= 3,
= COLOR_RGBA2BGR,
COLOR_BGR2RGB
COLOR_RGB2BGR
= 4,
= COLOR_BGR2RGB,
COLOR_BGRA2RGBA
COLOR_RGBA2BGRA
= 5,
= COLOR_BGRA2RGBA,
COLOR_BGR2GRAY
COLOR_RGB2GRAY
COLOR_GRAY2BGR
COLOR_GRAY2RGB
COLOR_GRAY2BGRA
COLOR_GRAY2RGBA
COLOR_BGRA2GRAY
COLOR_RGBA2GRAY
=
=
=
=
=
=
=
=
6,
7,
8,
COLOR_GRAY2BGR,
9,
COLOR_GRAY2BGRA,
10,
11,
COLOR_BGR2BGR565
COLOR_RGB2BGR565
COLOR_BGR5652BGR
COLOR_BGR5652RGB
COLOR_BGRA2BGR565
COLOR_RGBA2BGR565
COLOR_BGR5652BGRA
COLOR_BGR5652RGBA
=
=
=
=
=
=
=
=
12,
13,
14,
15,
16,
17,
18,
19,
COLOR_GRAY2BGR565
COLOR_BGR5652GRAY
= 20,
= 21,
Configuración Raspberry Pi
78
COLOR_BGR2BGR555
COLOR_RGB2BGR555
COLOR_BGR5552BGR
COLOR_BGR5552RGB
COLOR_BGRA2BGR555
COLOR_RGBA2BGR555
COLOR_BGR5552BGRA
COLOR_BGR5552RGBA
=
=
=
=
=
=
=
=
COLOR_GRAY2BGR555
COLOR_BGR5552GRAY
= 30,
= 31,
COLOR_BGR2XYZ
COLOR_RGB2XYZ
COLOR_XYZ2BGR
COLOR_XYZ2RGB
=
=
=
=
32,
33,
34,
35,
COLOR_BGR2YCrCb
COLOR_RGB2YCrCb
COLOR_YCrCb2BGR
COLOR_YCrCb2RGB
=
=
=
=
36,
37,
38,
39,
COLOR_BGR2HSV
COLOR_RGB2HSV
= 40,
= 41,
COLOR_BGR2Lab
COLOR_RGB2Lab
= 44,
= 45,
COLOR_BGR2Luv
COLOR_RGB2Luv
COLOR_BGR2HLS
COLOR_RGB2HLS
=
=
=
=
COLOR_HSV2BGR
COLOR_HSV2RGB
= 54,
= 55,
COLOR_Lab2BGR
COLOR_Lab2RGB
COLOR_Luv2BGR
COLOR_Luv2RGB
COLOR_HLS2BGR
COLOR_HLS2RGB
=
=
=
=
=
=
56,
57,
58,
59,
60,
61,
COLOR_BGR2HSV_FULL
COLOR_RGB2HSV_FULL
COLOR_BGR2HLS_FULL
COLOR_RGB2HLS_FULL
=
=
=
=
66,
67,
68,
69,
COLOR_HSV2BGR_FULL
COLOR_HSV2RGB_FULL
COLOR_HLS2BGR_FULL
COLOR_HLS2RGB_FULL
=
=
=
=
70,
71,
72,
73,
Configuración Raspberry Pi
22,
23,
24,
25,
26,
27,
28,
29,
50,
51,
52,
53,
79
COLOR_LBGR2Lab
COLOR_LRGB2Lab
COLOR_LBGR2Luv
COLOR_LRGB2Luv
=
=
=
=
74,
75,
76,
77,
COLOR_Lab2LBGR
COLOR_Lab2LRGB
COLOR_Luv2LBGR
COLOR_Luv2LRGB
=
=
=
=
78,
79,
80,
81,
COLOR_BGR2YUV
COLOR_RGB2YUV
COLOR_YUV2BGR
COLOR_YUV2RGB
=
=
=
=
82,
83,
84,
85,
// YUV 4:2:0 family
COLOR_YUV2RGB_NV12
COLOR_YUV2BGR_NV12
COLOR_YUV2RGB_NV21
COLOR_YUV2BGR_NV21
COLOR_YUV420sp2RGB
COLOR_YUV420sp2BGR
to RGB
= 90,
= 91,
= 92,
= 93,
= COLOR_YUV2RGB_NV21,
= COLOR_YUV2BGR_NV21,
COLOR_YUV2RGBA_NV12
COLOR_YUV2BGRA_NV12
COLOR_YUV2RGBA_NV21
COLOR_YUV2BGRA_NV21
COLOR_YUV420sp2RGBA
COLOR_YUV420sp2BGRA
=
=
=
=
=
=
94,
95,
96,
97,
COLOR_YUV2RGBA_NV21,
COLOR_YUV2BGRA_NV21,
COLOR_YUV2RGB_YV12
COLOR_YUV2BGR_YV12
COLOR_YUV2RGB_IYUV
COLOR_YUV2BGR_IYUV
COLOR_YUV2RGB_I420
COLOR_YUV2BGR_I420
COLOR_YUV420p2RGB
COLOR_YUV420p2BGR
=
=
=
=
=
=
=
=
98,
99,
100,
101,
COLOR_YUV2RGB_IYUV,
COLOR_YUV2BGR_IYUV,
COLOR_YUV2RGB_YV12,
COLOR_YUV2BGR_YV12,
COLOR_YUV2RGBA_YV12
COLOR_YUV2BGRA_YV12
COLOR_YUV2RGBA_IYUV
COLOR_YUV2BGRA_IYUV
COLOR_YUV2RGBA_I420
COLOR_YUV2BGRA_I420
COLOR_YUV420p2RGBA
COLOR_YUV420p2BGRA
=
=
=
=
=
=
=
=
102,
103,
104,
105,
COLOR_YUV2RGBA_IYUV,
COLOR_YUV2BGRA_IYUV,
COLOR_YUV2RGBA_YV12,
COLOR_YUV2BGRA_YV12,
COLOR_YUV2GRAY_420
COLOR_YUV2GRAY_NV21
COLOR_YUV2GRAY_NV12
COLOR_YUV2GRAY_YV12
COLOR_YUV2GRAY_IYUV
COLOR_YUV2GRAY_I420
=
=
=
=
=
=
106,
COLOR_YUV2GRAY_420,
COLOR_YUV2GRAY_420,
COLOR_YUV2GRAY_420,
COLOR_YUV2GRAY_420,
COLOR_YUV2GRAY_420,
Configuración Raspberry Pi
80
COLOR_YUV420sp2GRAY = COLOR_YUV2GRAY_420,
COLOR_YUV420p2GRAY = COLOR_YUV2GRAY_420,
// YUV 4:2:2 family to RGB
COLOR_YUV2RGB_UYVY = 107,
COLOR_YUV2BGR_UYVY = 108,
//COLOR_YUV2RGB_VYUY = 109,
//COLOR_YUV2BGR_VYUY = 110,
COLOR_YUV2RGB_Y422 = COLOR_YUV2RGB_UYVY,
COLOR_YUV2BGR_Y422 = COLOR_YUV2BGR_UYVY,
COLOR_YUV2RGB_UYNV = COLOR_YUV2RGB_UYVY,
COLOR_YUV2BGR_UYNV = COLOR_YUV2BGR_UYVY,
COLOR_YUV2RGBA_UYVY
COLOR_YUV2BGRA_UYVY
//COLOR_YUV2RGBA_VYUY
//COLOR_YUV2BGRA_VYUY
COLOR_YUV2RGBA_Y422
COLOR_YUV2BGRA_Y422
COLOR_YUV2RGBA_UYNV
COLOR_YUV2BGRA_UYNV
COLOR_YUV2RGB_YUY2
COLOR_YUV2BGR_YUY2
COLOR_YUV2RGB_YVYU
COLOR_YUV2BGR_YVYU
COLOR_YUV2RGB_YUYV
COLOR_YUV2BGR_YUYV
COLOR_YUV2RGB_YUNV
COLOR_YUV2BGR_YUNV
=
=
=
=
=
=
=
=
=
=
=
=
=
=
=
=
111,
112,
113,
114,
COLOR_YUV2RGBA_UYVY,
COLOR_YUV2BGRA_UYVY,
COLOR_YUV2RGBA_UYVY,
COLOR_YUV2BGRA_UYVY,
115,
116,
117,
118,
COLOR_YUV2RGB_YUY2,
COLOR_YUV2BGR_YUY2,
COLOR_YUV2RGB_YUY2,
COLOR_YUV2BGR_YUY2,
COLOR_YUV2RGBA_YUY2
COLOR_YUV2BGRA_YUY2
COLOR_YUV2RGBA_YVYU
COLOR_YUV2BGRA_YVYU
COLOR_YUV2RGBA_YUYV
COLOR_YUV2BGRA_YUYV
COLOR_YUV2RGBA_YUNV
COLOR_YUV2BGRA_YUNV
=
=
=
=
=
=
=
=
119,
120,
121,
122,
COLOR_YUV2RGBA_YUY2,
COLOR_YUV2BGRA_YUY2,
COLOR_YUV2RGBA_YUY2,
COLOR_YUV2BGRA_YUY2,
COLOR_YUV2GRAY_UYVY
COLOR_YUV2GRAY_YUY2
//CV_YUV2GRAY_VYUY
COLOR_YUV2GRAY_Y422
COLOR_YUV2GRAY_UYNV
COLOR_YUV2GRAY_YVYU
COLOR_YUV2GRAY_YUYV
COLOR_YUV2GRAY_YUNV
=
=
=
=
=
=
=
=
123,
124,
CV_YUV2GRAY_UYVY,
COLOR_YUV2GRAY_UYVY,
COLOR_YUV2GRAY_UYVY,
COLOR_YUV2GRAY_YUY2,
COLOR_YUV2GRAY_YUY2,
COLOR_YUV2GRAY_YUY2,
// alpha premultiplication
COLOR_RGBA2mRGBA
= 125,
COLOR_mRGBA2RGBA
= 126,
// RGB to YUV 4:2:0 family
Configuración Raspberry Pi
81
COLOR_RGB2YUV_I420
COLOR_BGR2YUV_I420
COLOR_RGB2YUV_IYUV
COLOR_BGR2YUV_IYUV
=
=
=
=
127,
128,
COLOR_RGB2YUV_I420,
COLOR_BGR2YUV_I420,
COLOR_RGBA2YUV_I420
COLOR_BGRA2YUV_I420
COLOR_RGBA2YUV_IYUV
COLOR_BGRA2YUV_IYUV
COLOR_RGB2YUV_YV12
COLOR_BGR2YUV_YV12
COLOR_RGBA2YUV_YV12
COLOR_BGRA2YUV_YV12
=
=
=
=
=
=
=
=
129,
130,
COLOR_RGBA2YUV_I420,
COLOR_BGRA2YUV_I420,
131,
132,
133,
134,
// Demosaicing
COLOR_BayerBG2BGR
COLOR_BayerGB2BGR
COLOR_BayerRG2BGR
COLOR_BayerGR2BGR
=
=
=
=
46,
47,
48,
49,
COLOR_BayerBG2RGB
COLOR_BayerGB2RGB
COLOR_BayerRG2RGB
COLOR_BayerGR2RGB
=
=
=
=
COLOR_BayerRG2BGR,
COLOR_BayerGR2BGR,
COLOR_BayerBG2BGR,
COLOR_BayerGB2BGR,
COLOR_BayerBG2GRAY
COLOR_BayerGB2GRAY
COLOR_BayerRG2GRAY
COLOR_BayerGR2GRAY
=
=
=
=
86,
87,
88,
89,
// Demosaicing using Variable Number of Gradients
COLOR_BayerBG2BGR_VNG = 62,
COLOR_BayerGB2BGR_VNG = 63,
COLOR_BayerRG2BGR_VNG = 64,
COLOR_BayerGR2BGR_VNG = 65,
COLOR_BayerBG2RGB_VNG
COLOR_BayerGB2RGB_VNG
COLOR_BayerRG2RGB_VNG
COLOR_BayerGR2RGB_VNG
=
=
=
=
COLOR_BayerRG2BGR_VNG,
COLOR_BayerGR2BGR_VNG,
COLOR_BayerBG2BGR_VNG,
COLOR_BayerGB2BGR_VNG,
// Edge-Aware Demosaicing
COLOR_BayerBG2BGR_EA = 135,
COLOR_BayerGB2BGR_EA = 136,
COLOR_BayerRG2BGR_EA = 137,
COLOR_BayerGR2BGR_EA = 138,
COLOR_BayerBG2RGB_EA
COLOR_BayerGB2RGB_EA
COLOR_BayerRG2RGB_EA
COLOR_BayerGR2RGB_EA
COLOR_COLORCVT_MAX
Configuración Raspberry Pi
=
=
=
=
COLOR_BayerRG2BGR_EA,
COLOR_BayerGR2BGR_EA,
COLOR_BayerBG2BGR_EA,
COLOR_BayerGB2BGR_EA,
= 139
82
};
//! types of intersection between rectangles
enum { INTERSECT_NONE = 0,
INTERSECT_PARTIAL = 1,
INTERSECT_FULL = 2
};
//! finds arbitrary template in the grayscale image using Generalized Hough
Transform
class CV_EXPORTS GeneralizedHough : public Algorithm
{
public:
//! set template to search
virtual void setTemplate(InputArray templ, Point templCenter = Point(-1,
-1)) = 0;
virtual void setTemplate(InputArray edges, InputArray dx, InputArray dy,
Point templCenter = Point(-1, -1)) = 0;
//! find template on image
virtual void detect(InputArray image, OutputArray positions, OutputArray
votes = noArray()) = 0;
virtual void detect(InputArray edges, InputArray dx, InputArray dy,
OutputArray positions, OutputArray votes = noArray()) = 0;
//! Canny low threshold.
virtual void setCannyLowThresh(int cannyLowThresh) = 0;
virtual int getCannyLowThresh() const = 0;
//! Canny high threshold.
virtual void setCannyHighThresh(int cannyHighThresh) = 0;
virtual int getCannyHighThresh() const = 0;
//! Minimum distance between the centers of the detected objects.
virtual void setMinDist(double minDist) = 0;
virtual double getMinDist() const = 0;
//! Inverse ratio of the accumulator resolution to the image resolution.
virtual void setDp(double dp) = 0;
virtual double getDp() const = 0;
//! Maximal size of inner buffers.
virtual void setMaxBufferSize(int maxBufferSize) = 0;
virtual int getMaxBufferSize() const = 0;
};
//! Ballard, D.H. (1981). Generalizing the Hough transform to detect
arbitrary shapes. Pattern Recognition 13 (2): 111-122.
//! Detects position only without traslation and rotation
class CV_EXPORTS GeneralizedHoughBallard : public GeneralizedHough
{
public:
//! R-Table levels.
virtual void setLevels(int levels) = 0;
Configuración Raspberry Pi
83
virtual int getLevels() const = 0;
//! The accumulator threshold for the template centers at the detection
stage. The smaller it is, the more false positions may be detected.
virtual void setVotesThreshold(int votesThreshold) = 0;
virtual int getVotesThreshold() const = 0;
};
//! Guil, N., González-Linares, J.M. and Zapata, E.L. (1999). Bidimensional
shape detection using an invariant approach. Pattern Recognition 32 (6):
1025-1038.
//! Detects position, traslation and rotation
class CV_EXPORTS GeneralizedHoughGuil : public GeneralizedHough
{
public:
//! Angle difference in degrees between two points in feature.
virtual void setXi(double xi) = 0;
virtual double getXi() const = 0;
//! Feature table levels.
virtual void setLevels(int levels) = 0;
virtual int getLevels() const = 0;
//! Maximal difference between angles that treated as equal.
virtual void setAngleEpsilon(double angleEpsilon) = 0;
virtual double getAngleEpsilon() const = 0;
//! Minimal rotation angle to detect in degrees.
virtual void setMinAngle(double minAngle) = 0;
virtual double getMinAngle() const = 0;
//! Maximal rotation angle to detect in degrees.
virtual void setMaxAngle(double maxAngle) = 0;
virtual double getMaxAngle() const = 0;
//! Angle step in degrees.
virtual void setAngleStep(double angleStep) = 0;
virtual double getAngleStep() const = 0;
//! Angle votes threshold.
virtual void setAngleThresh(int angleThresh) = 0;
virtual int getAngleThresh() const = 0;
//! Minimal scale to detect.
virtual void setMinScale(double minScale) = 0;
virtual double getMinScale() const = 0;
//! Maximal scale to detect.
virtual void setMaxScale(double maxScale) = 0;
virtual double getMaxScale() const = 0;
//! Scale step.
virtual void setScaleStep(double scaleStep) = 0;
virtual double getScaleStep() const = 0;
Configuración Raspberry Pi
84
//! Scale votes threshold.
virtual void setScaleThresh(int scaleThresh) = 0;
virtual int getScaleThresh() const = 0;
//! Position votes threshold.
virtual void setPosThresh(int posThresh) = 0;
virtual int getPosThresh() const = 0;
};
class CV_EXPORTS_W CLAHE : public Algorithm
{
public:
CV_WRAP virtual void apply(InputArray src, OutputArray dst) = 0;
CV_WRAP virtual void setClipLimit(double clipLimit) = 0;
CV_WRAP virtual double getClipLimit() const = 0;
CV_WRAP virtual void setTilesGridSize(Size tileGridSize) = 0;
CV_WRAP virtual Size getTilesGridSize() const = 0;
CV_WRAP virtual void collectGarbage() = 0;
};
class CV_EXPORTS_W Subdiv2D
{
public:
enum { PTLOC_ERROR
PTLOC_OUTSIDE_RECT
PTLOC_INSIDE
PTLOC_VERTEX
PTLOC_ON_EDGE
};
enum { NEXT_AROUND_ORG
NEXT_AROUND_DST
PREV_AROUND_ORG
PREV_AROUND_DST
NEXT_AROUND_LEFT
NEXT_AROUND_RIGHT
PREV_AROUND_LEFT
PREV_AROUND_RIGHT
};
=
=
=
=
=
=
=
=
=
=
=
=
=
-2,
-1,
0,
1,
2
0x00,
0x22,
0x11,
0x33,
0x13,
0x31,
0x20,
0x02
CV_WRAP Subdiv2D();
CV_WRAP Subdiv2D(Rect rect);
CV_WRAP void initDelaunay(Rect rect);
CV_WRAP int insert(Point2f pt);
CV_WRAP void insert(const std::vector<Point2f>& ptvec);
CV_WRAP int locate(Point2f pt, CV_OUT int& edge, CV_OUT int& vertex);
Configuración Raspberry Pi
85
CV_WRAP int findNearest(Point2f pt, CV_OUT Point2f* nearestPt = 0);
CV_WRAP void getEdgeList(CV_OUT std::vector<Vec4f>& edgeList) const;
CV_WRAP void getTriangleList(CV_OUT std::vector<Vec6f>& triangleList)
const;
CV_WRAP void getVoronoiFacetList(const std::vector<int>& idx, CV_OUT
std::vector<std::vector<Point2f> >& facetList,
CV_OUT std::vector<Point2f>&
facetCenters);
CV_WRAP Point2f getVertex(int vertex, CV_OUT int* firstEdge = 0) const;
CV_WRAP
CV_WRAP
CV_WRAP
CV_WRAP
CV_WRAP
CV_WRAP
int
int
int
int
int
int
getEdge( int edge, int nextEdgeType ) const;
nextEdge(int edge) const;
rotateEdge(int edge, int rotate) const;
symEdge(int edge) const;
edgeOrg(int edge, CV_OUT Point2f* orgpt = 0) const;
edgeDst(int edge, CV_OUT Point2f* dstpt = 0) const;
protected:
int newEdge();
void deleteEdge(int edge);
int newPoint(Point2f pt, bool isvirtual, int firstEdge = 0);
void deletePoint(int vtx);
void setEdgePoints( int edge, int orgPt, int dstPt );
void splice( int edgeA, int edgeB );
int connectEdges( int edgeA, int edgeB );
void swapEdges( int edge );
int isRightOf(Point2f pt, int edge) const;
void calcVoronoi();
void clearVoronoi();
void checkSubdiv() const;
struct CV_EXPORTS Vertex
{
Vertex();
Vertex(Point2f pt, bool _isvirtual, int _firstEdge=0);
bool isvirtual() const;
bool isfree() const;
int firstEdge;
int type;
Point2f pt;
};
struct CV_EXPORTS QuadEdge
{
QuadEdge();
QuadEdge(int edgeidx);
bool isfree() const;
int next[4];
int pt[4];
};
Configuración Raspberry Pi
86
std::vector<Vertex> vtx;
std::vector<QuadEdge> qedges;
int freeQEdge;
int freePoint;
bool validGeometry;
int recentEdge;
Point2f topLeft;
Point2f bottomRight;
};
class CV_EXPORTS_W LineSegmentDetector : public Algorithm
{
public:
/**
* Detect lines in the input image.
*
* @param _image
A grayscale(CV_8UC1) input image.
*
If only a roi needs to be selected, use
*
lsd_ptr->detect(image(roi), ..., lines);
*
lines += Scalar(roi.x, roi.y, roi.x, roi.y);
* @param _lines
Return: A vector of Vec4i elements specifying the
beginning and ending point of a line.
*
Where Vec4i is (x1, y1, x2, y2), point 1 is the
start, point 2 - end.
*
Returned lines are strictly oriented depending on
the gradient.
* @param width
Return: Vector of widths of the regions, where the lines
are found. E.g. Width of line.
* @param prec
Return: Vector of precisions with which the lines are
found.
* @param nfa
Return: Vector containing number of false alarms in the
line region, with precision of 10%.
*
The bigger the value, logarithmically better the
detection.
*
* -1 corresponds to 10 mean false alarms
*
* 0 corresponds to 1 mean false alarm
*
* 1 corresponds to 0.1 mean false alarms
*
This vector will be calculated _only_ when the
objects type is REFINE_ADV
*/
CV_WRAP virtual void detect(InputArray _image, OutputArray _lines,
OutputArray width = noArray(), OutputArray prec =
noArray(),
OutputArray nfa = noArray()) = 0;
/**
* Draw lines on the given canvas.
*
* @param image
The image, where lines will be drawn.
*
Should have the size of the image, where the lines were
found
* @param lines
The lines that need to be drawn
*/
Configuración Raspberry Pi
87
CV_WRAP virtual void drawSegments(InputOutputArray _image, InputArray
lines) = 0;
/**
* Draw both vectors on the image canvas. Uses blue for lines 1 and red for
lines 2.
*
* @param size
The size of the image, where lines were found.
* @param lines1
The first lines that need to be drawn. Color - Blue.
* @param lines2
The second lines that need to be drawn. Color - Red.
* @param image
Optional image, where lines will be drawn.
*
Should have the size of the image, where the lines were
found
* @return
The number of mismatching pixels between lines1 and
lines2.
*/
CV_WRAP virtual int compareSegments(const Size& size, InputArray lines1,
InputArray lines2, InputOutputArray _image = noArray()) = 0;
virtual ~LineSegmentDetector() { }
};
//! Returns a pointer to a LineSegmentDetector class.
CV_EXPORTS_W Ptr<LineSegmentDetector> createLineSegmentDetector(
int _refine = LSD_REFINE_STD, double _scale = 0.8,
double _sigma_scale = 0.6, double _quant = 2.0, double _ang_th = 22.5,
double _log_eps = 0, double _density_th = 0.7, int _n_bins = 1024);
//! returns the Gaussian kernel with the specified parameters
CV_EXPORTS_W Mat getGaussianKernel( int ksize, double sigma, int ktype =
CV_64F );
//! initializes kernels of the generalized Sobel operator
CV_EXPORTS_W void getDerivKernels( OutputArray kx, OutputArray ky,
int dx, int dy, int ksize,
bool normalize = false, int ktype = CV_32F
);
//! returns the Gabor kernel with the specified parameters
CV_EXPORTS_W Mat getGaborKernel( Size ksize, double sigma, double theta,
double lambd,
double gamma, double psi = CV_PI*0.5, int
ktype = CV_64F );
//! returns "magic" border value for erosion and dilation. It is
automatically transformed to Scalar::all(-DBL_MAX) for dilation.
static inline Scalar morphologyDefaultBorderValue() { return
Scalar::all(DBL_MAX); }
//! returns structuring element of the specified shape and size
CV_EXPORTS_W Mat getStructuringElement(int shape, Size ksize, Point anchor =
Point(-1,-1));
//! smooths the image using median filter.
Configuración Raspberry Pi
88
CV_EXPORTS_W void medianBlur( InputArray src, OutputArray dst, int ksize );
//! smooths the image using Gaussian filter.
CV_EXPORTS_W void GaussianBlur( InputArray src, OutputArray dst, Size ksize,
double sigmaX, double sigmaY = 0,
int borderType = BORDER_DEFAULT );
//! smooths the image using bilateral filter
CV_EXPORTS_W void bilateralFilter( InputArray src, OutputArray dst, int d,
double sigmaColor, double sigmaSpace,
int borderType = BORDER_DEFAULT );
//! smooths the image using the box filter. Each pixel is processed in O(1)
time
CV_EXPORTS_W void boxFilter( InputArray src, OutputArray dst, int ddepth,
Size ksize, Point anchor = Point(-1,-1),
bool normalize = true,
int borderType = BORDER_DEFAULT );
CV_EXPORTS_W void sqrBoxFilter( InputArray _src, OutputArray _dst, int
ddepth,
Size ksize, Point anchor = Point(-1, -1),
bool normalize = true,
int borderType = BORDER_DEFAULT );
//! a synonym for normalized box filter
CV_EXPORTS_W void blur( InputArray src, OutputArray dst,
Size ksize, Point anchor = Point(-1,-1),
int borderType = BORDER_DEFAULT );
//! applies non-separable 2D linear filter to the image
CV_EXPORTS_W void filter2D( InputArray src, OutputArray dst, int ddepth,
InputArray kernel, Point anchor = Point(-1,-1),
double delta = 0, int borderType = BORDER_DEFAULT
);
//! applies separable 2D linear filter to the image
CV_EXPORTS_W void sepFilter2D( InputArray src, OutputArray dst, int ddepth,
InputArray kernelX, InputArray kernelY,
Point anchor = Point(-1,-1),
double delta = 0, int borderType =
BORDER_DEFAULT );
//! applies generalized Sobel operator to the image
CV_EXPORTS_W void Sobel( InputArray src, OutputArray dst, int ddepth,
int dx, int dy, int ksize = 3,
double scale = 1, double delta = 0,
int borderType = BORDER_DEFAULT );
//! applies the vertical or horizontal Scharr operator to the image
CV_EXPORTS_W void Scharr( InputArray src, OutputArray dst, int ddepth,
int dx, int dy, double scale = 1, double delta = 0,
int borderType = BORDER_DEFAULT );
Configuración Raspberry Pi
89
//! applies Laplacian operator to the image
CV_EXPORTS_W void Laplacian( InputArray src, OutputArray dst, int ddepth,
int ksize = 1, double scale = 1, double delta =
0,
int borderType = BORDER_DEFAULT );
//! applies Canny edge detector and produces the edge map.
CV_EXPORTS_W void Canny( InputArray image, OutputArray edges,
double threshold1, double threshold2,
int apertureSize = 3, bool L2gradient = false );
//! computes minimum eigen value of 2x2 derivative covariation matrix at each
pixel - the cornerness criteria
CV_EXPORTS_W void cornerMinEigenVal( InputArray src, OutputArray dst,
int blockSize, int ksize = 3,
int borderType = BORDER_DEFAULT );
//! computes Harris cornerness criteria at each image pixel
CV_EXPORTS_W void cornerHarris( InputArray src, OutputArray dst, int
blockSize,
int ksize, double k,
int borderType = BORDER_DEFAULT );
//! computes both eigenvalues and the eigenvectors of 2x2 derivative
covariation matrix at each pixel. The output is stored as 6-channel matrix.
CV_EXPORTS_W void cornerEigenValsAndVecs( InputArray src, OutputArray dst,
int blockSize, int ksize,
int borderType = BORDER_DEFAULT );
//! computes another complex cornerness criteria at each pixel
CV_EXPORTS_W void preCornerDetect( InputArray src, OutputArray dst, int
ksize,
int borderType = BORDER_DEFAULT );
//! adjusts the corner locations with sub-pixel accuracy to maximize the
certain cornerness criteria
CV_EXPORTS_W void cornerSubPix( InputArray image, InputOutputArray corners,
Size winSize, Size zeroZone,
TermCriteria criteria );
//! finds the strong enough corners where the cornerMinEigenVal() or
cornerHarris() report the local maxima
CV_EXPORTS_W void goodFeaturesToTrack( InputArray image, OutputArray corners,
int maxCorners, double qualityLevel,
double minDistance,
InputArray mask = noArray(), int
blockSize = 3,
bool useHarrisDetector = false, double k
= 0.04 );
//! finds lines in the black-n-white image using the standard or pyramid
Hough transform
CV_EXPORTS_W void HoughLines( InputArray image, OutputArray lines,
double rho, double theta, int threshold,
Configuración Raspberry Pi
90
double srn = 0, double stn = 0,
double min_theta = 0, double max_theta = CV_PI
);
//! finds line segments in the black-n-white image using probabilistic Hough
transform
CV_EXPORTS_W void HoughLinesP( InputArray image, OutputArray lines,
double rho, double theta, int threshold,
double minLineLength = 0, double maxLineGap =
0 );
//! finds circles in the grayscale image using 2+1 gradient Hough transform
CV_EXPORTS_W void HoughCircles( InputArray image, OutputArray circles,
int method, double dp, double minDist,
double param1 = 100, double param2 = 100,
int minRadius = 0, int maxRadius = 0 );
//! erodes the image (applies the local minimum operator)
CV_EXPORTS_W void erode( InputArray src, OutputArray dst, InputArray kernel,
Point anchor = Point(-1,-1), int iterations = 1,
int borderType = BORDER_CONSTANT,
const Scalar& borderValue =
morphologyDefaultBorderValue() );
//! dilates the image (applies the local maximum operator)
CV_EXPORTS_W void dilate( InputArray src, OutputArray dst, InputArray kernel,
Point anchor = Point(-1,-1), int iterations = 1,
int borderType = BORDER_CONSTANT,
const Scalar& borderValue =
morphologyDefaultBorderValue() );
//! applies an advanced morphological operation to the image
CV_EXPORTS_W void morphologyEx( InputArray src, OutputArray dst,
int op, InputArray kernel,
Point anchor = Point(-1,-1), int iterations =
1,
int borderType = BORDER_CONSTANT,
const Scalar& borderValue =
morphologyDefaultBorderValue() );
//! resizes the image
CV_EXPORTS_W void resize( InputArray src, OutputArray dst,
Size dsize, double fx = 0, double fy = 0,
int interpolation = INTER_LINEAR );
//! warps the image using affine transformation
CV_EXPORTS_W void warpAffine( InputArray src, OutputArray dst,
InputArray M, Size dsize,
int flags = INTER_LINEAR,
int borderMode = BORDER_CONSTANT,
const Scalar& borderValue = Scalar());
//! warps the image using perspective transformation
CV_EXPORTS_W void warpPerspective( InputArray src, OutputArray dst,
Configuración Raspberry Pi
91
InputArray M, Size dsize,
int flags = INTER_LINEAR,
int borderMode = BORDER_CONSTANT,
const Scalar& borderValue = Scalar());
//! warps the image using the precomputed maps. The maps are stored in either
floating-point or integer fixed-point format
CV_EXPORTS_W void remap( InputArray src, OutputArray dst,
InputArray map1, InputArray map2,
int interpolation, int borderMode = BORDER_CONSTANT,
const Scalar& borderValue = Scalar());
//! converts maps for remap from floating-point to fixed-point format or
backwards
CV_EXPORTS_W void convertMaps( InputArray map1, InputArray map2,
OutputArray dstmap1, OutputArray dstmap2,
int dstmap1type, bool nninterpolation = false
);
//! returns 2x3 affine transformation matrix for the planar rotation.
CV_EXPORTS_W Mat getRotationMatrix2D( Point2f center, double angle, double
scale );
//! returns 3x3 perspective transformation for the corresponding 4 point
pairs.
CV_EXPORTS Mat getPerspectiveTransform( const Point2f src[], const Point2f
dst[] );
//! returns 2x3 affine transformation for the corresponding 3 point pairs.
CV_EXPORTS Mat getAffineTransform( const Point2f src[], const Point2f dst[]
);
//! computes 2x3 affine transformation matrix that is inverse to the
specified 2x3 affine transformation.
CV_EXPORTS_W void invertAffineTransform( InputArray M, OutputArray iM );
CV_EXPORTS_W Mat getPerspectiveTransform( InputArray src, InputArray dst );
CV_EXPORTS_W Mat getAffineTransform( InputArray src, InputArray dst );
//! extracts rectangle from the image at sub-pixel location
CV_EXPORTS_W void getRectSubPix( InputArray image, Size patchSize,
Point2f center, OutputArray patch, int
patchType = -1 );
//! computes the log polar transform
CV_EXPORTS_W void logPolar( InputArray src, OutputArray dst,
Point2f center, double M, int flags );
//! computes the linear polar transform
CV_EXPORTS_W void linearPolar( InputArray src, OutputArray dst,
Point2f center, double maxRadius, int flags );
//! computes the integral image
Configuración Raspberry Pi
92
CV_EXPORTS_W void integral( InputArray src, OutputArray sum, int sdepth = -1
);
//! computes the integral image and integral for the squared image
CV_EXPORTS_AS(integral2) void integral( InputArray src, OutputArray sum,
OutputArray sqsum, int sdepth = -1,
int sqdepth = -1 );
//! computes the integral image, integral for the squared image and the
tilted integral image
CV_EXPORTS_AS(integral3) void integral( InputArray src, OutputArray sum,
OutputArray sqsum, OutputArray
tilted,
int sdepth = -1, int sqdepth = -1 );
//! adds image to the accumulator (dst += src). Unlike cv::add, dst and src
can have different types.
CV_EXPORTS_W void accumulate( InputArray src, InputOutputArray dst,
InputArray mask = noArray() );
//! adds squared src image to the accumulator (dst += src*src).
CV_EXPORTS_W void accumulateSquare( InputArray src, InputOutputArray dst,
InputArray mask = noArray() );
//! adds product of the 2 images to the accumulator (dst += src1*src2).
CV_EXPORTS_W void accumulateProduct( InputArray src1, InputArray src2,
InputOutputArray dst, InputArray
mask=noArray() );
//! updates the running average (dst = dst*(1-alpha) + src*alpha)
CV_EXPORTS_W void accumulateWeighted( InputArray src, InputOutputArray dst,
double alpha, InputArray mask =
noArray() );
CV_EXPORTS_W Point2d phaseCorrelate(InputArray src1, InputArray src2,
InputArray window = noArray(), CV_OUT
double* response = 0);
CV_EXPORTS_W void createHanningWindow(OutputArray dst, Size winSize, int
type);
//! applies fixed threshold to the image
CV_EXPORTS_W double threshold( InputArray src, OutputArray dst,
double thresh, double maxval, int type );
//! applies variable (adaptive) threshold to the image
CV_EXPORTS_W void adaptiveThreshold( InputArray src, OutputArray dst,
double maxValue, int adaptiveMethod,
int thresholdType, int blockSize, double
C );
//! smooths and downsamples the image
CV_EXPORTS_W void pyrDown( InputArray src, OutputArray dst,
Configuración Raspberry Pi
93
const Size& dstsize = Size(), int borderType =
BORDER_DEFAULT );
//! upsamples and smoothes the image
CV_EXPORTS_W void pyrUp( InputArray src, OutputArray dst,
const Size& dstsize = Size(), int borderType =
BORDER_DEFAULT );
//! builds the gaussian pyramid using pyrDown() as a basic operation
CV_EXPORTS void buildPyramid( InputArray src, OutputArrayOfArrays dst,
int maxlevel, int borderType = BORDER_DEFAULT
);
//! corrects lens distortion for the given camera matrix and distortion
coefficients
CV_EXPORTS_W void undistort( InputArray src, OutputArray dst,
InputArray cameraMatrix,
InputArray distCoeffs,
InputArray newCameraMatrix = noArray() );
//! initializes maps for cv::remap() to correct lens distortion and
optionally rectify the image
CV_EXPORTS_W void initUndistortRectifyMap( InputArray cameraMatrix,
InputArray distCoeffs,
InputArray R, InputArray newCameraMatrix,
Size size, int m1type, OutputArray map1,
OutputArray map2 );
//! initializes maps for cv::remap() for wide-angle
CV_EXPORTS_W float initWideAngleProjMap( InputArray cameraMatrix, InputArray
distCoeffs,
Size imageSize, int destImageWidth,
int m1type, OutputArray map1,
OutputArray map2,
int projType =
PROJ_SPHERICAL_EQRECT, double alpha = 0);
//! returns the default new camera matrix (by default it is the same as
cameraMatrix unless centerPricipalPoint=true)
CV_EXPORTS_W Mat getDefaultNewCameraMatrix( InputArray cameraMatrix, Size
imgsize = Size(),
bool centerPrincipalPoint = false
);
//! returns points' coordinates after lens distortion correction
CV_EXPORTS_W void undistortPoints( InputArray src, OutputArray dst,
InputArray cameraMatrix, InputArray
distCoeffs,
InputArray R = noArray(), InputArray P =
noArray());
//! computes the joint dense histogram for a set of images.
CV_EXPORTS void calcHist( const Mat* images, int nimages,
const int* channels, InputArray mask,
Configuración Raspberry Pi
94
OutputArray hist, int dims, const int* histSize,
const float** ranges, bool uniform = true, bool
accumulate = false );
//! computes the joint sparse histogram for a set of images.
CV_EXPORTS void calcHist( const Mat* images, int nimages,
const int* channels, InputArray mask,
SparseMat& hist, int dims,
const int* histSize, const float** ranges,
bool uniform = true, bool accumulate = false );
CV_EXPORTS_W void calcHist( InputArrayOfArrays images,
const std::vector<int>& channels,
InputArray mask, OutputArray hist,
const std::vector<int>& histSize,
const std::vector<float>& ranges,
bool accumulate = false );
//! computes back projection for the set of images
CV_EXPORTS void calcBackProject( const Mat* images, int nimages,
const int* channels, InputArray hist,
OutputArray backProject, const float**
ranges,
double scale = 1, bool uniform = true );
//! computes back projection for the set of images
CV_EXPORTS void calcBackProject( const Mat* images, int nimages,
const int* channels, const SparseMat& hist,
OutputArray backProject, const float**
ranges,
double scale = 1, bool uniform = true );
CV_EXPORTS_W void calcBackProject( InputArrayOfArrays images, const
std::vector<int>& channels,
InputArray hist, OutputArray dst,
const std::vector<float>& ranges,
double scale );
//! compares two histograms stored in dense arrays
CV_EXPORTS_W double compareHist( InputArray H1, InputArray H2, int method );
//! compares two histograms stored in sparse arrays
CV_EXPORTS double compareHist( const SparseMat& H1, const SparseMat& H2, int
method );
//! normalizes the grayscale image brightness and contrast by normalizing its
histogram
CV_EXPORTS_W void equalizeHist( InputArray src, OutputArray dst );
CV_EXPORTS float EMD( InputArray signature1, InputArray signature2,
int distType, InputArray cost=noArray(),
float* lowerBound = 0, OutputArray flow = noArray() );
//! segments the image using watershed algorithm
Configuración Raspberry Pi
95
CV_EXPORTS_W void watershed( InputArray image, InputOutputArray markers );
//! filters image using meanshift algorithm
CV_EXPORTS_W void pyrMeanShiftFiltering( InputArray src, OutputArray dst,
double sp, double sr, int maxLevel =
1,
TermCriteria
termcrit=TermCriteria(TermCriteria::MAX_ITER+TermCriteria::EPS,5,1) );
//! segments the image using GrabCut algorithm
CV_EXPORTS_W void grabCut( InputArray img, InputOutputArray mask, Rect rect,
InputOutputArray bgdModel, InputOutputArray
fgdModel,
int iterCount, int mode = GC_EVAL );
//! builds the discrete Voronoi diagram
CV_EXPORTS_AS(distanceTransformWithLabels) void distanceTransform( InputArray
src, OutputArray dst,
OutputArray labels, int distanceType,
int maskSize,
int labelType = DIST_LABEL_CCOMP );
//! computes the distance transform map
CV_EXPORTS_W void distanceTransform( InputArray src, OutputArray dst,
int distanceType, int maskSize, int
dstType=CV_32F);
//! fills the semi-uniform image region starting from the specified seed
point
CV_EXPORTS int floodFill( InputOutputArray image,
Point seedPoint, Scalar newVal, CV_OUT Rect* rect =
0,
Scalar loDiff = Scalar(), Scalar upDiff = Scalar(),
int flags = 4 );
//! fills the semi-uniform image region and/or the mask starting from the
specified seed point
CV_EXPORTS_W int floodFill( InputOutputArray image, InputOutputArray mask,
Point seedPoint, Scalar newVal, CV_OUT Rect*
rect=0,
Scalar loDiff = Scalar(), Scalar upDiff =
Scalar(),
int flags = 4 );
//! converts image from one color space to another
CV_EXPORTS_W void cvtColor( InputArray src, OutputArray dst, int code, int
dstCn = 0 );
// main function for all demosaicing procceses
CV_EXPORTS_W void demosaicing(InputArray _src, OutputArray _dst, int code,
int dcn = 0);
Configuración Raspberry Pi
96
//! computes moments of the rasterized shape or a vector of points
CV_EXPORTS_W Moments moments( InputArray array, bool binaryImage = false );
//! computes 7 Hu invariants from the moments
CV_EXPORTS void HuMoments( const Moments& moments, double hu[7] );
CV_EXPORTS_W void HuMoments( const Moments& m, OutputArray hu );
//! computes the proximity map for the raster template and the image where
the template is searched for
CV_EXPORTS_W void matchTemplate( InputArray image, InputArray templ,
OutputArray result, int method );
// computes the connected components labeled image of boolean image ``image``
// with 4 or 8 way connectivity - returns N, the total
// number of labels [0, N-1] where 0 represents the background label.
// ltype specifies the output label image type, an important
// consideration based on the total number of labels or
// alternatively the total number of pixels in the source image.
CV_EXPORTS_W int connectedComponents(InputArray image, OutputArray labels,
int connectivity = 8, int ltype =
CV_32S);
CV_EXPORTS_W int connectedComponentsWithStats(InputArray image, OutputArray
labels,
OutputArray stats, OutputArray
centroids,
int connectivity = 8, int ltype
= CV_32S);
//! retrieves contours and the hierarchical information from black-n-white
image.
CV_EXPORTS_W void findContours( InputOutputArray image, OutputArrayOfArrays
contours,
OutputArray hierarchy, int mode,
int method, Point offset = Point());
//! retrieves contours from black-n-white image.
CV_EXPORTS void findContours( InputOutputArray image, OutputArrayOfArrays
contours,
int mode, int method, Point offset = Point());
//! approximates contour or a curve using Douglas-Peucker algorithm
CV_EXPORTS_W void approxPolyDP( InputArray curve,
OutputArray approxCurve,
double epsilon, bool closed );
//! computes the contour perimeter (closed=true) or a curve length
CV_EXPORTS_W double arcLength( InputArray curve, bool closed );
//! computes the bounding rectangle for a contour
CV_EXPORTS_W Rect boundingRect( InputArray points );
Configuración Raspberry Pi
97
//! computes the contour area
CV_EXPORTS_W double contourArea( InputArray contour, bool oriented = false );
//! computes the minimal rotated rectangle for a set of points
CV_EXPORTS_W RotatedRect minAreaRect( InputArray points );
//! computes boxpoints
CV_EXPORTS_W void boxPoints(RotatedRect box, OutputArray points);
//! computes the minimal enclosing circle for a set of points
CV_EXPORTS_W void minEnclosingCircle( InputArray points,
CV_OUT Point2f& center, CV_OUT float&
radius );
//! computes the minimal enclosing triangle for a set of points and returns
its area
CV_EXPORTS_W double minEnclosingTriangle( InputArray points, CV_OUT
OutputArray triangle );
//! matches two contours using one of the available algorithms
CV_EXPORTS_W double matchShapes( InputArray contour1, InputArray contour2,
int method, double parameter );
//! computes convex hull for a set of 2D points.
CV_EXPORTS_W void convexHull( InputArray points, OutputArray hull,
bool clockwise = false, bool returnPoints =
true );
//! computes the contour convexity defects
CV_EXPORTS_W void convexityDefects( InputArray contour, InputArray
convexhull, OutputArray convexityDefects );
//! returns true if the contour is convex. Does not support contours with
self-intersection
CV_EXPORTS_W bool isContourConvex( InputArray contour );
//! finds intersection of two convex polygons
CV_EXPORTS_W float intersectConvexConvex( InputArray _p1, InputArray _p2,
OutputArray _p12, bool handleNested
= true );
//! fits ellipse to the set of 2D points
CV_EXPORTS_W RotatedRect fitEllipse( InputArray points );
//! fits line to the set of 2D points using M-estimator algorithm
CV_EXPORTS_W void fitLine( InputArray points, OutputArray line, int distType,
double param, double reps, double aeps );
//! checks if the point is inside the contour. Optionally computes the signed
distance from the point to the contour boundary
CV_EXPORTS_W double pointPolygonTest( InputArray contour, Point2f pt, bool
measureDist );
Configuración Raspberry Pi
98
//! computes whether two rotated rectangles intersect and returns the
vertices of the intersecting region
CV_EXPORTS_W int rotatedRectangleIntersection( const RotatedRect& rect1,
const RotatedRect& rect2, OutputArray intersectingRegion );
CV_EXPORTS_W Ptr<CLAHE> createCLAHE(double clipLimit = 40.0, Size
tileGridSize = Size(8, 8));
//! Ballard, D.H. (1981). Generalizing the Hough transform to detect
arbitrary shapes. Pattern Recognition 13 (2): 111-122.
//! Detects position only without traslation and rotation
CV_EXPORTS Ptr<GeneralizedHoughBallard> createGeneralizedHoughBallard();
//! Guil, N., González-Linares, J.M. and Zapata, E.L. (1999). Bidimensional
shape detection using an invariant approach. Pattern Recognition 32 (6):
1025-1038.
//! Detects position, traslation and rotation
CV_EXPORTS Ptr<GeneralizedHoughGuil> createGeneralizedHoughGuil();
//! Performs linear blending of two images
CV_EXPORTS void blendLinear(InputArray src1, InputArray src2, InputArray
weights1, InputArray weights2, OutputArray dst);
enum
{
COLORMAP_AUTUMN = 0,
COLORMAP_BONE = 1,
COLORMAP_JET = 2,
COLORMAP_WINTER = 3,
COLORMAP_RAINBOW = 4,
COLORMAP_OCEAN = 5,
COLORMAP_SUMMER = 6,
COLORMAP_SPRING = 7,
COLORMAP_COOL = 8,
COLORMAP_HSV = 9,
COLORMAP_PINK = 10,
COLORMAP_HOT = 11
};
CV_EXPORTS_W void applyColorMap(InputArray src, OutputArray dst, int
colormap);
//! draws the line segment (pt1, pt2) in the image
CV_EXPORTS_W void line(InputOutputArray img, Point pt1, Point pt2, const
Scalar& color,
int thickness = 1, int lineType = LINE_8, int shift =
0);
//! draws an arrow from pt1 to pt2 in the image
CV_EXPORTS_W void arrowedLine(InputOutputArray img, Point pt1, Point pt2,
const Scalar& color,
int thickness=1, int line_type=8, int shift=0, double
tipLength=0.1);
Configuración Raspberry Pi
99
//! draws the rectangle outline or a solid rectangle with the opposite
corners pt1 and pt2 in the image
CV_EXPORTS_W void rectangle(InputOutputArray img, Point pt1, Point pt2,
const Scalar& color, int thickness = 1,
int lineType = LINE_8, int shift = 0);
//! draws the rectangle outline or a solid rectangle covering rec in the
image
CV_EXPORTS void rectangle(CV_IN_OUT Mat& img, Rect rec,
const Scalar& color, int thickness = 1,
int lineType = LINE_8, int shift = 0);
//! draws the circle outline or a solid circle in the image
CV_EXPORTS_W void circle(InputOutputArray img, Point center, int radius,
const Scalar& color, int thickness = 1,
int lineType = LINE_8, int shift = 0);
//! draws an elliptic arc, ellipse sector or a rotated ellipse in the image
CV_EXPORTS_W void ellipse(InputOutputArray img, Point center, Size axes,
double angle, double startAngle, double endAngle,
const Scalar& color, int thickness = 1,
int lineType = LINE_8, int shift = 0);
//! draws a rotated ellipse in the image
CV_EXPORTS_W void ellipse(InputOutputArray img, const RotatedRect& box, const
Scalar& color,
int thickness = 1, int lineType = LINE_8);
//! draws a filled convex polygon in the image
CV_EXPORTS void fillConvexPoly(Mat& img, const Point* pts, int npts,
const Scalar& color, int lineType = LINE_8,
int shift = 0);
CV_EXPORTS_W void fillConvexPoly(InputOutputArray img, InputArray points,
const Scalar& color, int lineType = LINE_8,
int shift = 0);
//! fills an area bounded by one or more polygons
CV_EXPORTS void fillPoly(Mat& img, const Point** pts,
const int* npts, int ncontours,
const Scalar& color, int lineType = LINE_8, int
shift = 0,
Point offset = Point() );
CV_EXPORTS_W void fillPoly(InputOutputArray img, InputArrayOfArrays pts,
const Scalar& color, int lineType = LINE_8, int
shift = 0,
Point offset = Point() );
//! draws one or more polygonal curves
CV_EXPORTS void polylines(Mat& img, const Point* const* pts, const int* npts,
int ncontours, bool isClosed, const Scalar& color,
Configuración Raspberry Pi
100
int thickness = 1, int lineType = LINE_8, int shift
= 0 );
CV_EXPORTS_W void polylines(InputOutputArray img, InputArrayOfArrays pts,
bool isClosed, const Scalar& color,
int thickness = 1, int lineType = LINE_8, int
shift = 0 );
//! draws contours in the image
CV_EXPORTS_W void drawContours( InputOutputArray image, InputArrayOfArrays
contours,
int contourIdx, const Scalar& color,
int thickness = 1, int lineType = LINE_8,
InputArray hierarchy = noArray(),
int maxLevel = INT_MAX, Point offset = Point()
);
//! clips the line segment by the rectangle Rect(0, 0, imgSize.width,
imgSize.height)
CV_EXPORTS bool clipLine(Size imgSize, CV_IN_OUT Point& pt1, CV_IN_OUT Point&
pt2);
//! clips the line segment by the rectangle imgRect
CV_EXPORTS_W bool clipLine(Rect imgRect, CV_OUT CV_IN_OUT Point& pt1, CV_OUT
CV_IN_OUT Point& pt2);
//! converts elliptic arc to a polygonal curve
CV_EXPORTS_W void ellipse2Poly( Point center, Size axes, int angle,
int arcStart, int arcEnd, int delta,
CV_OUT std::vector<Point>& pts );
//! renders text string in the image
CV_EXPORTS_W void putText( InputOutputArray img, const String& text, Point
org,
int fontFace, double fontScale, Scalar color,
int thickness = 1, int lineType = LINE_8,
bool bottomLeftOrigin = false );
//! returns bounding box of the text string
CV_EXPORTS_W Size getTextSize(const String& text, int fontFace,
double fontScale, int thickness,
CV_OUT int* baseLine);
} // cv
#endif
Configuración Raspberry Pi
101
8.3.4
Cv.hpp
Es la cabecera que incluye todas, o al menos las más usadas, librerías de OpenCV, necesario
incluirla en todos los proyectos que usen este conjunto de librerías:
Código
#ifndef __OPENCV_OLD_CV_HPP__
#define __OPENCV_OLD_CV_HPP__
//#if defined(__GNUC__)
//#warning "This is a deprecated opencv header provided for compatibility.
Please include a header from a corresponding opencv module"
//#endif
#include
#include
#include
#include
#include
#include
#include
#include
#include
"cv.h"
"opencv2/core.hpp"
"opencv2/imgproc.hpp"
"opencv2/photo.hpp"
"opencv2/video.hpp"
"opencv2/highgui.hpp"
"opencv2/features2d.hpp"
"opencv2/calib3d.hpp"
"opencv2/objdetect.hpp"
#endif
Configuración Raspberry Pi
102