1
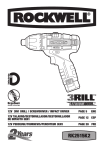
20V LI IMPACT DRIVER
OPERATION
1. HOW TO USE THE HOOK (See Fig. B1, B2)
Screw the Hook on the tool with the screw provided in
the plastic bag. The Hook (3) can be hooked on your belt
or pocket, etc.
2. INSTALLING OR REMOVING A BIT HOLDER,
SOCKET OR SCREWDRIVER BIT (See Fig. C)
To install the desired bit, pull the Collet Locking Sleeve
(8) forward and insert the desired bit into the sleeve as
far as it will go. Then release the collet locking sleeve to
secure the bit.
To remove the bit, pull the Collet Locking Sleeve (8)
forward and take the bit out firmly.
3. ON / OFF SWITCH (See Fig. D)
Depress the On/Off switch (5) to start and release it to
stop your tool. The On/Off Switch is fitted with a brake
function which stops your chuck immediately when you
quickly release the switch.
It is also a variable speed switch that delivers higher
speed and torque with increased trigger pressure.
Speed is controlled by the amount of switch trigger
depression.
WARNING: Do not operate for long periods
at low speed because excess heat will be
produced internally.
ENG
The LED Light is also a battery capacity indicator. It will
flash when battery power gets low.
7. DISPOSAL OF AN EXHAUSTED BATTERY PACK
To preserve natural resources, please recycle
or dispose of the Battery Pack (5) properly. This
Battery Pack contains Lithium batteries. Consult
your local waste authority for information regarding
available recycling and/or disposal options. Discharge
your Battery Pack by operating your tool, then remove
the battery pack from the tool housing and cover the
battery pack connections with heavy-duty adhesive
tape to prevent short circuit and energy discharge. Do
not attempt to open or remove any of the components.
MAINTENANCE
Your power tool requires no additional lubrication or
maintenance.
There are no user serviceable parts in your power tool.
Never use water or chemical cleaners to clean your
power tool. Wipe clean with a dry cloth. Always store your
power tool in a dry place. Keep the motor ventilation slots
clean. Keep all working controls free of dust. Occasionally
you may see sparks through the ventilation slots. This is
normal and will not damage your power tool.
4. SWITCH LOCK(See Fig. E1, E2)
The On/Off Switch (6) can be locked in the OFF position.
This helps to reduce the possibility of accidental starting
when not in use. To lock the Switch, place the Forward/
Reverse Rotation Control in the center position.
5. REVERSIBLE (See Fig. F)
For drilling and screw driving use forward rotation
” (Rotation Control lever is moved to the
marked “
left). Only use reverse rotation marked “
” (lever
is moved to the right) to remove screws or release a
jammed drill bit.
WARNING: Never change the direction of
rotation when the chuck is rotating, wait
until it has stopped!
6. USING THE LED LIGHT(See Fig. G)
The LED light allows you to keep a clear view under less
illuminated circumstances. To turn on the light, press
the On/Off switch and make sure the Forward/Reverse
Rotation Control is on right/left position. When you
release the On/Off Switch, the Light will be off.
9