1
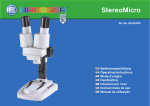
Biolux ICD 20x
Stereo-Mikroskop · Stereo Microscope
Art. No. 58-02000
DE
GB
FR
NL
IT
ES
PT
RU
Bedienungsanleitung
Operating Instructions
Mode d’emploi
Handleiding
Istruzioni per l’uso
Instrucciones de uso
Manual de utilização
Руководство по эксплуатации
Medien zu diesem Produkt
Über folgenden QR-Code/Weblink
können Sie weiterführende Medien
(Anleitungen,
Fachinformationen,
Videos etc.) über die BRESSER
Website abrufen*.
Media about this product
You can dowload further media
(manuals, technical information,
videos, etc) from the BRESSER
website* over the following QR code/
weblink.
Infos produit
Le code QR / lien ci-dessous vous
permet d’accéder à d’autres médias
(notices, informations spécialisées,
vidéos etc.) via notre site web
BRESSER*.
Aanvullende informatie over dit
product
Met deze QR code/weblink kunt u
aanvullende informatie (handleidingen,
vakinformatie, video’s etc.) ophalen
via de BRESSER website*.
Materiali relativi a questo prodotto
Attraverso il seguente codice QR/
link web si può accedere a ulteriori
materiali (istruzioni, informazioni
specialistiche, filmati ecc.) nel sito
web BRESSER*.
Informaciones sobre el producto
Siguiendo el código QR o enlace
web encontrará más informaciones
(instrucciones, fichas técnicas,
vídeos, etc.) sobre nuestros
productos en nuestra página web
BRESSER*.
Meios sobre este produto
Com o seguinte códido QR/
hiperligação
pode
aceder
a
meios complementares (manuais,
informações técnicas, vídeos etc.)
através da página da BRESSER na
Internet*.
Дополнительные материалы о
данном продукте
На сайте BRESSER размещены
дополнительные материалы о
данном продукте (руководство
по эксплуатации, технические
характеристики и пр.), которые
можно просмотреть, пройдя по
указанной ссылке или считав
данный QR-код при помощи любого
мобильного устройства.*
www.bresser.de/5802000
*Angebot abhängig von der Verfügbarkeit von Medien. · Offer subject to the availability of media. · Offre en fonction de la disponibilité des médias. · Aanbod
afhankelijk van de beschikbaarheid van media. · L’offerta dipende dalla disponibilità dei materiali. · Esta oferta está sujeta a la disponibilidad de las informaciones. ·
Oferta dependente da disponibilidade dos meios · Для некоторых продуктов дополнительные материалы не размещены на сайте BRESSER.
D
D
Fig. 2
1@
Fig. 1
1!
B
1)
j
H
C
E
Fig. 3
Fig. 4
1#
i
i
F
G
g
E
GEFAHR von Körperschäden!
Für die Arbeit mit diesem Gerät
werden häufig scharfkantige
und spitze Hilfsmittel eingesetzt. Bewahren Sie deshalb dieses Gerät sowie alle Zubehörteile und Hilfsmittel
an einem für Kinder unzugänglichen
Ort auf. Es besteht VERLETZUNGSGEFAHR!
men. Benutzen Sie gegebenenfalls
geeignete Schutzhandschuhe.
das Gerät ggf. zwecks Reparatur einschicken.
Kinder dürfen das Gerät nur unter
Aufsicht benutzen. Verpackungsmaterialien (Plastiktüten, Gummibänder,
etc.) von Kindern fernhalten! Es besteht ERSTICKUNGSGEFAHR!
ENTSORGUNG
Entsorgen Sie die Verpackungsmaterialien sortenrein. Informationen zur ordnungsgemäßen Entsorgung erhalten Sie beim kommunalen
Entsorgungsdienstleister oder Umweltamt.
Dieses Gerät beinhaltet Elektronikteile, die über eine Stromquelle (Batterien) betrieben werden.
Lassen Sie Kinder beim Umgang mit
dem Gerät nie unbeaufsichtigt! Die
Nutzung darf nur wie in der Anleitung
beschrieben erfolgen, andernfalls
besteht GEFAHR eines STROMSCHLAGS!
BRAND-/EXPLOSIONSGEFAHR!
Setzen Sie das Gerät keinen
hohen Temperaturen aus.
Benutzen Sie nur die empfohlenen
Batterien. Gerät und Batterien nicht
kurzschließen oder ins Feuer werfen! Durch übermäßige Hitze und
unsachgemäße Handhabung können
Kurzschlüsse, Brände und sogar Explosionen ausgelöst werden!
Batterien gehören nicht in Kinderhände! Achten Sie beim Einlegen der
Batterie auf die richtige Polung. Ausgelaufene oder beschädigte Batterien verursachen Verätzungen, wenn
Sie mit der Haut in Berührung kom-
GEFAHR von Sachschäden!
Bauen Sie das Gerät nicht auseinander! Wenden Sie sich im
Falle eines Defekts bitte an
Ihren Fachhändler. Er nimmt mit dem
Service-Center Kontakt auf und kann
4
Werfen Sie Elektrogeräte
nicht in den Hausmüll!
Gemäß der Europäischen
Richtlinie 2002/96/EG über Elektro- und Elektronik-Altgeräte und
deren Umsetzung in nationales
Recht müssen verbrauchte Elektrogeräte getrennt gesammelt und einer
umweltgerechten Wiederverwertung
zugeführt werden.
Batterien und Akkus dürfen
nicht im Hausmüll entsorgt
werden, sondern Sie sind zur Rückgabe gebrauchter Batterien und Ak-
kus gesetzlich verpflichtet. Sie können die Batterien nach Gebrauch
entweder in unserer Verkaufsstelle
oder in unmittelbarer Nähe (z.B. im
Handel oder in kommunalen Sammelstellen) unentgeltlich zurückgeben.
Batterien und Akkus sind mit einer
durchgekreuzten Mülltonne sowie dem chemischen Symbol des
Schadstoffes bezeichnet, „Cd“ steht
für Cadmium, „Hg“ steht für Quecksilber und „Pb“ steht für Blei.
Cd¹
1
2
3
Hg²
Pb³
Batterie enthält Cadmium
Batterie enthält Quecksilber
Batterie enthält Blei
EG-Konformitätserklärung
Eine „Konformitätserklärung“
in Übereinstimmung mit den
anwendbaren Richtlinien und entsprechenden Normen ist von der
Bresser GmbH erstellt worden. Diese kann auf Anfrage jederzeit eingesehen werden.
Teileübersicht (Abb. 1–4):
DE
1 Binokularer Einblick (mit Okularstutzen)
2 Stereo-Objektiv
3 Okulare
4 LED-Beleuchtung
5 Mikroskoptisch (mit zweifarbiger
Objektplatte)
6 Objektklammer
7 Scharfeinstellungsrad
8 Ein/Aus-Schalter
9 Batteriefach
10 Befestigungsschrauben
11 Deckel des Batteriefachs
12 Batteriekontakte (flache Bleche
und Federklemmen)
13 Streulichtkappe
Standort
Wählen Sie einen geeigneten Standort für Ihr Mikroskop. Der Platz muss
über eine ausreichend gute Lichtquelle verfügen (Tageslicht, Tischlampe). Achten Sie außerdem auf
einen stabilen Untergrund.
5
Einfache Beobachtung
Platzieren Sie das zu betrachtende
Objekt (z.B. Gesteinsprobe) in der
Mitte des Mikroskoptisches (5). Die
Objektplatte ist herausnehmbar und
hat eine schwarze und eine weiße
Seite. Helle oder transparente Objekte können auf der schwarzen Seite
untersucht werden. Wenn das Objekt
entsprechend flach und groß genug
ist, kann es zudem unter die Objektklammern (6) geklemmt werden.
Blicken Sie durch den binokularen
Einblick (1) und verändern Sie den
Abstand der Okulare (3) so, dass Sie
ein kreisrundes, klares Bild erhalten.
Die Bildschärfe wird durch langsames Drehen am Scharfeinstellungsrad (7) eingestellt.
das Batteriefach (9). Lösen Sie die
6 Befestigungsschrauben (10) des
Batteriefachdeckels (11) auf der Unterseite und nehmen den Deckel ab.
Legen Sie die Batterien so in die
Kammern ein, dass die flachen Minuspole (–) der Batterien gegen die
Federklemmen drücken und die
Pluspole (+) der Batterien dann die
flachen Kontakt-Bleche (12) berühren.
Setzen Sie den Deckel (11) wieder
auf und befestigen ihn mit den 6
Schrauben (10). Drehen Sie das Mikroskop um. Setzen Sie die Okulare
wieder ein. Mit dem Ein/Aus-Schalter (8) im Fuß des Mikroskops kann
die Beleuchtung (4) ein- oder ausgeschaltet werden.
Sie keine Reinigungsflüssigkeit, um
Schäden an der Elektronik zu vermeiden.
Batterien wechseln
Schalten Sie die Beleuchtung (4)
über den Ein/Aus-Schalter (8) aus.
Nehmen Sie beide Okulare (3) aus
den Okularstutzen (1) und drehen
Sie das gesamte Mikroskop um. Im
Fuß des Mikroskops befindet sich
HINWEISE zur Reinigung
Trennen Sie das Gerät vor der Reinigung von der Stromquelle (Batterien
entfernen)!
Zur Entfernung stärkerer Schmutzreste befeuchten Sie das Putztuch
mit einer Brillen-Reinigungsflüssigkeit und wischen Sie damit die Linsen
mit wenig Druck ab.
6
Reinigen Sie das Gerät nur äußerlich
mit einem trockenen Tuch. Benutzen
Schützen Sie das Gerät vor Staub
und Feuchtigk eit! Bewahren Sie es
in der mitgelieferten Tasche oder
Transportverpackung auf. Batterien
sollten aus dem Gerät entfernt werden, wenn es längere Zeit nicht benutzt wird.
Reinigen Sie die Linsen (Okulare und
Objektive) nur mit dem beiliegeden
Linsenputztuch oder mit einem anderen weichen und fusselfreien Tuch
(z.B. Microfaser) ab. Das Tuch nicht
zu stark aufdrücken, um ein Verkratzen der Linsen zu vermeiden.
RISK of bodily injury!
Aids with sharp edges and tips
are sometimes used with this
device. Please store the device and
all of its accessories and aids out of
the reach of children. There is a risk
of INJURY.
This device contains electronic components that are powered by either a
mains connection or batteries. Never
leave a child unsupervised with this
device. The device should only be
used as per these instructions otherwise there is a serious RISK of ELECTRICAL SHOCK.
Batteries should be kept out of children’s reach. When inserting batteries please ensure the polarity is correct. Leaking or damaged batteries
can cause injury if they come into
contact with the skin. If you need to
handle such batteries please wear
suitable safety gloves.
Children should only use this device
under supervision. Keep packaging
materials (plastic bags, rubber bands,
etc.) away from children. There is a
risk of SUFFOCATION.
FIRE-/ DANGER OF EXPLOSION!
Do not expose the device to
high temperatures. Use only
the recommended batteries. Do not
short-circuit the device or batteries,
or throw them into a fire. Excessive
heat or improper handling could trigger a short-circuit, a fire or an explosion.
RISK of material damage
Never take the device apart. Please
consult your dealer if there are
any defects. The dealer will
contact our service centre and send
the device in for repair if needed.
DISPOSAL
Dispose of the packaging materials properly, according to their
type (paper, cardboard, etc). Contact
your local waste disposal service or
environmental authority for information on the proper disposal.
Do not dispose of electronic
devices in the household garbage!
As per the Directive 2002/96/EC of
the European Parliament on waste
electrical and electronic equipment
and its adaptation into German law,
used electronic devices must be collected separately and recycled in an
environmentally friendly manner.
In accordance with the regulations concerning batteries
and rechargeable batteries, disposing of them in the normal household
waste is explicitly forbidden. Please
pay attention to dispose of your used
batteries as required by law - at a local collection point or in the retail
market (a disposal in domestic waste
violates the Battery Directive).
7
DE
GB
Batteries that contain toxins are
marked with a sign and a chemical
symbol. „Cd“ = cadmium, „Hg“ =
mercury, „Pb“ = lead.
Cd¹
Hg²
Pb³
battery contains cadmium
battery contains mercury
3
battery contains lead
1
2
EEC conformity explanation
Bresser GmbH has issued a
“Declaration of Conformity” in
accordance with applicable guidelines and corresponding standards.
This can be viewed any time upon request.
8
Your microscope is made up of
the following parts (Fig. 1-4):
1 Binocular view piece
(with eyepiece supports)
2 Stereo objective
3 Eyepieces
4 Illumination (LED)
5 Microscope stage (with black
and white object plate)
6 Stage clips
7 Focus knob
8 On/off switch
9 Battery compartment
10 Mounting screws
11 Battery compartment cover
12 Battery contacts (flat sheets and
spring terminals)
13 Diffusion cap
Location
Before you start, choose an ideal
location for using your microscope.
It is important that you have enough
light available (window, desk lamp).
Simple Observation
Place the object to be observed (for
example, a rock) in the middle of the
microscope stage (5). The objective
plate can be taken off. It has a black
and a white side. Bright or transparent
objects can best be examined on the
black side.
When the object is large enough, it
is best to fix it in place with the stage
clips (6).
Now, take a look through the
binocular eye lens (1) and change
the distance of the eyepiece (3), so
that you have a circular, clear image.
The sharpness is adjusted by slowly
turning the focus knob (7).
Replacing the batteries
Turn off the illumination (4) with the
On/Off switch (8). Remove both
eyepieces (3) from the eyepiece
supports (1) and turn the entire
microscope over. In the base of
the microscope there is a battery
compartment (9). Loosen the 4
fixing screws (10) of the battery
compartment cover (11) and remove
the cover.
Place the batteries in the compartment
so that the flat minus poles (-) press
against the spring terminal and the
plus poles (+) are touching the flat
contact sheets (12).
Put on the cover (11) and fix it with the
4 screws (10). Turn the microscope
over again. Place the eyepieces back
on. You can not turn on the light (4)
with the on/off switch (8) on the base
of the microscope.
Batteries should be removed from
the device if it is not going to be used
for a long period of time.
GB
Clean the lens (objective and
eyepiece) only with the cloth supplied
or some other soft lint-free cloth (e.g.
micro-fibre). Do not use excessive
pressure - this may scratch the lens.
Dampen the cleaning cloth with a
spectacle cleaning fluid and use it on
very dirty lenses.
TIPS on cleaning
Remove the device from it’s energy
source before cleaning (remove
batteries).
Clean the exterior of device with a
dry cloth. Do not use cleaning fluids
so as to avoid causing damage to
electronic components.
Protect the device from dust and
moisture. Store the device in the bag
supplied or in its original packaging.
9
RISQUE de dommages corporels !
Le travail avec cet appareil
entraîne souvent l’utilisation
d’accessoires pointus et à angles
vifs. Conservez donc cet appareil
ainsi que tous ses accessoires à un
endroit inaccessible aux enfants.
RISQUE DE BLESSURES !
Cet appareil contient des pièces
électroniques fonctionnant à l‘aide
d’une source de courant (piles).
Ne laissez jamais vos enfants sans
surveillance utiliser cet appareil !
L’appareil doit impérativement être
utilisé selon les instructions du mode
d’emploi : DANGER de CHOC ÉLECTRIQUE !
Les piles doivent être tenues hors de
la portée des enfants ! Faites attention
à la polarité lorsque vous insérez les
piles. Les piles qui ont fui ou qui sont
endommagées peuvent provoquer des
brûlures lorsqu’elles entrent en contact
avec votre peau. Enfilez des gants de
protection adaptés le cas échéant.
10
Les enfants ne devraient utiliser l’appareil que sous surveillance. Gardez hors
de leur portée les matériaux d’emballage (sachets en plastique, élastiques
etc.) ! DANGER D’ÉTOUFFEMENT !
DANGER D’INCENDIE/
D’EXPLOSION !
Ne pas exposer l’appareil à des
températures trop élevées.
N’utilisez que les batteries
conseillées. L’appareil et les batteries
ne doivent pas être court-circuitées
ou jeter dans le feu ! Toute surchauffe ou manipulation inappropriée peut
déclencher courts-circuits, incendies
voire conduire à des explosions !
DANGER de dommages sur le
matériel !
Ne démontez jamais l’appareil ! En
cas d’endommagement, adressezvous à votre revendeur. Il prendra contact avec le centre de
service et pourra, le cas échéant,
envoyer l’appareil au service de réparations.
ELIMINATION
Eliminez l’emballage en triant
les matériaux. Pour plus d’informations concernant les règles applicables en matière d’élimination de ce
type des produits, veuillez vous
adresser aux services communaux
en charge de la gestion des déchets
ou de l’environnement.
Ne jamais éliminer les appareils électriques avec les ordures ménagères !
Conformément à la directive européenne 2002/96/CE sur les appareils électriques et électroniques et
ses transpositions aux plans nationaux, les appareils électriques usés
doivent être collectés séparément et
être recyclés dans le respect des réglementations en vigueur en matière
de protection de l’environnement.
En conformité avec les règlements concernant les piles et
les piles rechargeables, jeter ces
produits avec les déchets ménagers
normaux est strictement interdit.
Veuillez à bien déposer vos piles usagées dans des lieux prévus à cet effet par la Loi, comme un point de
collecte locale ou dans un magasin
de détail (une élimination de ces produits avec les déchets domestiques
constituerait une violation des directives sur les piles et batteries).
Les piles qui contiennent des toxines sont marquées avec un signe
et un symbole chimique. « Cd » =
cadmium, « Hg » = mercure, « Pb »
= plomb.
Cd¹
Hg²
Pb³
batterie/pile contenant du cadmium
batterie/pile contenant du mercure
3
batterie/pile contenant du plomb
1
2
Certificat de conformité UE
Bresser GmbH a émis une
«déclaration de conformité»
conformément aux lignes directrices
applicables et aux normes correspondantes. Celle-ci peut être consultée à tout moment sur demande.
Ton microscope est composé des
pièces suivantes (Fig. 1–4):
1 Vue binoculaire (avec tubes
oculaires)
2 Objectif stéréo
3 Oculaires
4 Eclairage LED
5 Table de microscope
(avec porte-objet bicolore)
6 Pince pour objet
7 Roue de focalisation
8 Interrupteur marche/arrêt
9 Compartiment à piles
10 Vis de fixation
11 Couvercle du compartiment à
piles
12Contacts des piles (tôles plates
et bornes à ressort)
13 Cache de lumière diffuse
FR
Lieu
Avant de commencer, trouve un endroit spécifique pour installer le microscope. Il est important que tu aies
suffisamment de lumière à ta disposition (fenêtre, lampe de table).
11
Observation simple
Place l’objet à observer (par exemple, une pierre) au milieu de la table
du microscope (5). Le porte-objet
peut être extrait et possède un côté
noir et un côté blanc. Utilise le côté
noir, pour bien examiner les objets
clairs ou transparents.
Quand l’objet est suffisamment gros,
tu peux mieux le caler sous la pince
à objet (6).
Regarde maintenant à travers la vue
binoculaire (1) et modifie la distance
des oculaires (3) de sorte à obtenir
une image ronde et claire.
La précision de l’image se règle en
tournant lentement la roue de focalisation (7).
Changer de piles
Eteins l’éclairage (4) au moyen de
l’interrupteur Marche/Arrêt (8). Retire les deux oculaires (3) des tubes
oculaires (1) et retourne complètement le microscope. Au pied du microscope se trouve le compartiment
à piles (9). Desserre les 6 vis de fixa12
tion (10) du couvercle du compartiment à piles (11) sur sous l’appareil
et dépose le couvercle.
Place les batteries dans les compartiments de sorte que le pôle moins (-)
plat des piles s‘appuient contre les
bornes à ressorts et que le pôle plus
(+) des piles touchent ensuite les
contacts-tôles plates (12).
Remets le couvercle (11) en place
et fixes le à l’aide des 6 vis(10).
Retourne le microscope. Réinstalle
les oculaires. Avec l’interrupteur
marche/arrêt (8) au pied du microscope, tu peux maintenant allumer ou
éteindre l‘éclairage (4).
REMARQUES concernant le
nettoyage
Avant de procéder au nettoyage de
l’appareil, séparez-le de la source de
courant (retirez les piles) !
Ne nettoyez que l’extérieur de l’appareil et à l’aide d’un chiffon propre.
N’utilisez pas de liquide de nettoyage
afin d’éviter tout dommage au sys-
tème électronique.
Tenez l’appareil à l’abri de la poussière et de l’humidité ! Conservez-le
dans la sacoche incluse à la livraison
ou bien dans l’emballage de transport. Retirez les piles de l‘appareil
si vous ne n’utilisez pas pendant un
certain temps !
Pour nettoyer les lentilles (oculaires
et objectifs), utilisez uniquement le
chiffon à lentilles ci-joint ou bien un
chiffon doux et non pelucheux (par
exemple en microfibre). N’appuyez
pas trop fortement le chiffon sur les
lentilles pour ne pas les rayer.
Pour retirer des traces de saleté plus
résistantes, humidifiez légèrement le
chiffon avec un liquide prévu pour le
nettoyage des lunettes et passez sur
les lentilles en exerçant une légère
pression.
GEVAAR voor verwondingen!
Bij het werken met dit apparaat
worden vaak scherpe en puntige hulpmiddelen gebruikt. Bewaar
dit apparaat daarom samen met alle
onderdelen en hulpmiddelen op een
plaats die niet voor kinderen toegankelijk is. Uw kind kan LETSEL oplopen!
Dit apparaat bevat elektronische onderdelen die via een stroombron (batterijen) worden aangedreven.
Zorg dat kinderen tijdens de bediening
altijd onder toezicht staan! Gebruik mag
uitsluitend plaats vinden zoals in de
gebruiksaanwijzing staat omschreven,
anders bestaat het GEVAAR van een
ELEKTRISCHE SCHOK!
Batterijen horen buiten het bereik van
kinderen te blijven! Let bij het plaatsen
van een batterij op de juiste richting
(+/-). Lekkende of beschadigde batterijen veroorzaken irritatie als ze met
de huid in aanraking komen. Gebruik
in dat geval geschikte handschoenen.
Kinderen mogen het apparaat uitsluitend onder toezicht gebruiken. Houdt
het verpakkingsmateriaal (plastic zakken, elastiekjes, e.d.) buiten bereik
van kinderen! Hierdoor kunnen ze
STIKKEN!
BRAND-/EXPLOSIEGEVAAR!
Stel het apparaat niet bloot aan
hoge temperaturen. Gebruik uitsluitend de aanbevolen batterijen. Sluit
het apparaat en de batterijen niet kort
en gooi deze niet in het vuur! Te hoge
temperaturen en ondeskundig gebruik
kunnen leiden tot kortsluitingen, branden en zelfs explosies!
GEVAAR voor materiële schade!
Demonteer het apparaat niet! Neem
in alle situaties waarin zich een
defect voordoet contact op met
uw vakhandel. Hij neemt contact op
met het servicecentrum en kan het
apparaat indien nodig ter reparatie
opsturen.
AFVALVERWERKING
Bied het verpakkingsmateriaal
op soort gescheiden als afval
aan. Informatie over de juiste afvalverwerking kunt u van uw plaatselijke afvalverwerkingsbedrijf of de milieudienst krijgen.
Gooi elektrische apparaten niet
weg met het huisvuil!
Volgens de Europese Richtlijn
2002/96/EG over afgedankte elektrische en elektronische apparaten
alsmede de daaraan gerelateerde nationale wetgeving moeten gebruikte
elektrische apparaten gescheiden
worden ingezameld en volgens de milieurichtlijnen worden gerecycled.
Batterijen en accu’s mogen niet
worden weggegooid in de vuilnisbak. U bent wettelijk verplicht om
gebruikte batterijen in te leveren. U
kunt de gebruikte batterijen in onze
winkel of in de onmiddellijke omgeving,
bijv. bij gemeentelijke Inzamelpunten
gratis inleveren.
13
FR
NL
Batterijen en accu’s zijn gemarkeerd
met een doorgestreepte vuilnisbak en
het chemische symbool van de verontreinigingende stoffen: “Cd” staat voor
Cadmium, “Hg” staat voor Kwik en
“Pb” voor Lood.
Cd¹
Hg²
Pb³
batterij bevat cadmium
batterij bevat kwik
3
accu bevat lood
1
2
EU-Conformiteitsverklaring
Een “conformiteitsverklaring”
in overeenstemming met de
van toepassing zijnde richtlijnen en
overeenkomstige normen is door Bresser GmbH afgegeven. Deze kan elk
moment op aanvraag worden ingezien.
14
Je microscoop bestaat uit de
volgende delen (afb. 1–4):
1 Binoculaire inkijk (met oculairbuis)
2 Stereo-objectief
3 Oculairen
4 LED verlichting
5 Microscooptafel (met tweekleurig objectglas)
6 Objectklem
7 Scherpteregeling
8 Aan-/Uit-schakelaar
9 Batterijvak
10 Bevestigingsschroeven
11 Deksel van het batterijvak
12 Batterijcontacten (platte platen
en veerklemmen)
13 Strooilichtscherm
Locatie
Voordat je begint, zoek je een
geschikte plaats om met de
microscoop te kunnen werken. Het
is belangrijk dat je genoeg licht hebt
(raam, bureaulamp).
Eenvoudige observatie
Plaats het object dat je wilt
bekijken (bijvoorbeeld een steen) in
het midden van de microscooptafel
(5). Het objectglas kan verwijderd
worden en heeft een zwarte en een
witte kant. Lichtgekleurde of transparante voorwerpen kun je het beste op
de zwarte kant onderzoeken.
Als het object groot genoeg is,
kun je het het best onder de
objectklemmen (6) vastzetten.
Kijk nu door de binoculaire inkijk
(1) en verander de afstand van de
oculairen (3) zo, dat je een cirkelvormig, helder beeld krijgt.
De scherpte stel je in, door langzaam aan de scherpteregeling (7) te
draaien.
Batterijen verwisselen
Schakel de verlichting (4) uit
met de aan/uit schakelaar (8).
Neem beide oculairen (3) uit de
oculairbuis (1) en draai de hele
microscoop om. In de voet van de
microscoop bevindt zich het bat-
terijvak (9). Maak de 4 bevestigingsschroeven (10) van het dekseltje van
het batterijvak (11) aan de onderkant
los en haal het dekseltje er af.
Leg nu de batterijen zo in de
vakken dat de platte minpolen (–) van
de batterijen tegen de veerklemmen
drukken en de pluspolen (+) van de
batterijen dan de platte contactplaatjes (12) raken.
Doe het deksel (11) weer dicht en
bevestig het met de 4 schroeven
(10). Draai de microscoop om. Doe
de oculairen terug in de buis. Met de
aan/uit-schakelaar (8) in de voet van
de microscoop kun je nu de verlichting (4) aan- of uitzetten.
TIPS voor het schoonmaken
Ontkoppel het apparaat vóór het
schoonmaken van de stroombron
(batterijen verwijderen)!
delen te voorkomen.
Bescherm het apparaat tegen stof
en vocht! Bewaar het in de meegeleverde tas of verpakking. De batterijen
dienen uit het apparaat te worden
verwijderd als het gedurende langere
tijd niet wordt gebruikt.
NL
Reinig de lenzen (oculairglazen en
objectiefglazen) uitsluitend met het
meegeleverde lenspoetsdoekje of
met een andere zachte en pluisvrije
doek (bv. Velcro). Druk het doekje er
niet te stevig op om krassen op de
lenzen te voorkomen.
Om grotere vuildeeltjes te verwijderen maakt u het poetsdoekje nat met
een schoonmaakvloeistof voor brillen
en wrijft u daarmee de lenzen met
zachte druk af.
Reinig het apparaat uitsluitend aan
de buitenzijde met een droge doek.
Gebruik geen reinigingsvloeistof om
schade aan de elektronische onder15
PERICOLO di danni alla persona!
Nell’utilizzo del presente apparecchio si ricorre spesso
all‘uso di strumenti ausiliari appuntiti
o dotati di spigoli taglienti. Conservare quindi l’apparecchio, gli accessori
e gli strumenti ausiliari in un luogo
inaccessibile ai bambini. PERICOLO
DI LESIONI!
Il presente apparecchio contiene
parti elettroniche che funzionano con
l’apporto di energia da sorgenti elettriche (batteria).
Non lasciare i bambini incustoditi mentre utilizzano l’apparecchio!
L’utilizzo dell‘apparecchio è consentito esclusivamente nel rispetto delle
istruzioni per l’uso fornite. In caso
contrario sussiste il RISCHIO di SCARICHE ELETTRICHE!
Non lasciare le batterie nelle mani
dei bambini! Al momento di inserire
le batterie nell’apposito vano, fare
attenzione a rispettare le polarità.
16
Non utilizzare batterie danneggiate:
le sostanze fuoriuscite dall‘interno
della batteria sono corrosive e possono provocare lesioni se entrano a
contatto con la pelle. Utilizzare all’occorrenza guanti protettivi idonei.
Non lasciare mai incustoditi i bambini
quando usano l’apparecchio. Tenere i materiali di imballaggio (buste di
plastica, elastici, ecc.) lontano dalla
portata dei bambini! PERICOLO DI
SOFFOCAMENTO!
PERICOLO DI INNESCO DI
INCENDI/ESPLOSIONE
Non esporre l’apparecchio a
temperature elevate. Utilizzare
esclusivamente le batterie consigliate. Non cortocircuitare o buttare nel
fuoco l‘apparecchio e le batterie! Un
surriscaldamento oppure un utilizzo
non conforme può provocare cortocircuiti, incendi e persino esplosioni!
PERICOLO per danni a cose!
Non smontare l’apparecchio!
In caso di difetti all’apparecchio
rivolgersi al rivenditore specializzato.
Il rivenditore si metterà in contatto
con il servizio di assistenza clienti ed
eventualmente manderà l‘apparecchio in riparazione.
SMALTIMENTO
Smaltire i materiali di imballaggio dopo averli suddivisi. Per
informazioni sul corretto smaltimento,
si prega di rivolgersi all‘azienda municipale che si occupa dello smaltimento dei rifiuti o all’ufficio pubblico
competente.
Non gettare apparecchi elettrici nei comuni rifiuti domestici!
Secondo la direttiva europea
2002/96/CE sulle apparecchiature
elettriche ed elettroniche e ai sensi
della legge nazionale che la recepisce, gli apparecchi elettrici devono
essere differenziati e smaltiti separatamente per poter essere trattati e
riciclati nel rispetto dell’ambiente.
Le batterie normali e ricaricabili devono essere correttamente smaltiti come sta previsto dalla
legge. È possibile tornare batterie
inutilizzati presso il punto di vendita o
cedere in centri di raccolta organizzati dai comuni per la raccolta gratuitamente.
Le batterie normali e ricaricabili sono
contrassegnati con il simbolo corrispondente disposte per lo smaltimento e il simbolo chimico della sostanza
inquinante. Per Esempio: “CD” sta
per il cadmio, il “Hg” sta per mercurio
e “Pb” per il piombo.
Cd¹
Hg²
Pb³
Batteria contiene cadmio
Batteria contiene mercurio
3
Batteria contiene piombo
1
2
Dichiarazione di conformità CE
Een “conformiteitsverklaring”
in overeenstemming met de
van toepassing zijnde richtlijnen en
overeenkomstige normen is door
Bresser GmbH afgegeven. Deze kan
elk moment op aanvraag worden ingezien.
I componenti del tuo microscopio
(fig. 1-4):
1 Testata binoculare (con
portaoculari)
2 Obiettivo stereoscopico
3 Oculari
4 Illuminazione a LED
5 Tavolino portaoggetti (con
piastra portaoggetti bicolore)
6 Clip
7 Ghiera della messa a fuoco
8 Interruttore acceso/spento
9 Vano batterie
10 Viti di fissaggio
11 Coperchio del vano batterie
12 Contatti delle batterie (lamierini
piatti e morsetti a molla)
13 Protezione dalla luce diffusa
IT
Ubicazione
Prima di cominciare, cerca una posizione adatta per effettuare le tue
osservazioni al microscopio. È importante che ci sia luce a sufficienza
(finestra, lampada da tavolo).
17
Osservazione semplice
Posiziona l’oggetto da osservare (per
esempio una pietra) al centro del
tavolino portaoggetti (5). La piastra
portaoggetti è estraibile e presenta
un lato nero e un lato bianco. Il lato
nero è più indicato per osservare oggetti chiari o trasparenti.
Se l‘oggetto è sufficientemente grande è meglio fissarlo con le clip (6).
Guarda attraverso la testata binoculare (1) e modifica la distanza degli oculari (3) finché l‘immagine non apparirà
nitida e perfettamente circolare.
Per regolare la messa a fuoco gira
lentamente la ghiera (7).
Sostituzione delle pile
Spegnere l’illuminazione (4) mediante l’interruttore principale (8). Rimuovi
entrambi gli oculari (3) dai portaoculari (1) e capovolgi il microscopio.
Nella base del microscopio si trova
il vano batterie (9). Allentare le 6 viti
di fissaggio (10) del coperchio del
vano pile (11) situato sul lato inferiore
18
dello strumento, quindi rimuovere il
coperchio.
Inserisci le batterie in modo tale che
l’estremità piatta della batteria, cioè il
polo negativo (-), prema contro il morsetto a molla e che il polo positivo (+)
sia a contatto con il lamierino (12).
Rimettere il coperchio (11) e fissarlo
con le 6 viti (10). Capovolgere il microscopio. Rimetti gli oculari al loro
posto. Ora, premendo l’interruttore
acceso/spento (8), situato sulla base
del microscopio, puoi accendere e
spegnere l’illuminazione (4).
AVVERTENZE per la pulizia
Per pulire l’apparecchio, scollegarlo
dalla sorgente di energia elettrica (rimuovere le batterie)!
Pulire l’apparecchio solo esternamente con un panno asciutto. Non
utilizzare liquido detergente per
evitare che i componenti elettronici
dell’apparecchio si danneggino.
Proteggere l’apparecchio da polvere
e umidità! Conservarlo nella custodia
in dotazione o nella confezione originale. Laddove l’apparecchio resti
inutilizzato per un periodo di tempo
prolungato, rimuovere le batterie.
Pulire le lenti (oculare e obiettivo) solo
con l‘apposito panno in dotazione oppure con un altro panno morbido che
non lasci peli (per es. in microfibra).
Non premere con il panno sulle lenti
per evitare che si graffino.
Per rimuovere i residui di sporco più
ostinati inumidire il panno con un liquido detergente per occhiali e pulire le lenti esercitando solo una lieve
pressione.
¡PELIGRO de lesiones corporales!
A menudo, para trabajar con
este aparato es necesario utilizar instrumentos cortantes o puntiagudos. Por consiguiente, guarde
este aparato junto con todos sus
accesorios e instrumentos en un lugar que esté fuera del alcance de los
niños. ¡Existe PELIGRO DE PROVOCARSE HERIDAS!
maduras si entran en contacto con la
piel. Dado el caso, utilice guantes de
protección adecuados.
Este aparato incluye componentes
electrónicos operados a través de
una fuente de electricidad (pilas).
¡No deje que los niños manejen nunca el aparato sin su supervisión! ¡Sólo
se puede utilizar tal como se indica
en el manual de instrucciones, ya que
en caso contrario existe PELIGRO de
una DESCARGA ELÉCTRICA!
¡PELIGRO DE INCENDIO/
EXPLOSIÓN!
No exponga el aparato a altas temperaturas. Utilice exclusivamente
las pilas recomendadas. ¡No
cortocircuitar ni arrojar al fuego el
aparato o las pilas! El calor excesivo y el manejo inadecuado pueden
provocar cortocircuitos, incendios e
incluso explosiones.
¡Las pilas no deben llegar a manos de
los niños! Al introducir las pilas, preste siempre atención a que la polaridad sea correcta. Las pilas agotadas
o defectuosas pueden provocar que-
Los niños sólo pueden usar el aparato bajo la supervisión de un adulto. ¡Mantener fuera del alcance de
los niños los materiales de embalaje
(bolsas de plástico, cintas de goma,
etc.)! ¡Existe PELIGRO DE ASFIXIA!
¡PELIGRO de daños materiales!
¡No desmonte el aparato! En caso de
que perciba un defecto, diríjase a su
tienda especializada. En ella se pon-
drán en contacto con el centro de
servicio técnico y, si procede,
enviarán el aparato para que
sea reparado.
ELIMINACIÓN
Elimine los materiales de embalaje separándolos según su clase. Puede obtener información sobre
la eliminación reglamentaria de desechos en su proveedor de servicios de
eliminación de desechos municipal o
bien en su oficina de medio ambiente.
¡No deposite aparatos eléctricos en la basura doméstica!
Con arreglo a la Directiva Europea 2002/96/CE sobre aparatos
eléctricos y electrónicos usados y a
su aplicación en las respectivas legislaciones nacionales, los aparatos
eléctricos usados deben recopilarse
por separado y destinarse a un reciclaje adecuado desde el punto de
vista medioambiental.
19
IT
ES
De acuerdo con la normativa
en materia de pilas y baterías
recargables, está explicitamente prohibido depositarlas en la basura normal. Por favor, preste atención a lo
que la normativa obliga cuando usted
quiera deshacerse de estos productos - sobre puntos de recogida municipal o en el mercado minorista (disposición sobre violación de la
Directiva en materia de los residuos
domésticos- pilas y baterías-).
Las pilas y baterías que contienen
productos tóxicos están marcados
con un signo y un símbolo químico.
“Cd”= cadmio, “Hg”= mercurio, “Pb”
= plomo
Cd¹
Hg²
pila que contiene cadmio
2
pila que contiene mercurio
3
pila que contiene plomo
1
20
Declaración de conformidad con
la UE
Bresser GmbH ha emitido
una “Declaración de conformidad” de acuerdo con las directrices y normas correspondientes. Dicha declaración se puede consultar
en cualquier momento, previa petición.
Tu microscopio se compone de
las siguientes piezas (fig. 1–4):
1 Vista binocular (con soportes de
los oculares)
2 Objetivo estéreo
3 Oculares
4 Iluminación LED
5 Mesa del microscopio (con
platina bicolor)
6 Pinza para sujetar los objetos
7 Tornillo micrométrico
8 Interruptor de encendido/
apagado
9 Compartimento de las pilas
10 Tornillos de fijación
11 Tapa del compartimento de las
pilas
12 Contactos de las pilas (chapa
lisa y sujetador de muelle)
13 Tapón de luz parásita
Pb³
Lugar
Antes de empezar debes elegir un
lugar apropiado para practicar observaciones con tu microscopio. Es
importante que dispongas de luz suficiente (ventana, flexo).
Observación simple
Coloca el objeto que deseas observar (por ejemplo, una piedra) en el
centro de la mesa del microscopio
(5). La platina es extraíble y posee un
lado negro y otro blanco. Los objetos
transparentes o claros se pueden observar mejor en la parte negra.
Si el objeto es suficientemente grande, lo mejor que puedes hacer es
sujetarlo bajo las pinzas (6).
Mira ahora a través de la vista binocular (1) y modifica la distancia de los
oculares (3) de modo que obtengas
una imagen clara y redonda.
La nitidez de la imagen se ajusta girando lentamente el tornillo micrométrico (7).
Cambio de pilas
Apaga la iluminación (4) mediante el
interruptor (8). Extrae ambos oculares (3) de sus soportes (1) y dale
la vuelta a todo el microscopio. El
compartimento de las pilas (9) se
encuentra en el pie del microscopio.
Desenrosca los 4 tornillos de fijación
(10) del compartimento de las pilas
en la parte de abajo y saca la tapa.
Introduce ahora las pilas en las cámaras de modo que los polos negativos lisos (–) de las pilas presionen
los sujetadores de muelle y los polos
positivos (+) de las pilas entren en
contacto con la chapa lisa (12).
Pon la tapa (11) del compartimento
de nuevo en su sitio y fíjala mediante
los 4 tornillos (10). Gira el microscopio. Vuelve a colocar los oculares.
Mediante el interruptor de encendido/apagado (8) que hay en el pie del
microscopio puedes ahora encender
o apagar la iluminación (4).
Limpie el aparato con un paño seco
y sólo por la parte exterior. No utilice
ningún agente limpiador líquido, a fin
de evitar daños en el sistema electrónico.
INDICACIONES sobre la limpieza
Antes de limpiarlo, retire el aparato
de la fuente de alimentación eléctrica
(retirar las pilas).
Para eliminar restos persistentes
de suciedad, humedezca el paño
con un líquido de limpieza de gafas
y frote con él las lentes sin excesiva
presión.
¡Proteja el aparato del polvo y la
humedad! Guárdelo en el maletín
suministrado o en el embalaje de
transporte. Se recomienda retirar las
pilas del aparato si no se va a utilizar
durante un período prolongado.
Limpie las lentes (del ocular y del objetivo) sólo con el paño especial para
lentes adjunto o con otro paño suave
y sin pelusas (p. ej. microfibras). No
ejercer una excesiva presión con el
paño, a fin de evitar que las lentes se
rayen.
21
ES
RISCO de ferimentos!
Para trabalhar com este aparelho são utilizados meios auxiliares pontiagudos e com arestas
vivas. Por essa razão, guarde este
aparelho, e todos os componentes
e meios auxiliares, num local inacessível às crianças. RISCO DE FERIMENTOS!
Este aparelho contém componentes
electrónicos, que são operados por
uma fonte de corrente (pilhas).
Não deixe as crianças sem vigilância
durante o manuseamento do aparelho! A utilização deve efectuar-se
conforme o manual, caso contrário
há RISCO de CHOQUE ELÉCTRICO!
As pilhas devem ser mantidas afastadas das crianças! Preste atenção
para colocar a pilha na polaridade
correcta. Pilhas danificadas ou com
derramamento de ácido causam
queimaduras graves quando em con22
tacto com a pele. Se necessário, utilize luvas de protecção adequadas.
As crianças só devem utilizar o
aparelho sob vigilância. Manter os
materiais da embalagem (sacos de
plástico, elásticos, etc.) afastados
das crianças! RISCO DE ASFIXIA!
RISCO DE INCÊNDIO/EXPLOSÃO!
Não sujeite o aparelho a altas
temperaturas. Utilize apenas
as pilhas recomendadas. Não curtocircuitar nem atirar para o fogo o aparelho nem as pilhas! O calor excessivo e o manuseamento incorrecto
podem provocar curto-circuitos, incêndios e até explosões!
RISCO de danos materiais!
Não desmonte o aparelho! Em
caso de defeito, consulte o
seu distribuidor especializado. Ele
contactará o Centro de Assistência e
poderá enviar o aparelho para uma
eventual reparação.
ELIMINAÇÃO
Separe os materiais da embalagem. Pode obter mais informações sobre a reciclagem correcta
nos serviços municipais ou na agência do meio ambiente.
Não deposite os seus aparelhos electrónicos no lixo doméstico!
De acordo com a Directiva Europeia
2002/96/CE sobre aparelhos eléctricos e electrónicos e sua conversão
na legislação nacional, os aparelhos
electrónicos em fim de vida devem
ser separados e sujeitos a uma reciclagem ambientalmente correcta.
As pilhas e as baterias não devem ser eliminadas juntamente com o lixo doméstico, mas é obrigatório serem entregues para
reciclagem em locais próprios. Após
o uso, pode entregar as pilhas nos
nossos locais de venda ou entregálas gratuitamente num local próximo
(por ex. em estabelecimentos comerciais ou em pilhómetros).
As pilhas e as baterias devem estar
identificadas com um recipiente para
lixo rasurado bem como com o símbolo de material perigoso, “Cd” significa cádmio, “Hg” significa mercúrio
e “Pb” significa chumbo.
Cd¹
Hg²
Pb³
Pilha contém cádmio
Pilha contém mercúrio
3
Pilha contém chumbo
1
2
Indicações de conformidade da UE
Foi criada pela Bresser
GmbH uma “Declaração de
conformidade“ de acordo com as directivas e respectivas normas aplicáveis. A sua visualização pode ser solicitada a qualquer momento.
O teu microscópio consiste nestas partes (fig. 1–4):
1 Lente binocular (com apoios da
ocular)
2 Objectiva estéreo
3 Oculares
4 Iluminação LED
5 Mesa de microscópio (com suporte de duas cores para objetos)
6 Grampo para objectos
7 Roda de ajuste da nitidez
8 Interruptor para ligar/desligar
9 Compartimento das pilhas
10 Parafusos de fixação
11 Tampa do compartimento das pilhas
12 Contactos das pilhas (chapas
planas e grampos de mola)
13 Capa de luz difusa
Local de instalação
Antes de começares, escolhe um
local de instalação adequado para
veres ao microscópio. É importante que tenhas luz suficiente (janela,
candeeiro de mesa).
Observação simples
Coloca o objecto a ser observado
(por exemplo uma pedra) no centro
da mesa do microscópio (5). O suporte para objetos pode ser removido e tem um lado preto e outro
branco. Poderás observar melhor os
objetos claros ou transparentes com
o lado preto.
Se o objecto for grande o suficiente,
podes fixá-lo por baixo dos clipes (6).
Olha através da lente binocular (1) e
altera a distância das oculares (3), de
forma a obteres uma imagem clara e
circular.
Para ajustares a nitidez da imagem,
roda lentamente a roda de ajuste da
nitidez (7).
Trocar as pilhas
Desliga a iluminação (4) no interruptor para ligar/desligar (8). Retira as
duas oculares (3) dos respectivos
apoios (1) e vira o microscópio ao
contrário. Na base do microscópio
encontras o compartimento das pi23
PT
lhas (9). Solta os 6 parafusos de fixação (10) da tampa do compartimento
das pilhas (11) na parte de baixo e
retire a tampa.
Coloca as pilhas nos grampos, de
forma que os pólos negativos (–)
planos das pilhas pressionem os
grampos de mola e que os pólos
positivos (+) das pilhas toquem nas
chapas de contacto (12) planas.
Coloca novamente a tampa (11) e
fixa-a com os 6 parafusos (10). Gira
o microscópio. Coloca novamente
as oculares. Com o interruptor para
ligar e desligar (8) na base do microscópio podes ligar ou desligar a
iluminação (4).
INDICAÇÕES sobre a limpeza
Antes de limpar a fonte de corrente,
desligue o aparelho (remover as pilhas)!
Limpe o aparelho apenas no exterior com um pano seco. Não utilize
produtos de limpeza, a fim de evitar
24
danos no sistema electrónico.
Proteja o aparelho do pó e da humidade! Guarde-o na bolsa fornecida
ou na embalagem de transporte. As
pilhas devem ser retiradas do aparelho, se este não for usado durante
algum tempo.
Limpe as lentes (oculares e/ou objectivas) apenas com o pano de limpeza
fornecido ou com um outro pano macio e sem fios (p. ex. em microfibra).
Não exercer muita força com o pano,
para não arranhar as lentes.
Para remover restos de sujidade mais
difíceis humedeça o pano de limpeza
com um líquido de limpeza para óculos e limpe as lentes, exercendo uma
leve pressão.
ОПАСНОСТЬ травмирования!
При пользовании данным
устройством
может
потребоваться
применение
инструментов
с
острыми
краями.
Храните
устройство,
принадлежности и инструменты
в недоступном для детей месте.
Существует
риск
получить
ТРАВМУ!
Данное
устройство
содержит
электронные
компоненты,
приводимые в действие от
источника тока (батарейки). Не
оставляйте ребенка без присмотра.
Устройство следует использовать
только так, как указано в
инструкции, иначе есть серьезный
риск получить УДАР ТОКОМ.
Исключите
доступ
детей
к
батарейкам! При установке/замене
батареек соблюдайте полярность.
Вытекшие или поврежденные
батарейки вызывают раздражения
при контакте с кожей. В случае
необходимости
надевайте
подходящие защитные перчатки.
Дети
могут
пользоваться
устройством только под присмотром
взрослых.
Храните
упаковку
(пластиковые пакеты, резиновые
ленты и пр.) в недоступном для
детей месте. Существует опасность
УДУШЕНИЯ!
ОПАСНОСТЬ ПОЖАРА / ВЗРЫВА
Не допускайте нагревания
устройства
до
высокой
температуры. Используйте только
рекомендованные батарейки. Не
закорачивайте
устройство
и
батарейки, не бросайте их в огонь!
Перегрев
и
неправильное
обращение могут стать причиной
короткого замыкания, пожара и
даже взрыва!
ОПАСНОСТЬ
повреждения
материала!
Никогда
не
разбирайте
устройство.
При
возникновении
неисправностей
обратитесь к дилеру. Он свяжется с
нашим сервисным центром и при
необходимости отправит устройство
в ремонт.
УТИЛИЗАЦИЯ
Утилизируйте упаковку как
предписано законом. При
необходимости проконсультируйтесь
с местными властями.
Не
выбрасывайте
электронные
детали
в
обычный
мусорный
контейнер. Европейская директива
по утилизации электронного и
электрического
оборудования
2002/96/EU и соответствующие ей
законы требуют отдельного сбора и
переработки подобных устройств.
25
PT
RU
Элементы
питания
не
являются
бытовыми
отходами, поэтому в соответствии с
законодательными требованиями
их необходимо сдавать в пункты
приема использованных элементов
питания. Вы можете бесплатно
сдать использованные элементы
питания в нашем магазине или
рядом с вами (например, в торговых
точках или в пунктах приема).
На элементах питания изображен
перечеркнутый контейнер, а также
указано содержащееся ядовитое
вещество: «Cd» обозначает кадмий,
«Hg» – ртуть, а «Pb» – свинец.
Cd¹
Hg²
Pb³
Элемент питания содержит кадмий
Элемент питания содержит ртуть
3
Элемент питания содержит свинец
1
2
26
Сертификат соответствия ЕС
Сертификат соответствия был
составлен
с
учетом
действующих
правил
и
соответствующих норм компанией
Bresser GmbH. Его можно просмотреть
по запросу в любое время.
Подготовка к работе
Прежде чем приступить к работе,
выберите подходящее место для
установки микроскопа (лучше
всего поместить микроскоп рядом
с ярким источником света: под
лампой или у окна).
Детали микроскопа (рис. 1-4):
Первые наблюдения
Поместите объект (например, один
из минералов, входящих в комплект
поставки) в центр предметного
столика
(5).
Двухцветный
предметный столик значительно
упрощает изучение объектов, вне
зависимости от их цвета и яркости.
Например, яркие или прозрачные
объекты лучше изучать на черной
стороне предметного столика.
Крупные объекты рекомендуется
закреплять
на
предметном
столике при помощи зажимов (6),
чтобы случайно не сдвинуть их с
оптической оси.
Посмотрите в окуляры (3), установленные
в бинокулярную насадку (1), на
исследуемый объект. Отрегулируйте
1. Бинокулярная насадка (с
разъемами для окуляров)
2. Стереообъектив
3. Окуляры
4. Система освещения
(светодиоды)
5. Предметный столик
(двухцветный)
6. Зажимы для препаратов
7. Колесо фокусировки
8. Выключатель
9. Батарейный отсек
10. Шурупы
11. Крышка батарейного отсека
12. Контакты для установки
батареек
13. Светорассеивающая крышка
межзрачковое расстояние окуляров
так, чтобы изображение не двоилось во
время наблюдений.
Сфокусируйте изображение при
помощи колеса фокусировки (7).
Замена батареек
Выключите систему освещения (4),
нажав выключатель (8). Выньте
оба окуляра (3) из бинокулярной
насадки
(1)
и
переверните
микроскоп. Батарейный отсек
(9) расположен в основании
микроскопа. Выкрутите 6 шурупа
(10) и снимите крышку батарейного
отсека (11).
Установите
батарейки
в
батарейный
отсек,
соблюдая
указанную полярность.
Закройте крышку батарейного
отсека (11) и закрутите шурупы (10)
обратно. Переверните микроскоп
и поставьте его на основание.
Вставьте обратно окуляры (3).
Включите систему освещения (4),
нажав выключатель (8), чтобы
продолжить работу.
УКАЗАНИЯ по чистке
Перед
чисткой
отключите
устройство от источника питания
(выньте батарейки)!
очков и протрите
небольшим усилием.
линзы
с
Протирайте
поверхности
устройства сухой салфеткой. Не
используйте чистящую жидкость,
она может повредить электронные
компоненты.
Берегите устройство от пыли и
влаги. Храните устройство в кейсе
или в оригинальной упаковке. Если
устройство не будет использоваться
в течение длительного времени,
выньте из него батарейки!
RU
Линзы (окуляры и объектив)
следует очищать только мягкой
нетканой салфеткой (например,
микрофиброй). Не давите слишком
сильно – можно поцарапать линзу.
Для удаления более сильных
загрязнений смочите чистящую
салфетку в жидкости для чистки
27
Garantie & Service
Die reguläre Garantiezeit beträgt
2 Jahre und beginnt am Tag des
Kaufs. Um von einer verlängerten,
freiwilligen Garantiezeit wie auf dem
Geschenkkarton angegeben zu profitieren, ist eine Registrierung auf
unserer Website erforderlich. Die
vollständigen Garantiebedingungen
sowie Informationen zu Garantiezeitverlängerung und Serviceleistungen
können Sie unter www.bresser.de/
garantiebedingungen einsehen.
Warranty & Service
The regular guarantee period is
2 years and begins on the day
of purchase. To benefit from an
extended voluntary guarantee period
as stated on the gift box, registration
on our website is required. You can
consult the full guarantee terms as
well as information on extending
the guarantee period and details of
our services at www.bresser.de/
warranty_terms.
28
Garantie et Service
La durée normale de la garantie
est de 2 ans à compter du jour
de l’achat. Afin de pouvoir profiter
d’une prolongation facultative de la
garantie, comme il est indiqué sur le
carton d’emballage, vous devez vous
enregistrer sur notre site Internet.
Vous pouvez consulter l’intégralité
des conditions de garantie ainsi
que les informations concernant
la prolongation de la garantie et
les prestations de service sur
www.bresser.de/warranty_terms.
Garantie & Service
De
reguliere
garantieperiode
bedraagt 2 jaar en begint op de
dag van aankoop. Om gebruik te
maken van een verlengde vrijwillige
garantieperiode zoals aangegeven
op de geschenkverpakking is
aangegeven dient het product op onze
website geregistreerd te worden. De
volledige garantievoorwaarden en
informatie over de verlenging van de
garantieperiode en servicediensten
kunt u bekijken op www.bresser.de/
warranty_terms.
Garanzia e assistenza
La durata regolare della garanzia
è di 2 anni e decorre dalla data
dell'acquisto.
Per
godere
di
un'estensione
volontaria
della
garanzia come descritto sulla
confezione regalo, è necessario
registrarsi nel nostro sito Web. Le
condizioni complete di garanzia e
le informazioni sull'estensione di
garanzia e i servizi di assistenza
sono visibili al sito www.bresser.de/
warranty_terms.
Garantía y servicio
El período regular de garantía es
dos anos iniciándose en el día de
la compra. Para beneficiarse de
un período de garantía más largo
y voluntario tal y como se indica
en la caja de regalo es necesario
registrarse en nuestra página web.
Garantia e Serviço
O prazo de garantia normal perfaz 2
anos e começa no dia da compra.
Para usufruir de um prazo de
garantia opcional alargado tal como
indicado no certificado de garantia,
é necessário registar-se no nosso
Website.
Todas as condições de garantia
bem como informações sobre
o prolongamento da garantia e
prestações de serviço podem ser
consultadas em www.bresser.de/
warranty_terms.
необходимо зарегистрироваться
на нашем сайте. Подробные
условия гарантии, информацию
о
расширенной
гарантии
и
о наших сервисных центрах
можно получить на нашем сайте
www.bresser.de/warranty_terms.
GARANTIE/WARRANTY
Las condiciones de garantía
completas así como informaciones
relativas a la ampliación de la garantía
y los servicios pueden encontrarse
en www.bresser.de/warranty_terms.
Гарантия и обслуживание
Стандартный гарантийный срок
составляет 2 года, начиная со дня
покупки. Чтобы воспользоваться
расширенной
гарантией,
29
30
31
Irrtümer und technische Änderungen vorbehalten. · Errors and technical changes reserved. · Sous réserve d’erreurs et de modifications techniques.
Vergissingen en technische veranderingen voorbehouden. · Con riserva di errori e modifiche tecniche.
Queda reservada la posibilidad de incluir modificaciones o de que el texto contenga errores. · Erros e alterações técnicas reservados.
Оставляем за собой право на ошибки и технические изменения.
ANL5802000MSP0914BRESSER
Bresser GmbH
Gutenbergstr. 2
DE-46414 Rhede
Germany
www.bresser.de