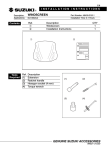
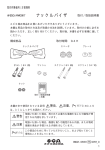
1
INSTALLATION INSTRUCTIONS I ISTRUZIONI DI MONTAGGIO D MONTAGEANLEITUNG E INSTRUCCIONES PARA EL MONTAJE F INSTRUCTIONS DE MONTAGE J 取付説明書 GB GB Description: Applications: Front Master Cylinder Cap AN650L3 Part Number : 59600-268XX Installation Time : 0.1 Hours D Beschreibung: Vorderer Hauptzylinderdeckel Teil-Nr.: 59600-268XX Verwendungen: AN650L3 Montagezeit: 0,1 hr(s) F Description: Modèle: Chapeau de maître-cylindre avant Code: 59600-268XX AN650L3 Temps d’installation: 0,1 hr(s) I Descrizione: Applicazione: Cappello pompa freno anteriore Codice: 59600-268XX AN650L3 Tempo di montaggio: 0,1 hr(s) E Descripción: Aplicación: Tapa de cilindro maestro delantero N°de código: 59600-268XX AN650L3 Tiempo de instalación: 0,1 hr(s) J 品名: 適用機種: フロントマスタシリンダキャップ 品番: 59600-268XX AN650L3 取付時間: 0.1 H GB Contents Inhalt Contenu Imballo Contenido コンテンツ Important GB WARNING / CAUTION / NOTICE / NOTE Please read this manual and follow its instructions carefully. To emphasize special information, the symbol and the words WARNING, CAUTION, NOTICE and NOTE have special meanings. Pay particular attention to messages highlighted by these signal words: WARNING Indicates a potential hazard that could result in death or serious injury. CAUTION GB Indicates a potential hazard that could result in minor or moderate injury. NOTICE D Indicates special information to make maintenance easier or instructions clearer. Wichtig D WARNUNG / VORSICHT / HINWEIS / ANMERKUNG Diameter Tightening Torque (mm) N·m kgf-m lbf-ft 5 3.0 0.3 6 5.5 0.55 2.0 4.0 8 13.0 1.3 9.5 10 29.0 2.9 21.0 Wichtige hinweise zur montage 1. Prüfen, ob der Satz alle auf der ersten Seite aufgeführten Teile enthält. 2. Jedes Teil im Satz auf Kratzer und Beschädigung überprüfen. 3. Das Fahrzeug auf ebenem Untergrund parken. 4. Den Zündschlüssel abziehen und an sicherer Stelle aufbewahren. 5. Abgenommene oder zu montierende Teile nicht einfach auf den Boden, sondern auf einen weichen Lappen legen, damit sie nicht verkratzt werden. 6. Darauf achten, dass die Fahrzeugkarosserie bei der Montage des Zubehörs nicht beschädigt wird. D Anzugsdrehmoment Durchmes- Anzugsdrehmoment Sofern nicht ausdrücklich ein anderes An- ser (mm) N·m kgf-m zugsdrehmoment vorgeschrieben ist, die 5 3,0 0,3 Schrauben mit den in der Tabelle rechts 6 5,5 0,55 angegebenen Standard-Anzugsdrehmomenten anziehen. 8 13,0 1,3 Der Wert gibt das Anzugsdrehmoment für 10 29,0 2,9 eine konventionelle oder mit “4” markierte Schraube an. Für andere, nicht in der Tabelle aufgeführte Schrauben, schlagen Sie bitte in der Wartungsanleitung nach. Lesen Sie bitte dieses Handbuch und befolgen Sie die darin enthaltenen Anweisungen genau. Das Symbol und die Schlüsselwörter WARNUNG, VORSICHT, HINWEIS sowie ANMERKUNG werden zur Betonung spezieller Informationen verwendet. Beachten Sie insbesondere Informationen, die durch die folgenden Schlüsselwörter gekennzeichnet sind: WARNUNG Weist auf eine mögliche Gefahr hin, die tödlich ausgehen oder schwere Verletzungen verursachen kann. VORSICHT Weist auf eine mögliche Gefahr hin, die leichte bis mittelschwere Verletzungen verursachen kann. HINWEIS Weist auf eine mögliche Gefahr hin, die zu Fahrzeug- und Ausrüstungsschäden führen kann. ANMERKUNG:Kennzeichnet Informationen, die Wartungsarbeiten erleichtern bzw. Anweisungen verdeutlichen sollen. F Tightening Torque Tighten bolts to the torque indicated in the right table as standard value unless otherwise explicitly specified. The value shows conventional or “4” marked bolt tightening torque. For other bolts not listed in the table, refer to the service manual. Indicates a potential hazard that could result in vehicle or equipment damage. NOTE: Precautions for Installation 1. Check that the kit includes all the parts listed in the first page. 2. Check each part in the kit for scratches or any form of damage. 3. Park the vehicle on a level ground. 4. Remove the ignition key from the switch and store it in a safe place. 5. Protect any items removed or to be installed from scratches by placing them on a soft cloth first before putting them on the ground. 6. Use care not to cause any damage to the body of the vehicle during installation of the accessory. Important F AVERTISSEMENT / ATTENTION / AVIS / NOTE Précautions à l’installation 1. Vérifier que le kit inclut toutes les pièces énumérées en première page. 2. Vérifier que les pièces du kit ne sont pas rayées ou détériorées d’une manière quelconque. 3. Garer le véhicule sur une surface plane. 4. Enlever la clé de contact du contacteur et la ranger dans un endroit sûr. 5. Protéger des rayures toutes les pièces déposées ou à installer en les plaçant sur un chiffon plutôt qu’à même le sol. 6. Éviter d’endommager le véhicule pendant l’installation de l’accessoire. Lire attentivement ce manuel et se conformer soigneusement aux instructions données. Pour souligner des informations spéciales, on utilise le symbole et les mots AVERTISSEMENT, ATTENTION, AVIS et NOTE. Lire avec soin les messages précédés par ces mots: AVERTISSEMENT Indique un danger potentiel pouvant résulter en blessures graves ou mortelles. F ATTENTION Couple de serrage Serrer les boulons au couple spécifié dans le tableau des valeurs standards ci-contre sauf spécification contraire. Les valeurs données dans ce tableau correspondent aux couples de serrage des boulons conventionnels ou des boulons marqués “4”. Pour les boulons non listés dans ce tableau, voir le manuel d’entretien. Indique un danger potentiel pouvant résulter en blessures légères ou modérées. AVIS Indique un danger potentiel pouvant résulter en détérioration du véhicule ou des équipements. NOTE: Signale des informations spéciales pour faciliter l’entretien ou clarifier des instructions importantes. 1 Diamètre (mm) Couple de serrage N·m kgf-m 5 3,0 0,3 6 5,5 0,55 8 13,0 1,3 10 29,0 2,9 GENUINE SUZUKI ACCESSORIES 99021-26J90 I Importante I ATTENZIONE / AVVERTENZA / AVVISO / NOTA Leggere questo manuale e seguire con attenzione le sue istruzioni. Il simbolo e le parole ATTENZIONE, AVVERTENZA, AVVISO e NOTA enfatizzano la presenza di importanti informazioni. Fare attenzione particolare ai messaggi evidenziati da queste parole: ATTENZIONE Indica un pericolo che può portare alla morte o ferimenti gravi. AVVERTENZA Indica un pericolo che può portare a ferimenti lievi o moderati. AVVISO Indica un pericolo che può portare a danni al veicolo o altre attrezzature. NOTA: E Indica informazioni speciali per rendere più facile la manutenzione oppure per chiarire le istruzioni date. Importante Lea este manual y siga sus instrucciones cuidadosamente. Para realzar la información especial, el símbolo y las palabras ADVERTENCIA, ATENCIÓN, AVISO y NOTA tienen un significado especial. Ponga mucha atención a los mensajes resaltados por estas palabras: ADVERTENCIA Indica un posible peligro que podría causar la muerte o lesiones graves. ATENCIÓN Indica un posible peligro que podría causar lesiones menores o moderadas. AVISO Indica un posible peligro que podría causar daños en el vehículo o el equipo. NOTA: J Indica información especial para que el mantenimiento resulte más fácil o las instrucciones más claras. 重要 本書の中で使用されている記号 , ,注記, アドバイス のところは,とくにしっかりお読みください 。 取扱いを誤った場合,死亡または重大な傷害を 生じる可能性がある危害の程度を示しています。 取扱いを誤った場合,傷害を負う可能性がある 危害の程度を示しています。 アドバイス 取扱いを誤った場合,物的損害の発生する危害 の程度を示しています。 お車のために守っていただきたいこと,知って おくと便利なことを示しています。 Coppia di serraggio Diametro (mm) Coppia di serraggio N·m kgf-m 5 3,0 0,3 6 5,5 0,55 8 13,0 1,3 10 29,0 2,9 Precauciones para la instalación 1. Compruebe que el juego incluya todas las piezas enumeradas en la primera página. 2. Compruebe cada pieza del juego para asegurarse de que no esté rayada ni dañada. 3. Estacione el vehículo en un terreno nivelado. 4. Retire la llave de contacto y guárdela en un lugar seguro. 5. Proteja cada pieza que haya quitado o que vaya a instalar para que no se raye colocándola primero sobre un paño blando antes de ponerla en el suelo. 6. Tenga cuidado para no causar ningún daño a la carrocería del vehículo durante la instalación de un accesorio. E Par de apriete Apriete los pernos al par indicado en la tabla de la derecha a menos que se especifique explícitamente lo contrario. El par de apriete indicado es para los pernos convencionales o los que están marcados con un “4”. Para otros pernos que no se enumeran en la tabla, consulte el manual de servicio. J 本書は用品の取付け方法及び取扱の方法を説明しています。 取付けの前に必ずお読みいただき,正しく取り付けてくだ さい。取付後,本書を必ずお客様に渡してください 。 注記 I Stringere i bulloni alla coppia di serraggio indicata nella tabella a destra come valore standard, salvo esplicita indicazione diversa. Il valore della coppia di serraggio è convenzionale o per bulloni contrassegnati con un “4”. Per quanto riguarda i bulloni nono elencati in tabella, consultare il manuale di servizio. E ADVERTENCIA / ATENCIÓN / AVISO / NOTA Precauzioni per l’installazione 1. Controllare che il kit contenga tutte le parti elencate nella prima pagina. 2. Controllare che nessuna parte del kit abbia graffi o danni. 3. Parcheggiare il veicolo in un punto in piano. 4. Rimuovere la chiave di accensione dall’interruttore e conservarla in un luogo sicuro. 5. Proteggere ogni elemento tolto o da installare da graffi mettendolo su di un panno soffice steso a terra. 6. Fare attenzione a non danneggiare la scocca del veicolo durante l’installazione dell’accessorio. Par de apriete Diámetro (mm) N·m 5 3,0 0,3 6 5,5 0,55 8 13,0 1,3 10 29,0 2,9 kgf-m 取付注意点 ●お客様ご自身で取付ける場合は,ご自身の知識 ・ 技量の範囲で行ってください。 難しいことはスズキ販売店にご相談ください。 ●平坦な足場のしっかりした場所で,メインスタンドまたはサイドスタンドを立て てください。 ●エンジン回転中および停止後しばらくの間は,マフラ,エンジンなどが熱くなっ ています。このとき触れるとやけどを負うおそれがあります。 ●取付けを行うときは火気を近づけないでください。 アドバイス ・ 取付けはエンジンを停止し,キーを抜いた状態で行ってください。 ・ 適切な工具を使用してください。 ・ 本書に記載の取付位置以外の場所,または取付方法以外の方法で取付けた場合は,取付 作業者の責任となります。 ・ 適用機種以外には使用しないでください。適用機種以外に取付けられたものについては 取付作業者の責任となります。 J 締付トルク とくに指示のない個所は,右記を 目安に締付けてください 。 ネジ径 mm 締付トルク N.m 5 3 6 5 8 13 10 29 Installation Installation Montage Installazione Instalación 取付け 1 2 2 GENUINE SUZUKI ACCESSORIES