1
GAS SPRINGS INSTALLATION
LABELS (IF APPLICABLE)
Items Needed:
Gas Springs (Qty: 2)
5/16 - 18 Ball Studs (Qty: 4)
5/16 - 18 Clip-on Nut (Qty: 4)
1/2-in Wrench
Process:
• Apply at room temperature (above 50ºF [10ºC]).
• Clean the application surface (inside of cover) and let dry.
• Place the label face down and begin to remove the
backing by starting at one of the four corners. Hold the
edge of the application tape and slowly remove the
backing by pulling at an angle, toward the opposite
corner, ensuring the decals stay attached to the
application tape.
• Align and apply the label starting at the left or right side
with the graphics face down (suggested label location
shown). Using a plastic squeegee or stiff cardboard,
press firmly as you draw the edge over the face of the
application tape, working from the center out to the
edges.
• Remove the application tape.
• If air bubbles form, smooth out with squeegee toward the
edges.
Process:
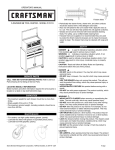
• Install (2) 5/16-18 Ball Studs and (2) 5/16-18 Clip-on Nut
into slot on left and right side of cover. Tighten using 1/2in wrench.
5/16 - 18
Clip-on Nut
5/16 - 18
Ball Stud
3-3/4
3-1/8
• Install (2) 5/16-18 Ball Studs into top tray using (2)
5/16-18 Clip-on Nut. (Ball Studs should face towards the
middle of the unit.) Tighten using 1/2-in wrench.
5/16 - 18
Clip-on Nut
OPERATION
REMOVING DRAWERS
• Empty the drawer.
• Fully extend the drawer.
Release
5/16 - 18
Ball Stud
• Install Gas Spring as shown in image below by pushing
the sockets onto Ball Studs (cylinder side up).
Gas
Spring
• Close and open cover to check Gas Springs are properly
installed.
Lever Style - Lift or lower (depending on the slide) the
release lever on both sides, (this allows the slides to ride
over the stops). Pull out to remove.
3