1
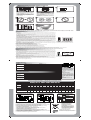
How to install & get started / Guía de instalación
Take the cooler out from the carton, remove all
protective covers and place in front of an open
window or install in a window for effective cooling.
Some models can also be placed on a trolley. Do
not use in a closed room.
Extraiga el enfriador del empaque, quite las
cubiertas protectoras y colóquelo frente a una
ventana abierta. Algunos modelos pueden
colocarse sobre una base con ruedas. No lo use en
un cuarto cerrado.
Pour water by lifting the lid on top or through front or
through spout at the back. You may also add ice cubes
for faster cooling.
Note: For longer life of pump, always operate it with
sufficient water in the tank
Set controls as desired
Seleccione el modo de operación que usted desee
Wait 5 minutes for the pads to get wet properly
Espere 5 minutos hasta que los filtros se mojen
completamente.
Adjust louver manually as desired.
Ajuste las rejillas manualmente como usted lo desee.
Sit back and enjoy.
Relájese y disfrute.
Plug in to power source and switch on.
Sólo conecte y encienda.
Llene el depósito con agua, levantando la tapa
superior, o por el frente, o por la toma en la parte
trasera. Puede también agregar cubos de hielo para
enfriamiento más rápido.
Nota: Para una prolongada vida de su bomba,
siempre opérela con suficiente agua en su
contenedor.
For maximum cooling turn the air flow knob to “HIGH”.
Gire la perilla de control de aire a “HIGH” , para máximo
enfriamiento
How to operate Remote Control models - Storm 100 i & 70 i / Cómo operar el Control remoto en los modelos - Storm 100 i & 70 i
1. POWER : Power On and OFF
ENCENDIDO : Encendido y Apagado.
2.ON/OFF TIMER:
ON TIMER : To set the ON timer, switch on the power supply then press the power button. ON timer icon in LCD will blink for 10
seconds, press the timer button in this duration and set the desired on time. ON time can be set in intervals of 30 minutes, the set time
will be displayed.
OFF TIMER : This will work when the cooler is running. You can set the OFF time in intervals of 30 minutes by pressing the timer button.
Each press will increase the OFF time by 30 minutes up to 12 hours.
ENCENDER / APAGAR EL TIMER :
ENCENDIDO: Para programar el timer, conecte el enfriador al suministro de energía y presione el botón de encendido. El ícono del
timer empezará a parpadear durante 10 segundos. Presione el botón del timer durante este tiempo y ajuste al tiempo deseado. El
timer puede ajustarse a intervarlos de 30 minutos, el tiempo seleccionado será indicado en la pantalla. APAGADO: Funcionará
cuando el enfriador esté en operación. Ajuste esta función a intervalos de 30 minutos presionando el botón del timer. Cada ajuste
incrementará el tiempo en 30 minutos hasta 12 horas.
3.COOL : Press the button to switch ON/OFF the pump. Cool Icon will appear on LCD when switched On. The Pump will start only when
sufficient water is in the tank, this will be indicated by water symbol displayed on LCD. Pump will not start if the water level is low and
this will be indicated by a buzzer for 5 seconds and water symbol on LCD will blink.
FRÍO : Presione el botón para encender/apagar la bomba. Al encenderla, el ícono de Frío aparecerá en la pantalla. La bomba funciona
solamente cuando hay suficiente agua en el depósito y esto será indicado por el símbolo de agua en la pantalla. Si hay bajo nivel de
agua éste será indicado por un zumbido que durará 5 segundos y el simbolo de agua en la pantalla empezará a parpadear.
4.FAN +/- : Fan+ will increase the speed by pressing button each time from any speed between 1 to 8 level & similarly Fan- will decrease
the Fan speed
VENTILACIÓN +/- : Cada vez que se presione el botón Fan+ la velocidad del ventilador se incrementará del nivel 1 al 8 y de igual
manera el botón Fan- disminuirá la velocidad del ventilador.
5. SWING : Press button to switch on/off the swing function.
SWING : Presione el botón para encender/apagar la función de swing.
6. AUTO : Auto function = The speed varies randomly to give the feel of natural breeze
AUTO : Función Automática = La velocidad varia de manera alterna para dar una sensación de brisa natural.
7. IONIZER : Ionizer function - ON and OFF (in selected models / optional)
IONIZADOR : Función Ionizador - Encendido y Apagado (en modelos seleccionados/opcional)
8.This cooler must moved only by properly holding the handle (given on top)
Este enfriador deberá ser movido tomándolo sólo de la agarradera (instalada en la parte superior)
R
Remote Control
Control Remoto
Control Panel
Panel de Control
Remote Control & Control Panel may vary from model to model
Control Remoto y Panel de Control puede variar de un modelo a otro.
General : Last setting is memorized for all the functions. LCD background will turn off after 30 seconds and will re-appear while pressing any function keys
General : El último ajuste es memorizado para todas las funciones. El fondo de la pantalla se apagará despues de 30 segundos y volverá a encender al oprimir cualquier botón.
How to operate Remote Control models - H!Cool Smart & DiET Range / Cómo operar el Control remoto en los modelos - H!Cool Smart & DiET Range
1. POWER (ON/OFF) : Press the button to switch on/off the cooler. Icon will glow with GREEN color at on position and RED color at off
position
ENCENDER / APAGAR : Presione el botón para encender o apagar el enfriador. Cuando esté encendido, el ícono brillara en color verde
y en color rojo cuando esté apagado
2. COOL : Press the button to switch ON/OFF the pump. Cool Icon will glow when switched On. The Pump will start only when sufficient
water is in the tank, indicated by water icon glowing in WHITE. Low water level will be indicated by a buzzer for 5 seconds and water
icon will start blinking in red color.
FRÍO : Presione el botón para encender o apagar la bomba. Al encender la bomba, se enciende el ícono de Frío con una luz en color
blanca y se mantendrá así en tanto haya suficiente agua en el depósito. Si hay bajo nivel de agua éste será indicado por un zumbido
que durará 5 segundos y el ícono de Frío empezará a parapadear en color rojo.
3. FAN : When started, the fan icon will glow. Press the button for High, Medium and Low speeds. The selected speed will be indicated by
glowing LED.
VENTILACIÓN :Al enciender el enfriador, enciende también el ícono de ventilación. Presione el botón para seleccionar velocidad alta,
media y baja. La velocidad seleccionada brillará con luz LED.
4. SWING : Press button to switch on/off the swing function. Swing icon will glow when switched ON
SWING : Presione el botón para encender o apagar el swing. El ícono del swing brillará cuando se encienda.
5. TIMER : Press the button to set OFF timer from 1 - 7 hours in intervals of 1 hr. Timer icon will glow when timer is switched ON and the
glowing LEDs will indicate the total OFF time set.
TIMER : Presione el botón para programar el timer de 1 a 7 horas con intérvalos de 1 hr. Cuando se active el timer, el ícono brillará y la
luz LED indicará el tiempo de apagado seleccionado.
Remote Control
Control Remoto
Control Panel
Panel de Control
Remote Control & Control Panel may vary from model to model
Control Remoto y Panel de Control puede variar de un modelo a otro.
Trouble Shooting
Trouble
Less cooling
Water leakage
Fan not working
Shock on cooler
Cause
Remedy
Pump is switched OFF
Humidity control OFF(Selected models)
Drain plug is displaced.
Grill lock is disengaged.
Cooling pad sagging
Air flow switch is turned OFF
Loose contact at the socket
Switch or motor malfunction
Device malfunction
Switch ON the pump
Ensure that the humidity control knob is ON.
Ensure that the drain plug is positioned properly.
Relock the grill.
Change the cooling pads.
Switch ON the fan by selecting the required speed.
Rectify faulty wiring.
Call the nearest service provider.
Call the nearest service provider.
How to drain water
To drain the left over water from the
tank, remove the drain plug given at
lower back side of the tank. After
draining, fix the drain plug properly.
Solución de problemas
Problemas
NoEnfria
Fuga de Agua
Abanico No Funciona
Corto en el enfriandor
It is advisable to drain water on
regular basis.
Causa
Solucion
Perilla de la bomba en APAGADO
Control de humedad APAGADO (ciertos modelos)
Tapón de drenado no está colocado
Candado de la rejilla desajustado
Filtros saturados de contaminantes
Perilla de corriente de aire en APAGADO
Falso contacto en la alimentación
Motor o interruptor no funcionan
Mal funcionamiento del enfriador
Asegúrese que la perilla de control de bomba esté ENCENDIDA
Asegúrese que la perilla de control de humedad esté ENCENDIDA
Asegúrese que el tapón de drenado esté colocado correctamente.
Ajuste nuevamente la rejilla
Cambie los filtros
Encienda el ventilador seleccionando la velocidad requerida
Revise fallas en el cordón
Llame al centro de servicio más cercano
Llame al centro de servicio más cercano
Cómo drenar el agua:
Para drenar el agua del depósito,
retire el tapón de drenado que se
encuentra en la parte inferior trasera
del aparato. Después de drenar el
agua coloque y fije apropiadamente
el tapón.
Es recomendable drenar el agua
regularmente.
Electrical Specifications / Especificaciones Eléctricas
Hi Cool
Model Winter Sumo Sumo Jr Plus/Smart
Ninja
Tech Specs
Rated
Power
(watts max.)
220 V/60Hz
110 V/60Hz
230 V/50Hz
Rated
Current (A)
220 V/60Hz
110 V/60Hz
Nominal Air Capacity (m3/hr)
(At zero static pressure)
Reservoir Capacity
(upto brim in ltr.)
Cooling Capacity
(Min. %)
Jumbo Kaizen Jumbo Jr Kaizen Jr Ice Cube
DIET
DIET
DIET
8T/8i/8CR 22T/22i/22CR 50T/50i/50CR
Storm 100 i Storm 70 i
200
200
180
0.9
1.8
160
180
160
0.7
1.8
175
175
150
0.9
1.6
175
200
175
0.8
2.2
100
100
95
0.5
1.2
185
200
185
0.7
1.6
175
175
150
0.9
1.6
110
110
110
0.5
1.0
100
100
95
0.5
1.0
95
95
95
0.5
1.0
120
120
115
0.6
1.2
160
175
160
0.8
2.0
175
190
175
0.8
2.0
255
275
235
1.1
2.6
460
495
425
1.9
4.7
4500
3500
2100
1200
1100
4000
2200
2200
1000
1300
600
1100
1250
5500
3500
56
45
45
31
17
51
51
21
21
17
06
22
50
100
70
75
75
70
60
55
80
75
70
70
65
60
60
60
55
55
Warning / Advertencia:
1. Unplug and disconnect the cooler from power source before attempting any maintenance or service.
1. Desconecte el enfriador de la corriente eléctrica antes de intentar hacer cualquier mantenimiento o servicio.
2. Electrical wiring on your unit is not required as the unit has been wired at the factory.
2. No se requiere cablear la unidad ya que la unidad viene cableada desde la fábrica.
3. If the supply cord is damaged, it must be replaced by the manufacturer or its service agent or a similarly
qualified person in order to avoid a hazard.
3. Si el cordón suministrado está dañado, éste debe ser reemplazado por
el fabricante o agente de servicio o personal calificado para evitar riesgos.
4. Motor insulation class B. The blower/fan motor comes equipped with thermal overload protection.
4. Aislamiento de motor clase B. La turbina/motor del abanico vienen
equipados con protección térmica de sobrecarga.
5. Appliance is not to be used by children or persons with reduced physical, sensory or mental capabilities,
or lack of experience and knowledge, unless they have been given supervision or instruction.
5. Este equipo no debe ser usado por niños o personas con discapacidad física,
sensorial o mental, o sin experiencia o conocimiento, a menos que hayan recibido supervisión o instrucciones.
6. Children are advised not to play with the appliances.
6. Los niños deben ser advertidos de no jugar con electrodomésticos.
Waste electric products should not
be disposed off with household
waste. Please recycle where
facilities exist. Check with your
local authority or retailer for
recycling advice.
Los productos eléctricos inserbibles no
deben ser depositados con la basura de
la casa. Por favor recicle donde existan
lugares propios para reciclaje. Pregunte
a las autoridades locales o vendedor
por información de reciclaje
Symphony cooler works on inverter.
Inverter has to be of sine wave type only
Los Enfriadores de aire Symphony funcionan también con
un inversor. El inversor debe ser de onda tipo senoidal.