1
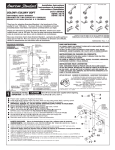
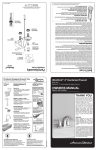
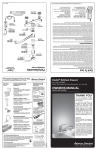
Installation Instructions Instruccions de Instalación Roughing-In Dimensions Install Supports for Tub Spout, Valve Body and Shower Instale los soportes para el pico de la tina, el cuerpo de la válvula y la ducha Finished Wall Pared Terminada Agujero 1" Min. - 2" Max. 25mm Min. - 51mm Max. 1/2 N.P.T. Shower Arm Ensamble y suelde todas las conexiones en los ensambles de la tubería Shower Arm Support Soporte del brazo de la ducha WALL AX MI M Brazo de Ducha Assemble and Solder All Connections on Piping Assemblies M Dimensiones Calculadas 1-1/4" Dia. Hole 3-5/8" Ref. (92mm) WALL AX M MI WALL AX MI 74" para el espacio de la cabeza desde el fondo de la tina Opcional Para Terminar Piso Habituaimente Entre 65" y 78" (1651 y 1981mm) 1-1/4" (32mm) 18" Optional 2-1/8" (53mm) 18" opcionales 4" 4" (102mm) (102mm) 1/2" N.P.T. Valve Inlets Entradas de Válvula (3) 1-3/4" (44mm) Dia. Holes for Valves on 4" Centers y Valve Bod Supporterpo cu Soporte dellvula de la vá 1/2" Copper 1/2" Cobre ut Tub Spoort Supp del 2 Soportela tina pico de Apply Sealing Tape to all Threaded Connections except Valve Body inlets. Thread the four Piping Assemblies to the Valve Body and tighten. 4" Min. 4" mín. (3) Agujeros 1-3/4" (44mm) Dia. Para Válvulas en Centros de 4" Aplique cinta selladora en todas las conexiones roscadas excepto en las entradas del cuerpo de la válvula. Enrosque los cuatro ensambles de la tubería en el cuerpo de la válvula y apriete. 4-3/4" Ref. (121mm) M 1" Ref. (25mm) No Sealing Tape 1/2" Copper Spout Nipple Pico Boquilla de Unión 1-1/4" Dia. Hole Top of Tub Rim WALL AX MI WALL AX Fondo de la tina Parte Superior del Anillo de Tina Agujero WALL AX MI MI Sin cinta selladora Bottom of Tub 4" (102mm) M Optional to Finished Floor Usually Between 65" and 78" (1651 and 1981mm) 1/2" NPT M 74" for Head Clearance from Bottom of Tub 6-1/2" Ref. (165mm) Bottom of Tub Fondo de la Bañera NOTE: No Concealed Piping Furnished 3 1 NOTA: Cañería Abierta Abastecida Secure the Bath/Shower Assembly to the Supports Turn On Water Supplies and Check all Connections for Leaks. Turn Off Supplies.Install Plaster Guards and Finish all Wall Construction. Asegure el ensamble de la tina/ducha en los soportes Abra los suministros de agua y revise todas las conexiones en busca de fugas. Cierre los suministros. Instale las protecciones de masilla y termine toda la construcción de la pared. Finished Wall M Pared terminada WALL AX W MI ALL MAX W MI M ALL MAX M MI WALL AX WALL AX MI MI MI M A AXW LL 1" (25mm) 5 6 Apply Sealing Tape to all Threaded Connections. Install Shower Arm, Shower Head and Spout. Long End nt ala Se Extremo largo Aplique cinta selladora en todas las conexiones roscadas. Instale el brazo de la ducha, el cabezal de la ducha y el pico. Connect Hot and Cold Water Supplies to Valve Body Conecte los suministros de agua caliente y fría al cuerpo de la válvula Hole faces Down in the Off Position El orificio da hacia abajo en la posición cerrada Cold Fría Caliente Instale la manija, apriete con la llave hexagonal provista. 8 7 4 Test Installed Fitting: Care and Cleaning: t5VSO)"/%-&4UP0''QPTJUJPO t5VSOPOXBUFSTVQQMJFTBOEDIFDLGPSMFBLT t0QFSBUFCPUI)"/%-&4UPnVTIXBUFSMJOFTUIPSPVHIMZ On )BOEMFTPOMZUVSO$IFDL56#41065GPSMFBLT Abrir t1VMMVQ%*7&35&3,/0#BOEDIFDL4)08&3)&"% DPOOFDUJPOTGPSMFBLT Prueba de Ajuste Instalado: Do: Simply rinse the product clean with clear water, dry with a soft cotton flannel cloth. Do Not: Clean the product with soaps, acid, polish, abrasives, harsh cleaners, or a cloth with a coarse surface. Para el Cuidado: Shr Debe: Lavar el producto sólo con agua limpia, secar con un paño suave de algodón. No Debe: Limpiar el producto con jabones, ácido, productos para pulir, abrasivos, limpiadores duros ni con paño grueso. Recommended Tools 90˚ Herramientas Recomendadas t$PMPRVFMBT."/*+"4FOMBQPTJDJØO$&33"%" Off Cerrado t"CSBFMBCBTUFDJNJFOUPEFBHVBZCVTRVFQÏSEJEBT Transfer Valve t0QFSFBNCBT."/*+"4QBSBBCSJSDPNQMFUBNFOUFFMBCBTUFDJNJFOUP Transfiera EFBHVBZCVTRVFQÏSEJEBTFOFM1*$0%&-"5*/" Válvula Tub Tina t0QFSFMB7«-76-"%*7&3403"ZDPOUSPMFRVFOPIBZBQÏSEJEBT en todas las conexiones del CABEZAL DE LA DUCHA. 10' Sealant Hot Install Handle, Tighten with Hex Wrench Supplied. On Abrir 90˚ Off Cerrado M968755_SP_EZ REV. 1.1 Cadet Three-Handle Bath and Shower Sets ® 3375 SERIES Cadet® Conjunto de Tina/Ducha de Tres Manijas 3375 SERIE