1
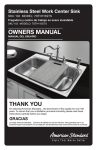
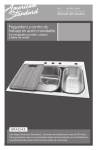
Stainless Steel Work Center Sink
SKU 102 MODEL: 7OTH115STS
Fregadero y centro de trabajo en acero inoxidable
SKU 102 MODELO: 7OTH115STS
OWNERS MANUAL
MANUAL DEL USUARIO
THANK YOU
for selecting American Standard... the benchmark of fine quality for over 100
years. To ensure that your installation proceeds smoothly please read these
instructions carefully before you begin.
GRACIAS
por elegir American Standard… sinónimo de calidad por más de 100 años. Para garantizar que no se
presente ningún inconveniente con la instalación, lea atentamente estas instrucciones antes de comenzar.
ATTENTION:
ATENCIÓN:
1. Your installation must comply with all local plumbing building codes. Have a qualified tradesman do or
approve your plumbing installation.
2. Always wear safety goggles and gloves in order to avoid personal injury.
3. Please read and save this guide before using this product. Store the guide in a safe place so you will
know where it is when you want to refer to it.
1. La instalación debe cumplir con todos los códigos locales de construcción y fontanería. Solicite los servicios de un proveedor calificado
para realizar o aprobar la instalación.
2. Use guantes y gafas de seguridad en todo momento para evitar lesiones personales.
3. Lea y guarde esta guía antes de utilizar este producto. Guarde la guía en un lugar seguro para consultarla cuando sea necesario.
Carefully check the unit prior to installation to ensure there is no damage.
Do not dispose of any packaging until you are satisfied with this product.
If you have any problems with this product or there are missing or damaged parts, please call toll free:
1-800-459-4409
DO NOT RETURN THE UNIT TO THE PLACE OF PURCHASE BEFORE CALLING
THE TOLL FREE NUMBER ABOVE.
Verifique cuidadosamente la unidad antes de instalarla para asegurarse de que no haya daños. No se deshaga del embalaje hasta que
esté satisfecho con el producto. Si tiene algún problema con este producto, faltan piezas o hay piezas dañadas, llame gratis al:
1-800-459-4409
NO DEVUELVA LA UNIDAD AL LUGAR DE COMPRA ANTES DE LLAMAR AL NÚMERO GRATUITO.
Before You Start
Antes de comenzar
1. Inspect your unit before proceeding. Check surface for any flaws or damage. Your unit has been manufactured
from 304 stainless steel providing an extremely durable surface. Once you unpack your unit check for dents,
bends, bumps or scuff marks. If any damage is noticed, do not install. Report damage immediately.
2. Please read all the instructions carefully and keep for future reference.
3. Protect the entire surface during installation.
4. Your installation must comply with all local plumbing building codes. Have a qualified tradesman do or approve
your plumbing installation.
WARNING:
Always wear safety goggles and gloves in order to avoid any personal injuries.
1.
2.
3.
4.
Examine la unidad antes de proceder. Verifique si la superficie presenta defectos o daños. Su unidad fue fabricada a partir
de acero inoxidable 304, por lo que tiene una superficie sumamente durable. Cuando desempaque la unidad, verifique si
presenta abolladuras, curvaturas, golpes o marcas por rozaduras. Si observa algún daño, no la instale. Informe sobre los daños
inmediatamente.
Lea detenidamente todas las instrucciones y guárdelas para consultarlas en el futuro.
Proteja la superficie en su totalidad durante la instalación.
La instalación debe cumplir con todos los códigos locales de construcción y fontanería. Solicite los servicios de un proveedor
calificado para realizar o aprobar la instalación.
ADVERTENCIA:
Use guantes y gafas de seguridad en todo momento para evitar lesiones personales.
Tools Required
Herramientas requeridas
•Tape measure
•Carpenter’s
square
•Pencil
•Saber-saw /
Jig-saw
•Electric drill
•Drill bit
[3/8 in (10mm)]
•Pipe wrench
•Phillips screw
driver
•Plumber’s putty
•Silicone sealant
•Masking tape
• Cinta métrica
• Escuadra de carpintero • Lápiz
• Sierra reciprocante
• Taladro eléctrico
• Broca [3⁄8 in (10mm)]
• Llave aprietatubos
• Desarmador Phillips
(en cruz)
• Masilla de plomero
• Sellador de silicona
• Cinta de enmascarar
Parts List
Lista de piezas
Stainless steel sink................................1 pc
Colander................................................1 pc
Inner sink................................................1 pc
Under mounting clamps................... 10 sets
Surface mounting clamps................ 10 sets
Bamboo cutting board..........................1 pc
Fregadero de acero inoxidable................................1 unidad
Colador ....................................................................1 unidad
Fregadero interno ....................................................1 unidad
Presillas de montaje inferior.................................. 10 juegos
Presillas de montaje superficial............................. 10 juegos
Tabla de cortar de bambú........................................1 unidad
Under Counter Mounting Installation
Instalación de montaje inferior
NOTE: It is highly recommended that under
mounting be performed by a professional
installer. Improper installation will void the
warranty.
all local plumbing and building codes. The
warranty will be voided if these installation
instructions are not followed.
Under mount sinks are sinks that are mounted
from below the counter top. If you are installing
a surface “drop-in” sink, please refer to the
surface mounting instructions in the next
section of this manual.
NOTA: Se recomienda fervientemente que el montaje inferior
lo lleve a cabo un instalador profesional. La instalación
inadecuada anulará la garantía.
The instructions that follow are for installing
the under mount stainless steel sink in a solid
surface counter top only. Minimum thickness
of the actual counter top material is 0.75 in
(1.9 cm). In addition, a 1 in (2.54 cm) build up
around the sink is preferred. It is recommended
that under mount sinks and routering of your
solid surface material should be installed
by a professional installer for best results.
Requirements vary for installation in a granite,
marble, stone, or butcher block counter top.
Please contact your fabricator for specific
details. Before installing, inspect the sink
for damage. Do not install a damaged unit.
Remember, it is your responsibility to follow
Los fregaderos de instalación inferior son aquellos que se
montan en la parte inferior de la encimera. Si instala un
fregadero de montaje superficial instantáneo, consulte las
instrucciones de montaje superficial que figuran en la siguiente
sección de este manual.
Las instrucciones que aparecen a continuación sirven para la
instalación inferior de un fregadero de acero inoxidable en una
encimera de superficie sólida únicamente. El espesor mínimo
del material de la encimera existente es de 0,75 pulg.
(1,9 cm). Además, se prefiere un refuerzo alrededor del
fregadero de 1 pulg. (2,54 cm). Para obtener mejores
resultados, se recomienda que un instalador profesional
se encargue de la instalación de los fregaderos de montaje
inferior y de la disposición del material de la superficie sólida.
Los requisitos varían en función de la instalación en una
encimera de granito, mármol, piedra o tipo tabla de carnicero.
Comuníquese con el fabricante para conocer detalles
específicos. Antes de instalar el fregadero, verifique que no
presente daños. No instale una unidad dañada. Recuerde
que es su responsabilidad respetar todos los códigos locales
de construcción y fontanería. La garantía se anulará si no se
siguen estas instrucciones de instalación.
Under mount Installing
1.) Opening Size :
The overall dimensions of this sink are 33 in
x 22 in (83.8 cm x 55.9 cm). The flat mating
surface that will touch the underside of your
counter top is 0.75 in (1.9 cm) wide. We
suggest you use a cutout size as noted:
31.5 in W x 20.5 in D (80 W cm x 52 cm D)
giving zero reveal.
Las dimensiones generales de este fregadero son 33 pulg. x
22 pulg. (83,8 cm x 55,9 cm). Las superficie de acoplamiento
plana que tendrá contacto con el lado inferior de su encimera
tiene 0,75 pulg. (1,9 cm) de ancho. Le sugerimos que use una
sección de corte del tamaño que se indica a continuación:
Sección de corte (ancho x profundidad) 31,5 pulg. x 20,5 pulg.
(80 cm x 52 cm) sin lugar para mochete.
31.5 in
(80 cm)
20.5 in
(52 cm)
Radius: ½ in
1.27cm
2.)Opening:
(Recommended for professional installers only)
CREATE A TEMPLATE
Using a framing square, draw a line from front
to back on the bottom of the counter top,
indicating the location of the center of the sink.
Draw a line parallel to the front edge of the
counter top indicating how far back the sink
should be located. Typically the setback is 2 in
to 2.5 in (5 cm to 6.4 cm) from the front of the
counter, depending on the counter top overhang,
the type of sink bowl and the deck size. Using
cardboard or paper, draw a rectangle with rounded
corners 31.5 in x 20.5 in (80 cm x 52 cm). Mark
the center point of the sink on the template.
(Recomendado para instaladores profesionales únicamente)
ELABORE UNA PLANTILLA
Mediante una escuadra de enmarcar, dibuje una línea desde
adelante hacia atrás en la parte inferior de la encimera, que
indicará la ubicación del centro del fregadero. Dibuje una línea3/4 in
paralela al borde delantero de la encimera que indicará cuán(19mm)
lejos debe ubicarse el fregadero. Generalmente el retranqueo
es de 2 pulg. a 2,5 pulg. (5 cm a 6,4 cm) desde la parte
delantera de la encimera. De acuerdo con la saliente de la
encimera, se determinará el tipo de cubeta del fregadero y el
tamaño de la plataforma. Use cartón o papel para dibujar un
rectángulo con esquinas redondeadas de 31,5 pulg. x 20,5
pulg. (80 cm x 52 cm). Marque el punto central del fregadero
en la plantilla.
g:
1.Cut out the template.
1. Corte la plantilla.
2.Center the template on the counter top,
ensuring that the sink will clear all objects.
It is suggested this sink be used in a
36 in (91.4 cm) cabinet or larger to avoid
interferences. NOTE: The minimum counter
top thickness required is 0.75 in (1.9 cm).
3/4 in
(19mm)
2.Centre la plantilla en la encimera y procure que el
fregadero esté lejos de todos los objetos. Se recomienda
usar este fregadero en un armario que mida 36 pulg.
(91,4 cm) o más para evitar interferencias.
NOTA: El espesor mínimo requerido de la encimera
es de 0,75 pulg (1,9 cm).
3.Place a line of masking tape on the counter
top, around the sink cutout area, on which
you may trace the template on to. Ensure
the template is parallel to the counter top
front with the correct amount of setback for
the mounting hardware to be installed.
Perimeter
of3.)Clips:
sink
P
o
Perímetro del
fregadero
3/4 in
Sealant
(19mm)
3.Aplique una línea de cinta de enmascarar sobre la
Sellante
encimera, alrededor de la sección de corte del fregadero,
Cutout Counter
sobre la que puede marcar la plantilla. Procure que la
Sección de corteEncimera
plantilla esté paralela a la parte delantera de la encimera
1 inch (2.54 cm) hole saw
con el retranqueo correcto para instalar el equipo de
perforadora de 1 pulg (2.54 cm)
Top MountingSierra
Clamps
montaje.
Tighten
Presillas para instalación superficial
4.Trace the template onto the masking tape,
and double check the location.
Perimeter4.Marque la plantilla sobre la cinta de enmascarar, y vuelva
of sink
a comprobar la ubicación.
Perímetro del
fregadero
5.Using proper tools specified by the
counter top manufacturer, cut
and
3/4
in remove
the cutout, following the manufacturers
(19mm)
instructions.
Cutoutque especificó el
5.Usando las herramientas adecuadas
Sección
de cortela sección
fabricante de la encimera, corte
y elimine
1 inch (2.54de
cm)
holedesaw
corte,
acuerdo con las instrucciones de los
fabricantes.
Sierra perforadora
de 1 pulg (2.54 cm)
Apretar
Perimeter
of sink
Perímetro del
fregadero
Cutout
Sección de corte
6.On the underside of the counter top, mark
and drill 10 holes, 0.375 in (10 mm) diameter
and 0.5 in (1.27 cm) deep for the threaded
inserts provided. The location of these
holes should be equally spaced around the
perimeter of the cutout (3 front and back,
2 each side) and should be set back 1.25 in
(3.2 cm) from the cutout opening.
6.En el lado inferior de la encimera, marque y perfore 10
orificios de 0,375 pulg. (10 mm) de diámetro y 0,5 pulg.
(1,27 cm) de profundidad para los insertos roscados
suministrados. Estos orificios deben situarse a intervalos
iguales alrededor3.)Sealing
del perímetro de
sección de
corte
& la
putting
the
sink under neath to the counter top:
(3 en las partes delantera y trasera, 2 en cada lado) y deben
separarse al menos 1,25 pulg. (3,2 cm) de la abertura de la
sección de corte.
Under mout Installing
7.Test fit the sink underneath the counter top
cut out. Ensure the reveal is equal on all 4
sides, when viewed from above. Mark this
location using a pencil to scribe the edge
of
Sealant
Sellante
the sink lip on at least two sides.
7.Compruebe si el fregadero cabe debajo de la sección de
corte de la encimera. Procure que el mochete sea igual
en los 4 lados, cuando se lo ve desde arriba. Marque esta
ubicación con un lápiz para trazar la orilla del reborde del
fregadero en al menos dos lados.
Pe
fre
T
8.Install the threaded inserts, clamps, and
bolts loosely. Ensure the clamps are
turned as to not interfere with the final sink
placement.
Sealant
Sellante
8.Instale los insertos roscados, las presillas y los pernos, sin
ajustarlos. Asegúrese de doblar las presillas para que no
interfieran con la colocación definitiva del fregadero.
6
9.Place a small bead of silicone sealant
around the outside perimeter of the sink
and carefully place into its final location,
using the scribe marks made above.
Counter top
9
Encimera
Silicone bead
Cordón de silicona
10
3
9.Bordee el perímetro externo del fregadero con un cordón
de sellante de silicona y coloque cuidadosamente el
fregadero en su ubicación definitiva, siguiendo las marcas
de gramil trazadas anteriormente.
Tightenin
Tighten
Secuenci
Apretar
10.Carefully rotate the clamps over the clamp
bar on the sink and gently tighten, working
from side to side to fasten the sink firmly.
Recheck the alignment visually from above.
10.Gire cuidadosamente las presillas sobre la barra de
sujeción y ajústelas suavemente. Hágalo de un lado al otro
para ajustar firmemente el fregadero.
Vuelva a corroborar la alineación visualmente desde arriba.
11.From the show side, carefully wipe away
any excess silicone, and allow the bond to
rest undisturbed for 8 hours or overnight, for
best results.
11.En el lado de exhibición, limpie cuidadosamente cualquier
exceso de silicona, y permita que la adhesión permanezca
inalterada durante 8 horas o toda la noche, para obtener
mejores resultados.
Counter top
Encimera
12.Install the counter top as directedSilicone
by
bead
Cordón de silicona
the manufacturer, and install all other
plumbing as required.
12.Instale la encimera como lo indica el fabricante,
Tighten
y los demás artículos
de fontanería según sea
Apretar
necesario.
Surface Mounting Installation
Instalación de montaje superficial
1. C
arefully unpack the sink and check all
parts.
1.Desempaque cuidadosamente el fregadero y compruebe
todas las piezas.
2. Create template.
Topmount Installing
1.) Opening Size :
2. Elabore una plantilla.
The overall dimensions of this sink are 33 in x
22 in (83.8 cm x 55.9 cm). We suggest you use
a cutout size noted below.
Cut out (width x depth) 32.25 in x 21.25 in
(81.9 cm x 54 cm) giving zero reveal.
Las dimensiones generales de este fregadero son 33 pulg.
x 22 pulg. (83,8 cm x 55,9 cm). Le sugerimos que use una
sección de corte del tamaño que se indica a continuación.
Sección de corte (ancho x profundidad) 32,25 pulg.
x 21,25 pulg. (81,9 cm x 54 cm) sin lugar para
mochete.
2.)Opening:
32.25 in
(81.9 cm)
21.25 in
(54 cm)
Radius: ½ in
1.27cm
2.)Opening:
Topmount Installing
21.25 in
(54 cm)
3.
If the
sink is Size
being: installed in a new
Fig. 1
1.)
Opening
counter top, place the sink upside down on
the counter top. NOTE: Minimum32.25
counterin
top thickness is 0.75 in (19 mm).(81.9
Centercm)
the
sink left to right on the sink cabinet making
sure that it will not interfere inside with
the structure of the cabinet or the counter
32.25 in
2.)Opening:
top. The unit should be placed so that
it iscm)
(81.9
parallel to 21.25
the frontinof the counter top and it
Radius: ½ in
clears the overhang
(54 cm) of the counter top and
1.27cm
the front INSIDE face of the cabinet. Trace
21.25
in
the outline as per Fig. 1.
Radius: ½ in
(54 cm)
1.27cm
3.Si el fregadero se instala en una encimera nueva,
colóquelo boca abajo sobre esta. NOTA: El espesor
mínimo de la encimera es de 0,75 pulg. (19 mm). Coloque
el fregadero de izquierda a derecha en el centro del
armario y asegúrese de que no interfiera con la estructura
.)Opening:
del armario o la encimera. La unidad debe colocarse
2.)Opening:
de forma paralela a la parte delantera de la encimera
sin tocar la saliente de la encimera ni la cara delantera
INTERNA del armario. Marque el contorno según la fig. 1.
Then draw a new line 0.375 in (9.5 mm)
inside the first. This will be the cutline.
Fig. 2.
Perimeter
Fig.
2
Per
of s
of sink
Perímetro del
fregadero
Perím
fregad
3/8 in
(9.5mm)
3/8 in
(9.5mm) Cutout
Luego, dibuje un nueva línea de 0,375 pulg. (9,5 mm)
dentro de la primera. Esta será la línea de corte (fig. 2).
3/8 in
(9.5mm)
1 in (2.54 cm) hole saw
Taladro circular de 1 pulg. (2.54 cm)
4.Carefully drill a hole inside the center cut
line and use a saber-saw or jig-saw to start
cutting along the inside cut line. Place a
support underneath the cutout portion of
the counter top to prevent it from falling
during cutting. Fig. 3.
4.Con cuidado, taladre un orificio dentro de la línea de corte
central y comience a cortar por la línea de corte interna
con una sierra
sable o caladora. Coloque un soporte
Perimeter
of sección
sink
debajo de la
de corte de la encimera para evitar
Perímetro del
que se caiga
mientras se la está cortando (fig. 3).
fregadero
3/8 in
(9.5mm)
Perimeter
of sink
Perímetro del
fregadero
Cutout
1 in (2.54 cm) hole saw
Taladro circular de 1 pulg. (2.54 cm)
Espacio de corte
Espacio de corte
Fig. 3
Perimeter
of sink
P
of
Perímetro del
fregadero
Pe
fre
3/8 in
(9.5mm)
Perimeter
sink cm) hole saw
1 inof(2.54
Perímetro del
Taladro
fregaderocircular de 1 pulg. (2.54 cm)
Perimeter
of sink
Cutout
Espacio de corte
Cutout
Espacio de corte
Perímetro del
fregadero
Topmount Installing
3/8 in
(9.5mm)
Cutout
3.)SealingEspacio
anddeputting
the sink into the counter top:
corte
1 in (2.54 cm) hole saw
Taladro circular de 1 pulg. (2.54 cm)
5.Insert the sink into the hole in the counter
top to test the fit. Make adjustment to
the
Sealant
hole if necessary. Fig. 4.
Sellante
5.Coloque el fregadero en el orificio de la encimera para
saber si cabe. De no ser así, realice los ajustes necesarios
al orificio (fig. 4).
Fig. 4
Cutout
Espacio de corte
3.)Sealing and putting the sink into the co
Sealant Sealant
Sellante
Sellante
Fig. 5
6.Apply silicone sealant around the underside
of sink rim on all four sides. Fig. 5.
Sealant
Sellante
Topmount Installing
6.Aplique sellante de silicona en los cuatro lados que
rodean el lado inferior del borde del fregadero (fig. 5).
3.)Sealing and putting the sink into the counter top:
7.Carefully lower the sink into the counter
top, ensuring the factory installed clips
Sealant top edges. Slide
do not catch the counter
Sellante
each clip along the rails so they are evenly
spaced around the sink front, back and
sides.
7.Baje cuidadosamente el fregadero hasta la encimera;
procure que los ganchos instalados en fábrica no se
enganchen en los bordes de la encimera. Deslice los
ganchos por el riel de modo que haya un espacio
uniforme entre ellos alrededor del fregadero, tanto en la
parte delantera y trasera como en los laterales.
3.)Clips:
3.)Clips:
3.)Clips:
Fig. 6
8.Swing the clamps and tighten the screws
progressively until the sink rim is flush
with counter top. Check several times
3.)Clips:
the alignment as you tighten so that the
front of the sink is parallel to the front of
the counter top. Adjust and re-tighten if
necessary. Do not over tighten. Fig. 6. Top Mounting Clamps
Top Mounting Clamps
Sealant
Counter
Encimera
Sealant
Tighten
9.Limpie el exceso de sellante con un trapo.
Counter
Encimera
Mounting Clamps
para instalación superficial
Tighten
Sellante
Apretar
Apretar
Counter
Encimera
Apretar
6
Tightening Sequence
For Clips
Secuencia de ajuste
de los ganchos
4
2
9
7
10
8
Tighten
Apretar
3
1
5
Double Sided Cuting Board
Tabla de cortar de doble cara
The specially designed cutting board can be used
in conjunction with the sink. One side will catch
drippings in the edge trough, while the other will
allow juices to drain into the sink through the
handle.
La tabla de cortar especialmente diseñada puede usarse junto con
el fregadero. Un lado recolectará los goteos de los bordes, mientras
que el otro permitirá que los jugos desemboquen en el fregadero a
través de la manija.
Juices
Jugos
Tighten
Counter F
EncimeraSecu
de
Tighten
F
Secu
de
Tighten
9.Wipe excess sealant withSealant
a rag.
Sellante
Sellante
Presillas para instalación superficial
Presillas para instalación superficial
Presillas para instalación superficial
8.Gire las presillas y ajuste los tornillos gradualmente hasta
que el borde del fregadero esté nivelado con la encimera.
Verifique varias veces la alineación mientras ajusta, para
que la parte delantera del fregadero quede paralela a la
Mounting
Clamps
parte delantera de la encimera.Top
De ser
necesario,
corrija y
3.)Clips:
Presillas para instalación superficial
vuelva a ajustar. No ajuste excesivamente (fig. 6).
Sealant
SellanteClamps
Top Mounting
Juices
Jugos
Use this side when the cutting
board is in the sink track.
Use this side when the cutting
board is on the counter top.
Use este lado cuando la tabla de cortar
se coloca en el fregadero.
Use este lado cuando la tabla de cortar
se coloca sobre la encimera.
Care And Maintenance
Cuidado y mantenimiento
Your sink is manufactured with the highest grade stainless steel, it will provide you many years of
enjoyment with the proper care and maintenance.
• After use always rinse your sink with tap water to dilute and remove any deposit. Avoid any residue
of food, detergent, soap, grease or condiment to dry or sit for extended periods of time on the
surface of the sink. Towel dry after use when possible to avoid water spots, should these occur,
cleanse with a mild solution of vinegar and water followed by a good rinse.
• Liquid soap, a general household cleaner or a weak solution of vinegar and water should be used for
regular cleaning. Never use abrasive products as they will dull and scratch the finish.
• Scouring pads should be of a plastic nature recommended for use in stainless steel sinks. They
should only be used in the bowls of the sink and the scrubbing should be done in the direction of the
satin finish lines. Do not use scouring pads on the deck as they will dull the mirror finish.
• Never use steel wool pads as they will leave iron particles on the sink and will lead to corrosion. For
the same reason never leave mild steel or cast iron pans on your sink for extended periods of time.
Este fregadero se fabricó con acero inoxidable de la mejor calidad y podrá disfrutarlo muchos años siempre y cuando lo
cuide y mantenga adecuadamente.
• U
na vez que lo haya utilizado, lave siempre el fregadero con agua del grifo para diluir y quitar cualquier depósito. Evite
que se seque o se deposite cualquier residuo de comida, detergente, jabón, grasa o condimentos por un período
prolongado en la superficie del fregadero. Cuando pueda, seque el fregadero con una toalla para evitar marcas de agua.
Si esto sucede, límpielo con una solución suave de vinagre y agua y luego enjuáguelo bien.
• L
a limpieza regular debería realizarse con jabón líquido, limpiador doméstico multiuso o una solución suave de vinagre y
agua. Nunca utilice productos abrasivos, ya que opacarán y rayarán el acabado.
• L
as esponjas deben ser plásticas y recomendadas para fregaderos de acero inoxidable. Sólo deben utilizarse en las
cubetas del fregadero y se debe restregar en el sentido de las líneas del acabado satinado. No utilice esponjas en el
exterior del fregadero, ya que opacarán el acabado de espejo.
• N
unca utilice esponjas de lana de acero, ya que dejarán partículas de acero en el fregadero y lo corroerán. Por el mismo
motivo, nunca deje cacerolas de acero dulce o hierro fundido en el fregadero por períodos prolongados.
Replacement Parts
Piezas de repuesto
If you are missing or require replacement parts, please call customer service at
1‑800‑459‑4409 (8:30 am - 5:00 pm EST) or email us at [email protected]. Identify
the required part(s) and have the replacement part number ready when you call.
Si requiere de una pieza faltante o pieza de repuesto, por favor comuníquese a servicio al cliente al 1-800-459-4409 (8:30 am
a 5:00 pm, hora del este) o vía correo electrónico a [email protected]. Identifique la(s) parte(s) requerida(s) y tenga
el número de pieza de reemplazo a la mano al momento de llamar.
Part Name
Nombre de la pieza
Part Number
topmount clamps
lowes1001
undermount clamps
Boclip002
black leg for colander & sliding sink
Boleg001
presillas de montaje superficial
presillas de montaje inferior
soporte negro para colador y fregadero deslizables
sliding sink
fregadero deslizable
Picture
Número de la pieza
Fotografía
Parts
Parts
BoSlik001
topmount clips
topmount clips
Parts
topmountclips
clips
undermount
Parts
topmount clips
undermount clips
topmount clips
sliding sink
Parts
Quantity
Cantidad
Parts
10
10
Parts
1
undermount clips
Black leg for colander & sliding sink
undermount clips
1
colador
Bocod001
topmount clips
colander
sliding sink
sliding sink
undermount clips
Black leg for colander & sliding sink
bamboo cutting board
Black leg forundermount
colander clips
& sliding sinkBlack leg for colander & sliding sink
topmount clips
colander
colander
Black leg for colander & sliding s
Black leg for colander & sliding sink
undermount clips
bamboo cutting
colander board
Black leg for colander & sliding sink
bamboo cutting board
1
small strainer for sliding sink
bamboo cutting board
tabla para cortar de bambú
small strainer for sliding sink
filtro pequeño para fregadero deslizable
Bambd001
sliding sink
sliding sink
colander
small strainer for sliding sink
sliding sink
Bostr001
colander
bamboo
cutting board
small strainer for sliding sink
colander
sliding sink
small strainer for sliding sink
1
bamboo cutting board
1
small strainer for sliding sink
small strainer for sliding sink
small strainer for sliding sink
bamboo cutting board
colander
bamboo cutting board
Lifetime Parts and Finish Limited Warranty
Garantía A Vida Limitada De Las Piezas Y El Acabado
All parts and finishes of this product are warranted to the original consumer purchaser to be free from
defects in material and workmanship for as long as the original consumer purchaser owns their home. We
recommend using a professional plumber for all installation and repair.
We will replace, free of charge, during the warranty period, any part or finish that proves defective in
material and/or workmanship under normal installation, use and service.
Replacement parts may be obtained by calling 1-800-459-4409 (8:30 am - 5:00 pm EST) or through our
website at:
www.qualitycraft.com
This warranty is extensive in that it covers replacement of all defective parts and even finish, but these are
the only two things that are covered. LABOR CHARGES AND/OR DAMAGE INCURRED IN INSTALLATION,
REPAIR, OR REPLACEMENT, AS WELL AS ANY OTHER KIND OF LOSS OR DAMAGE ARE EXCLUDED.
Proof of purchase (original sales receipt) from the original consumer purchaser must be supplied for all
warranty claims. THIS IS THE EXCLUSIVE WARRANTY BY QUALITY CRAFT, WHICH DOES NOT MAKE
ANY OTHER WARRANTY OF ANY KIND, INCLUDING THE IMPLIED WARRANTY OF MERCHANTABILITY.
This warranty excludes all industrial, commercial and business usage. Some states do not allow the
exclusion or limitation of incidental or consequential damages, so the above limitation or exclusion may not
apply to you. Any damages to this product as a result of misuse, abuse, or neglect or any use of other than
parts supplied by Quality Craft WILL VOID THE WARRANTY. This warranty gives you specific legal rights,
and you may also have other rights which vary from state to state.
Se garantiza al consumidor/comprador original que todas las piezas y los acabados de este producto no presentarán defectos
en los materiales ni en la mano de obra durante el tiempo en que dicho consumidor/comprador original sea propietario de su
hogar. Recomendamos que llame a un fontanero profesional para realizar todas las instalaciones y reparaciones.
Sustituiremos sin cargo cualquier pieza o acabado cuyos materiales y/o mano de obra resulten ser defectuosos en condiciones
de instalación, uso y servicio normales durante el período de garantía.
Puede obtener piezas de repuesto si llama al 1-800-459-4409 (8:30 am a 5:00 pm, hora del este) o a través de nuestro sitio web:
www.qualitycraft.com
Esta garantía es extensiva, ya que cubre la sustitución de todas las piezas defectuosas e incluso el acabado, pero estos son los
únicos dos elementos que cuentan con cobertura.
SE EXCLUYEN LOS COSTOS DE MANO DE OBRA Y/O LOS DAÑOS EN LOS QUE SE HAYA INCURRIDO DURANTE LA
INSTALACIÓN, REPARACIÓN O SUSTITUCIÓN, COMO TAMBIÉN CUALQUIER OTRO TIPO DE PÉRDIDA O DAÑO. Para
efectuar cualquier reclamación de garantía, el consumidor/comprador original debe proporcionar el comprobante de compra
(la factura de compra original). ÉSTA ES LA GARANTÍA EXCLUSIVA OTORGADA POR QUALITY CRAFT, QUE NO BRINDA
GARANTÍA ALGUNA DE NINGÚN OTRO TIPO, INCLUIDA LA GARANTÍA IMPLÍCITA DE COMERCIABILIDAD.
Esta garantía excluye todo tipo de uso industrial, comercial y empresarial.
Algunos estados no permiten la exclusión o limitación de daños incidentales o resultantes, de modo que es posible que la
limitación o exclusión mencionada no sea pertinente en su caso. Los daños ocasionados a este producto como consecuencia
del uso incorrecto, maltrato o negligencia o del uso de otras piezas no suministradas por Quality Craft ANULARÁN LA
GARANTÍA. Esta garantía le otorga derechos legales específicos y es posible que usted también tenga otros derechos que varían
de un estado a otro.
Imported by / Importado por
2436 Boul. Industriel
Laval, Quebec, Canada H7S 2G7
Tel: 1-800-459-4409
www.qualitycraft.com
Products Designed Around You
Productos diseñados pensando en usted
Toilets
. Our Champion® 4, Cadet® 3 and many
other models feature our permanent
EverClean® surface
EverClean® antimicrobial inhibits the
growth of stain and odor causing
bacteria on the surface
Inodoros
. Nuestros Champion® 4, Cadet® 3 y muchos
otros modelos cuentan con la superficie
permanente EverClean®
Sinks and Vanity Tops
. Select models feature our
permanent EverClean® surface
Superficie Antimicrobial EverClean® inhibe el
crecimiento de moho y bacterias causantes
de mal olor en la superficie
Lavabos y cubiertas de gabinetes
. Modelos selectos cuentan con la superficie
permanente EverClean®
Pre-assembled drains with only 4 parts
Turbine Technology and Flowise™
Showerheads Use Less Water
Showerheads
. Look for high efficiency designs that use
40% less water while providing an
invigorating shower
Regaderas Flowise™
con tecnología de
turbina utilizan
menos agua
Regaderas
. De Alta Eficiencia usan hasta un 40% menos agua
brindando unavigorizante experiencia
Kitchen Faucets
. Many functional options available,
including pull-down sprays
and swivel spouts
Select Pull-Down Kitchen
Faucets Offer Pause
Button Feature
Llaves de conina
Llaves de cocina con
botón de pausa en
modelos selectos
. Estilos funcionales disponibles con sprays
ajustables y extensiones con manguera
Whirlpools and Airbaths
. Lifetime Limited Warranty with in-home service
provides peace of mind
Select Whirlpool Models
Feature Deep Soak Drains &
Sleek Comfort Jets™
Hidromasajes y aeroburbujas
. Garantía Limitada de Por Vida con
servicio en casa le darán paz
y tranquilidad
inas de
hidromasaje
más profundas e
innovadores
Comfort Jets™ en
modelos selectos
The Responsible Bathroom
Making the right choice doesn’t require sacrifice. The average family of four can save more than 33,000
gallons a year simply by installing water efficient American Standard toilets, showers and faucets.
Learn more with interactive tools and information at www.responsiblebathroom.com.
El Baño Responsable
Tomar la decisión correcta no requiere sacrificios. La familia promedio puede ahorrar
más de 33,000 galones de agua al año instalando productos eficientes de
American Standard como inodoros, regaderas y llaves.
Conozca más con herramientas interactivas e información en
www.responsiblebathroom.com.