Transcript
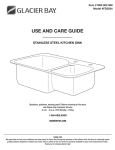
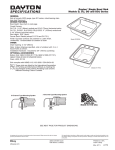
INSTALLATION
INSTRUCTIONS
VESSEL SINKS
www.YosemiteHomeDecor.com
1-800-305-9872
READ FIRST!!!
Observe all local plumbing and building codes.
Follow these instructions only if it applies to your installation. Vessel sinks allow you to be creative and flexible with
your installation.
Before installation, remove your new Stainless sink and carefully inspect it for damage. Return the Stainless sink to its
packaging until you are ready to install it.
We strongly recommend having the sink on site before cutting
your countertop.
These instructions contain important care and cleaning instructions. Please review these instructions carefully.
ABOVE COUNTER/ TOPMOUNT INSTALLATION
STEP 1:
Carefully set the sink in the outlined drain hole opening.
STEP 2:
To secure the sink on the countertop, use a silicon sealer.
Use moderate force and hand-tighten the drain kit to the sink.
STEP 3:
Install the faucet and drains according to the manufacturer’s instruction manual.
CARE INSTRUCTIONS
Clean your stainless steel sink with a soft washcloth and warm water, wiping the sink in the direction of the polish
marks. Use another soft towel to dry the surface once cleaned. If left to air dry stainless steel sinks may spot and
streak. When regular dish soap doesn’t remove grease and grime you may use white vinegar then rinse with warm
water and towel dry. Stainless steel is durable, but not indestructible. Never use cleaners that contain chlorine or
bleach as they can damage your sink. Also avoid steel and wool scrub brushes as they can leave scratches, use a soft
towel instead. Lastly, rather than leaving wet sponges in your sink we advise that you use a cup or plate to avoid
constant wetness to reduce the risk of rust from long-term exposure to water.
** NOTE: Sink model, design, shape, cutout on top, vanity may vary from the picture above.
The diagram is for Instructional purposes only.